Traditional Spring uses .xml files to inject beans or configure aop, resulting in poor readability and poor maintenance. The use of annotations can annotate entities or classes in an all-round way, which greatly simplifies configuration writing;
1. @Autowired (automatic assembly)
When spring uses xml files to use beans and references, zoo entities have tiger and monkey classes, written as follows:
     <bean id="zoo" class="com.spring.model.Zoo" >
        <property name="tiger" ref="tiger" />
        <property name="monkey" ref="monkey" />
    </bean>
If you use the annotation @Autowired to autowire, you can eliminate this reference. When Spring finds the @Autowired annotation, it will automatically find the Bean that matches it in the code context (the default is the type match), and automatically inject it into the corresponding place go with.
public class Zoo {
    @Autowired
    private Tiger tiger;
    @Autowired
    private Monkey monkey;
    public String toString(){
        return tiger + "\n" + monkey;
    }
}
2. @Qualifier (specify the name of the injected bean)
Assuming that the Car class has 2 subclasses, when using @Autowired to assemble, you can use @Qualifier to specify the name of the subclass you want to assemble;
public class CarFactory {
    @Autowired
    @Qualifier("bmwCar")
    private ICar car;
    public String toString(){
        return car.getCarName();
    }
}
Three, @Service (declared as bean)
After the class is annotated with @Service, it is declared as a bean. Only when it becomes another class of bean can it be automatically injected as a member variable using @Autowired. The @Scope annotation indicates that this class is a singleton model, and it is a new one every time The zoo class;
@Service("Zoo")
@Scope("prototype")
public class Zoo {
    @Autowired
    private Tiger tiger;
    @Autowired
    private Monkey monkey;
    public String toString(){
        return tiger + "\n" + monkey;
    }
}
Four, @Component (refers to components in general, use this annotation when it is not easy to classify)
The @Component annotated class is managed by Spring, which is equivalent to configuring a bean in xml. This annotation is generally used for classes that are neither the presentation layer nor the business layer nor the persistence layer. When the project is started, the class is Has been instantiated;
Five, @Controller (labeled as a presentation layer bean) and @RestController
@RestController is an annotation added after Spring4, which is equal to +@ResponseBody in @Controller, indicating that this is a presentation layer interface class that can return a json string. In the following example, @Controller annotated this class will return the hello.html resource, and if it is changed to @ RestController will be able to define rest interface;
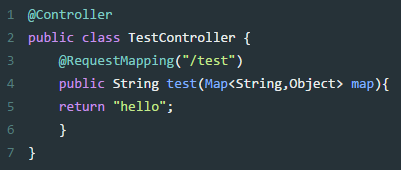
Six, @RequestMapping (define request mapping path)
@RequestMapping can be placed above the class and method to define the request path of the REST request. /user will be the root path of the api request provided by the method in the UserController class; @RequestMapping has 8 attributes.
value: Specifies the actual address of the request.
method: Specify the request method type (GET, POST, PUT, DELETE), etc.
consumes: Specify the Context-Type of the submitted content for processing the request.
produces: Specifies the type of content returned, and can also set the character encoding of the returned value.
params: Specifies that certain parameter values must be included in the request before the method is processed.
headers: The specified request must contain certain specified header values before the method can process the request.
@RestController
@RequestMapping("/user")
@Api("统一认证管理")
@Slf4j
public class UserController {
    @Autowired
    AuthServiceImpl authService;
    @Autowired
    UserServiceImpl userService;
    @Autowired
    private HttpSession session;
    @PostMapping("/login")
    @ApiImplicitParam(name = "req", value = "用户登陆信息", dataType = "LoginReq")
    public R login(@RequestBody @NotNull LoginReq req) throws Exception {
}
Seven, @RequestParam
It is used to map the request parameter data to the parameters of the processing method, that is, when you initiate a request on the page with parameters passed, the following example will get the passed id, and logically process the id in the method body;

8. @ Repository (labeled data access components, namely DAO components)
The annotated class is generally the persistence layer, and the usage is awkward. After @mapper, there is no need to set the scan address in the spring configuration. The namespace attribute in mapper.xml corresponds to the relevant mapper class. Spring will dynamically generate the Bean and inject it into the ServiceImpl in. @Repository needs to configure the scan package address in Spring, and then generate the dao layer bean, which is then injected into the ServiceImpl. In the following example, the mapper can also be injected into spring without writing the @ Repository annotation;
package com.example.testspring.mapper;
import com.example.testspring.model.Students;
import org.apache.ibatis.annotations.Mapper;
import org.springframework.stereotype.Repository;
import java.util.List;
@Repository
@Mapper
public interface StudentMapper {
    List<Students> SelectAll();
    Students SelectByID(int id);
}
Nine, @Configuration (configuration class) and @ConfigurationProperties
The @Configuration annotation treats the class as a configuration and also an IoC container. If @Bean is registered on one of its method headers, it will be used as a Bean in the Spring container;
A large number of @ConfigurationProperties annotations (such as server.port) are used in the Spring source code, and the on-demand configuration of Beans is achieved by using it in conjunction with other annotations. This annotation has a prefix attribute. The configuration in the configuration file is bound by the specified prefix. This annotation can It can be placed on a class or on a method. When used as a method, it needs to be annotated with @Bean and the class to which it belongs needs to have an @Configuration annotation.
In the following example, the combined annotation is used to define the data source written in application.propertity, spring.datasource.ds1;
@Configuration
public class DataSourceConfig {
	// 主数据源 ds1数据源
	@Primary
	@Bean(name = "ds1DataSourceProperties")
	@ConfigurationProperties(prefix = "spring.datasource.ds1")
	public DataSourceProperties ds1DataSourceProperties() {
		return new DataSourceProperties();
	}
}
Ten, @Mapper annotation
Mybatis3.4.0 started to add @Mapper annotation, the purpose is to no longer write mapper mapping files, the following example uses mybatisPlus;
@Mapper
public interface UserMapper extends BaseMapper<User>{
    User getByIdLazy(String userId);
    User findById(String userId);
    boolean deleteRoleByUserId(String userId);
    boolean insertRolesBatch(@Param("list") List<UserRole> list);}
Eleven, @getMapping and @postMapping
@getMapping and @postMapping are combined annotations:
@getMapping = @requestMapping(method = RequestMethod.GET)
@postMapping = @requestMapping(method = RequestMethod.POST)