JWT(json web token)。
1, jwt (full name json web token). It is mainly used to generate token, which is a string of encrypted strings.
The process is like this
- User requests server with username and password
- The server verifies the user information and generates a token to store in the database
- The server passes the verification and sends the token to the user
- The client stores tokens, generally local storage exists. And append this token value to each request, which can be added to the ajax request header or request body as a parameter
- The server verifies the token. The token verification is compared with the token stored in the database. If the verification is passed, the business logic will be processed and the data will be returned.
The advantage is this
- Support cross-domain access : Cookie does not allow cross- domain access, which does not exist for the Token mechanism, provided that the transmitted user authentication information is transmitted through the HTTP header
- It is more suitable for mobile applications: If the client is an iOS or Android, cookies are not supported, and the Token authentication mechanism is much simpler.
- Easy to get started : the simple thief. Let me elaborate below.
- you guess
2. Implementation steps (After reading the introduction of other blogs, I made the simple steps very complicated, so I tried it again by myself)
- Add dependency in pom file
<!-- 添加依赖JwtPermission --> <dependency> <groupId>com.github.whvcse.JwtPermission</groupId> <artifactId>jwtp-spring-boot-starter</artifactId> <version>2.0.2</version> </dependency> - Add corresponding entities, database and build corresponding tables. The association relationship of each table should be understood from the literal meaning of the table name. If you don’t understand it, you can see the introduction of field remarks in the following table creation statement (the first five sys-related tables need to create corresponding entities, token-related The table only needs to build a table, no need to create an entity)
1,系统用户表:sys_user
2,系统角色表:sys_role
3,系统权限表:sys_authorities
4,用户角色关联表:sys_user_role
5,角色权限关联表:sys_role_authorities
6,根据jar包中的代码建oauth_token表和oauth_token_key表。
https://download.csdn.net/download/nienianzhi1744/11878539 (For details, see table creation sql and table relationship descriptions are in this link)
3. Verify the user name and password when logging in, create a token after passing it, save it to the database and return it to the client.
// 几个公司私有的接口(userJpaService,userRoleService,authoritiesService)没有导入,这几个接口主要写的是根据id查询实体的方法
import io.swagger.annotations.Api;
import io.swagger.annotations.ApiImplicitParam;
import io.swagger.annotations.ApiImplicitParams;
import io.swagger.annotations.ApiOperation;
import java.util.HashMap;
import java.util.List;
import java.util.Map;
import org.springframework.beans.factory.annotation.Autowired;
import org.springframework.stereotype.Controller;
import org.springframework.web.bind.annotation.PostMapping;
import org.springframework.web.bind.annotation.ResponseBody;
import org.wf.jwtp.provider.Token;
import org.wf.jwtp.provider.TokenStore;

@Api(value = "其他配置——用户登录相关接口", tags = "main")//swagger注解,可以不加
@Controller
public class MainController extends BaseController {
    @Autowired
    private UserJpaService userJpaService;

    @Autowired
    private UserRoleJpaService userRoleService;

    @Autowired
    private AuthoritiesJpaService authoritiesService;

    @Autowired
    private TokenStore tokenStore;

    @ResponseBody
    @ApiOperation(value = "用户登录")//ApiOperation和ApiImplicitParams是swgger注解,便于接口API交互,可以不加
    @ApiImplicitParams({
            @ApiImplicitParam(name = "username", value = "账号", required = true, dataType = "String", paramType = "form"),
            @ApiImplicitParam(name = "password", value = "密码", required = true, dataType = "String", paramType = "form")
    })
    @PostMapping("${api.version}/login")
    @Log(describe = "用户登录",operationType= OperationType.LOGON)//此处为自定义注解,用于记录用户操作,可以不加
    public Map login(String username, String password) {
        Map returnMap=new HashMap<>();
        /*根据用户名获取实体*/
        User user = userJpaService.getByUsername(username);
        /*若数据库中无该用户的数据*/
        if(user==null){
            returnMap.put("fail","登录失败");
        }
        /*若密码对不上,数据库中的密码应该是加密的,此处仅为演示不做加密处理*/
        else if(!password.equals(user.getPassword())){
            returnMap.put("fail","密码输入有误");
        }else{
            /*根据用户id获取角色的id集合*/
            String[] roles = arrayToString(userRoleService.getRoleIds(user.getUserId()));
            /*根据用户id获取权限id集合*/
            String[] permissions = listToArray(authoritiesService.listByUserId(user.getUserId()));
            /*调用TokenStore的createNewToken创建token*/
            Token token = tokenStore.createNewToken(String.valueOf(user.getUserId()), permissions, roles);
            returnMap.put("success","登录成功");
            returnMap.put("access_token",token.getAccessToken());
        }
        return returnMap;
    }

    private String[] listToArray(List<String> list) {
        String[] strs = new String[list.size()];
        for (int i = 0; i < list.size(); i++) {
            strs[i] = list.get(i);
        }
        return strs;
    }

    private String[] arrayToString(Object[] objs) {
        String[] strs = new String[objs.length];
        for (int i = 0; i < objs.length; i++) {
            strs[i] = String.valueOf(objs[i]);
        }
        return strs;
    }

}
After the client receives the token in the returned map, it passes
localStorage.setItem("key","value")将map中的token值存到localstorage。4. The last step, this step is simple.
After logging in, in the subsequent Ajax business request, bring the token value in localstorage and verify it with the value in the database in the background. This method is more.
Let me talk about the next strategy (not recommended), directly put the token in the background as a parameter, and receive and verify it in the background.
Let's talk about the best policy (recommended):
Front end: repackage ajax request. Put the value of the token in the request header. In this way, you don't need to add token every time you use Ajax, you can directly call this packaged Ajax and use it directly.
var token=localStorage.getItem("key")
$.ajax({
             type: "post",
             url:"xxx",
             contentType: "application/json;charset=utf-8",
             data :JSON.stringify({"tbId": 1}),
             dataType: "json",
             beforeSend: function (XMLHttpRequest) {
         		XMLHttpRequest.setRequestHeader("Authorization", "Bearer "+token);
             },
             success: function (data) {
            	 alert(data);
             },error:function(error){
                 console.log(error);
             }
)
Backend: Configure swagger annotations. In the configuration of swagger, the request headers in the parameters are required. Add a swaper annotation on the requested interface to verify the token in the request header.
1. Add pom dependency
<dependency>
      <groupId>io.springfox</groupId>
      <artifactId>springfox-swagger2</artifactId>
      <version>2.2.2</version>
    </dependency>
    <dependency>
      <groupId>io.springfox</groupId>
      <artifactId>springfox-swagger-ui</artifactId>
      <version>2.2.2</version>
    </dependency>
2. Swagger configuration
import springfox.documentation.schema.ModelRef;
import springfox.documentation.service.Parameter;
import org.springframework.context.annotation.Bean;
import org.springframework.context.annotation.Configuration;
import springfox.documentation.builders.ApiInfoBuilder;
import springfox.documentation.builders.ParameterBuilder;
import springfox.documentation.builders.PathSelectors;
import springfox.documentation.builders.RequestHandlerSelectors;
import springfox.documentation.service.ApiInfo;
import springfox.documentation.spi.DocumentationType;
import springfox.documentation.spring.web.plugins.Docket;
import springfox.documentation.swagger2.annotations.EnableSwagger2;
import java.util.ArrayList;
import java.util.List;
@Configuration
@EnableSwagger2
public class SwaggerConfig {
@Bean
public Docket createRestApi() {
return new Docket(DocumentationType.SWAGGER_2)
.apiInfo(apiInfo())
.select()
.apis(RequestHandlerSelectors.basePackage("com.xxx.xxx.controller"))
.paths(PathSelectors.any())
.build()
.globalOperationParameters(headerInfo());//************把消息头添加;
}
private ApiInfo apiInfo() {
return new ApiInfoBuilder()
.title("API文档")
.description("后台管理系统")
.termsOfServiceUrl("")
.version("1.0")
.build();
}
private List<Parameter> headerInfo(){
ParameterBuilder ticketPar = new ParameterBuilder();
List<Parameter> pars = new ArrayList<Parameter>();
ticketPar.name("Authorization").description("access_token")//name表示名称,description表示描述
.modelRef(new ModelRef("string")).parameterType("header")
.required(true).defaultValue("Bearer ").build();//required表示是否必填,defaultvalue表示默认值
pars.add(ticketPar.build());//添加完此处一定要把下边的带***的也加上否则不生效
return pars;
}
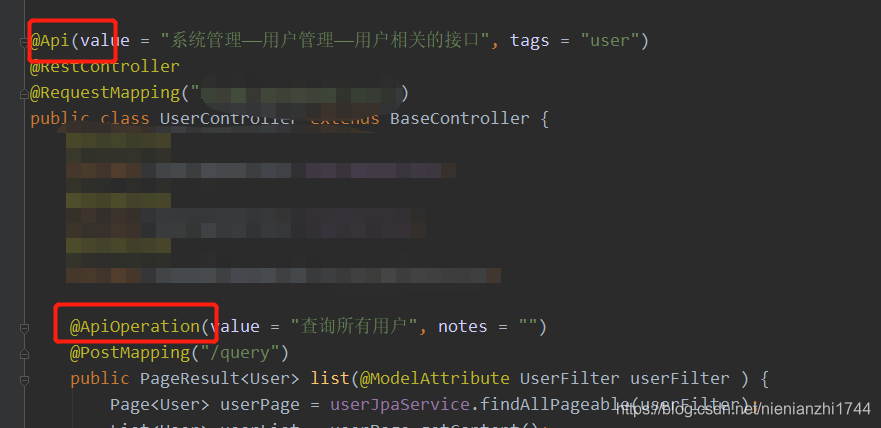
}3. Add swagger annotations on the interface, as shown in the figure
In this way, the interface with swagger annotations will automatically check the token in the request header in the request when requested.