Article Directory
1. Build a virtual web host
1 Overview
- Virtual web host refers to running multiple web sites on the same server, each of which does not actually occupy the entire server independently, so it is called "virtual "web host"
- Virtual web hosting services can make full use of the hardware resources of the server, thereby greatly reducing website construction and operating costs
- The use of httpd service can be very convenient to build a virtual host server, only need to run a httpd service to support a large number of web sites at the same time
2. The type of virtual host supported by httpd service
The virtual host types supported by the httpd service include the following three:
- Based on the domain name: use a different domain name for each virtual host, but the corresponding IP address is the same.
For example, the IP addresses of www.xcf.com and www.zxc.com are both 192.168.126.20
This is the most commonly used type of virtual web host
2. Based on IP address: use a different domain name for each virtual host, and their corresponding IP addresses are also different.
This method requires the server to be equipped with multiple network interfaces (configure multiple Virtual network card), so the application is not very wide
. 3. Port-based: This method does not use domain names and IP addresses to distinguish different site content, but uses different TCP port numbers, so users are browsing different virtual sites You need to specify the port number at the same time to access
4. In addition, because different types of virtual hosts have different distinguishing mechanisms, it is recommended not to use them at the same time to avoid mutual confusion
3. Virtual hosting based on domain name
- Provide domain name resolution for virtual hosts
Method 1: Deploy DNS domain name resolution server to provide domain name resolution
Method 2: Temporarily configure the mapping between domain names and IP addresses in the /etc/hosts file
echo "192.168.126.15 www.xcf.com" >> /etc/hosts
echo "192.168.126.15 www.zxc.com" >> /etc/hosts
cd /usr/local/httpd/htdocs
mv index.html{

    ,.bak}
ls
- Prepare web documents for virtual hosting
mkdir -p /var/www/html/xcf
mkdir -p /var/www/html/zxc
echo "<h1>www.xcf.com</h1>" > /var/www/html/xcf/index.html
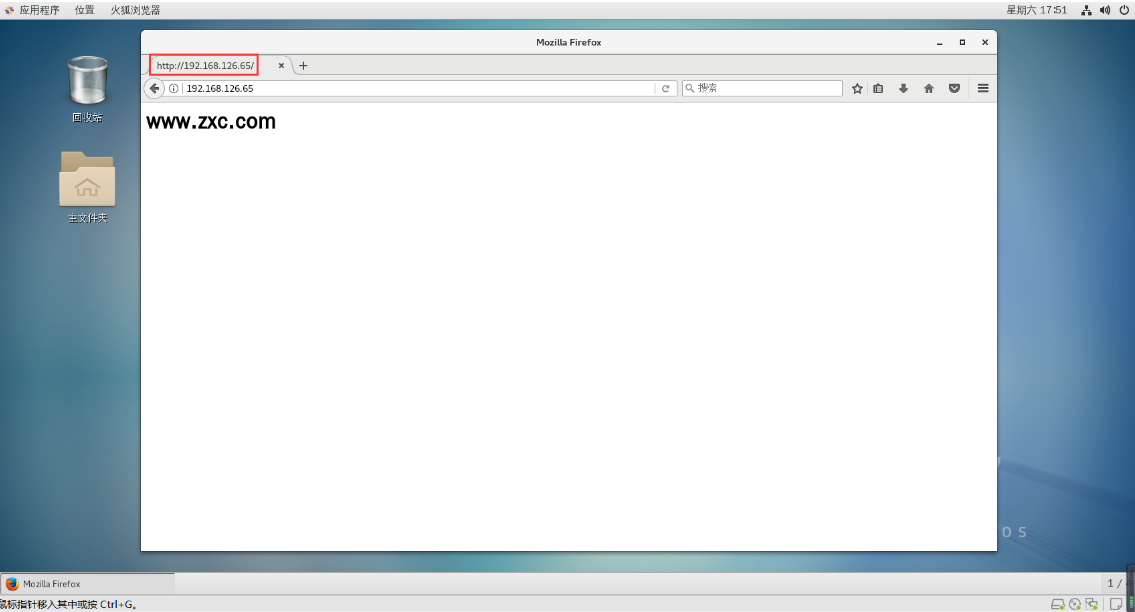
echo "<h1>www.zxc.com</h1>" > /var/www/html/zxc/index.html
- Add virtual host configuration
vim /usr/local/httpd/conf/extra/httpd-vhosts.conf #源码编译安装的虚拟主机配置文件路径
#vim /etc/httpd/conf.d/vhosts.conf #RPM或YUM安装的虚拟主机配置文件路径
模板文件:
<VirtualHost *:80> #设置虚拟站点区域
ServerAdmin [email protected] #设置管理员邮箱,这行可注释掉
DocumentRoot "/usr/local/httpd/docs/dummy-host.example.com" #设置网站根目录
ServerName dummy-host.example.com #设置Web站点的完整域名(主机名+域名)
ServerAlias www.dummy-host.example.com
#域名别名,也可以注释
ErrorLog "logs/dummy-host.example.com-error_log" #设置错误日志文件的路径
CustomLog "logs/dummy-host.example.com-access_log" common #设置访问日志文件的路径
</VirtualHost> #结束标签
修改为:
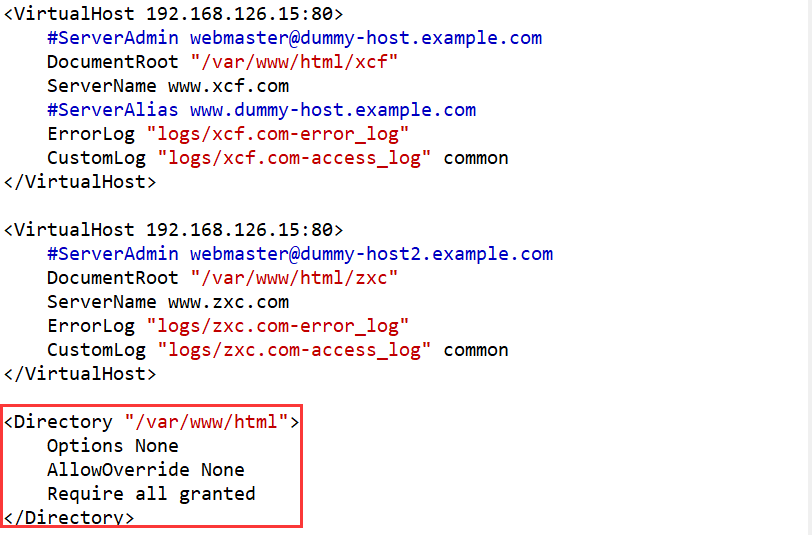
<VirtualHost 192.168.126.15:80>
DocumentRoot "/var/www/html/xcf"
ServerName www.xcf.com
ErrorLog "logs/xcf.com-error_log"
CustomLog "logs/xcf.com-access_log" common
</VirtualHost>
<VirtualHost 192.168.126.15:80>
DocumentRoot "/var/www/html/zxc"
ServerName www.zxc.com
ErrorLog "logs/zxc.com-error_log"
CustomLog "logs/zxc.com-access_log" common
</VirtualHost>

- Load independent configuration file
vim /usr/local/httpd/conf/httpd.conf
#源码编译安装的httpd服务主配置文件路径
------480行------取消注释
Include conf/extra/httpd-vhosts.conf    #加载独立的配置文件

#vim /etc/httpd/ conf /httpd. conf		#RPM或YUM安装的httpd服务主配置文件路径
IncludeOptional conf.d/* .conf   		#最后一行已默认开启此项
- Set up access control
vim /usr/local/httpd/conf/extra/httpd-vhosts.conf

#在最后加入下面内容

<Directory "/var/www/html">    #设置目录访问权限
    Options None               #不启用任何的服务器特性
    AllowOverride None         #不允许重写Apache默认配置
    Require all granted        #允许所有主机访问
</Directory>

systemctl restart httpd.service
options指令常用选项:
None:表示不启用任何的服务器特性
FollowSymLinks:服务器允许在此目录中使用符号连接(软链接)。
Indexes:如果输入的网址对应服务器上的一个文件目录,而此目录中又没有Apache配置文件中的DirectoryIndex指令指定的文件(例如:DirectoryIndex index.html index.php) ,则列出该目录下的所有文件。
Multiviews:如果客户端请求的路径可能对应多种类型的文件,那么服务器将根据客户端请求的具体情况自动选择一个最匹配客户端要求的文件。例如,在服务器站点的file文件夹下中存在名为hello.jpg和hello.html的两个文件,此时用户输入http://localhost/file/helle ,如果在file文件夹下并没有hello子目录,那么服务器将会尝试在file目录下查找形如hello.*的文件,然后根据用户请求的具体情况返回最匹配要求的hello.jpg或者hello.html
All:表示除Multiviews之外的所有特性。这也是Options指令的默认设置

Allowoverride指令解释:
.htaccessy(分布式隐含配置文件):提供了针对每个目录改变配置的方法,即在一个特定的目录中放置一个包含特定指令的文件,其中的指令作用于此目录及其所有子目录当Allooverride设置成None时,相应的配置目录下的.htaccess文件是不被读取的,即无法生效。当Allooverride设置成A11时,每一次请求访问相应目录下的文件时,都会读取.htaccess文件的配置,意味着原Apache指令会被.htaccess文件中的指令重写。
从性能和安全性考虑,一般都尽可能避免使用.htaccess文件,任何希望放在.htaccess文件中的配置,都可放在主配置文件(httpd.conf )的段中,而且高效。因此Allowoverride属性一般都配置成None

地址限制策略:
Require all granted:允许所有主机访问。
Require all denied:拒绝所有主机访问,
Require local:仅允许本地主机访问。
Require [not] host <主机名或域名列表>:允许或拒绝指定主机或域名访问。
Require [not] ip <IP地址或网段列表>:允许或拒绝指定IP地址网络访问。
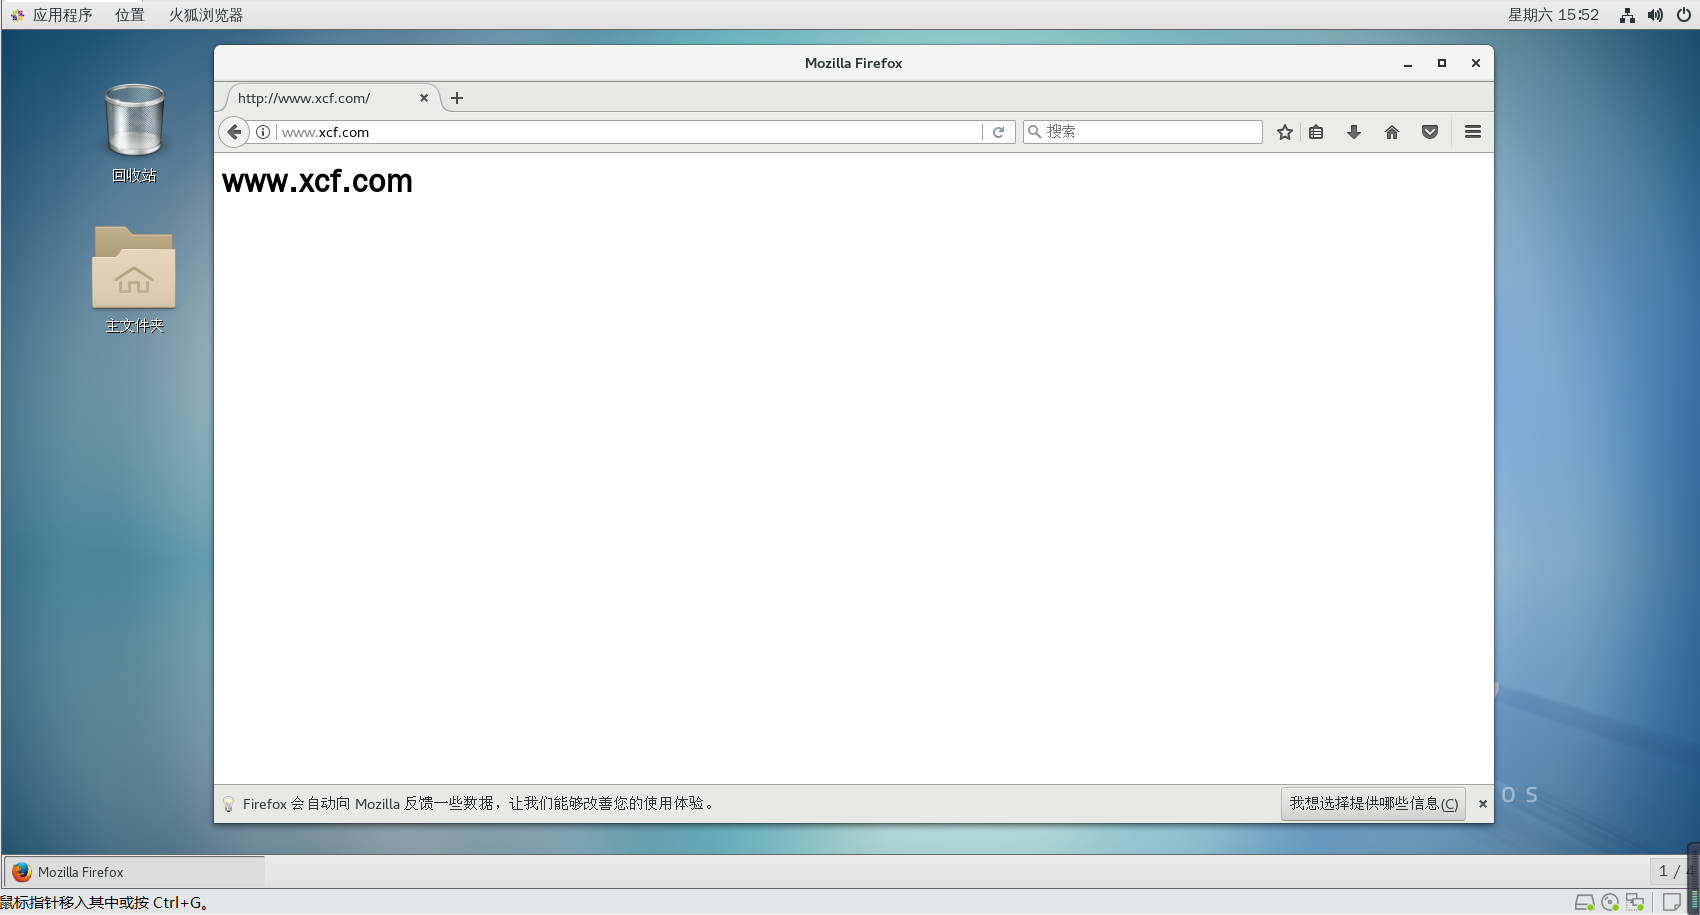
- Browser access verification

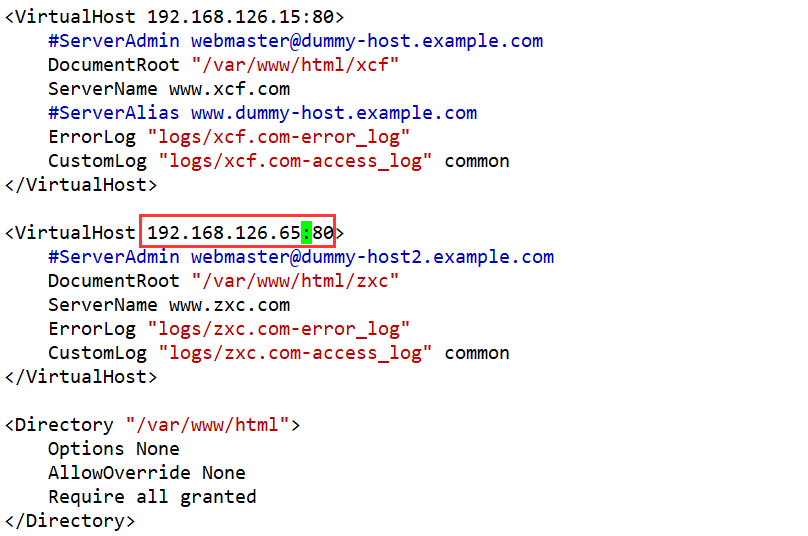
4. Virtual host based on IP address
- Add a virtual network card
ifconfig ens33:0 192.168.126.65 netmask 255.255.255.0     #添加虚拟网卡

ifconfig
#检查一下是否添加成功
- Add the host configuration of the virtual network card
vim /usr/local/httpd/conf/extra/httpd-vhosts.conf
<VirtualHost 192.168.126.15:80>
    DocumentRoot "/var/www/html/xcf"
    ServerName www.xcf.com
    ErrorLog "logs/xcf.com-error_log"
    CustomLog "logs/xcf.com-access_log" common
</VirtualHost>

<VirtualHost 192.168.126.65:80>
#将此处IP地址更改为自己新创建的虚拟网卡的IP地址即可
    DocumentRoot "/var/www/html/zxc"
    ServerName www.zxc.com
    ErrorLog "logs/zxc.com-error_log"
    CustomLog "logs/zxc.com-access_log" common
</VirtualHost>

<Directory "/var/www/html">
    Options None
    AllowOverride None
    Require all granted
</Directory>
- Modify the main configuration file
vim /usr/local/httpd/conf/httpd.conf
#在53行添加监听
Listen 192.168.126.15:80
Listen 192.168.126.65:80

- Restart the service and browse the web to test
systemctl restart httpd.service
5. Port-based virtual hosting
vim /usr/local/httpd/conf/extra/httpd-vhosts.conf
<VirtualHost 192.168.126.15:80>
    DocumentRoot "/var/www/html/xcf"
    ServerName www.xcf.com
    ErrorLog "logs/xcf.com-error_log"
    CustomLog "logs/xcf.com-access_log" common
</VirtualHost>

<VirtualHost 192.168.126.65:8080>
#修改此处即可
    DocumentRoot "/var/www/html/zxc"
    ServerName www.zxc.com
    ErrorLog "logs/zxc.com-error_log"
    CustomLog "logs/zxc.com-access_log" common
</VirtualHost>

<Directory "/var/www/html">
    Options None
    AllowOverride None
    Require all granted
</Directory>
vim /usr/local/httpd/conf/httpd.conf

#修改端口号
Listen 192.168.126.65:8080

#重启服务,随后打开浏览器进行验证
systemctl restart httpd.service

2. Apache connection retention
- The HTTP protocol is based on the TCP protocol. Before making an HTTP connection, a TCP connection must be made. Each TCP connection requires three handshake and four waves. Establishing and closing connections consumes a lot of memory and CPU resources for the HTTP protocol.
- The solution is to keep the HTTP connection. It is to keep the client connection as much as possible, and transmit multiple HTTP request responses through a TCP connection. For the client, the response time can be increased by more than 50%, and for the server, the resource consumption when establishing and closing the connection can be reduced.
vim /usr/local/httpd/conf/extra/httpd-default.conf

KeepAlive On
#设置是否打开连接保持功能,后面接OFF表示关闭,接ON表示打开。可以根据网站的并发请求量决定是否打开,即在高并发时打开连接保持功能,并发量不高时关闭此功能
MaxKeepAliveRequests 100
#用于设置在一次长连接中可以传输的最大请求数量,超过此最大请求数量就会断开连接,最大值的设置决定于网站中网页的内容,一般设置数量会多于网站中所有的元素
KeepAliverimeout 5
#设置来自同一个客户端一次连接多次请求之间的最大间隔时间,即两次请求之间超过该时间连接就会自动断开,从而避免客户端占用连接资源
Three, Apache access control
effect:
- Control access to website resources
- Add access authorization for specific website directories
Common access control methods:
- Client address display
- User authorization restrictions
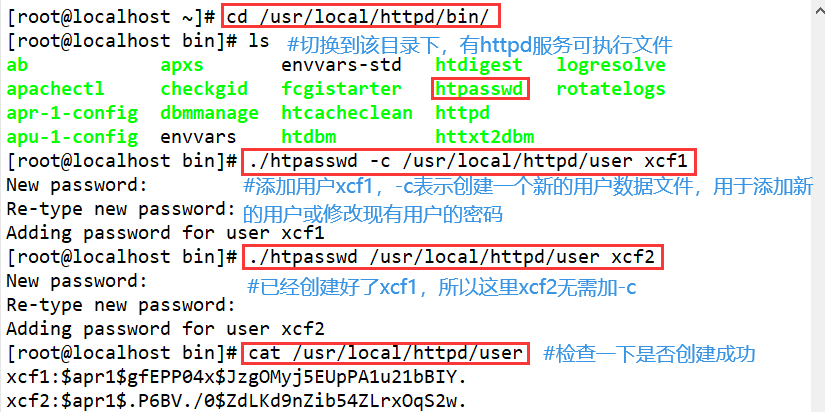
- Create user authentication data file
cd /usr/local/httpd/bin

[root@www bin]#./htpasswd -c /usr/local/httpd/user xcf1  #创建xcf1用户数据文件,此处有-c
#-c选项表示新建用户数据文件,缺省时则表示指定的用户数据文件已经存在,用于添加新的用户或修改现有用户的密码
New password:             #输入用户密码
Re-type new password:     #确认密码
Adding password for user xcf1

[root@www bin]#./htpasswd  /usr/local/httpd/user xcf2 #创建xcf2用户数据文件,此处没有-c
New password:
Re-type new password:
Adding password for user xcf2
#-c指定的文件位置为/usr/local/httpd/目录下的任意目录中都可以

[root@www bin]#cat /usr/local/httpd/user
#查看用户是否添加成功
- Add user authorization configuration
vim /usr/local/httpd/conf/httpd.conf
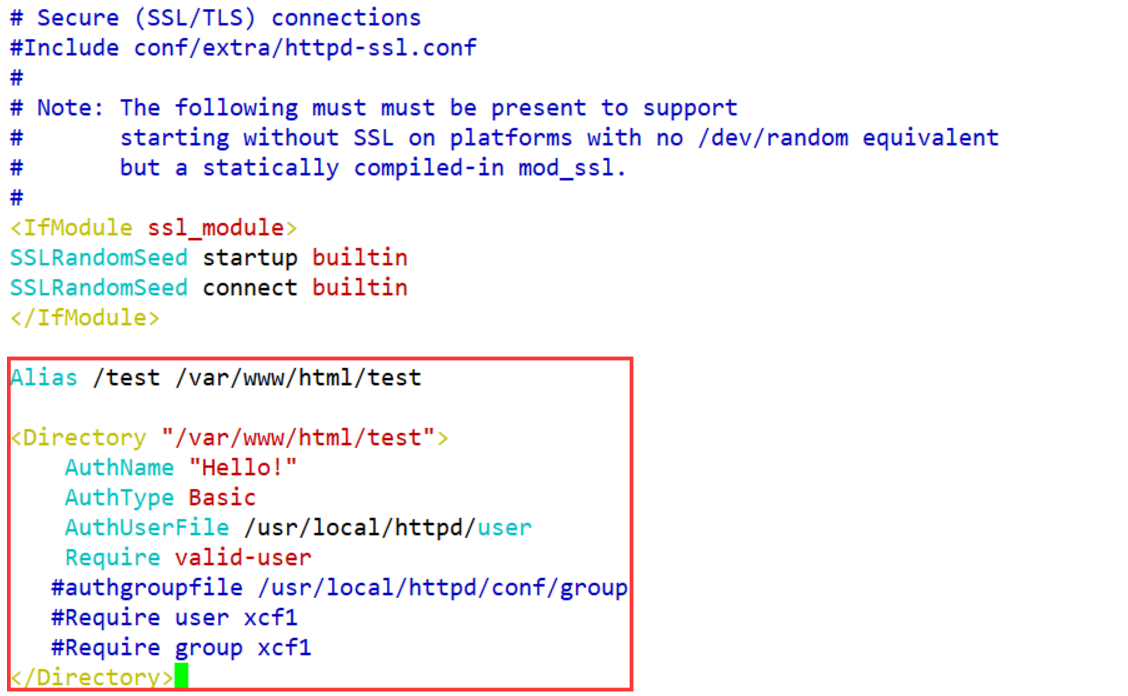
------在末行添加以下内容--------
Alias /test /var/www/html/test
<Directory "/var/www/html/test">
AuthName "Hello!"
AuthType Basic
AuthUserFile /usr/local/httpd/user
Require valid-user
#authgroupfile /usr/local/httpd/conf/group
#Require user xcf1
#Require group xcf1
</Directory>
解释:
Alias /test /var/www/html/test #设置虚拟目录的根目录,/test为虚拟目录名称
<Directory "/var/www/html/test"> #设置虚拟目录配置区域
AuthName "Hello!" #定义受保护的领域名称,会在认证对话框中显示
AuthType Basic #设置认证的类型,Basic表示基本认证
AuthUserFile /usr/local/httpd/user #设置用于保存用户账号和密码的认证文件的路径
Require valid-user #开启用户认证,只有认证文件中的合法用户才能访问
#authgroupfile /usr/local/httpd/conf/group #设置用于保存组账号和密码的认证文件的路径
#Require user xcf1 #仅允许指定用户访问
#Require group xcf1 #仅允许指定组访问
</Directory>
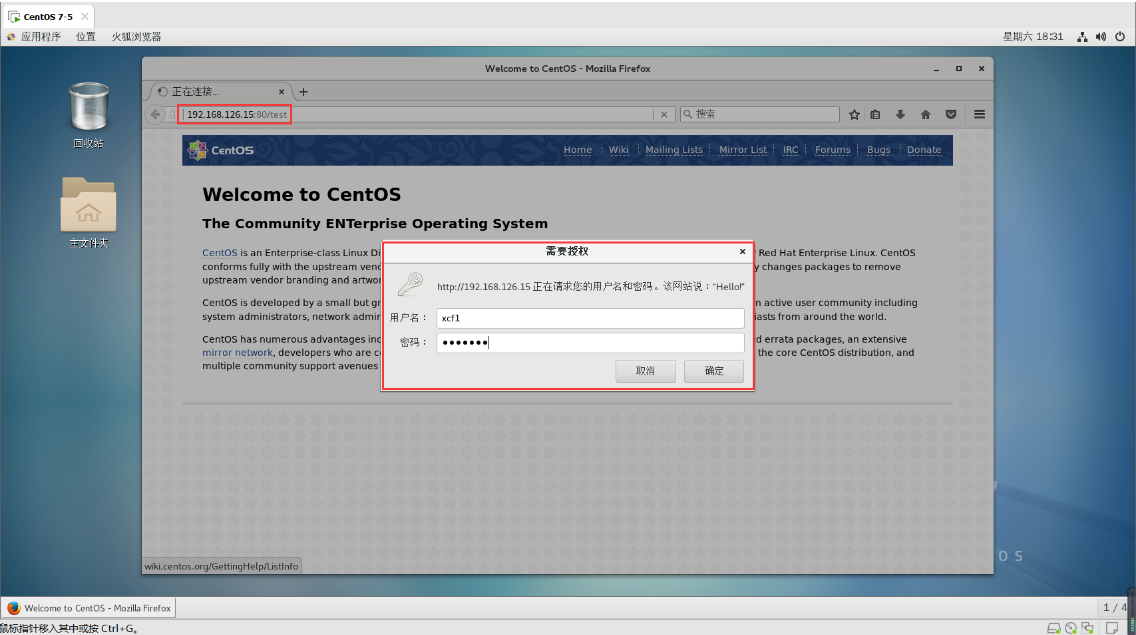
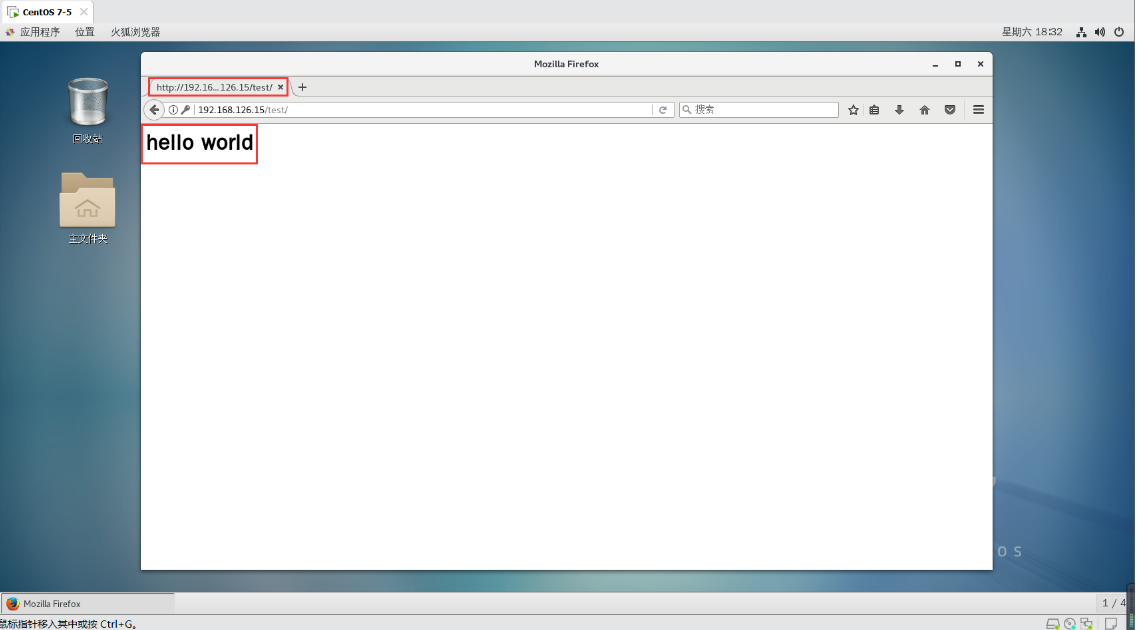
- Verify user access
[root@www bin]#mkdir -p /var/www/html/test
[root@www bin]#echo "<h1>hello world</h1>" > /var/www/html/test/index.html
[root@www bin]#systemctl restart httpd.service

http://192.168.126.15:80/test
Four, Apache log segmentation
Use Apache's own rotatelogs splitting tool to automatically split Apache logs according to the date of the day
- File location of Apache log file
cd /usr/local/httpd/logs
- Use Apache's own rotatelogs segmentation tool to automatically segment Apache logs according to the date of each day
vim /usr/local/httpd/conf/httpd.conf
-----修改275行附近该字段--------
ErrorLog "|/usr/local/bin/rotatelogs -l /var/log/httpd/error_%Y%m%d.log 86400"   #分割错误日志
-----修改305行附近该字段---------
CustomLog "|/usr/local/bin/rotatelogs -l /var/log/httpd/access_%Y%m%d.log 86400"    combined     #分割访问日志


#解释:
ErrorLog "| rotatelogs 命令的绝对路径 -l 日志文件路径/网站名-error_%Y%m%d.log 86400"	'//which rotatelogs命令查看绝对路径,%Y%m%d表示年月日,86400表示一天的秒数'
CustomLog "| rotatelogs 命令的绝对路径 -l 日志文件路径/网站名-access_%Y%m%d.log 86400" combined
#开头的 | 为管道符号。
#-l 选项表示使用本地时间为时间基准
#86400表示一天(60×60×24),即每天生成一个新的日志文件
mkdir /var/log/httpd
#创建分割后的日志文件保存目录

systemctl restart httpd.service
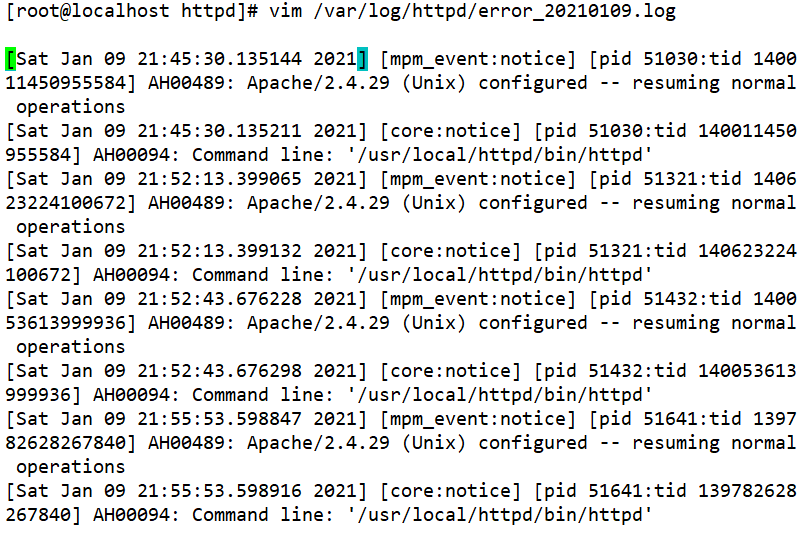
- View split log
vim /var/log/httpd/error_20210106.log
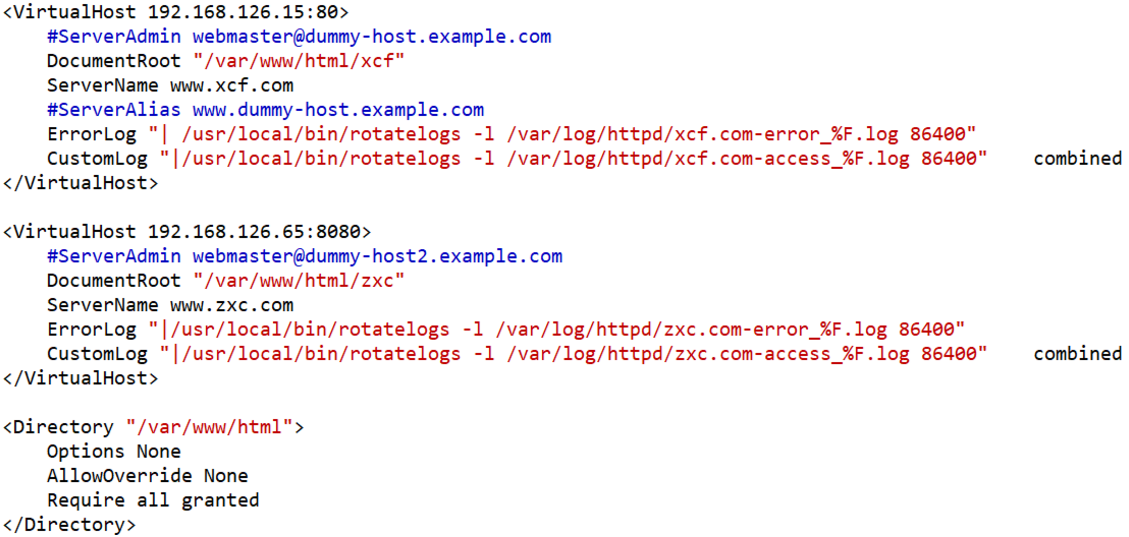
- Configure virtual host log split
vim /usr/local/httpd/conf/extra/httpd-vhosts.conf

<VirtualHost 192.168.126.15:80>
    DocumentRoot "/var/www/html/xcf"
    ServerName www.xcf.com
    ErrorLog "| /usr/local/bin/rotatelogs -l /var/log/httpd/xcf.com-error_%F.log 86400"
   CustomLog "|/usr/local/bin/rotatelogs -l /var/log/httpd/xcf.com-access_%F.log 86400"    combined
</VirtualHost>

<VirtualHost 192.168.126.65:8080>
    DocumentRoot "/var/www/html/zxc"
    ServerName www.zxc.com
    ErrorLog "|/usr/local/bin/rotatelogs -l /var/log/httpd/zxc.com-error_%F.log 86400"
    CustomLog "|/usr/local/bin/rotatelogs -l /var/log/httpd/zxc.com-access_%F.log 86400"    combined
</VirtualHost>

<Directory "/var/www/html">
    Options None
    AllowOverride None
    Require all granted
</Directory>

systemctl restart httpd.service
- After browsing the visited webpage, check the log in the /var/log/httpd directory

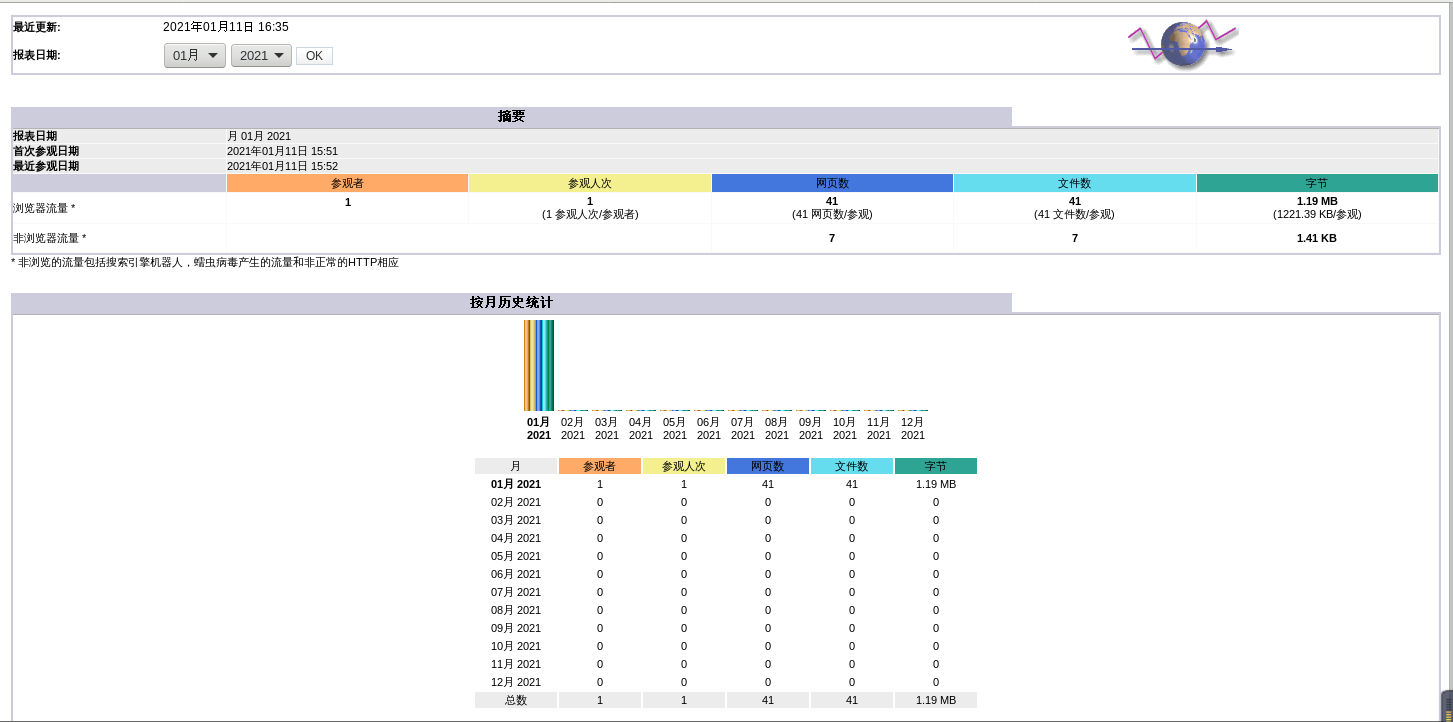
Five, Apache log analysis
AWStats is an open source log analysis system developed using Perl language, which is used to complete automated log statistics and analysis.
Software package Baidu cloud link https://pan.baidu.com/s/1yELT8luYz9U2Ek9EXO3Fjg (link: rjcf)
- Transfer the software packages required to install AWStats to the /opt directory for installation
cd /opt
awstats-7.6.tar.gz

tar zxvf awstats-7.6.tar.gz
mv /opt/awstats-7.6 /usr/local/awstats
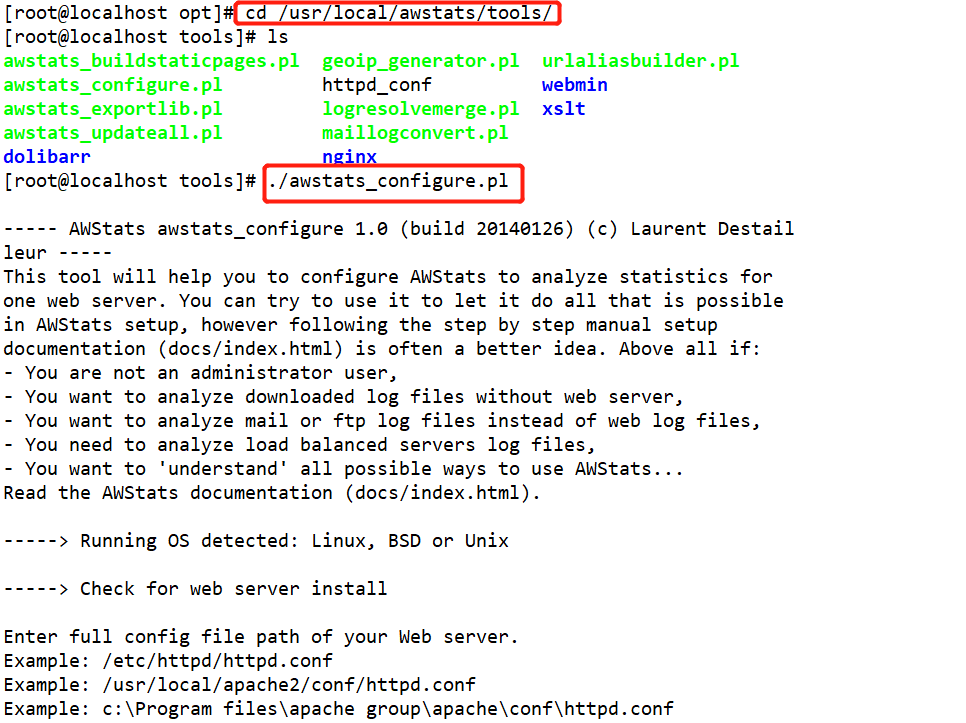
- Create a configuration file for the site to be counted
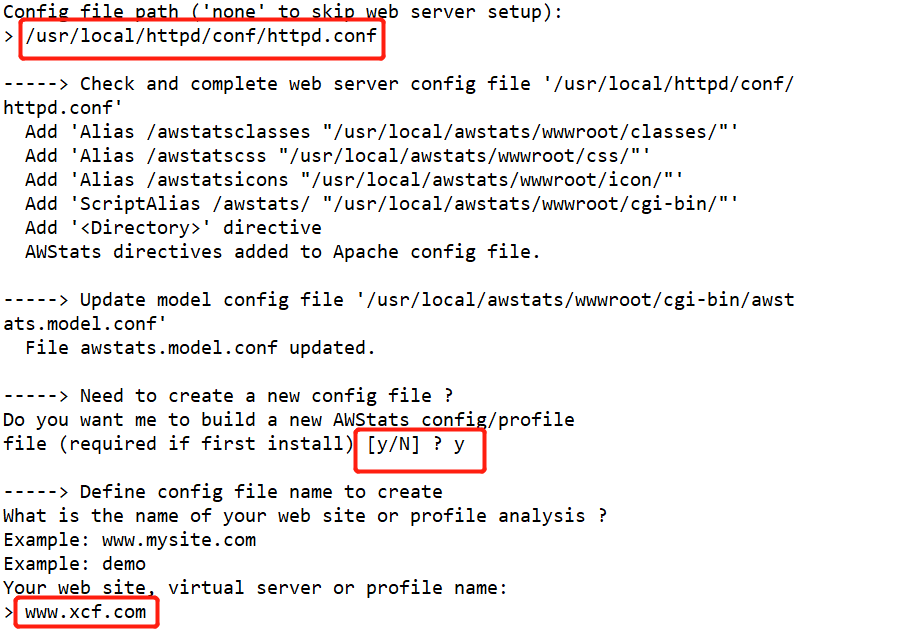
cd /usr/local/awstats/tools/
./awstats_configure.pl
.........
Config file path ('none' to skip web server setup):
> /usr/local/httpd/conf/httpd.conf #输入HTTPD服务主配置文件的路径
.........
#输入Y
Your web site, virtual server or profile name:
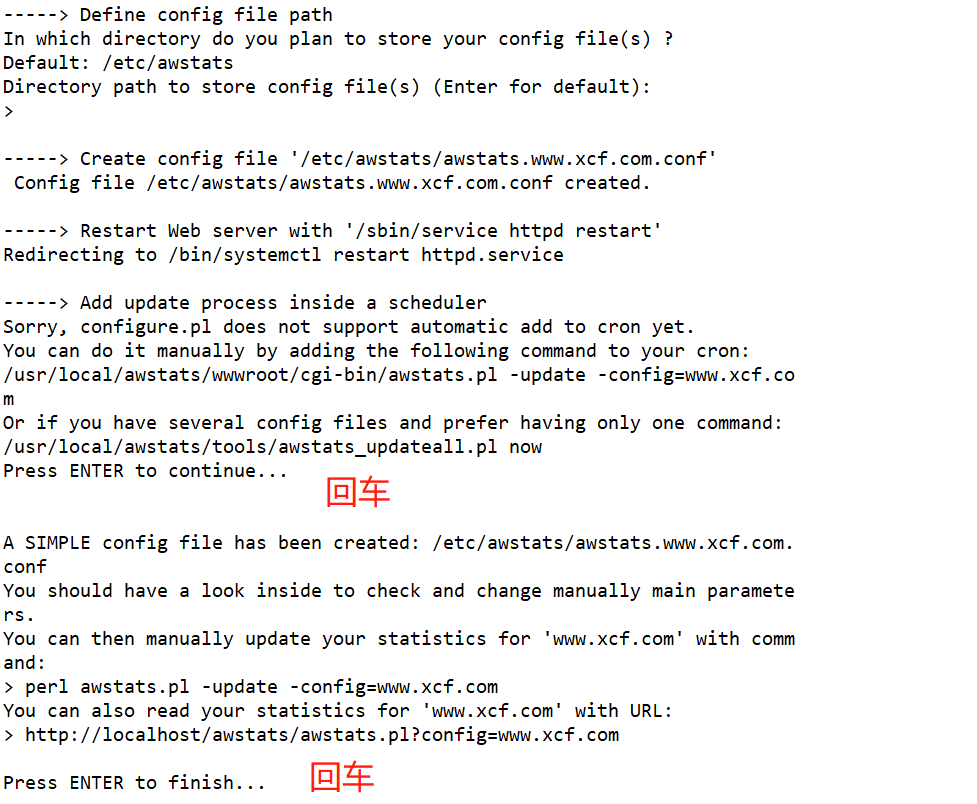
> www.xcf.com #输入要统计的站点域名
#回车
#回车
- Modify the automatically generated awstats access permissions, load the CGI module (Apache 2.4 or higher version needs to load the CGI module)
vim /usr/local/httpd/conf/httpd.conf
#275行左右
Errorlog "logs/error_log"
#303行左右
CustomLog "logs/access_log" combined
.......
----143行左右--------
<IfModule !mpm_prefork_module>
LoadModule cgid_module modules/mod_cgid.s #取消注释
</IfModule>
<IfModule mpm_prefork_module>
LoadModule cgi_module modules/mod_cgi.so #取消注释
</IfModule>
-----481行左右------
# Virtual hosts
#Include conf/extra/httpd-vhosts.conf #将该行注释掉
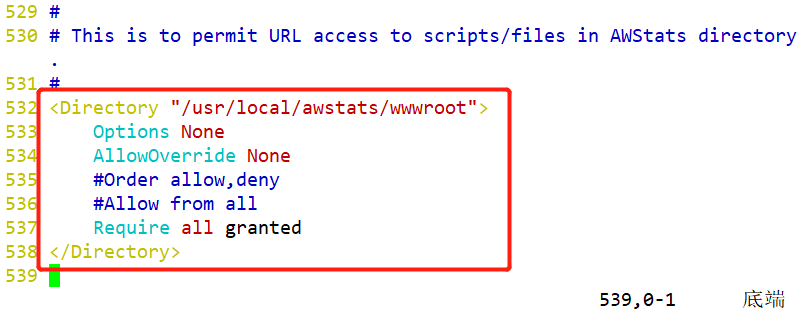
-------跳至末行修改-------
<Directory "/usr/local/awstats/wwwroot">
Options None
AllowOverride None
#Order allow,deny #注释
#Allow from all #注释
Require all granted #添加此行
</Directory>


- Modify site statistics configuration file
vim /etc/awstats/awstats.www.gcc.com.conf
LogFile="/usr/local/httpd/logs/access_log"    #修改访问日志文件位置
DirData="/var/lib/awstats"    #awstats目录默认不存在,需要手动创建


mkdir /var/lib/awstats


- Perform log analysis and set up cron scheduled tasks
systemctl restart httpd.service
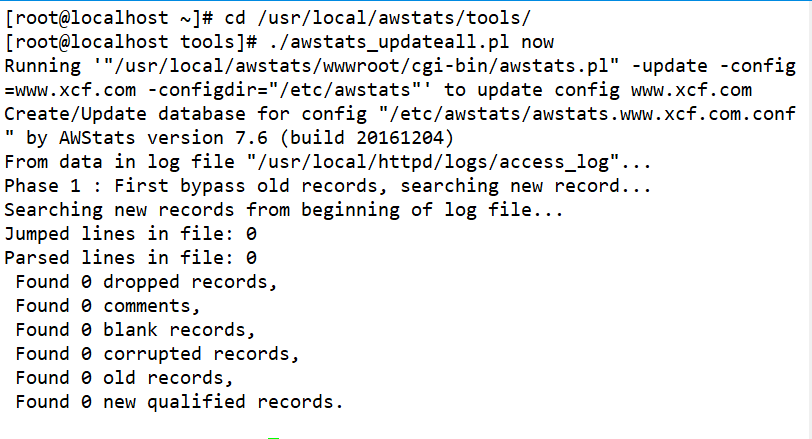
cd /usr/local/awstats/tools/
./awstats_updateall.pl now #更新数据(根据站点配置文件指定的日志文件路径)
##也可以设置定时任务进行刷新
crontab -e
*/5 * * * * /usr/local/awstats/tools/awstats_updateall.pl now
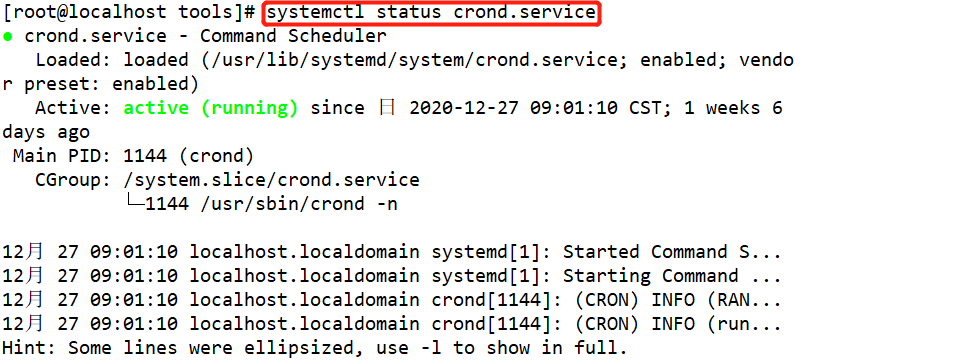
systemctl status crond #使用该命令查看是否打开,如果没打开可以start 打开

- Visit AWStats analysis system site
systemctl stop firewalld
systemctl disable firewalld
setenforce 0

#之前添加过,这里也可以不用再重复输入
echo "192.168.126.15 www.xcf.com" >> /etc/hosts
浏览器访问
http://www.xcf.com/awstats/awstats.pl?config=www.xcf.com
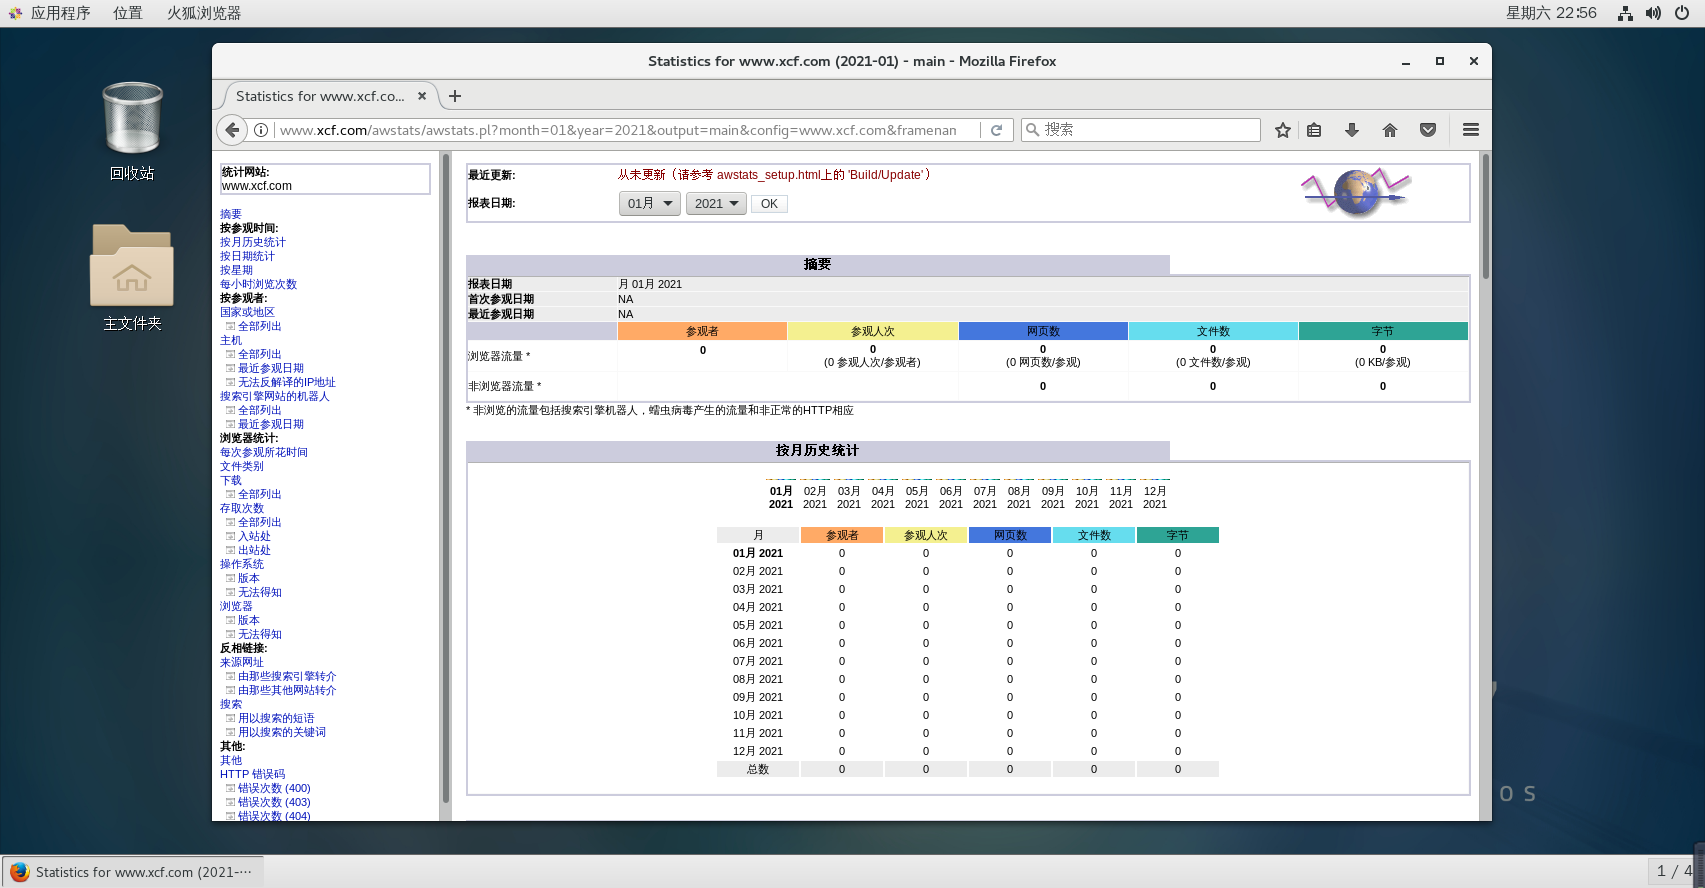
Access records can be generated by visiting www.xcf.com
- It is very likely that the web page cannot be refreshed here. Here is a solution.
First, vim /usr/local/httpd/logs/access_log, delete all 1000DD in the log,
and then enter the browser and browse again
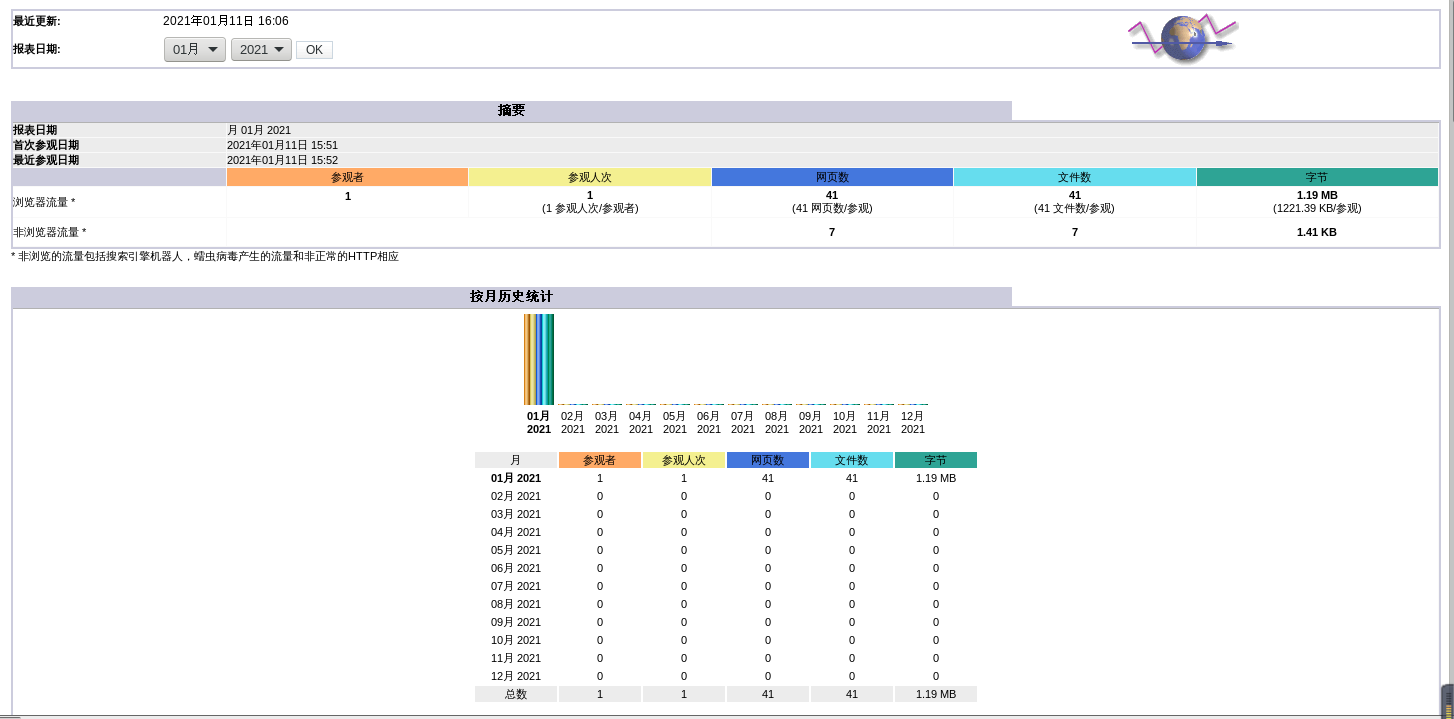
cd /usr/ local/awstats/tools/
./awstats_updateall.pl now (Repeat and update the data a few more times!!)
Open the webpage again, it's fine
- Optimize webpage address
vim /usr/local/httpd/htdocs/aws.html

<html>
<head>
<meta http-equiv=refresh content="0;url=http://www.xcf.com/awstats/awstats.pl?config=www.xcf.com">
</head>
<body></body>
</html>


HTML文件结构解释:
<html> </html>:用于HTML文件结构最外层表示的标签
<head></head>:用于HTML网页内容描述信息的头标签
<body></body>:用于显示网页内容的内容标签
<meta>:定义了HTML文档中的元数据,比如针对搜索引擎和更新频度的描述和关键词。这里的http-equiv=refresh用于实现网页自动跳转

浏览器访问
http://www.xcf.com/aws.html