Video lesson: https://edu.csdn.net/course/play/7621
Contents of this chapter
Section 1 Toast prompt box
Section 2 AlertDialog dialog box
Section 3 Featured dialog box
Section 4 Custom dialog box
Objective of this chapter
Familiar with the usage of Toast .
Familiar with the usage of Dialog .
Master the usage of several commonly used characteristic dialog boxes.
Master the method of custom dialog box.
Master the usage of Notification .
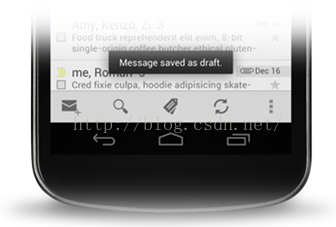
Toast is a form that floats on the top of the screen and is used to display messages. u is mainly used to display prompt information for various actions, such as:
ØThe mail being written is automatically saved to the draft box
ØSuccessfully deleted a communication
u Toast form just occupies part of the screen window
u The current Activity still exists and can interact with the user
u Toast will automatically close after displaying for a period of time
Build Toast message
u 1. Create a Toast object through the Toast.makeText () method
Context context = getApplicationContext();CharSequence text = "Hello toast!";int duration = Toast.LENGTH_SHORT;Toast toast = Toast.makeText(context, text, duration);
Ø The duration parameter indicates the timeout setting of Toast display, and can take the following values:
l Toast.LENGTH_SHORT display for a short time (about 2 seconds)
l Toast.LENGTH_LONG displays for a long time (about 3.5 seconds)
u 2. Display the Toast form through the Toast.show () method
u
Adjust the display position of Toast
uBy default, Toast is displayed at the bottom of the screen, horizontally centered
u by Toast.setGravity () can modify the position of the method, supports three parameters
Ø The first parameter gravity : Receive a Gravity constant, which can be a combination of constants
ØThe second parameter is the offset in the x direction
Ø The third parameter is the offset in the y direction
toast .setGravity(Gravity.TOP|Gravity.LEFT, 20, 30);
Toast 's appearance can be customized in addition to the default
U . 1 , as Toast customize a layout view (display content toast_layout.xml )
<LinearLayout ……><TextView android:id="@+id/text"android:layout_width="wrap_content"android:layout_height="wrap_content"android:textColor="#FFF"</LinearLayout>
u 2. Use dynamic loading method to use custom layout for Toast in the program
LayoutInflater li = getLayoutInflater();View layout = li.inflate(R.layout.toast_layout_root, null);TextView tv = (TextView)layout.findViewById(R.id.text);tv.setText("custom toast"); Toast t = new Toast(getApplicationContext());t.setGravity(Gravity.CENTER, 0, 0);t.setDuration(Toast.LENGTH_SHORT);t.setView(layout);t.show();
Dialog is to let a user make a decision or enter some information windows, dialog boxes usually do not fill the screen, and Toast different, the dialog box does not close automatically when the dialog box appears, the current Activity interface continues to display but can not interact, dialogue The box is not a view, the base class is Dialog inherited from Object
There are many ways to create dialogs
u Android system provides many dialog box classes for creating various dialog boxes
Ø android.app.AlertDialog
Ø android.app.DatePickerDialog
Ø android.app.TimePickerDialog
Ø android.app.ProgressDialog
u Define the content of the dialog box independently
u by AlertDialog create the dialog box is the most common way
AlertDialog is a direct subclass of Dialog
u contains a title
u contains a text message
u can manage 0 to 3 buttons
u can contain single-selection lists and multiple-selection lists
u can not create objects directly, you need to use AlertDialog.Builder
u
u
Use AlertDialog
u Create AlertDialog object
AlertDialog.Builder builder = new AlertDialog.Builder(this);AlertDialog alert = builder.create();
u using Builder object setTitle () method sets the title content
builder.setTitle (" Information Tips ");
u using Builder object the setMessage () method sets the message content
builder.setMessage (" Information Prompt ");
Use AlertDialog to add buttons
builder.setPositiveButton("Yes", new DialogInterface.OnClickListener() {public void onClick(DialogInterface dialog, int id) {MyActivity.this.finish();}}).setNegativeButton("No", new DialogInterface.OnClickListener() {public void onClick(DialogInterface dialog, int id) {dialog.cancel();}});
The simple list dialog is equivalent to placing the ListView component on the dialog
u by AlertDialog.Builder in setItems () to set the content and event listeners
AlertDialog.Builder builder = new AlertDialog.Builder(this);builder.setTitle("Please choose your favorite sport");builder.setItems(items, new OnClickListener() {public void onClick(DialogInterface dialog, int which) { show.setText("You selected "" + items[which] + """); }});builder.create().show();
The simple list dialog box is equivalent to putting the ListView component on the dialog box, and the rendering after running
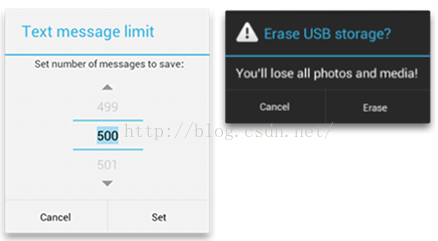
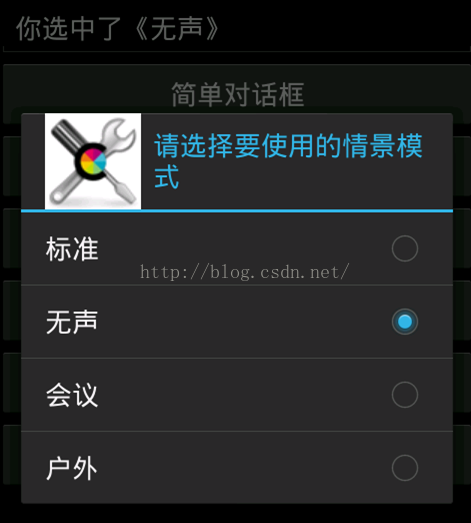
Single-selection list dialog box is used to display single-selection list
u by Builder in setSingleChoiceItems () to set the content and event listeners
AlertDialog.Builder builder = new AlertDialog.Builder(this);builder.setSingleChoiceItems(items, 1, new OnClickListener(){ public void onClick(DialogInterface dialog, int which) {show.setText("You selected "" + items[ which] + "》");} });builder.setTitle("Please select the profile to use");builder.create().show();
单选列表对话框用于显示单选列表, 运行后的效果图
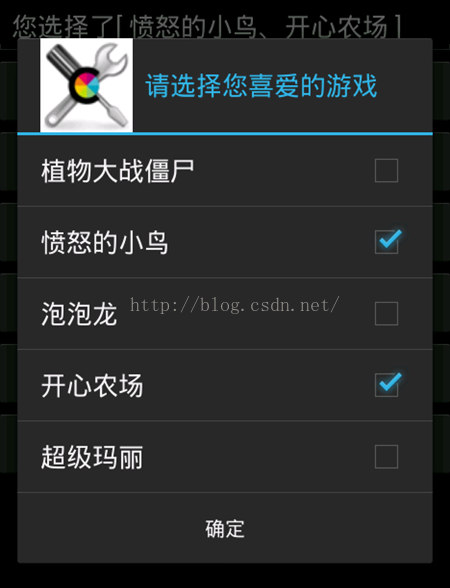
复选列表对话框用于显示复选项列表, 通过 Builder 中的 setMultiChoiceItems () 设置内容和事件监听
final boolean[] checkedItems= new boolean[] { false, true, false,true, false };AlertDialog.Builder builder = new AlertDialog.Builder(this);builder.setTitle("请选择您喜爱的游戏");builder.setMultiChoiceItems(items, checkedItems,new OnMultiChoiceClickListener() { public void onClick(DialogInterface dialog, int which, boolean isChecked) { checkedItems[which]=isChecked; //改变被操作列表项的状态 }});builder.create().show();
复选列表对话框用于显示复选项列表
u 运行后的效果图
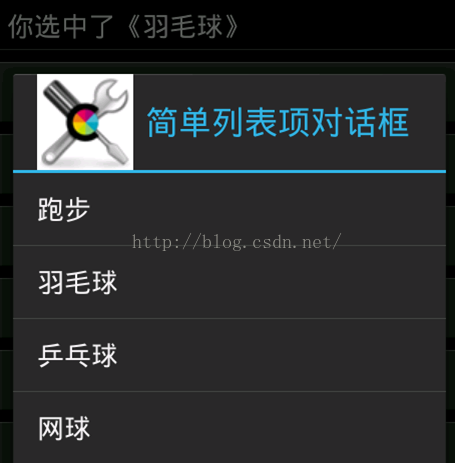
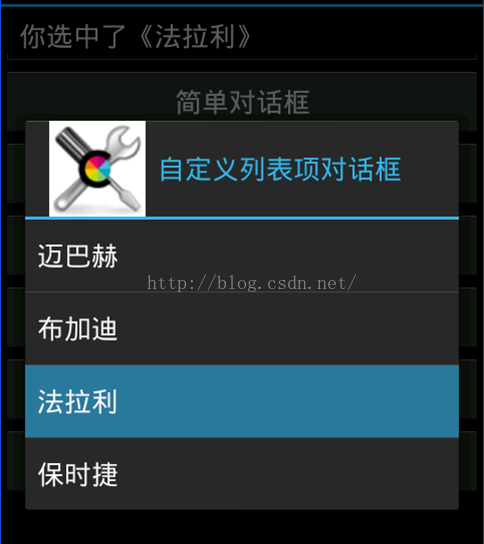
自 定义 列表对话框用于显示自定义列表, 通过 Builder 中的 setAdapter () 设置列表项内容
final String[] items = new String[] { "迈巴赫","布加迪","法拉利","保时捷"};AlertDialog.Builder builder = new AlertDialog.Builder(this) .setTitle("自定义列表项对话框") .setIcon(R.drawable.tools) .setAdapter(new ArrayAdapter<String>(this, android.R.layout.simple_list_item_1, items), new OnClickListener() { public void onClick(DialogInterface dialog, int which) { show.setText("你选中了《" + items[which] + "》"); }});builder.create().show();
自定义列表对话框用于显示自定义列表, 运行后的效果图
自定义对话框的实现思路
u 所谓自定义就是要摆脱对话框的固有模式,显示自定义的设计
u 首先需要做的是通过布局的方式将自定义内容的布局设计出来
Ø 一般会在 res/layout 下通过 xml 文件存放自定义的设计
u 然后通过对话框提供的能力将自定义的布局显示在对话框中
u AlertDialog 类提供了使用自定义内容的基础
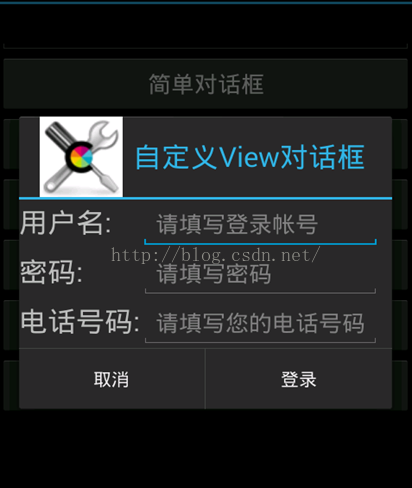
通过 AlertDialog 类实现自定义对话框
u AlertDialog 是 Dialog 的子类,完全具备了 Dialog 的特性
u 对于 Dialog 来讲,如果没有设置 Title , Title 位置依然空白存在
Ø AlertDialog 可以解决这个问题
u 使用 AlertDialog 加载自定义布局的示例如下:
LayoutInflater inflater = (LayoutInflater)getSystemService(LAYOUT_INFLATER_SERVICE);View layout = inflater.inflate(R.layout.custom_dlg, null);AlertDialog.Builder builder = new AlertDialog.Builder(MainActivity.this);builder.setView(layout);AlertDialog alertDialog = builder.create();alertDialog.show();
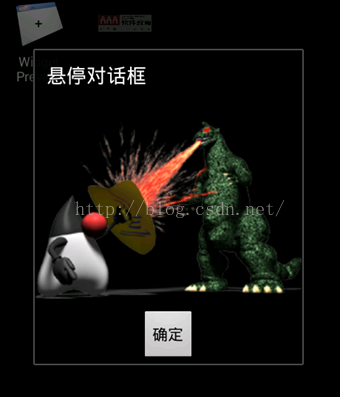
自定义对话框, 示例运行效果
对话框风格的窗口
这种对话枢本质上依然是窗口,只是把显示窗口的 Activity 的风格设为对话枢风格即 可, 需要 先增加 Activity, 在清单文件中进行设置
<activity android:name="com.aaa.ui.DialogTheme" android:theme="@android:style/Theme.Dialog" android:label="@string/app_name"> <intent-filter> <action android:name="android.intent.action.MAIN" /> <category android:name="android.intent.category.LAUNCHER" /> </intent-filter></activity>
自定义对话框
u 示例运行效果