Flutter Started Step Two - Routing Management
1. Page Jump
2. Routing
3. Name the route
4. routes generated hook
Speaking of routing, when we learn the computer network also learned a route, but this route either-routing. But just from the perspective of functional meaning, both quite similar.
Route (Route) in mobile development generally refers to page (Page), Route conceptual meaning with this single-page web application development is the same, Route in Android usually refers to a Activity.
Route management Flutter in and native to develop similar, whether it is Android or iOS, navigation management will maintain a routing stack, routing stack (push) corresponding to the operation to open a new page, routing the stack (pop) operation corresponding page closing operation, and The main route management is how to manage the routing stack.
.
.
1. a small chestnut how the page jump
in Android native development, we always do the jump page. Now we Flutter, but also learn about how to make the jump page.
In the case of our counter, we run into the following code:
class NewRoute extends StatelessWidget {
  @override
  Widget build(BuildContext context) {
    return Scaffold(
      appBar: AppBar(
        title: Text("New route"),
      ),
      body: Center(
        child: Text("This is new route"),
      ),
    );
  }
}
This class inherits from StatelessWidget, there is no doubt it is a parent widget. We add to it the Appbar, set the title, in the center of the screen prompts "This is new route".
Then we Column child in _MyHomePageState.build method of adding a widget button (FlatButton):
Column(
      mainAxisAlignment: MainAxisAlignment.center,
      children: <Widget>[
      ... //省略无关代码

//以下代码
      FlatButton(
         child: Text("open new route"),
         textColor: Colors.blue,
         onPressed: () {
          //导航到新路由
          Navigator.push( context,
           MaterialPageRoute(builder: (context) {
              return NewRoute();
           }));
          },
         ),
        //以上代码
       ],
 )
And then we re-heat sync APP, then click on the button, it will jump to a new page.
Navigator 2.
Navigator is a route management component that provides a method to open and exit routes page. Navigator through a stack to administer the active route set. Usually the current screen page is displayed route top of the stack. Navigator provides a range of methods to manage the routing stack, here we only introduce the two most commonly used methods:
Future push(BuildContext context, Route route)
bool pop(BuildContext context, [ result ])
A small chestnut: Passing parameters (routing by value) between pages, we create a new reason to page:
class TipRoute extends StatelessWidget {
  TipRoute({
    Key key,
    @required this.text,  // 接收一个text参数
  }) : super(key: key);
  final String text;

  @override
  Widget build(BuildContext context) {
    return Scaffold(
      appBar: AppBar(
        title: Text("提示"),
      ),
      body: Padding(
        padding: EdgeInsets.all(18),
        child: Center(
          child: Column(
            children: <Widget>[
              Text(text),
              RaisedButton(
                onPressed: () => Navigator.pop(context, "我是返回值"),
                child: Text("返回"),
              )
            ],
          ),
        ),
      ),
    );
  }
}
Then jump to the code that is below the new route of the page;
class RouterTestRoute extends StatelessWidget {
  @override
  Widget build(BuildContext context) {
    return Center(
      child: RaisedButton(
        onPressed: () async {
          // 打开`TipRoute`,并等待返回结果
          var result = await Navigator.push(
            context,
            MaterialPageRoute(
              builder: (context) {
                return TipRoute(
                  // 路由参数
                  text: "我是提示xxxx",
                );
              },
            ),
          );
          //输出`TipRoute`路由返回结果
          print("路由返回值: $result");
        },
        child: Text("打开提示页"),
      ),
    );
  }
}
We can re-write an entry, or you can make changes directly on the above example the page jump.
3. Name the route
so-called "named Route" (Named Route) that is the name of the route, we can give the route a name, and then you can open a new direct route by route name, which brings a routing management intuitive and simple way.
Flutter routing table structure is such that:
Map<String, WidgetBuilder> routes;
Registration is very simple way routing table, we go back to the example, "counter" before, and then locate the build method MyApp class MaterialApp, add routes property, the code is as follows:
MaterialApp(
  title: 'Flutter Demo',
  theme: ThemeData(
    primarySwatch: Colors.blue,
  ),
  //注册路由表
  routes:{
   "new_page":(context) => NewRoute(),
    ... // 省略其它路由注册信息
     //  "/":(context) => MyHomePage(title: 'Flutter Demo Home Page'), //注册首页路由
  } ,
  home: MyHomePage(title: 'Flutter Demo Home Page'),//标记主页
);
Now we have completed the registration of the routing table. The above home routing code does not use named routes, if we want to be registered as a named route home how to do it? Actually very simple, direct "Now Home routing code and then lift the comments did not mark this line below the home page can be commented out.
Then we can use named routes to jump, and jump directly want to perform tasks local add a line of code:
Navigator.pushNamed(context, "new_page");
It can be. "New_page" We are registered in the routing table named above.
In the above we saw how to pass parameters under normal circumstances, and now we look at how to pass parameters when using named routes:
First we look at the goal page
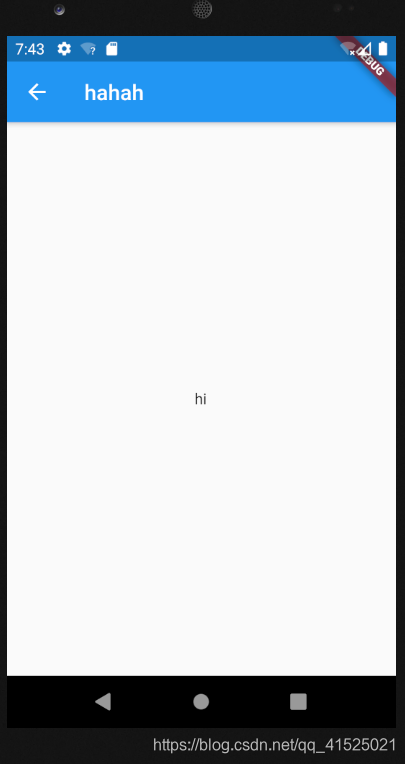
class EchoRoute extends StatelessWidget {

  @override
  Widget build(BuildContext context) {
    //获取路由参数
    var args=ModalRoute.of(context).settings.arguments;
    //...省略无关代码
    print(args);
    return Scaffold(
      appBar: AppBar(
        title: Text("hahah"),
      ),
      body: (
      Center(
        child: (
            Text(args)
        ),
      )
      ),
    );
  }
}
We named the route we are now into the top of the first, and then we call this place jump:
Navigator.of(context).pushNamed("new_page",arguments: "hi");
So that our argument will pass over.
Suppose we also want to pass above routing parameters TipRoute routing page registered to the example of the routing table, so that it can be opened by routing name. However, due to the TipRoute accepts a text argument, how do we fit in this case does not change the premise TipRoute source? it's actually really easy:
MaterialApp(
  ... //省略无关代码
  routes: {
   "tip2": (context){
   //将我们本页面的参数放到构造函数中
     return TipRoute(text: ModalRoute.of(context).settings.arguments);
   },
 },
);
4. routes generated hook
Suppose we want to develop an electricity supplier APP, when the user is not logged in can see the information of the store, merchandise, etc., but after the transaction, shopping cart, user's personal information and other pages need to be logged in to watch. In order to achieve the above functions, we need to determine the user logs in the open state before routing each page! If every route open before we all need to determine what will be very troublesome, then what better way to do? The answer is yes!
MaterialApp have a onGenerateRoute property, it may be called upon to open a named route, said it might be the reason why, is because when the call Navigator.pushNamed (...) to open a named route if the specified route name is already registered in the routing table, It will call routing table builder function to generate routing component; if the routing table is not registered, will call onGenerateRoute to generate routes. onGenerateRoute callback signature as follows:
Route Function (RouteSettings settings)
With onGenerateRoute callback, to achieve the above page permissions control function is very easy: we give permission to use the routing table, replaced by a onGenerateRoute callback, then the callback unified control, such as:
MaterialApp(
  ... //省略无关代码
  onGenerateRoute:(RouteSettings settings){
      return MaterialPageRoute(builder: (context){
           String routeName = settings.name;
       // 如果访问的路由页需要登录,但当前未登录,则直接返回登录页路由,
       // 引导用户登录;其它情况则正常打开路由。
     }
   );
  }
);
Note, onGenerateRoute will only take effect named route.
