Documents blog
How to play a direct reference vuepress document it, you can summarize some knowledge wooden thing, or reproduced, repeated daily look at a few times, such as spring-like warm bath, do not pull the other, and write simple template build their own how to deploy github static pages, because the git access is relatively slow, so the code will eventually move to the cloud top, that speed, general feeling of flying ....


First formwork it,
node environment, vuepress environment is not to say, direct reference documentation
Brother holds many lessons using: Reco this version, I played ad for miscellaneous south, remember advertising
Old practice step by step, fear finished article, readers read, come one, Lv, fuck, sucker stuff, written by Mao ah, ha ha, which lost, meaning to blog, blog is not suitable write principle, to write to the principle of Denver, know almost ah. Gangster much literary talent publishing a little better, a lot of big brother will help you correct me question a few days finished on the amount of reading, or no problem, but the premise is the stomach there are to be ink , so-called, in order to live had to go, and it was wooden with green dots, no nonsense, open line and
1. Go to github, click on the new, creating depots

2. Go to create a page, write your name warehouse, which finished finally click create button, enter the current repository page

3. clone current repository, select, read and write permissions to use the ssh, https do not have permission to write

Note: You can not clone, to click on the upper right picture, find the penultimate setting, where adding keys on your current computer, not on its own generate about
4. Cloning of the warehouse on the desktop and then
Terminal uses a cmder, comes with git, like a small partner can try, this terminal is still great,
5. Cloning of the following execution, the initialization script package.json, installation vuepress, and vuepress-theme-reco dependent skin to produce
# git clone 仓库地址

# cd 项目目录

# npm init -y

# yarn add vuepress vuepress-theme-reco
6. Create a new file in the root directory docs in the docs folder, the new file README.md, as follows

# mkdir docs

# cd docs

# touch README.md
In README.md write the following sentence in the file (this is the markdown syntax)
# Hello VuepressThe last directory is now:

7. Configure startup script, then the scripts in package.json
  "scripts": {
    "start": "vuepress dev docs",
    "build": "vuepress build docs"
  },
8. Do npm start to start the project .... start is complete, open the address below, and see the bottom of this page


9. Then configure vuepress, and then create the following directory docs folder, config.js is the configuration file, puclic folder is stored static resources such as images, etc.

config.js export an object, as follows, with regard to the specific configuration, reference, configuration files , configuration reference topic Reco , do not do more than repeat
module.exports = {
  title: 'demo模板',
  description: '我的第一个',
  markdown: {
    lineNumbers: true
  },
  theme: 'reco', // 使用皮肤
  themeConfig: {
    nav: [{ text: '主页', link: '/', icon: 'reco-home' }],
    version: '1.0'
  },
  plugins: []
}
10. Restart project ..., see below

11. deployed to github to static pages,
1. First, go to your warehouse, the warehouse name copy it
2. Open the file in the config.js docs, configure the base property, the name is the name of your warehouse, remember to bring a double / /
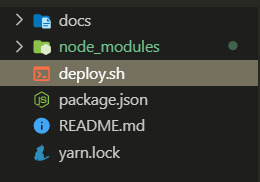
module.exports = {
  base: '/demo-vue-press/',
  title: 'demo模板',
  description: '我的第一个',
  markdown: {
    lineNumbers: true
  },
  theme: 'reco',
  themeConfig: {
    nav: [{ text: '主页', link: '/', icon: 'reco-home' }],
    version: '1.0'
  },
  plugins: []
}
3. Configure automatic packaging script, and then under the root directory of the new deploy.sh (Jiaosha name does not matter, but must .sh as the file name), the content is written into the bottom,
Remember to put this into your own address:
The following configuration is automatically packaged and packed files to the repository gh-pages branch, remember to replace their warehouse address
#!/usr/bin/env sh

# 确保脚本抛出遇到的错误
set -e

# 生成静态文件
npm run build

# 进入生成的文件夹
cd docs/.vuepress/dist

git init
git add -A
git commit -m 'deploy'

# 如果发布到 https://<USERNAME>.github.io/<REPO>
git push -f [email protected]:frontend-qin/demo-vue-press.git master:gh-pages

cd -
To 4. Here, the script then performs
You can simply drag the script to end in execution, can be re-vscode terminal, the direct input commands execute this file
Once you have entered, click OK (Enter key), a window will pop up git, as follows, after the execution and so on, the window will close, remember the front of the warehouse address steps, no errors, otherwise there would be an error of execution
5. Open your warehouse page, refresh, click on the branch, you will see a gh-pages branch, then switch to this branch, you will see the static files
6. Click warehouse setting
7. Go to this page, drop down to find GitHub Pages, will see addresses, select the branch gh-pages branch
8. Click the address of the page that you have just a
9. assign this address into the warehouse page impressions, clicks, warehouse, warehouse back to the page, click edit edit the address on the back, save, here is basically over


12. We all know that, github another country visit is very slow, especially without walls junior partner, for speed, chose to deploy this blog to code the cloud on
After logging in, select in the upper right corner

13. Select the template just import your blog

14. import is complete, click on Services, select the code page Cloud

15. Select branch, click Start

16, the start is completed, there will be the deployment of address

17. Click on the address, you can visit, after little friends can not help anything, blow your own blog up
