First, the system audit
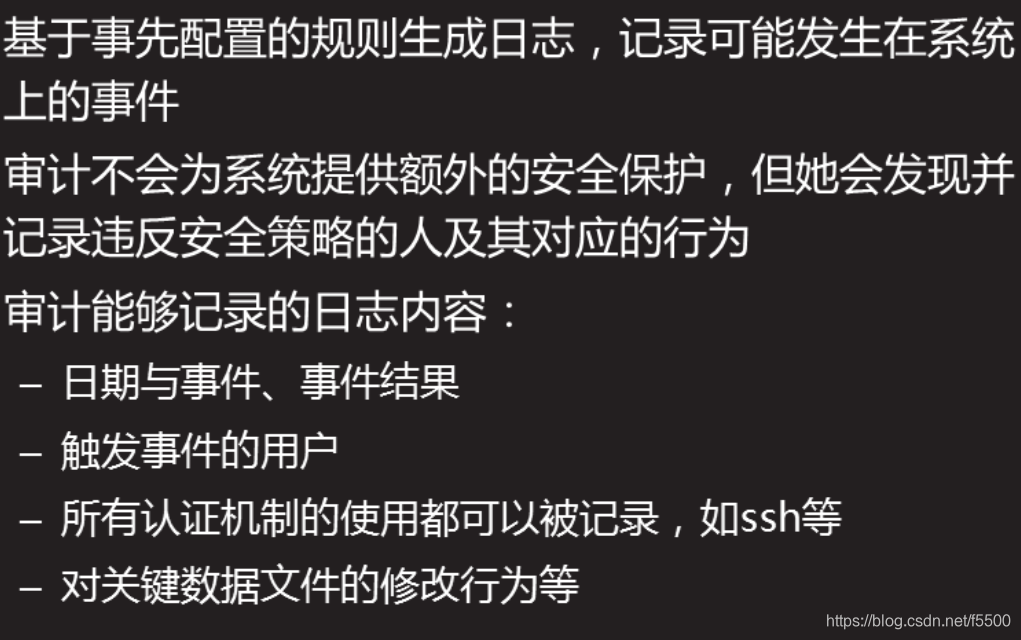
1.1 Overview

1.2 deployment audit

install software
[root@proxy ~]# yum -y install audit
[root@proxy ~]# cat /etc/audit/auditd.conf
log_file = /var/log/audit/audit.log
[root@proxy ~]# systemctl start auditd   //日志文件
auditctl command
auditctl command control and audit systems set rules determine what actions will be logging
[root@proxy ~]# auditctl -s     //查询状态
[root@proxy ~]# auditctl -l     //查看规则
[root@proxy ~]# auditctl -D     //删除所有规则
Defining Provisional Rules
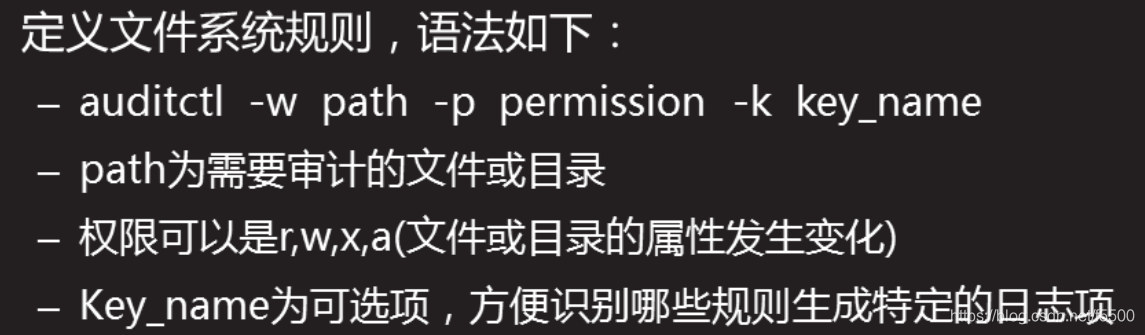
auditctl -w -p privileges -k log path name
[root@proxy ~]# auditctl -w /etc/passwd -p wa -k passwd_change
//设置规则所有对passwd文件的写、属性修改操作都会被记录审计日志
[root@proxy ~]# tailf /var/log/audit/audit.log  //查看日志
Permanent rules define
the configuration file /etc/audit/rules.d/audit.rules/
[Proxy the root @ ~] # Vim /etc/audit/rules.d/audit.rule
-w / etc / -p the passwd WA - passwd_changes K
-w / usr / sbin / -k partition_disks the fdisk -PX
通过工具搜索日志
系统提供的ausearch命令可以方便的搜索特定日志,默认该程序会搜索/var/log/audit/audit.log,ausearch options -if file_name可以指定文件名。

```bash
[root@proxy ~]# auditctl -w /root/22.sh -p wa -k 22_wa
[root@proxy ~]# echo 33 >> 22.sh
[root@proxy ~]# ausearch -k 22_wa   //查看日志
[root@proxy ~]#  aureport   //生成审计报告;是对整个日志的内容做统计
[root@proxy ~]#  aureport -ts yesterday -te now   //生成昨天到现在的审计报告,其他选项找man
Log output
time time-> Mon Mar 9 17:28:23 2020
user uid = 0
command comm = "XXXX"
command parameter
execution result success = yes
Second, the security service
Nginx security optimizations include: Do not delete the module, a modified version of the information, limiting concurrency, reject illegal request, to prevent buffer overflow.
MySQL security optimizations include: initialization script security, password security, backup and restore, data security.
Tomcat security optimizations include: Hide the version information, start down the right, delete the default test page.
2.1 nginx security
Delete unnecessary modules
Nignx modular design of the software, what features and modules as well as modules which do not need to need, can be customized at compile time to install the software, parameters can be opened using -with some modules, can be disabled using -without a these modules. Minimizing installation program always right!
Here is disable certain modules Case:
[root@proxy ~]# tar -xf nginx-1.12.tar.gz
[root@proxy ~]# cd nginx-1.12
[root@proxy nginx-1.12]# ./configure \
>--without-http_autoindex_module \            //禁用自动索引文件目录模块,默认是开启的
>--without-http_ssi_module
[root@proxy nginx-1.12]# make
[root@proxy nginx-1.12]# make install
A modified version information, and hide specific version number
by default Nginx will display the version information and version numbers, the information to the attacker to bring the convenience, ease them to find a specific version of the loopholes.
If you need to shield the version number information, do the following, you can hide the version number
[root@proxy ~]# vim /usr/local/nginx/conf/nginx.conf
… …
http{
     server_tokens off;                            //在http下面手动添加这么一行
     … …
}
[root@proxy ~]# nginx -s reload
[root@proxy ~]# curl -I http://192.168.4.5          //查看服务器响应的头部信息
However, the server software is used to show nginx, this information can be modified by the following method.
[root@proxy nginx-1.12]# vim +48 src/http/ngx_http_header_filter_module.c
//注意:vim这条命令必须在nginx-1.12源码包目录下执行!!!!!!
//该文件修改前效果如下:
static u_char ngx_http_server_string[] = "Server: nginx" CRLF;
static u_char ngx_http_server_full_string[] = "Server: " NGINX_VER CRLF;
static u_char ngx_http_server_build_string[] = "Server: " NGINX_VER_BUILD CRLF;
//下面是我们修改后的效果:
static u_char ngx_http_server_string[] = "Server: Jacob" CRLF;
static u_char ngx_http_server_full_string[] = "Server: Jacob" CRLF;
static u_char ngx_http_server_build_string[] = "Server: Jacob" CRLF;
//修改完成后,再去编译安装Nignx,版本信息将不再显示为Nginx,而是Jacob
[root@proxy nginx-1.12]# ./configure
[root@proxy nginx-1.12]# make && make install
[root@proxy nginx-1.12]# killall nginx
[root@proxy nginx-1.12]# /usr/local/nginx/sbin/nginx            //启动服务
[root@proxy nginx-1.12]# curl -I http://192.168.4.5            //查看版本信息验证
2.2 limit concurrency
DDOS attacker sends a large number of concurrent connections, tying up server resources (including the number of connections, bandwidth, etc.), this will lead to a normal user in a state of waiting or can not access the server.
Providing a ngx_http_limit_req_module Nginx module, may reduce the risk of DDOS attack, operation is as follows:
[root@proxy ~]# vim /usr/local/nginx/conf/nginx.conf
… …
http{
… …
limit_req_zone $binary_remote_addr zone=one:10m rate=1r/s;
    server {
        listen 80;
        server_name localhost;
        limit_req zone=one burst=5;
            }
}
//备注说明:
//limit_req_zone语法格式如下:
//limit_req_zone key zone=name:size rate=rate;
//上面案例中是将客户端IP信息存储名称为one的共享内存,内存空间为10M
//1M可以存储8千个IP信息,10M可以存储8万个主机连接的状态,容量可以根据需要任意调整
//每秒中仅接受1个请求,多余的放入漏斗
//漏斗超过5个则报错
[root@proxy ~]# /usr/local/nginx/sbin/nginx -s reload

[root@client ~]# ab -c 100 -n 100  http://192.168.4.5/     //客户端使用ab测试软件测试效果
2.3 reject illegal request
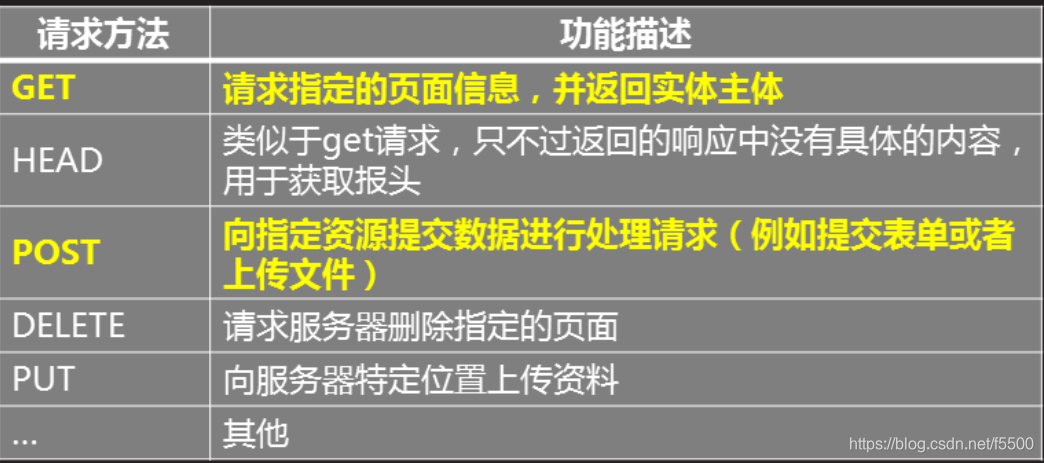
Site is using the HTTP protocol, which is defined in many ways, allowing users to connect to the server, access to resources needed. But the practical application of generally only need to get and post.
The method of HTTP request specific meaning as shown in Table -1.
Before unmodified server configuration, the client requests using different test methods:
[root@client ~]# curl -i -X GET  http://192.168.4.5            //正常
[root@client ~]# curl -i -X HEAD http://192.168.4.5            //正常
//curl命令选项说明:
//-i选项:访问服务器页面时,显示HTTP的头部信息
//-X选项:指定请求服务器的方法
Nginx allows reject illegal request method provided by the following:
[root@proxy ~]# vim /usr/local/nginx/conf/nginx.conf
http{
       server {
                 listen 80;
#这里,!符号表示对正则取反,~符号是正则匹配符号
#如果用户使用非GET或POST方法访问网站,则retrun返回444的错误信息
              if ($request_method !~ ^(GET|POST)$ ) {
                     return 444;
               }
        }
}
[root@proxy ~]# /usr/local/nginx/sbin/nginx -s reload
After modifying the server configuration, the client requests using different test methods:
[root@client ~]# curl -i -X GET  http://192.168.4.5            //正常
[root@client ~]# curl -i -X HEAD http://192.168.4.5            //报错
2.4 to prevent buffer overflow
When the client connect to the server, the server will enable a variety of cache used to store information about the connection status.
If an attacker sends a large number of connection requests, and the server does not do caching restrictions, it is possible to overflow memory data (lack of space).
Nginx modify configuration files, adjust various buffer parameters, can effectively reduce the risk of spillage.
[root@proxy ~]# vim /usr/local/nginx/conf/nginx.conf
http{
client_body_buffer_size  1K;
client_header_buffer_size 1k;
client_max_body_size 1k;
large_client_header_buffers 2 1k;
 … …
}
[root@proxy ~]# /usr/local/nginx/sbin/nginx -s reload
2.5 Database Security
Initialization security script
after the installation of MariaDB or MySQL, the default root no password, and provides test test database that anyone can operate. There is a name for the mysql_secure_installation of script that can help us set a password for root, and prohibit root landing a remote database from another host, and delete the test database test.
[root@proxy ~]# systemctl status mariadb
//确保服务已启动
[root@proxy ~]# mysql_secure_installation
//执行初始化安全脚本
Password security
manually modify MariaDB or MySQL database password method:
[root@proxy ~]# mysqladmin -uroot -predhat password 'mysql'
//修改密码,旧密码为redhat,新密码为mysql
[root@proxy ~]# mysql -uroot -pmysql
MariaDB [(none)]>set password for root@'localhost'=password('redhat');
//使用账户登录数据库,修改密码
MariaDB [(none)]> select user,host,password from mysql.user;
+--------+---------+---------------------------------------------+
| user     | host     | password                                       |
+--------+---------+---------------------------------------------+
| root     | localhost     | *84BB5DF4823DA319BBF86C99624479A198E6EEE9 |
| root     | 127.0.0.1     | *84BB5DF4823DA319BBF86C99624479A198E6EEE9 |
| root     | ::1           | *84BB5DF4823DA319BBF86C99624479A198E6EEE9 |
+--------+-----------+--------------------------------------------+
Change Password successful, and the password is encrypted in the database, what is the problem? The problem is that your password is expressly recorded, plaintext password below to see:
[root@proxy ~]# cat .bash_history
mysqladmin -uroot -pxxx password 'redhat'
//通过命令行修改的密码,bash会自动记录历史,历史记录中记录了明文密码
[root@proxy ~]# cat .mysql_history
set password for root@'localhost'=password('redhat');
select user,host,password from mysql.user;
flush privileges;
//通过mysql命令修改的密码,mysql也会有所有操作指令的记录,这里也记录了明文密码
In addition there is a binlog log database also has the plain text password (after 5.6 version fixes).
How to deal with it?
1. manage their own history, do not use clear text login, select the appropriate version after version 5.6,
2. log, conduct audits (to find the perpetrator), using a firewall ACL settings from the TCP layer (prohibition of contacts outside the network database).
Data backup and restore
First, backup database (Note that the user name is root, password is redhat):
[root@proxy ~]# mysqldump -uroot -predhat mydb table > table.sql
//备份数据库中的某个数据表
[root@proxy ~]# mysqldump -uroot -predhat mydb > mydb.sql
//备份某个数据库
[root@proxy ~]# mysqldump -uroot -predhat --all-databases > all.sql
//备份所有数据库
Next, restore the database (Note that the user name is root, password is redhat):
[root@proxy ~]# mysql -uroot -predhat mydb  < table.sql            //还原数据表
[root@proxy ~]# mysql -uroot -predhat mydb  < mydb.sql            //还原数据库
[root@proxy ~]# mysql -uroot -predhat < all.sql                    //还原所有数据库
2.6 Data Security
On the server (192.168.4.5), create a database account:
[root@proxy ~]# mysql -uroot -predhat
//使用管理员,登陆数据库
MariaDB [(none)]> grant all on *.* to tom@'%' identified by '123';
//创建一个新账户tom
Use tcpdump packet capture (192.168.4.5)
[root@proxy ~]# tcpdump -w log -i any src or dst port 3306
//抓取源或目标端口是3306的数据包,保存到log文件中
The client (192.168.4.100) landed database server (192.168.4.5) from the remote
[root@client ~]# mysql -utom -p123 -h 192.168.4.5
//在192.168.4.100这台主机使用mysql命令登陆远程数据库服务器(192.168.4.5)
//用户名为tom,密码为123
MariaDB [(none)]> select * from mysql.user;
//登陆数据库后,任意执行一条查询语句
Check back to the server to fetch data packets
How to solve the problem in clear text?
After using SSH remote connection to the server, and then log in from a local database (to avoid the transmission of data in the network, because the network environment does not capture those who do not know).
Or may be encrypted using SSL MySQL server, as similar to the HTTP + SSL, MySQL supports SSL encryption (to ensure that the data transmitted in the network are encrypted).
2.7 Tomcat security
Hide the version information, modify tomcat master configuration file (hidden version information)
unmodified former version information, use the command to view the server version information
note: proxy IP address 192.168.2.5 is used here as a proxy 192.168.2.100 Client Access server.
[root@proxy ~]# curl -I http://192.168.2.100:8080/xx
//访问不存在的页面文件,查看头部信息
[root@proxy ~]# curl -I http://192.168.2.100:8080
//访问存在的页面文件,查看头部信息
[root@proxy ~]# curl http://192.168.2.100:8080/xx
//访问不存在的页面文件,查看错误信息
Tomcat modify configuration files, a modified version information (operating at 192.168.2.100):
[root@web1 tomcat]# yum -y install java-1.8.0-openjdk-devel
[root@web1 tomcat]# cd /usr/local/tomcat/lib/
[root@web1 lib]# jar -xf catalina.jar
[root@web1 lib]# vim org/apache/catalina/util/ServerInfo.properties
//根据自己的需要,修改版本信息的内容
[root@web1 lib]# /usr/local/tomcat/bin/shutdown.sh        //关闭服务
[root@web1 lib]# /usr/local/tomcat/bin/startup.sh        //启动服务
After modification, the client again to see the version information (in operation 192.168.2.5):
[root@proxy ~]# curl -I http://192.168.2.100:8080/xx
//访问不存在的页面文件,查看头部信息
[root@proxy ~]# curl -I http://192.168.2.100:8080
//访问存在的页面文件,查看头部信息
[root@proxy ~]# curl http://192.168.2.100:8080/xx
//访问不存在的页面文件,查看错误信息
Modified again tomcat server configuration file, the modified version information, manually add the server parameters (operating at 192.168.2.100):
[root@web1 lib]# vim /usr/local/tomcat/conf/server.xml
<Connector port="8080" protocol="HTTP/1.1"
connectionTimeout="20000"  redirectPort="8443" server="jacob" />
[root@web1 lib]# /usr/local/tomcat/bin/shutdown.sh        //关闭服务
[root@web1 lib]# /usr/local/tomcat/bin/startup.sh        //启动服务
After modification, the client again to see the version information (in operation 192.168.2.5):
2.8 Downgrade start
Tomcat using the default administrator account root system advanced to start the service, start the service to make use of ordinary users.
[root@web1 ~]# useradd tomcat
[root@web1 ~]# chown -R tomcat:tomcat /usr/local/tomcat/
//修改tomcat目录的权限,让tomcat账户对该目录有操作权限
[root@web1 ~]# su -c '/usr/local/tomcat/bin/startup.sh' tomcat
//使用su命令切换为tomcat账户,以tomcat账户的身份启动tomcat服务
[root@web1 ~]# chmod +x /etc/rc.local                //该文件为开机启动文件
[root@web1 ~]# vim /etc/rc.local                     //修改文件,添加如下内容
su -c /usr/local/tomcat/bin/startup.sh tomcat
Remove the default test page
[root@web1 ~]# rm -rf /usr/local/tomcat/webapps
Three, Linux's security patch
Use diff and patch tools to patch
requirements:
use diff compare file differences
using diff to generate a patch file
using the patch command to patch the old version
diff command common options:
-u header information output unified content (using patch), the computer knows which files need to be modified
-r recursively all resources (you can compare directory) Contrast directory
-a all files as text (including binaries)
-N-free file as an empty file (empty files how to become the second file)
3.1 Comparison difference single file
1) scripts written two versions, one for version v1, v2 is a version.
[root@proxy ~]# cat test1.sh                                //v1版本脚本
#!/bin/bash
echo "hello wrld"
[root@proxy ~]# cat test2.sh                                //v2版本脚本
#!/bin/bash
echo "hello the world"
echo "test file"
2) Use the diff command syntax
use the diff command to view differences in the different versions of the file.
[root@proxy ~]# diff  test1.sh test2.sh                     //查看文件差异
[root@proxy ~]# diff -u test1.sh test2.sh                 //查看差异,包含头部信息
3) Use the patch command to patch the single-file code
generation patch file
[root@proxy demo]# diff -u test1.sh test2.sh > test.patch
Use the command patch patch
patch the code in the same directory as the code
[root@proxy demo]# yum -y install patch
[root@proxy demo]# patch -p0 < test.patch                    //打补丁
patching file test1.sh
//patch -pnum(其中num为数字,指定删除补丁文件中多少层路径前缀)
//如原始路径为/u/howard/src/blurfl/blurfl.c
//-p0则整个路径不变
//-p1则修改路径为u/howard/src/blurfl/blurfl.c
//-p4则修改路径为blurfl/blurfl.c
//-R(reverse)反向修复,-E修复后如果文件为空,则删除该文件
[root@proxy demo]# patch -RE < test.patch                     //还原旧版本,反向修复
3.2 Comparison of the differences of all files in a directory
1) preparing the experimental environment
[root@proxy demo]#  tree source1/                        //source1目录下2个文件
|-- find
`-- test.sh

[root@proxy demo]#  tree source2/                        //source1目录下3个文件
|-- find
|-- test.sh
`-- tmp.txt
//注意:两个目录下find和test.sh文件内容不同,source2有tmp.txt而source1没有该文件
2) make a patch file
[root@proxy demo]# diff -u source1/ source2/
//仅对比了文本文件test.sh;二进制文件、tmp都没有对比差异,仅提示,因为没有-a和-N选项
[root@proxy demo]# diff -Nu source1/ source2/
//对比了test.sh,并且使用source2目录的tmp.txt与source1的空文件对比差异。
[root@proxy demo]# diff -Nua source1/ source2/
//对比了test.sh、tmp.txt、find(程序)。
3) Use the patch command of all the code directory patch
Under the code using the previous created source1 and source2 directory for the material, generate a patch file
[root@proxy ~]# cd demo
[root@proxy demo]# diff -Nuar source1/ source2/ > source.patch
Use the patch command to patch the code
[root@proxy demo]# ls
source1  source2  source.patch
[root@proxy demo]# cat source.patch                //对比的文件有路径信息
--- source1/test.sh 2018-02-07 22:51:33.034879417 +0800
+++ source2/test.sh 2018-02-07 22:47:32.531754268 +0800
@@ -1 +1 @@
-hello world
+hello the world
[root@proxy demo]# cd source1
[root@proxy source1]# patch  -p1 < ../source.patch
