1 Understanding Ant Design Pro
Ant Design Pro is a ready to use out of the box Ant Design of enterprise-class background in front-end / design solutions based on.
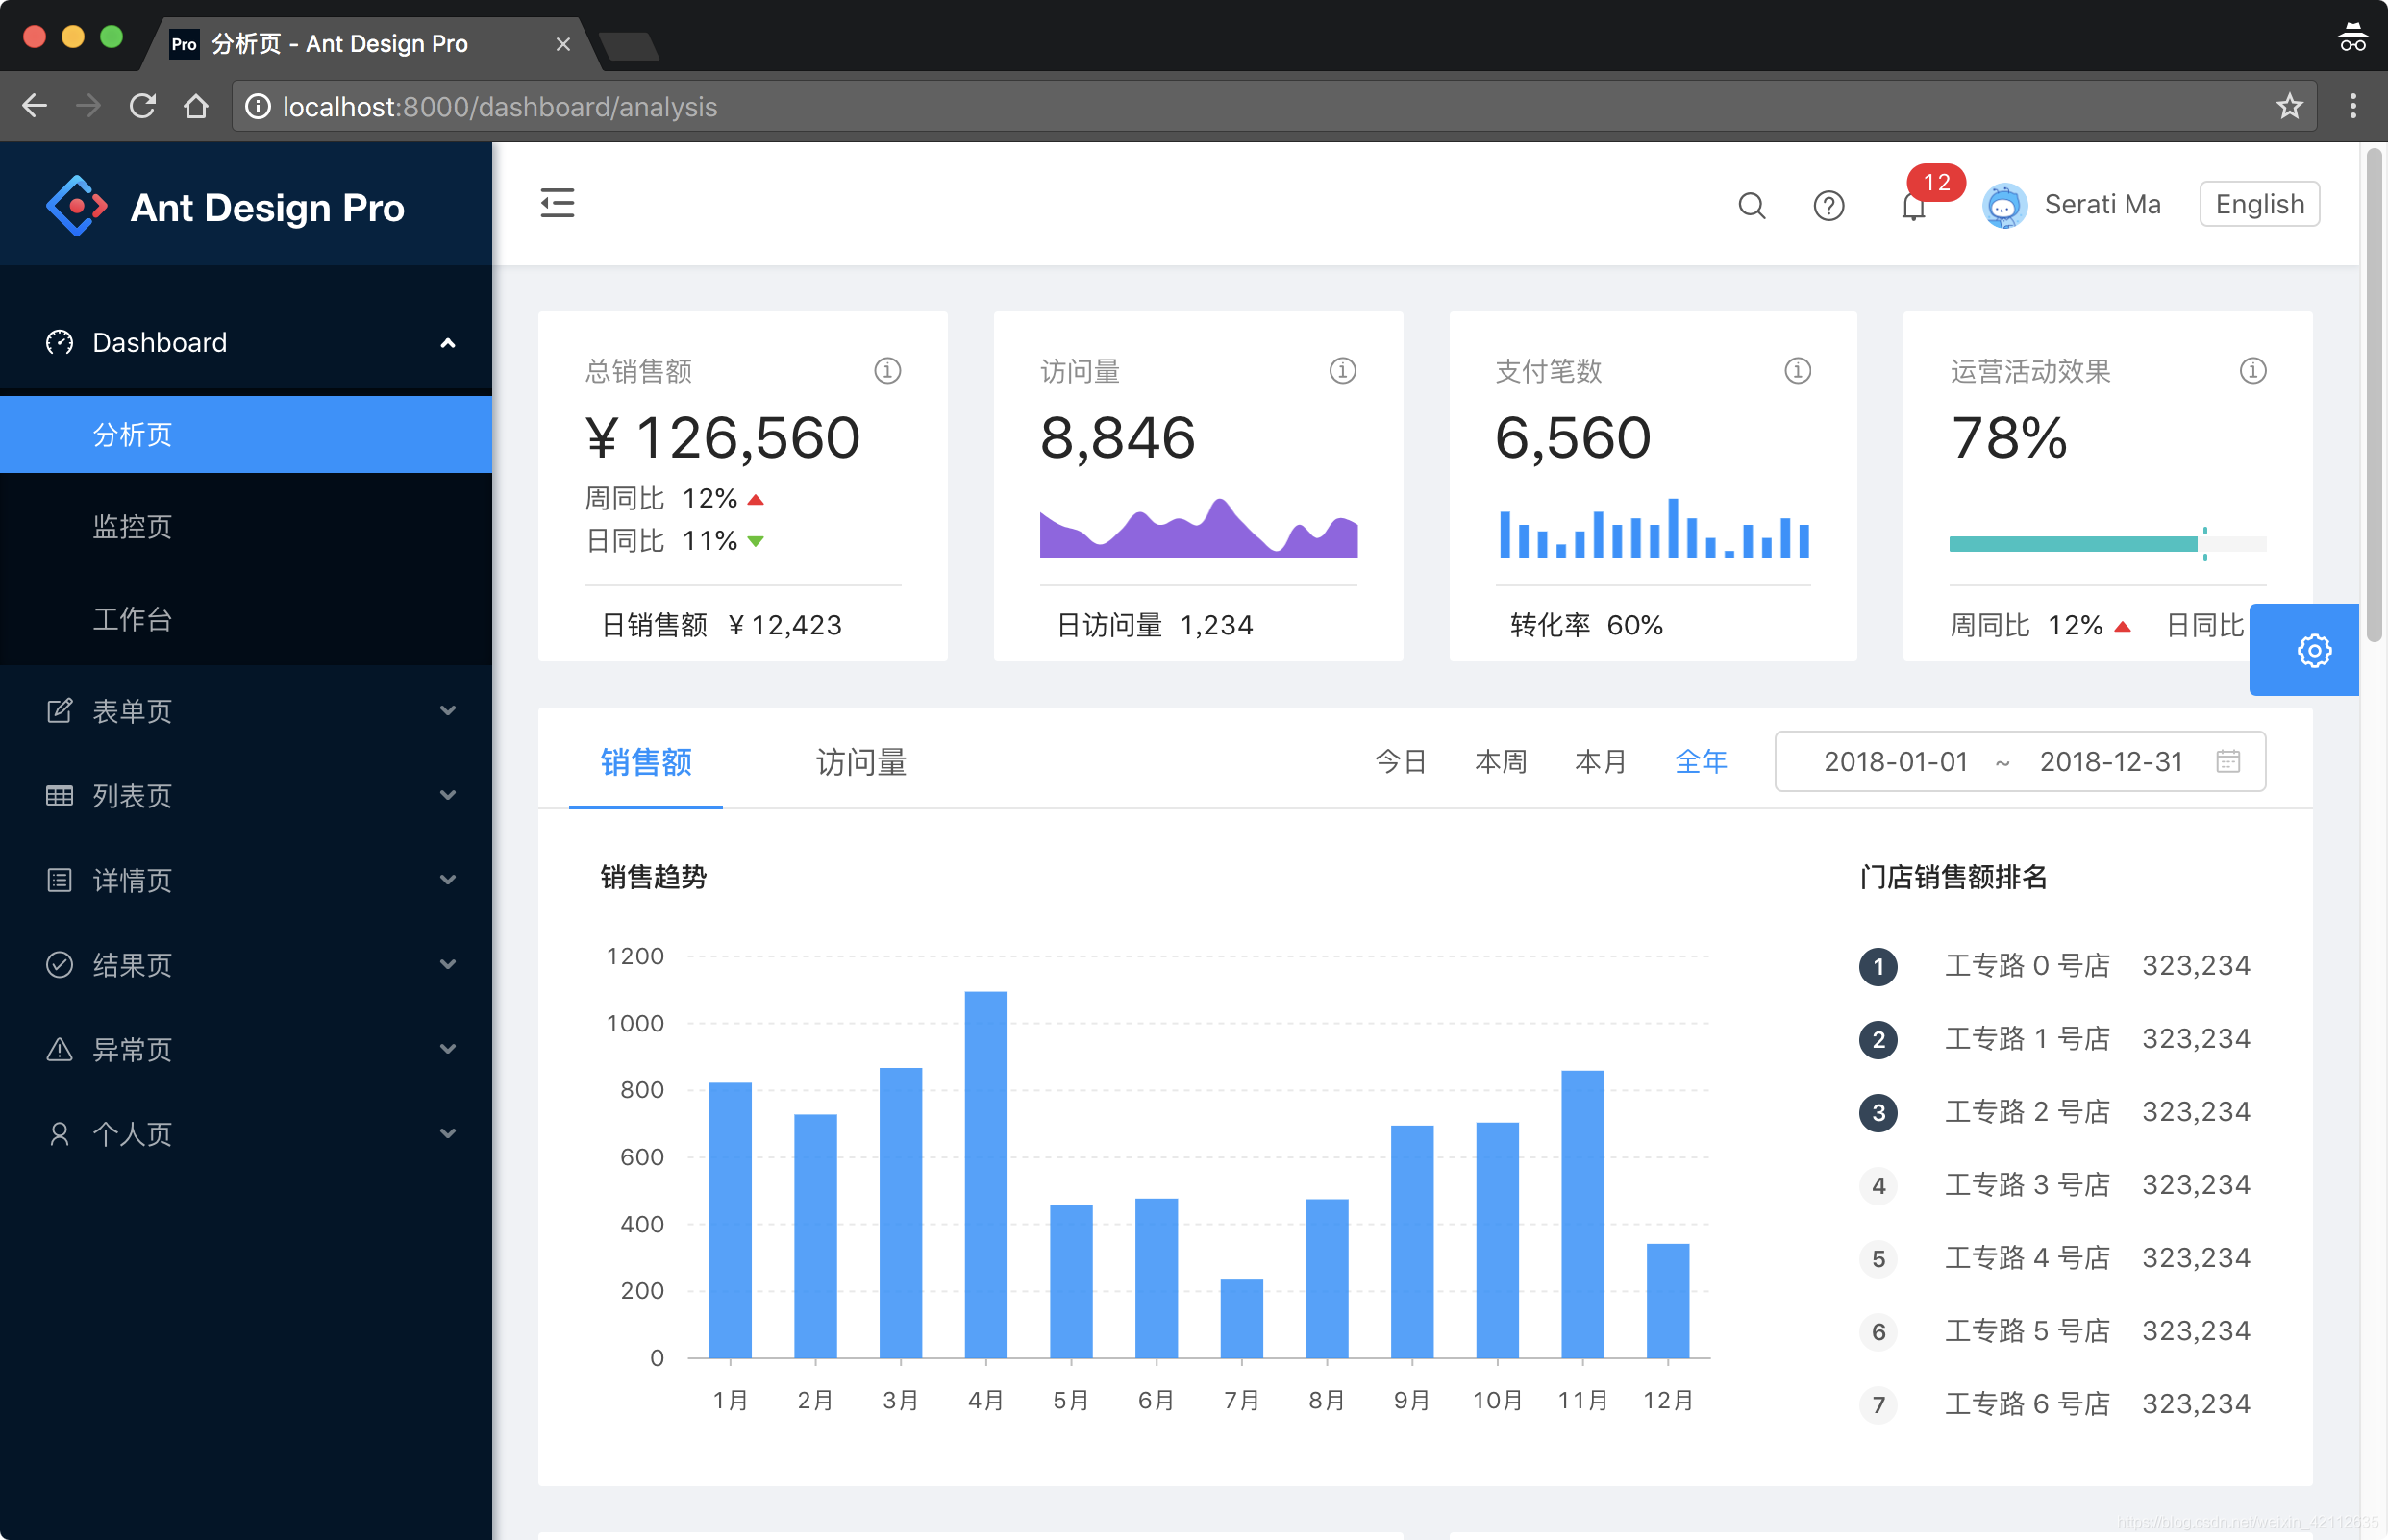
effect:
Source Address: https://github.com/ant-design/ant-design-pro
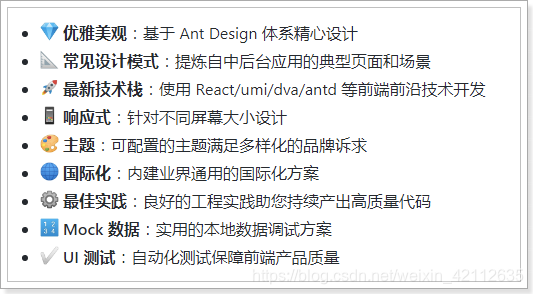
characteristic::
2 Getting started
2.1 To deploy the installation
Download: https://github.com/ant-design/ant-design-pro

First step: ant-design-pro-master.zip extract to any directory
Catalog Ant Design Pro provides the following:
├── config                   # umi 配置,包含路由,构建等配置
├── mock                     # 本地模拟数据
├── public
│   └── favicon.png          # Favicon
├── src
│ ├──assets                  # 本地静态资源
│ ├──components              # 业务通用组件
│ ├──e2e                     # 集成测试用例
│ ├──layouts                 # 通用布局
│ ├──models                  # 全局 dva model
│ ├──pages                   # 业务页面入口和常用模板
│ ├──services                # 后台接口服务
│ ├──utils                   # 工具库
│ ├──locales                 # 国际化资源
│ ├──global.less             # 全局样式
│ └──global.js               # 全局 JS
├── tests                    # 测试工具
├── README.md
└── package.json
The second step, the imported items to the Idea

The third step: initialize and start
Install its dependencies:
tyarn install
Start the service:
tyarn start
test:
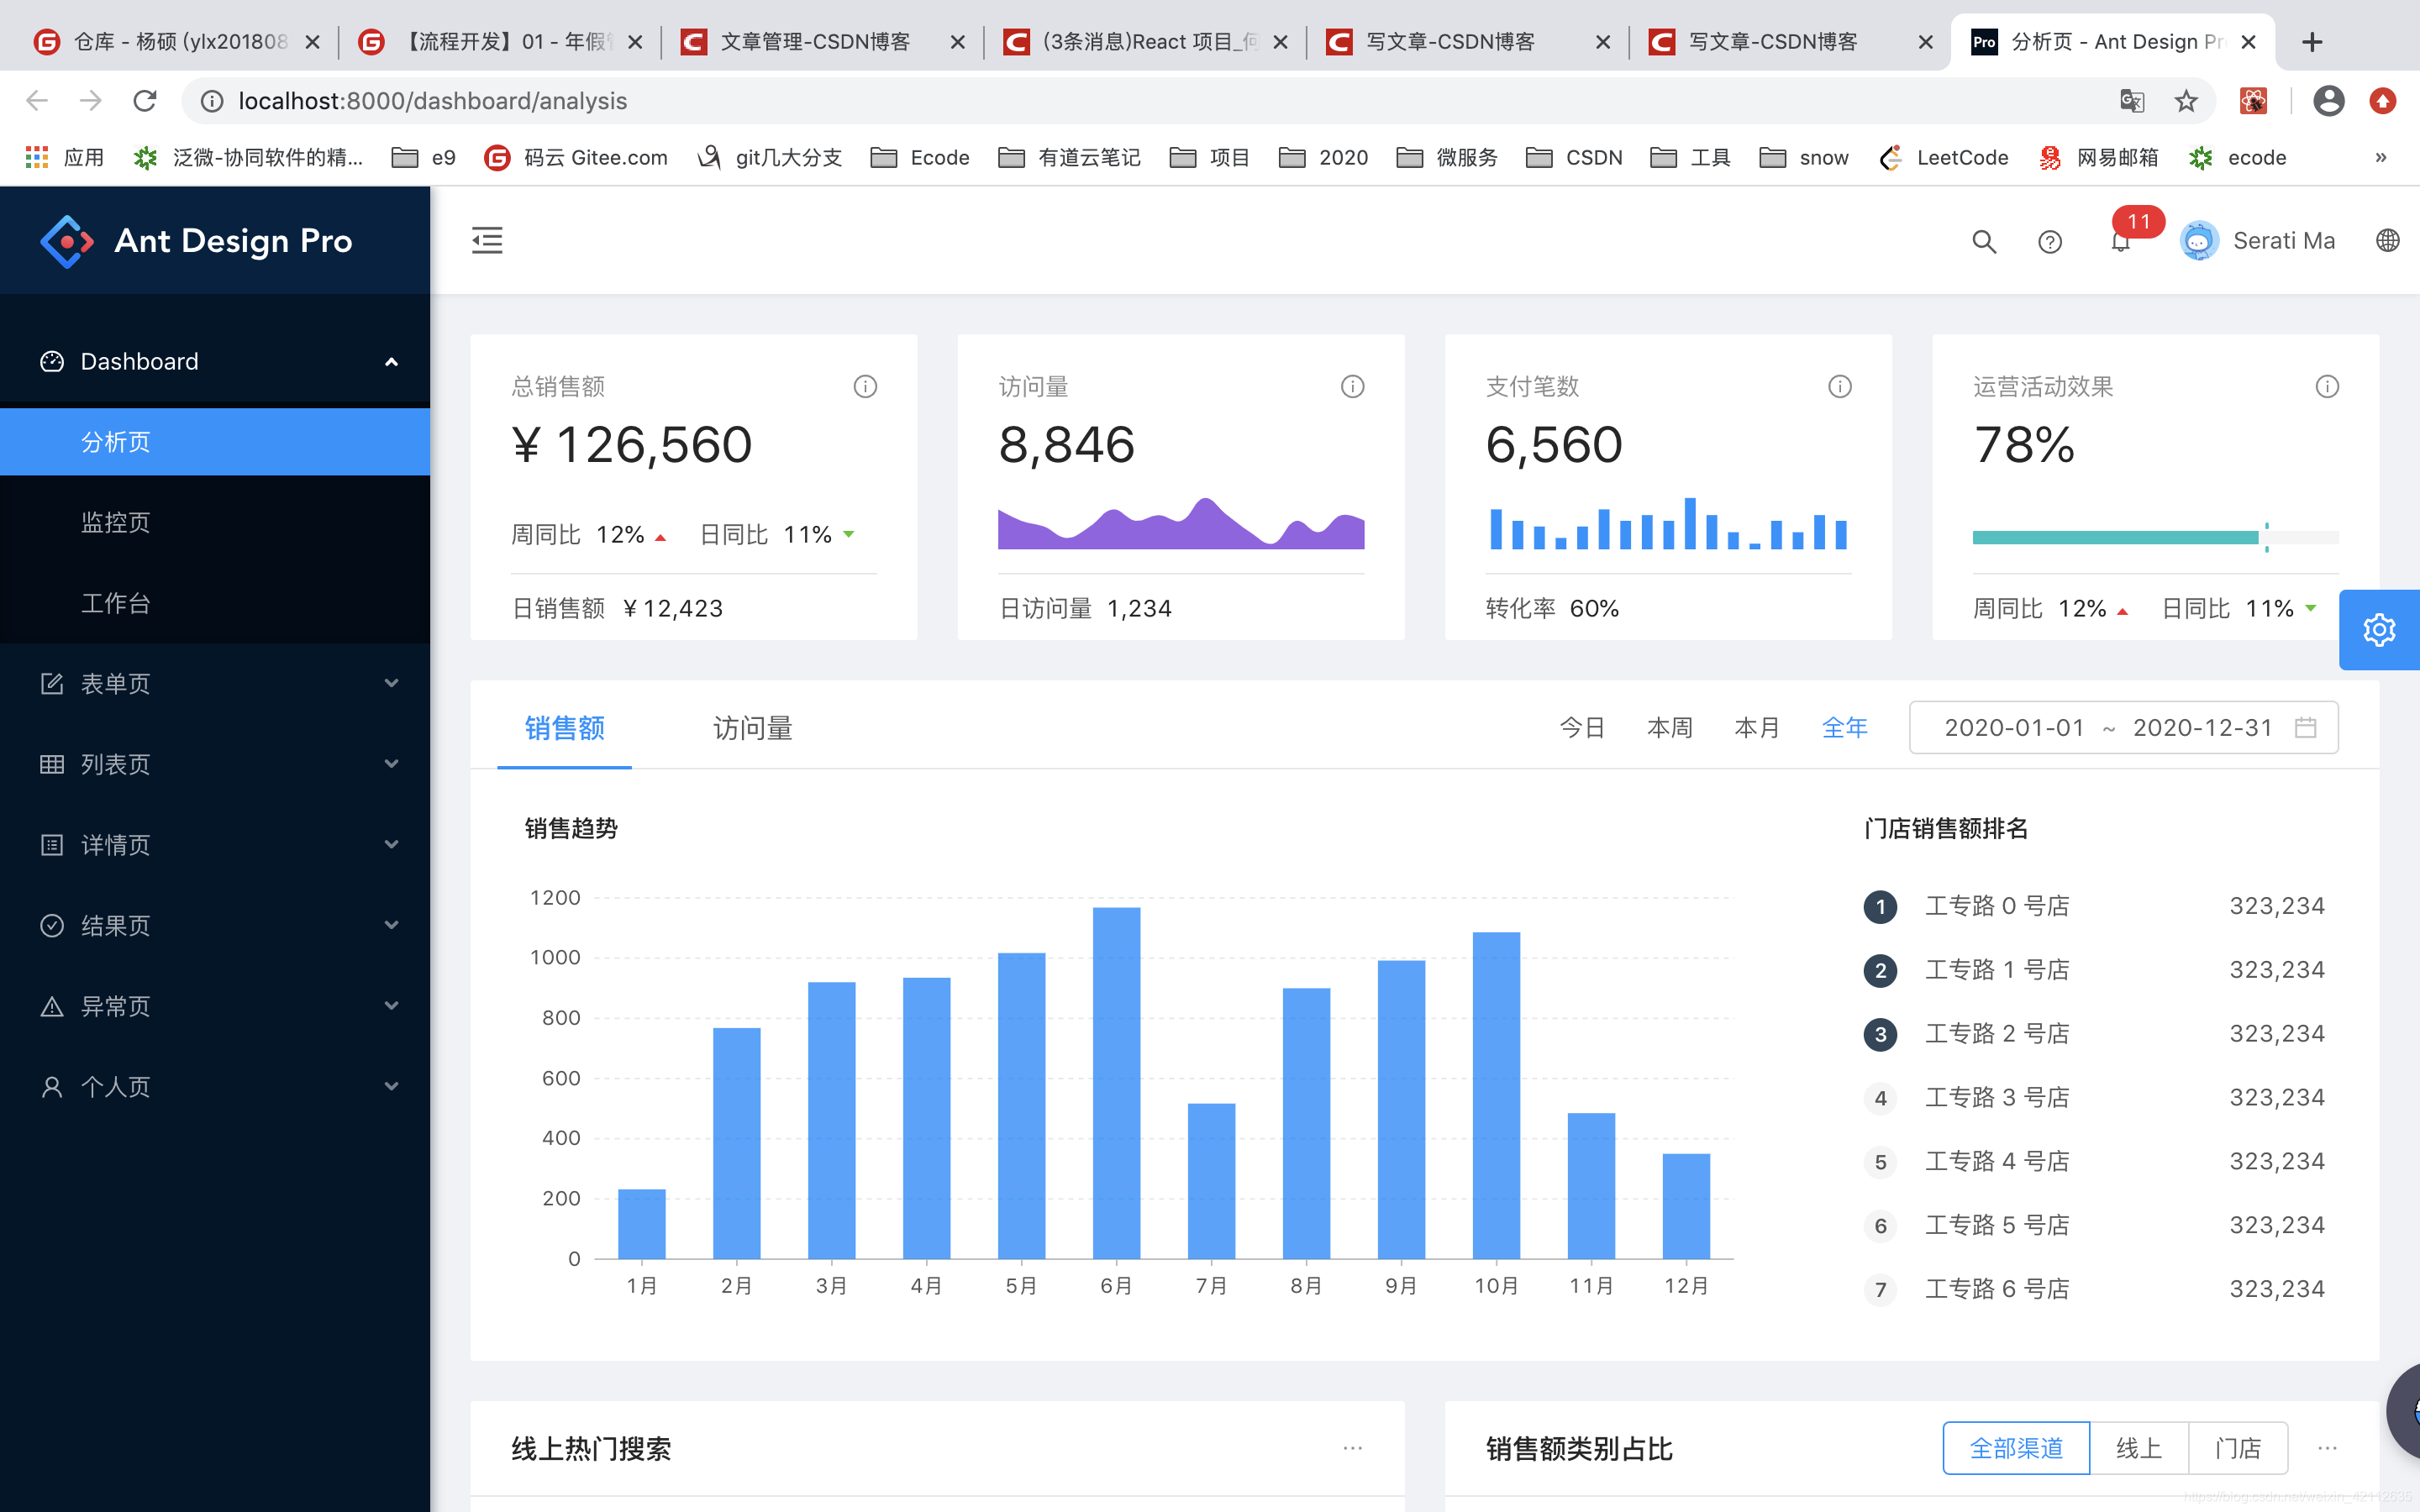
You can see, the system has started finished.
2.2 Menus and routing
The default menu is not put directly into the project development, so we need to figure out how to customize menus and routing.
In pro, the menu and routing, in router.config.jsmanaging the configuration file:

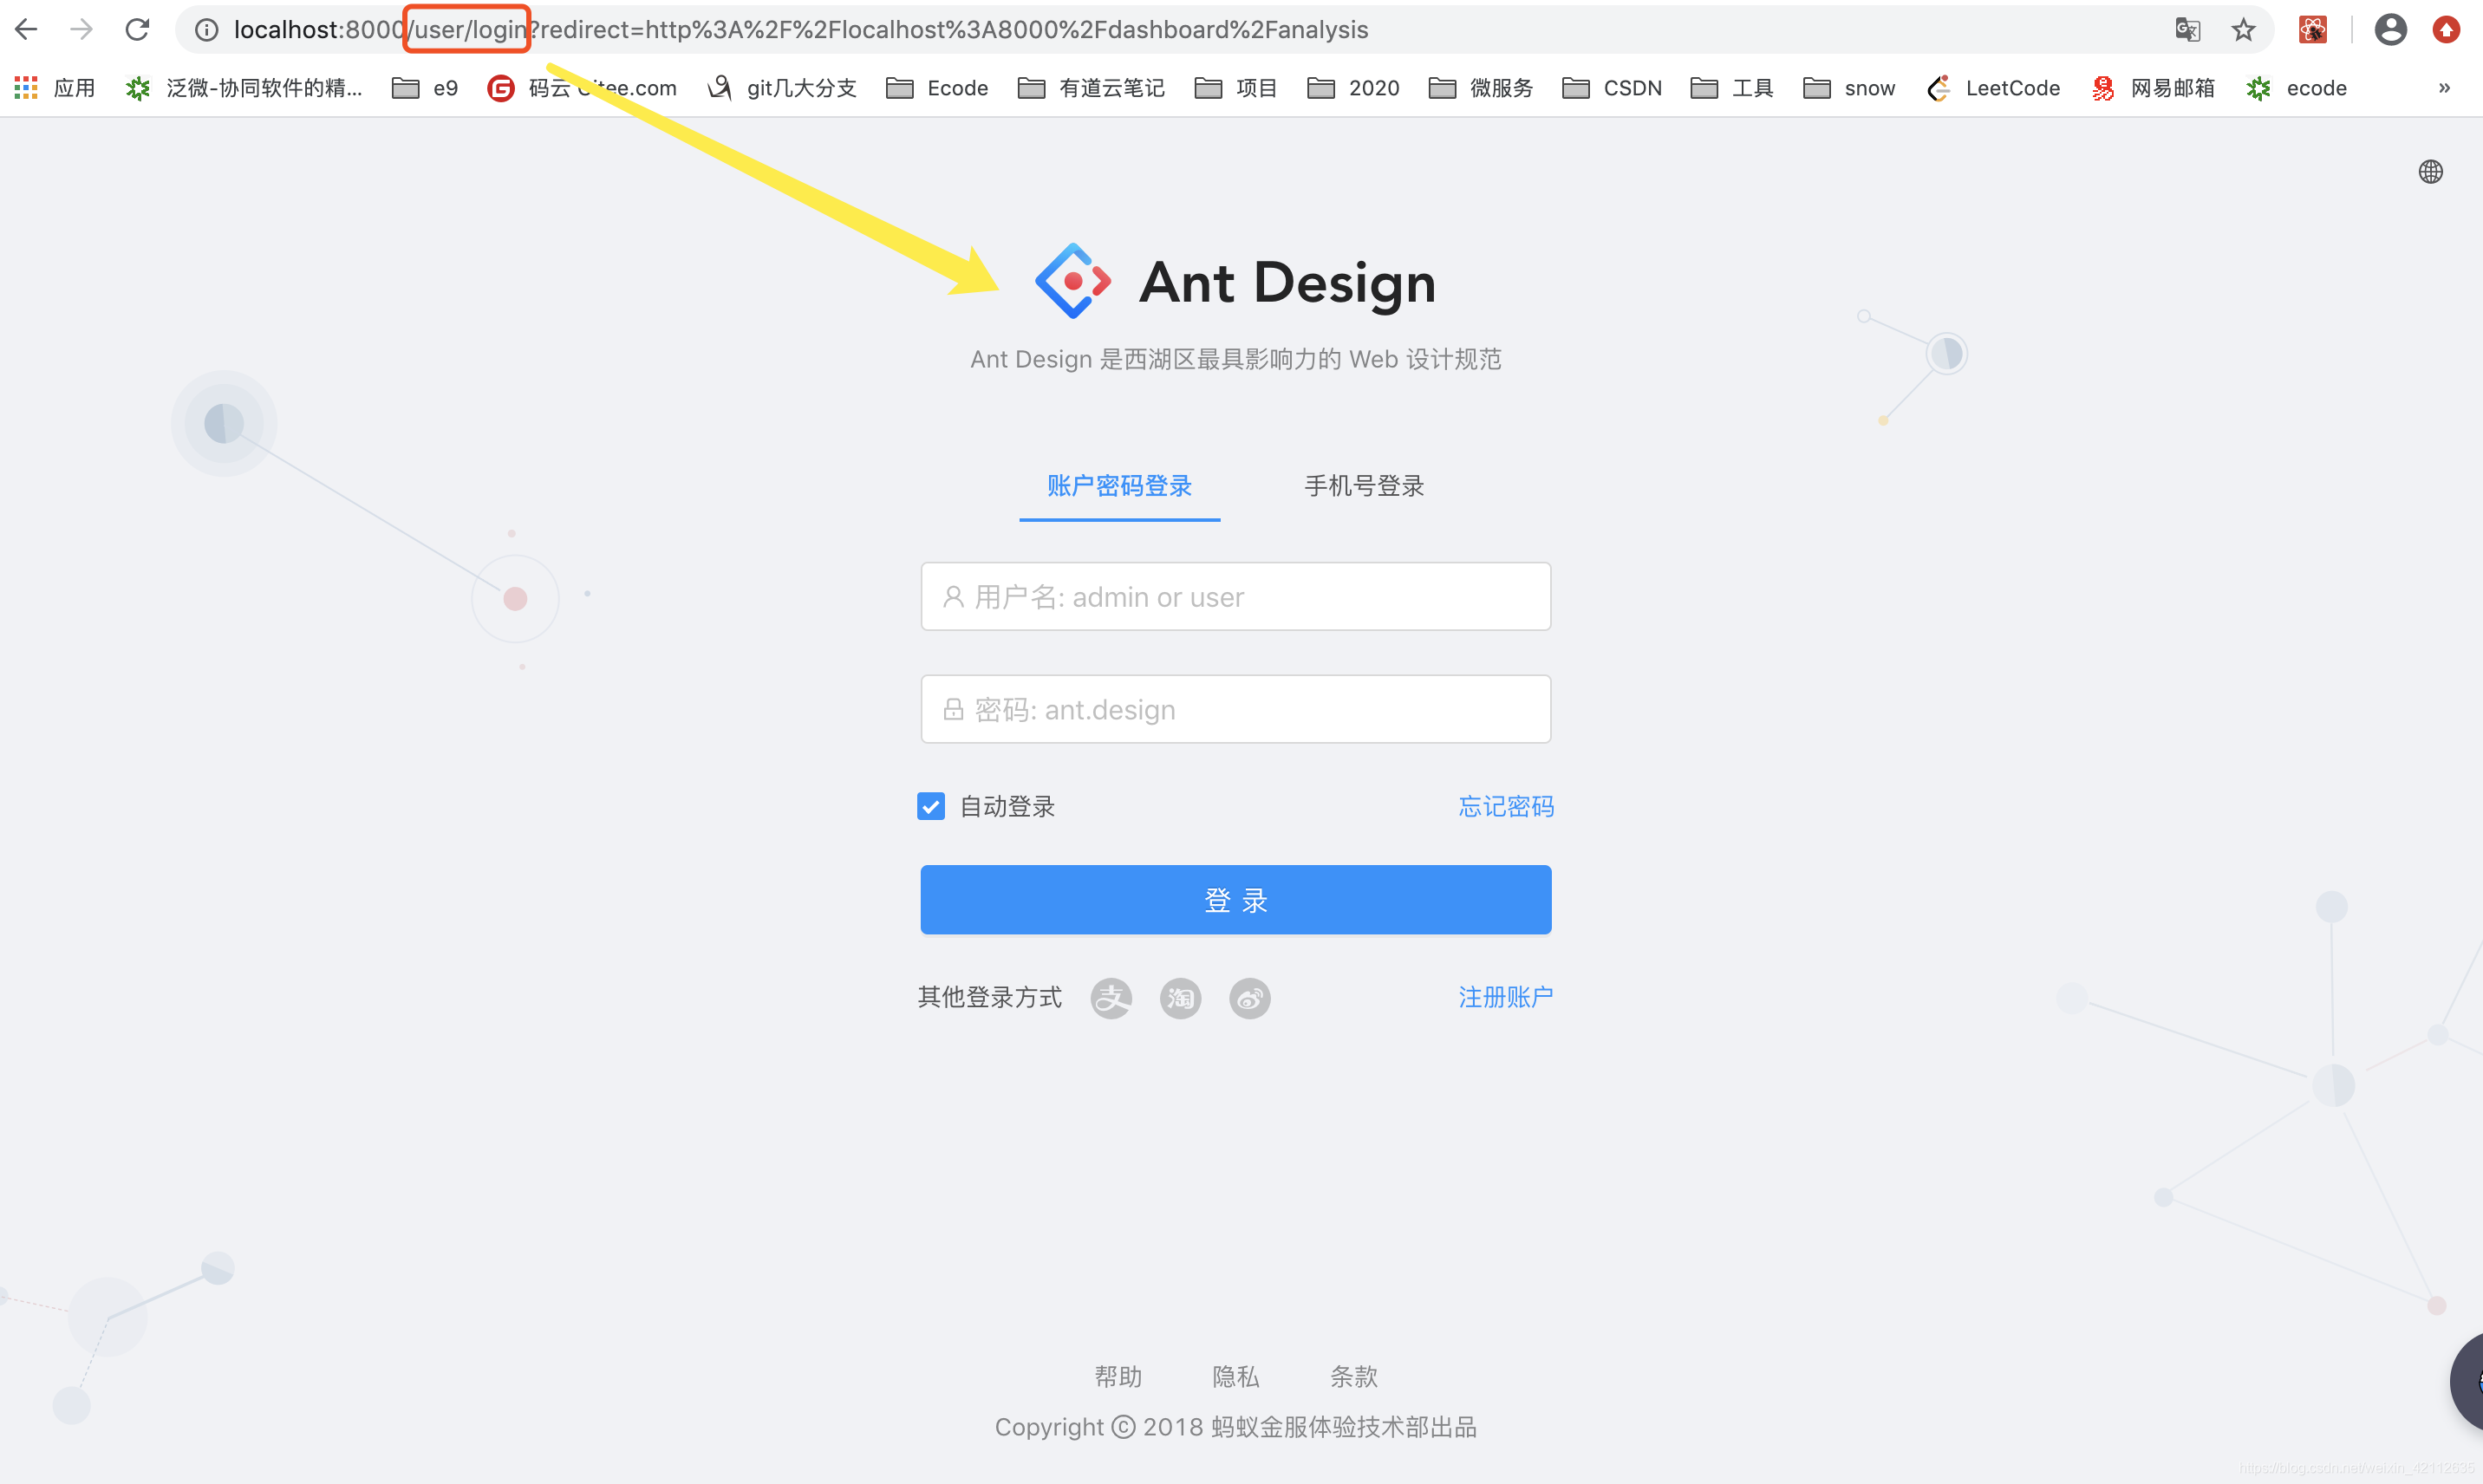
Open router.config.jsafter it can be seen, there are 2 Pro provided by the routines (layout), respectively, /userand /:
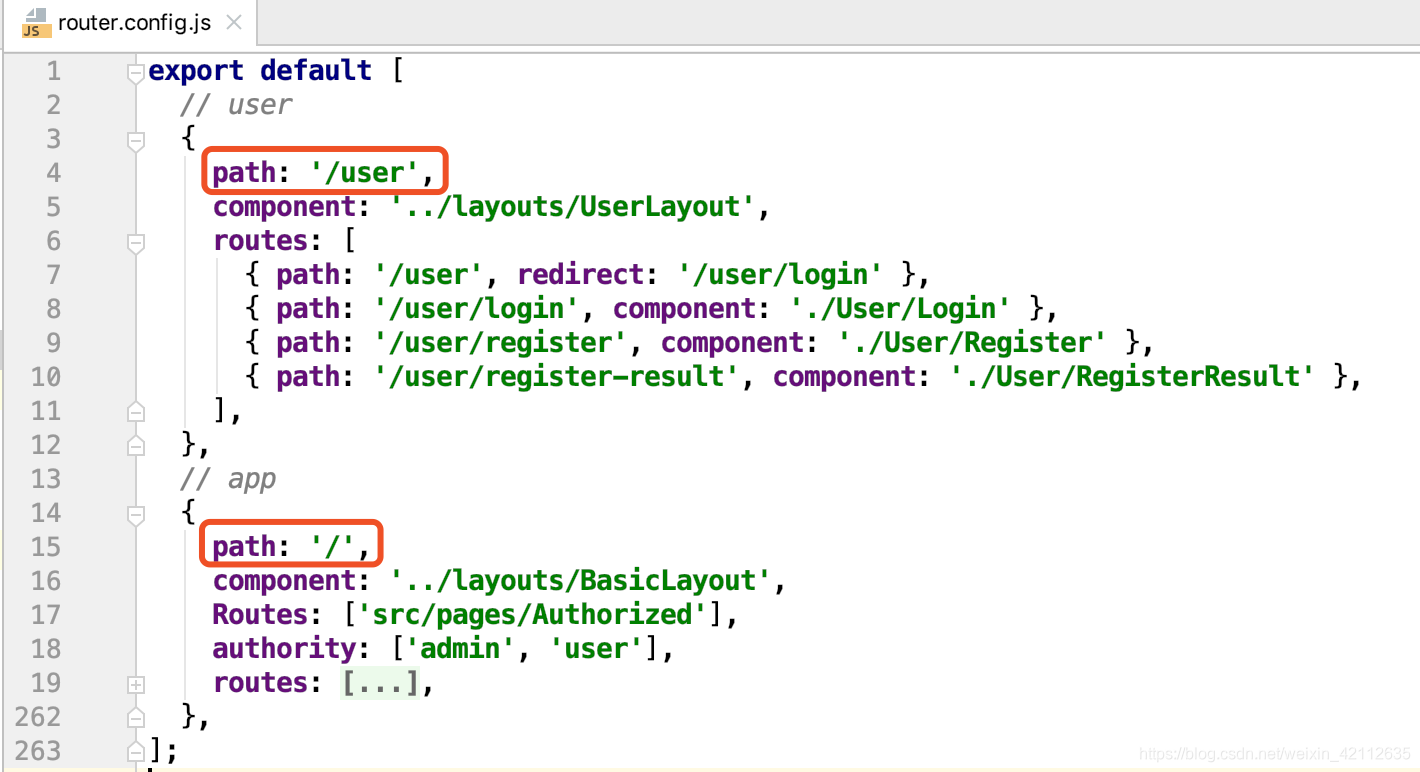
/user Layout:
Next, let's focus, /routing:
    routes: [
      // dashboard
      { path: '/', redirect: '/dashboard/analysis' },
      {
        path: '/dashboard',
        name: 'dashboard',
        icon: 'dashboard',
        routes: [
          {
            path: '/dashboard/analysis',
            name: 'analysis',
            component: './Dashboard/Analysis',
          },
          {
            path: '/dashboard/monitor',
            name: 'monitor',
            component: './Dashboard/Monitor',
          },
          {
            path: '/dashboard/workplace',
            name: 'workplace',
            component: './Dashboard/Workplace',
          },
        ],
      },
Therefore, it is concluded, the menu is generated by the routing configuration.
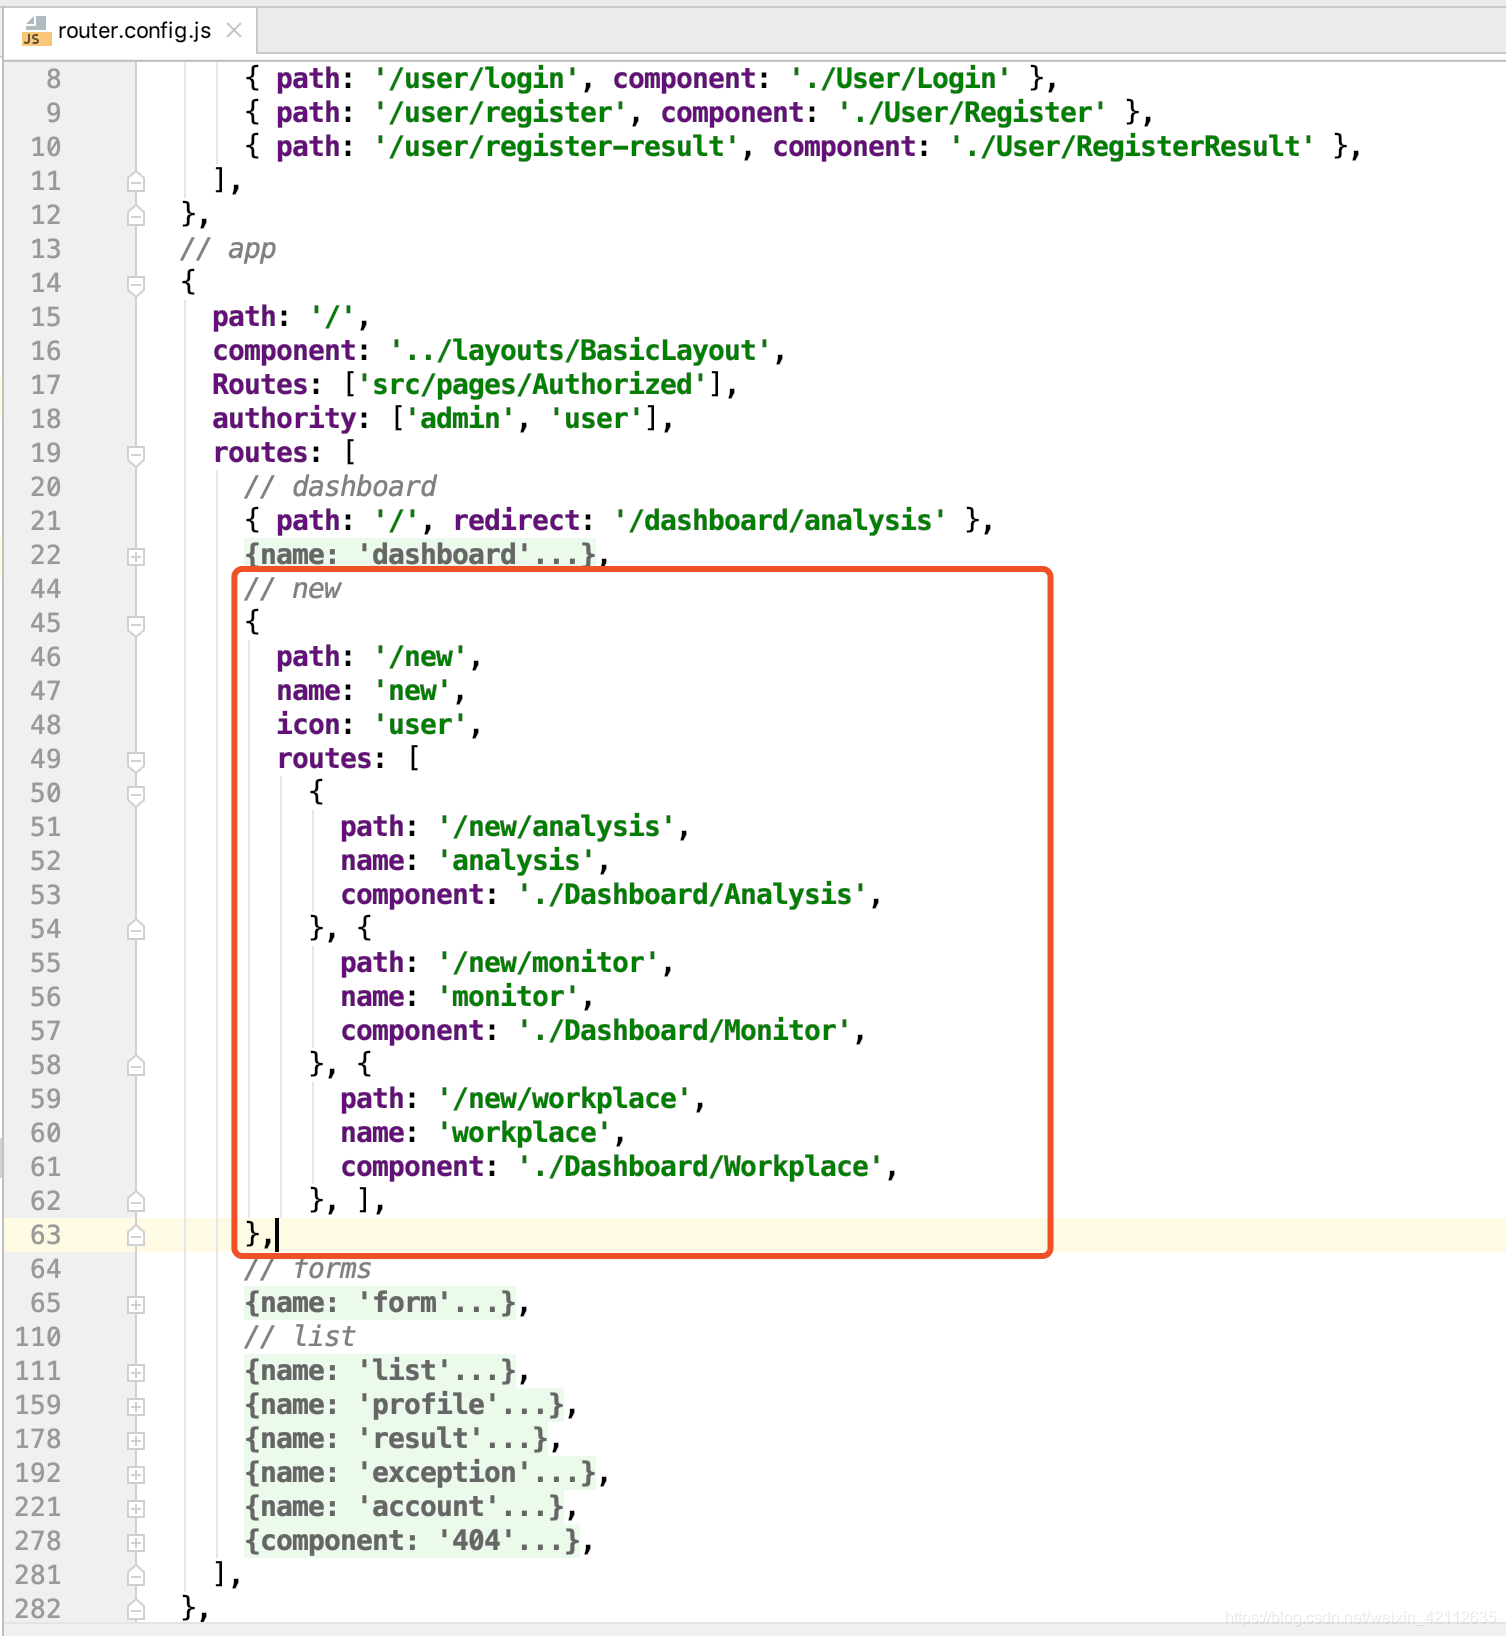
The next experiment, a new route:
      // new
      {
        path: '/new',
        name: 'new',
        icon: 'user',
        routes: [
          {
            path: '/new/analysis',
            name: 'analysis',
            component: './Dashboard/Analysis',
          }, {
            path: '/new/monitor',
            name: 'monitor',
            component: './Dashboard/Monitor',
          }, {
            path: '/new/workplace',
            name: 'workplace',
            component: './Dashboard/Workplace',
          }, ],
      },
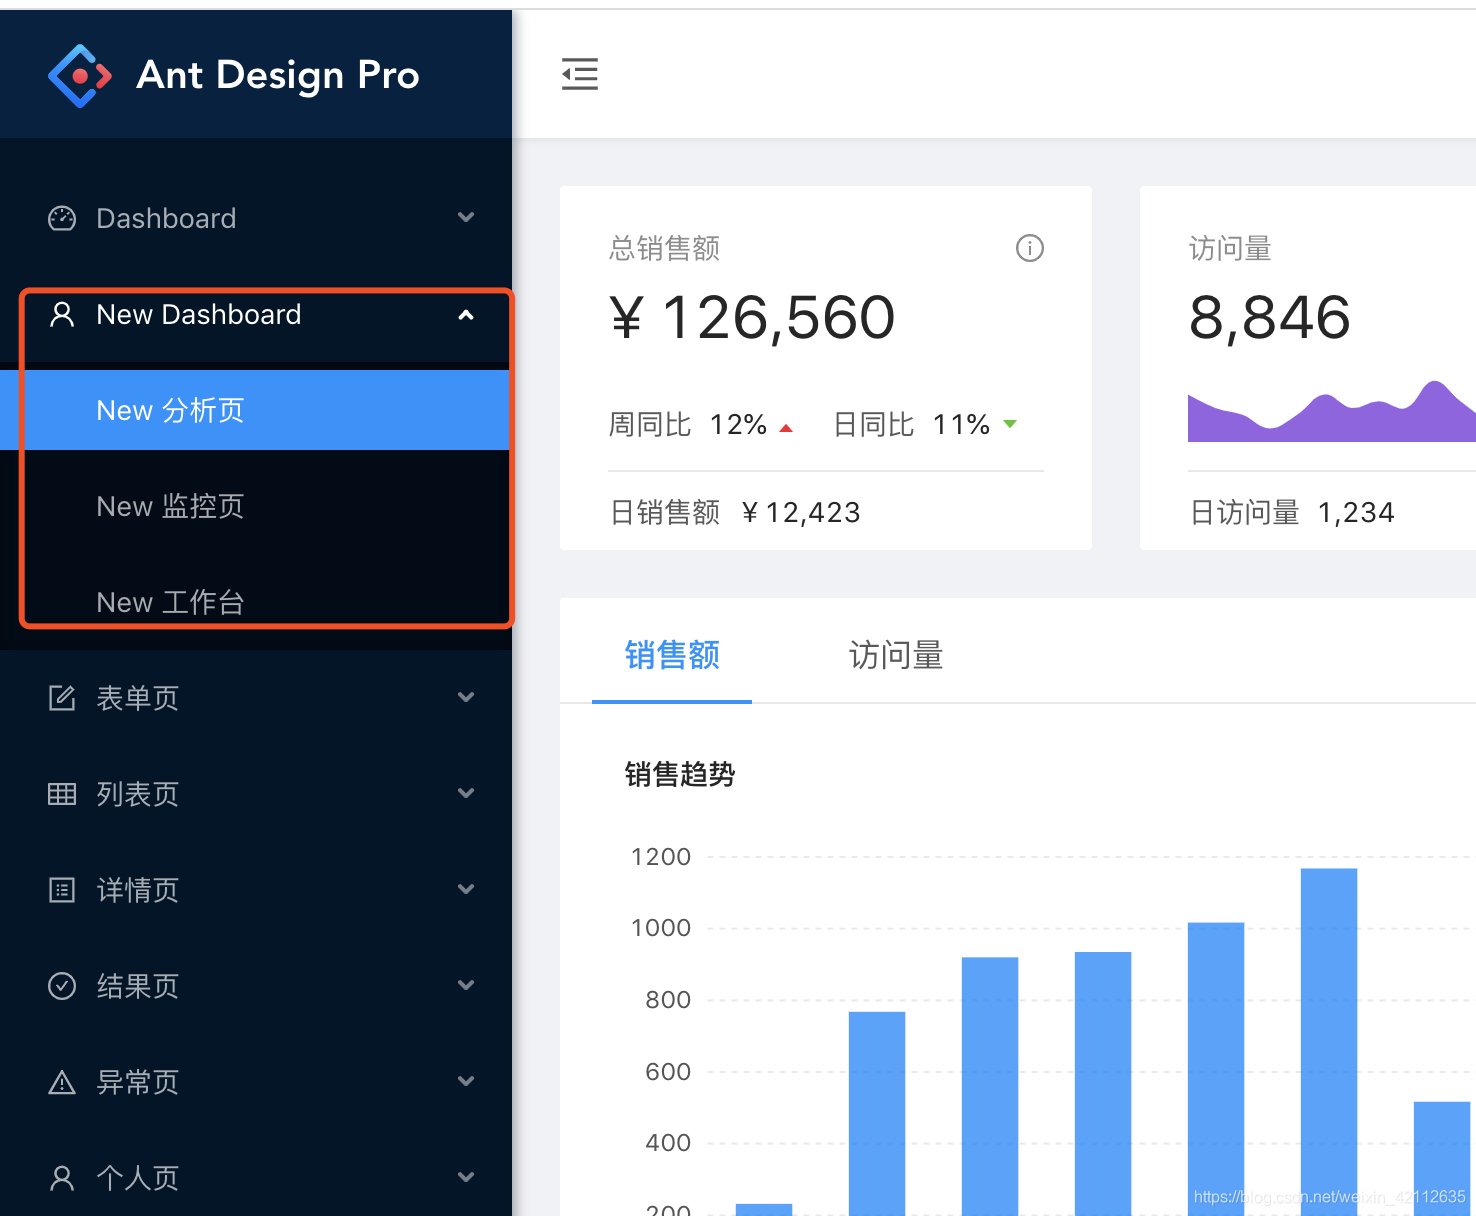
test:
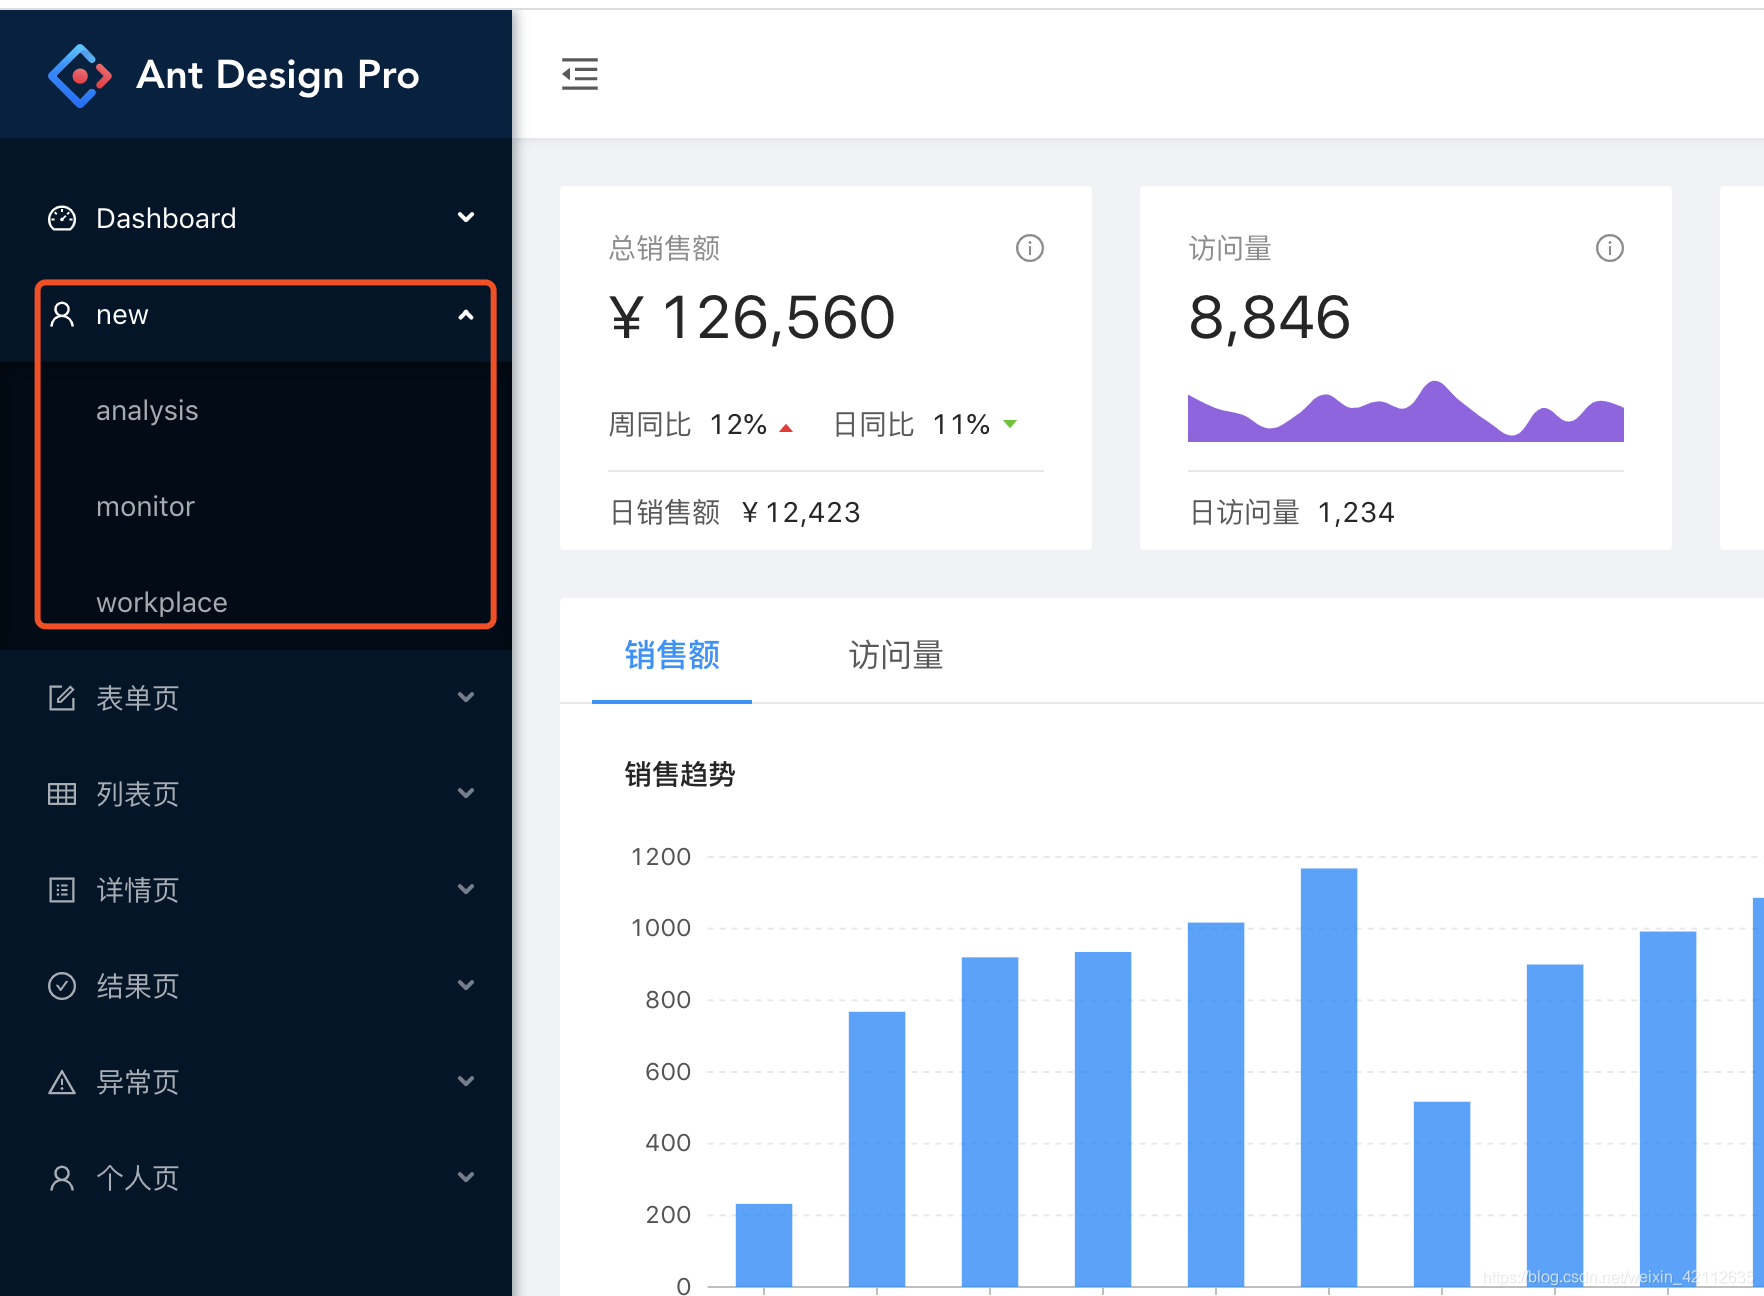
As it can be seen, as well as a new menu added to the page, the text is displayed just wrong. So where text configuration?
In fact, the text is configured in the international file:

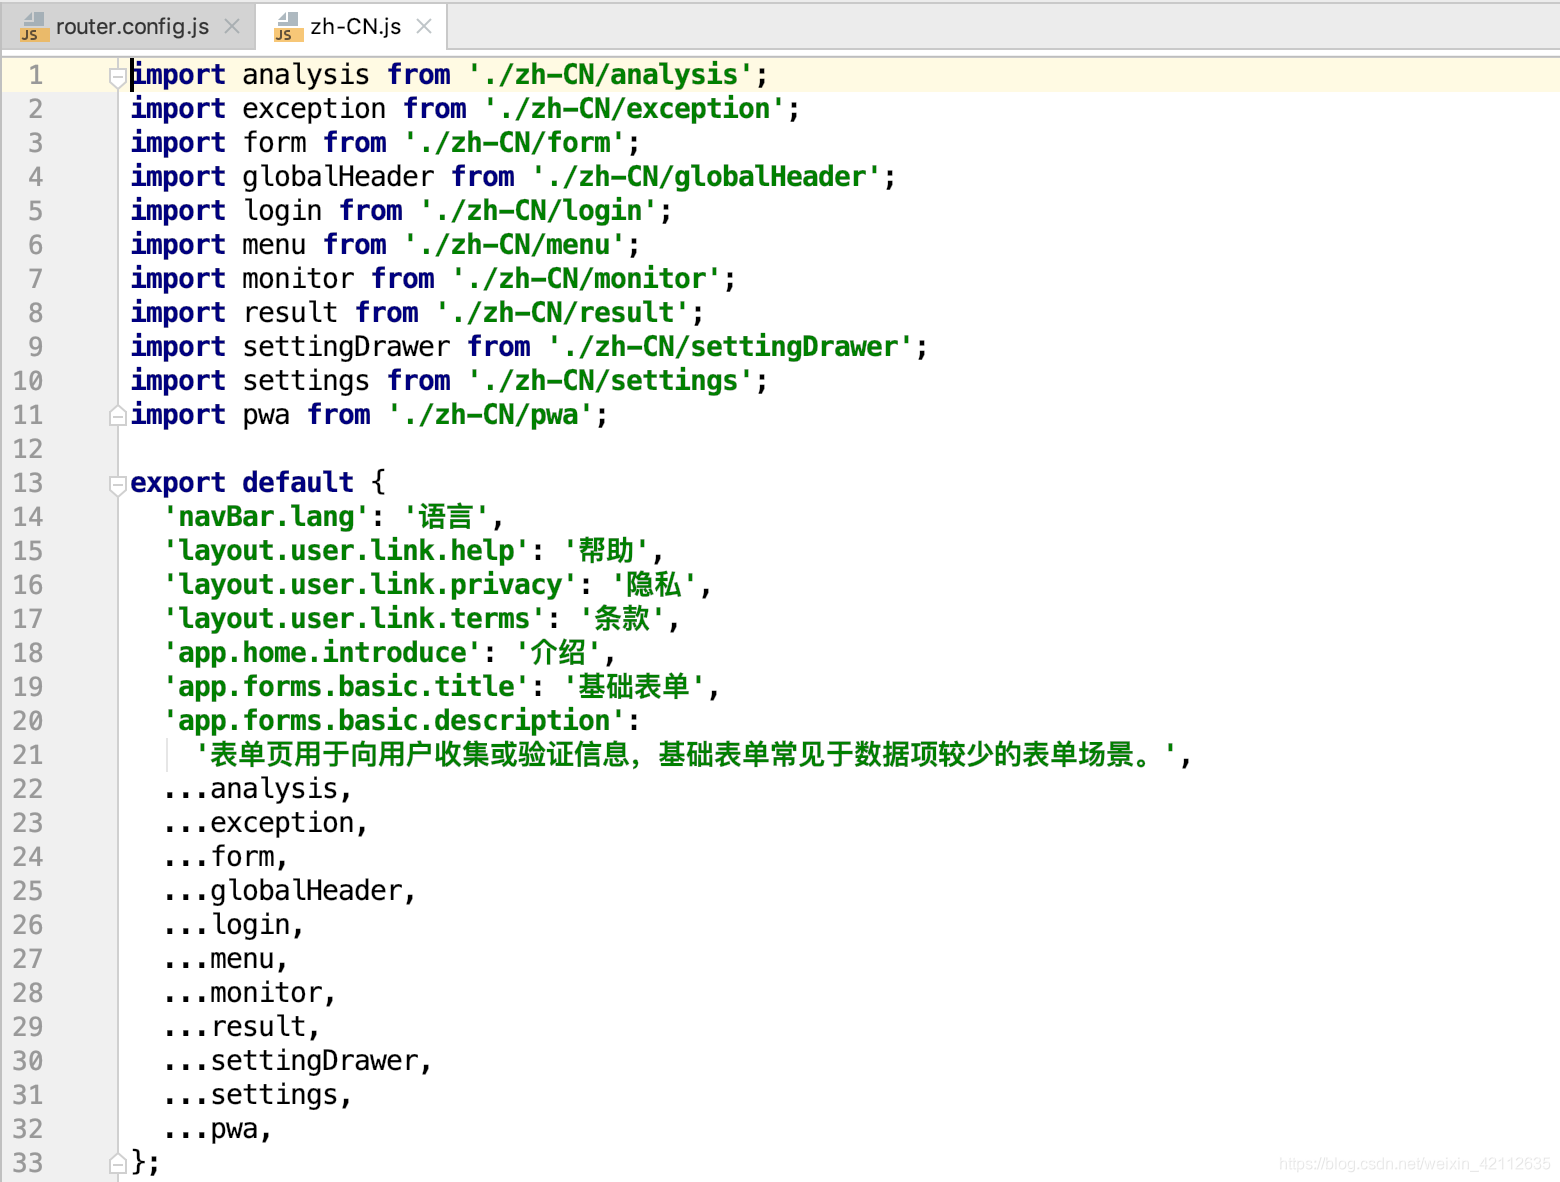
New configuration is as follows:
'menu.new': 'New Dashboard',
'menu.new.analysis': 'New 分析页',
'menu.new.monitor': 'New 监控页',
'menu.new.workplace': 'New 工作台',
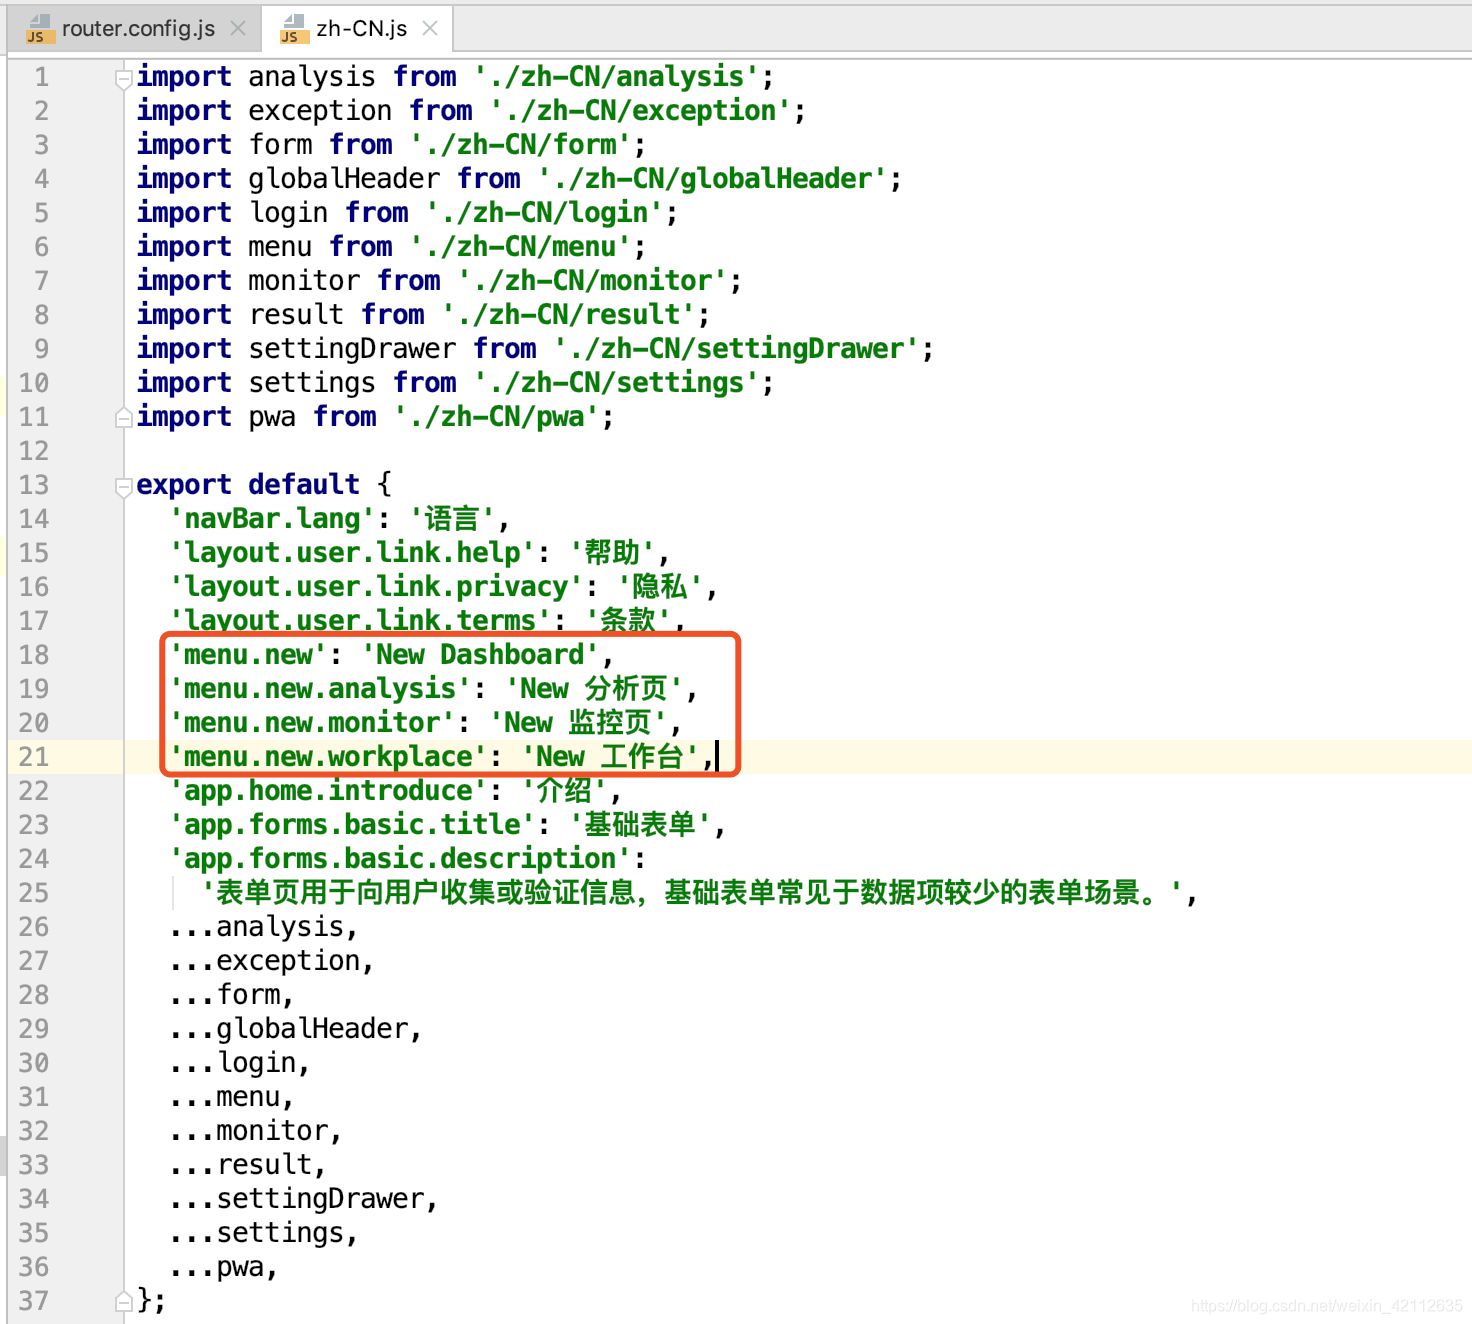
carry out testing:
2.3 Add page
Above we add a new menu, but the page is still using a template page, how to add pages?
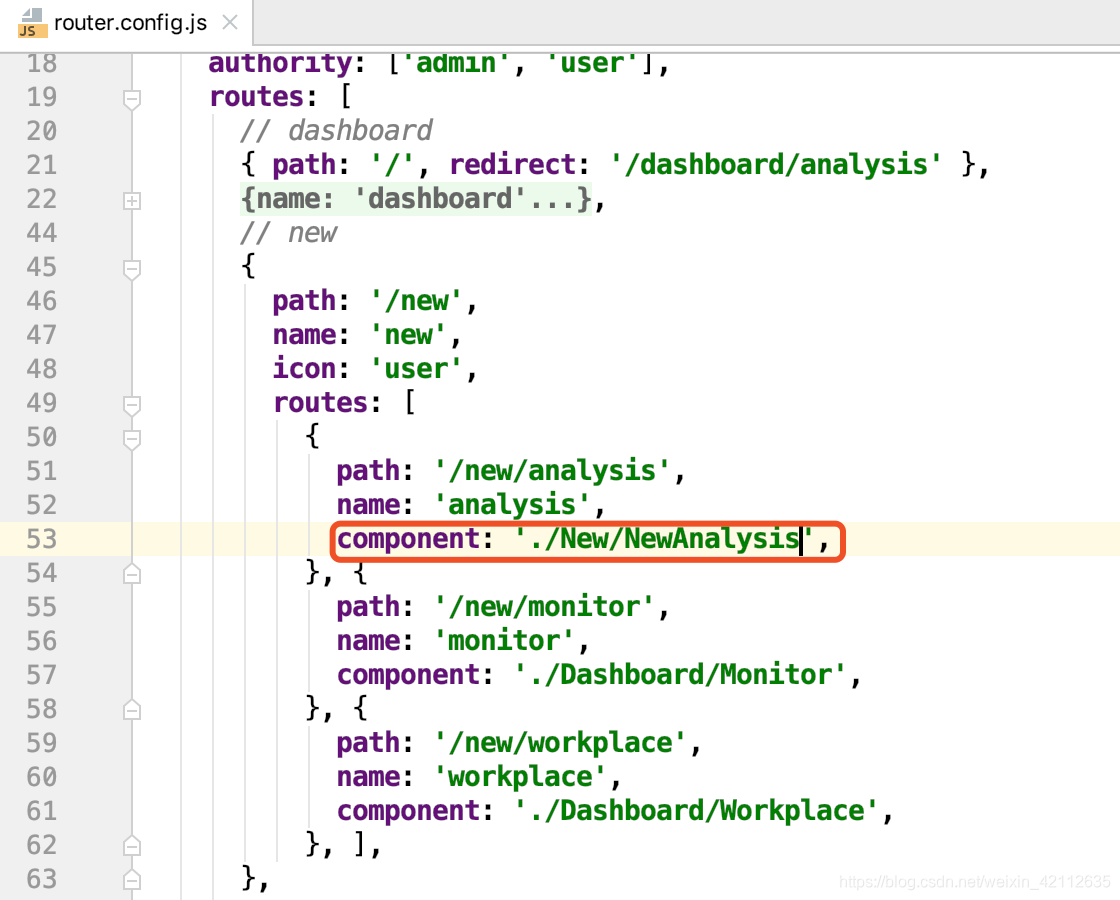
All pages are still stored src/pagesin the pagesdirectory, create a directory in order to function as a unit, such as:

Create a file NewAnalysis.js:
import React from 'react';

class NewAnalysis extends React.Component {
  render() {
    return (
      <div>NewAnalysis</div>
    );
  }
}

export default NewAnalysis;
Modify the path in the route:
test:
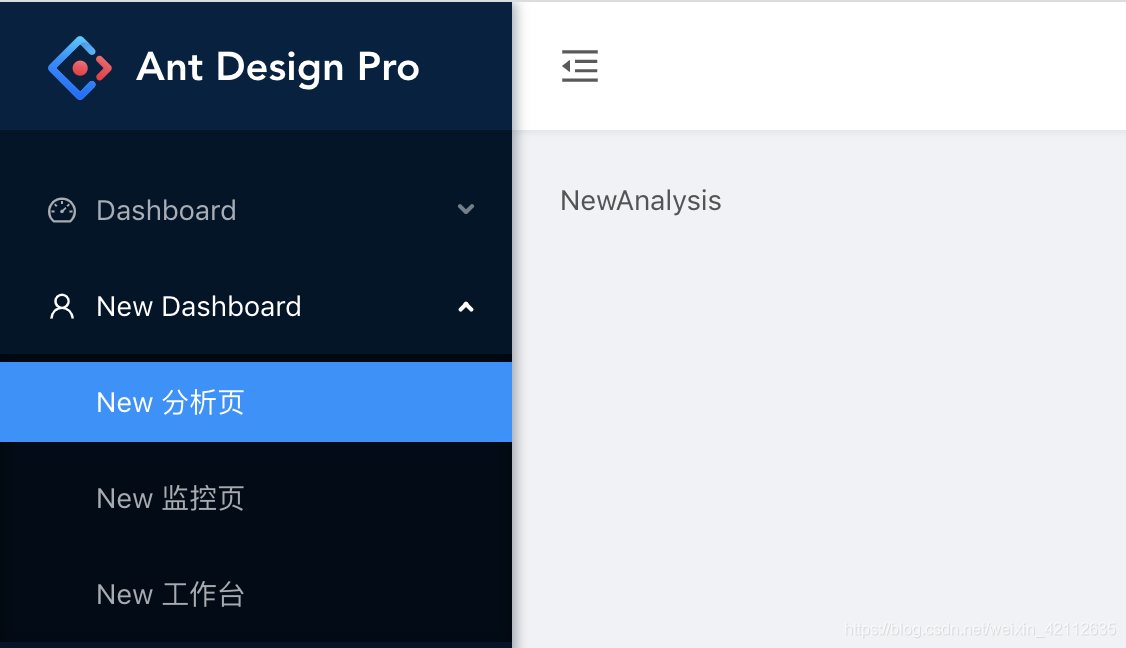
We can see that a new page has been created and has been added to the menu.
model execution flow of 2.4 pro
In the pro system, model of how to perform the following form to us, for example, to explore the implementation process at Pro.
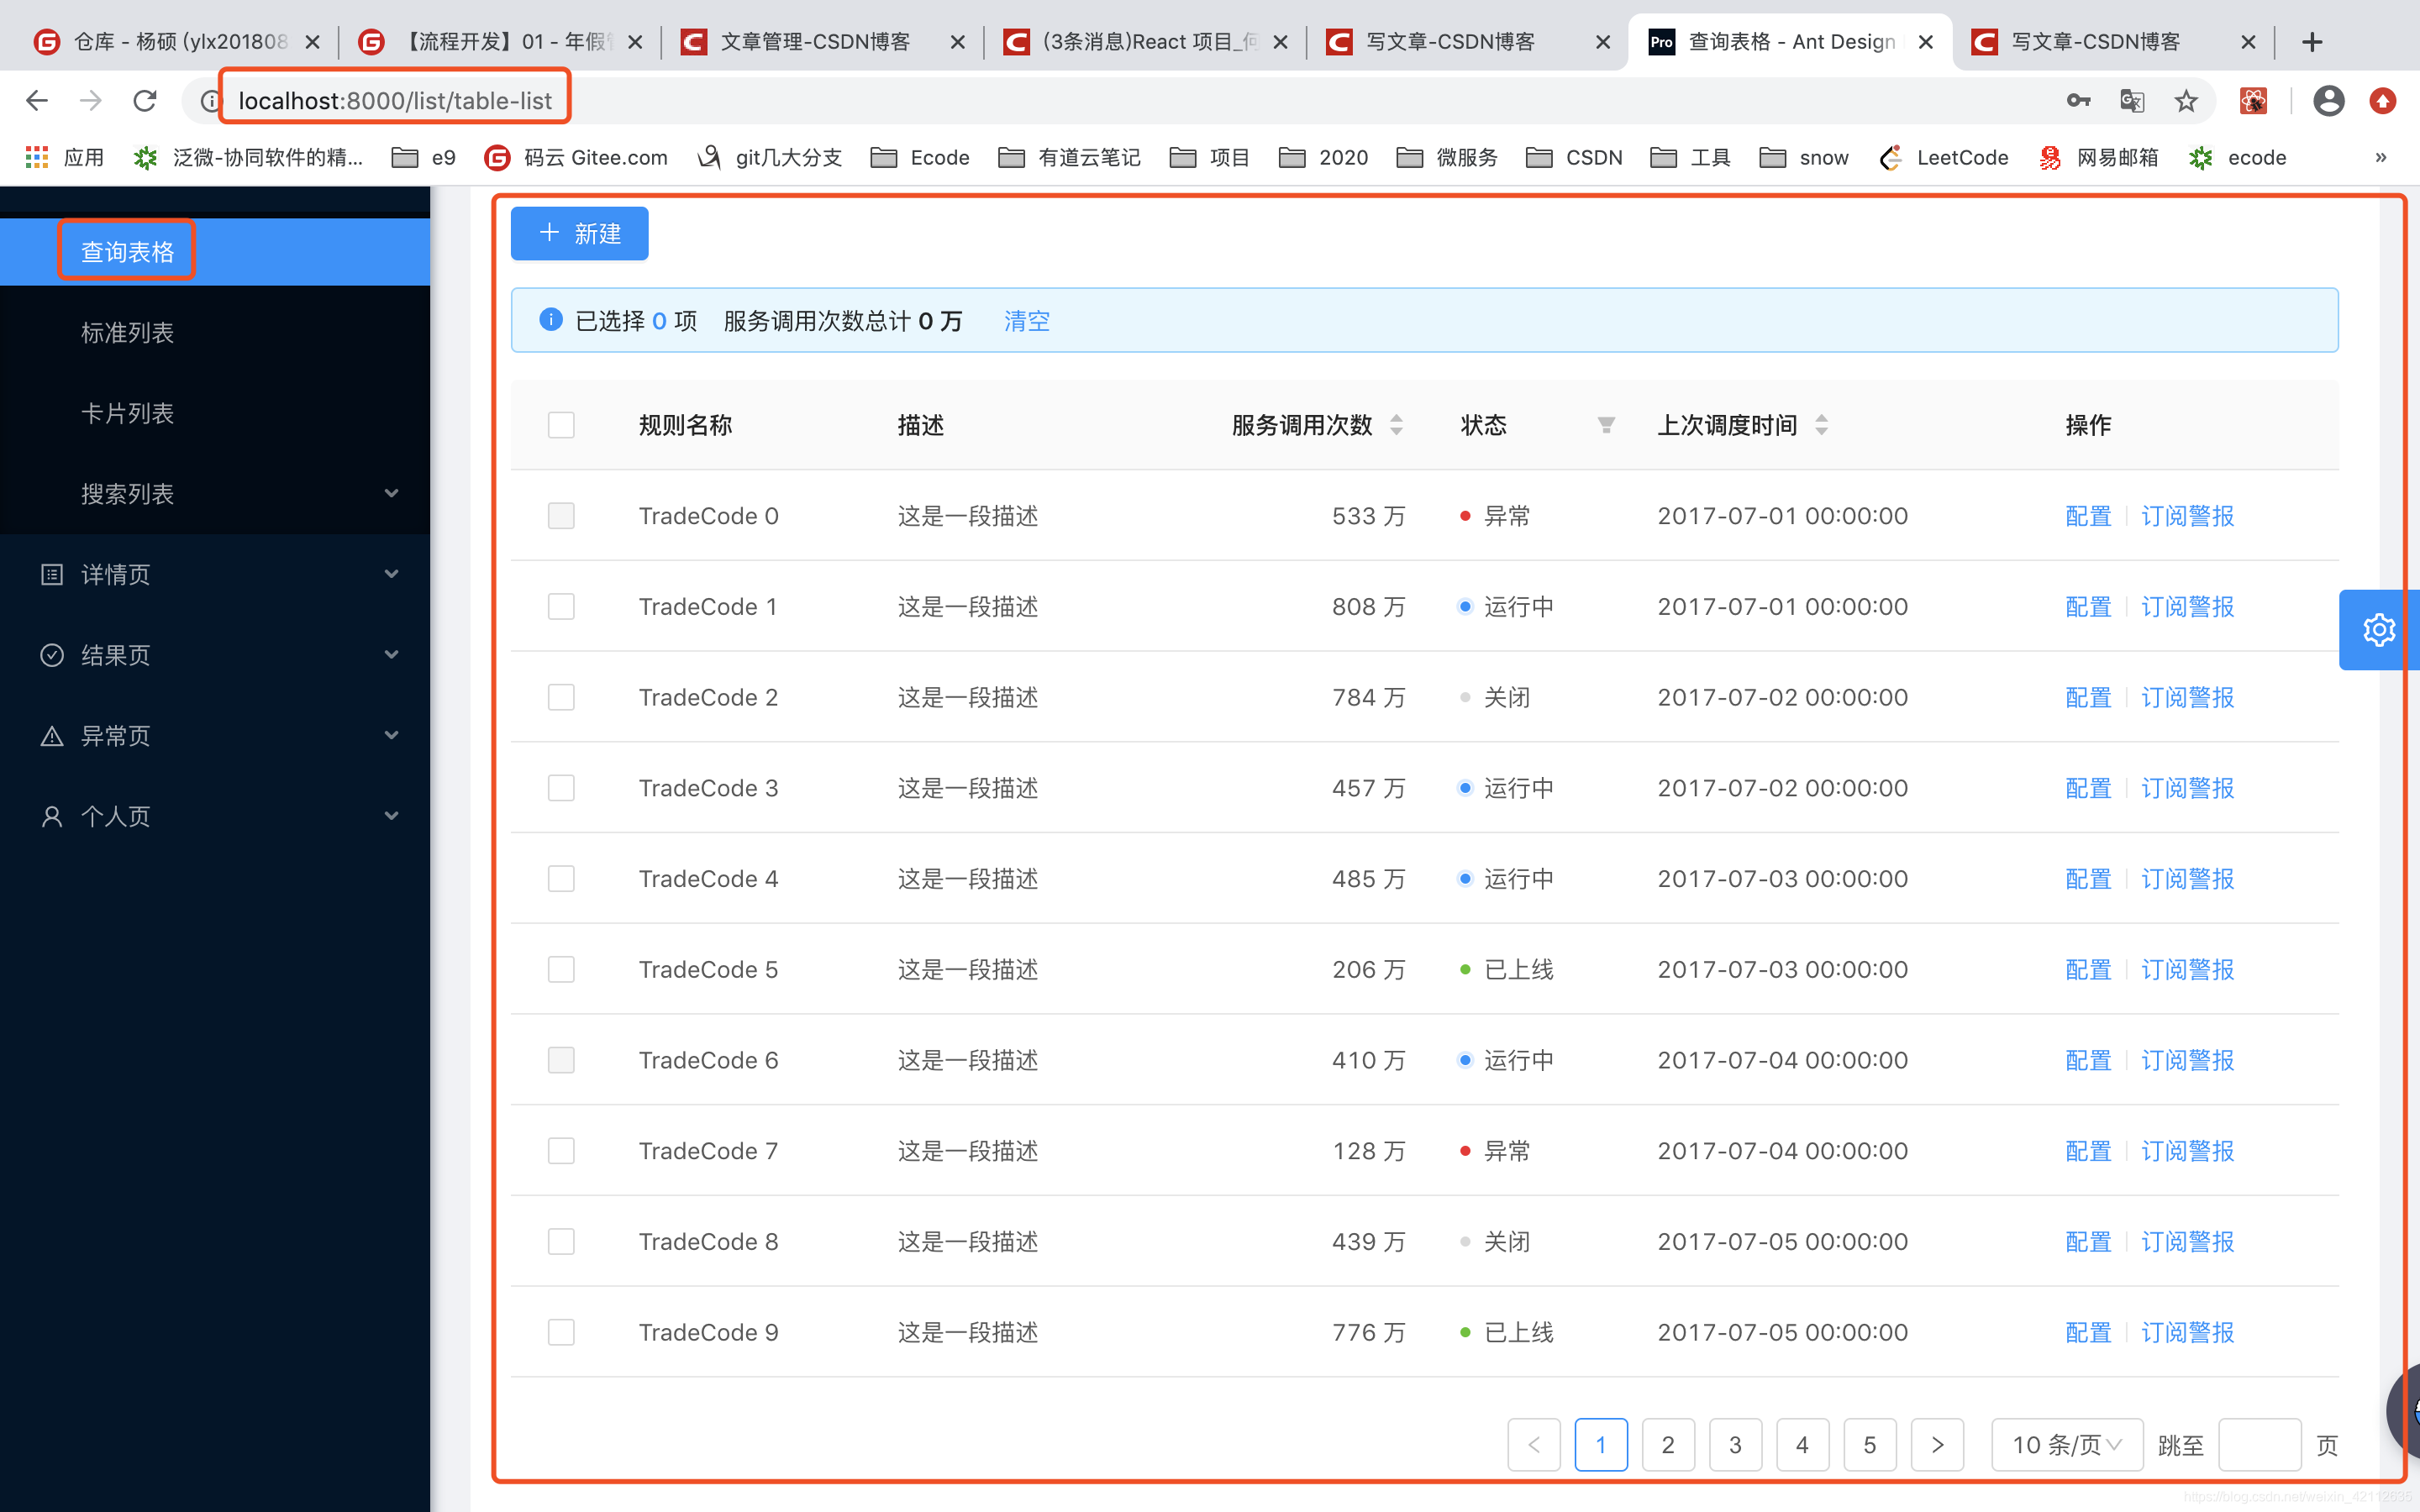
Enter TableList.jsthe code to view, generate a table of the main logic here:
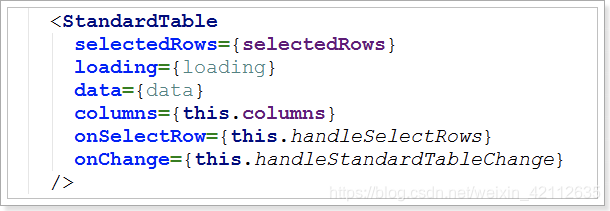
In StandardTableusing Table component generation table, wherein the data source is a data:

TableList.js In, data configured from a data acquisition process to:
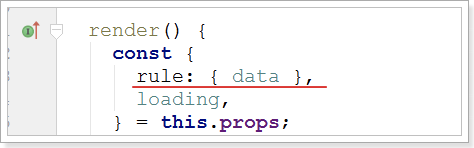
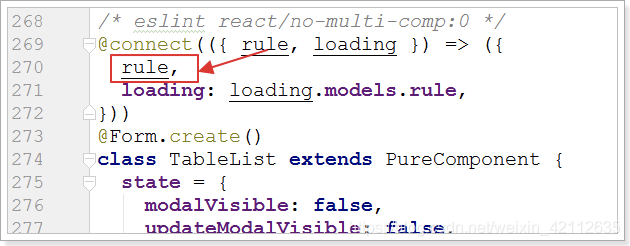
this.propsThe rule data, by @connect()acquiring decorator:
Note that: { rule, loading }deconstruction expression, from propsacquiring data:
Data acquired from the model, the models under rule.jsin:
In the TableList.jsloading data, the component loading is complete:
In the rule.jsmiddle, loading data:

queryRuleIt is /services/apicarried out definition:

The data mockis in mock/rule.jscompletion.
This is the entire data load, update process.
