1 Reverse Proxy
1.1 What is a reverse proxy
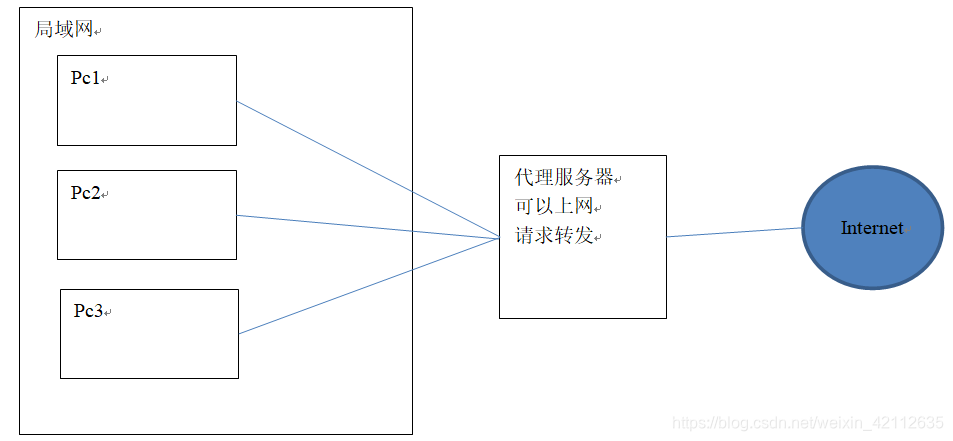
Forward Proxy
Reverse Proxy:
Reverse proxy (Reverse Proxy) mode refers to the proxy server to accept connection requests on the internet, then 将请求转发给内部网络上的服务器, and returns to the requesting client on the internet connection on the results obtained from the server, and the external proxy server appears as a reverse proxy server.
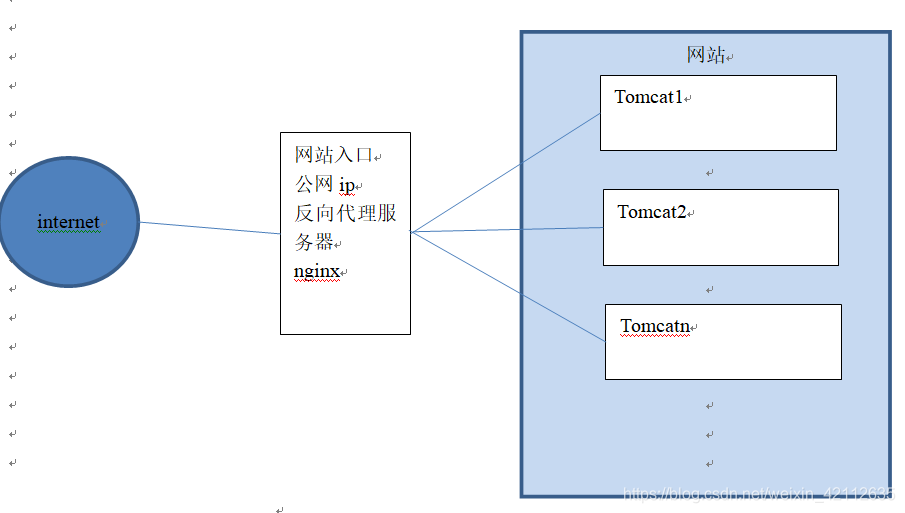
Reverse proxy server determines which server to provide services.
Depending on the domain name request, Nginxforwards the request to the corresponding server, thus hiding the real address of the server.
Reverse proxy server does not provide services, also
请求的转发.
1.2 reverse proxy Benefits
Reverse Proxy benefits: 隐藏真实内部 ip 地址a request to access nginxa proxy server (outside the network can access), then use the nginxrelay server to the real server.
1.3 Nginxto achieve reverse proxy
Two domain names point to the same nginxserver, different users access the domain name to display different web content.
- Two domain names are
www.e3mall.comandwww.taotao.com nginxThe server uses a virtual machine:192.168.153.11

Step 1: Install two
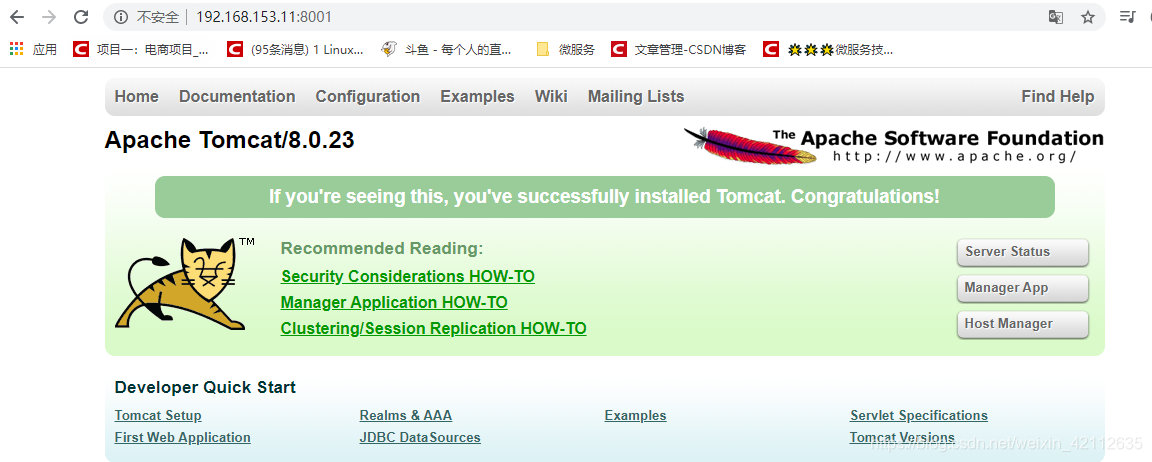
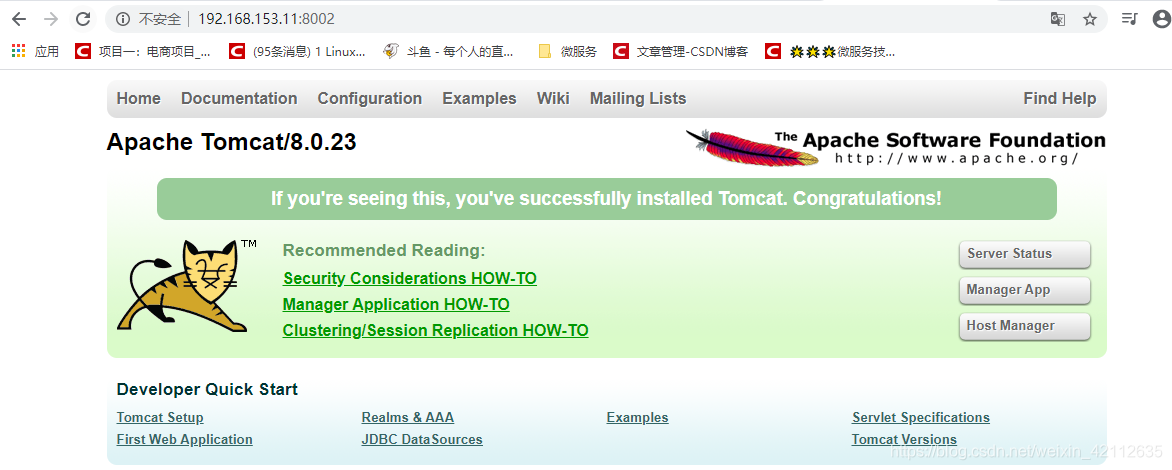
tomcatwere running8080and8081port.
Download Tomcat:
wget https://archive.apache.org/dist/tomcat/tomcat-8/v8.0.23/bin/apache-tomcat-8.0.23.tar.gz
Decompression:
tar -zxvf apache-tomcat-8.0.23.tar.gz
Copy the two Tomcat:
cp apache-tomcat-8.0.23 tomcat-1 -r
cp apache-tomcat-8.0.23 tomcat-2 -r
[root@weaver-1 ~]# ll
total 8872
-rw-------. 1 root root    1801 Jan  6 15:48 anaconda-ks.cfg
drwxr-xr-x. 9 root root     160 Mar 18 03:43 apache-tomcat-8.0.23
-rw-r--r--. 1 root root 9076980 May 19  2015 apache-tomcat-8.0.23.tar.gz
drwxr-xr-x. 9 root root     160 Mar 18 03:44 tomcat-1
drwxr-xr-x. 9 root root     160 Mar 18 03:44 tomcat-2
[root@weaver-1 ~]#
Modify tomcat-1the port number is 8001:
vi tomcat-1/conf/server.xml
Modify the three ports:
# 8005 改为 8006
<Server port="8006" shutdown="SHUTDOWN">
  <!-- Security listener. Documentation at /docs/config/listeners.html
  <Listener className="org.apache.catalina.security.SecurityListener" />
......
    # 8080 改为 8001
    <Connector port="8001" protocol="HTTP/1.1"
               connectionTimeout="20000"
               redirectPort="8443" />
......
    # 8009 改为 8010
    <Connector port="8010" protocol="AJP/1.3" redirectPort="8443" />
Modify tomcat-2the port number is 8002:
vi tomcat-2/conf/server.xml
Modify the three ports:
# 8005 改为 8007
<Server port="8007" shutdown="SHUTDOWN">
  <!-- Security listener. Documentation at /docs/config/listeners.html
  <Listener className="org.apache.catalina.security.SecurityListener" />
......
    # 8080 改为 8002
    <Connector port="8002" protocol="HTTP/1.1"
               connectionTimeout="20000"
               redirectPort="8443" />
......
    # 8009 改为 8011
    <Connector port="8011" protocol="AJP/1.3" redirectPort="8443" />
Step Two: Start two
tomcat:
tomcat-1/bin/startup.sh
tomcat-2/bin/startup.sh
[root@weaver-1 ~]# tomcat-1/bin/startup.sh
Using CATALINA_BASE:   /root/tomcat-1
Using CATALINA_HOME:   /root/tomcat-1
Using CATALINA_TMPDIR: /root/tomcat-1/temp
Using JRE_HOME:        /usr/java/jdk1.8.0_131
Using CLASSPATH:       /root/tomcat-1/bin/bootstrap.jar:/root/tomcat-1/bin/tomcat-juli.jar
Tomcat started.
[root@weaver-1 ~]# tomcat-2/bin/startup.sh
Using CATALINA_BASE:   /root/tomcat-2
Using CATALINA_HOME:   /root/tomcat-2
Using CATALINA_TMPDIR: /root/tomcat-2/temp
Using JRE_HOME:        /usr/java/jdk1.8.0_131
Using CLASSPATH:       /root/tomcat-2/bin/bootstrap.jar:/root/tomcat-2/bin/tomcat-juli.jar
Tomcat started.
[root@weaver-1 ~]#
View startup success:
tail -f tomcat-1/logs/catalina.out
tail -f tomcat-2/logs/catalina.out

test:
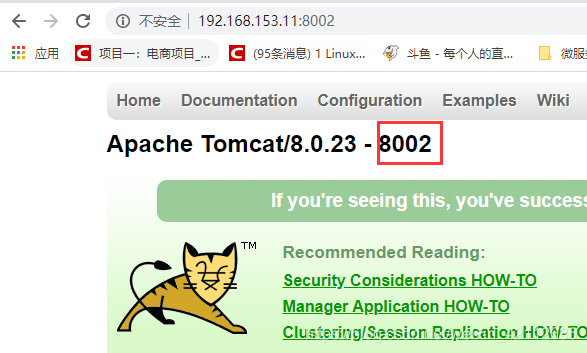
Modify the welcome page:
vi tomcat-1/webapps/ROOT/index.jsp
vi tomcat-2/webapps/ROOT/index.jsp
```bash
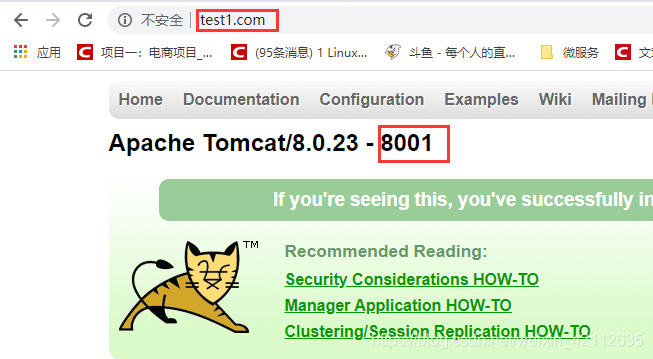
<h1>${pageContext.servletContext.serverInfo} - 8001</h1>
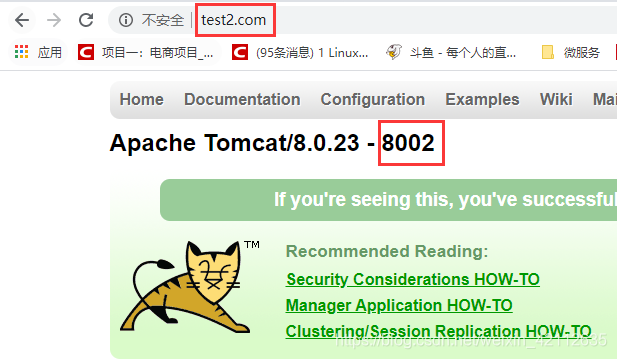
<h1>${pageContext.servletContext.serverInfo} - 8002</h1>
refresh page:

Step Three: Configure a reverse proxy server
Modify the nginxconfiguration file:
vi /usr/local/nginx/conf/nginx.conf
#user  nobody;
worker_processes  1;

#error_log  logs/error.log;
#error_log  logs/error.log  notice;
#error_log  logs/error.log  info;

#pid        logs/nginx.pid;


events {
    worker_connections  1024;
}


http {
    include       mime.types;
    default_type  application/octet-stream;

    #access_log  logs/access.log  main;

    sendfile        on;

    keepalive_timeout  65;

    #gzip  on;

    server {
        listen       80;                 # server监听的端口号
        server_name  localhost;          # 配置域名

        location / {
            root   html;                 # 拦截后,跳转根路径
            index  index.html index.htm; # 默认页面
        }

    }

	############ 添加配置一
	server {
        listen       80;
        server_name  www.test1.com;

        location / {
            proxy_pass   http://127.0.0.1:8001;
            index  index.html index.htm;
        }

    }

	############ 添加配置二
	server {
        listen       80;
        server_name  www.test2.com;

        location / {
            proxy_pass   http://127.0.0.1:8002;
            index  index.html index.htm;
        }

    }

}
Or configured as follows:
#user  nobody;
worker_processes  1;

#error_log  logs/error.log;
#error_log  logs/error.log  notice;
#error_log  logs/error.log  info;

#pid        logs/nginx.pid;


events {
    worker_connections  1024;
}


http {
    include       mime.types;
    default_type  application/octet-stream;

    #access_log  logs/access.log  main;

    sendfile        on;

    keepalive_timeout  65;

    #gzip  on;

    server {
        listen       80;                 # server监听的端口号
        server_name  localhost;          # 配置域名

        location / {
            root   html;                 # 拦截后,跳转根路径
            index  index.html index.htm; # 默认页面
        }

    }

	############ 添加配置一
	upstream test1 {
        server 127.0.0.1:8001;
    }
	server {
        listen       80;
        server_name  www.test1.com;

        location / {
            proxy_pass   http://test1;
            index  index.html index.htm;
        }

    }

	############ 添加配置二
	upstream test2 {
        server 127.0.0.1:8002;
    }
	server {
        listen       80;
        server_name  www.test2.com;

        location / {
            proxy_pass   http://test2;
            index  index.html index.htm;
        }

    }

}
Step four:
nginxreload the configuration file.
/usr/local/nginx/sbin/nginx -s reload
Step Five: Configure the domain name
Add a mapping between the domain name and ip in the hosts file in the machine
192.168.153.11 www.test.com
192.168.153.11 www.test1.com
192.168.153.11 www.test2.com
test: