Uma conversão mútua entre CGImageRef e UIImage
CGImageRef é um ponteiro de estrutura. Através do CGImageRef, todos os parâmetros do UIImage podem ser obtidos, como largura e altura do pixel, profundidade de bits do canal de cores, profundidade de bits do pixel, arranjo de bytes de pixel e ordem de leitura, etc. A conversão entre CGImageRef e UIImage é como segue:
Converter UIImage para CGImageRef
    UIImage *image = [UIImage imageNamed:@"testImg"];
    CGImageRef imageRef = image.CGImage;
Converter CGImageRef em UIImage
    CGImageRef imageRef = [UIImage imageNamed:@"testImg"].CGImage;
    UIImage *finalImage = [UIImage imageWithCGImage:imageRef];
Lembre-se de liberar o CGImageRef toda vez que for usá-lo, caso contrário, causará um vazamento de memória. O método de liberação também é muito simples, conforme mostrado abaixo:
CGImageRelease(imageRef);
Método de criação de dois CGImageRef
Criado usando uma fonte de dados png
Instruções
CGImageCreateWithPNGDataProvider(CGDataProviderRef cg_nullable source, const CGFloat * __nullable decode, bool shouldInterpolate, CGColorRenderingIntent intent)
Exemplo de uso:
    NSString *path = [[NSBundle mainBundle] pathForResource:@"bundle8Bit" ofType:@".png"];
    NSData *bundleImgData = [NSData dataWithContentsOfFile:path];
    CGDataProviderRef provider = CGDataProviderCreateWithCFData((__bridge CFDataRef)bundleImgData);
    CGImageRef imageRef = CGImageCreateWithPNGDataProvider(provider, NULL, true, kCGRenderingIntentDefault);
    UIImage *image = [UIImage imageWithCGImage:imageRef];
    CGImageRelease(imageRef);
    CGDataProviderRelease(provider);

    self.imageV.image = image;
Criado usando uma fonte de dados jpeg
Instruções
CGImageCreateWithJPEGDataProvider(CGDataProviderRef cg_nullable source, const CGFloat * __nullable decode, bool shouldInterpolate, CGColorRenderingIntent intent)
Exemplo de uso:
    NSString *path = [[NSBundle mainBundle] pathForResource:@"houst" ofType:@".jpg"];
    NSData *bundleImgData = [NSData dataWithContentsOfFile:path];
    CGDataProviderRef provider = CGDataProviderCreateWithCFData((__bridge CFDataRef)bundleImgData);
    CGImageRef imageRef = CGImageCreateWithJPEGDataProvider(provider, NULL, true, kCGRenderingIntentDefault);
    UIImage *image = [UIImage imageWithCGImage:imageRef];
    CGImageRelease(imageRef);
    CGDataProviderRelease(provider);

    self.imageV.image = image;
Criado usando uma fonte de dados de matriz
O uso de fontes de dados de matriz para criar imagens é o método mais flexível, que basicamente pode atender totalmente a todas as nossas necessidades de personalização e pode implementar alterações em nível de pixel nas imagens, usando o nome do método
CGImageCreate(size_t width, size_t height,size_t bitsPerComponent, size_t bitsPerPixel, size_t bytesPerRow, CGColorSpaceRef cg_nullable space, CGBitmapInfo bitmapInfo,CGDataProviderRef cg_nullable provider,const CGFloat * __nullable decode, bool shouldInterpolate,CGColorRenderingIntent intent)
Os parâmetros são analisados da seguinte forma:
size_t largura largura da imagem (nível de pixel)
size_t altura altura da imagem (nível de pixel)
size_t bitsPerComponent profundidade de bits de cada canal de pixel (número de bits)
size_t bitsPerPixel profundidade de bits de cada ponto de pixel (número de bits)
size_t bytesPerRow espaço de pixel por linha Tamanho (em bytes)
CGColorSpaceRef espaço cg_nullable Espaço de cores
CGBitmapInfo bitmapInfo Arranjo de pixels e ordem de leitura
CGDataProviderRef provedor cg_nullable Fonte de fornecimento de dados
const CGFloat * __nullable decode Decode arrr Geralmente passa em null para manter os dados de origem
bool shouldInterpolate Se deve usar a diferença para imagem de transição suave
CGColorRenderingIntent A maneira como as intenções são mapeadas de um espaço de cores para outro
Como usar
//创建一个宽2000像素 高3000像素 每通道8bit 一共三通道(无alpha通道) 使用rgb颜色空间 的一张纯红色的图片
    size_t imageWidth = 2000;
    size_t imageHeight = 3000;
    size_t bitsPerComponent = 8;
    size_t bitsPerPixel = 24;
    size_t bytesPerRow = imageWidth * bitsPerPixel / 8;
    CGColorSpaceRef colorSpaceRef = CGColorSpaceCreateDeviceRGB();
    CGBitmapInfo bitmapInfo = kCGImageAlphaNone | kCGImageByteOrderDefault;

    //创建纯红色数据源
    int byteIndex = 0;
    unsigned char *rawData = (unsigned char*) malloc(imageWidth * imageHeight * 3);
    for (int i = 0; i < imageHeight; i ++) {
        for (int j = 0; j < imageWidth; j ++) {
            rawData[byteIndex ++] = 255; //red通道
            rawData[byteIndex ++] = 0;  //green通道
            rawData[byteIndex ++] = 0;  //blue通道
        }
    }
    CGDataProviderRef dataProviderRef = CGDataProviderCreateWithData(NULL,
                                                                     rawData,
                                                                     imageWidth*imageHeight*3,
                                                                     NULL);

    CGImageRef imageRef = CGImageCreate(imageWidth,
                                        imageHeight,
                                        bitsPerComponent,
                                        bitsPerPixel,
                                        bytesPerRow,
                                        colorSpaceRef,
                                        bitmapInfo,
                                        dataProviderRef,
                                        nil,
                                        NO,
                                        kCGRenderingIntentDefault);
    UIImage *image = [UIImage imageWithCGImage:imageRef];
    CGColorSpaceRelease(colorSpaceRef);
    CGDataProviderRelease(dataProviderRef);
    CGImageRelease(imageRef);

    self.imageV.image = image;
Resultado da criação
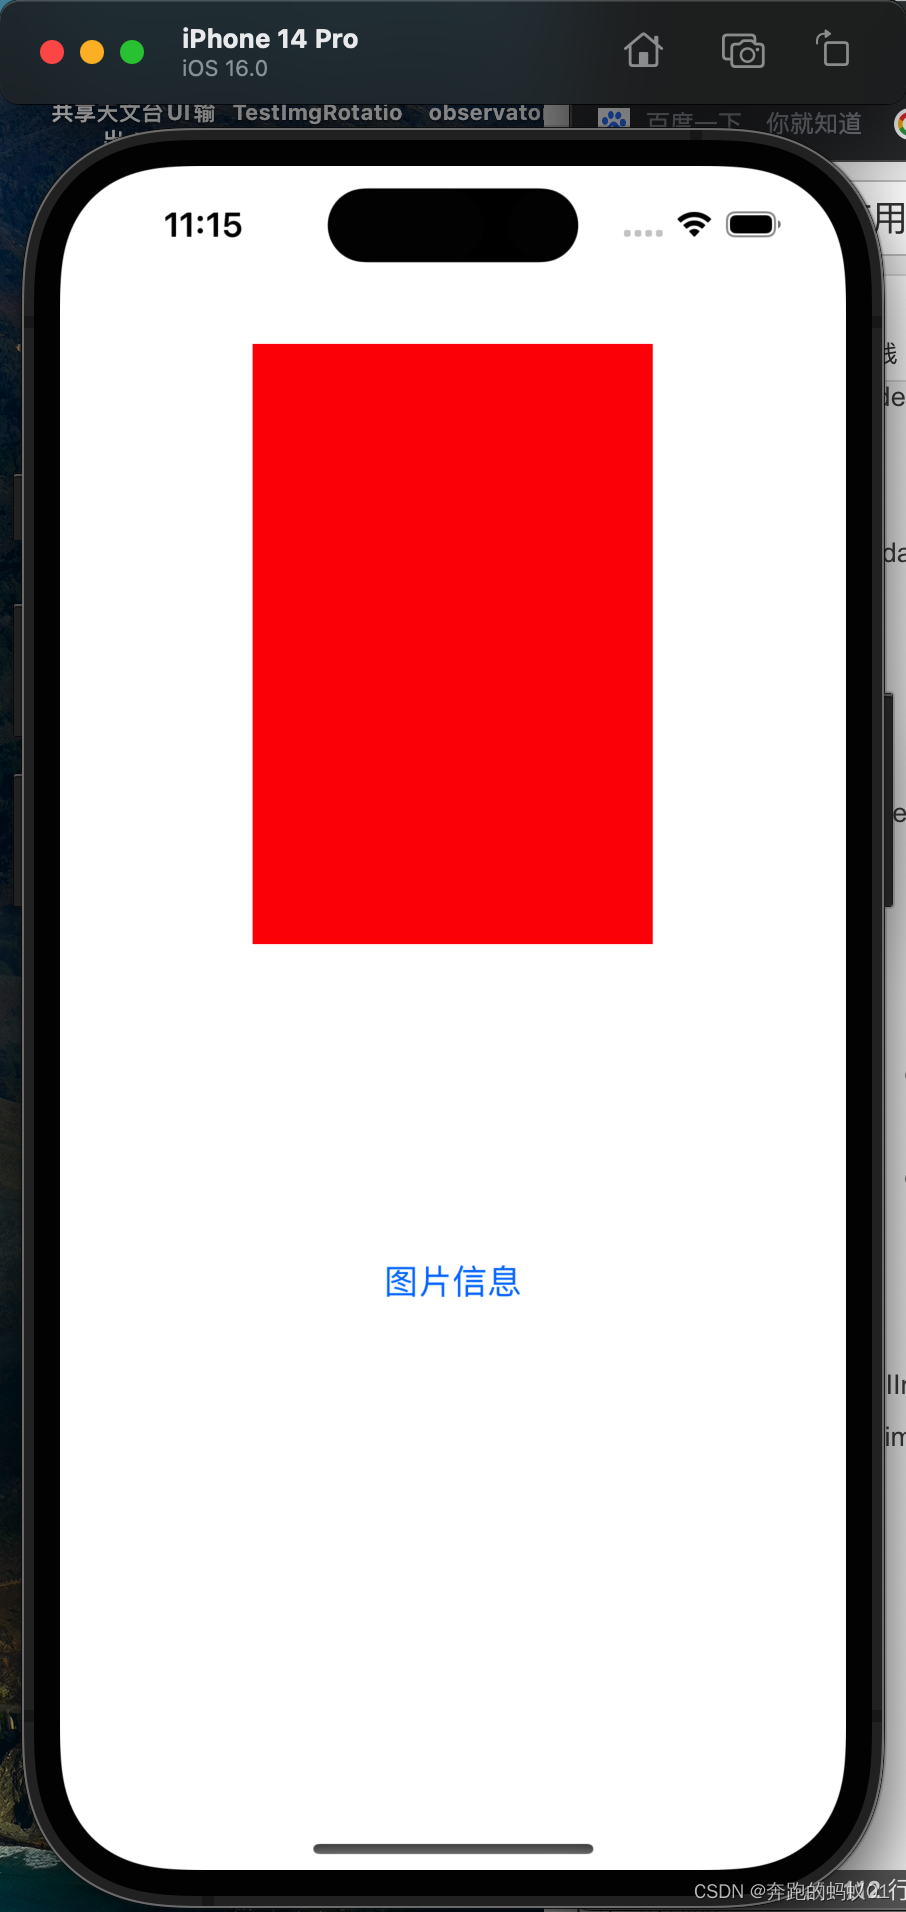
Verificação das informações da imagem de saída:
    size_t bitsPerComponentCheck = CGImageGetBitsPerComponent(imageRef);
    printf("每个通道占用的位数:%zu\n",bitsPerComponentCheck);
    size_t bitsPerPixelCheck = CGImageGetBitsPerPixel(imageRef);
    printf("每个像素占用的位数:%zu",bitsPerPixelCheck);
输出结果:
每个通道占用的位数:8
每个像素占用的位数:24
Consistente com os parâmetros que criamos
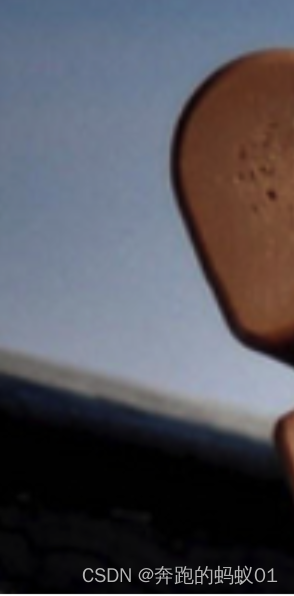
Três usam CGImageRef para cortar a imagem
方法 CGImageCreateWithImageInRect(CGImageRef cg_nullable image, CGRect rect)
Alguns exemplos de métodos de uso são os seguintes
    NSString *path = [[NSBundle mainBundle] pathForResource:@"bundle8Bit" ofType:@".png"];
    NSData *bundleImgData = [NSData dataWithContentsOfFile:path];
    CGDataProviderRef provider = CGDataProviderCreateWithCFData((__bridge CFDataRef)bundleImgData);
    CGImageRef imageRef = CGImageCreateWithPNGDataProvider(provider, NULL, true, kCGRenderingIntentDefault);
    CGImageRef clipImageRef = CGImageCreateWithImageInRect(imageRef, CGRectMake(0, 0, 100, 200));
    UIImage *image = [UIImage imageWithCGImage:clipImageRef];
    self.imageV.image = image;
Pegue o canto superior esquerdo da imagem como o vértice e recorte a área da imagem com uma largura de pixel de 100 e uma altura de 200.
Corte a imagem original:
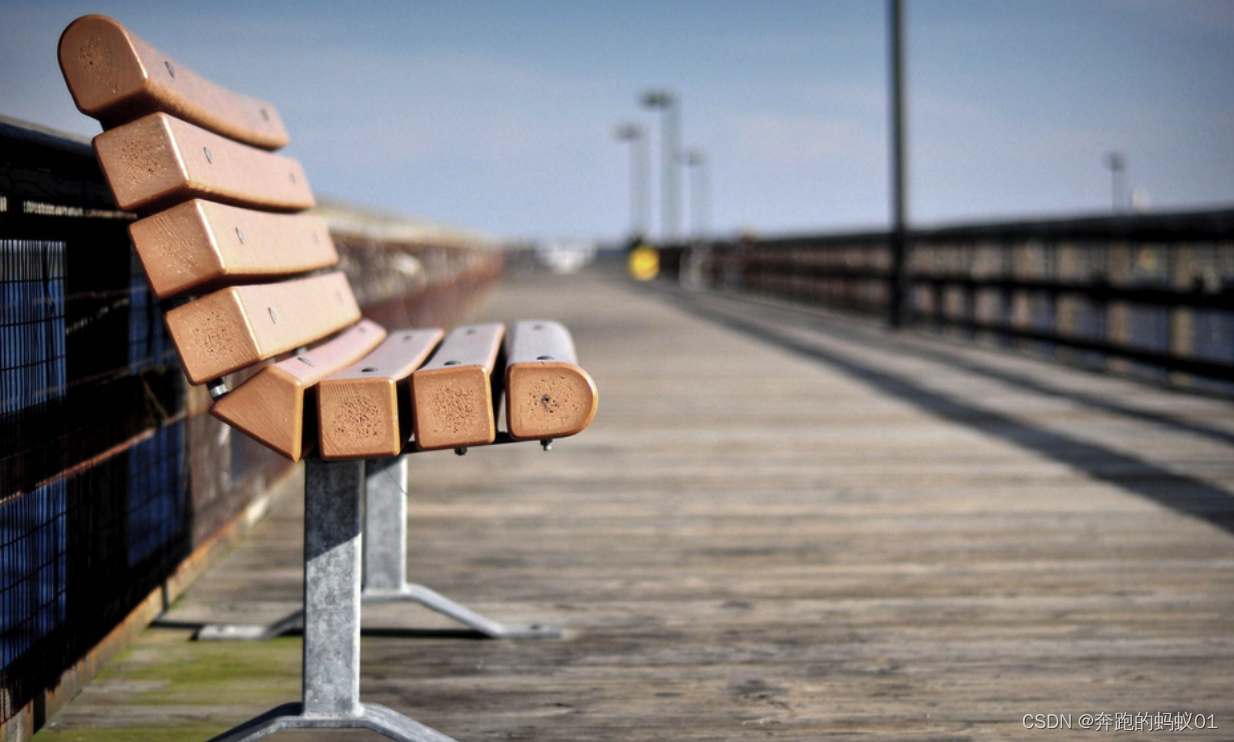
Imagem recortada:
Download do código-fonte: Download do código-fonte