目次
1.texliveをダウンロードする
ダウンロードリンク: TeX Live を ISO イメージとして取得 - TeX Users Group
写真に示すように、リンクをクリックして texlive 公式 Web サイトに入り、近くの CTAN ミラーからダウンロードをクリックします

入力後、必要な texlive バージョンを選択します。私は 2023 バージョンを選択しました。
 ここのダウンロードは遅い可能性があります。科学的にインターネットをサーフィンするか、このミラー Web サイトを参照することをお勧めします: /CTAN/systems/texlive/Images/ のインデックス | 清華大学オープンソース ソフトウェア ミラー ステーション | 清華オープンソース ミラー
2.texliveをインストールする
ダウンロードが完了したら、texlive を開き、install-tl-windows をクリックします。

ファイルを実行した後、ポップアップ インターフェイスでインストール パスを D ドライブに変更します。

変更後、「インストール」をクリックして完了を待ちます。
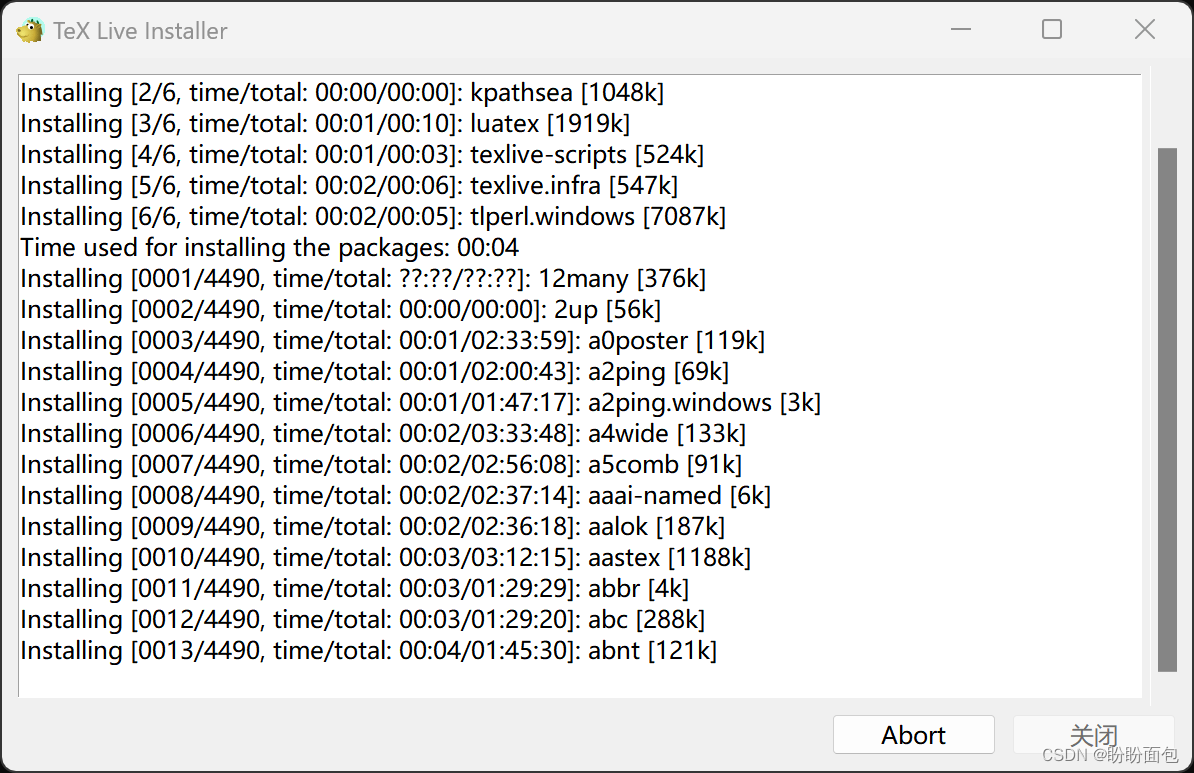
完了フラグ:
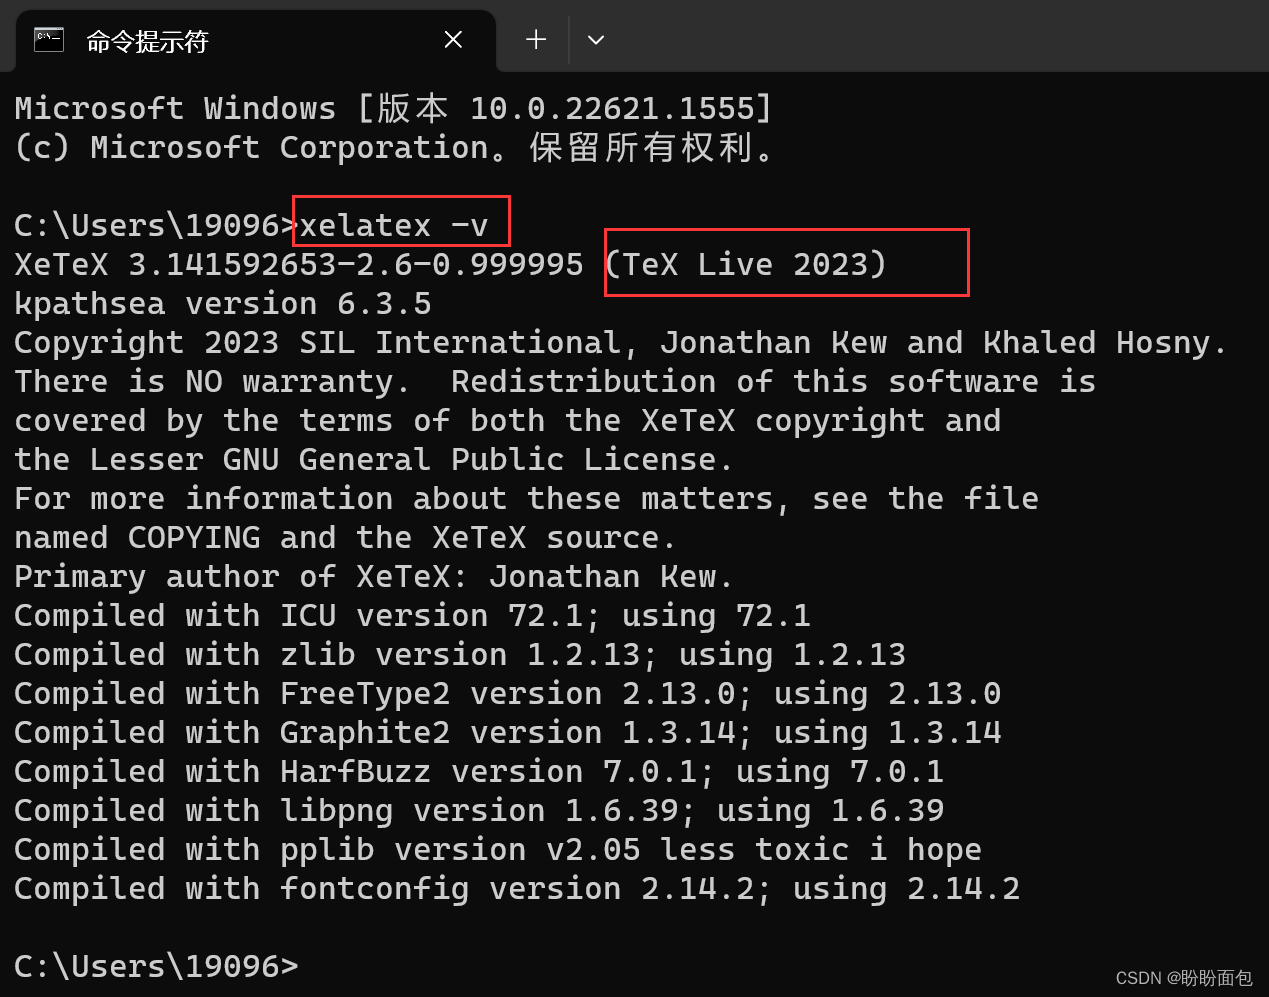
 cmd コマンド ラインを開き、xelatex -v コマンドを入力します。次の出力が表示されれば、インストールは成功です。
3.vscodeでlatexを設定する
vscode はデフォルトでここにインストールされます。インストールされていない場合は、「Visual Studio Code - コード編集。再定義」リンクをクリックしてインストールします。
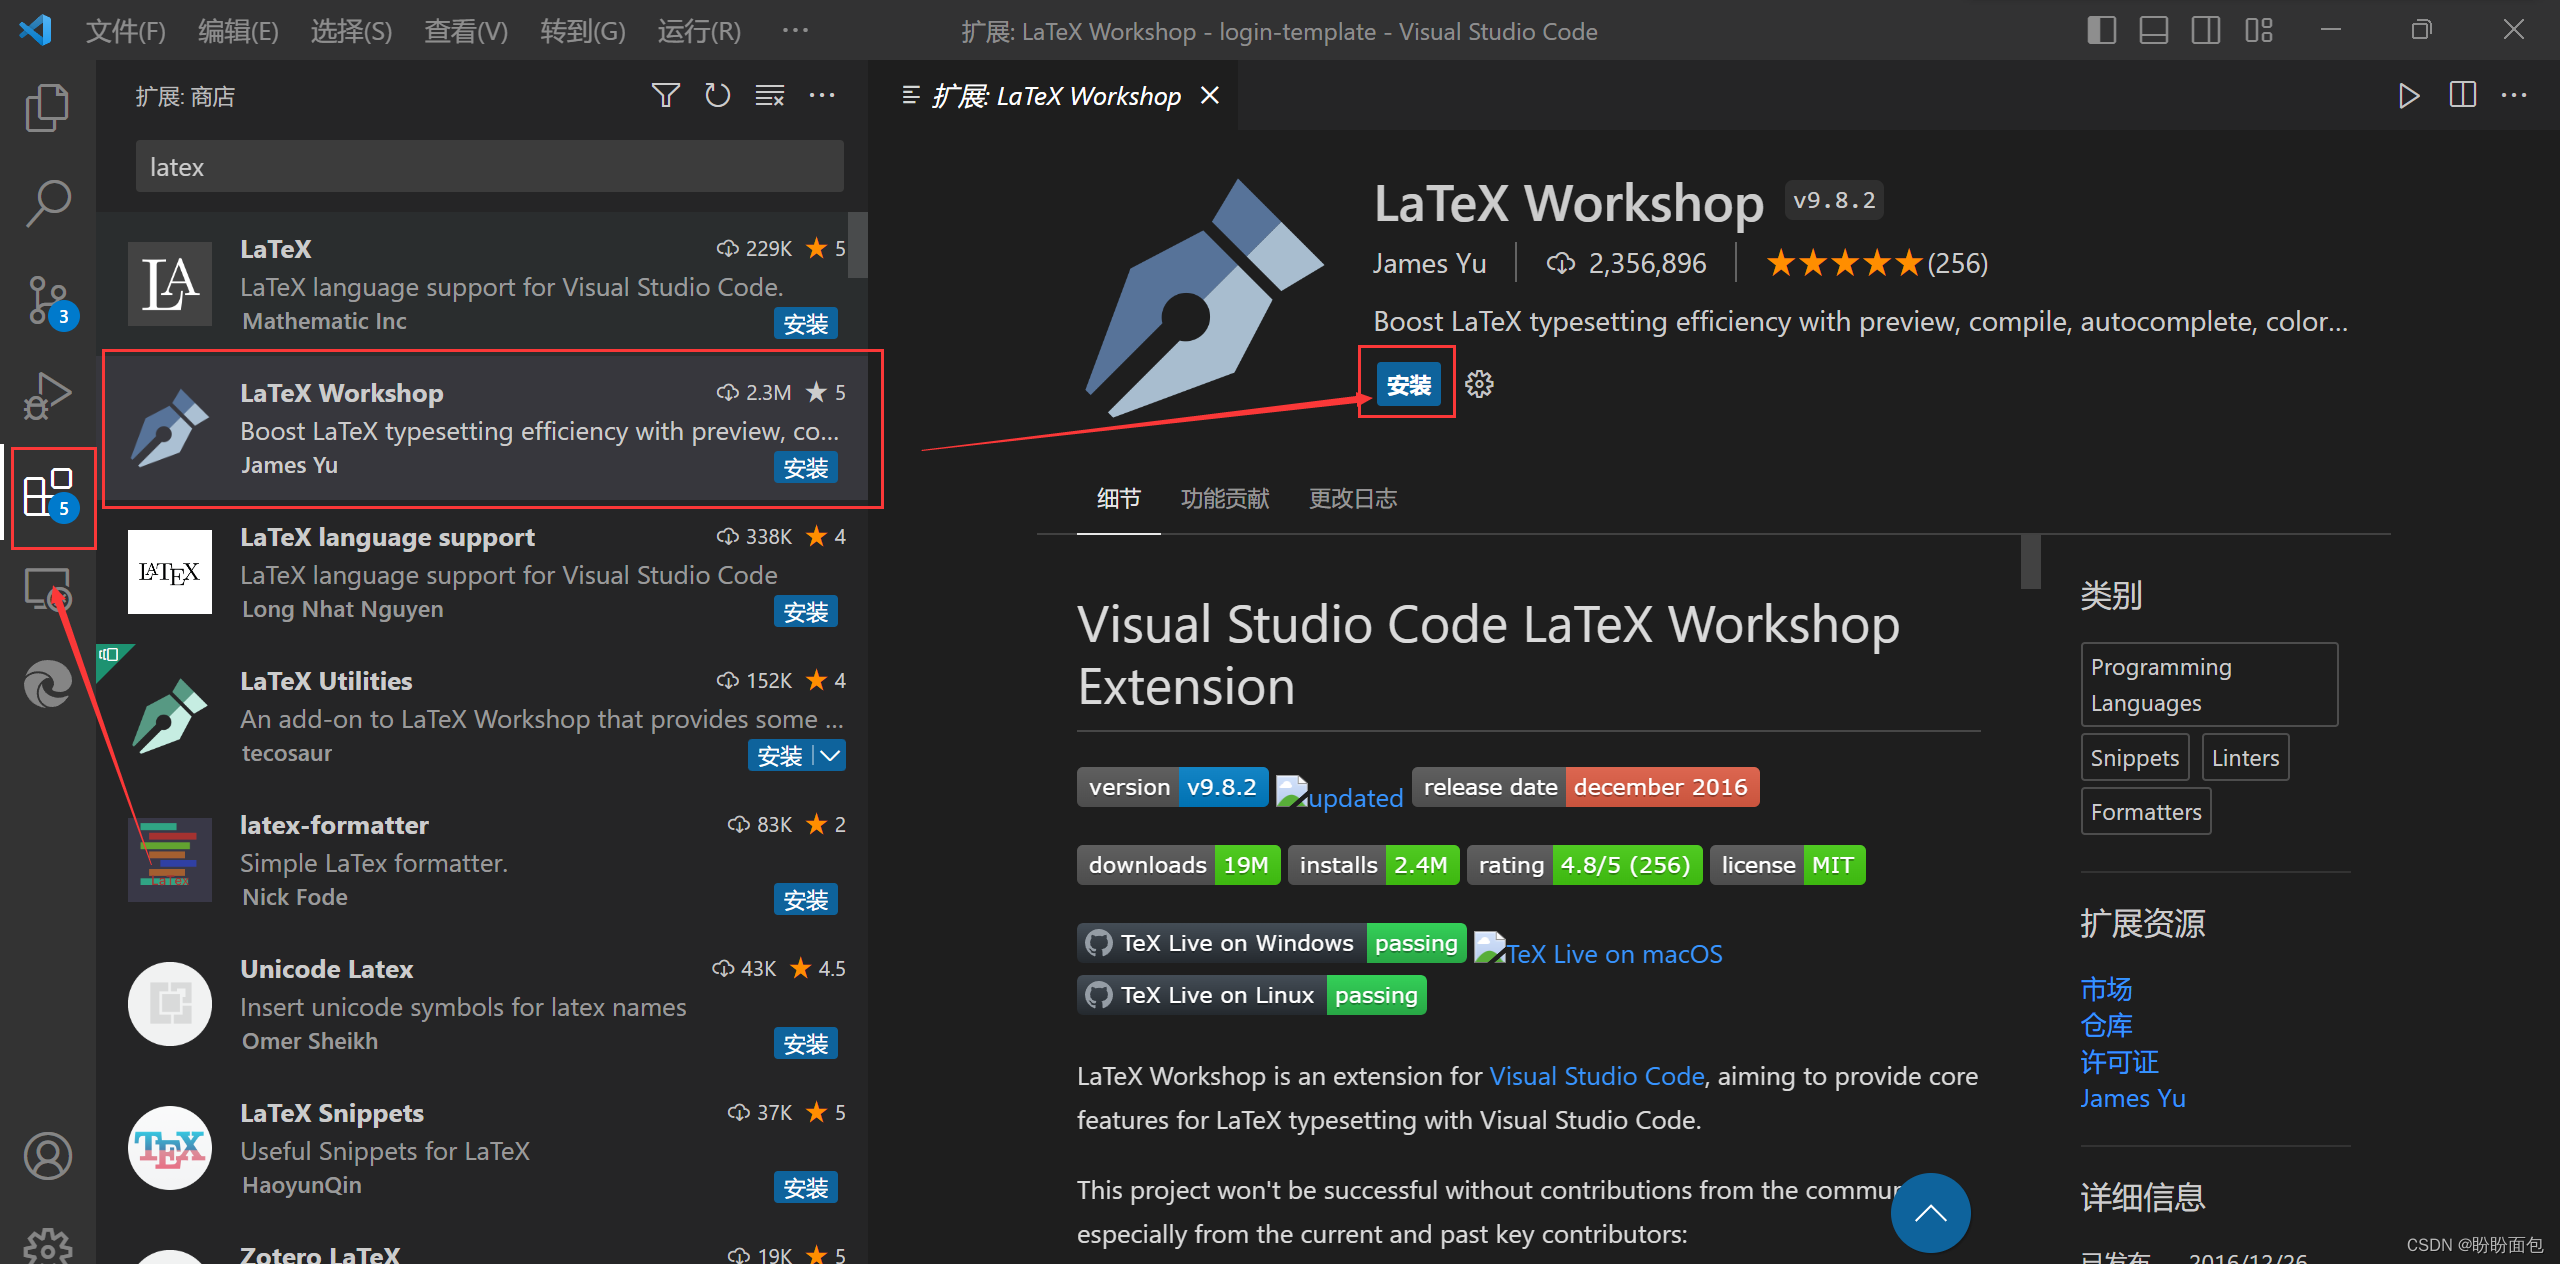
インストールが成功したら、vscode サイドバー拡張オプションをクリックし、latex ワークショップを検索して、クリックしてインストールします。
インストールが完了したら、latex の設定を実行します。
左下隅の [設定] をクリックし、右上隅をクリックして settings.json に切り替えます。
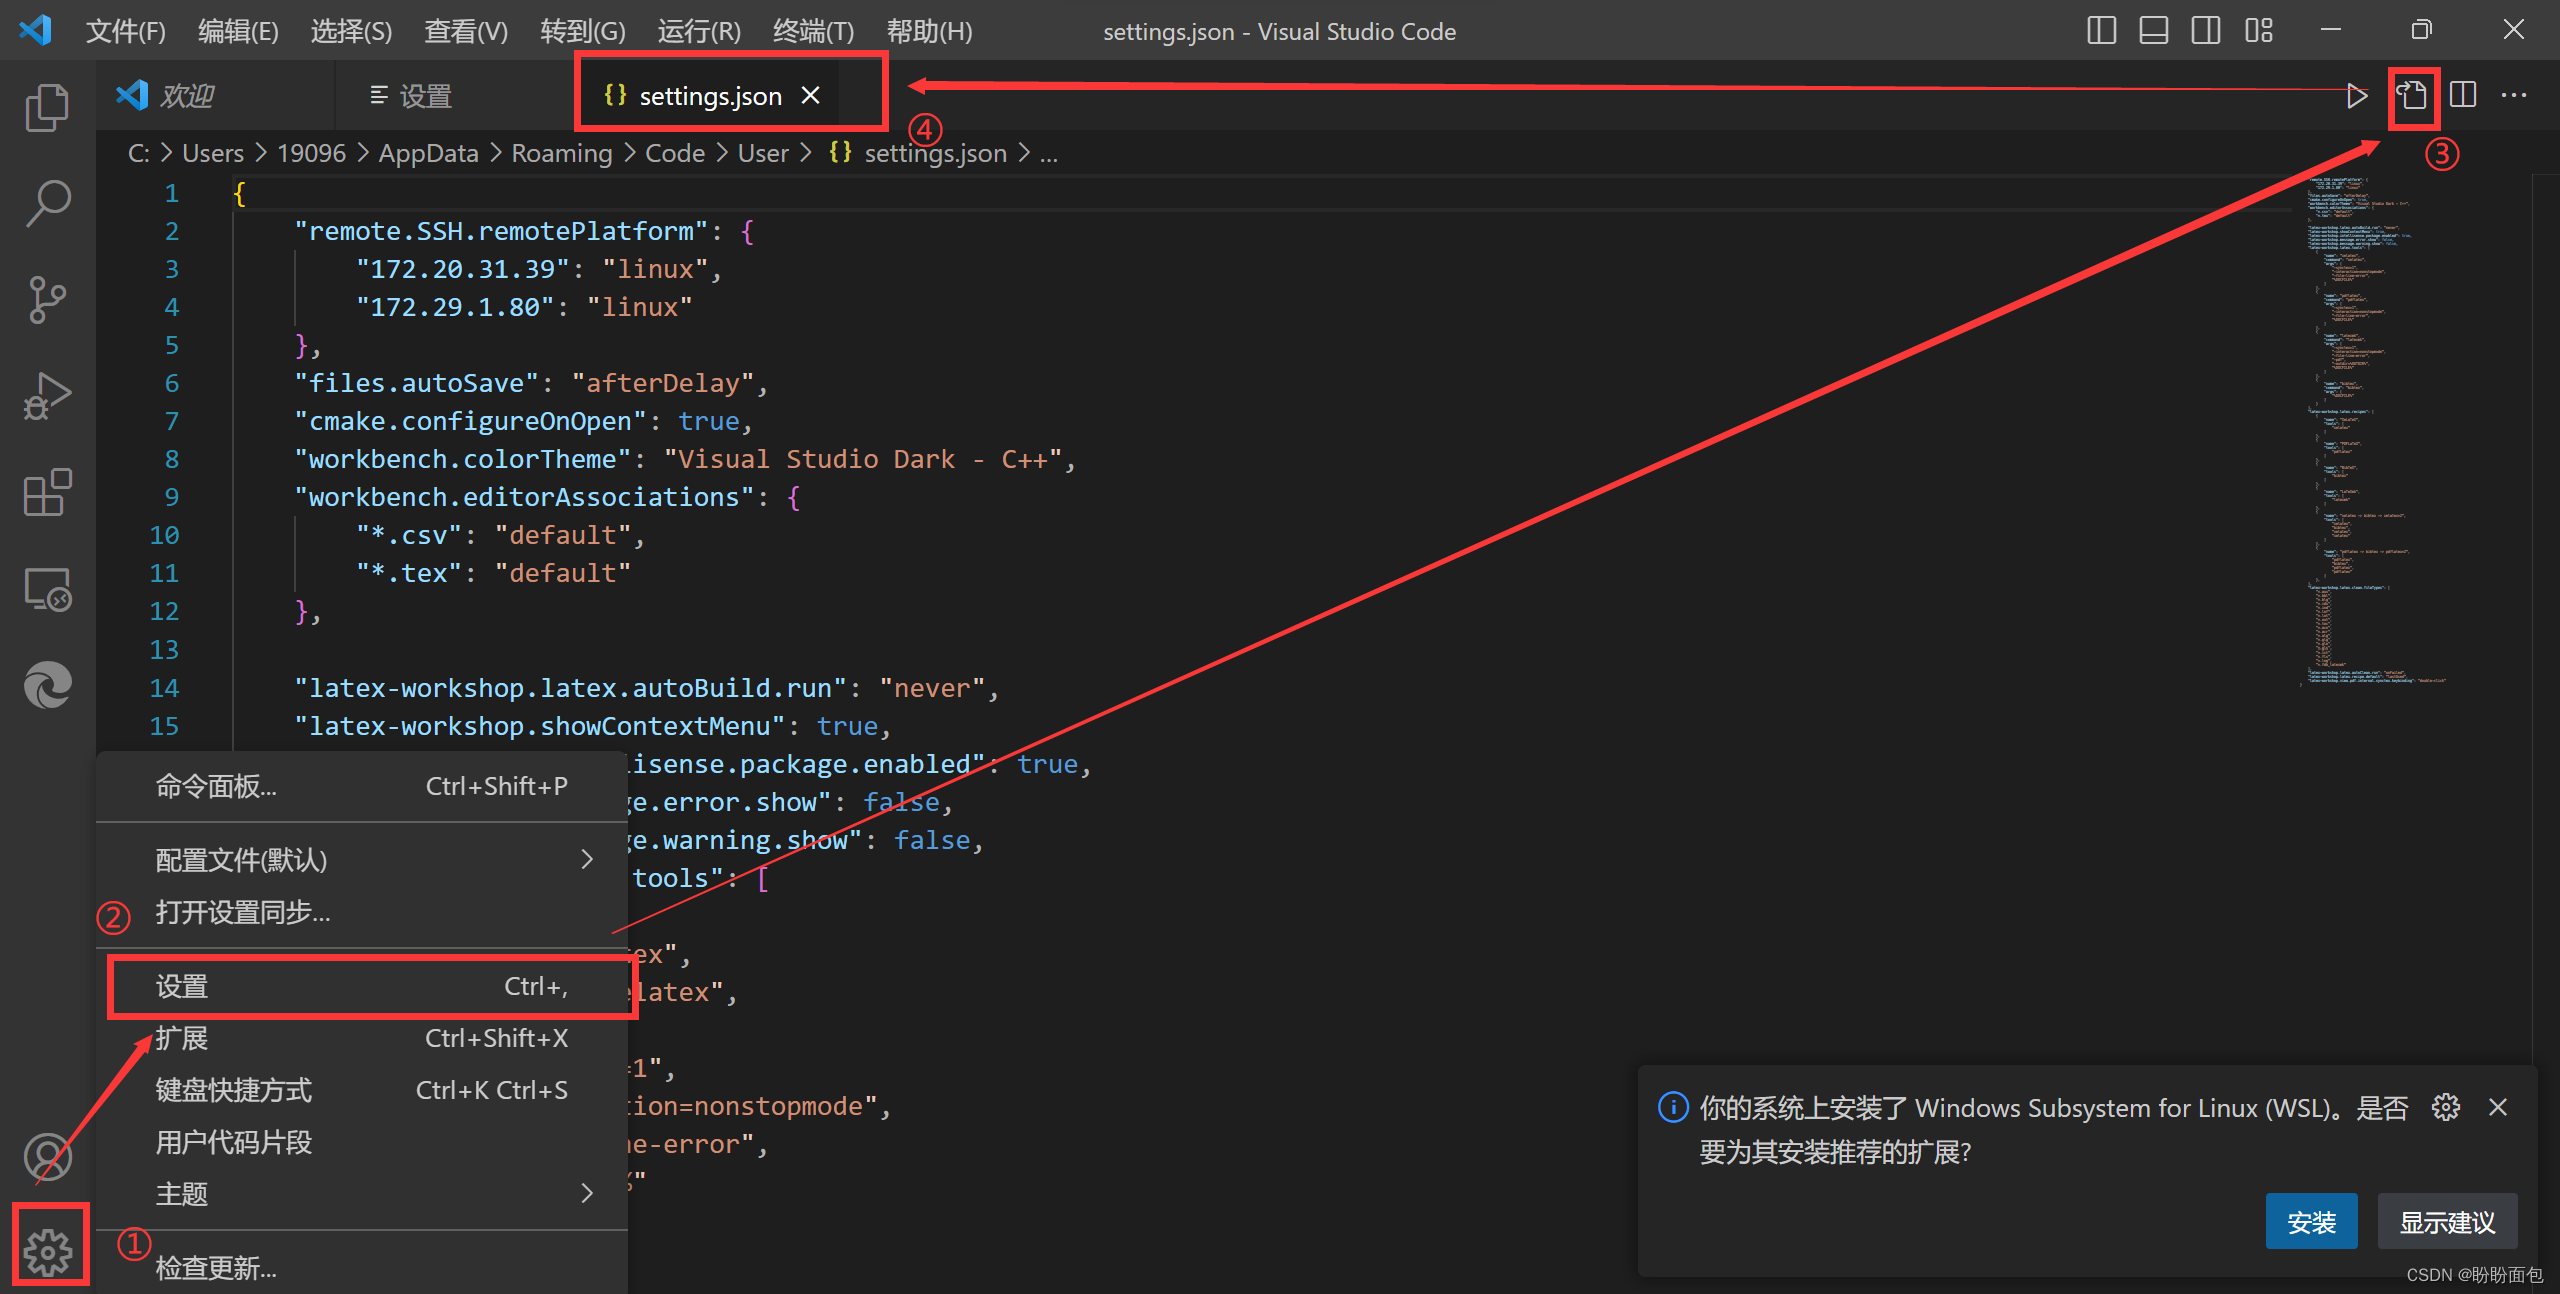 設定情報は以下の通りなので、settings.jsonに貼り付けるだけです。
"latex-workshop.latex.tools": [
    {
        "name": "pdflatex",
        "command": "pdflatex",
        "args": [
            "-synctex=1",
            "-interaction=nonstopmode",
            "-file-line-error",
            "%DOCFILE%"
        ]
    },
    {
        "name": "xelatex",
        "command": "xelatex",
        "args": [
            "-synctex=1",
            "-interaction=nonstopmode",
            "-file-line-error",
            "%DOCFILE%"
        ]
    },
    {
        "name": "bibtex",
        "command": "bibtex",
        "args": [
            "%DOCFILE%"
        ]
    }
],
"latex-workshop.latex.recipes": [
    {
        "name": "xelatex",
        "tools": [
            "xelatex"
        ],
    },
    {
        "name": "pdflatex",
        "tools": [
            "pdflatex"
        ]
    },
    {
        "name": "xe->bib->xe->xe",
        "tools": [
            "xelatex",
            "bibtex",
            "xelatex",
            "xelatex"
        ]
    },
    {
        "name": "pdf->bib->pdf->pdf",
        "tools": [
            "pdflatex",
            "bibtex",
            "pdflatex",
            "pdflatex"
        ]
    }
],
"latex-workshop.latex.clean.fileTypes": [
    "*.aux",
    "*.bbl",
    "*.blg",
    "*.idx",
    "*.ind",
    "*.lof",
    "*.lot",
    "*.out",
    "*.toc",
    "*.acn",
    "*.acr",
    "*.alg",
    "*.glg",
    "*.glo",
    "*.gls",
    "*.ist",
    "*.fls",
    "*.log",
    "*.fdb_latexmk"
],
//tex文件浏览器,可选项为"none" "browser" "tab" "external"
"latex-workshop.view.pdf.viewer": "tab",
//自动编译tex文件
"latex-workshop.latex.autoBuild.run": "onFileChange",
//显示内容菜单:(1)编译文件;(2)定位游标
"latex-workshop.showContextMenu": true,
//显示错误
"latex-workshop.message.error.show": false,
//显示警告
"latex-workshop.message.warning.show": false,
//从使用的包中自动补全命令和环境
"latex-workshop.intellisense.package.enabled": true,
//设置为never,为不清除辅助文件
"latex-workshop.latex.autoClean.run": "never",
//设置vscode编译tex文档时的默认编译链
"latex-workshop.latex.recipe.default": "lastUsed",
// 用于反向同步的内部查看器的键绑定。ctrl/cmd +点击(默认)或双击
"latex-workshop.view.pdf.internal.synctex.keybinding": "double-click",
構成情報のコマンドの詳細な説明については、次の 2 つの記事を参照してください。
Visual Studio Code (vscode) による LaTeX の構成 - Ali-loner の記事 - Zhihu
4. テスト
github から latex テンプレートをダウンロードしました: MathModel/2020 Latex template.zip at master · zhanwen/MathModel · GitHub
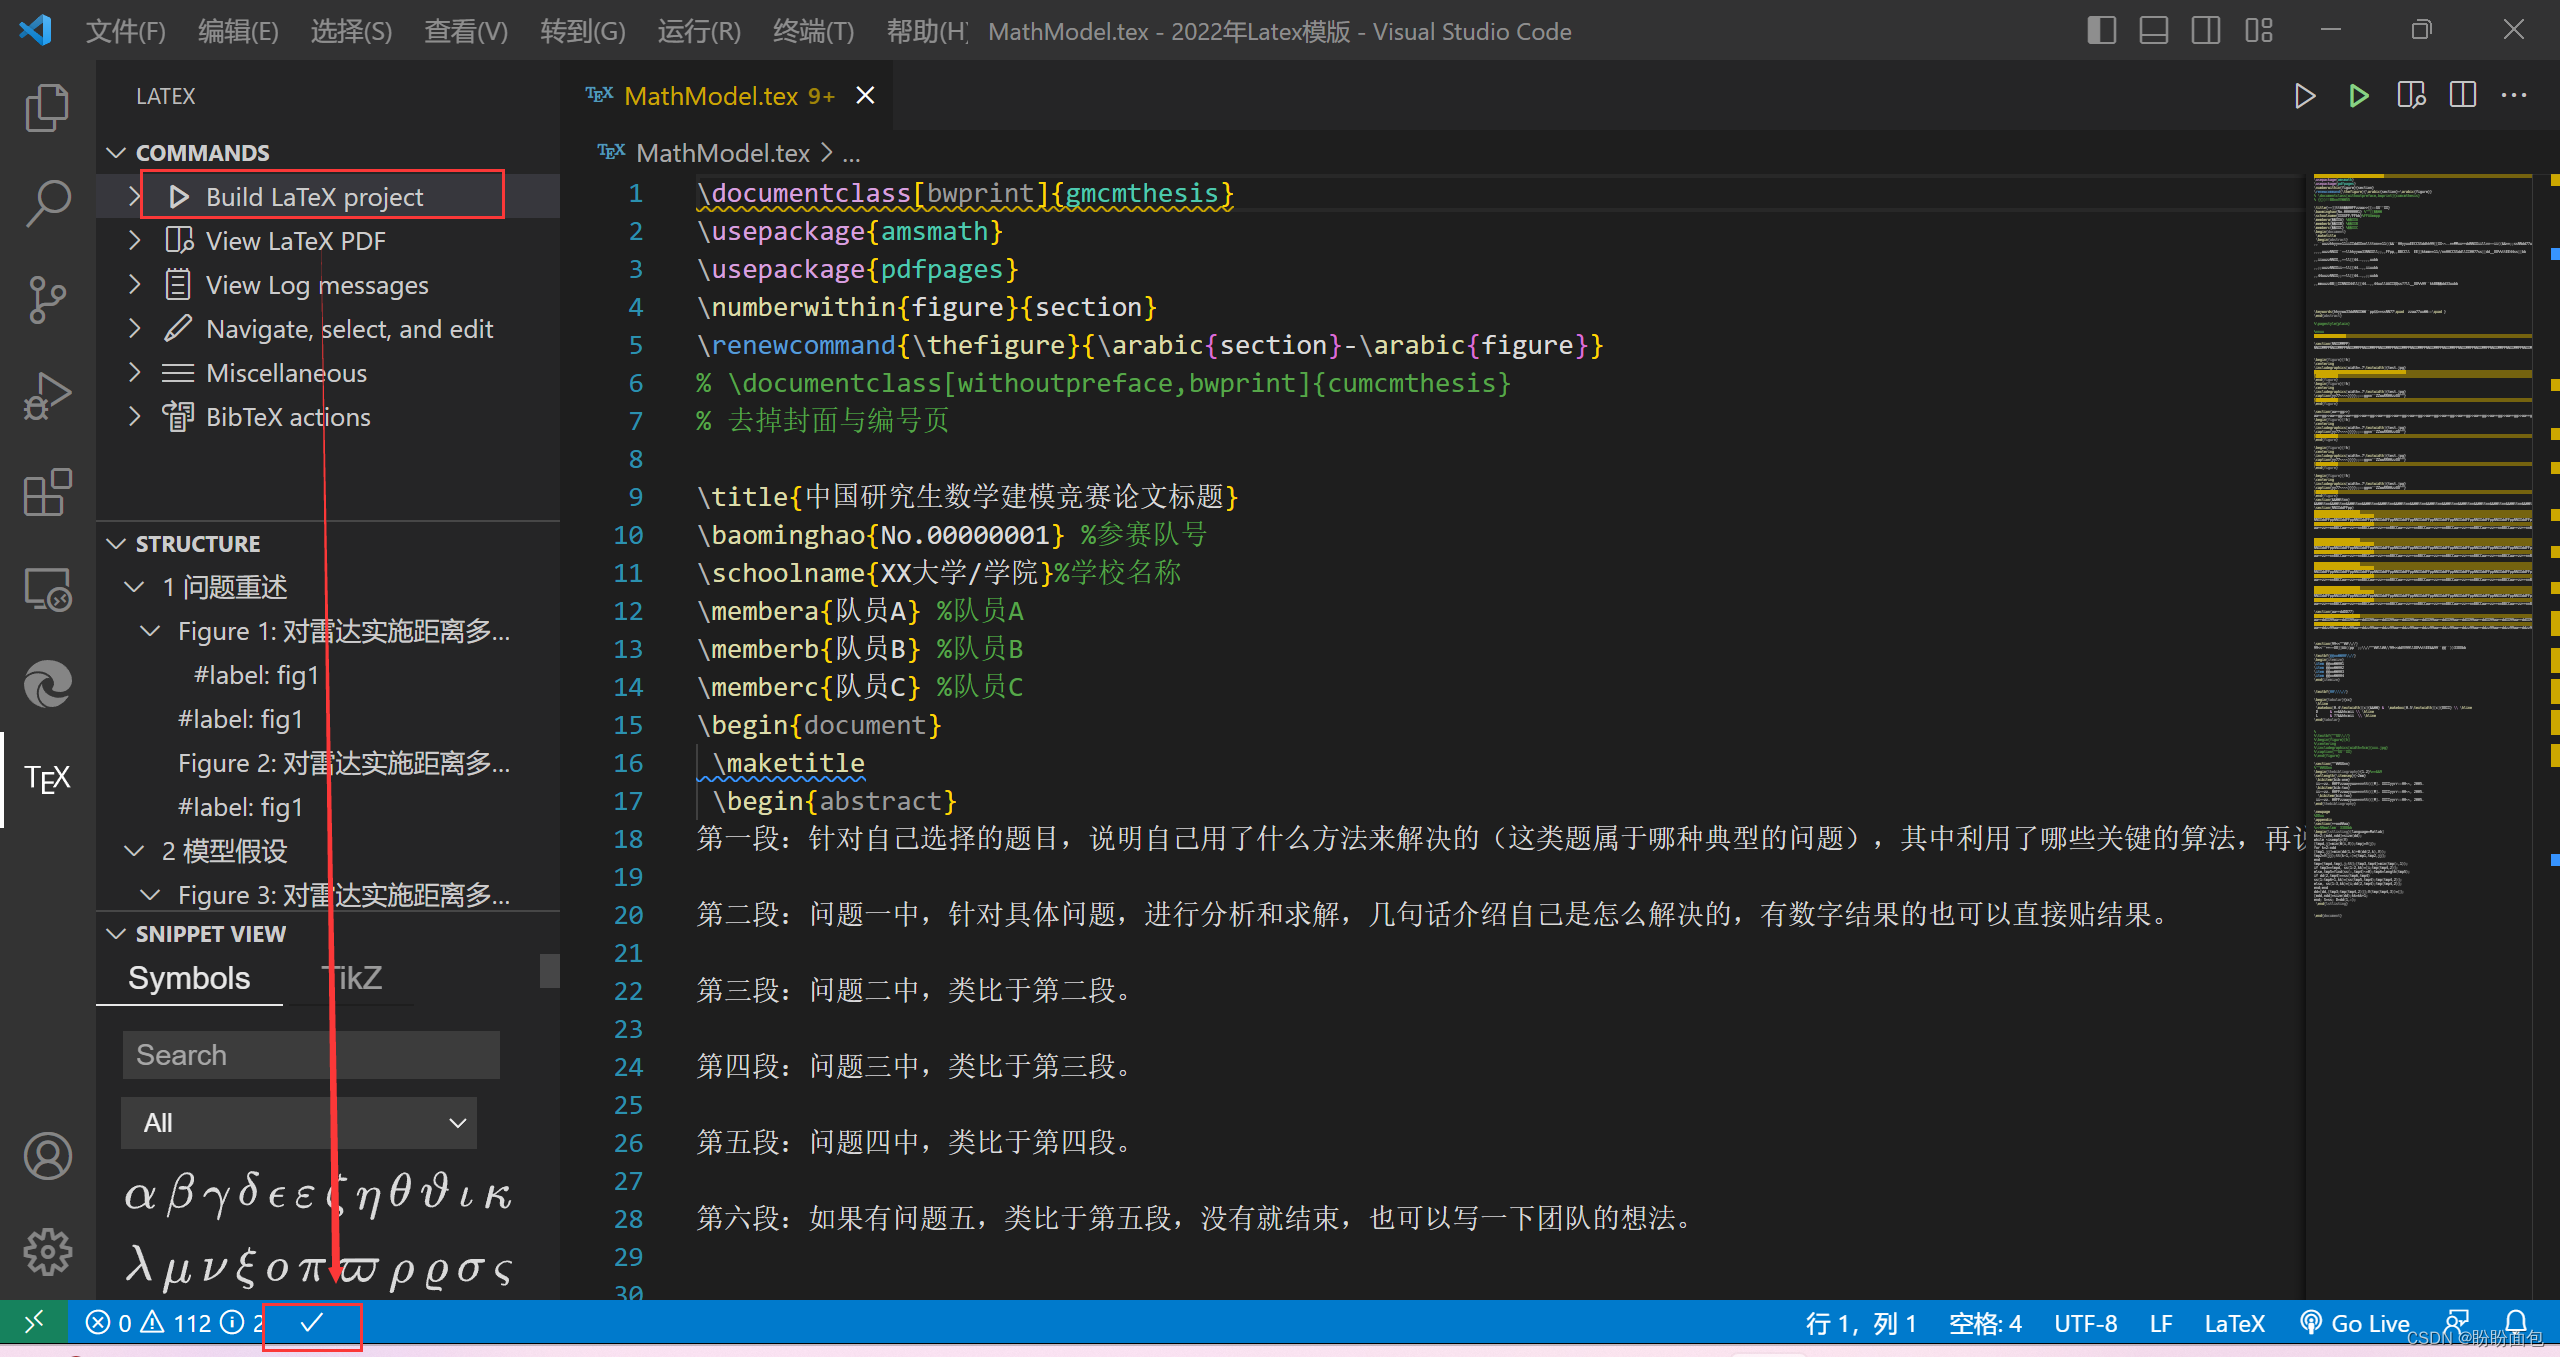
解凍後、vscode で開き、[Build Latex project] をクリックします。下部にチェック マークが表示されていれば、コンパイルが成功したことを意味します。それ以外の場合は、チェックでエラーが発生します。
コンパイルが成功したら、図に示すように、[latex PDF を表示] をクリックします。
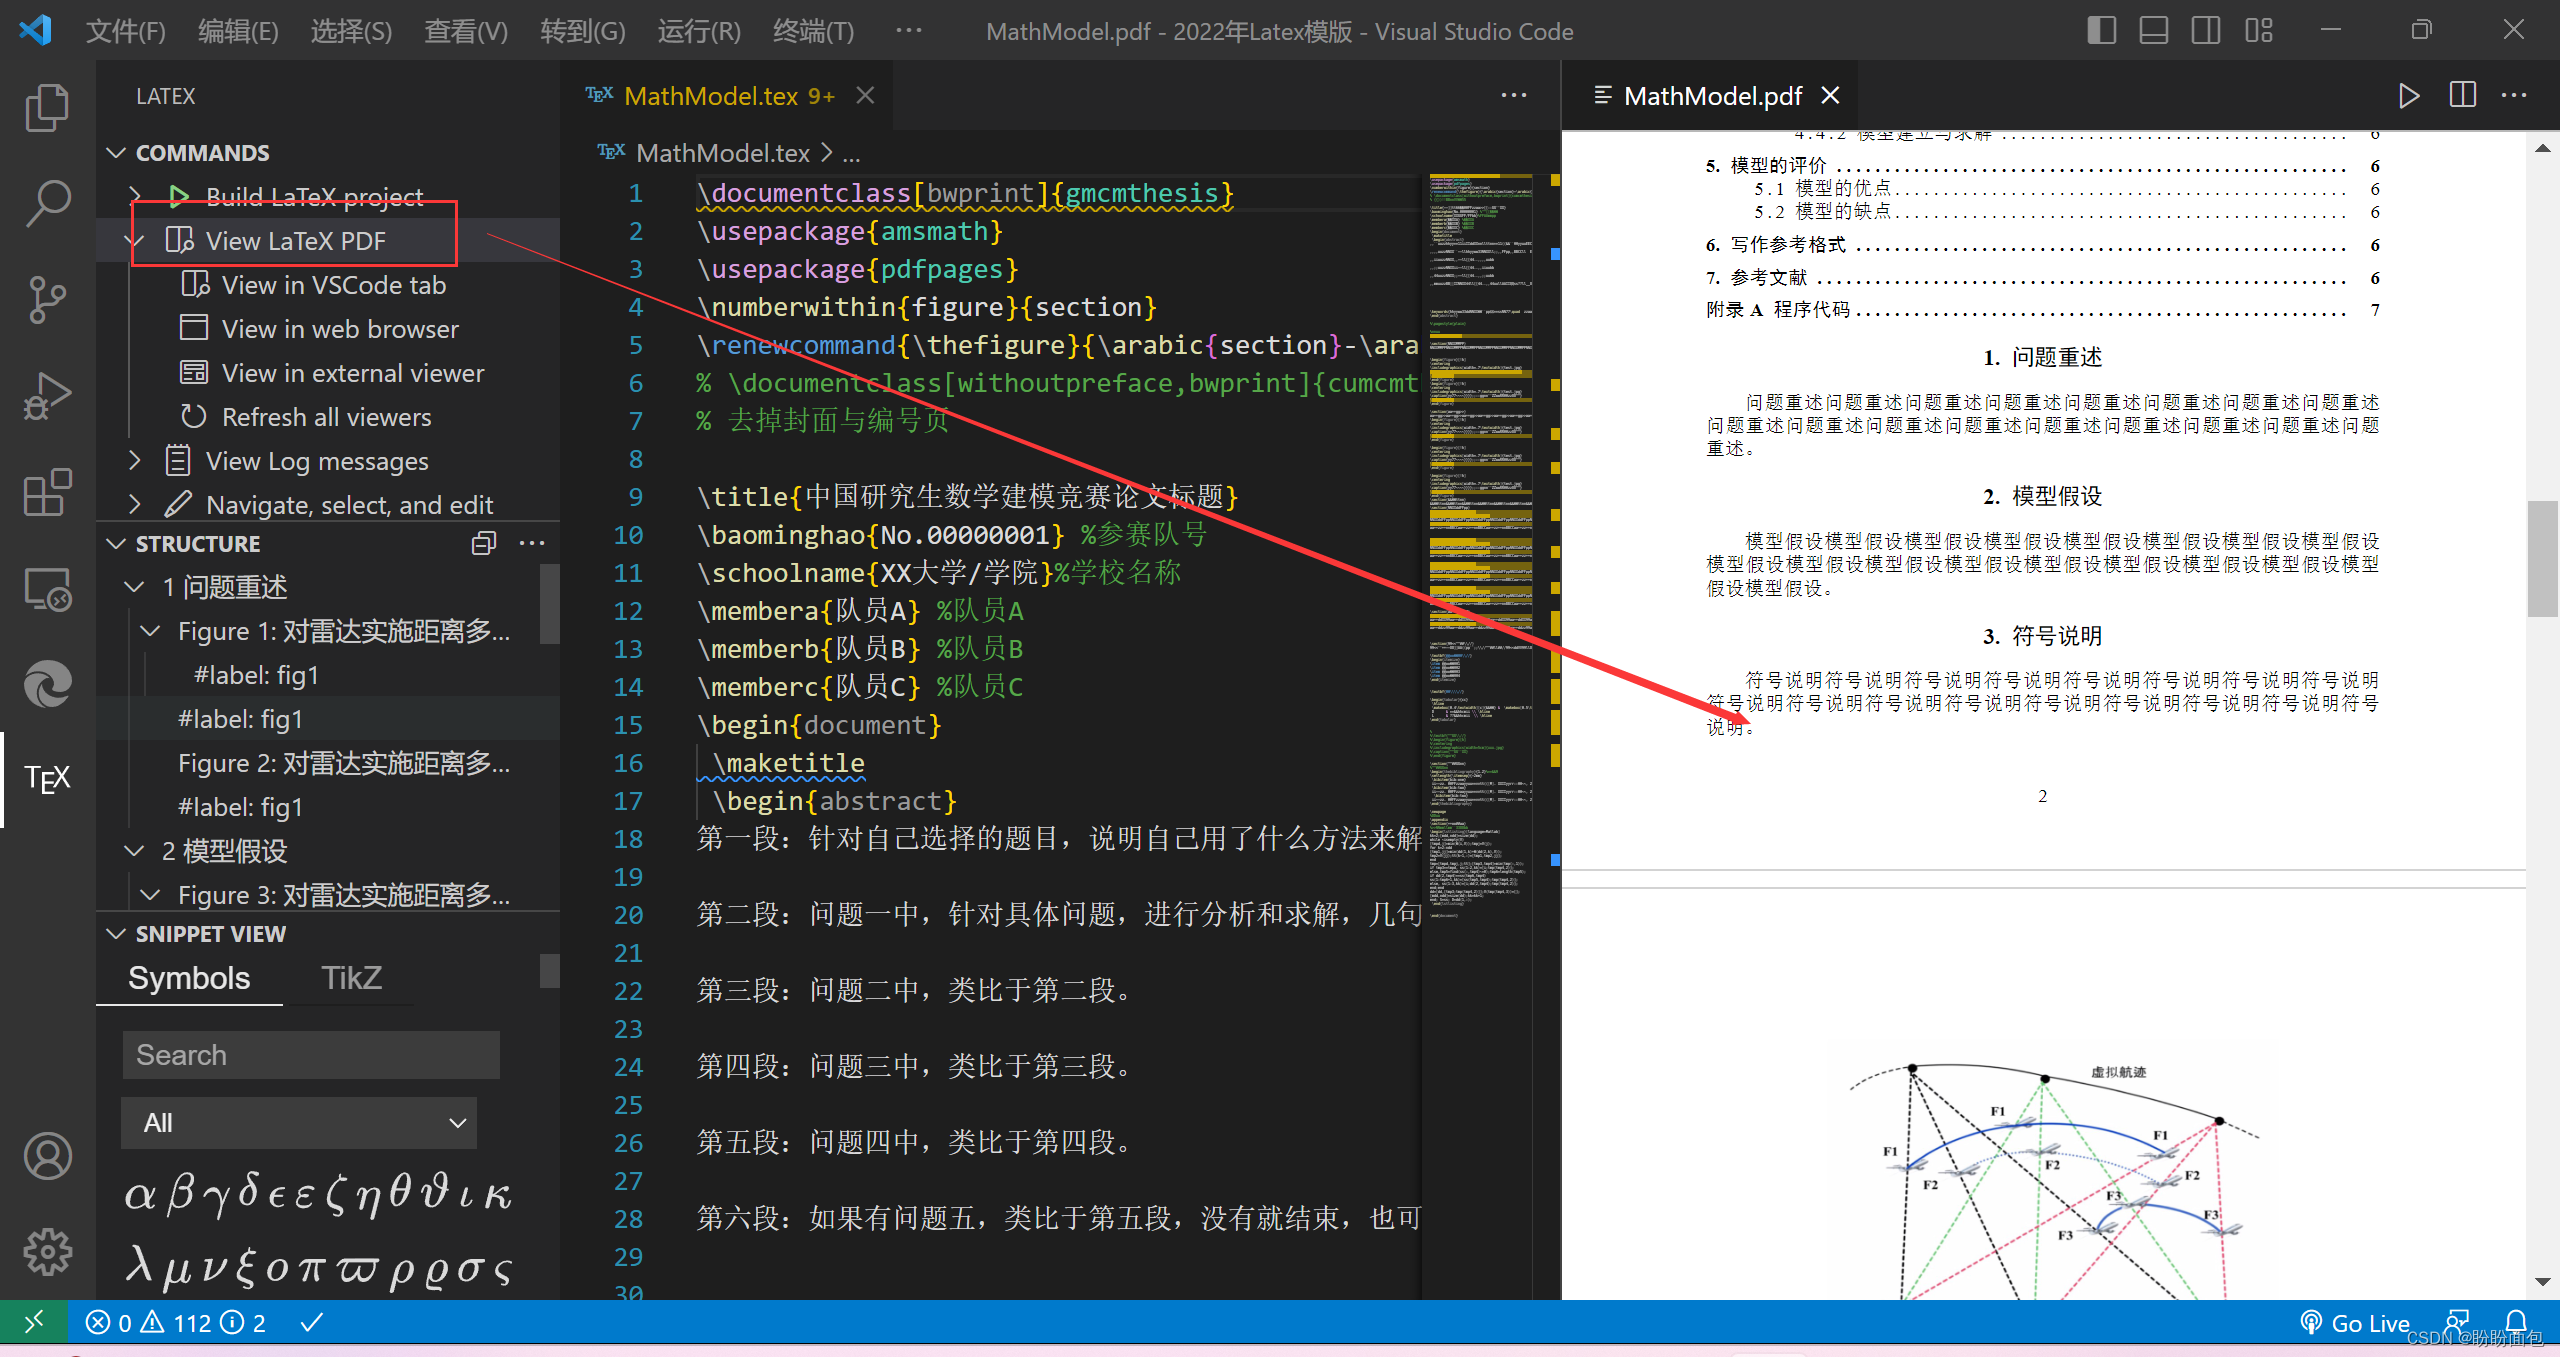
この時点で完了です~