PBR Eye Rendering
In order to achieve the real eye rendering effect, it is necessary to understand the structure and characteristics of the human eye. Then focus on the external performance points of the rendering structure.
1. The structure and main performance points of the eye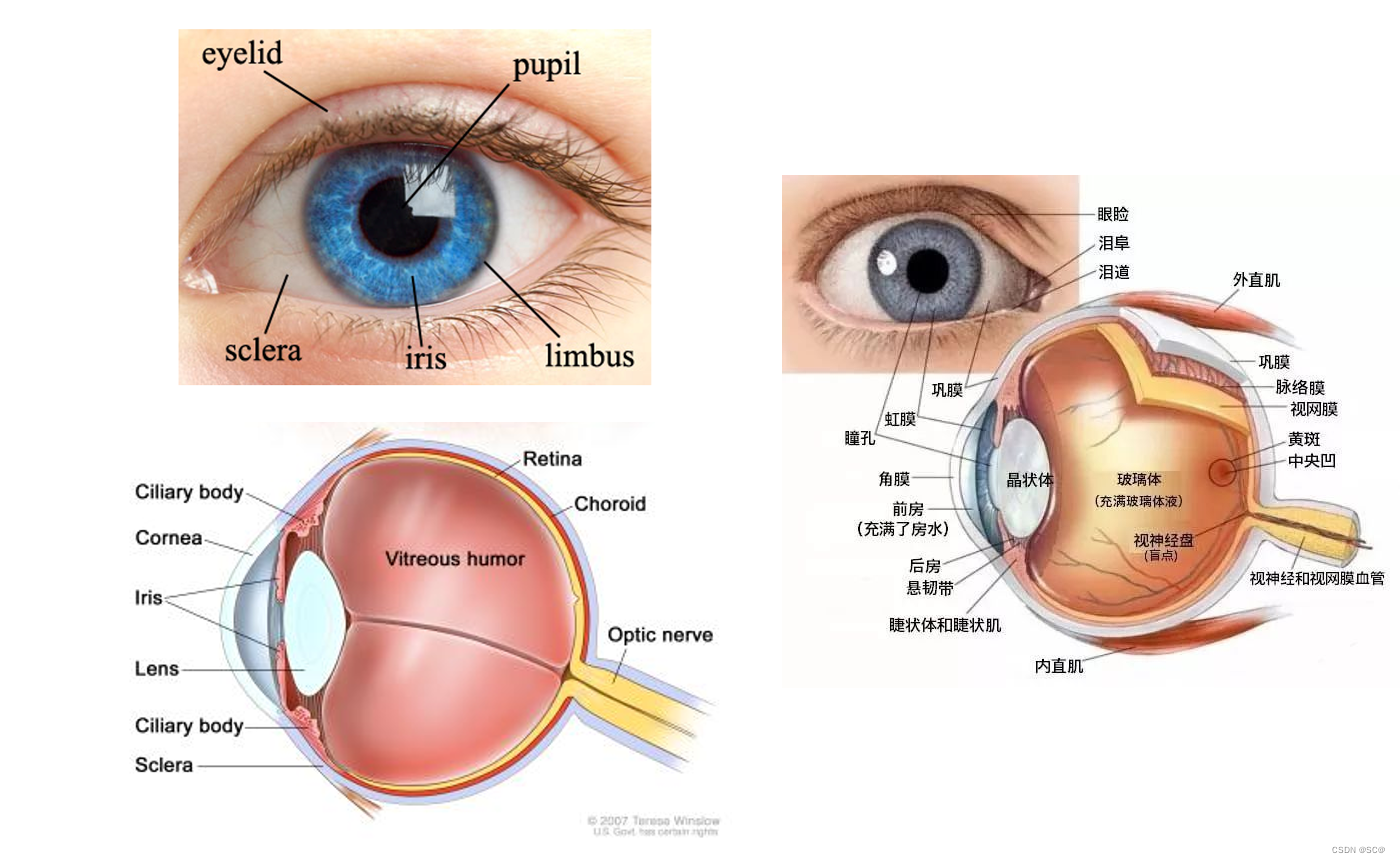
- The Sclera , the white part of the eye, also known as the "white of the eye," is an area that is usually very moist and has a small amount of tactile texture.
- The iris (Iris) , the colorful luan tail flower-shaped part, is the color ring around the center of the eye. The iris is a ring of muscle-like fibers that expand and contract to let more light in or close the pupil.
- The pupil is the black part of the iris. It is the hole through which light passes, which then enters the lens, where it refracts and then reaches the retina.
- **The limbus (Limbus)** is the dark ring that exists between the iris and the sclera. It is more dominant in some eyes than others and fades away when viewed from the side.
- The cornea is a transparent dome layer located above the iris. The space between the cornea and iris is filled with fluid (aqueous humor), which is what causes the iris to refract.
2. Production plan
- Sclera - You can adjust the size and texture of the sclera area
- Iris / Cornea - Cornea and Iris, the two parts overlap from the model point of view. This program calculates the Mask area of Iris/Cornea in the shader, which can flexibly adjust the radius of the cornea and iris
- Limbus - is also calculated in Shader, and the dark ring will gradually disappear when viewed from the side
- Pupil - pupil size can be adjusted freely
3. Rendering Features
-
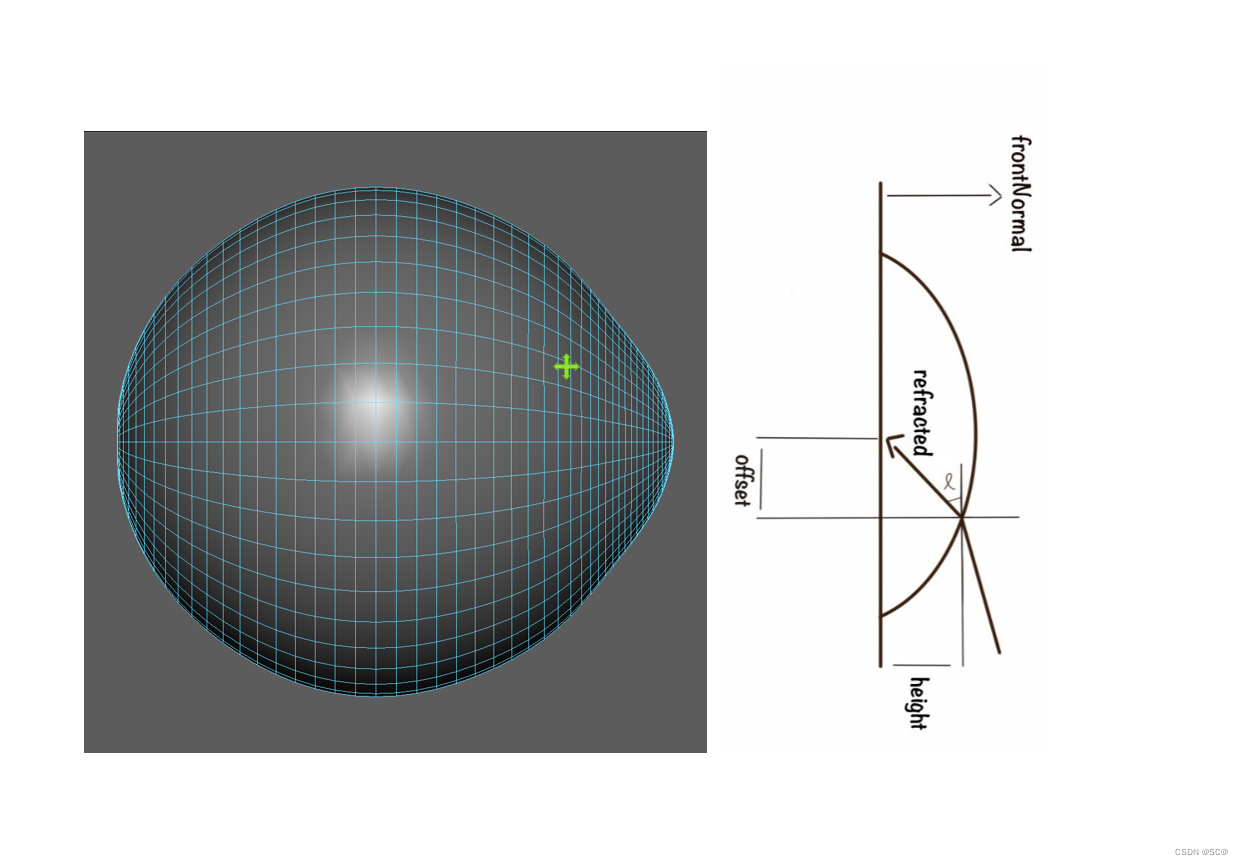
There are two methods of View Refraction
: 1: Parallax mapping. Two: Calculate the refraction based on the physical method. Here , the physical method is used to calculate the refraction . This method is better than the parallax mapping.
1/ Eyeball facing EyeDirection
2/ Diopter height (depth) and refractive index IOR
3/ Calculate the refraction direction of light, and then convert it into UV offset -
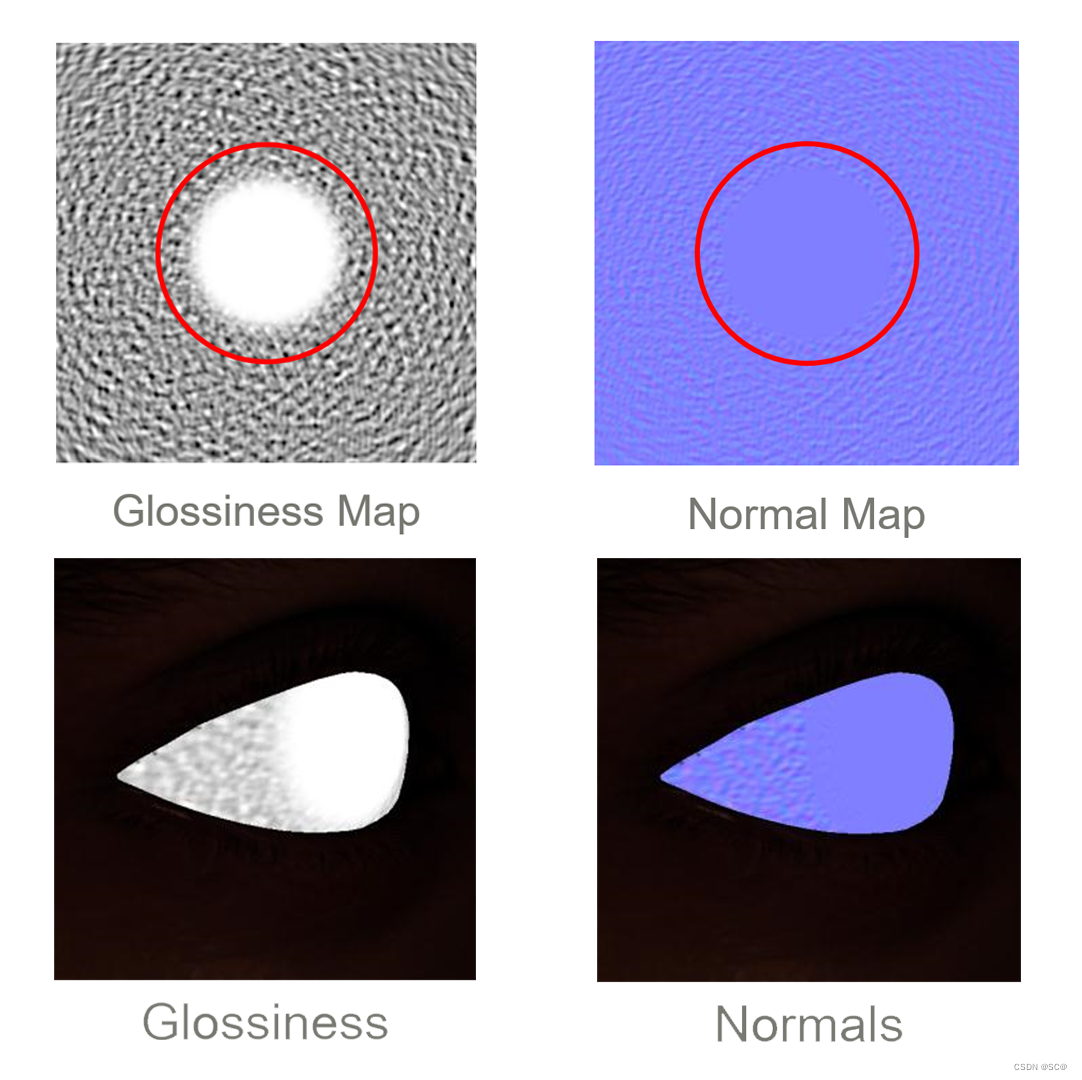
Reflections
Note that the reflections of the cornea Cornea and the sclera Sclera are different (smoothness and normal)
-
Light Refraction
There is a layer of liquid between the cornea and the iris, which will refract light and cause the caustic effect. -
Ambient Occlusion
4. Main points of the realization process
1. Mixing of two maps of sclera and iris
/ First calculate a Mask to mix sclera and iris, the calculation process is as follows:
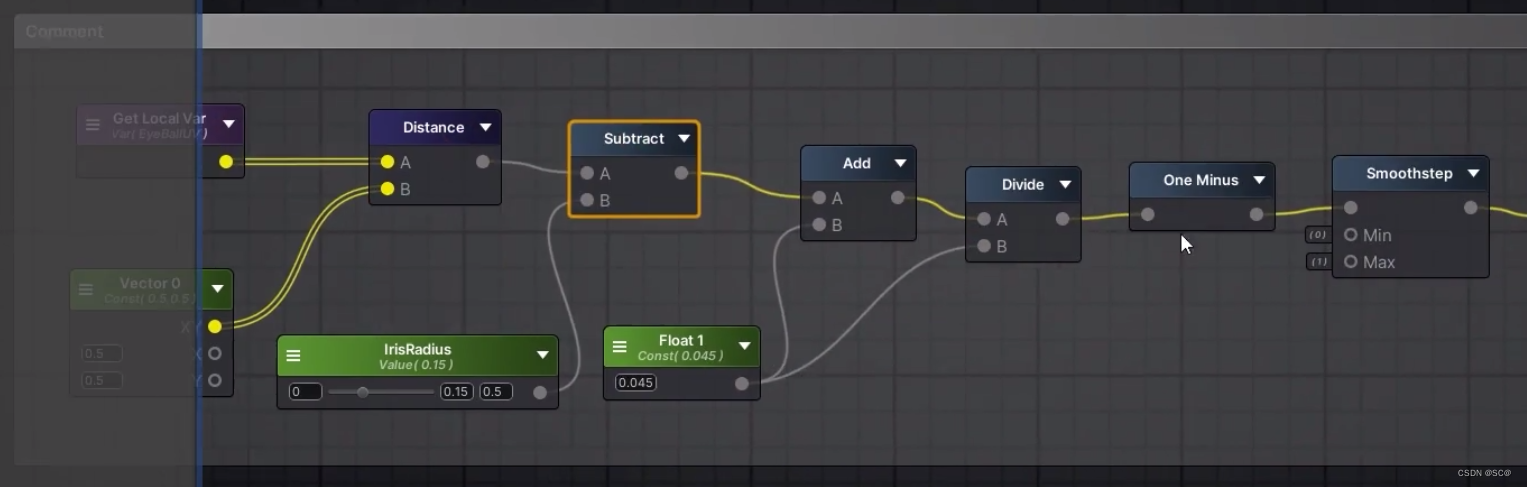
/ First, the uv expansion of the eyeball model is a circle whose center coordinates are (0.5, 0.5). This calculation The process is to obtain the uv coordinates of the model, calculate the distance between the uv coordinates of the point and the center uv, subtract the iris radius, and then divide this value by a small number before inverting. In order to get the correct Mask range, use The smoothstep function performs 0-1 mapping and obtains a Mask result.

/ Then use the calculated Mask result to interpolate and mix the sclera and iris to get a basic eyeball effect. 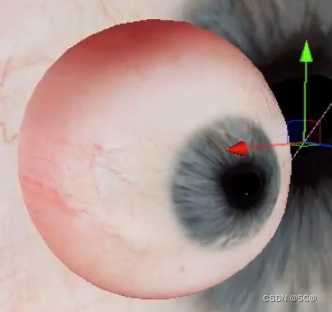
2. View Refraction (line of sight refraction)
/ As mentioned in the analysis of the previous rendering characteristics, if we want to realize the line of sight refraction effect of the iris behind the cornea and aqueous humor, we must first obtain several information, the direction of the eyeball, and the depth from the cornea to the iris (Height), the refractive index IOR of aqueous humor and air, so as to calculate the refraction direction of the line of sight, and finally use the refraction direction of the line of sight to offset the iris map sampling UV to realize the refraction effect of the iris.
/First calculate the iris depth (IrisDepth). The calculation method used here is to use a map of HDR information to record the depth from the point on the model to the middle patch. This texture is sampled twice, the first sample is normal, the second sample is the depth from the virtual iris position to the middle patch, and the two are subtracted to get the depth from the cornea to the virtual iris. Detailed calculation process: 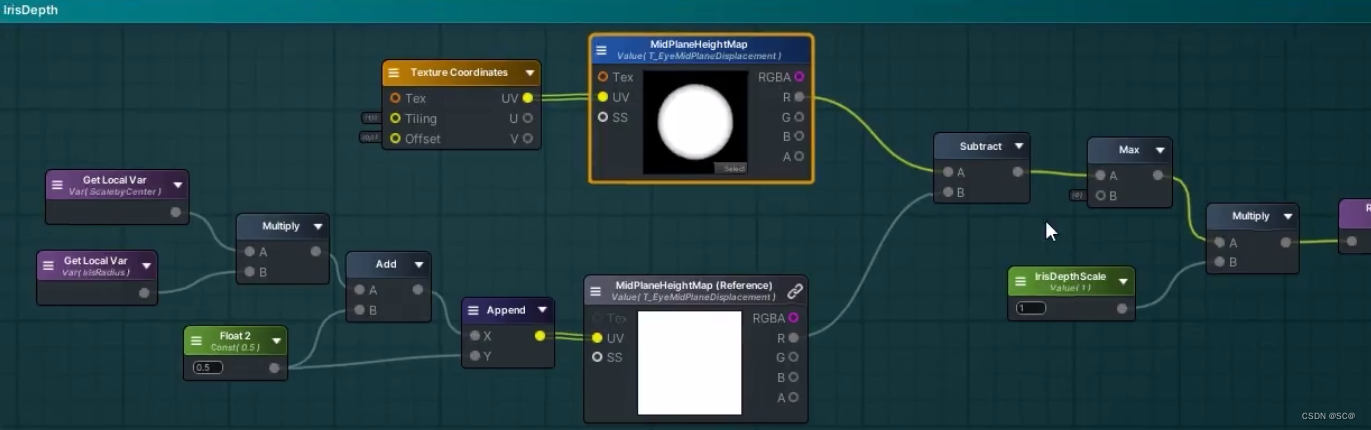
/Then to get the direction of the eyeball, here we use the method of baking a normal map to get it.
/Finally, use the uv value returned by the EyeRefraction function to sample the iris texture to obtain the final iris refraction effect in the simulated line of sight direction.
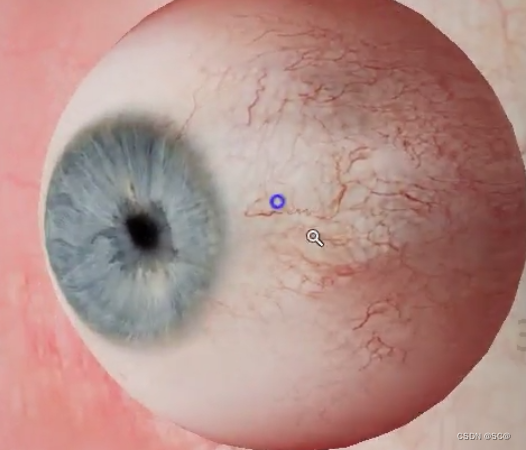
/As for the EyeRefraction function mentioned above, it encapsulates the calculation process from the incidence of the line of sight to the refraction, and then to the iris to generate uv offset. Its parameters are the information we obtained above.
3. The implementation of the limbus (Limbus)
is very similar to the calculation of the iris mask above. It also calculates a layer of mask, and then uses this layer of mask to achieve the mixing of the black edge and the iris, and then the mixed result is calculated through the above. The iris mask is mixed with the sclera, so that the basic structure of the eye is basically achieved.
4. Illumination calculation (parameter input of the illumination function)
/ The above steps realize the mixing of the BaseColor of different parts of the eyeball and the sight refraction of the iris. This part will be used as the BaseColor part of the input to the main illumination function.
/SpecularColor, Roughness, SurfaceNormal,
/CausticNormal caustic normal, used to simulate the iris caustic effect under light refraction.
/IrisNormal iris normal, used to simulate the uneven texture of the iris surface.