vueプロジェクトの開発
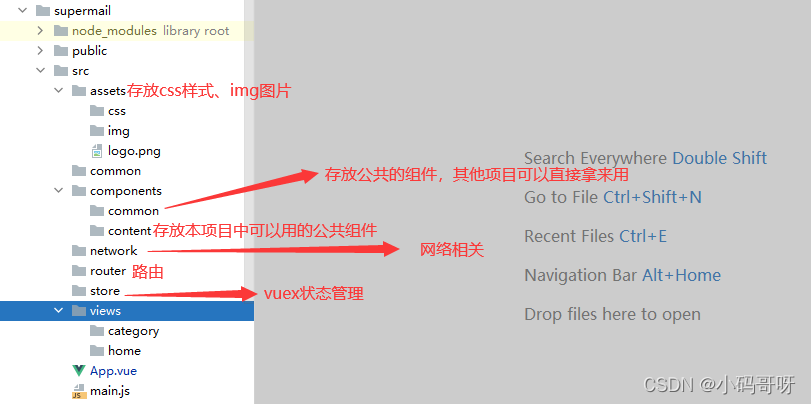
1.ディレクトリ構造を分割します
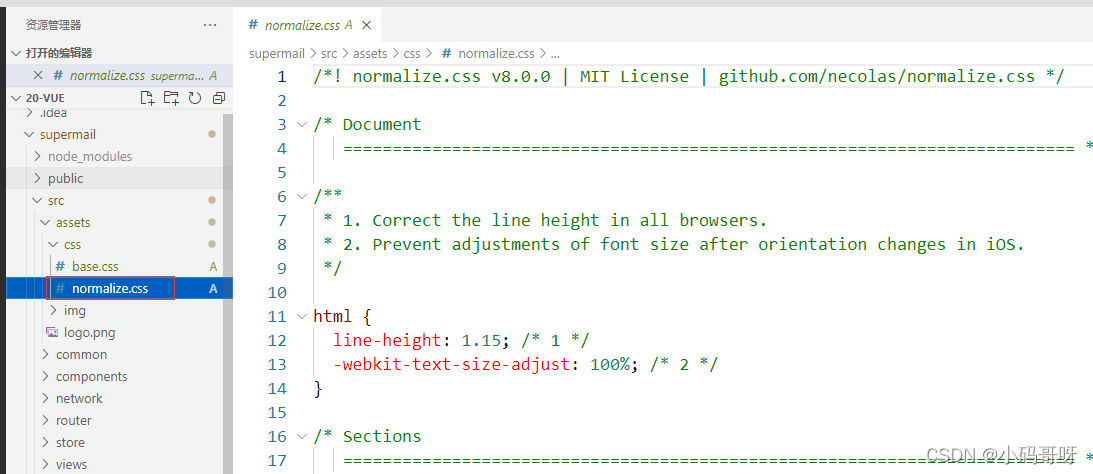
2.パブリックCSSを導入します
Normalize.cssは、さまざまなブラウザがWeb要素をより均一にレンダリングできるようにするカスタマイズ可能なCSSファイルです。
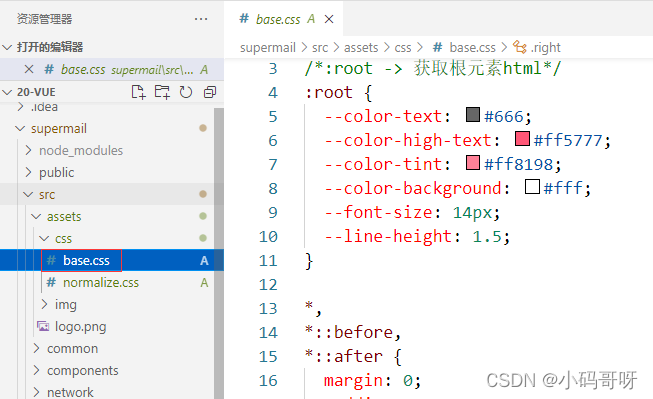
base.css
3.プロジェクト構造でのフォルダーエイリアスの構成
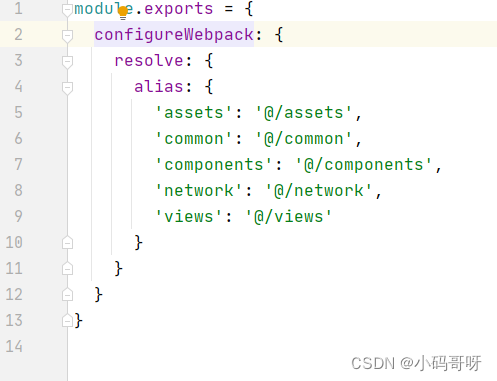
module.exports = {


  configureWebpack: {


    resolve: {


      alias: {


        'assets': '@/assets',
        'common': '@/common',
        'components': '@/components',
        'network': '@/network',
        'views': '@/views'
      }
    }
  }
}
4. editorconfigコード仕様の構成—
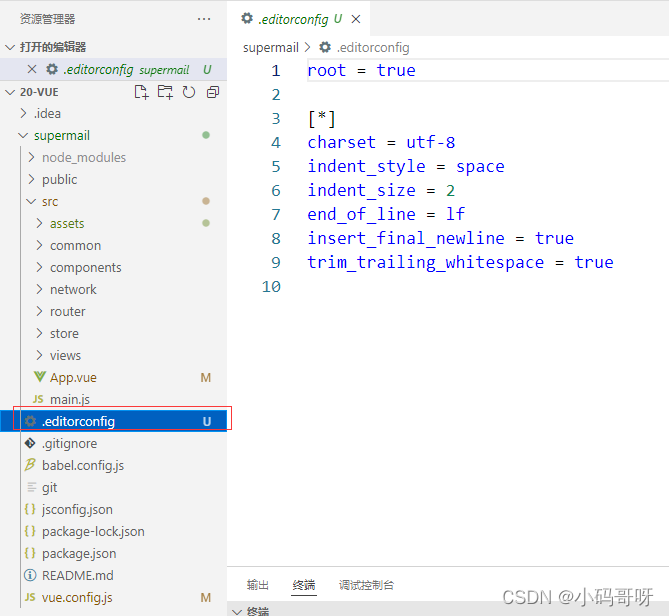
root = true

[*]
charset = utf-8
indent_style = space
indent_size = 2
end_of_line = lf
insert_final_newline = true
trim_trailing_whitespace = true
5.ルートを作成します
5.1、ルーティングをインストールします
npm install vue-router@3.0.2 --save
インストールの成功:

5.2、ルーティングを構成する
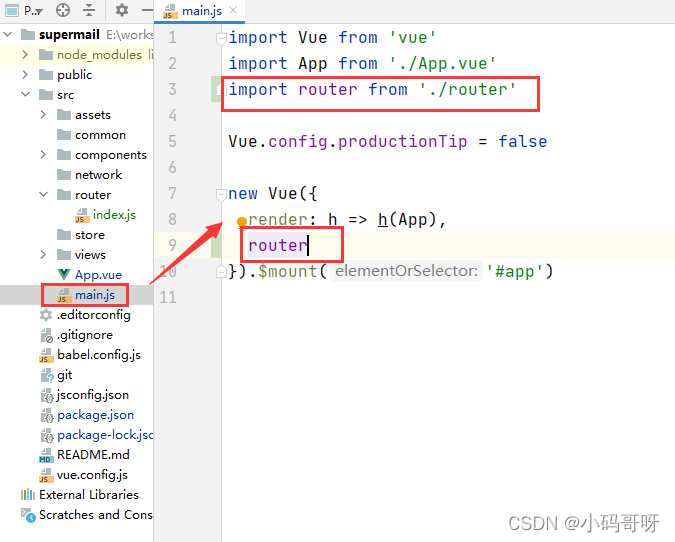
import Vue from 'vue'
import VueRouter from 'vue-router'
//懒加载
const Home = () => import('../views/home/Home')
const Category = () => import('../views/category/Category')
const Cart = () => import('../views/cart/Cart')
const Profile = () => import('../views/profile/Profile')
const Detail = () => import('../views/detail/Detail')
//1、安装插件
Vue.use(VueRouter)
//2、创建router
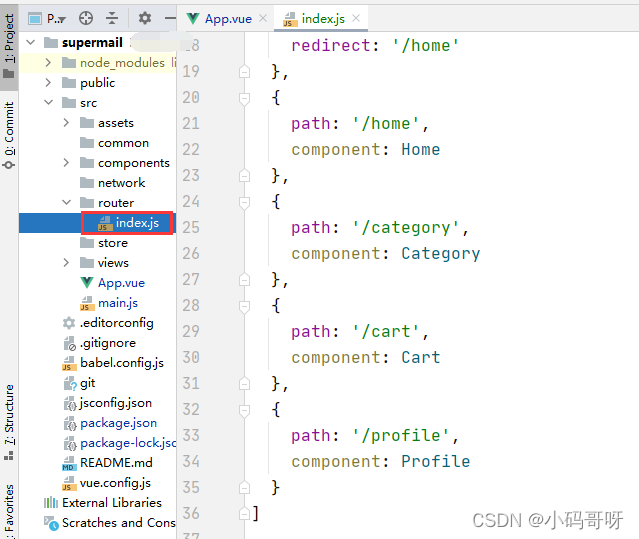
const routes = [
{
path: '',
redirect: '/home'
},
{
path: '/home',
component: Home
},
{
path: '/category',
component: Category
},
{
path: '/cart',
component: Cart
},
{
path: '/profile',
component: Profile
}
]
const router = new VueRouter({
routers,
mode: 'history'
})
//3、导出router
export default router
5.3、main.jsページでルーティングを紹介
5.4.APP.vueページはルーティングを使用します
<template>
  <div id="app">
    <router-view></router-view>
    <main-tab-bar></main-tab-bar>
  </div>
</template>