プログラミングが好きなあなたのように!
SpringBoot実用的なコースは学習https://edu.csdn.net/course/detail/31433
SpringCloud入門コースを学びhttps://edu.csdn.net/course/detail/31451を
序文
この記事では、SpringBootケースを開発し、MyBatis-Plus、SpringMVC、Thymeleaf、およびインターセプターを統合したSpringBootのアプリケーション開発スキルを習得します。
ケース紹介
ケースには、
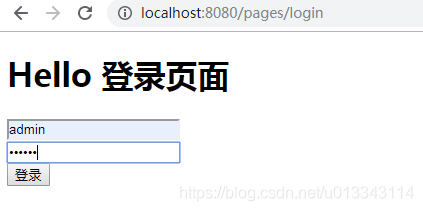
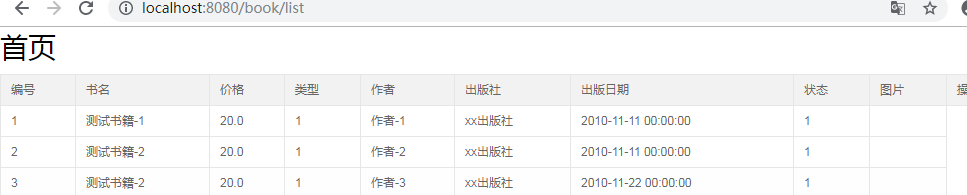
ログインページとブックリストの表示の2つの機能が含まれます。ログインページの
ログインに失敗し、ブックリストを表示できませんでした
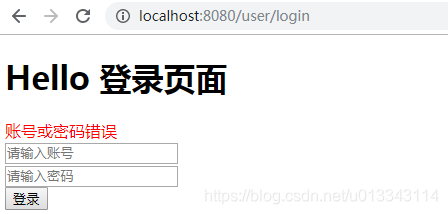
。
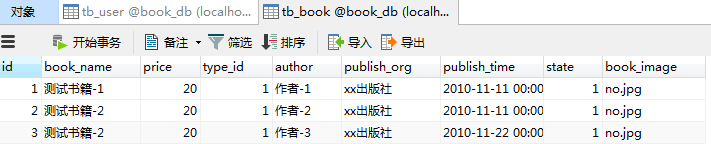
データベースには、
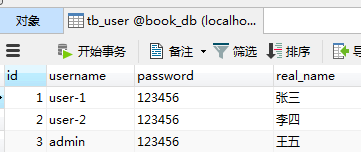
tb_userユーザーテーブル
tb_bookブックテーブルの2つのテーブルがあります。
MyBatis-Plusを統合する
MyBatis-Plusは、MyBatisの拡張フレームワークであり、一般的なマッパーおよびサービスインターフェイスを提供します。
依存関係をインポートします。
<dependency>
     <groupId>org.projectlombok</groupId>
     <artifactId>lombok</artifactId>
     <optional>true</optional>
 </dependency>

 <dependency>
     <groupId>com.baomidou</groupId>
     <artifactId>mybatis-plus-boot-starter</artifactId>
     <version>3.3.2</version>
 </dependency>

 <dependency>
     <groupId>mysql</groupId>
     <artifactId>mysql-connector-java</artifactId>
     <scope>runtime</scope>
 </dependency>
構成ファイル
spring:
  datasource:
    driver-class-name: com.mysql.cj.jdbc.Driver
    url: jdbc:mysql://localhost:3306/book_db?useUnicode=true&characterEncoding=UTF-8&serverTimezone=UTC
    username: root
    password: 123456
  resources:
    static-locations: classpath:static/
mybatis-plus:
  mapper-locations: classpath:mappers/*.xml
  type-aliases-package: com.blb.day12_spring_boot.entity
ユーザーエンティティクラス
@Data
@TableName("tb_user")
public class User implements Serializable {

    @TableId(type = IdType.AUTO)
    private Integer id;
    private String username;
    private String password;
    private String realName;
}
本の実体
@Data
@TableName("tb_book")
public class Book {

    @TableId(type = IdType.AUTO)
    private Integer id;
    private String  bookName;
    private float price;
    private Integer typeId;
    private String author;
    private String publishOrg;
    private String publishTime;
    private Integer state;
    private String bookImage;
}
ユーザーマッパーインターフェイス
public interface UserMapper extends BaseMapper<User> {
}
ブックマッパーインターフェイス
public interface BookMapper extends BaseMapper<Book> {
}
ユーザーサービスインターフェース
public interface UserService extends IService<User> {
}
ブックサービスインターフェース
public interface BookService extends IService<Book>{
}
ユーザーサービスインターフェイス実装クラス
@Service
public class BookServiceImpl extends ServiceImpl<BookMapper, Book> implements BookService {
}
ブックサービスインターフェイス実装クラス
@Service
public class UserServiceImpl extends ServiceImpl<UserMapper, User> implements UserService {
}
SpringMVCを統合する
依存関係をインポートする
 <dependency>
     <groupId>org.springframework.boot</groupId>
     <artifactId>spring-boot-starter-web</artifactId>
 </dependency>
ページジャンプ用コントローラー
/**
 * 页面跳转控制器
 * 例: http://localhost:8080/pages/login 跳转 login页面
 */
@Controller
@RequestMapping("pages")
public class PageController {

    @RequestMapping("{page}")
    public String toPage(@PathVariable("page")String page){
        return page;
    }
}
ユーザーログインコントローラー
/**
 * 用户登录控制器
 */
@Controller
@RequestMapping("user")
public class UserController {

    @Autowired
    private UserService userService;

    @PostMapping("login")
    public String login(Model model, HttpSession session, String username, String password){
        //使用MyBatis-Plus的通用service查询账号和密码
        User user = userService.getOne(new QueryWrapper<User>().eq("username", username)
                .eq("password", password));
        //查询失败,提示错误
        if(user == null){
            model.addAttribute("msg","账号或密码错误");
            return "login";
        }
        //查询成功,保存user对象,跳转书籍列表页面
        session.setAttribute("user",user);
        return "redirect:/book/list";
    }
}
ブックコントローラー
/**
 * 书籍控制器
 */
@Controller
@RequestMapping("book")
public class BookController {

    @Autowired
    private BookService bookService;

    @RequestMapping("list")
    public String list(Model model){
        //查询所有书籍,跳转到index.html
        List<Book> list = bookService.list();
        model.addAttribute("books",list);
        return "index";
    }
}
Thymeleafを統合する
SpringBootはデフォルトでJSPをサポートしていません。JSPよりも優れたテンプレートエンジンテクノロジーをサポートしています
。ThymeleafThymeleafの利点:
-
動的環境と静的環境の組み合わせ:Thymeleafは、ネットワーク環境と非ネットワーク環境の両方で実行できます。つまり、アーティストはブラウザーでページの静的効果を表示でき、プログラマーはデータを使用して動的ページ効果を表示できます。サーバー上。これは、htmlプロトタイプをサポートし、htmlタグに属性を追加して、テンプレートとデータの表示を実現するためです。ブラウザがhtmlを解釈するとき、未定義のタグ属性を無視するため、thymeleafテンプレートを静的に実行できます。データがページに返されると、Thymeleafタグが静的コンテンツを動的に置き換えて、ページを動的に表示します。
-
箱から出して:標準と春の標準の2つの方言を提供し、テンプレートを直接適用してJSTLとOGNLの式効果を実現し、毎日のテンプレート、jstl、およびラベル変更の問題を回避します。同時に、開発者はカスタム方言を拡張および作成することもできます。
-
マルチダイアレクトのサポート:Thymeleafは、Spring標準ダイアレクトと、SpringMVCと完全に統合されたオプションのモジュールを提供します。これにより、フォームバインディング、属性エディター、国際化、およびその他の機能をすばやく実装できます。
-
SpringBootと完全に統合されたSpringBootは、Thymeleafのデフォルト構成を提供し、Thymeleafのビューリゾルバーを設定します。jspで以前と同じようにThymeleafを操作できます。コードにほとんど違いはありません。つまり、テンプレートの構文に違いがあります。
依存関係をインポートする
<dependency>
    <groupId>org.springframework.boot</groupId>
    <artifactId>spring-boot-starter-thymeleaf</artifactId>
</dependency>
resources / templatesディレクトリに新しいHTMLファイルを作成します。
ページのhtmlタグに名前空間を追加します:xmlns:th =“ http://www.thymeleaf.org”
login.html
<!DOCTYPE html>
<html lang="en" xmlns:th="http://www.thymeleaf.org">
<head>
    <meta charset="UTF-8">
    <title>登录页面</title>
</head>
<body>
    <h1>Hello 登录页面</h1>
    <span th:text="${msg}" style="color:red"></span>
    <form action="/user/login" method="post">
        <input type="text" name="username" placeholder="请输入账号"><br>
        <input type="password" name="password" placeholder="请输入密码"><br>
        <input type="submit" value="登录">
    </form>
</body>
</html>
index.html
<!DOCTYPE html>
<html lang="en" xmlns:th="http://www.thymeleaf.org">
<head>
    <meta charset="UTF-8">
    <title>首页</title>
</head>
<body>
    <h1>首页</h1>
    <table >
        <thead>
        <tr>
            <th>编号</th>
            <th>书名</th>
            <th>价格</th>
            <th>类型</th>
            <th>作者</th>
            <th>出版社</th>
            <th>出版日期</th>
            <th>状态</th>
            <th>操作</th>
        </tr>
        </thead>
        <tbody>
            <tr th:each="book : ${books}">
                <td th:text="${book.id}"></td>
                <td th:text="${book.bookName}"></td>
                <td th:text="${book.price}"></td>
                <td th:text="${book.typeId}"></td>
                <td th:text="${book.author}"></td>
                <td th:text="${book.publishOrg}"></td>
                <td th:text="${book.publishTime}"></td>
                <td th:text="${book.state}"></td>
                <td> </td>
            </tr>
        </tbody>
    </table>
</body>
</html>
このページでは、2つのThymeleafタグが使用されています。
- th:textは
テキストコンテンツをバインドするために使用されます。式$ {xx}は、バックグラウンドで渡されるデータの名前をバインドするELに似ています。 - th:eachは
、コレクションコンテンツをループするために使用され、形式は次のとおりです。変数名:$ {コレクション名}
統合インターセプター
ログイン機能は、そうでない場合は、ユーザが直接検証することなく、本のリストにアクセスすることができ、SpringMVCインターセプタを追加する必要があります。
アイデアは次のとおりです。
- ログインに成功したら、ユーザーオブジェクトをセッションに保存します
- インターセプターはユーザー要求をインターセプトします。セッションにユーザーオブジェクトがない場合は、強制的にログインします。
- ユーザーオブジェクトがある場合はログインします
public class MyLoginInterceptor implements HandlerInterceptor {

    @Override
    public boolean preHandle(HttpServletRequest request, HttpServletResponse response, Object handler) throws Exception {
        //获得session的user对象
        User user = (User) request.getSession().getAttribute("user");
        if(user == null){
            //没有登录,拦截,强制登录
            response.sendRedirect("/pages/login");
            return false;
        }
        //登录,就放行
        return true;
    }
}
インターセプターを構成する
/**
 * 拦截器配置
 */
@Configuration
public class InterceptorConfig extends WebMvcConfigurationSupport {

    @Override
    protected void addInterceptors(InterceptorRegistry registry) {
        //添加拦截器
        registry.addInterceptor(new MyLoginInterceptor())
                //配置拦截路径 所有
                .addPathPatterns("/**")
                //配置不拦截路径
                .excludePathPatterns("/**/login","/**/*.css","/**/*.js");
        super.addInterceptors(registry);
    }

    @Override
    public void addResourceHandlers(ResourceHandlerRegistry registry) {
        //重写这个方法,映射静态资源文件
        registry.addResourceHandler("/**")
                .addResourceLocations("classpath:/resources/")
                .addResourceLocations("classpath:/static/")
                .addResourceLocations("classpath:/public/");
        super.addResourceHandlers(registry);
    }
}
終わり
他のJavaの知識を学ぶ必要がある場合は、ここでJavaの概要に関する非常に詳細な知識を調べてください。