序文:
- 注釈はコードの特殊なマーク、形式です:@note name(属性名=属性値、属性名=属性値...)
- 注釈を使用すると、注釈はクラス、メソッド、および属性に適用されます
- 注釈を使用する目的:xml構成を簡素化します
1.Springで提供されるBean管理作成オブジェクトの注釈
次の4つの注釈関数は同じであり、Beanインスタンスの作成に使用できます。
- @成分
- @サービス
- @コントローラ
- @リポジトリ
手順:
1。コンポーネントスキャンをオンにします
<?xml version="1.0" encoding="UTF-8"?>
<beans xmlns="http://www.springframework.org/schema/beans"
       xmlns:xsi="http://www.w3.org/2001/XMLSchema-instance"
       xmlns:context="http://www.springframework.org/schema/context"
       xsi:schemaLocation="http://www.springframework.org/schema/beans http://www.springframework.org/schema/beans/spring-beans.xsd http://www.springframework.org/schema/context https://www.springframework.org/schema/context/spring-context.xsd">

    <!--开启组件扫描
        1.扫描包上层目录
        2.如果扫描多个包,多个包使用逗号隔开
    -->
    <context:component-scan base-package="iocbean.byannotation"></context:component-scan>
</beans>
2.クラスを作成し、クラス上にオブジェクトを作成できる注釈を追加します
//在注解里面 value 属性值可以省略不写,
// 如果不写默认值是类名称的首字母小写 例如:Person --> person
@Component(value = "person") //相当于xml配置<bean id="person" class="iocbean.byannotation.Person"></bean>
public class Person {


    private String name;
    private String age;
    private String gender;

    @Override
    public String toString() {


        return "Person{" +
                "name='" + name + '\'' +
                ", age='" + age + '\'' +
                ", gender='" + gender + '\'' +
                '}';
    }
}
テストコード:
public class DemoTest {


    @Test
    public void test1(){


        ApplicationContext context = new ClassPathXmlApplicationContext("iocbean/byannotation/bean.xml");

        Person person = context.getBean("person", Person.class);

        System.out.println(person);
    }
}
出力結果:
Person{name='null', age='null', gender='null'}

Process finished with exit code 0
2.コンポーネントスキャンの詳細構成
- use-default-filters = "false"は、デフォルトのフィルターが現在使用されていないことを意味します。フィルターを自分で構成します。context:include-filter、スキャンするコンテンツを設定します。
- context:exclude-filter:スキャンされないコンテンツを設定します
それらの中には、注釈、aspectj、割り当て可能、カスタム、およびregexのいくつかのタイプのタイプがあります。
その意味は次のとおりです。
- 注釈:注釈タイプ
- assignable_type:注釈:指定されたタイプ
- アスペクトj:アスペクトの表現によると、基本的には使わない
- regex:通常の表現によると
- カスタム:カスタムルール
構成ファイルの例:
<?xml version="1.0" encoding="UTF-8"?>
<beans xmlns="http://www.springframework.org/schema/beans"
       xmlns:xsi="http://www.w3.org/2001/XMLSchema-instance"
       xmlns:context="http://www.springframework.org/schema/context"
       xsi:schemaLocation="http://www.springframework.org/schema/beans http://www.springframework.org/schema/beans/spring-beans.xsd http://www.springframework.org/schema/context https://www.springframework.org/schema/context/spring-context.xsd">

    <!--开启组件扫描
        1.扫描包上层目录
        2.如果扫描多个包,多个包使用逗号隔开
    -->
    <context:component-scan base-package="iocbean.byannotation"></context:component-scan>


    <!--示例 1
        use-default-filters="false" 表示现在不使用默认 filter,
        自己配置 filter context:include-filter ,设置扫描哪些内容
    -->
    <context:component-scan base-package="iocbean.byannotation" use-default-filters="false">
        <context:include-filter type="annotation" expression="org.springframework.stereotype.Service"></context:include-filter>
    </context:component-scan>

    <!--示例 2
        下面配置扫描包所有内容 context:exclude-filter: 设置哪些内容不进行扫描
    -->
    <context:component-scan base-package="iocbean.byannotation">
        <context:exclude-filter type="annotation" expression="org.springframework.stereotype.Controller"></context:exclude-filter>
    </context:component-scan>
</beans>
3.属性注入を実現するための注釈
1. @Autowired:属性タイプに応じた自動アセンブリ
@Component
public class Student {


    // 添加注入属性注解
    @Autowired
    //定义 Person 类型属性
    // 不需要添加 set 方法
    private Person person;

    @Override
    public String toString() {


        return "Student{" +
                "person=" + person +
                '}';
    }
}
2. @修飾子:名前に従って挿入します
@Qualifierアノテーションは、上記の@Autowiredで使用する必要があります
    //添加注入属性注解
    @Autowired //根据类型进行注入
    @Qualifier(value = "person")//根据名称进行注入
    //定义 Person 类型属性
    // 不需要添加 set 方法
    private Person person1;
3. @ Resource:タイプに応じて注入でき、名前に応じて注入できます
実際、@ ResourceはSpringの注釈ではありません。そのパッケージはjavax.annotation.Resourceであり、インポートする必要がありますが、Springはこの注釈の挿入をサポートしています。
@ResourceアノテーションはJ2EEに属し、デフォルトで名前でアセンブルされます。名前は、name属性を介して指定できます。
- name属性が指定されていない場合、フィールドに注釈が書き込まれると、デフォルトでフィールド名が名前検索に使用されます。
- name属性が指定されていない場合、setterメソッドで注釈が書き込まれると、デフォルトで属性名がアセンブリに使用されます。
- name属性が指定されていない場合、名前に一致するBeanが見つからない場合、タイプに従ってアセンブリが実行されます。
- name属性が指定されている場合、それは名前に従ってのみアセンブルされることに注意してください。
推奨される使用法:@Resourceアノテーションはフィールド上にあり、このアノテーションはJ2EEに属しているため、スプリングとの結合が減少します。最も重要なことは、コードがよりエレガントに見えることです。
@Resourceアノテーションを使用すると、上位バージョンのJDKはアセンブルに失敗し、代わりに@Autowired()と@Qualifier( "")を使用した後にBeanアセンブリが成功することに注意してください。Springアノテーションを使用する開発では、@ Resourceを使用してnullポインタ例外を報告する場合に2つの解決策があります。
- jdk8を使用する
- javax.annotationの新しいjarパッケージをインポートします
たとえば、JDK12バージョンのjavax.annotation。*パッケージの内容は次のとおりです。Resource
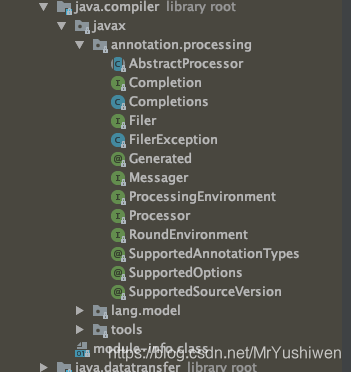
注釈クラスがないことがわかります。次にjavax.annotation-api-1.3.2.jarを再インポートし、完了後、次のようになります。@ Resource注釈

を使用できるようになります。
コード例:
    @Resource//根据类型进行注入
    private Person person;

    @Resource(name = "person1") //根据名称进行注入
    private Person person3;
4. @ Value:共通タイプの属性を挿入します
    @Value(value = "19")
    private String age;
5. @ Autowired(required = false)
デフォルトでは、依存オブジェクトが存在する必要があります。null値を許可する場合は、required属性をfalseに設定できます。
つまり、依存オブジェクトが存在せず、注入が失敗する場合があります。required= falseを追加しないと、例外が発生します。パラメータ(required = false)を追加すると、注入が失敗した場合、この時点でnull値が自動的に注入され、エラーは報告されません。
コード例:
    @Autowired(required = false)
    private Person person;


    @Autowired(required = false) //根据类型进行注入
    @Qualifier(value = "person1")//根据名称进行注入
    private Person person1;
4.構成
xml構成ファイルの代わりに構成クラスを作成します
//作为配置类,替代xml配置文件
@Configuration
//定义扫描的路径,从中找出标识了需要装配的类自动装配到spring的bean容器中
@ComponentScan("iocbean.byannotation/complete_annotation")
public class SpringIocConfig {


}
個人クラス:
@Component
public class Person {


    @Value("Mr.Yu")
    private String name;
    @Value("21")
    private String age;
    @Value("男")
    private String gender;

    public Person() {


        System.out.println("Person类构造器");
    }

    @Override
    public String toString() {


        return "Person{" +
                "name='" + name + '\'' +
                ", age='" + age + '\'' +
                ", gender='" + gender + '\'' +
                '}';
    }
}
学生クラス:
@Component
public class Student {


    @Autowired(required = false)
    private Person person;

    @Autowired(required = false)
    @Qualifier("person")
    private Person person1;

    @Resource
    private Person person2;

    public Student() {


        System.out.println("Student类构造器");
    }

    @Override
    public String toString() {


        return "Student{" +
                "person=" + person +
                ", person1=" + person1 +
                ", person2=" + person2 +
                '}';
    }
}
テストコード:
public class DemoTest {


    @Test
    public void test1(){


        ApplicationContext context = new AnnotationConfigApplicationContext(SpringIocConfig.class);

        Student student = context.getBean("student", Student.class);

        System.out.println(student);
    }
}
出力結果:
Person类构造器
Student类构造器
Student{person=Person{name='Mr.Yu', age='21', gender='男'}, person1=Person{name='Mr.Yu', age='21', gender='男'}, person2=Person{name='Mr.Yu', age='21', gender='男'}}

Process finished with exit code 0