1つは、データベースのインストールです
ご使用の環境に応じてインストールすることを選択してください
1、yum指定ディレクトリインストール
https://blog.csdn.net/llwy1428/article/details/105143053
2、yumは直接インストールします
https://blog.csdn.net/llwy1428/article/details/102486414
3.コンパイルしてインストールします
https://blog.csdn.net/llwy1428/article/details/95444151
4.PostgreSqlの基本操作
https://blog.csdn.net/llwy1428/article/details/102598732
5. Centos7 yumのインストール、構成PgAdmin4
https://blog.csdn.net/llwy1428/article/details/102486511
6、Centos7PostgreSqlデータベースインストール拡張機能
https://blog.csdn.net/llwy1428/article/details/105167524
7. Centos7PostgreSqlデータベースはFDW拡張機能を使用します
https://blog.csdn.net/llwy1428/article/details/106291669
2、TimescaleDBのインストールと構成
1.データベースをインストールします。
https://blog.csdn.net/llwy1428/article/details/102486414
2.timescaledb.repoファイルを作成します
[root@localhost ~]# sudo vi /etc/yum.repos.d/timescaledb.repo[timescale_timescaledb]
name=timescale_timescaledb
baseurl=https://packagecloud.io/timescale/timescaledb/el/7/$basearch
repo_gpgcheck=1
gpgcheck=0
enabled=1
gpgkey=https://packagecloud.io/timescale/timescaledb/gpgkey
sslverify=1
sslcacert=/etc/pki/tls/certs/ca-bundle.crt
metadata_expire=3003.timescaledb-postgresql-11をインストールします
[root@localhost ~]# sudo yum install -y timescaledb-postgresql-114.データベースを構成します
[root@localhost ~]# sudo timescaledb-tune --pg-config=/usr/pgsql-11/bin/pg_config 


注:デフォルト構成を使用する場合は、次のコマンドを直接使用できます
[root@localhost ~]# sudo timescaledb-tune --pg-config=/usr/pgsql-11/bin/pg_config --quiet --yes5.データベースサービスを再起動します
[root@localhost ~]# sudo systemctl restart postgresql-11.service6.テスト:
ユーザーの切り替え:
[root@localhost ~]# su - postgresコマンドウィンドウに入ります。
-bash-4.2$ psqlデータベースの時系列を作成する
postgres=# CREATE DATABASE timeseries;
postgres=# \l
作成したデータベースの時系列を入力します
postgres=# \c timeseries
timeseries=# CREATE EXTENSION IF NOT EXISTS timescaledb CASCADE;
テーブルを作成します。
timeseries=# CREATE TABLE conditions (time TIMESTAMP WITH TIME ZONE NOT NULL,device_id TEXT,temperature NUMERIC,humidity NUMERIC);
timeseries=# SELECT create_hypertable('conditions', 'time');
データの挿入:
timeseries=# INSERT INTO conditions(time, device_id, temperature, humidity) VALUES (NOW(), 'weather-pro-000000', 84.1, 84.1);
timeseries=# INSERT INTO conditions VALUES (NOW(), 'weather-pro-000002', 71.0, 51.0),(NOW(), 'weather-pro-000003', 70.5, 50.5),(NOW(), 'weather-pro-000004', 70.0, 50.2);
クエリデータ
timeseries=# SELECT * FROM conditions LIMIT 10;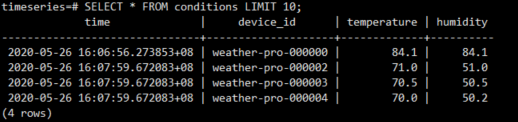
クエリデータ
timeseries=# SELECT * FROM conditions ORDER BY time DESC LIMIT 3;
参照アドレス:
https://www.digitalocean.com/community/tutorials/how-to-install-and-use-timescaledb-on-centos-7
この時点で、Centos7 postgresql v11インストールタイムスケールデータベースTimescaleDB操作が完了しました!