Table of contents
Introduction Introduction
Artificial intelligence has played an important role in accelerating the inheritance and innovative development of the field of traditional Chinese medicine. Among them, the extraction of TCM text information is the core component of the construction of the TCM knowledge map, which lays the foundation for the construction of upper-level applications such as the clinical auxiliary diagnosis and treatment system (CDSS).
In this NER challenge, our goal is to extract key information from the instructions of traditional Chinese medicines, including 13 types of entities such as medicines, medicinal ingredients, diseases, symptoms, and syndromes, and build a knowledge base of traditional Chinese medicines.
By applying natural language processing and deep learning techniques, we can perform semantic analysis and entity extraction on TCM drug instructions. By training the model, we can identify and extract important information such as drug names, drug ingredients, related diseases, symptoms, and syndromes, and store them in the TCM drug knowledge base.
Building a knowledge base of TCM drugs is of great significance to promote the research and clinical practice of TCM. This knowledge base can provide convenient and quick reference information for TCM researchers and clinicians to help them gain a deeper understanding of the characteristics, efficacy and application range of TCM. At the same time, the knowledge base also provides a data basis for intelligent applications in the field of traditional Chinese medicine, such as the construction of CDSS systems and other medical decision support systems.
The open source project this time is Cinese-DeepNER-Pytorch, the champion solution of Tianchi Traditional Chinese Medicine Instructions Entity Recognition Challenge. This blog is mainly about deploying and running different models of this algorithm.
For details on the scheme and model principles of this project, please refer to another blog:
Tianchi Competition Traditional Chinese Medicine Instructions Entity Recognition Challenge Champion Scheme Open Source (1) Scheme and Model Principles
environment
python3.7
pytorch==1.6.0 +
transformers==2.10.0
pytorch-crf==0.7.2
build environment
To build the environment, it is recommended to build pytorch-GPUthe version. For the specific building process, please refer to my other blog:
NLP practice: Pytorch implements 6 classic deep learning Chinese short text classification-bert+ERNIE+bert_CNN+bert_RNN+bert_RCNN+bert_DPCNN
In addition, you need to use the following commands to install the relevant libraries in the installation environment:
pip install transformers==2.10.0 -i https://pypi.tuna.tsinghua.edu.cn/simple
pip install pytorch-crf==0.7.2 -i https://pypi.tuna.tsinghua.edu.cn/simple/
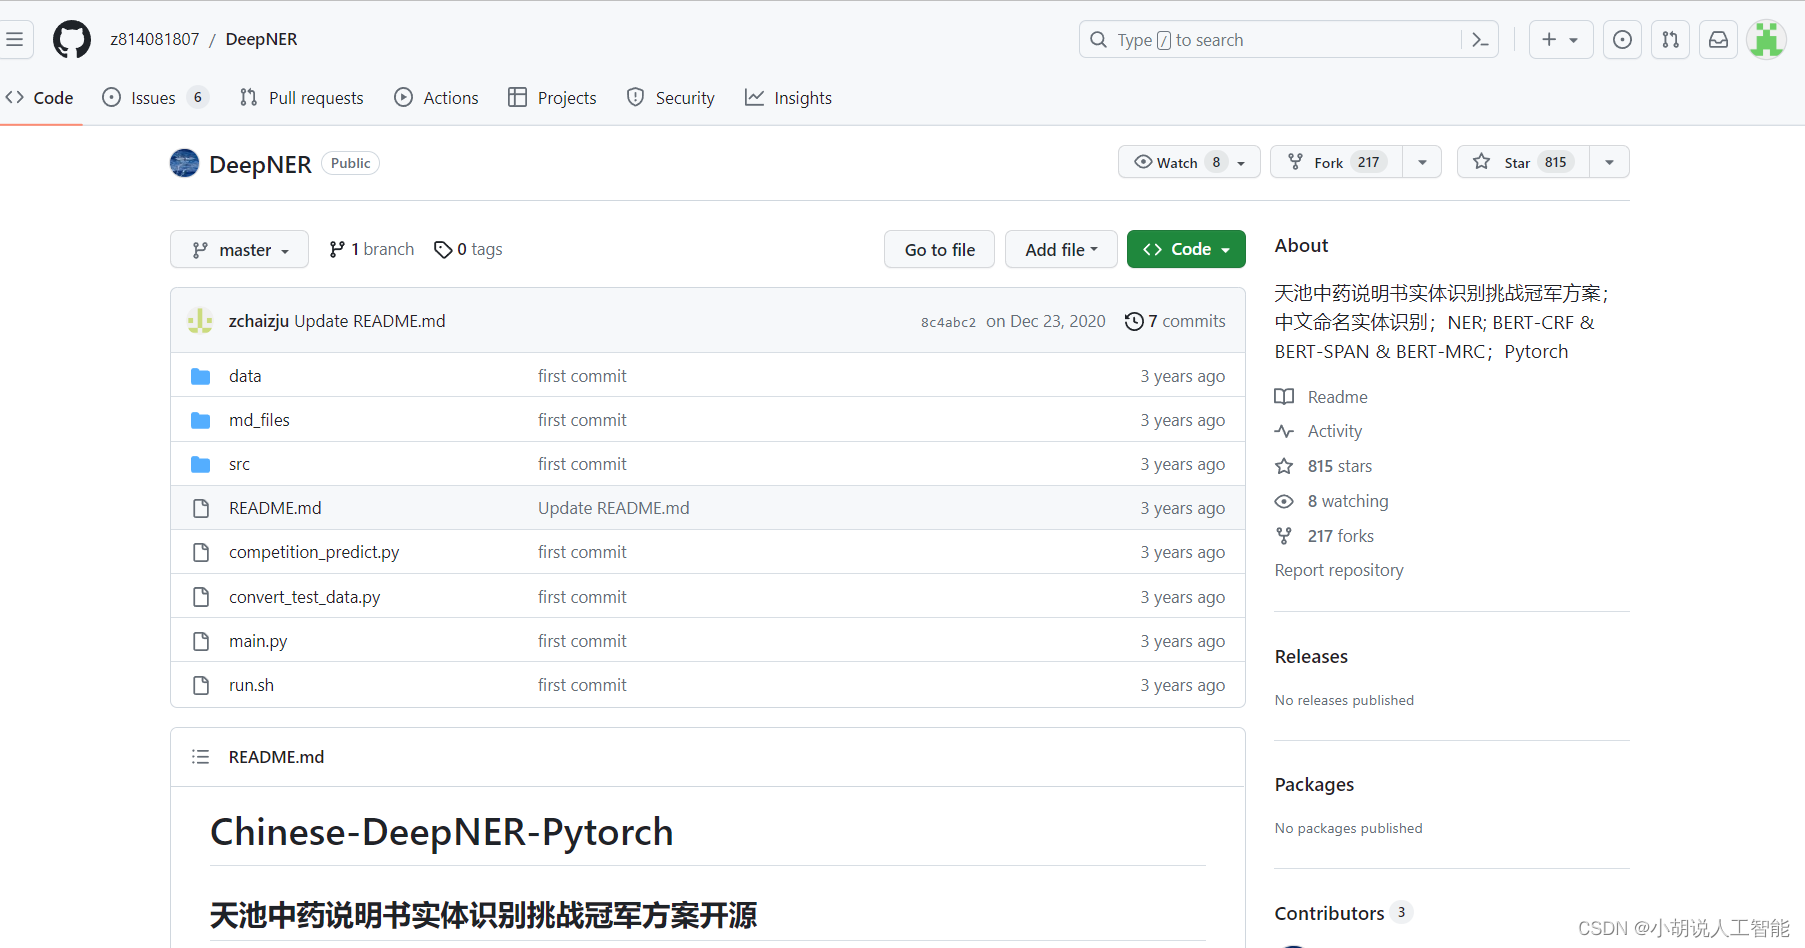
Github address
Use the following github address to download locally.
Tianchi Traditional Chinese Medicine Instructions Entity Recognition Challenge Champion Scheme
Project Directory Description
After downloading locally, you can see the following directory:
DeepNER
│
├── data                                    # 数据文件夹
│   ├── mid_data                            # 存放一些中间数据
│   │   ├── crf_ent2id.json                 # crf 模型的 schema
│   │   └── span_ent2id.json                # span 模型的 schema
│   │   └── mrc_ent2id.json                 # mrc 模型的 schema
│
│   ├── raw_data                            # 转换后的数据
│   │   ├── dev.json                        # 转换后的验证集
│   │   ├── test.json                       # 转换后的初赛测试集
│   │   ├── pseudo.json                     # 转换后的半监督数据
│   │   ├── stack.json                      # 转换后的全体数据
│   └── └── train.json                      # 转换后的训练集
│
├── out                                     # 存放训练好的模型
│   ├── ...
│   └── ...
│
├── src
│   ├── preprocess
│   │   ├── convert_raw_data.py             # 处理转换原始数据
│   │   └── processor.py                    # 转换数据为 Bert 模型的输入
│   ├── utils
│   │   ├── attack_train_utils.py           # 对抗训练 FGM / PGD
│   │   ├── dataset_utils.py                # torch Dataset
│   │   ├── evaluator.py                    # 模型评估
│   │   ├── functions_utils.py              # 跨文件调用的一些 functions
│   │   ├── model_utils.py                  # Span & CRF & MRC model (pytorch)
│   │   ├── options.py                      # 命令行参数
│   |   └── trainer.py                      # 训练器
|
├── competition_predict.py                  # 复赛数据推理并提交
├── README.md                               # ...
├── convert_test_data.py                    # 将复赛 test 转化成 json 格式
├── run.sh                                  # 运行脚本
└── main.py                                 # main 函数 (主要用于训练/评估)
Steps for usage
Download the pretrained model
download first
-
Harbin Institute of Technology pre-training model: https://github.com/ymcui/Chinese-BERT-wwm
Baidu cloud download link:
Link: https://pan.baidu.com/s/1axdkovbzGaszl8bXIn4sPw
Extraction code: jjba(Note: It is necessary to manually convert the two [unused] in vocab.txt into [INV] and [BLANK])
tips: It is recommended to use uer, roberta-wwm, robert-wwm-large
Note: run.shThe specified in the script BERT_DIRrefers to the folder where BERT is located, and the BERT folder downloaded from Baidu Cloud above needs to be placed in the specified folder
如:export BERT_DIR=“./bert/torch_$BERT_TYPE”
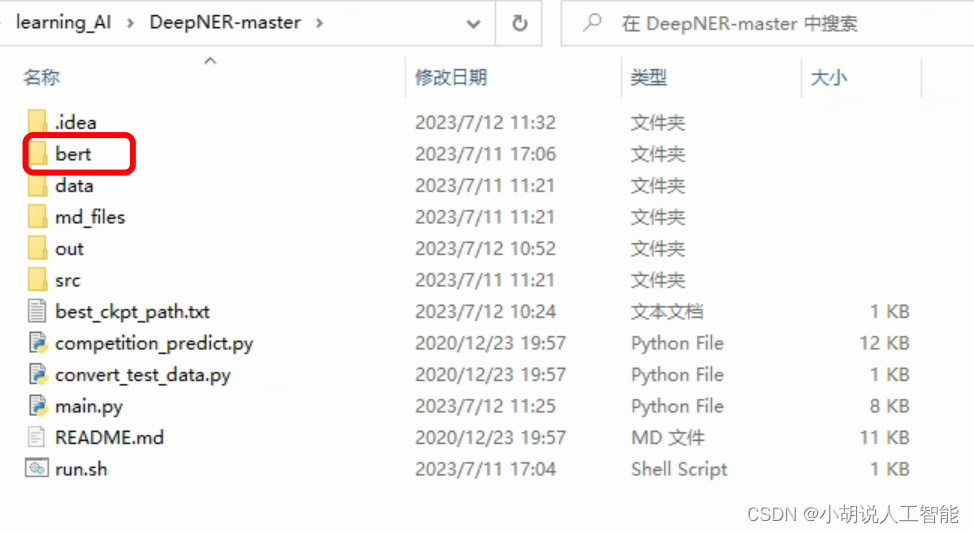
It means that you can directly put it in the bert folder under the DeepNER directory. Note that github export BERT_DIR="../bert/torch_$BERT_TYPE"is placed in the upper directory of DeepNER by default.
The blogger finally put the directory as shown below:

change some code
-
If you are using a Linux system , you don't need to make any changes.
-
If the system you are using is a Windows system , you need to change the division method of some addresses. Otherwise, related errors will appear, as follows:
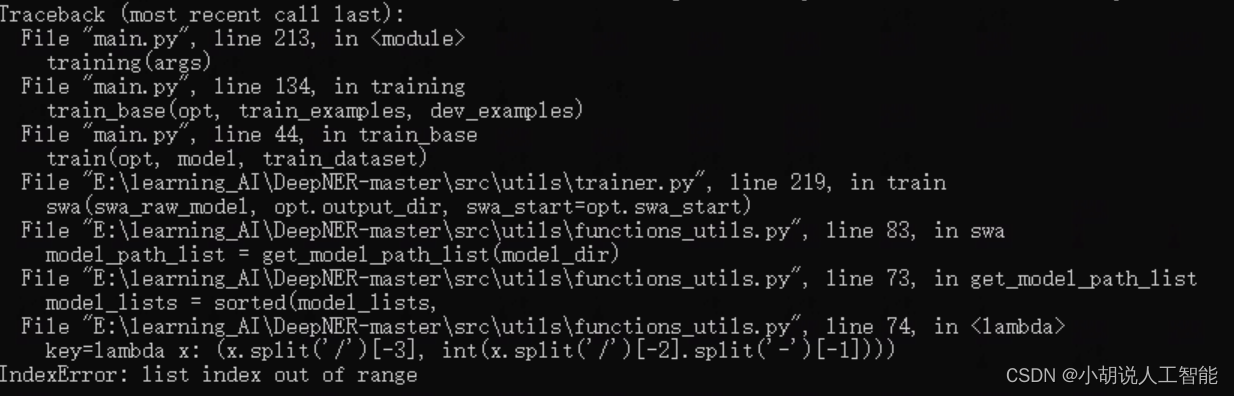
The code that needs to be modified under the specific Windows system (the core is to /change the in the path division \\) is as follows:
1) The get_model_path_list/src/utils/function_utils.py function in , the specific modification is as follows:
def get_model_path_list(base_dir):
    """
    从文件夹中获取 model.pt 的路径
    """
    model_lists = []

    base_dir = os.path.abspath(base_dir)  #生成绝对路径
    # print(base_dir)

    for root, dirs, files in os.walk(base_dir):
        for _file in files:
            if 'model.pt' == _file:
                model_lists.append(os.path.join(root, _file))

    model_lists = sorted(model_lists,
                         key=lambda x: (x.split('\\')[-3], int(x.split('\\')[-2].split('-')[-1])))

    return model_lists
2) main.pyLine 69, the specific modification is as follows:
model_path = os.path.abspath(model_path)  #生成绝对路径
tmp_step = model_path.split('\\')[-2].split('-')[-1]
3) main.pyLine 106, the specific modification is as follows:
del_dir_list = [os.path.join(opt.output_dir, path.split('\\')[-2])
                        for path in model_path_list if path != max_f1_path]
model training
parameter settings
BERT-CRF model training
task_type='crf'
mode='train' or 'stack'  train:单模训练与验证 ; stack:5折训练与验证

swa_start: swa 模型权重平均开始的 epoch
attack_train: 'pgd' / 'fgm' / '' 对抗训练 fgm 训练速度慢一倍, pgd 慢两倍,pgd 本次数据集效果明显
BERT-SPAN model training
task_type='span'
mode:同上
attack_train: 同上
loss_type: 'ce':交叉熵; 'ls_ce':label_smooth; 'focal': focal loss
BERT-MRC model training
task_type='mrc'
mode:同上
attack_train: 同上
loss_type: 同上
run training
1) Linux system: Open the terminal directly, enter the environment built above, go to the DeepNER directory, and run the following command to start training.
According to the above parameter setting instructions :
- If you need to train BERT-CRF, you can refer to the following and modify
run.shthe file
#!/usr/bin/env bash

export MID_DATA_DIR="./data/mid_data"
export RAW_DATA_DIR="./data/raw_data"
export OUTPUT_DIR="./out"

export GPU_IDS="0"
export BERT_TYPE="roberta_wwm"  # roberta_wwm / roberta_wwm_large / uer_large
export BERT_DIR="./bert/torch_$BERT_TYPE"

export MODE="train"
export TASK_TYPE="crf"

python main.py \
--gpu_ids=$GPU_IDS \
--output_dir=$OUTPUT_DIR \
--mid_data_dir=$MID_DATA_DIR \
--mode=$MODE \
--task_type=$TASK_TYPE \
--raw_data_dir=$RAW_DATA_DIR \
--bert_dir=$BERT_DIR \
--bert_type=$BERT_TYPE \
--train_epochs=10 \
--swa_start=5 \
--attack_train="" \
--train_batch_size=24 \
--dropout_prob=0.1 \
--max_seq_len=512 \
--lr=2e-5 \
--other_lr=2e-3 \
--seed=123 \
--weight_decay=0.01 \
--loss_type='ls_ce' \
--eval_model \
#--use_fp16
- If you need to train BERT-SPAN, you can refer to the following and modify
run.shthe file
#!/usr/bin/env bash

export MID_DATA_DIR="./data/mid_data"
export RAW_DATA_DIR="./data/raw_data"
export OUTPUT_DIR="./out"

export GPU_IDS="0"
export BERT_TYPE="roberta_wwm"  # roberta_wwm / roberta_wwm_large / uer_large
export BERT_DIR="./bert/torch_$BERT_TYPE"

export MODE="train"
export TASK_TYPE="span"

python main.py \
--gpu_ids=$GPU_IDS \
--output_dir=$OUTPUT_DIR \
--mid_data_dir=$MID_DATA_DIR \
--mode=$MODE \
--task_type=$TASK_TYPE \
--raw_data_dir=$RAW_DATA_DIR \
--bert_dir=$BERT_DIR \
--bert_type=$BERT_TYPE \
--train_epochs=10 \
--swa_start=5 \
--attack_train="" \
--train_batch_size=24 \
--dropout_prob=0.1 \
--max_seq_len=512 \
--lr=2e-5 \
--other_lr=2e-3 \
--seed=123 \
--weight_decay=0.01 \
--loss_type='ls_ce' \
--eval_model \
#--use_fp16
- If you need to train BERT-MRC, you can refer to the following and modify
run.shthe file
#!/usr/bin/env bash

export MID_DATA_DIR="./data/mid_data"
export RAW_DATA_DIR="./data/raw_data"
export OUTPUT_DIR="./out"

export GPU_IDS="0"
export BERT_TYPE="roberta_wwm"  # roberta_wwm / roberta_wwm_large / uer_large
export BERT_DIR="./bert/torch_$BERT_TYPE"

export MODE="train"
export TASK_TYPE="mrc"

python main.py \
--gpu_ids=$GPU_IDS \
--output_dir=$OUTPUT_DIR \
--mid_data_dir=$MID_DATA_DIR \
--mode=$MODE \
--task_type=$TASK_TYPE \
--raw_data_dir=$RAW_DATA_DIR \
--bert_dir=$BERT_DIR \
--bert_type=$BERT_TYPE \
--train_epochs=10 \
--swa_start=5 \
--attack_train="" \
--train_batch_size=24 \
--dropout_prob=0.1 \
--max_seq_len=512 \
--lr=2e-5 \
--other_lr=2e-3 \
--seed=123 \
--weight_decay=0.01 \
--loss_type='ls_ce' \
--eval_model \
#--use_fp16
bash run.sh
2) Windows system: Open the terminal directly, enter the environment built above, go to the DeepNER directory, and run the following command to start training.
- Training BERT-CRF
python main.py --gpu_ids="0" --output_dir="./out" --mid_data_dir="./data/mid_data" --mode="train" --task_type="crf" --raw_data_dir="./data/raw_data" --bert_dir="./bert/torch_roberta_wwm" --bert_type="roberta_wwm" --train_epochs=10 --swa_start=5 --attack_train="" --train_batch_size=12 --dropout_prob=0.1 --max_seq_len=512 --lr=2e-5 --other_lr=2e-3 --seed=123 --weight_decay=0.01 --loss_type='ls_ce' --eval_model
- Training BERT-SPAN
python main.py --gpu_ids="0" --output_dir="./out" --mid_data_dir="./data/mid_data" --mode="train" --task_type="span" --raw_data_dir="./data/raw_data" --bert_dir="./bert/torch_roberta_wwm" --bert_type="roberta_wwm" --train_epochs=10 --swa_start=5 --attack_train="" --train_batch_size=12 --dropout_prob=0.1 --max_seq_len=512 --lr=2e-5 --other_lr=2e-3 --seed=123 --weight_decay=0.01 --loss_type='ls_ce' --eval_model
- Training BERT-MRC
python main.py --gpu_ids="0" --output_dir="./out" --mid_data_dir="./data/mid_data" --mode="train" --task_type="mrc" --raw_data_dir="./data/raw_data" --bert_dir="./bert/torch_roberta_wwm" --bert_type="roberta_wwm" --train_epochs=10 --swa_start=5 --attack_train="" --train_batch_size=12 --dropout_prob=0.1 --max_seq_len=512 --lr=2e-5 --other_lr=2e-3 --seed=123 --weight_decay=0.01 --loss_type='ls_ce' --eval_model
Note: Friends can also adjust max_seq_len to 512 or 256, use different lr (learning rate), different loss_type ('ce': cross entropy; 'ls_ce': label_smooth; 'focal': focal loss), Different swa_start (swa model weight average start epoch), different attack_train ('pgd' or 'fgm' in confrontation training fgm training speed is twice as slow, pgd is twice as slow, and pgd has obvious effect on this data set). Compare training results.
3) Description of the running problem:
When encountering the following prompt, it means that your GPU memory is not enough (the blogger’s memory is 16G, the display is not enough), it is recommended to adjust train_batch_sizefrom 24 to 12 or 6 and try again.

4) Demonstration of training results:
BERT-CRF model:
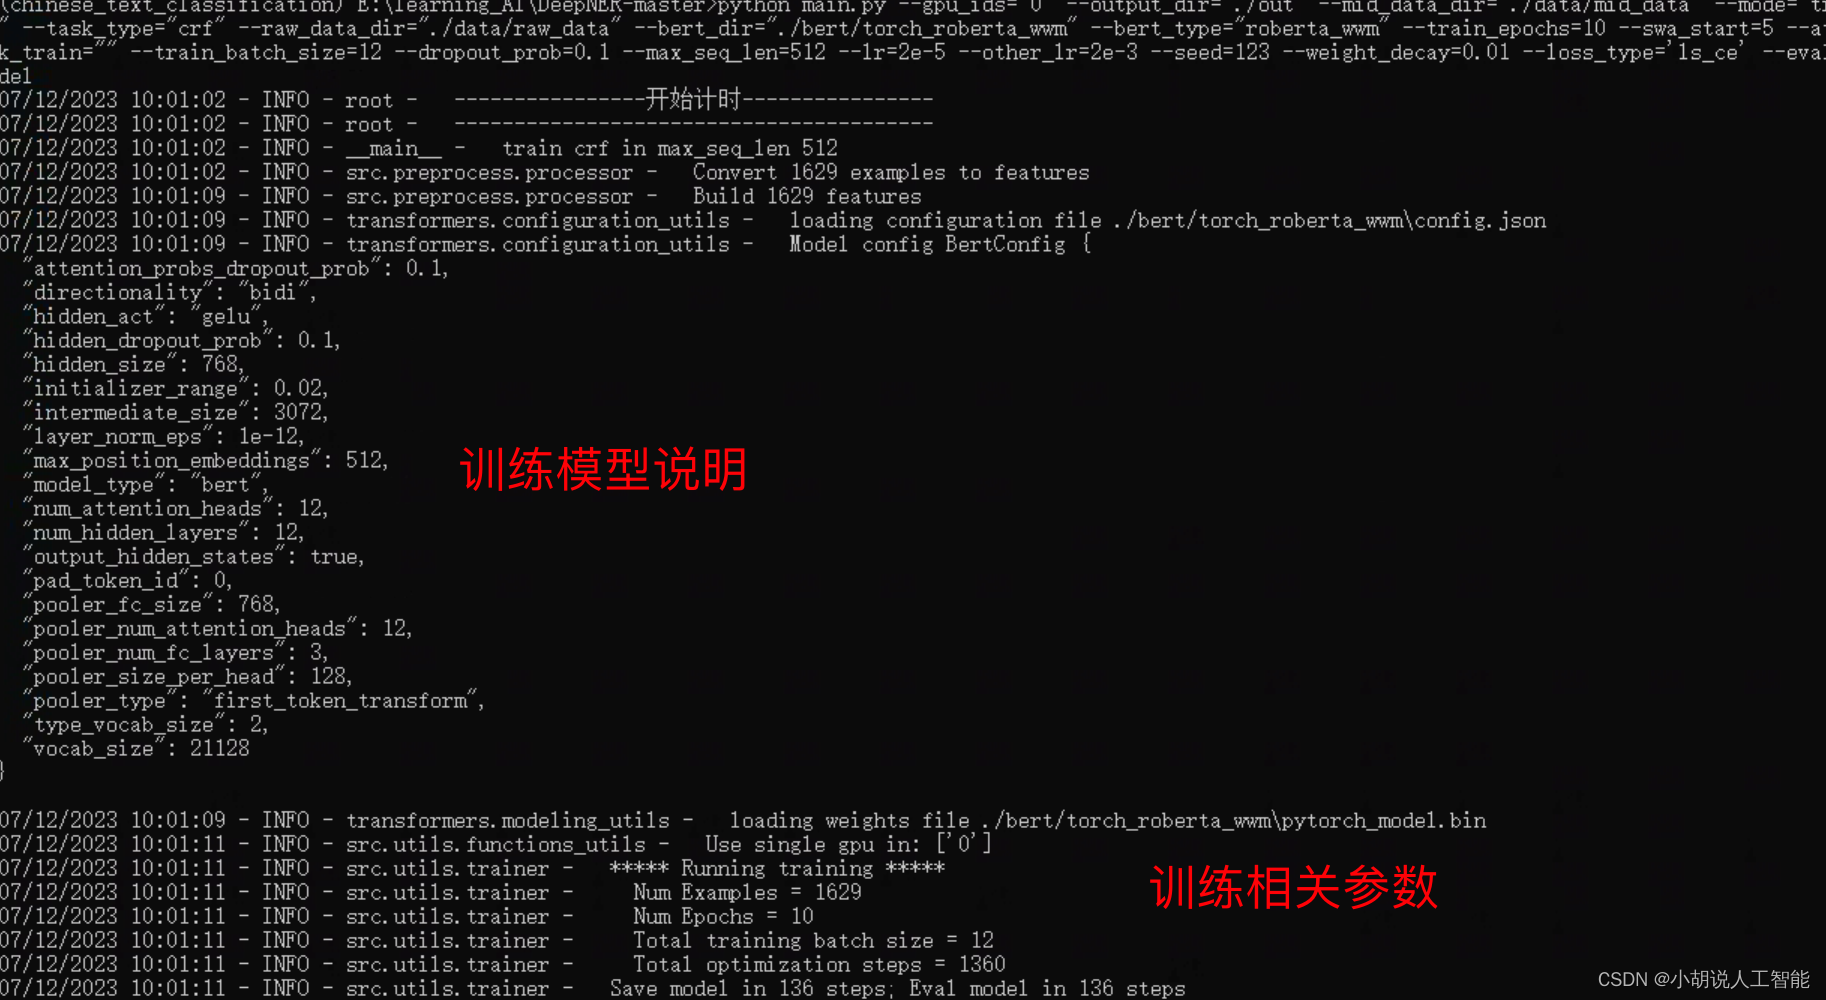
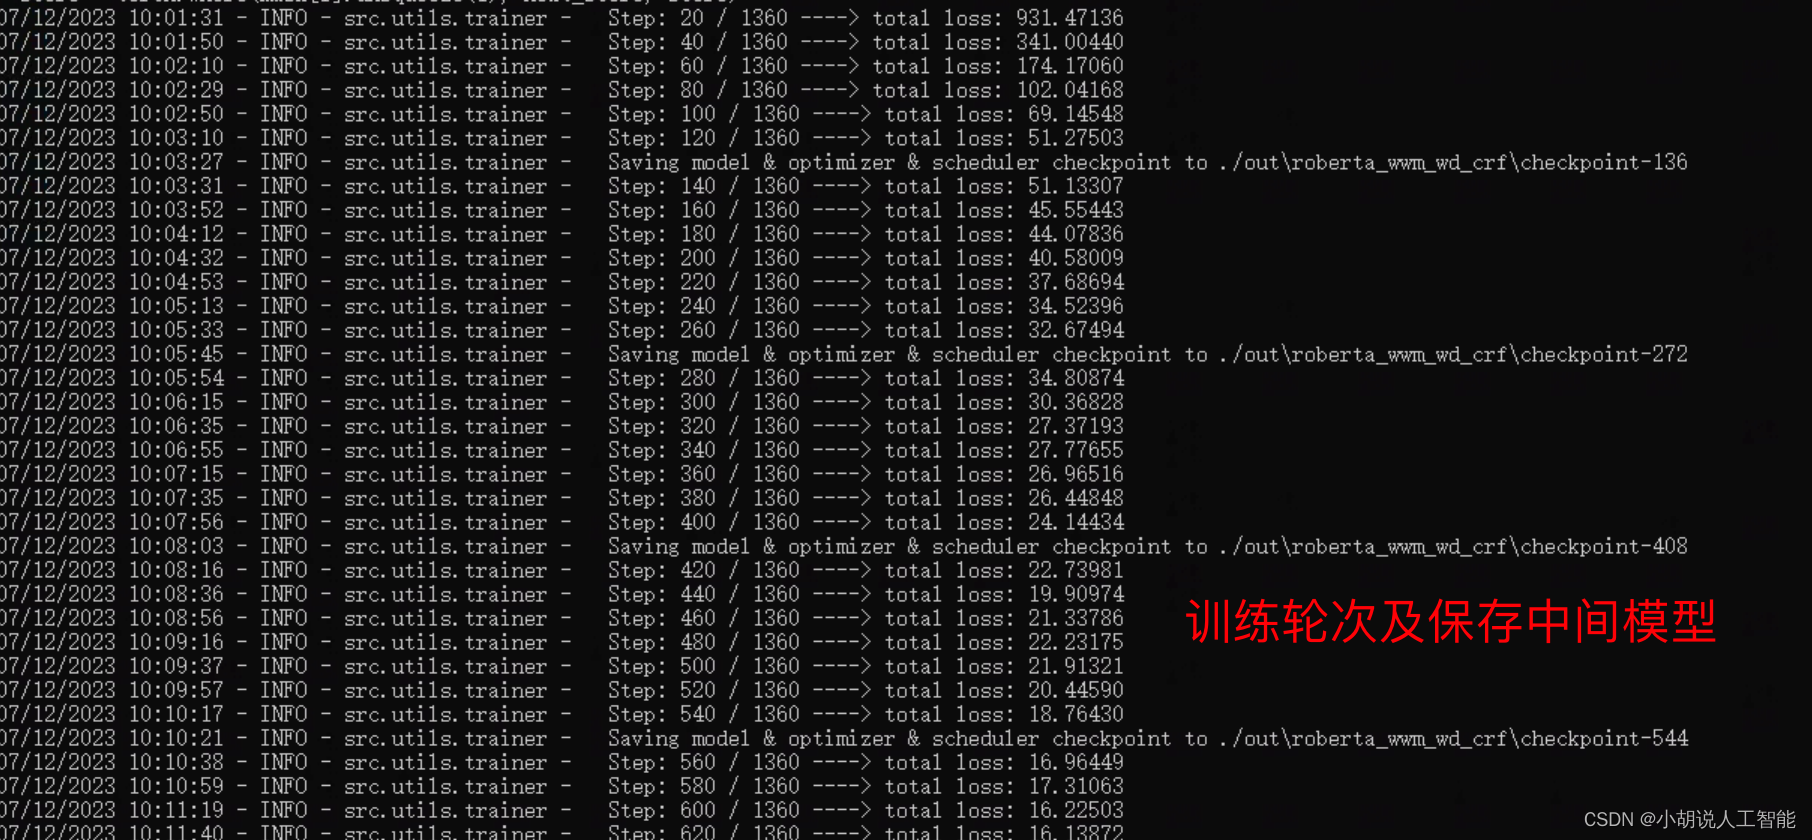

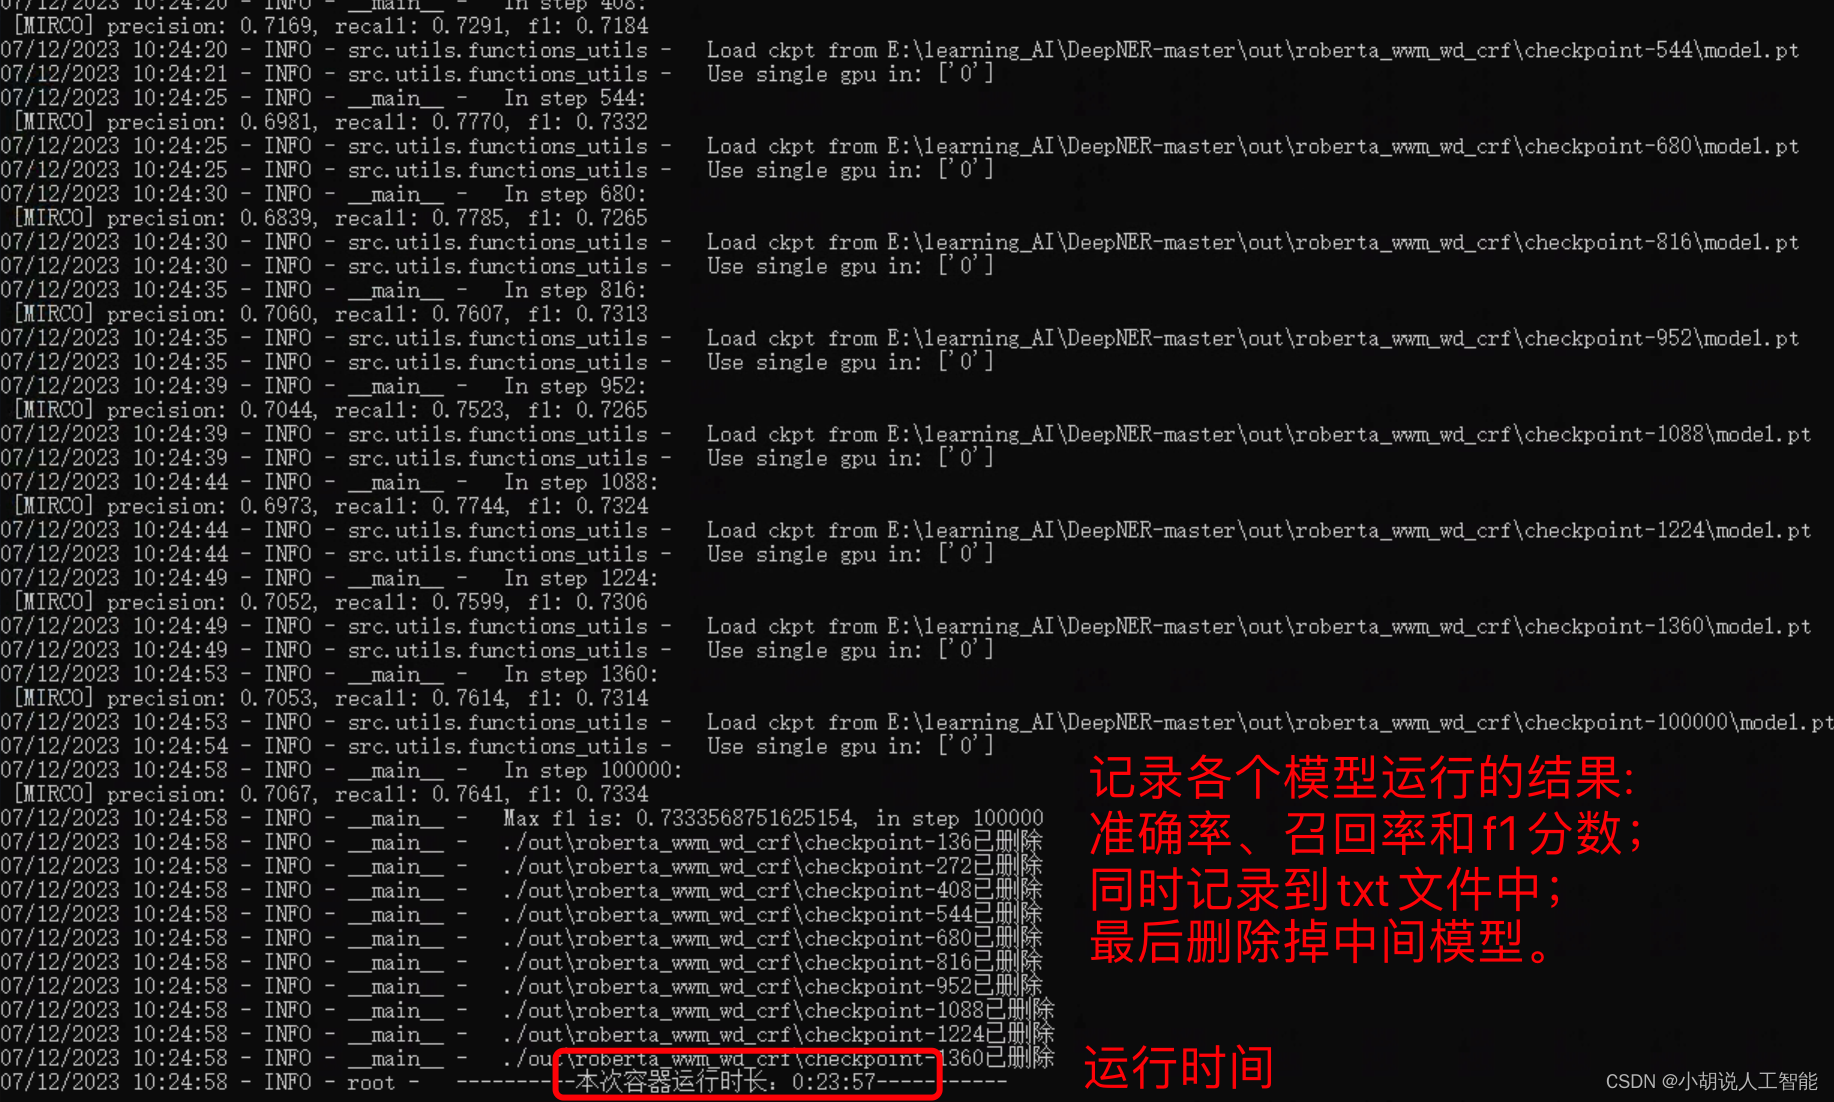
From the above pictures, it can be seen that the entire training took about 23 minutes and 57 seconds; the accuracy rate of the BERT-CRF model training to the end was about 70.67%, the recall rate was 76.41%, and the f1 score was 0.7334.
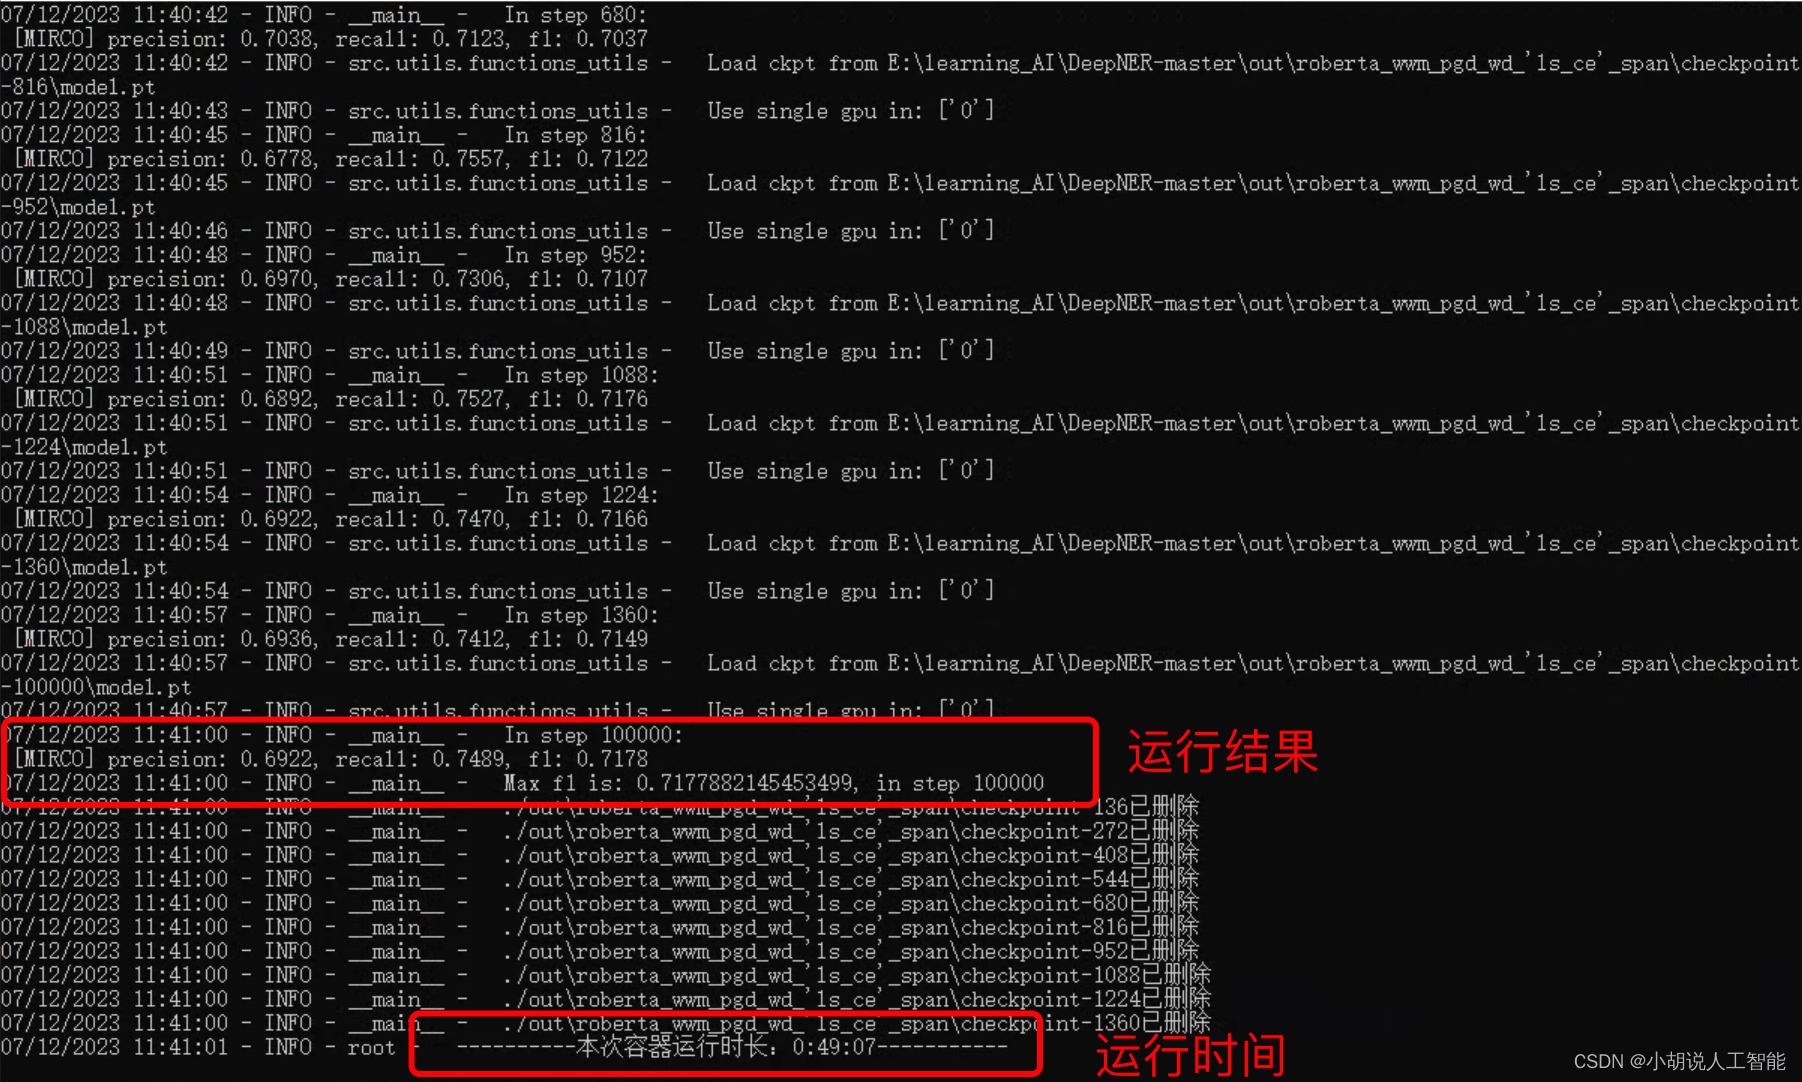
BERT-SPAN model:
The training results are as shown in the figure below. It can be seen that the entire training took about 49 minutes and 07 seconds; the BERT-SPAN model trained to the final accuracy rate was about 69.22%, the recall rate was 74.89%, and the f1 score was 0.7178.
Predict the rematch test file (after the above model training is completed)
Note: There is no data to run, waiting for the official data to open source to run
# convert_test_data
python convert_test_data.py
# predict
python competition_predict.py
References
Other information download
If you want to continue to learn about artificial intelligence-related learning routes and knowledge systems, welcome to read my other blog " Heavy | Complete artificial intelligence AI learning-basic knowledge learning route, all materials can be downloaded directly from the network disk without paying attention to routines "
This blog refers to Github's well-known open source platform, AI technology platform and experts in related fields: Datawhale, ApacheCN, AI Youdao and Dr. Huang Haiguang, etc. There are about 100G related materials, and I hope to help all friends.