vue3 + vite + ts + element-ui to build a background management framework
1. Create a vue3 project to build
vue3 official website vue3 official website
vite vite official website link
npm install
// 创建项目
npm create vite@latest
? Project name: vue3_vite_project // 输入项目名称

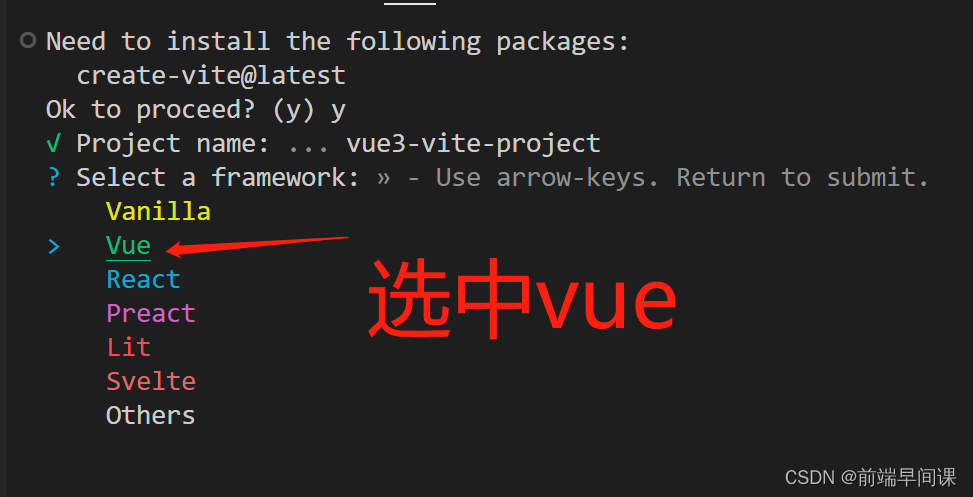
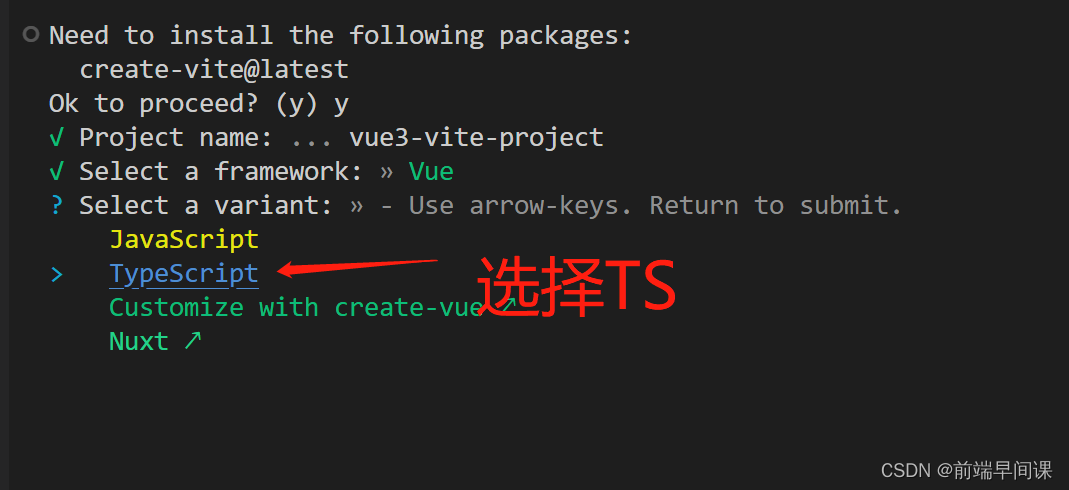
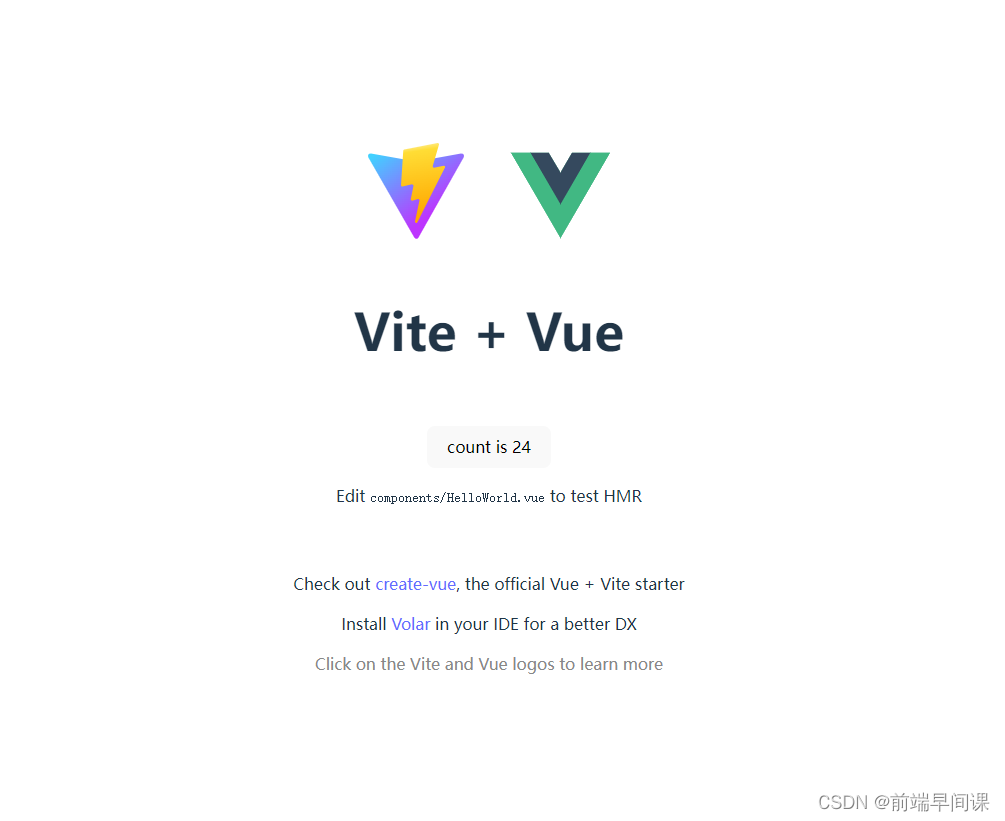
Follow the prompts to output!
2. Install less and scss
Use less or scss in vite
and set the corresponding scss or less in style after installation, recommend scss compilation
Install less dependencies
npm add -D less
Install sass dependencies
npm add -D sass
3. Vite automatically imports grammar plug-ins
It is recommended to use plugins, vite.config.js configuration;
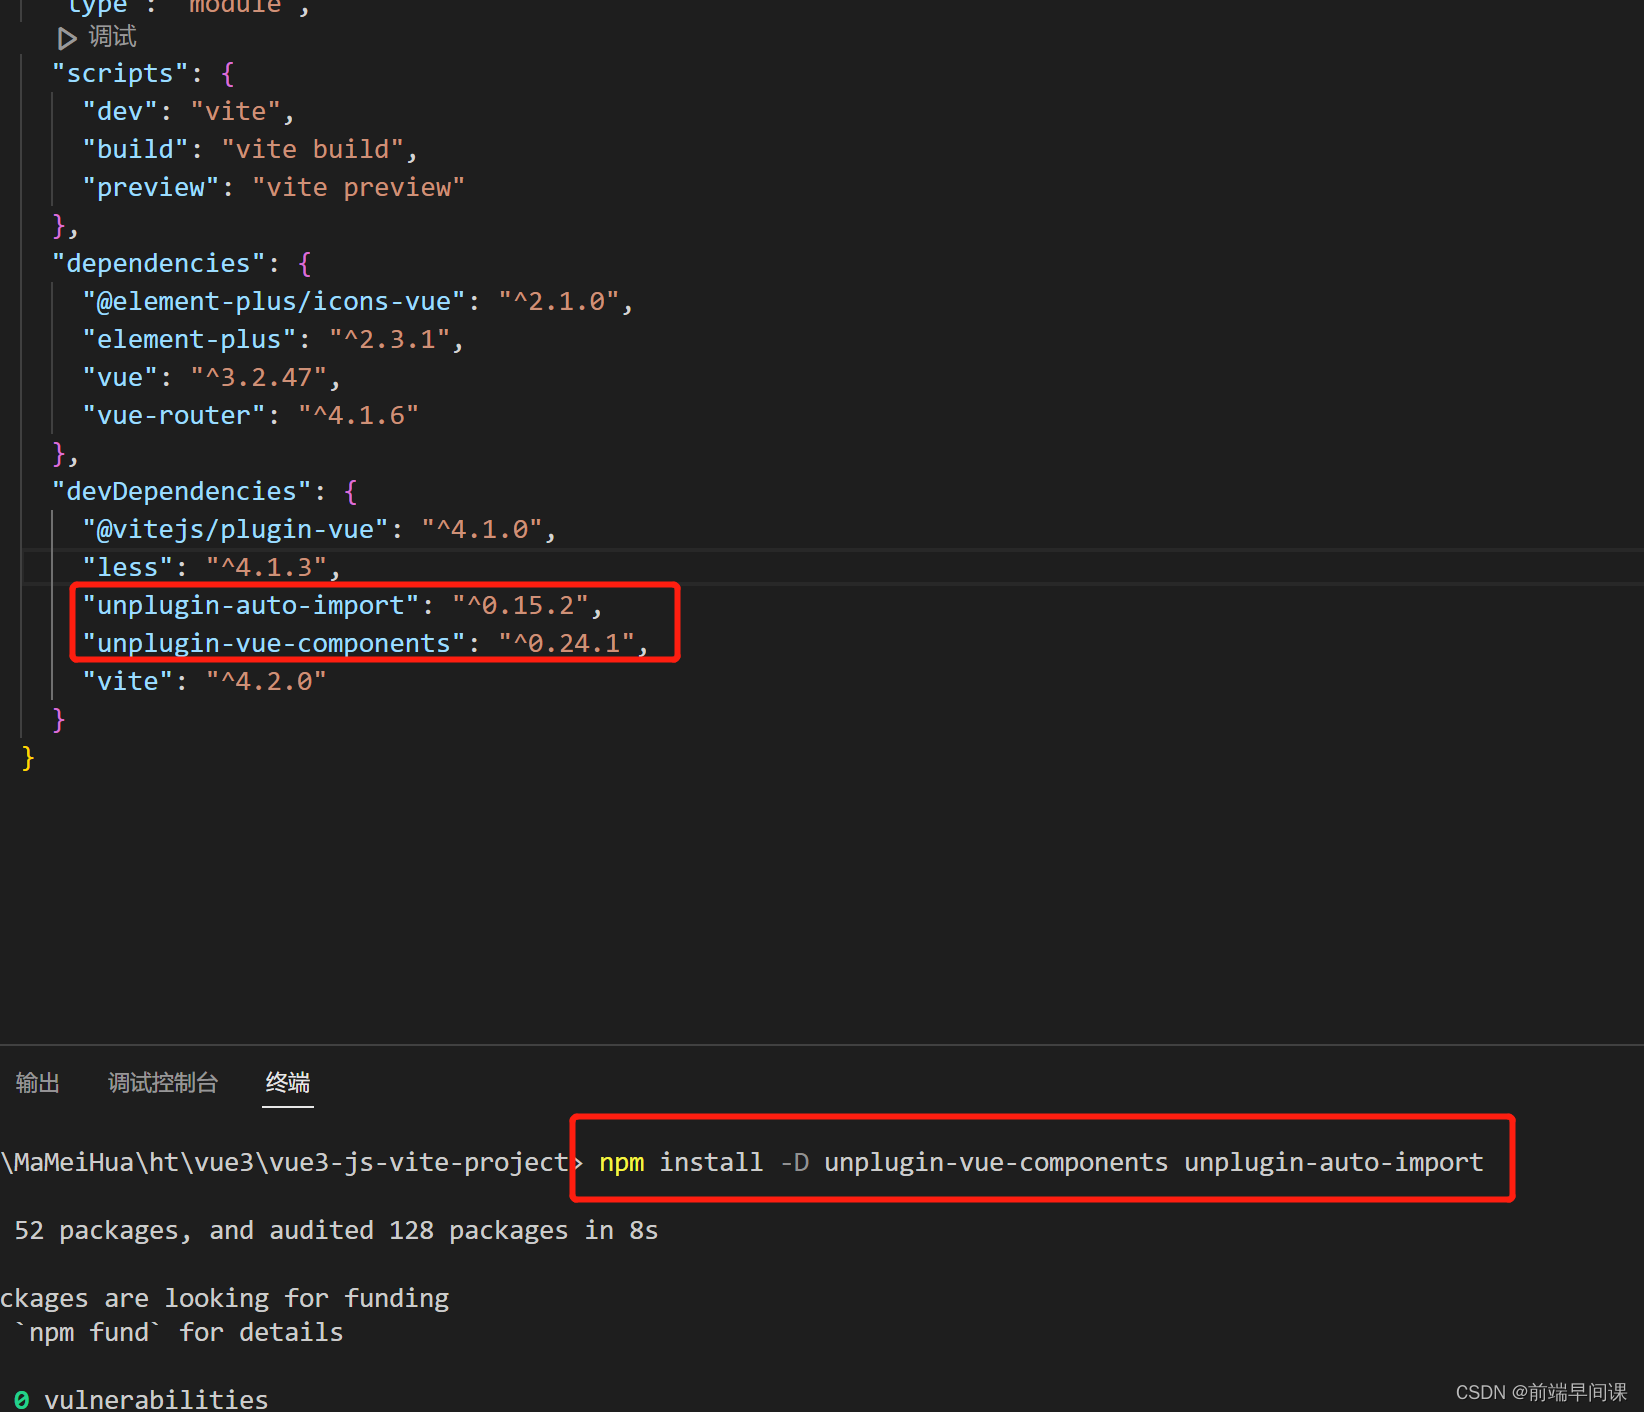
unplugin-vue-components // automatically import AIP such as hook reactive ref in vue;
unplugin-auto-import // automatically import ui-components such as ant-design-vue element-plus, etc.;
npm 使用
npm install -D unplugin-vue-components unplugin-auto-import
No need to introduce direct access

import {

     defineConfig } from 'vite'
import vue from '@vitejs/plugin-vue'
// 自动导入vue中hook reactive ref等
import AutoImport from "unplugin-auto-import/vite"
//自动导入ui-组件 比如说ant-design-vue  element-plus等
import Components from 'unplugin-vue-components/vite';

// https://vitejs.dev/config/
export default defineConfig({


  plugins: [
    vue(),
    AutoImport({


      //安装两行后你会发现在组件中不用再导入ref,reactive等
			imports: ['vue', 'vue-router'],
      //存放的位置
      dts: "src/auto-import.d.ts",
    }),
    Components({


      // 引入组件的,包括自定义组件
      // 存放的位置
      // dts: "src/components.d.ts"
    })
  ],
})
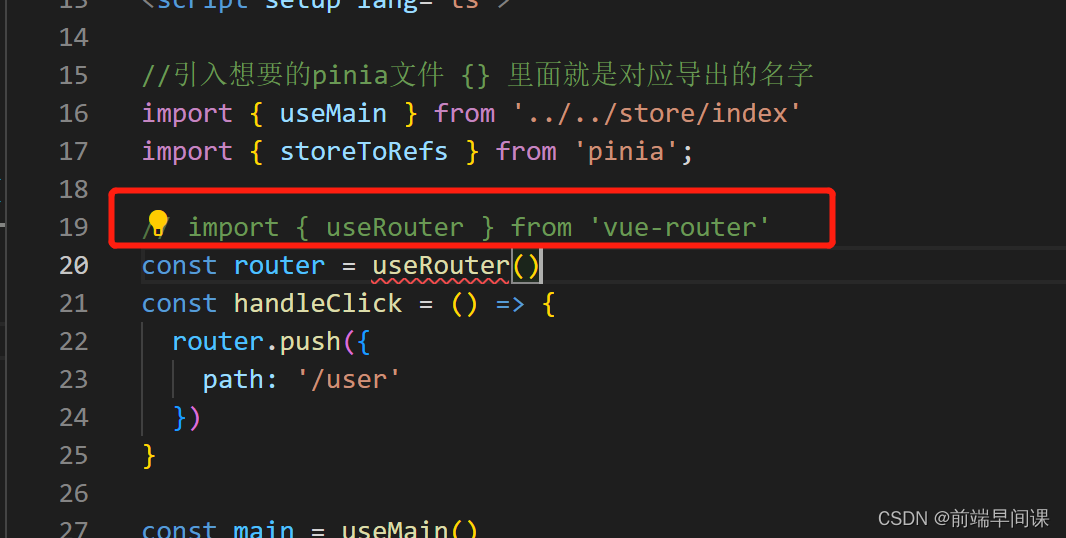
4. Install router
vue-router official websitevue -router official website
npm install
npm install vue-router@4
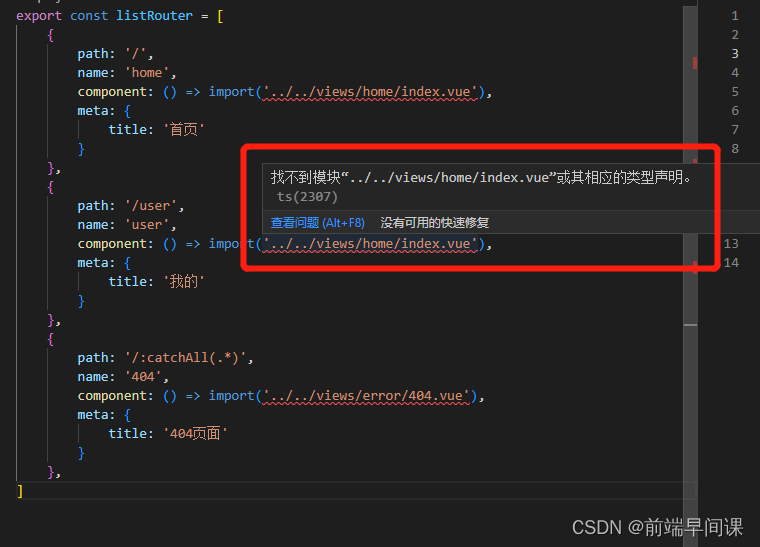
After the installation is successful, introduce the router in main.ts
and use ts to find the module cannot be found!
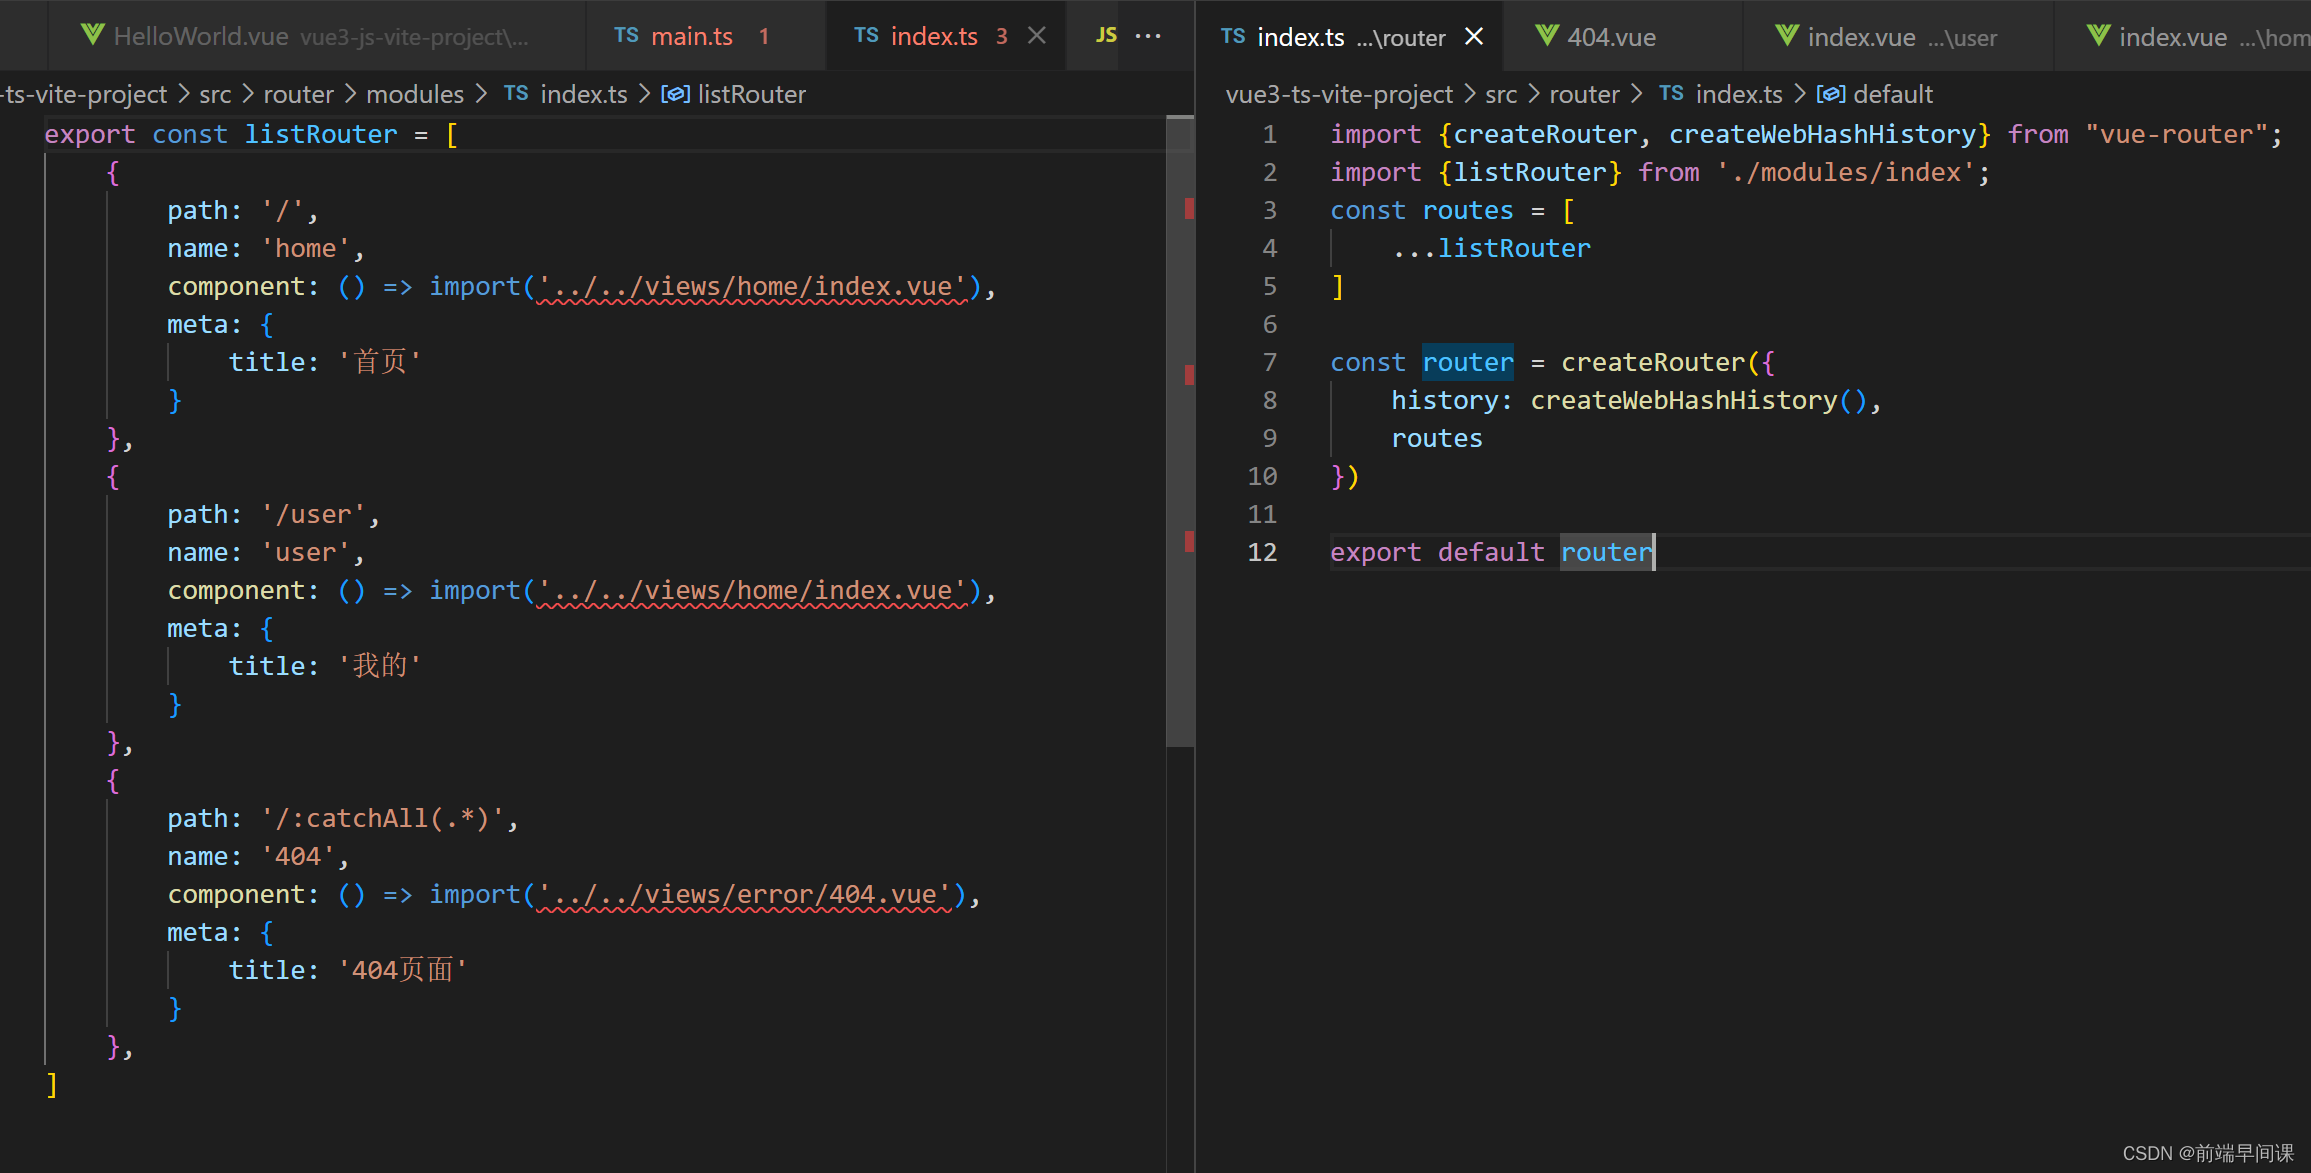
At this time, we need to find
vite-env.d.tsa few lines of code in the file in the root directory of the file!
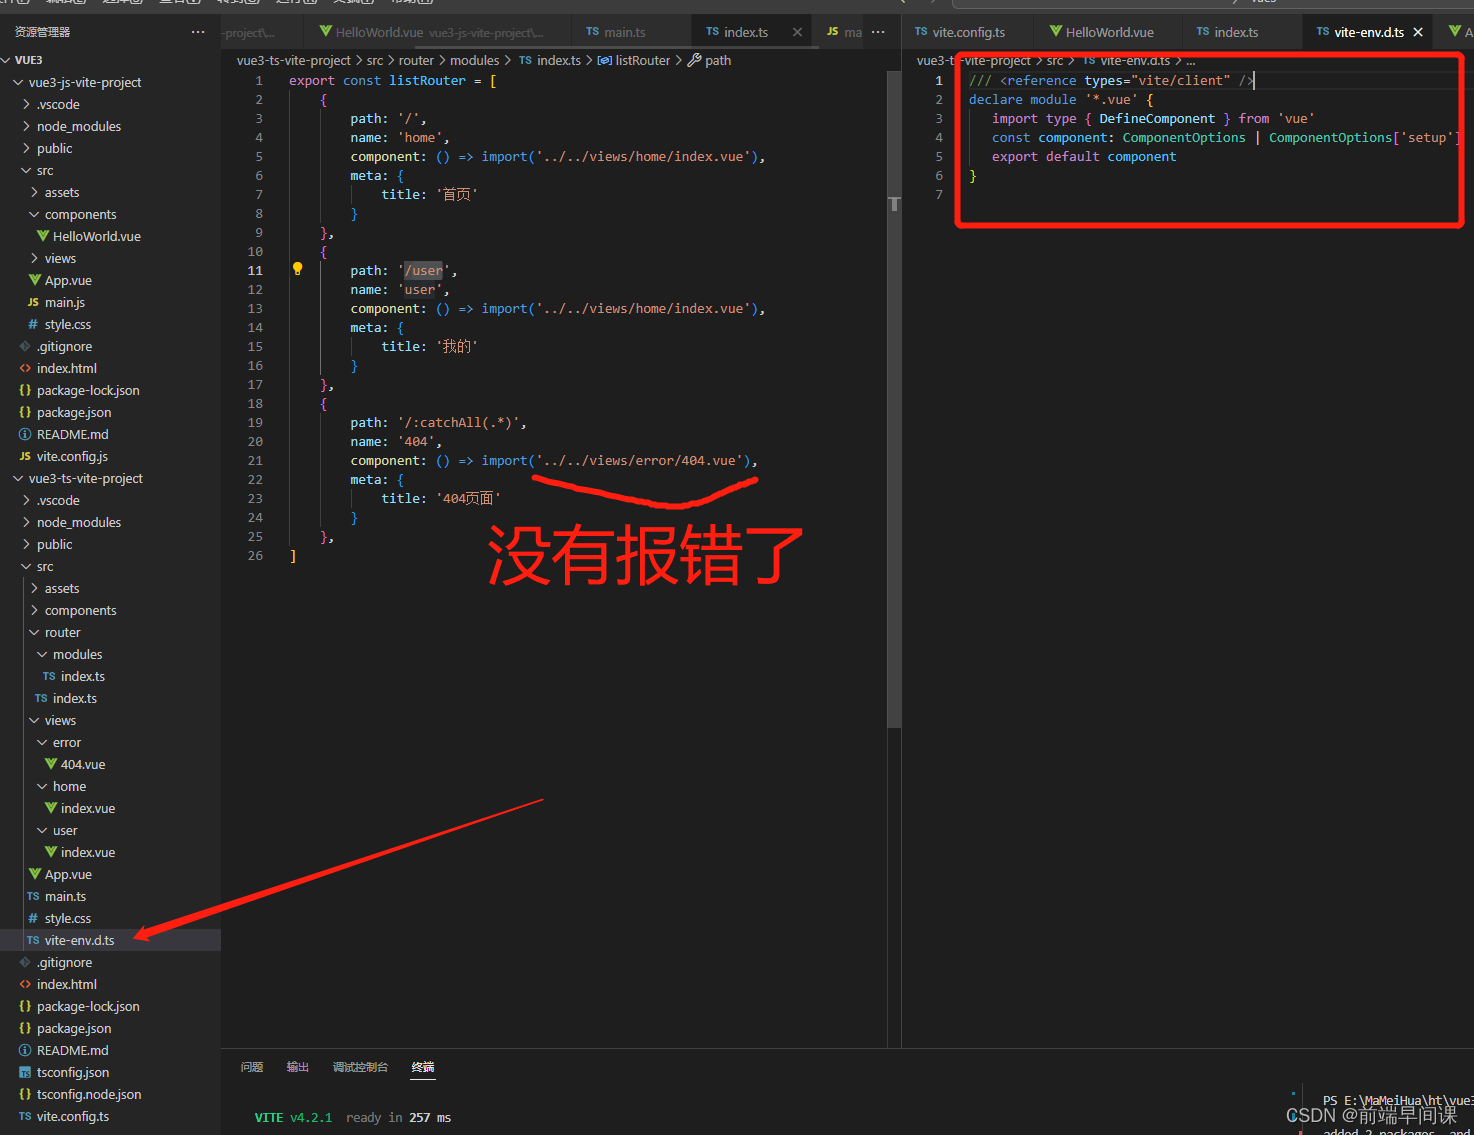
// 在文件中加上
declare module '*.vue' {


   import type {

     DefineComponent } from 'vue'
   const component: DefineComponent<{

    }, {

    }, any>
   export default component
}
// 或者
declare module '*.vue' {


   import type {

     DefineComponent } from 'vue'
   const component: ComponentOptions | ComponentOptions['setup']
   export default component
}
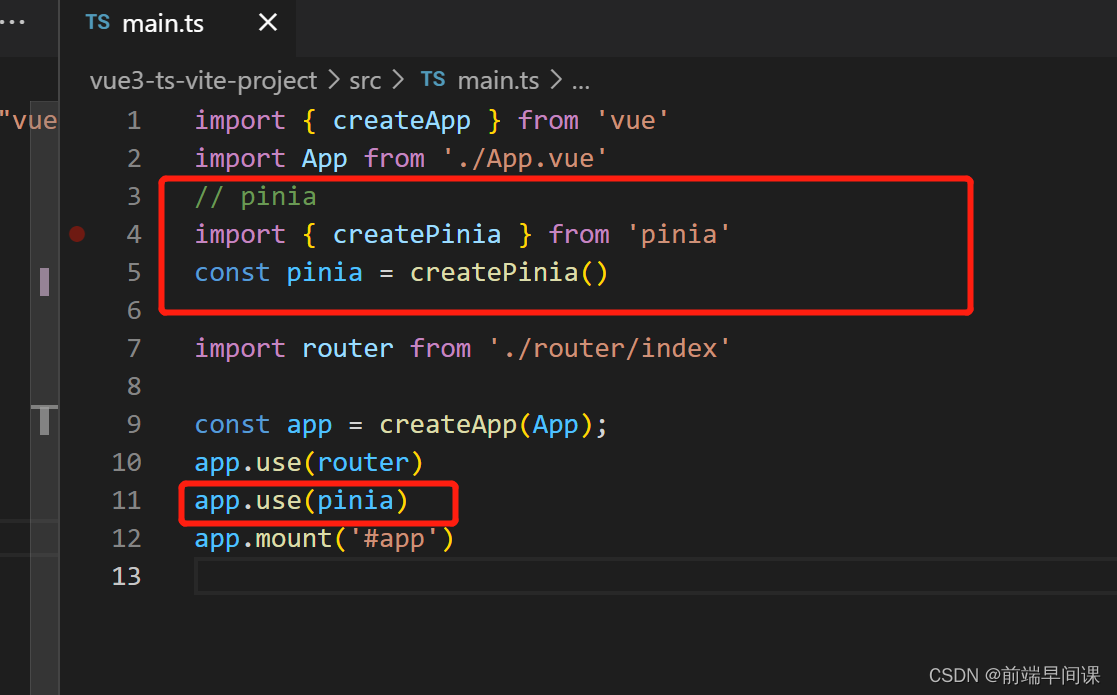
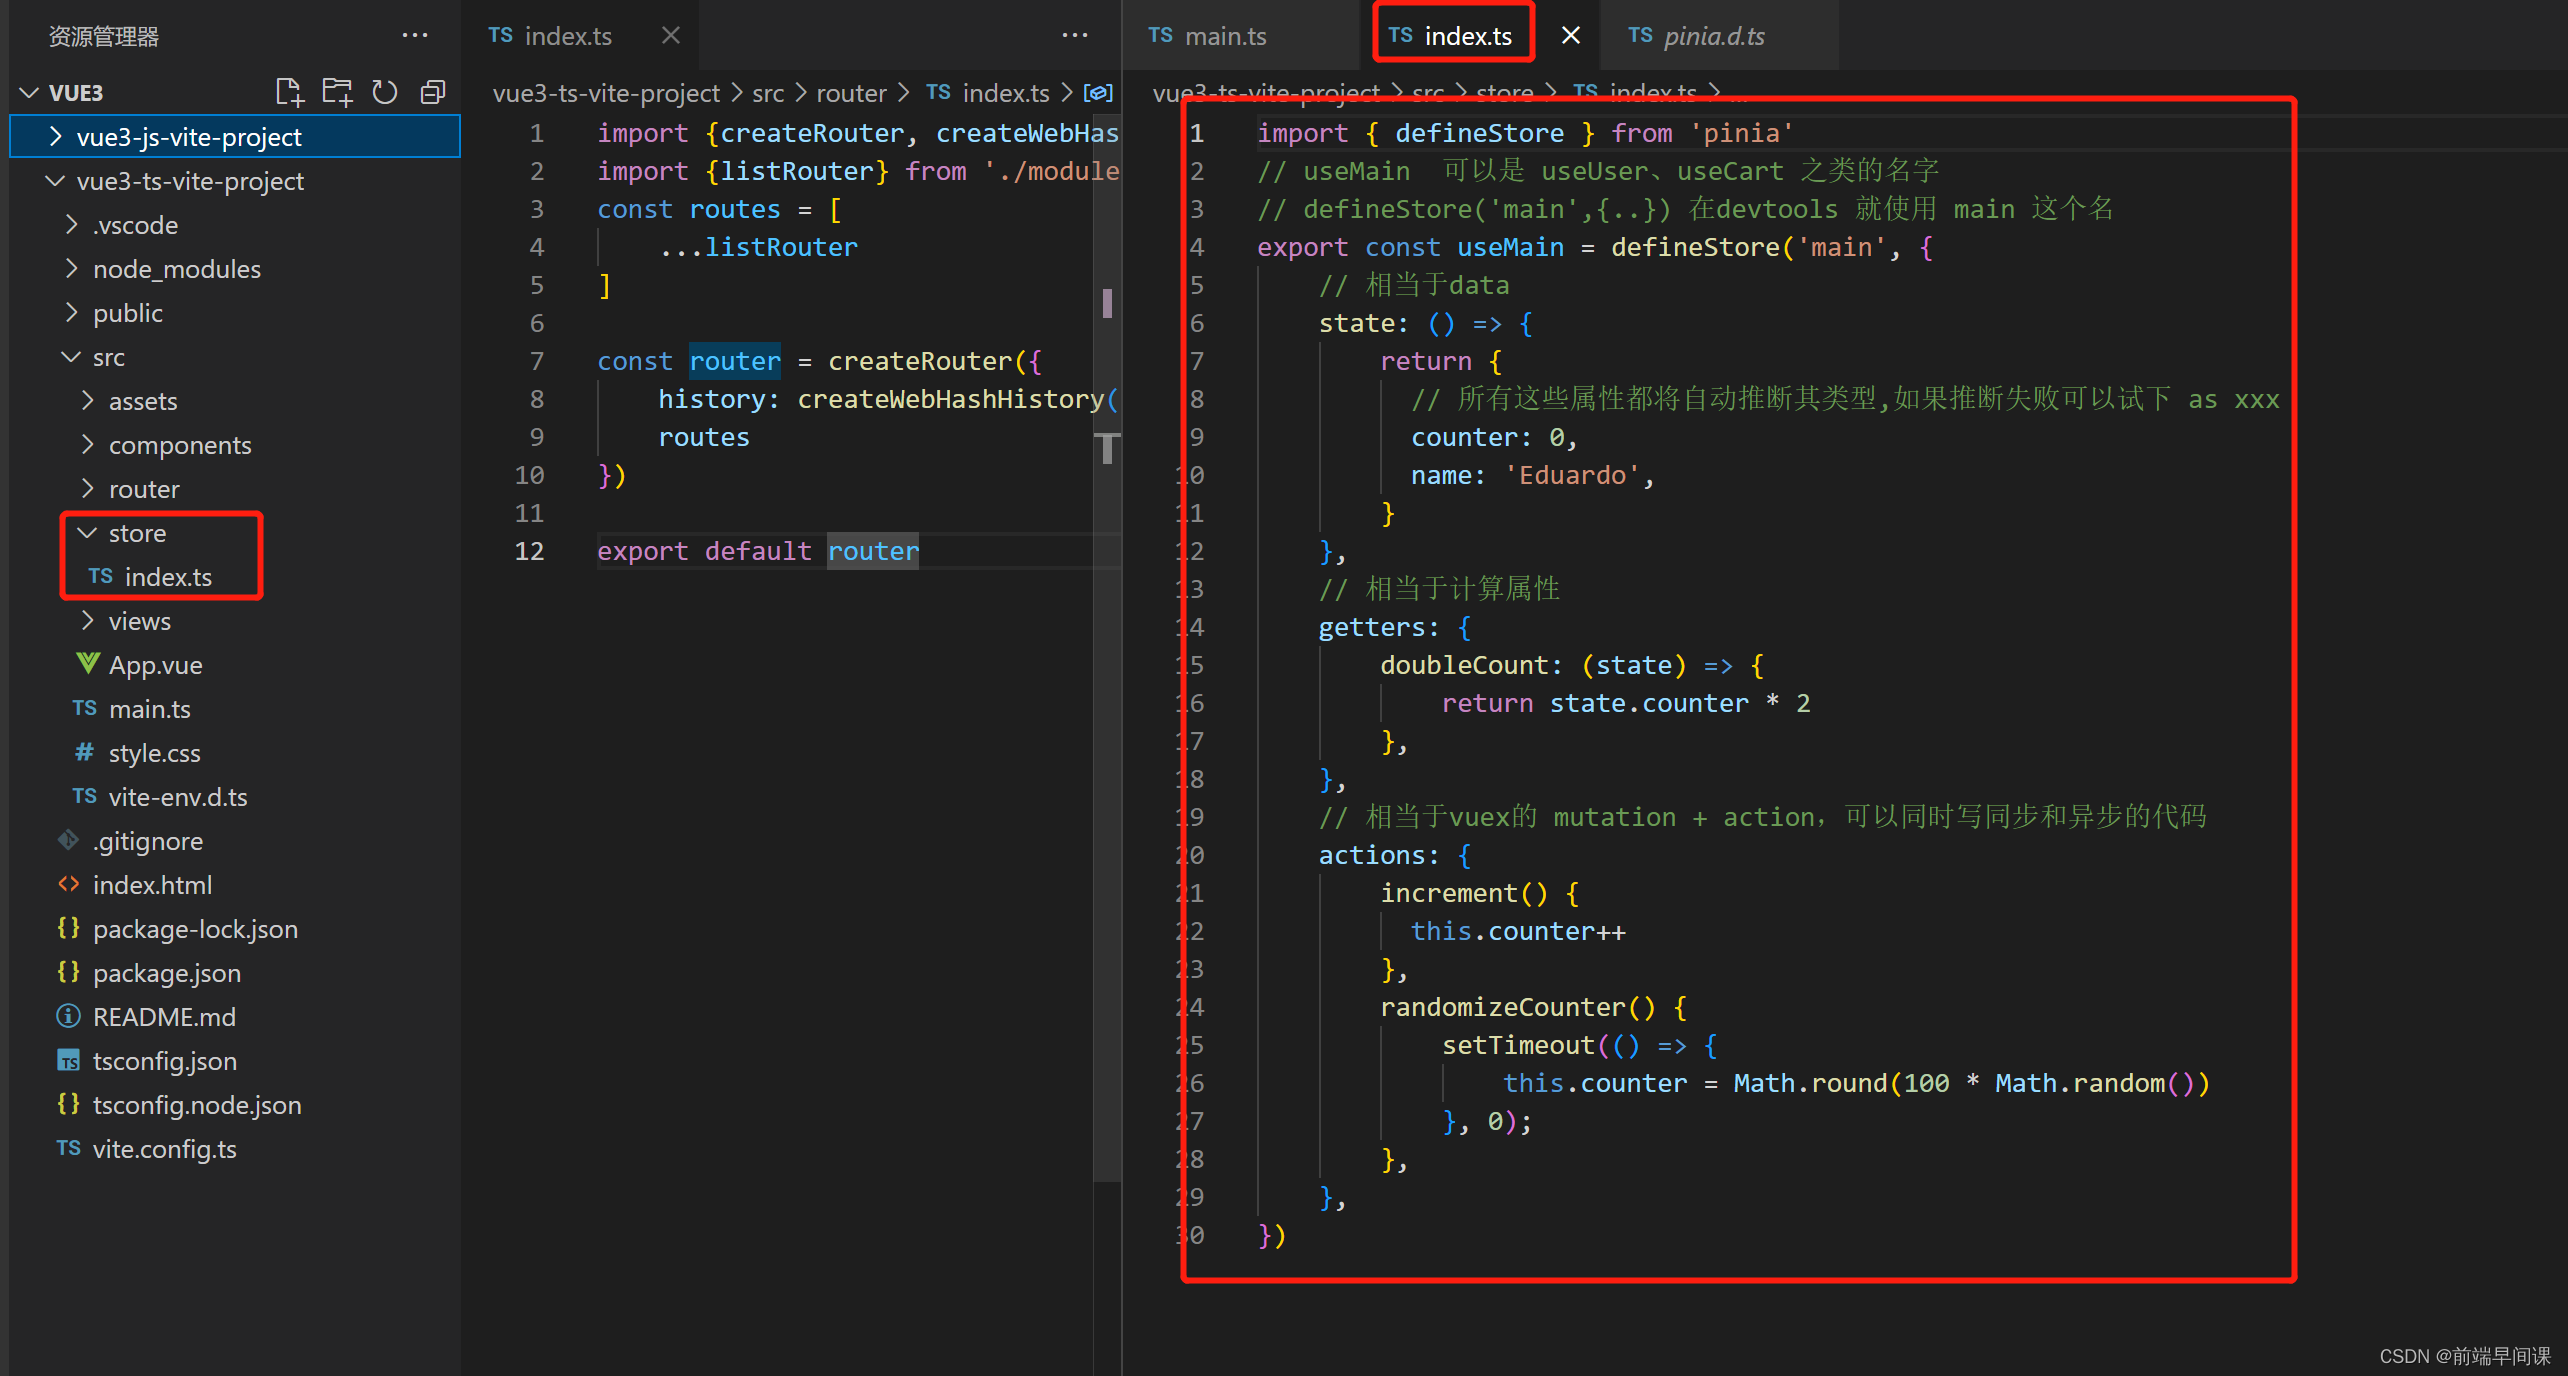
5. Install pinia
Vue3+ts uses pinia better, vuex uses ts without pinia elegant
pinia official website pinia official website
npm install
npm install pinia
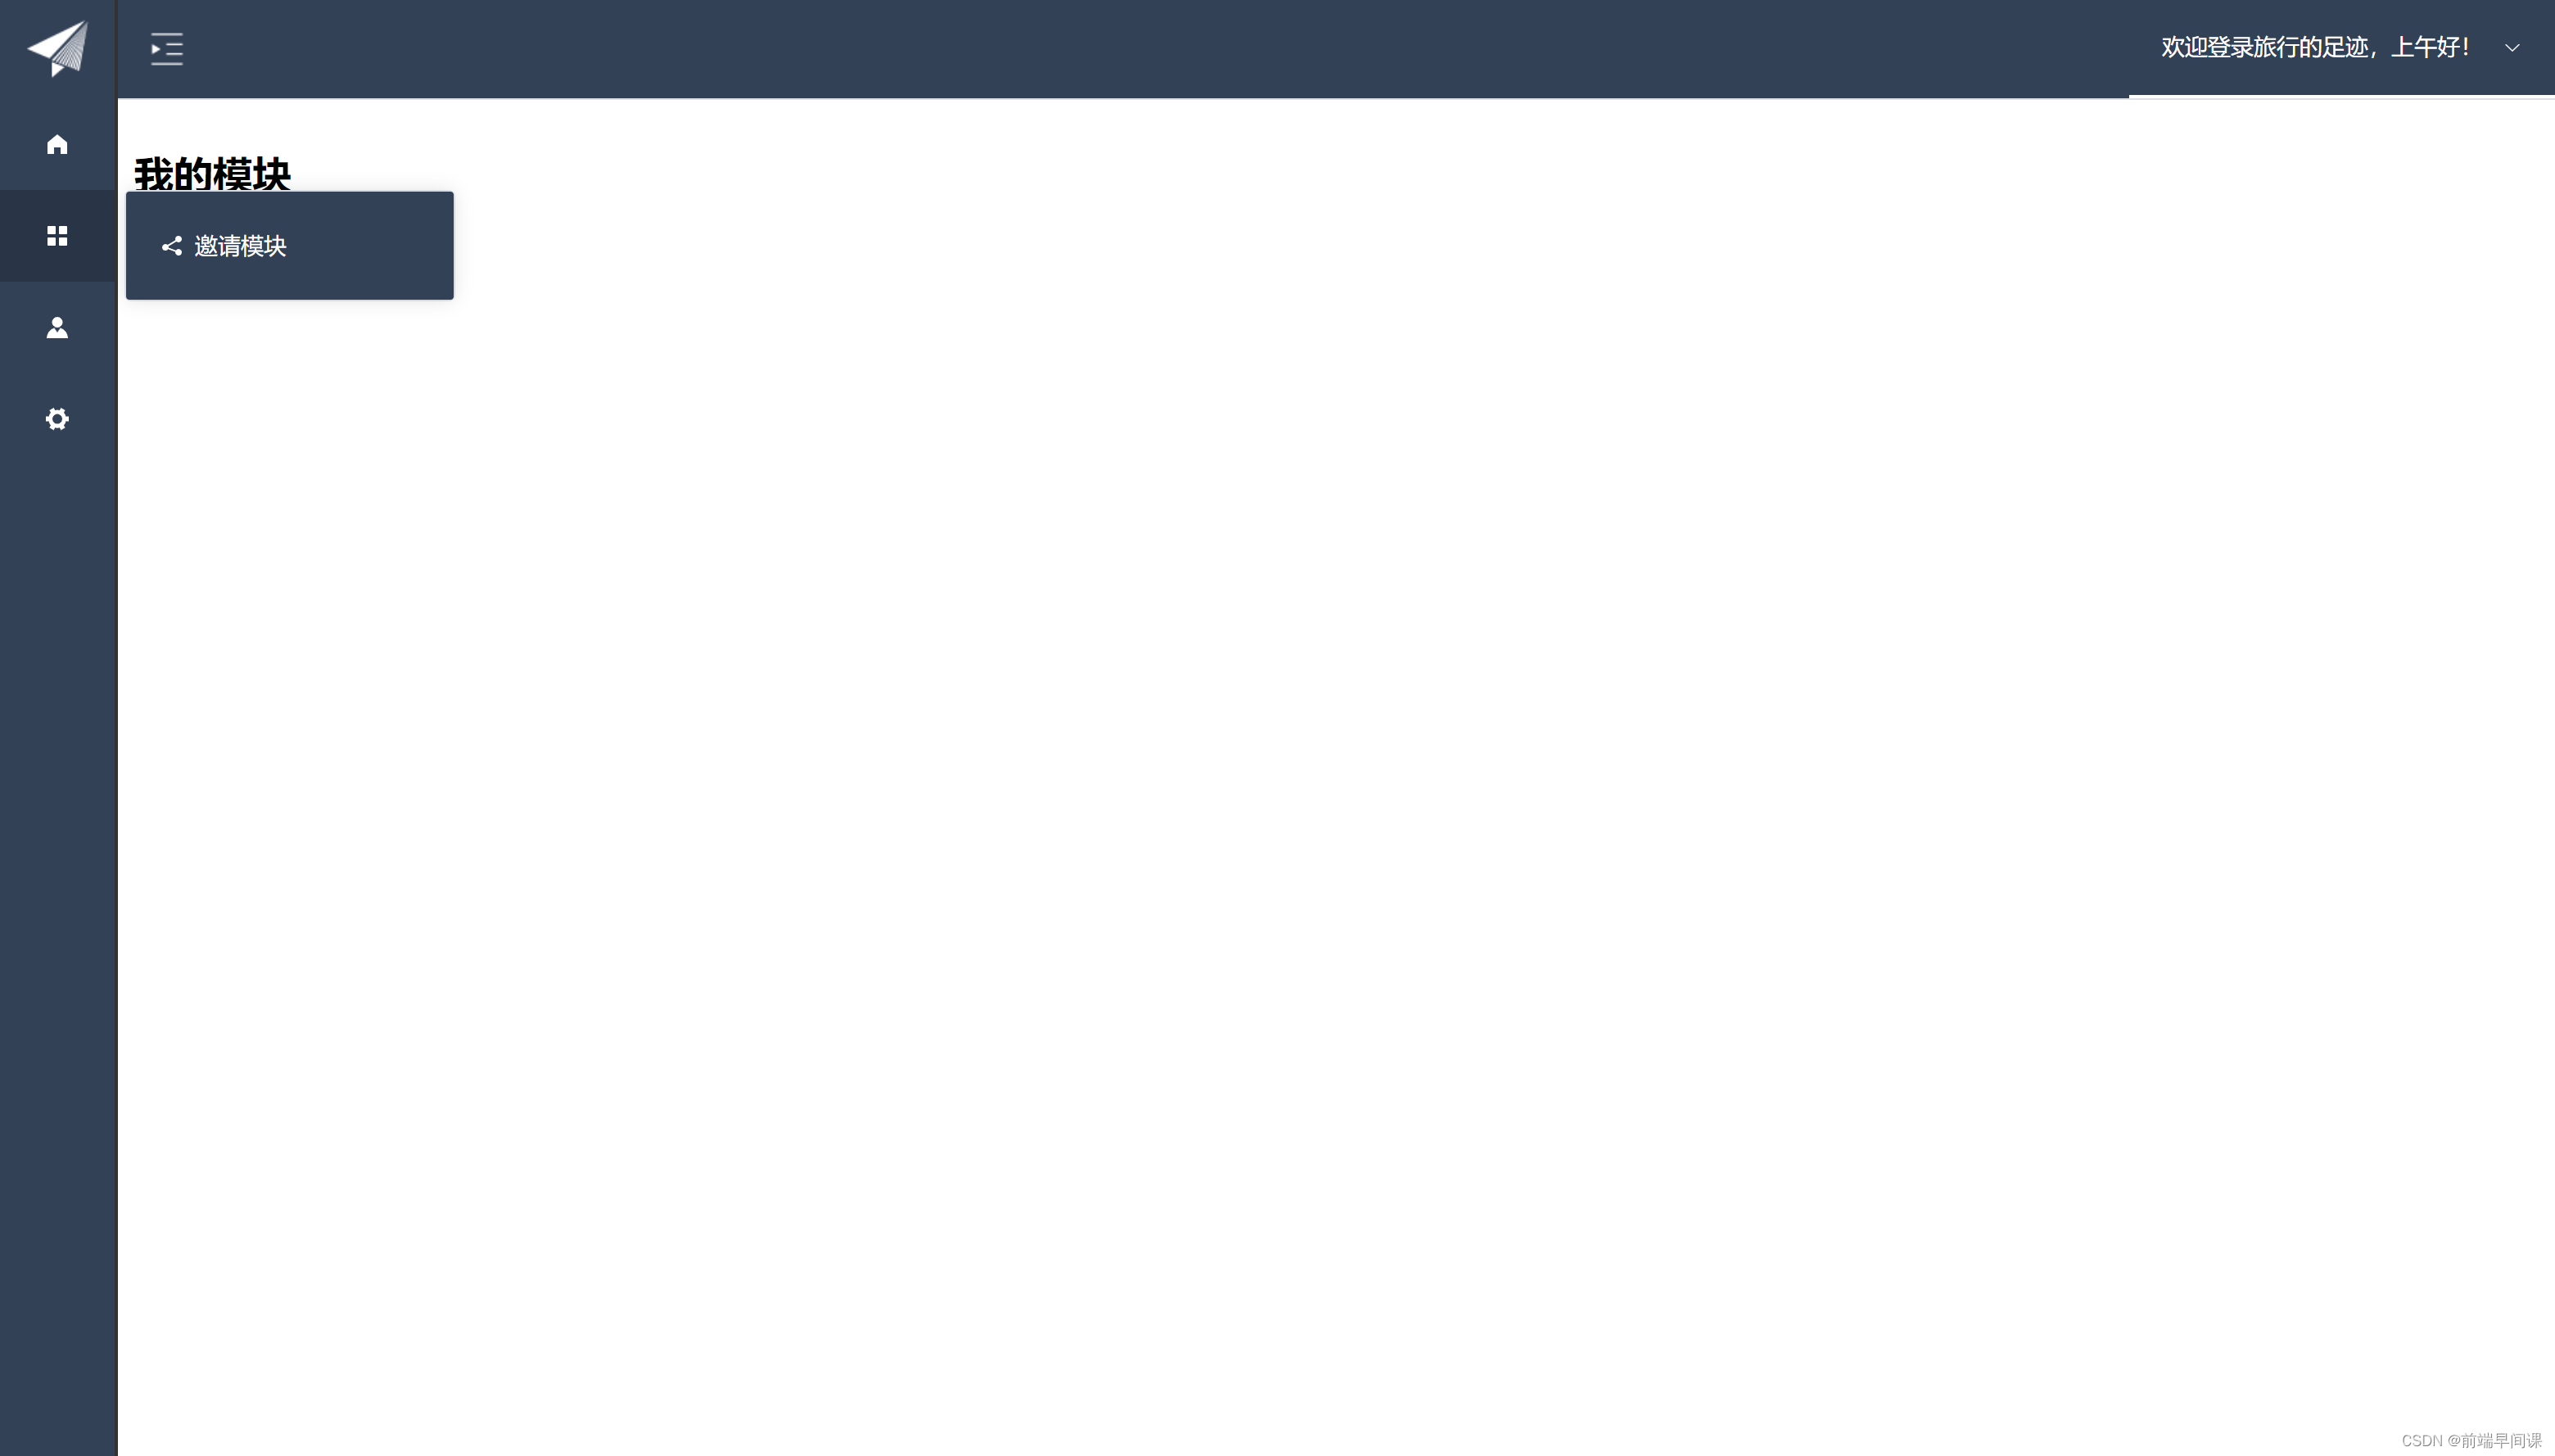
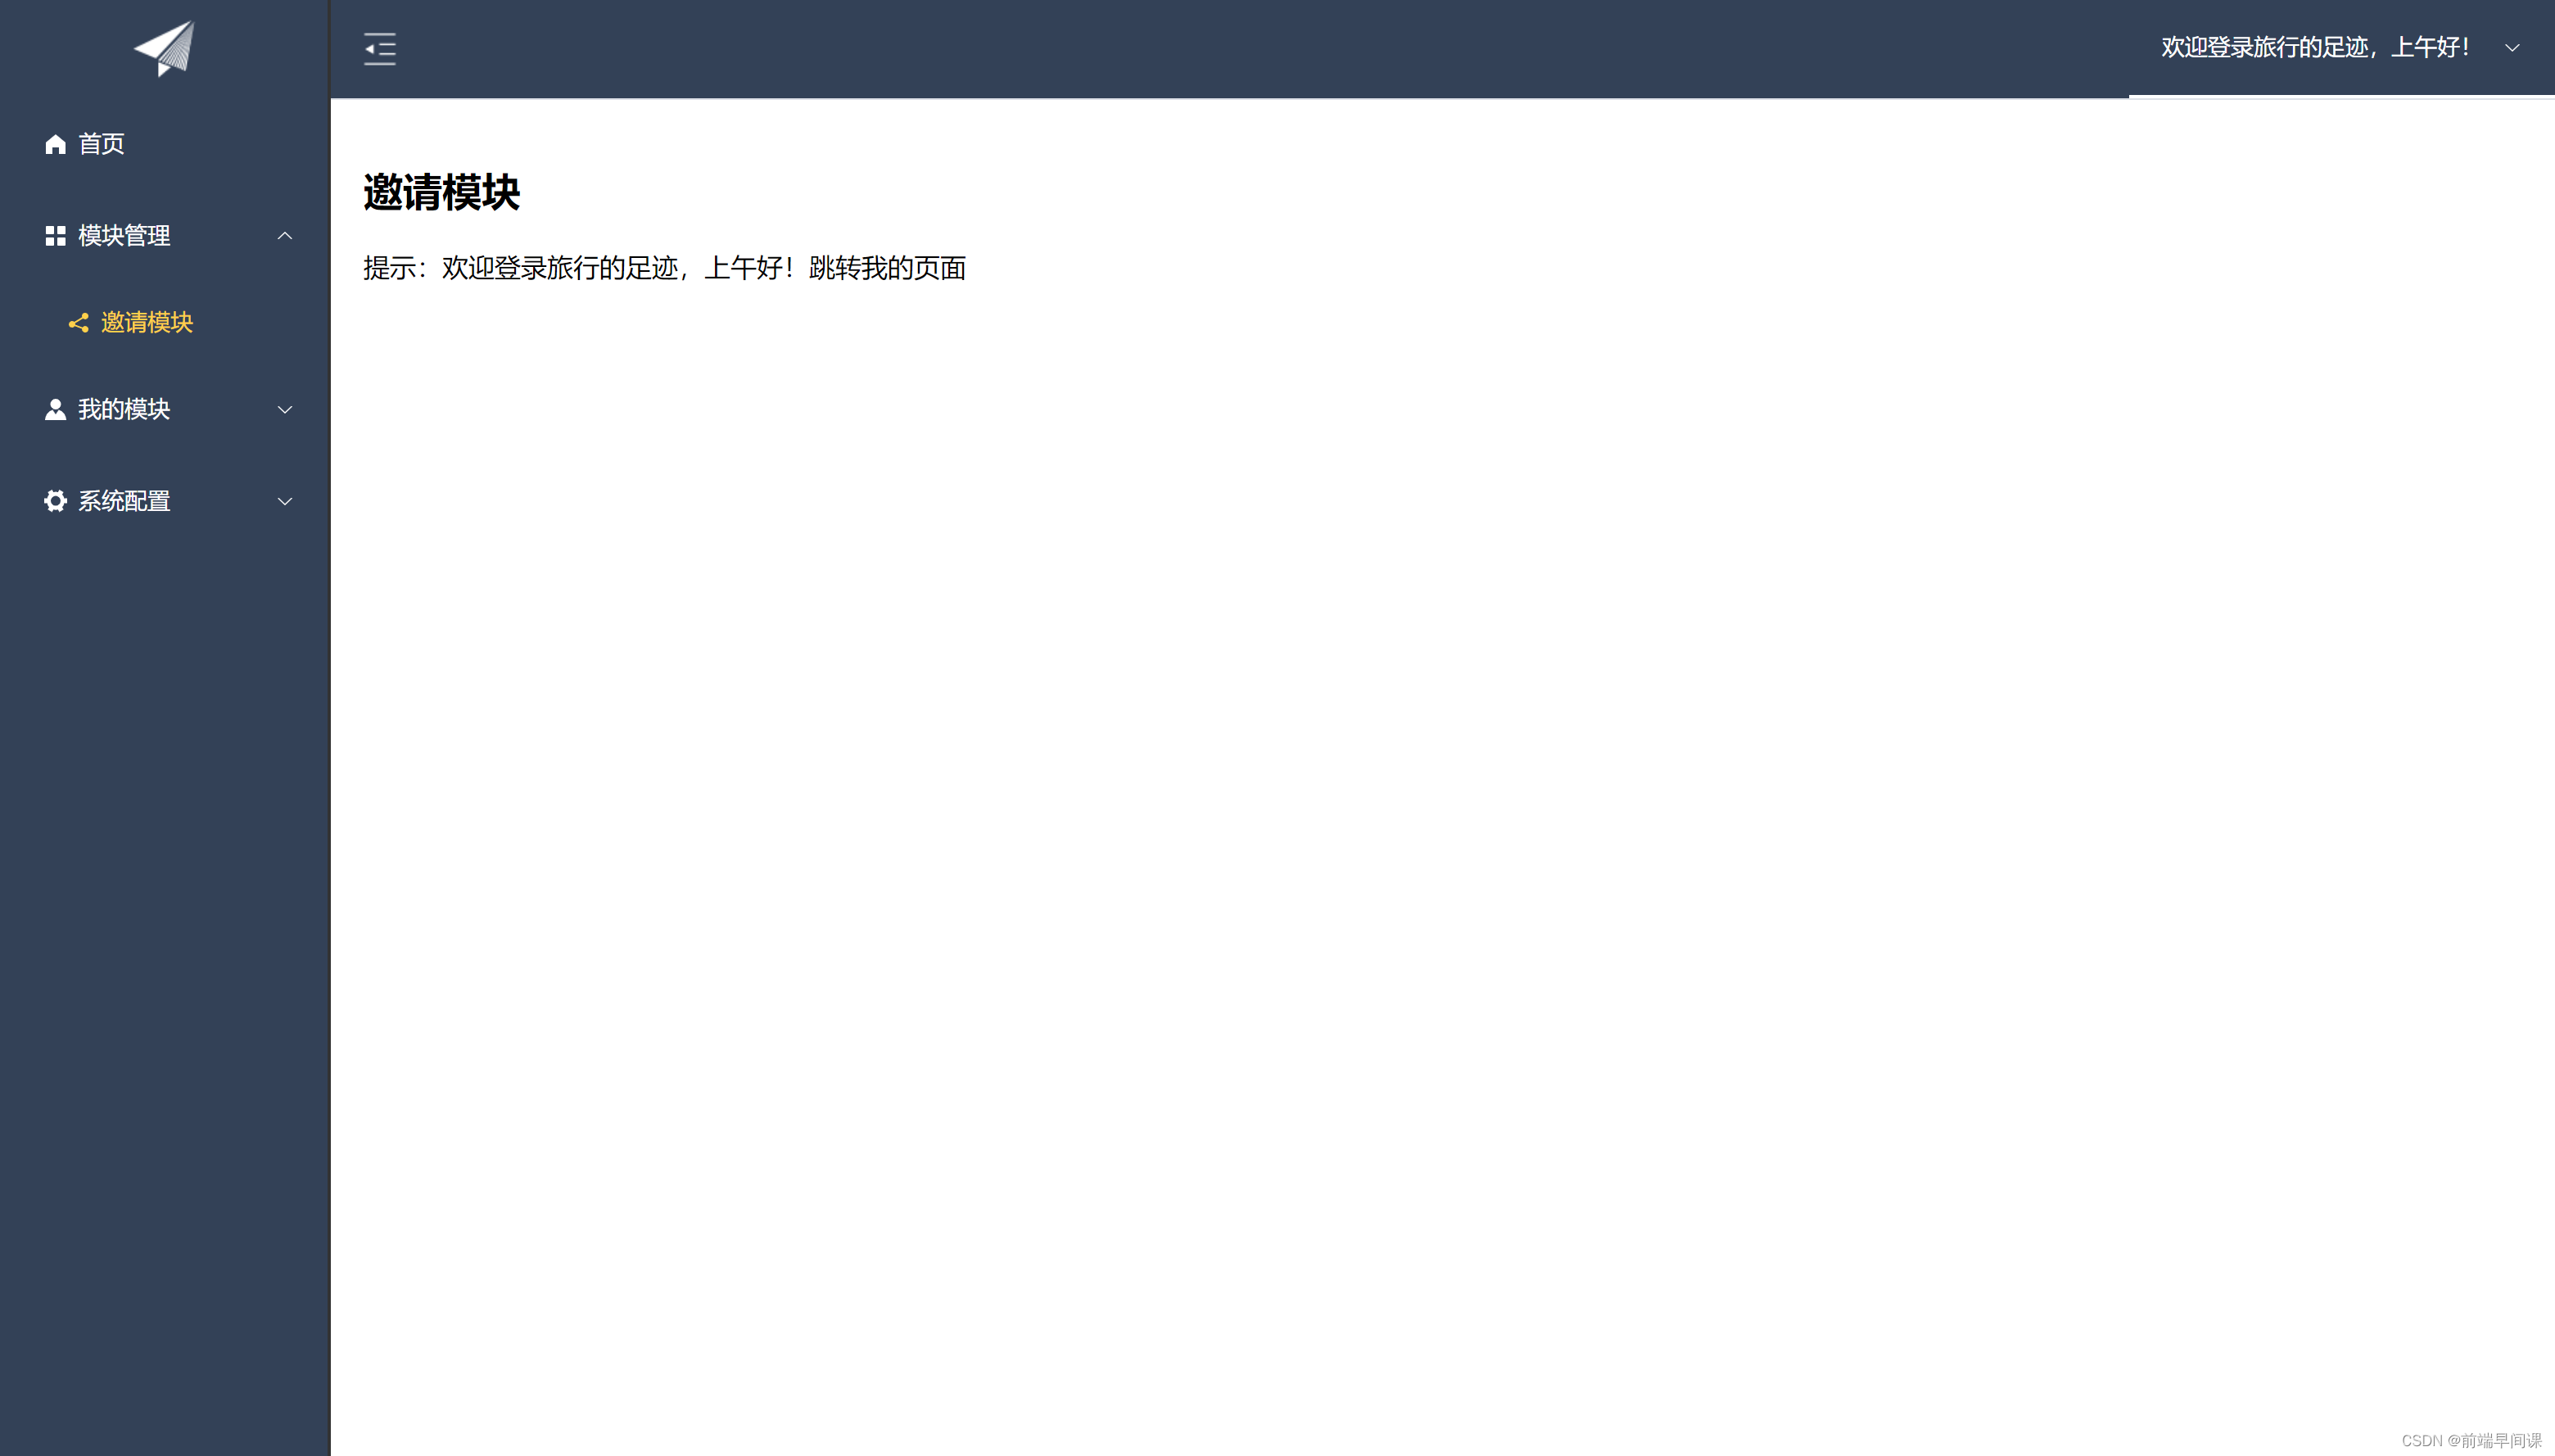
6. Build the background system – build the basic configuration layout page
1. Download element-ui-plus
npm install element-plus --save
Download element icon The icon on the left side of this route will be usednpm install @element-plus/icons-vue
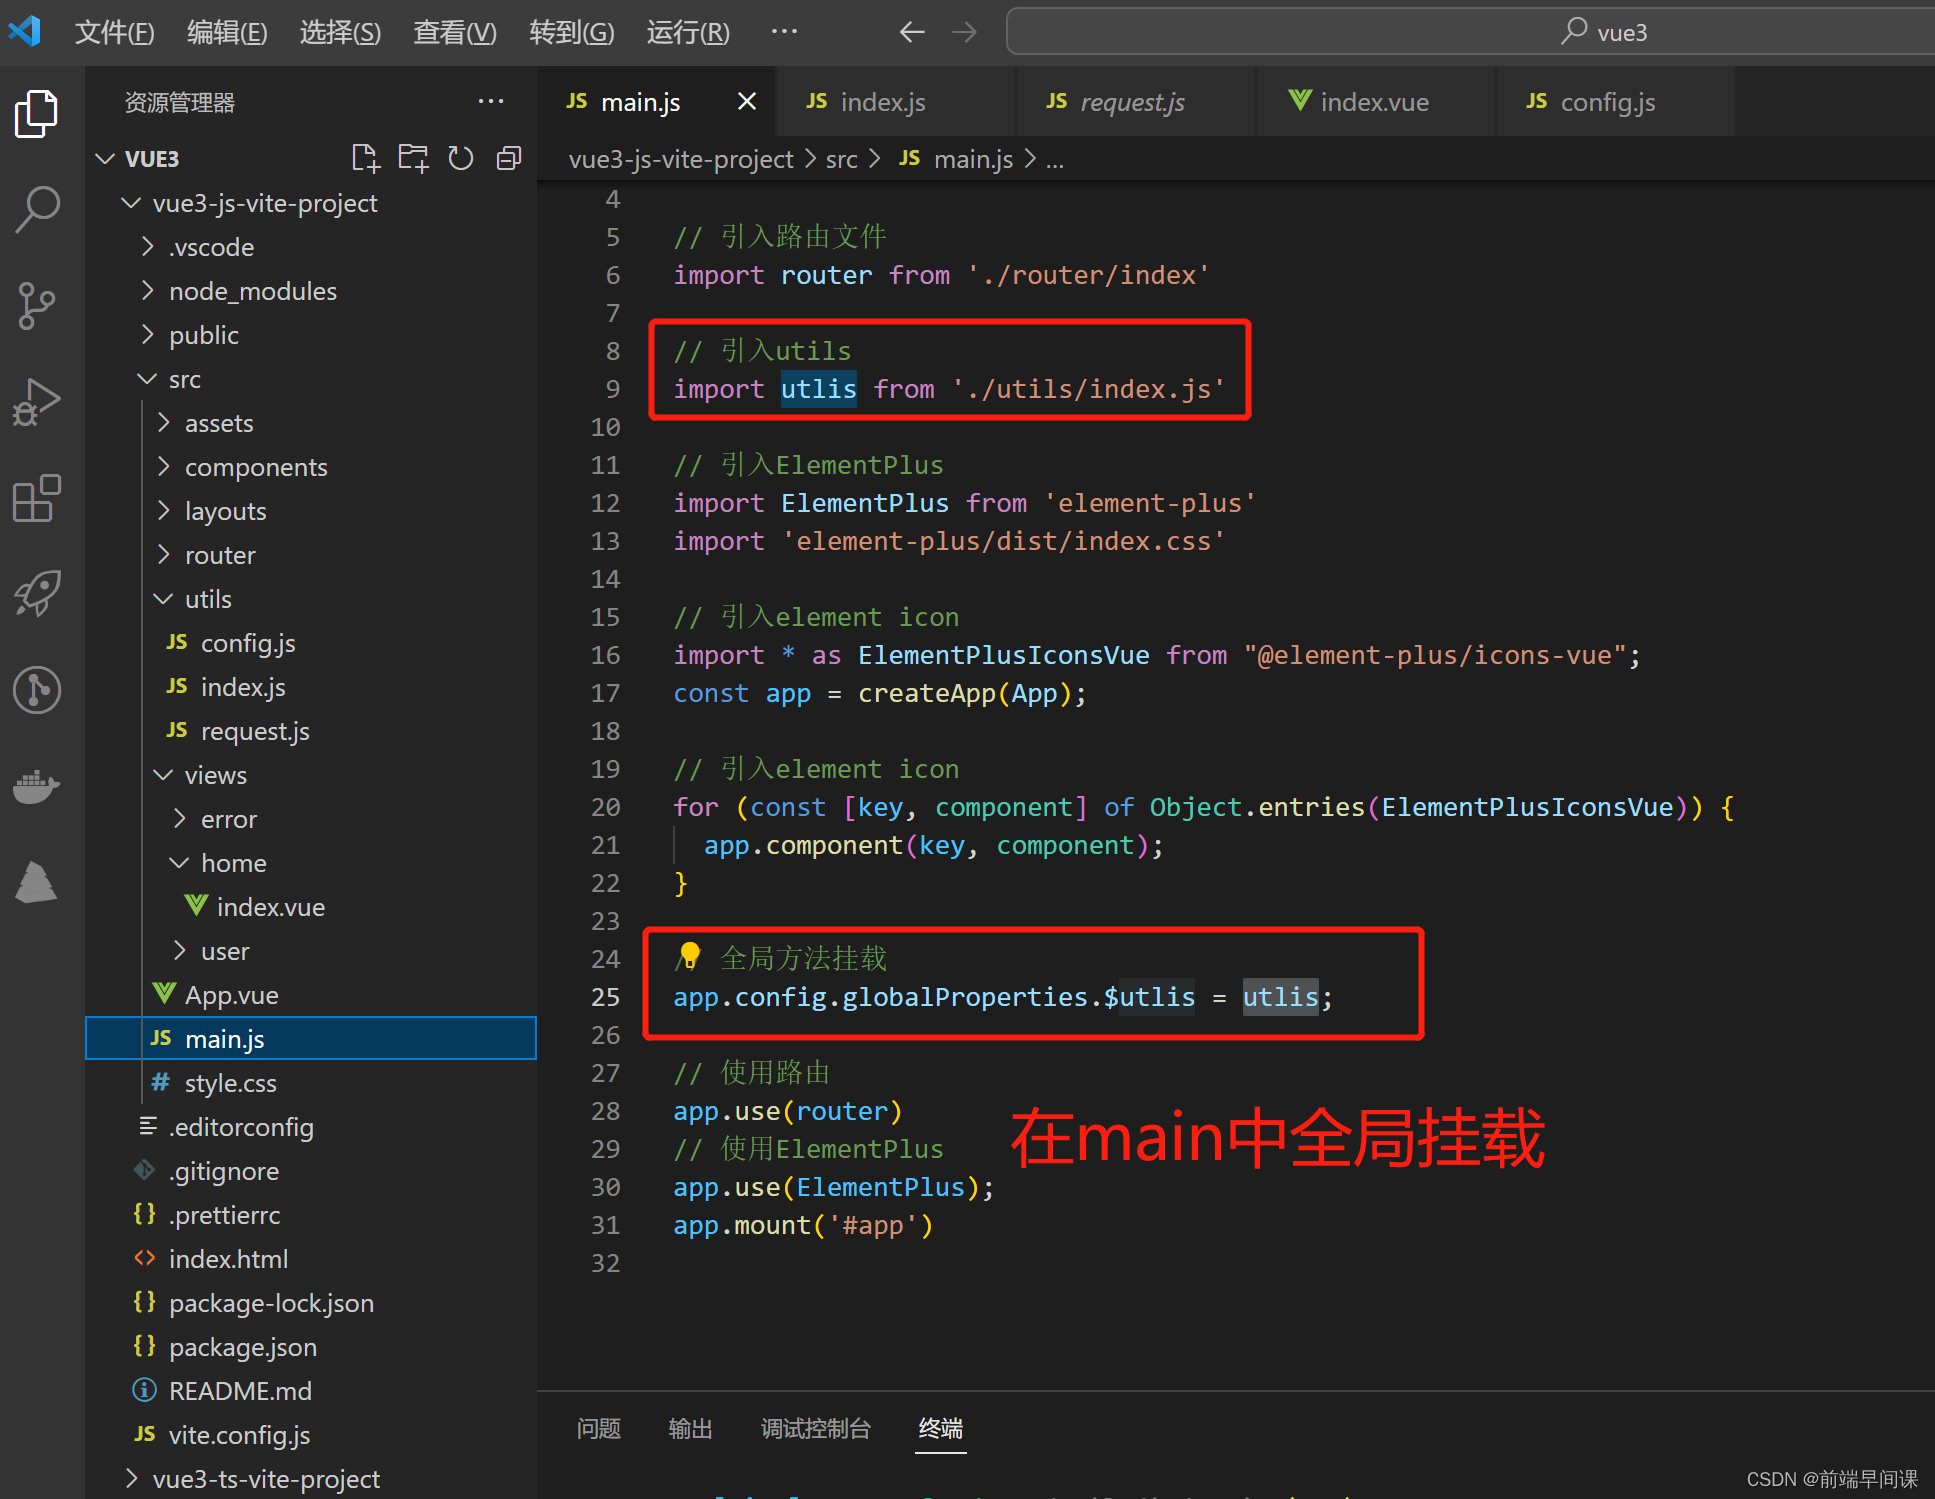
2. Encapsulate public js method
3. Mount public js globally
4. Introduce element-ui
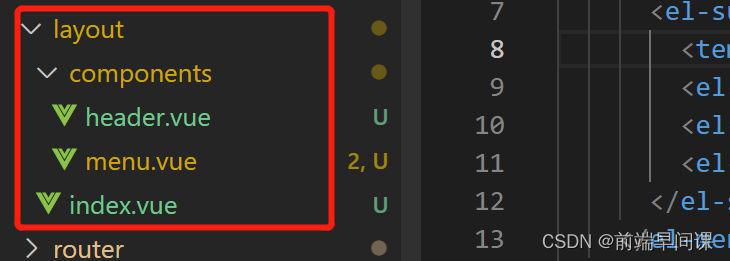
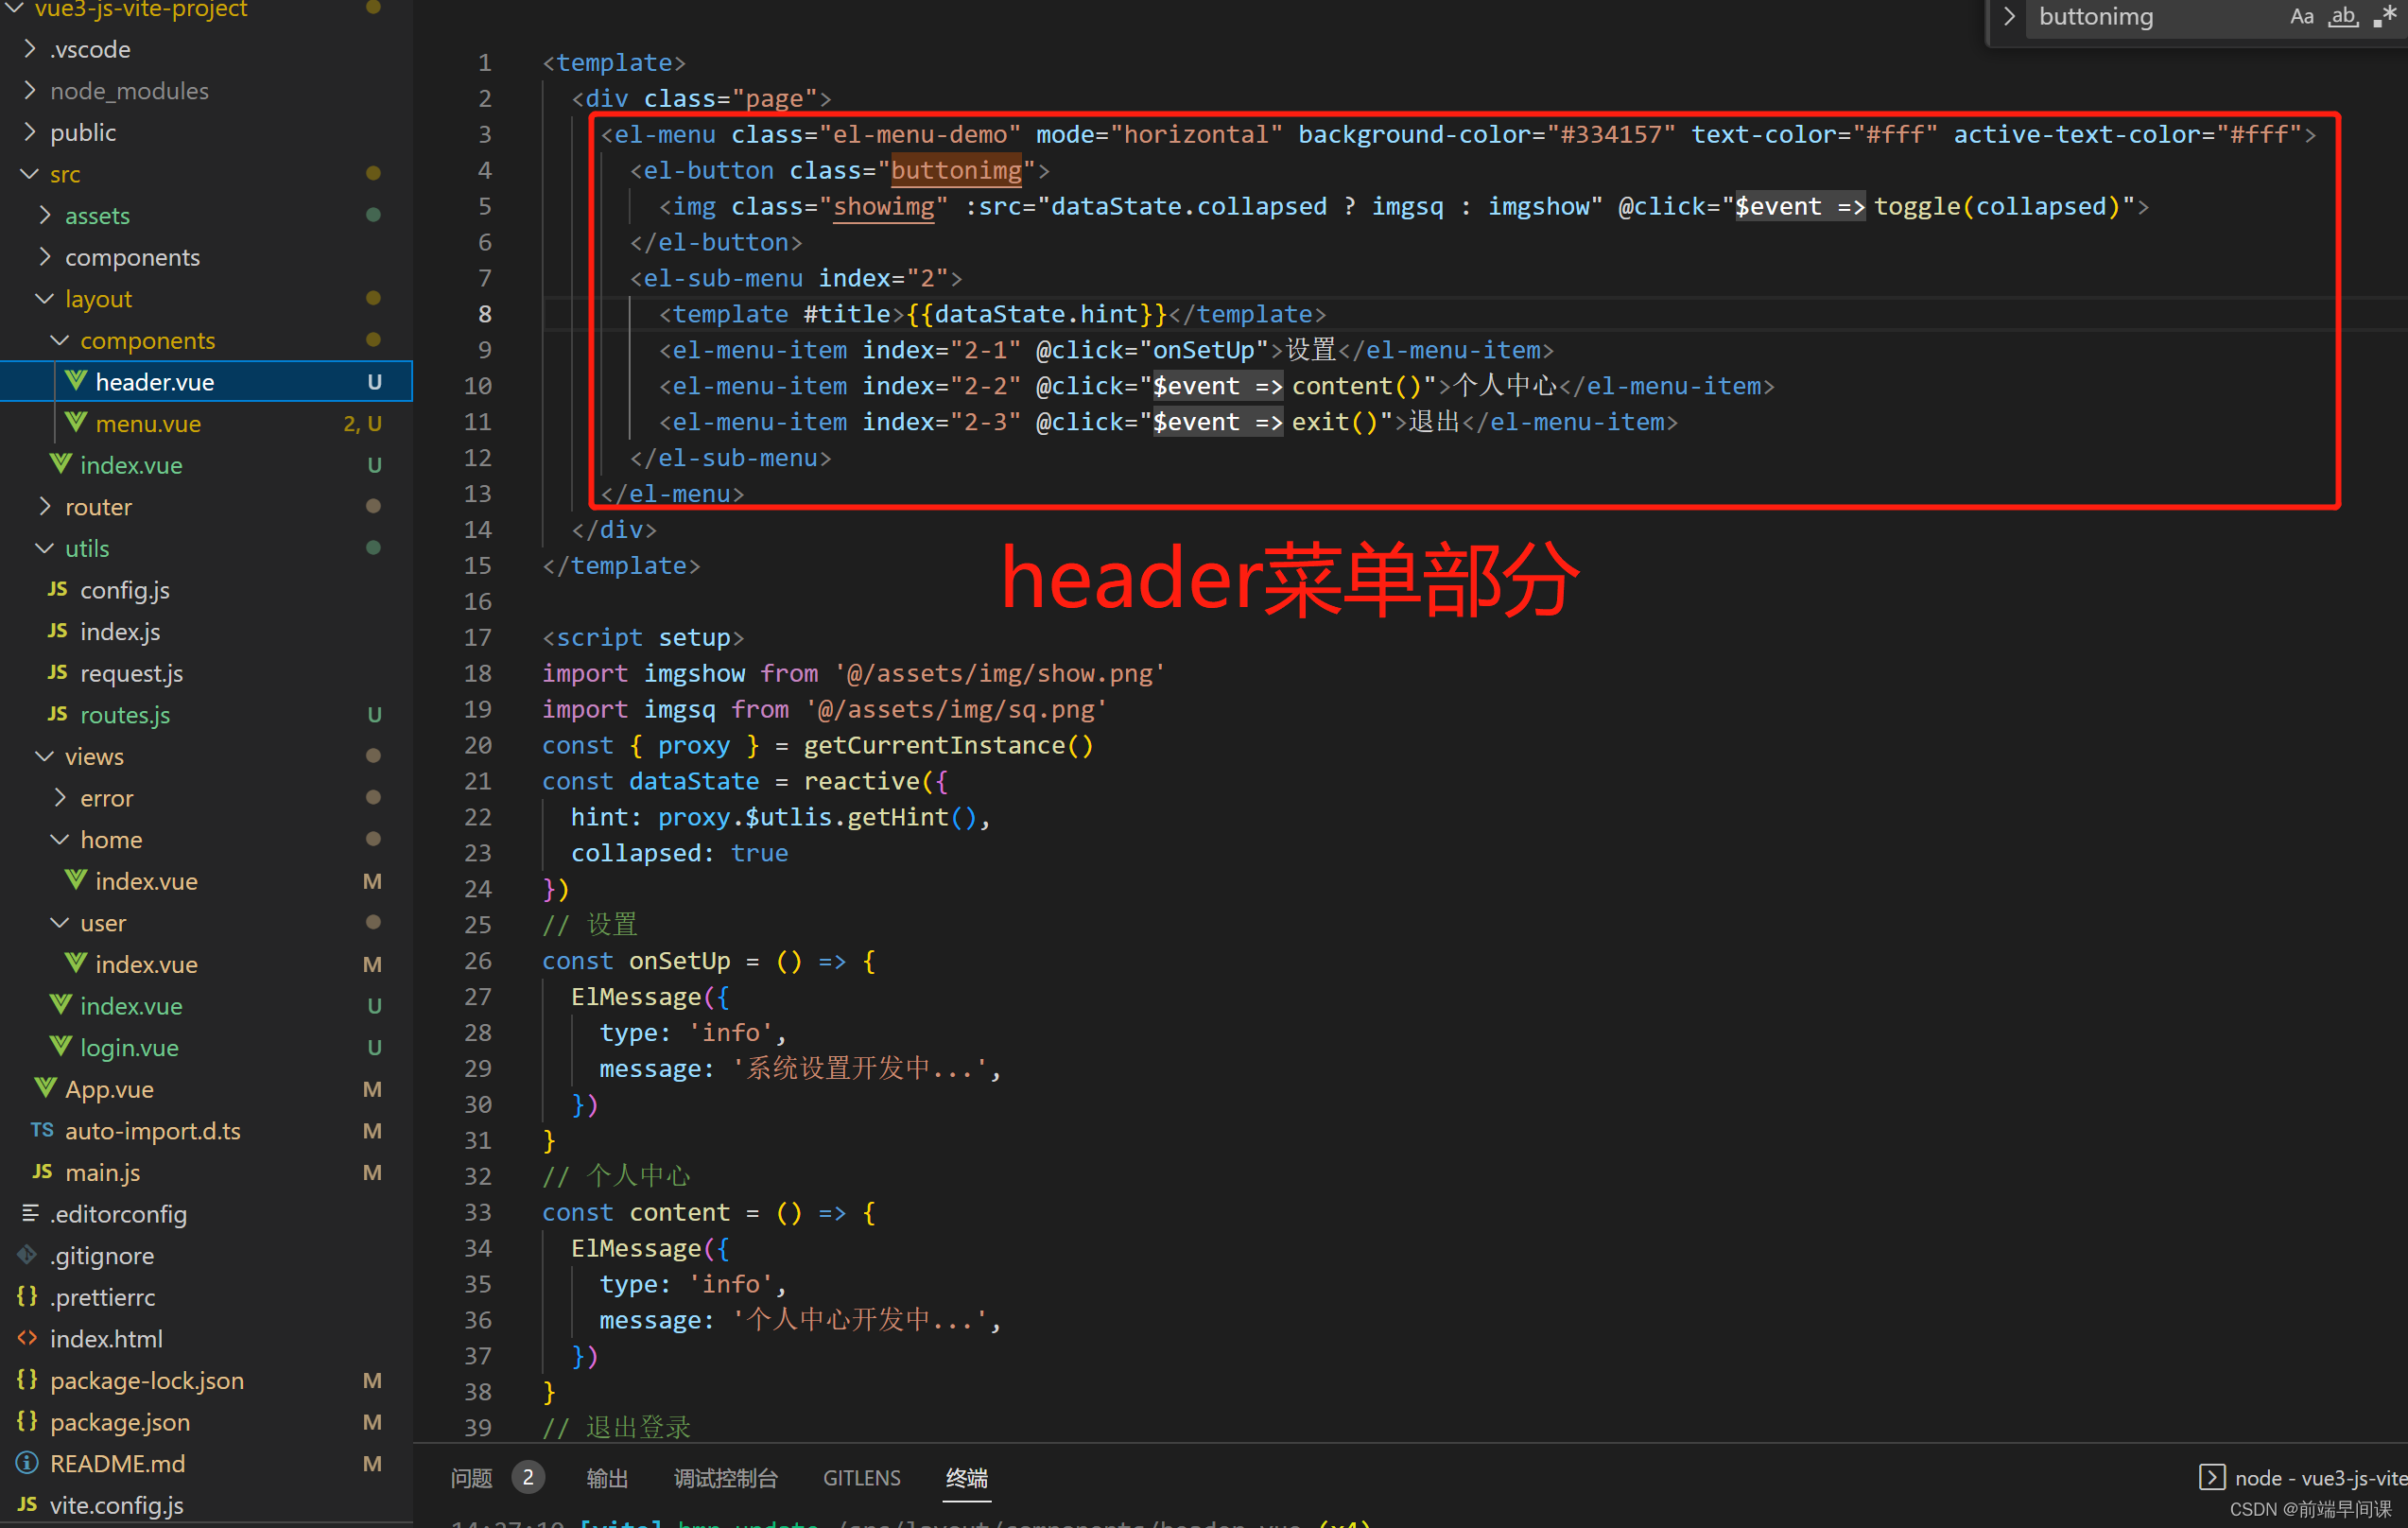
5. Build menu components
1. The use of element-ui-plus
2. Encapsulation of public js methods

3. Mount public js globally
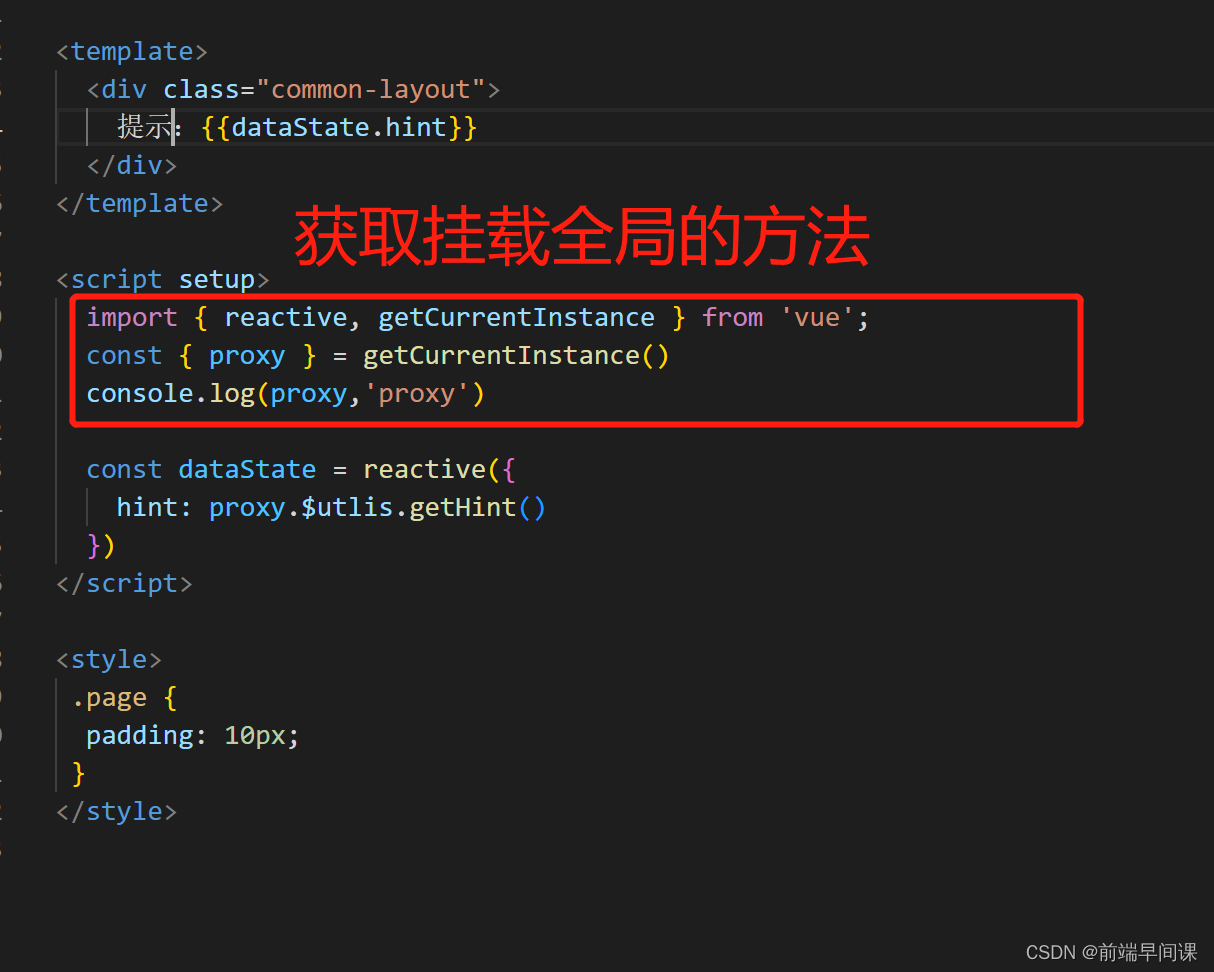
What needs to be noted here is that
app.config.globalPropertiesthere are some pitfalls in the use, how we can solve the remaining problems, please see the following example:
Solution 1:
// 这里要注意 getCurrentInstance 模块导入
  import {

     reactive, getCurrentInstance } from 'vue';
const {

     appContext } = getCurrentInstance();
const globalProxy = appContext.config.globalProperties;
console.log(appContext,'globalProxy')
// 通过appContext.config.globalProperties调用获取
// 这样使用 即使打包发布也不会出现问题
Solution 2:
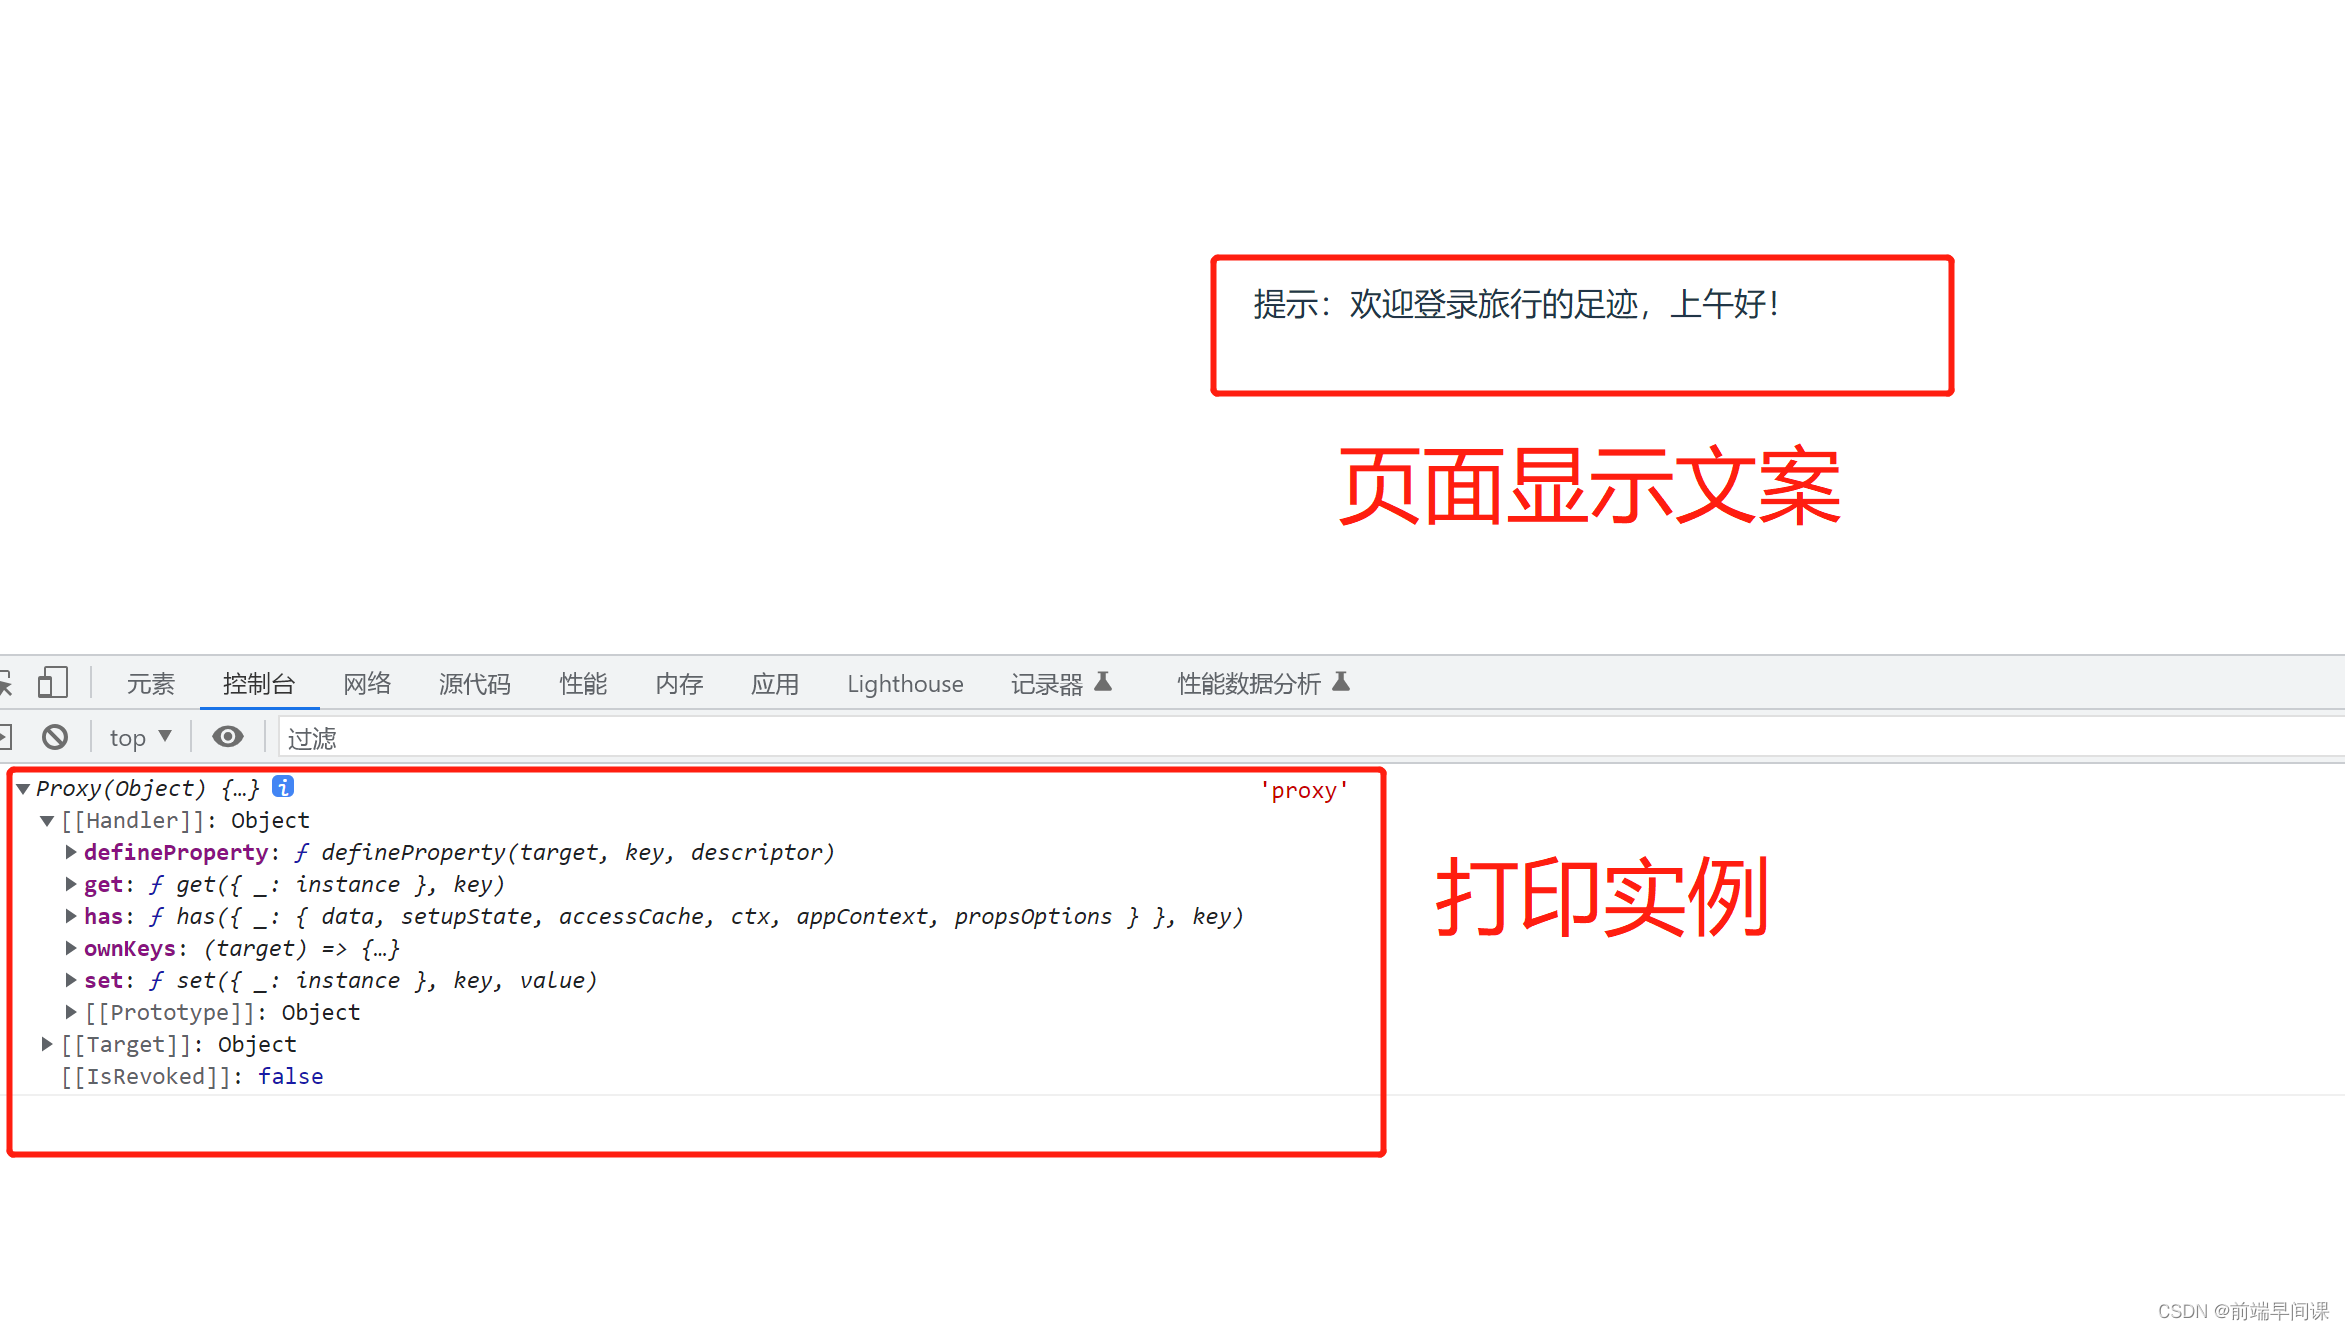
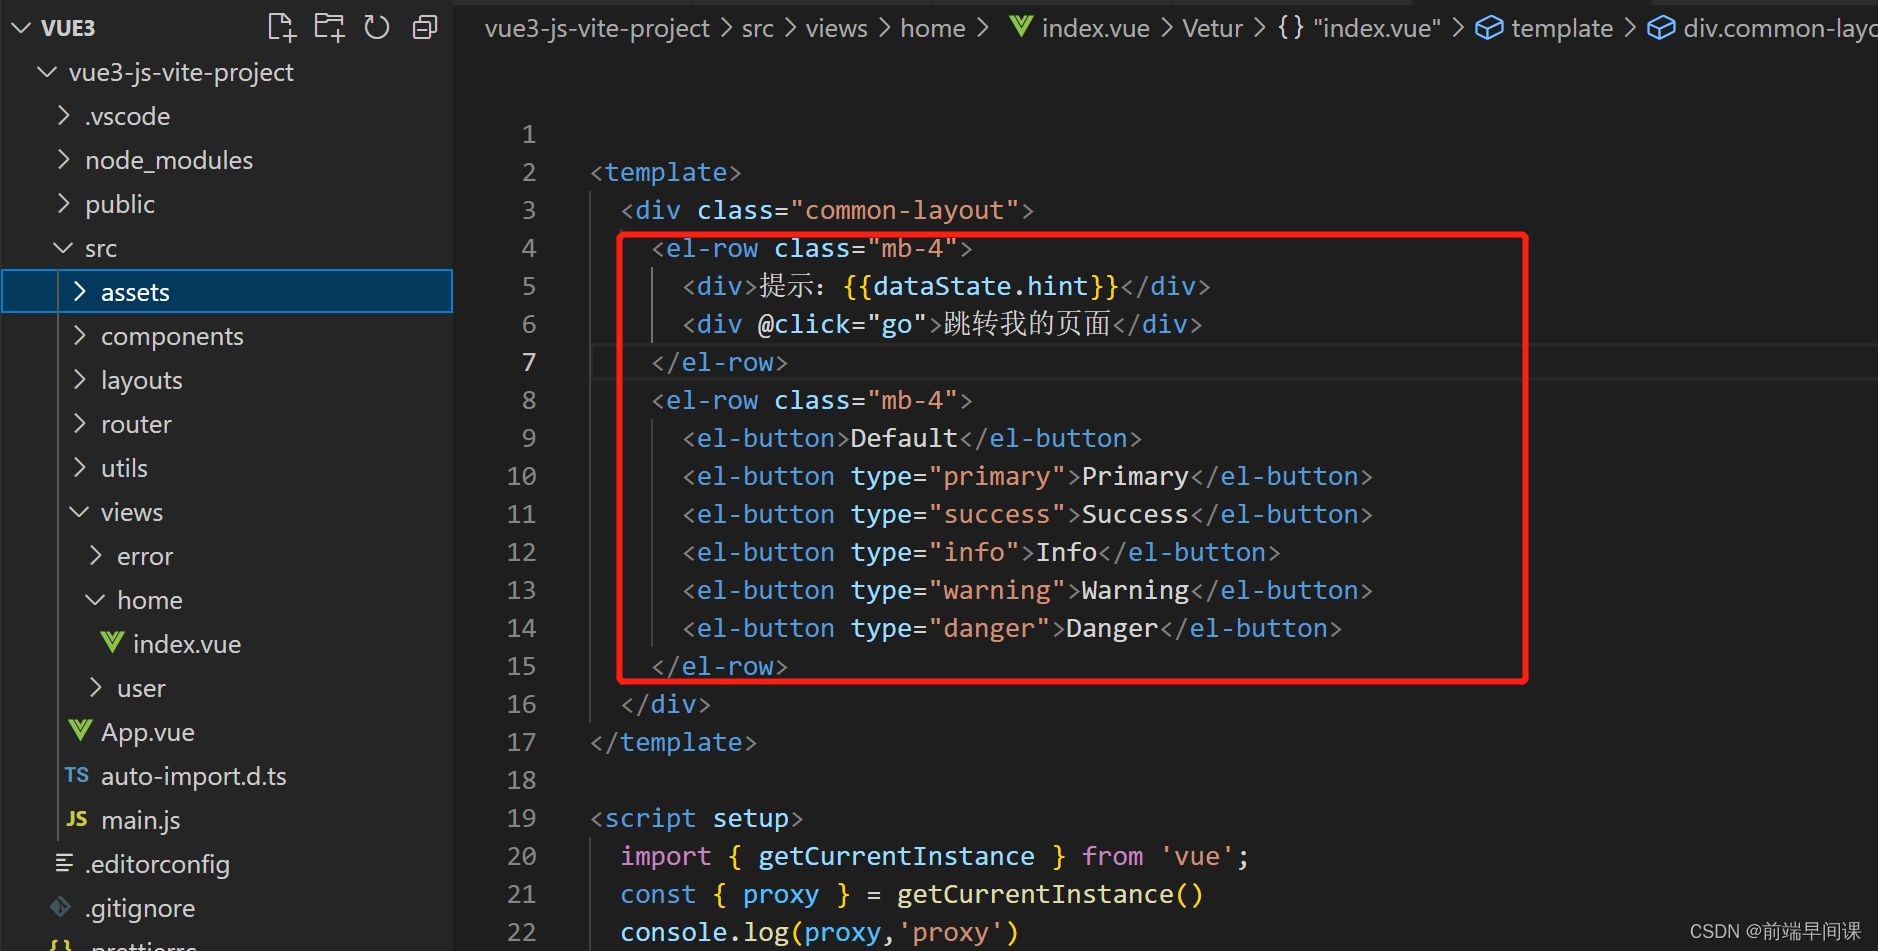
const {

     proxy } = getCurrentInstance()
console.log(proxy.$utlis.getHint(),'首页')
console.log(proxy,'proxy')
// 获取挂载在全局的方法
// 这样使用 即使打包发布也不会出现问题
** 4. Introduce element-ui**

5. Build menu components

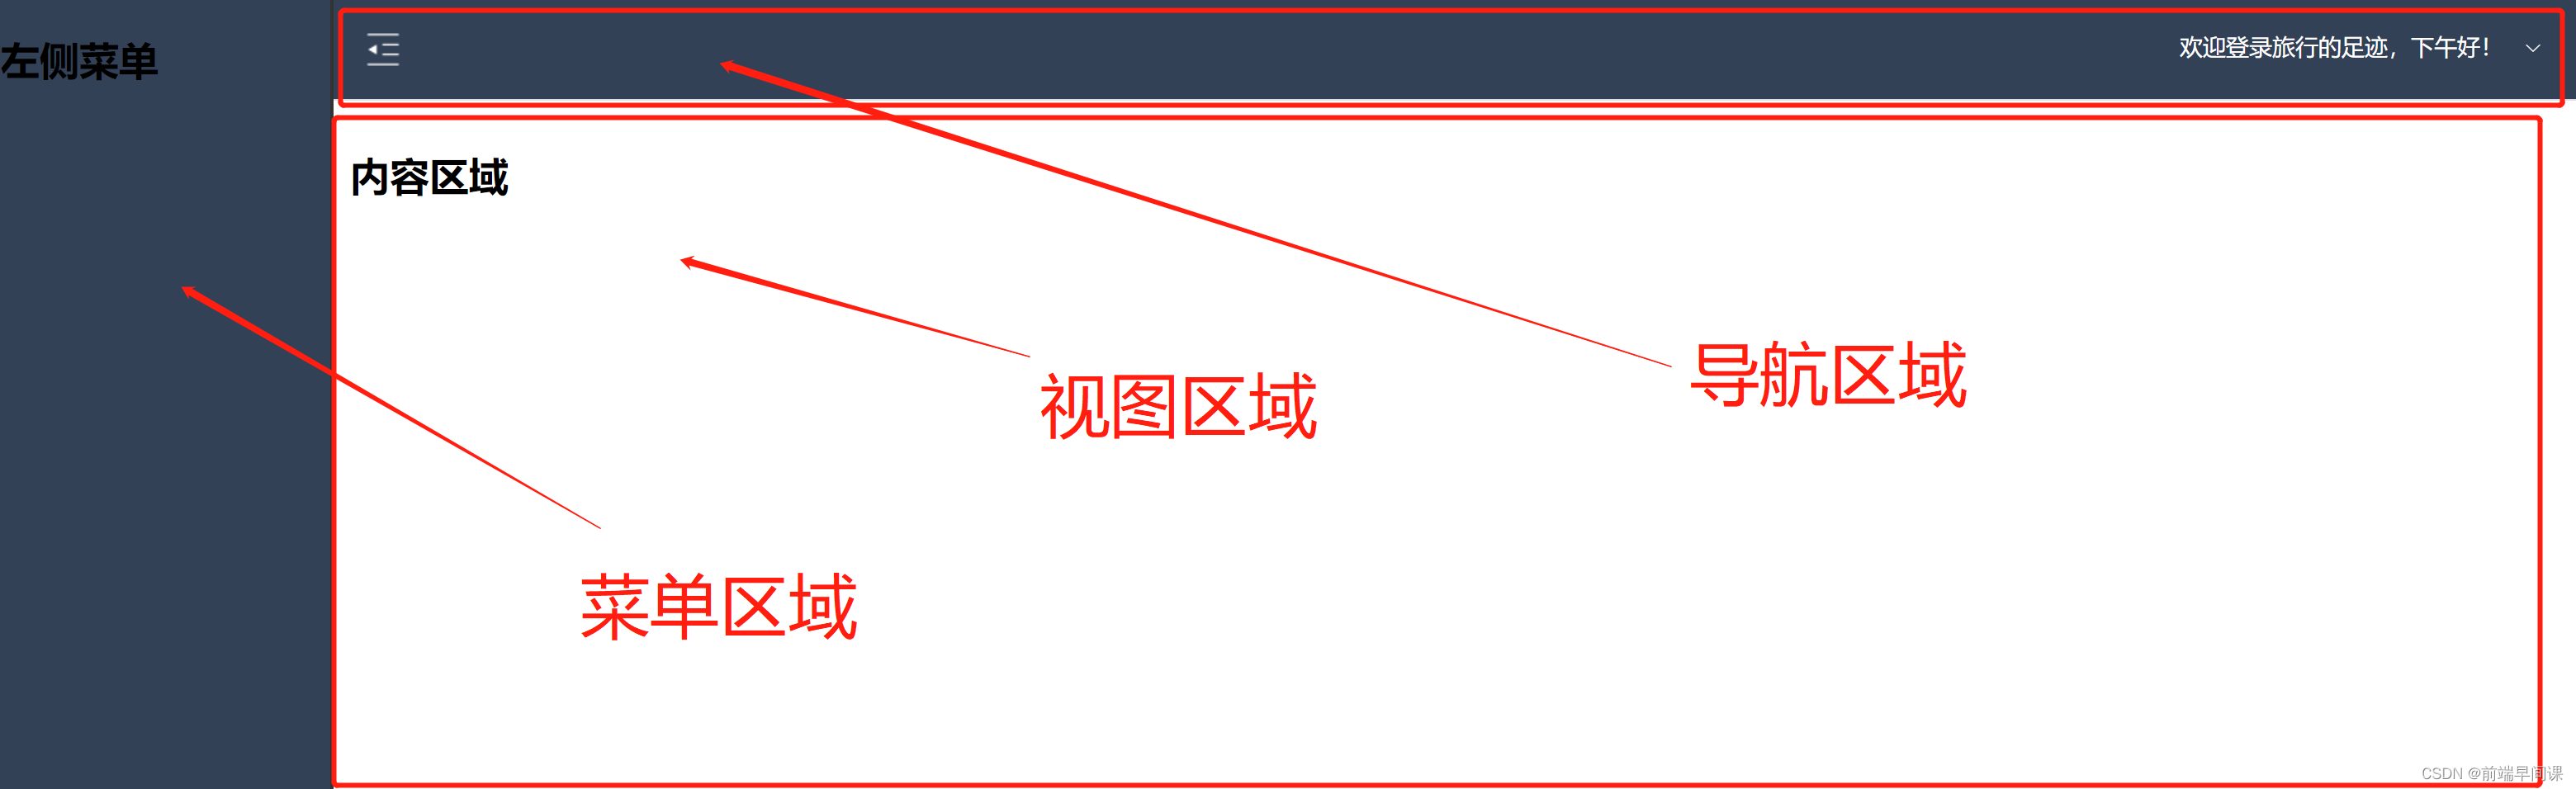
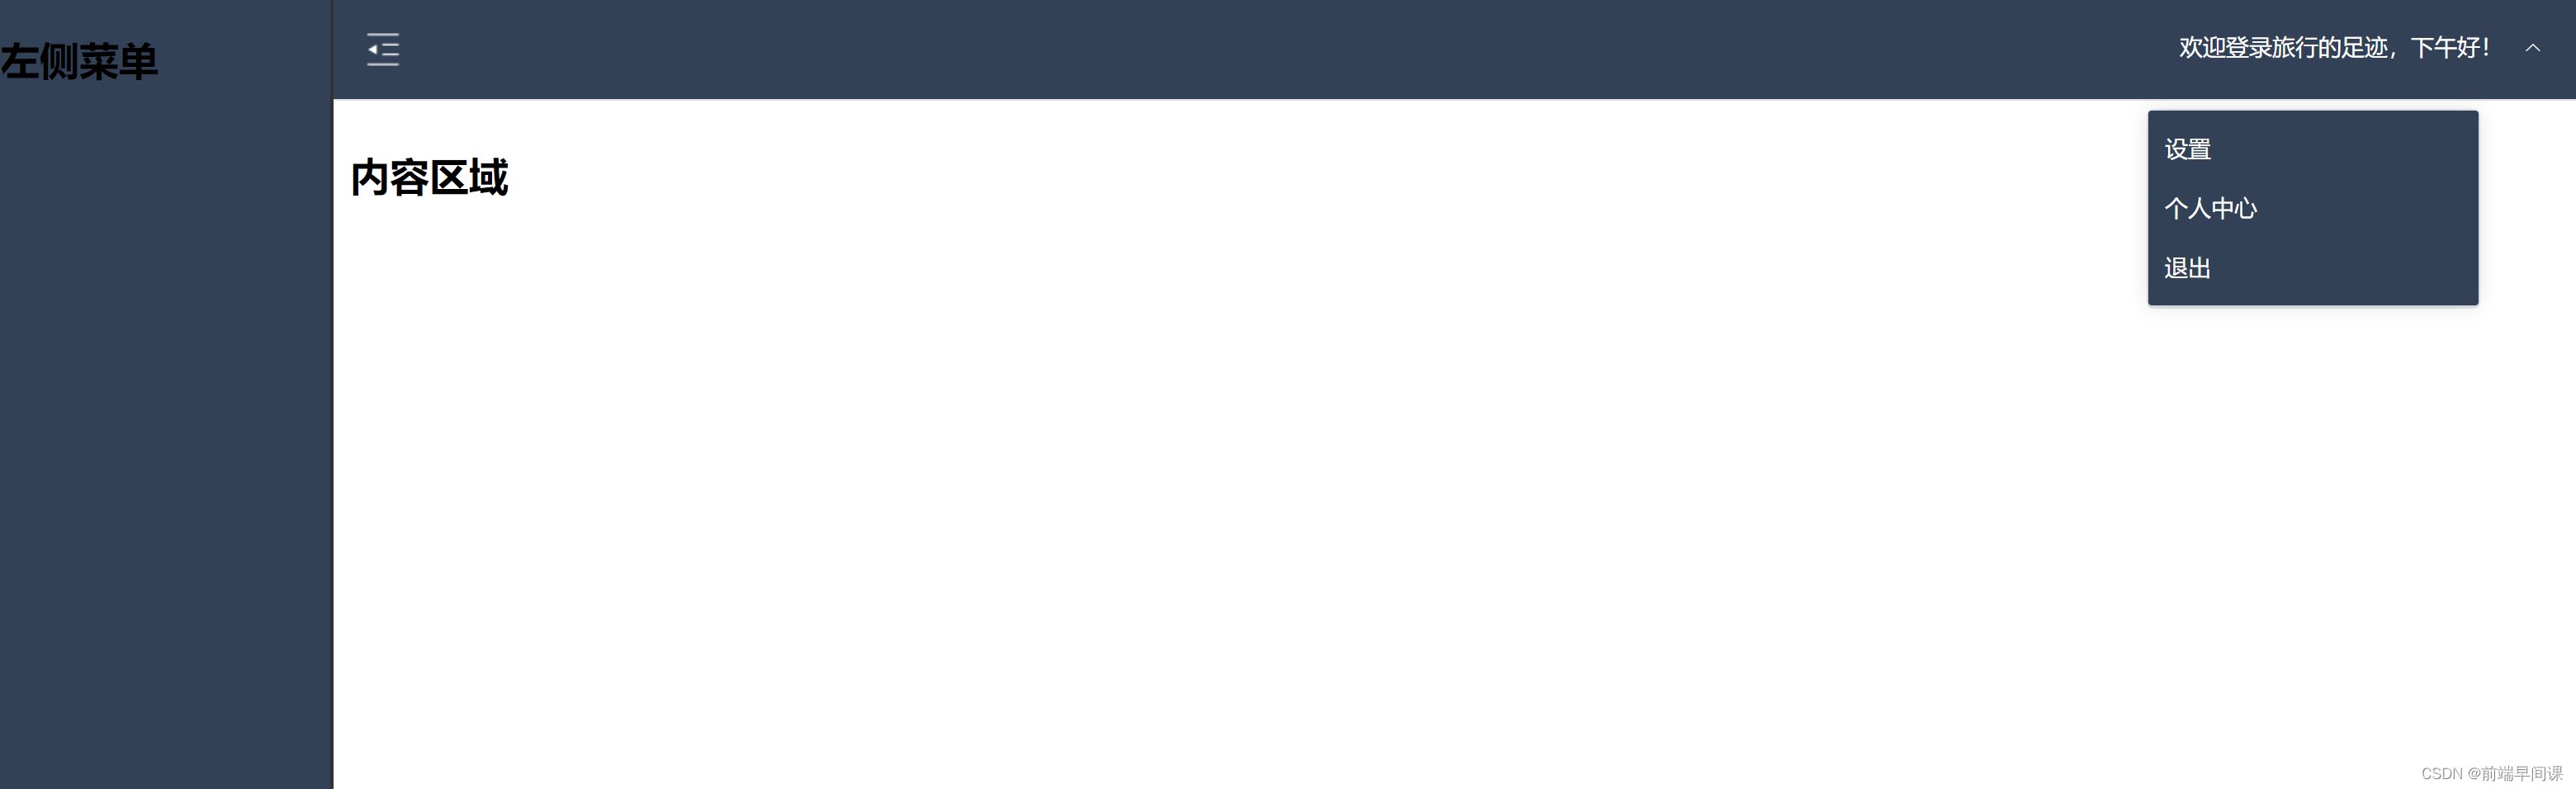
Finally, show the finished module:
The frame building has been completed here
Preview Project: Preview Project
Summarize:
On the road to the front | I know very little, but I am good at learning.
If you have any questions, please leave a message to discuss.
— Follow me: Don’t get lost on the front end —