ControlNet is a neural network architecture that controls the diffusion model by adding additional conditions.
It copies the weights of the neural network block into a "locked" copy and a "trainable" copy.
A "trainable" person will understand your condition. A "locked" model will keep your model.
Therefore, training with a small dataset of image pairs does not break production-ready diffusion models.
A "zero convolution" is a 1×1 convolution with both weights and biases initialized to zero.
Before training, all zero-convolutions output zeros, and ControlNet does not cause any distortion.
None of the layers are trained from scratch. You are still fine-tuning. Your original model is safe.
This allows training on a small scale or even on personal devices.
This is also friendly to merge/replace/offset models/weights/blocks/layers.
1. Overview
(AI generates a picture and then uses controlnet to generate multiple similar pictures, change background, change clothes, hair color, etc.)
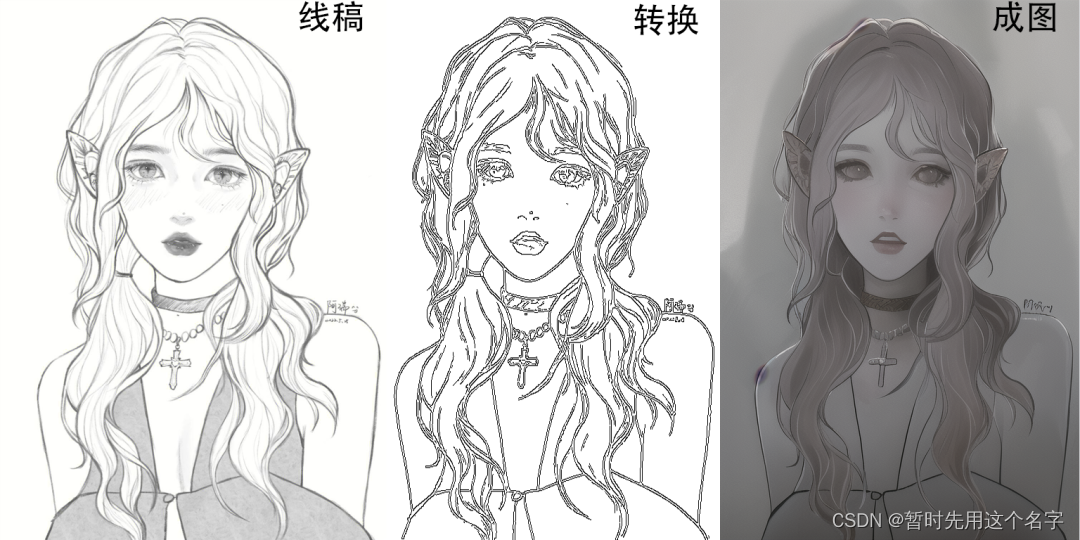
(The far left is the line drawing I found online, the author is A Rui. The last two are the pictures I processed with control net)
Control Net allows AI to paint and accurately draw more poses and actions, not just headshots, images with limited motion and poses such as upright shots,

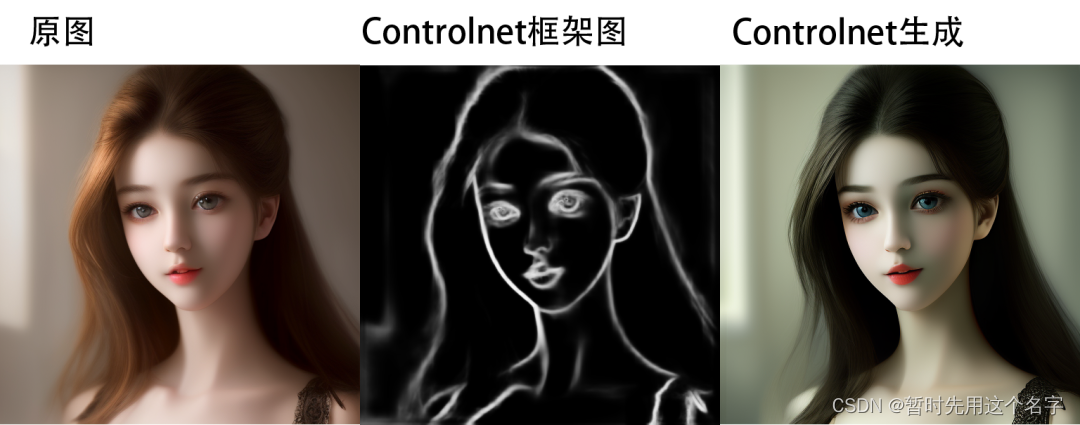
(Figure: contorlnet official document)
It can also color the manuscript, and generate corresponding people and objects according to the sketch.
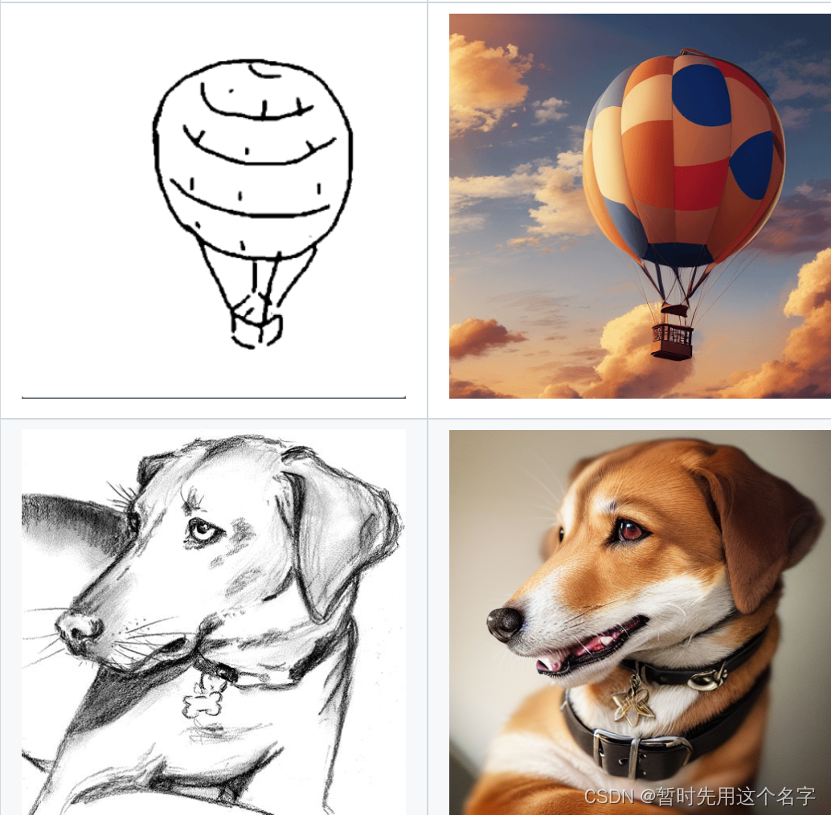
(Figure: contorlnet official document)
It is really powerful. It can be said that it has greatly expanded the use space of AI drawing.
Making AI drawing is not only a self-entertainment for AI enthusiasts, it can even enter the commercial field as an auxiliary production tool.
2. Installation
(1) Install ControlNet
-
First you need to install sdwebui, if not installed, please click " Windows Installation Stable Diffusion WebUI and Problem Solving Record ".
-
Install the Controlnet plugin
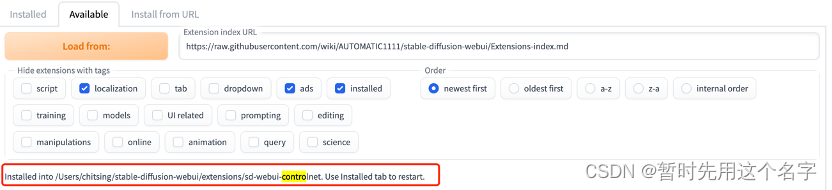
Open stable-diffusion-webui, click the extension on the far right, then click available, and then click the "Load From:" button.
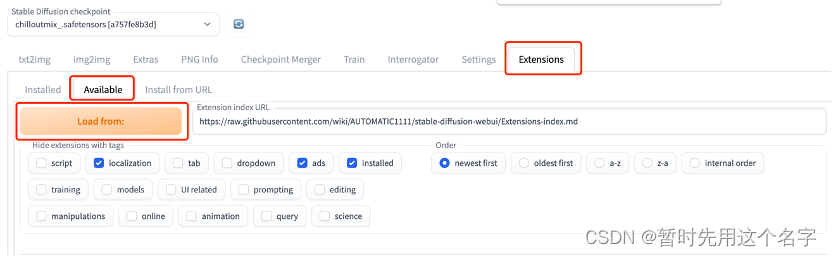
At this time, a series of available plug-ins will appear at the bottom of the page.
Note: Sometimes after clicking the load from button here, the page will report an error saying that the connection failed.
Don't worry, refresh the page, debug the network, open/switch the internal and external network, click load from again, and try a few more times.
Next, Ctrl/command + Fsearch for "controlnet", find the controlnet plug-in, and click on the right installto install this plug-in.

After the installation is complete, the plug-in panel will be displayed intalled into xxx, indicating that it has been installed.
Remarks:
If it is really impossible to download and install control net through the available page, you can also install it manually through the Install from URL page. The address of the plug-in is: https://github.com/Mikubill/sd-webui-controlnet, or you can download the entire package of the plug-in through git clone or the github webpage and put it under the stable-diffusion-webui > extensions folder. After installation, remember to click apply and restart on the installed page (apply and restart).
(2) Install OpenPose
Don't rush to switch to the installed page, let's install a plug-in called Openpose Editor, so that we can edit the custom POSE (posture) by ourselves later.
Find openpose, find the plug-in in the picture below, and click install on the right

Wait for the installation until " Installed into … openpose-editor. Use Installed tab to restart." is displayed, which means the installation is complete.
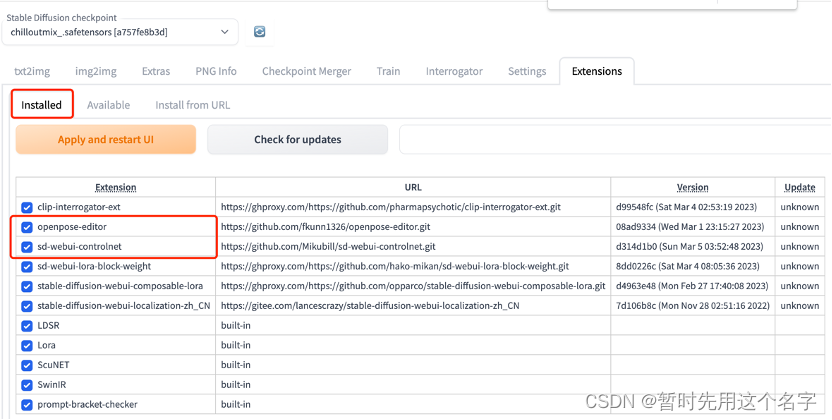
At this time, click on installedthe page, and you will find that the two plug-ins you just installed are already displayed on it. At this time, click apply and restart ui(Apply and restart the software), and then wait for the web page to automatically refresh. If it shows that it cannot be connected, then manually refresh it.
Same as above, if it is impossible to install on the available page, you can also use the install from url page, or download the code package and copy it to stable-diffusion-webui > extensions. The plug-in address is https://github.com/fkunn1326/openpose-editor. After installation, remember to click apply and restart on the installed page (apply and restart).
3. Activation
Open the contorlnet editor.
After the page is refreshed, on the home page of sdwebui, under the original Seed, there will be a long box with the words ControlNet, click the triangle on the right to expand.
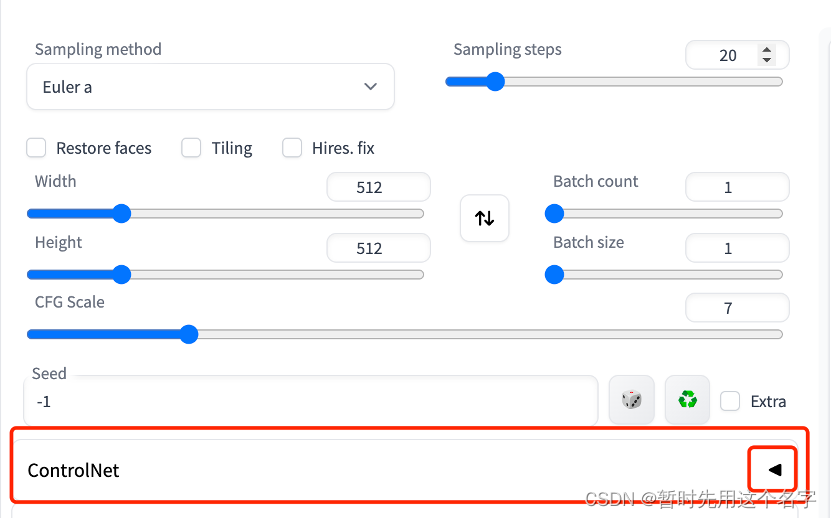
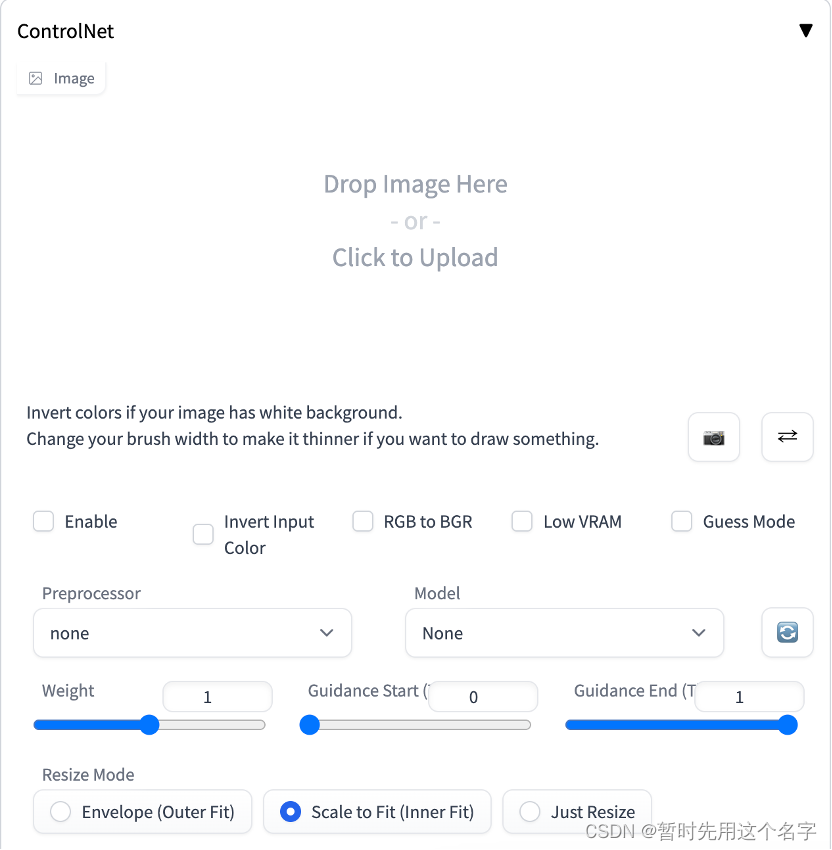
Expand the interface as shown below.
4. Model
ControlNet requires a dedicated model, otherwise the relevant functions cannot be used to guide the drawing.
download link:
- https://huggingface.co/lllyasviel/ControlNet/tree/main/models
- https://huggingface.co/TencentARC/T2I-Adapter/tree/main/models
But you will find that there are many models, which one to choose?
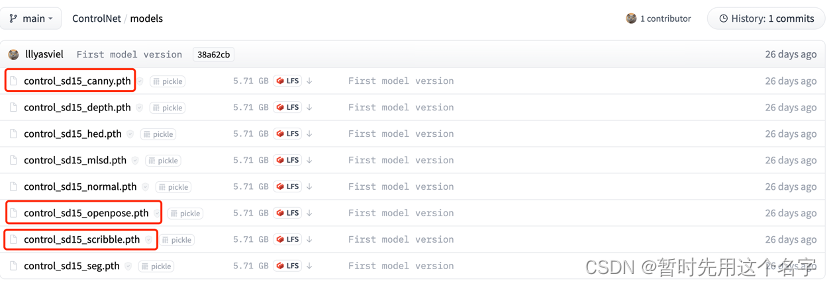
If you have limited hard drives, you can download the three models of canny, openpose, and scribble first.
Canny is mainly for edge detection, which is a relatively general model. Openpose is the legendary model dedicated to gesture control, and scribble is a manuscript model, which is suitable for graffiti and then generates a beautiful picture, and is very playable.
(If the hard disk space is relatively large, it is recommended to download all of them, because each model has its own usage scenarios and each has its own characteristics.)
After downloading, put the model file stable-diffusion-webui\extensions\sd-webui-controlnet\modelsunder the folder.
Now everyone can start playing with controlnet.
(PS: ControlNet relies on the xformers algorithm framework and Nvidia graphics card. Students with Mac systems may only get 70-80 points, and the speed is slow. It is difficult to achieve the wow effect described in the document.)