1. Introducción a la uni-aplicación
Al usar uniCloud, puede manejar el desarrollo de aplicaciones para el usuario y la parte de atrás de pequeños programas usted mismo. No es necesario comprar un nombre de dominio, no es necesario comprar un servidor en la nube. Lo más importante es que cuando la cantidad de visitas al applet es pequeña, los recursos relacionados con el servidor back-end son gratuitos.
2. Uso de la aplicación uni (uniCloud)
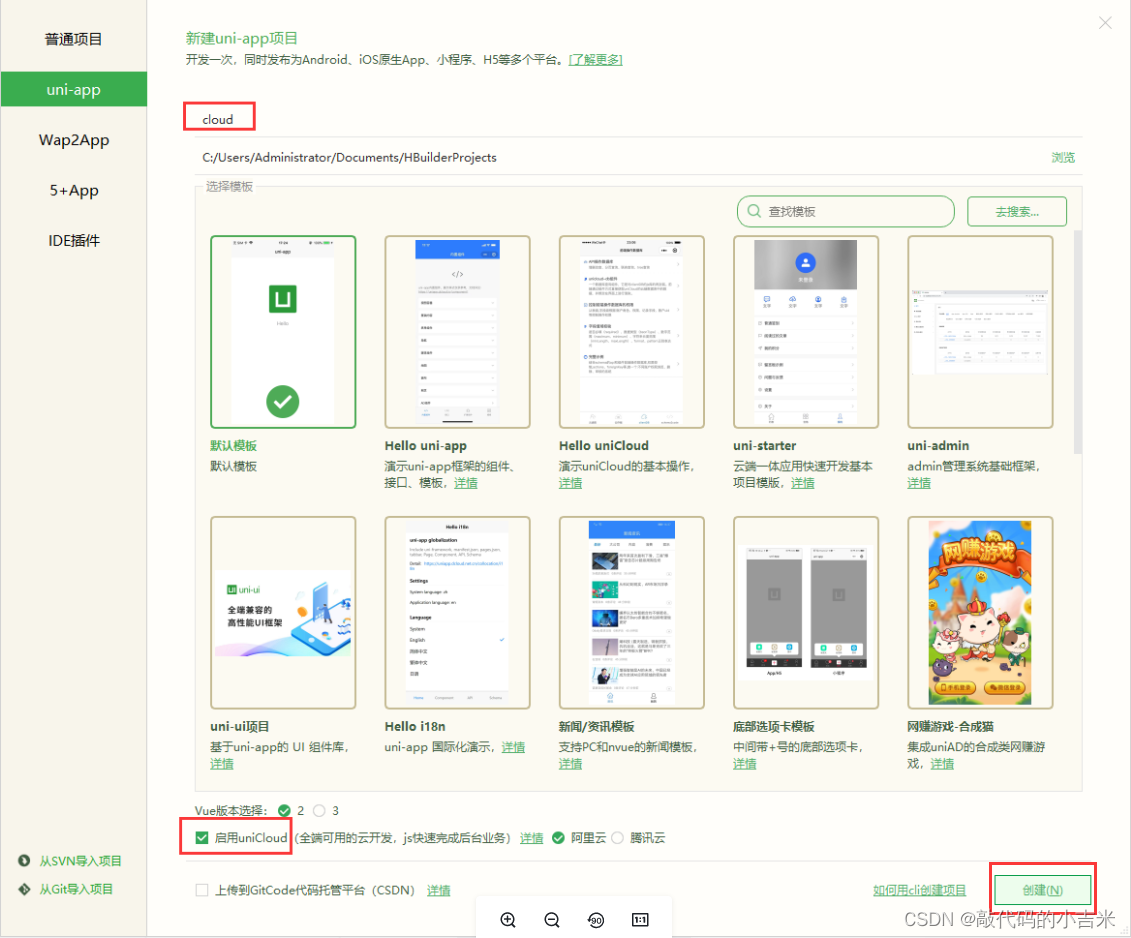
1. Crea un proyecto uniCloud
2. Crear espacio de servicio en la nube
2.1 Espacio en la nube asociado
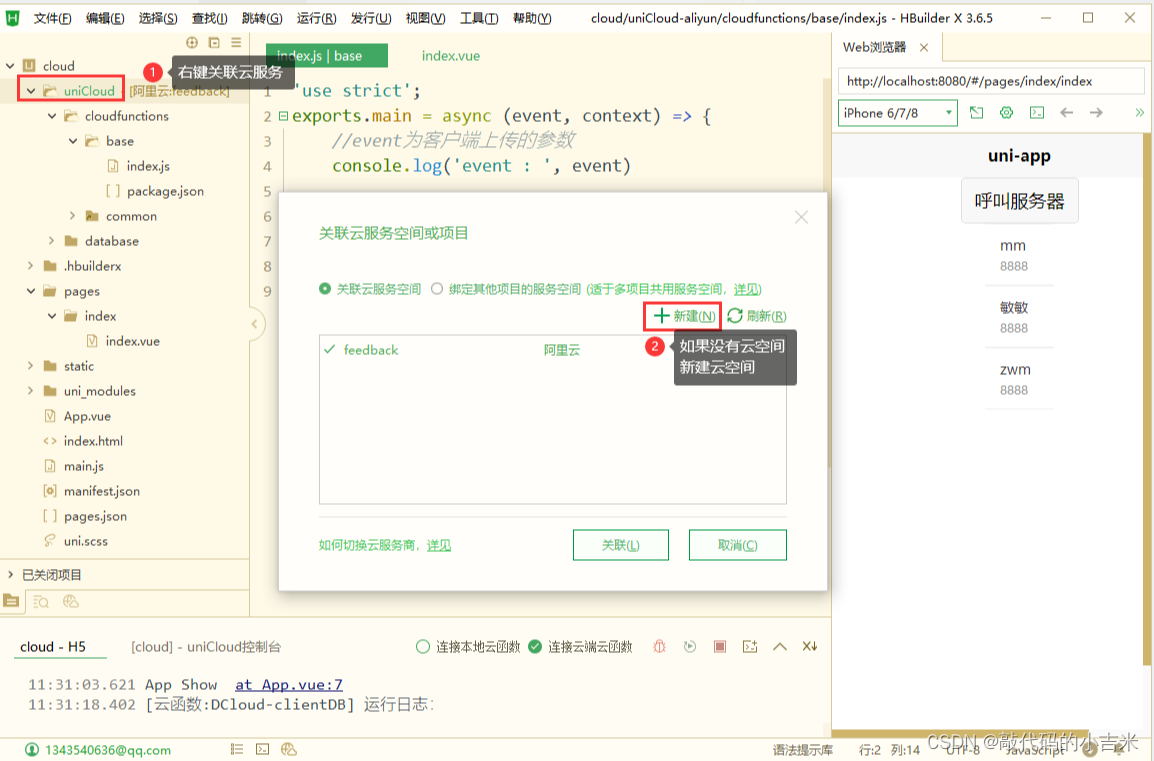
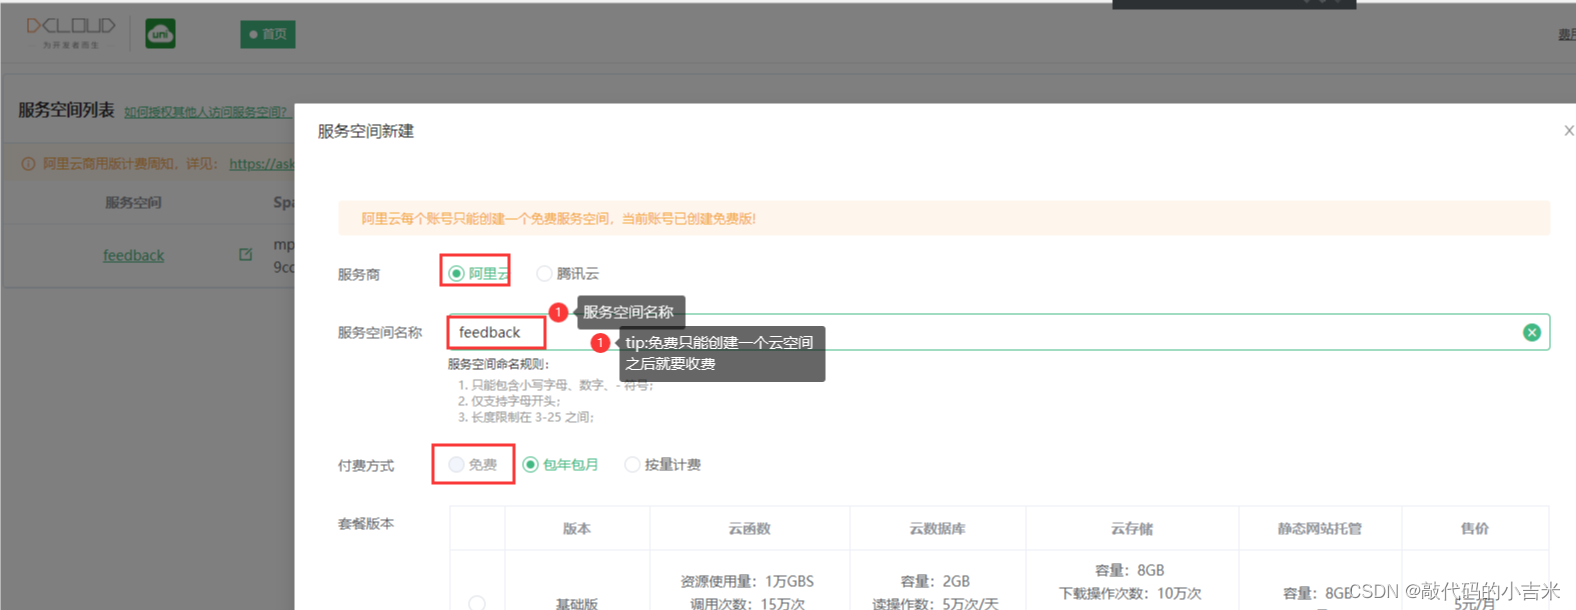
2.2 Crear un nuevo espacio en la nube
3. Función de nube
3.1 Crear una función en la nube
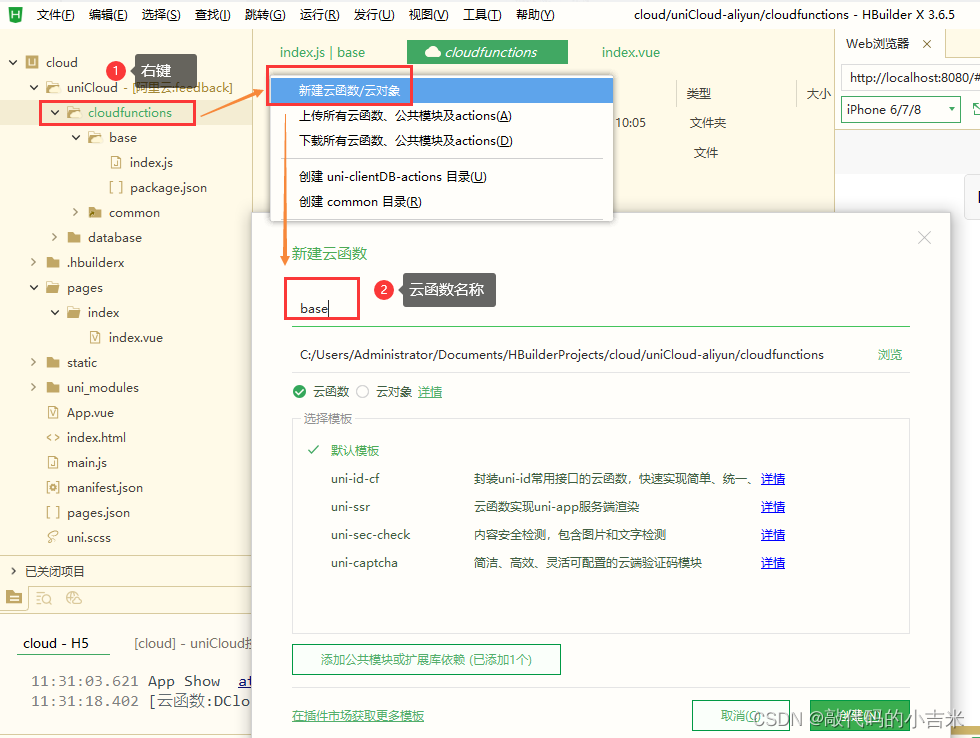
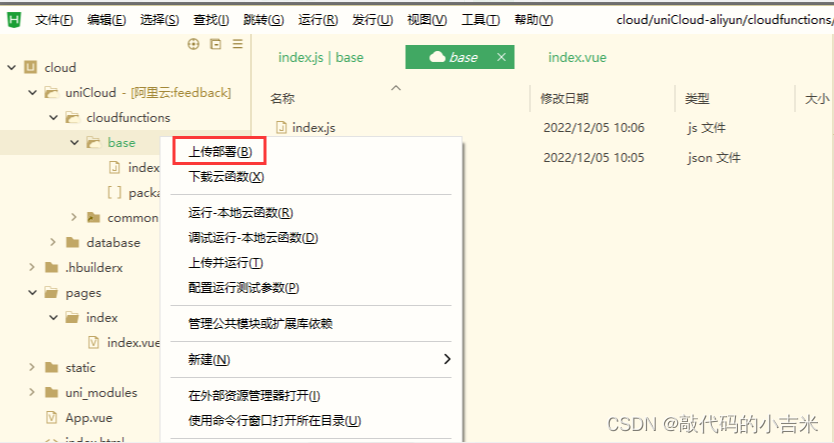
3.1.2 Subir función de nube
3.2 Llamada de página
en métodos

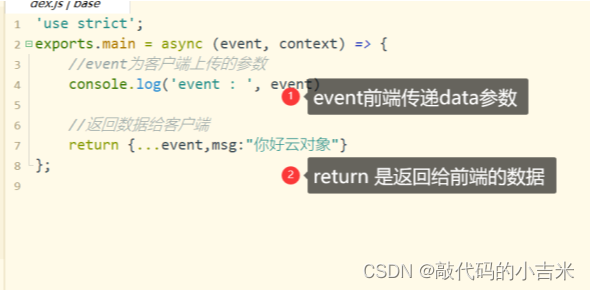
3.3 Escribir funciones en la nube
función de nube index.js
4. Base de datos en la nube
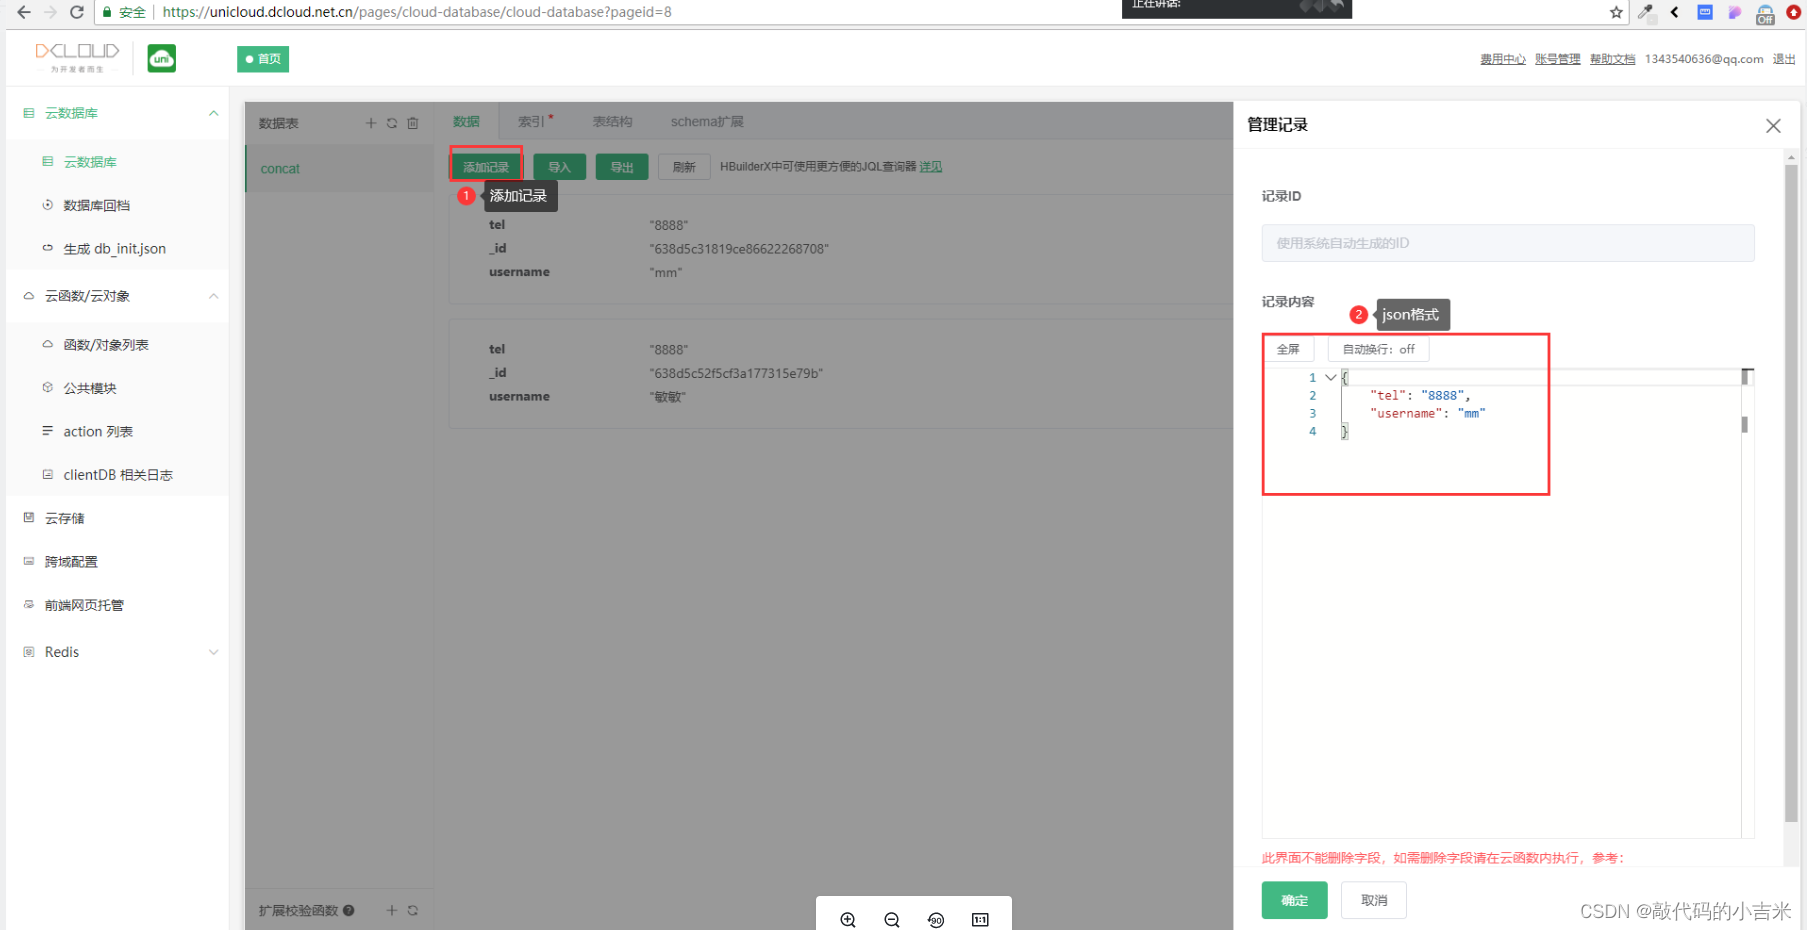
4.1 Crear datos en la nube
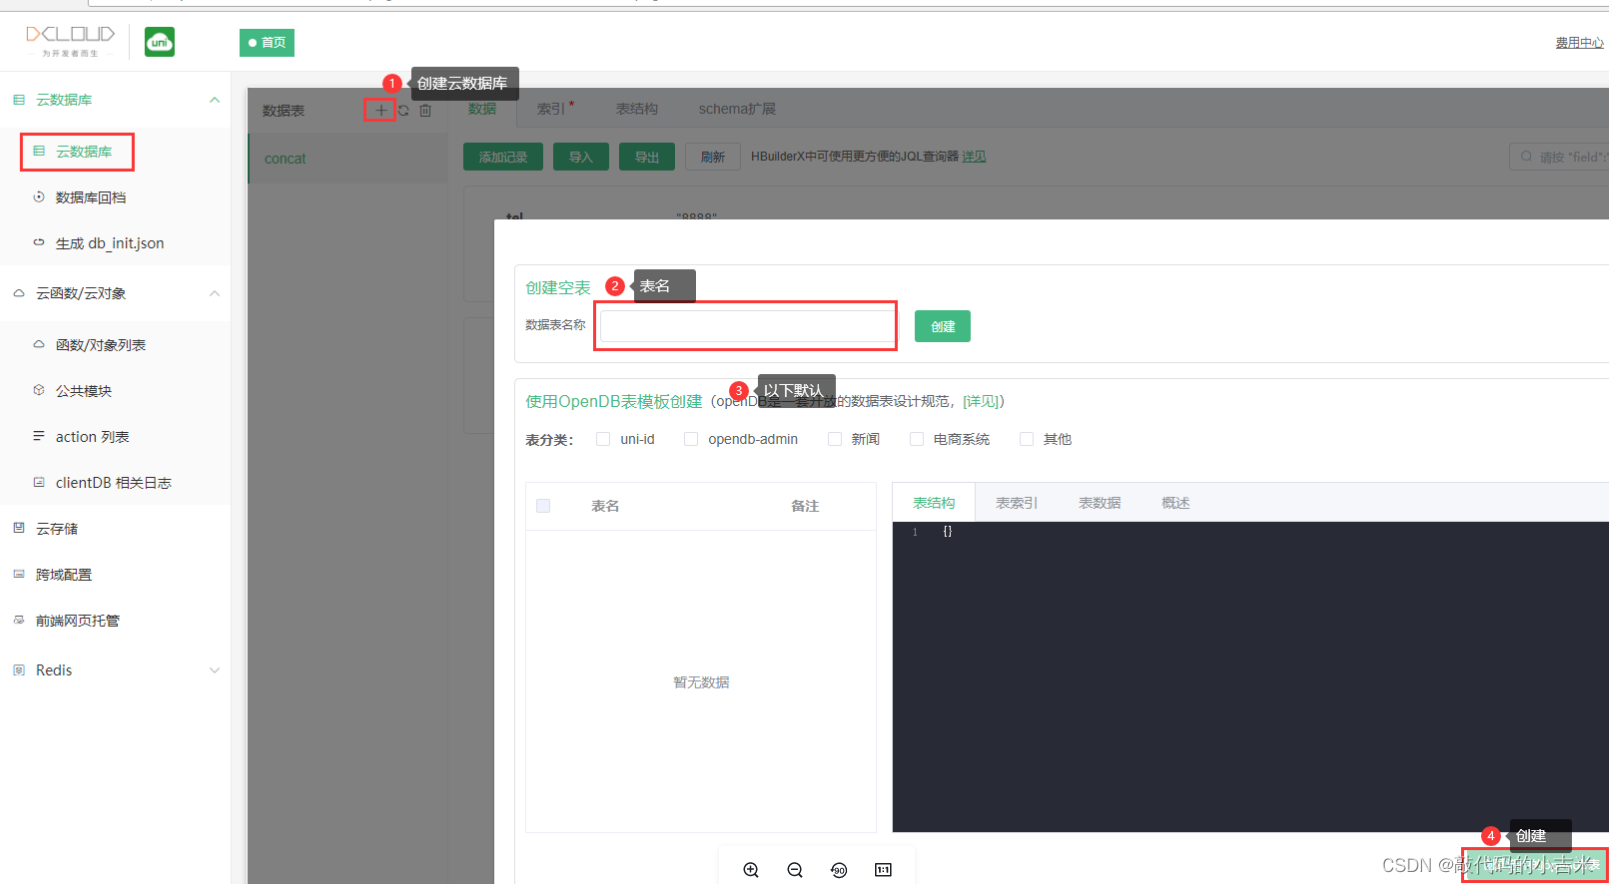
4.2 Agregar datos en la nube
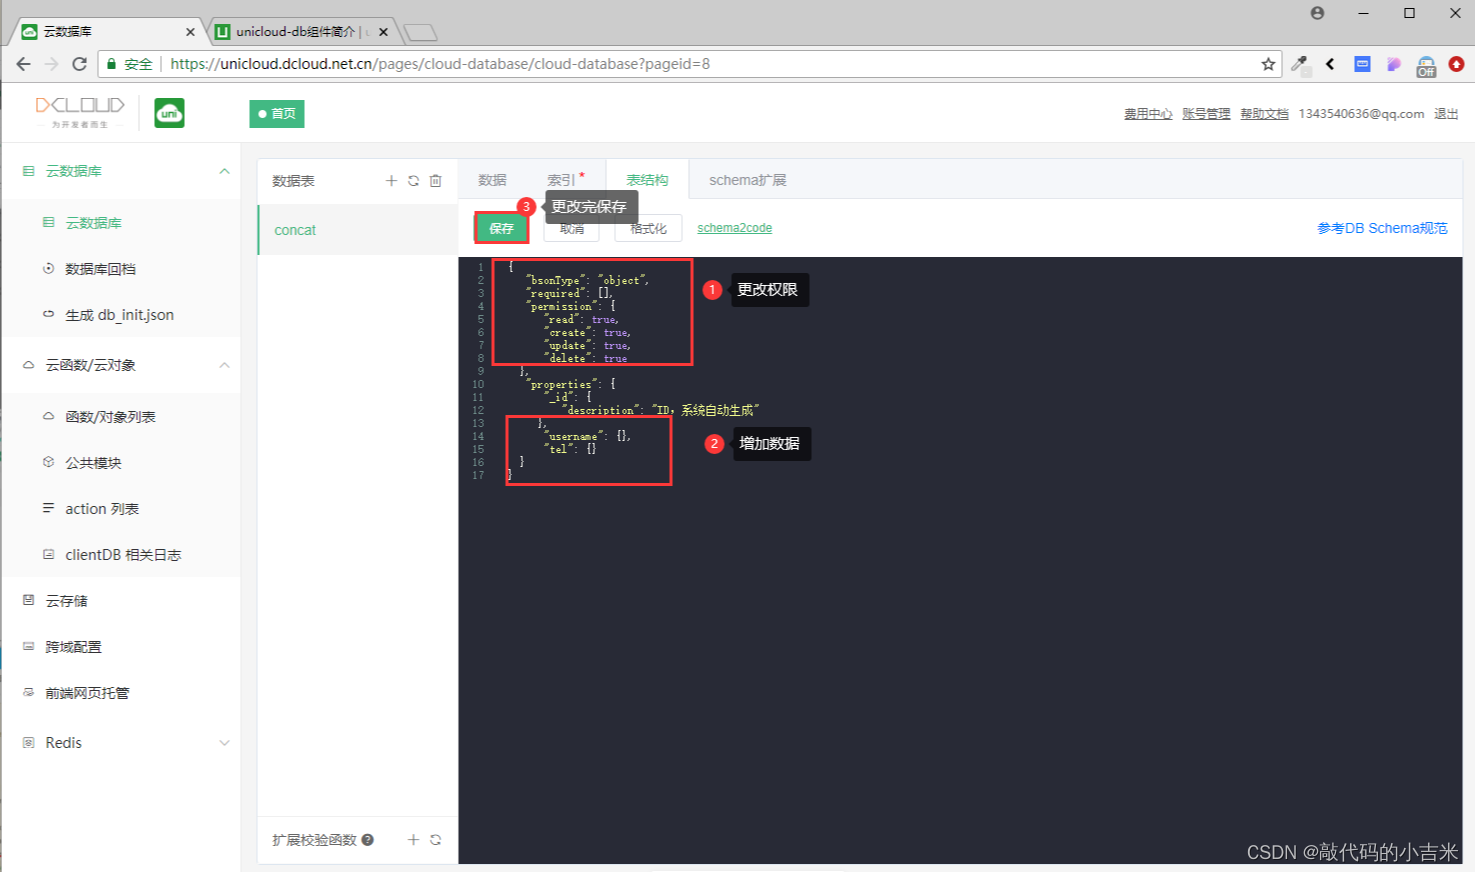
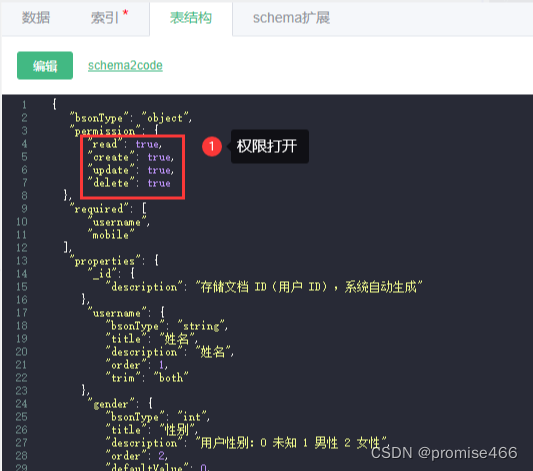
4.3 Datos en la nube: introducción a la estructura de la tabla
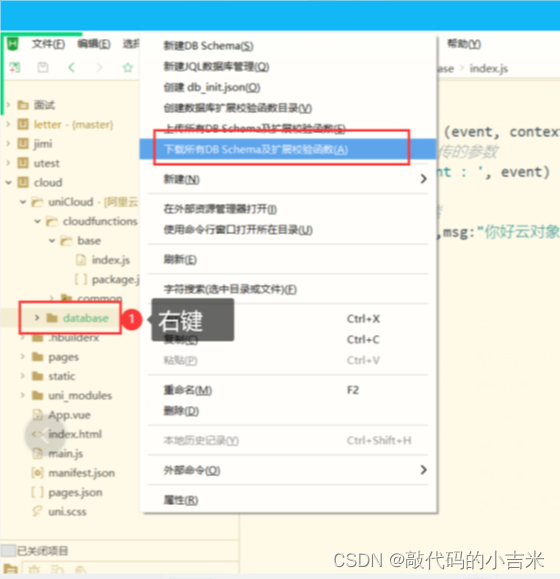
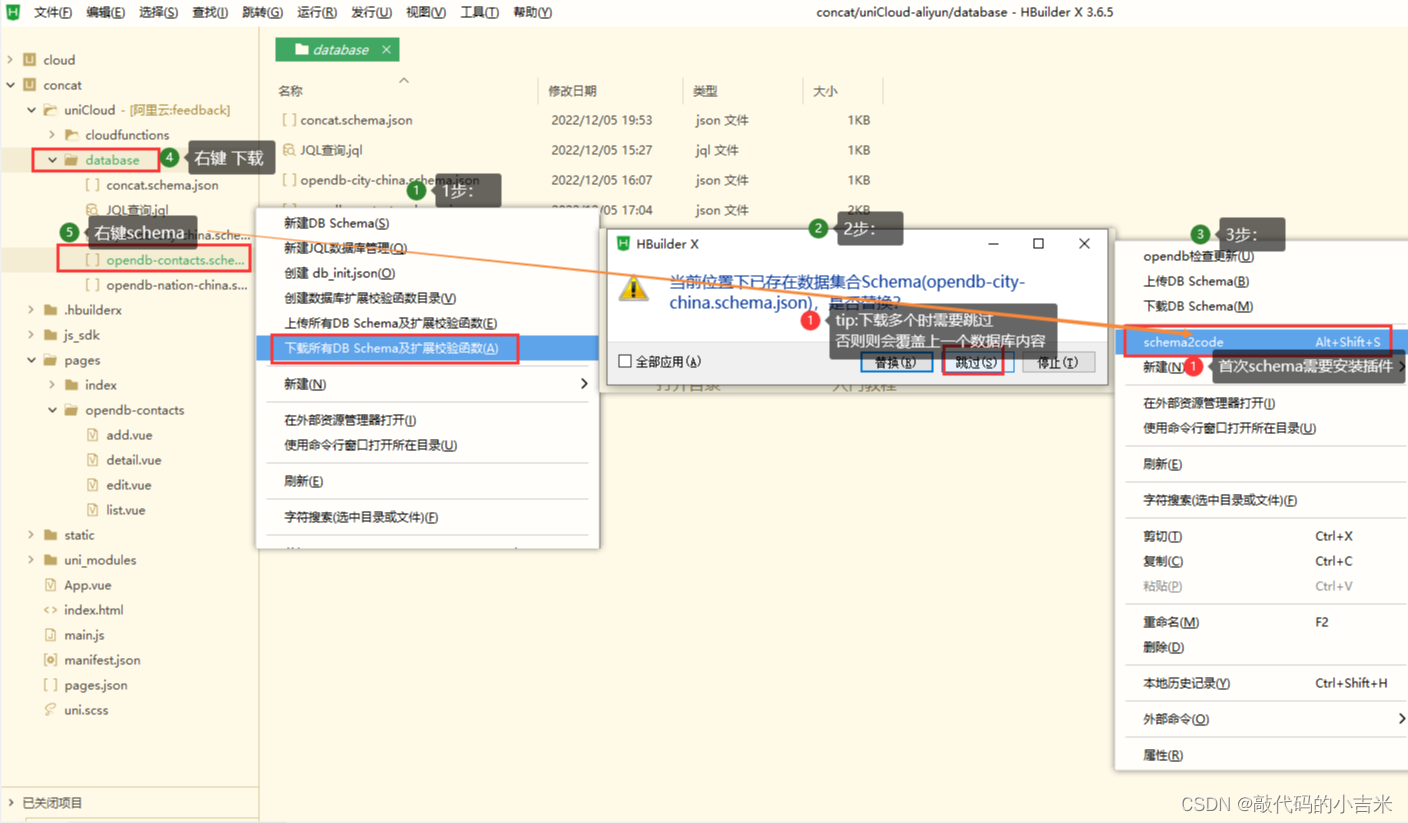
4.4 Descargar la estructura de la tabla (descargar cuando sea necesario)
4.5 Ejecución del proyecto
Consejo: conecte la función de la nube
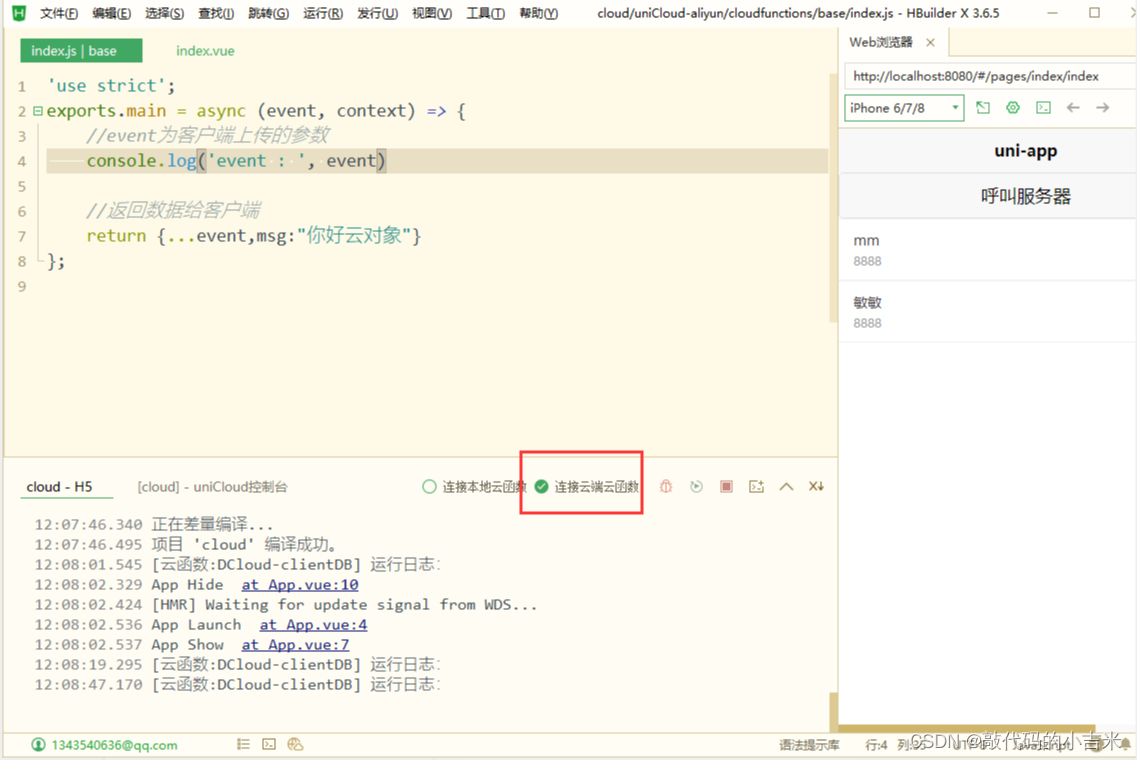
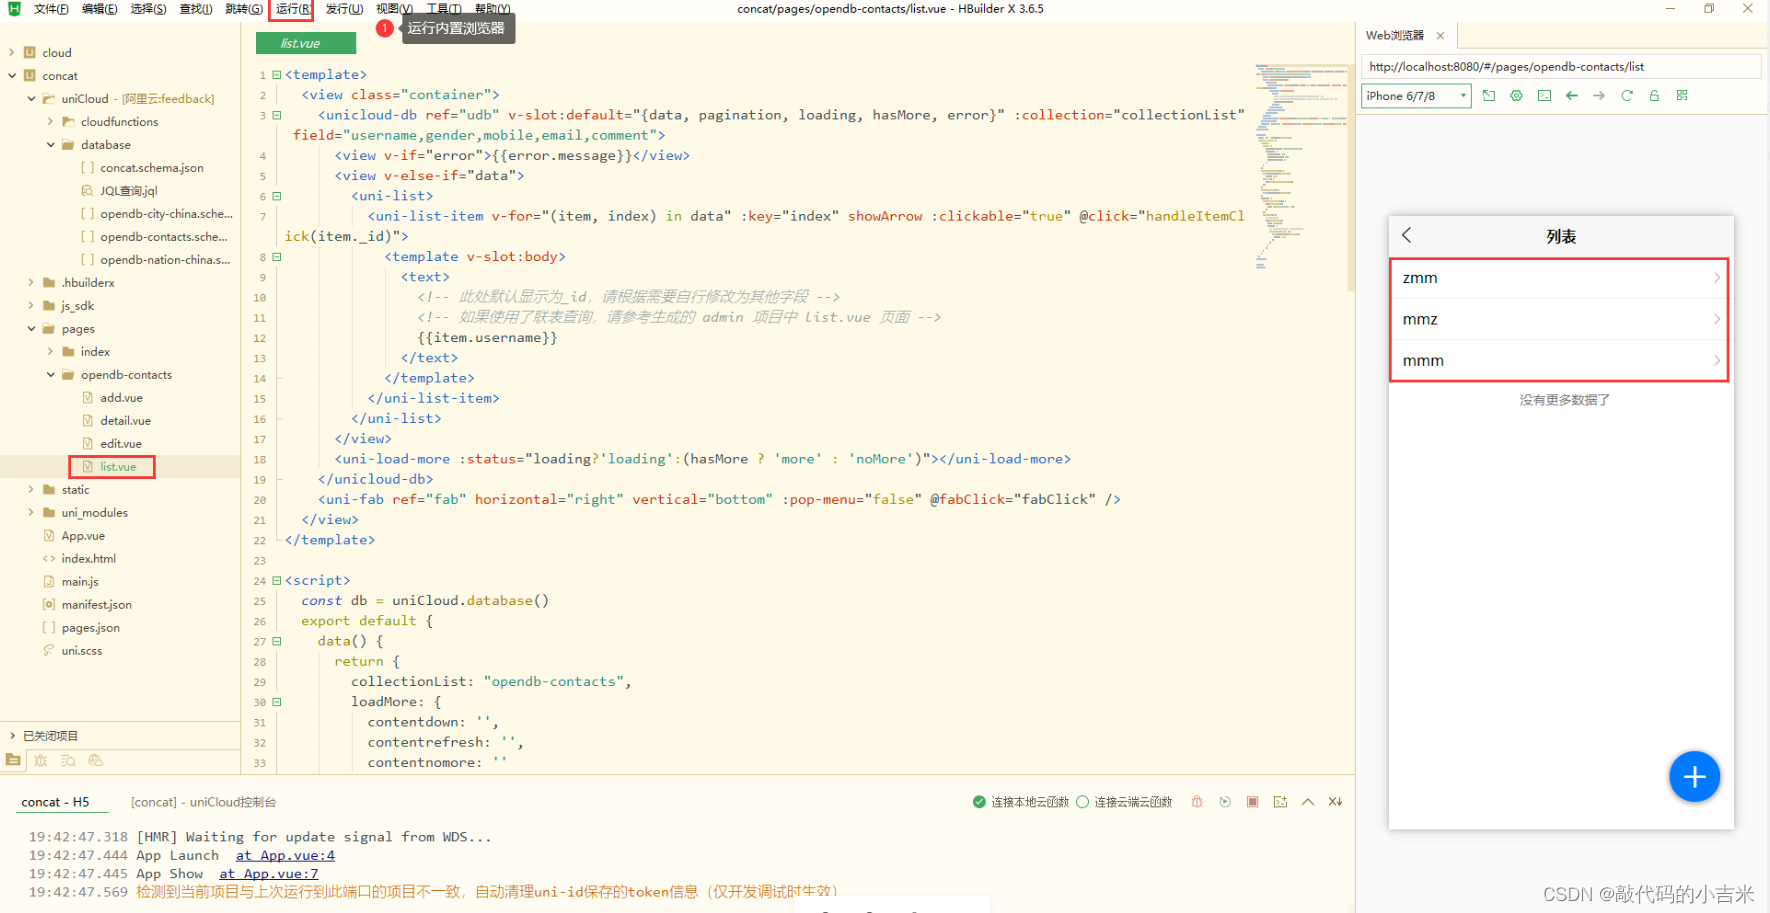
4.6 Mostrar datos (front end)
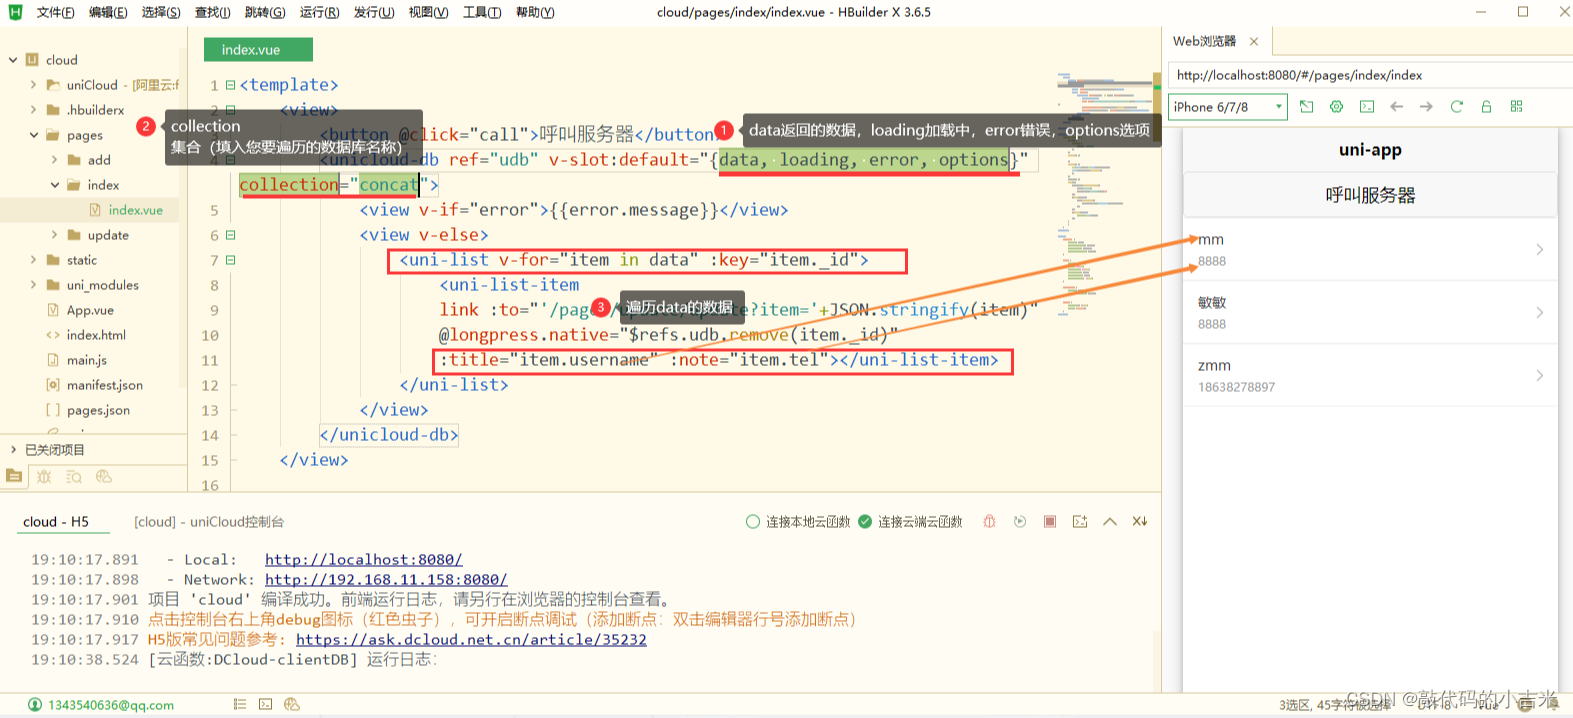
el código
<template>
	<view>
		<button @click="call">呼叫服务器</button>
		<unicloud-db v-slot:default="{data, loading, error, options}" collection="concat">
			<view v-if="error">{

   {error.message}}</view>
			<view v-else>
				<uni-list v-for="item in data" :key="item._id">
					<uni-list-item
					:title="item.username" :note="item.tel"></uni-list-item>
				</uni-list>
			</view>
		</unicloud-db>
	</view>

</template>

<script>
	export default {


		data() {


			return {


				title: 'Hello'
			}
		},
		onLoad() {


		},
		onShow() {


			if(this.$refs&&this.$refs.udb){


			this.$refs.udb.$refresh()
			}
		},
		methods: {


		call(){


			uniCloud.callFunction({


				name:"base",
				data:{

      name:"mumu",age:18}
			})
			.then(res=>{


				uni.showModal({


					content:JSON.stringify(res.result)
				})
			})
			.catch(err=>{


				console.log(err);
			})
		}
		}
	}
</script>

<style>
	.content {


		display: flex;
		flex-direction: column;
		align-items: center;
		justify-content: center;
	}

	.logo {


		height: 200rpx;
		width: 200rpx;
		margin-top: 200rpx;
		margin-left: auto;
		margin-right: auto;
		margin-bottom: 50rpx;
	}

	.text-area {


		display: flex;
		justify-content: center;
	}

	.title {


		font-size: 36rpx;
		color: #8f8f94;
	}
</style>
5. Adición, eliminación y modificación de datos en la nube
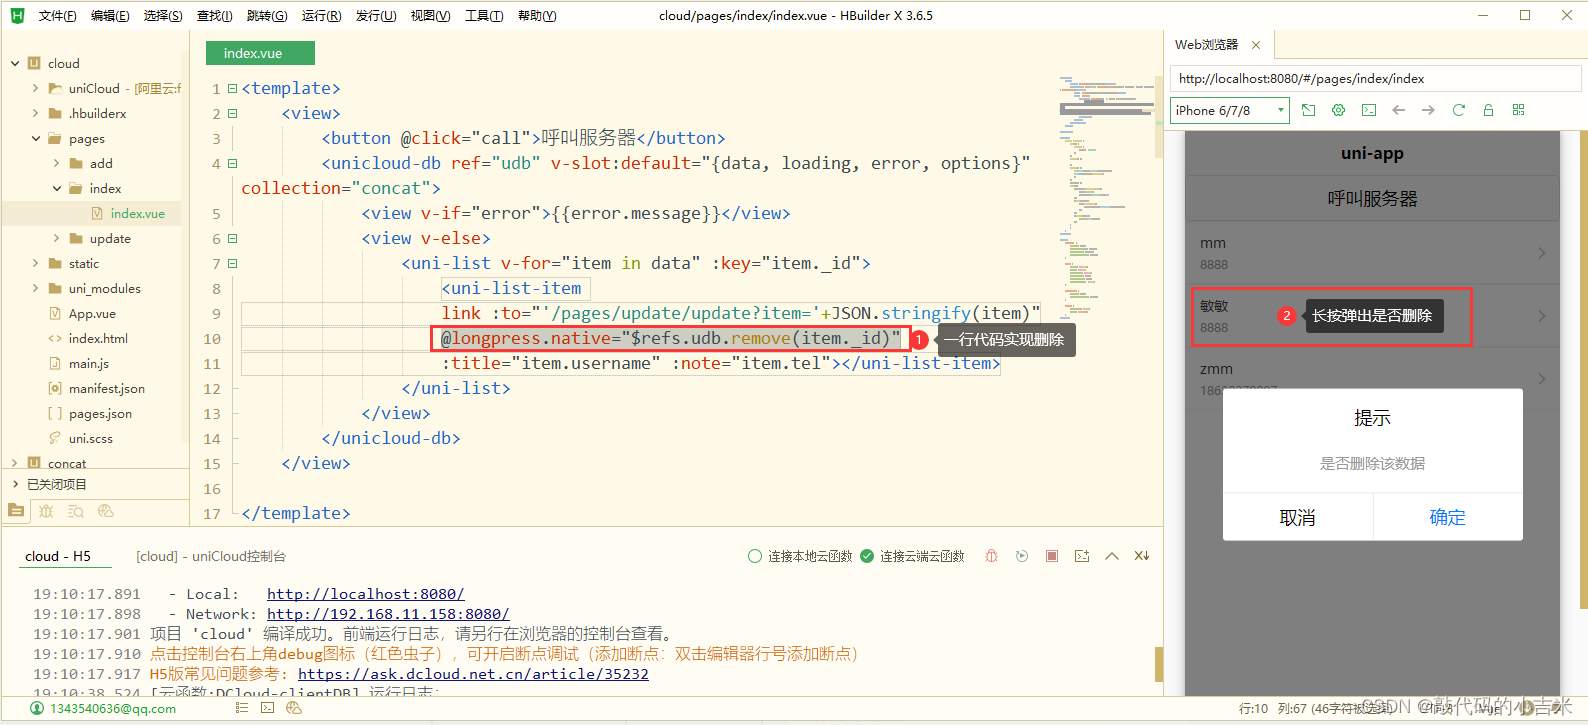
5.1 Eliminar datos de la nube
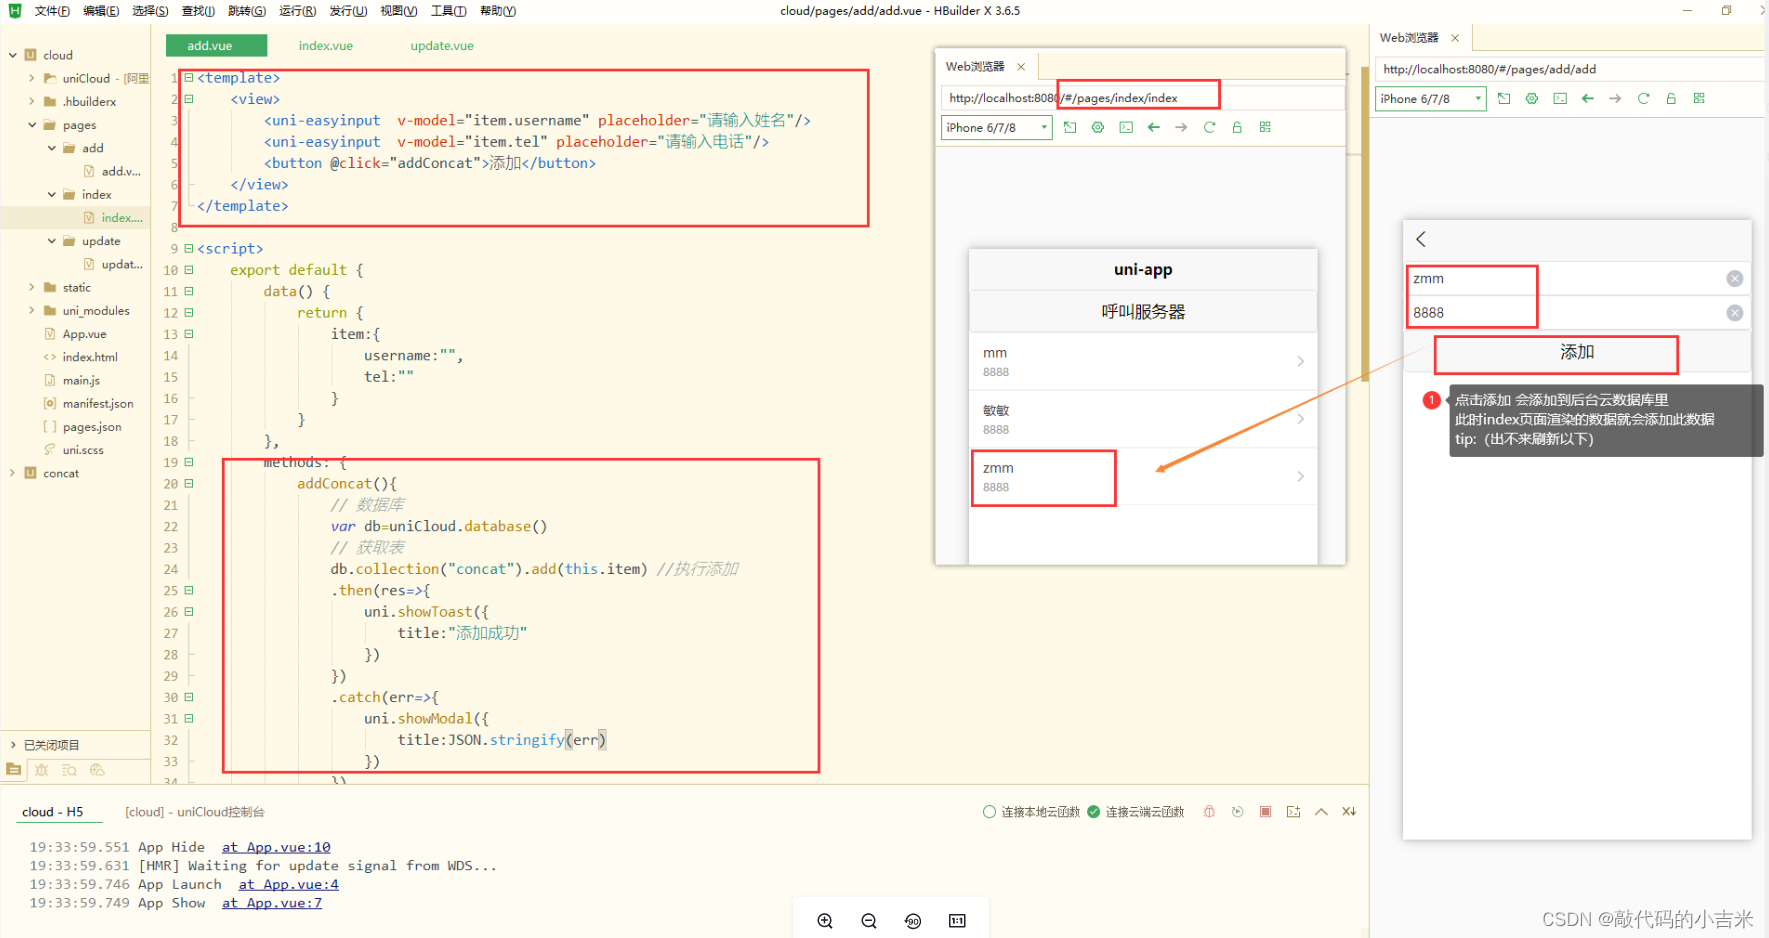
5.2 Agregar datos en la nube
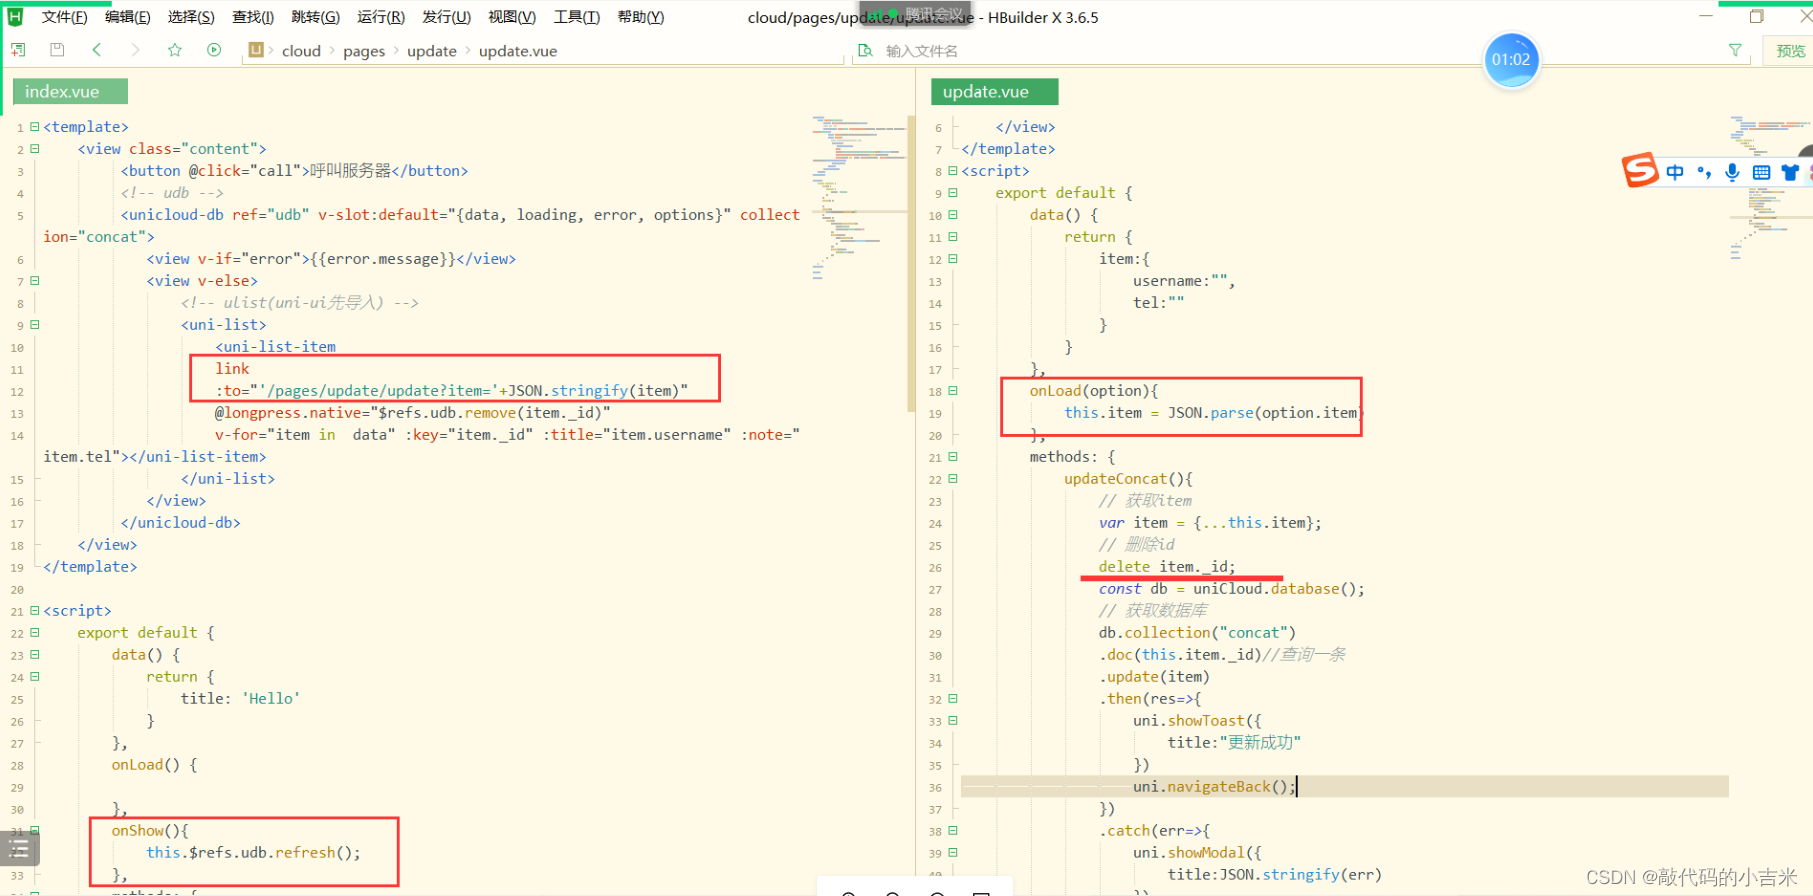
5.3 Modificar datos en la nube
código de índice (eliminado)
<template>
	<view>
		<button @click="call">呼叫服务器</button>
		<unicloud-db ref="udb" v-slot:default="{data, loading, error, options}" collection="concat">
			<view v-if="error">{

   {error.message}}</view>
			<view v-else>
				<uni-list v-for="item in data" :key="item._id">
					<uni-list-item
					link :to="'/pages/update/update?item='+JSON.stringify(item)"
					@longpress.native="$refs.udb.remove(item._id)"
					:title="item.username" :note="item.tel"></uni-list-item>
				</uni-list>
			</view>
		</unicloud-db>
	</view>

</template>

<script>
	export default {


		data() {


			return {


				title: 'Hello'
			}
		},
		onLoad() {


		},
		onShow() {


			if(this.$refs&&this.$refs.udb){


			this.$refs.udb.$refresh()
			}
		},
		methods: {


		call(){


			uniCloud.callFunction({


				name:"base",
				data:{

      name:"mumu",age:18}
			})
			.then(res=>{


				uni.showModal({


					content:JSON.stringify(res.result)
				})
			})
			.catch(err=>{


				console.log(err);
			})
		}
		}
	}
</script>

<style>
	.content {


		display: flex;
		flex-direction: column;
		align-items: center;
		justify-content: center;
	}

	.logo {


		height: 200rpx;
		width: 200rpx;
		margin-top: 200rpx;
		margin-left: auto;
		margin-right: auto;
		margin-bottom: 50rpx;
	}

	.text-area {


		display: flex;
		justify-content: center;
	}

	.title {


		font-size: 36rpx;
		color: #8f8f94;
	}
</style>
añadir código
<template>
	<view>
		<uni-easyinput  v-model="item.username" placeholder="请输入姓名"/>
		<uni-easyinput  v-model="item.tel" placeholder="请输入电话"/>
		<button @click="addConcat">添加</button>
	</view>
</template>

<script>
	export default {


		data() {


			return {


				item:{


					username:"",
					tel:""
				}
			}
		},
		methods: {


			addConcat(){


				// 数据库
				var db=uniCloud.database()
				// 获取表
				db.collection("concat").add(this.item) //执行添加
				.then(res=>{


					uni.showToast({


						title:"添加成功"
					})
				})
				.catch(err=>{


					uni.showModal({


						title:JSON.stringify(err)
					})
				})
			}
		}
	}
</script>

<style>

</style>
modificar el código
<template>
	<view>
		<uni-easyinput  v-model="item.username" placeholder="请输入姓名"/>
		<uni-easyinput  v-model="item.tel" placeholder="请输入电话"/>
		<button @click="updateConcat">更新</button>
	</view>
</template>

<script>
	export default {


		data() {


			return {


				item:{


					username:"",
					tel:""
				}
			}
		},
		methods: {


			updateConcat(){


				var item={

      ...this.item}
				// 删除id
				delete item._id
				const db=uniCloud.database()
				db.collection("concat")
				.doc(this.item._id)
				.update(item)
				.then(res=>{


					uni.showToast({


						title:"更新成功"
					})
				})
				.catch(err=>{


					uni.showModal({


					title:JSON.stringify(err)
					})
				})
			}
		},
		onLoad(option) {


			this.item=JSON.parse(option.item)
		}
	}
</script>

<style>

</style>
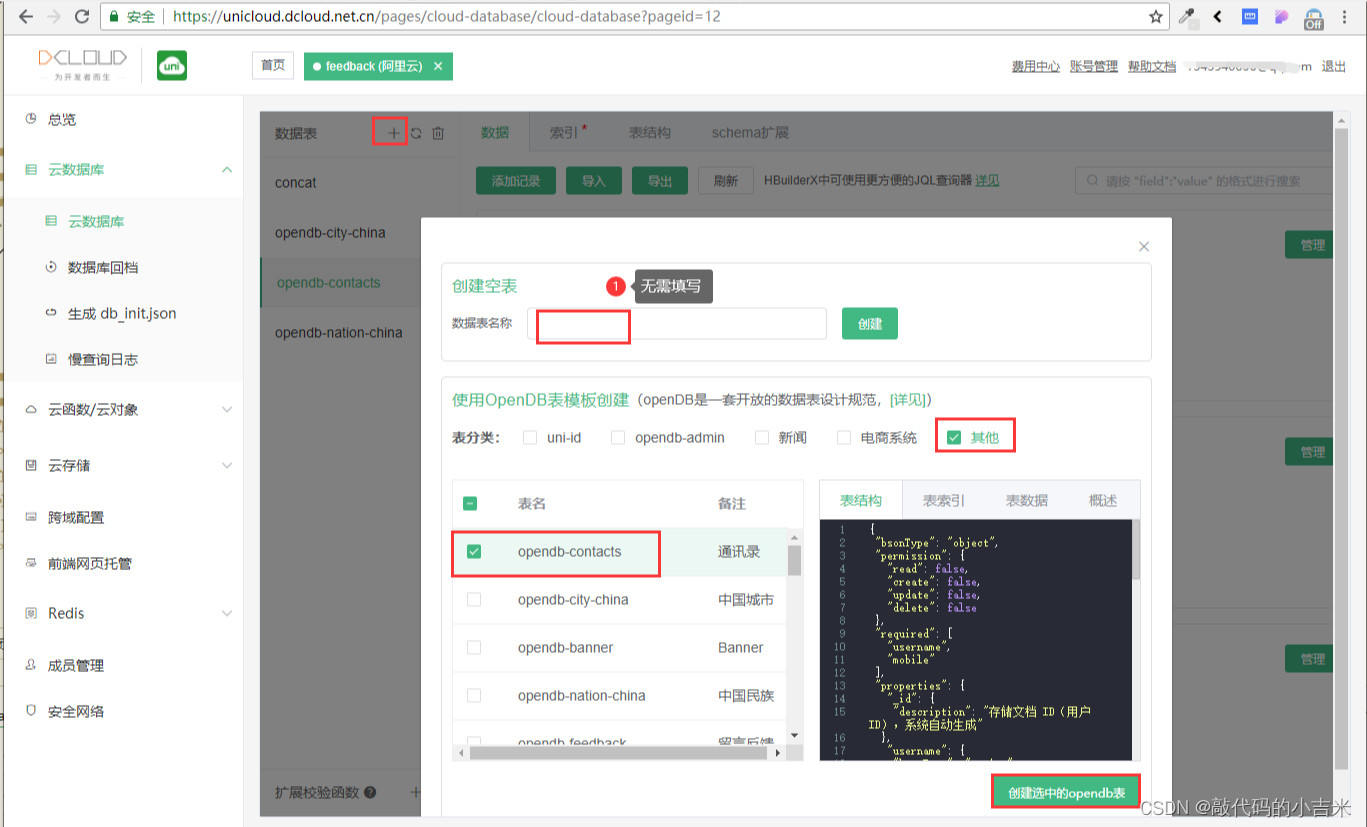
6. Schema genera código automáticamente
6.1 Crear datos en la nube
6.2 Descargar y confiar en la combinación de esquemas
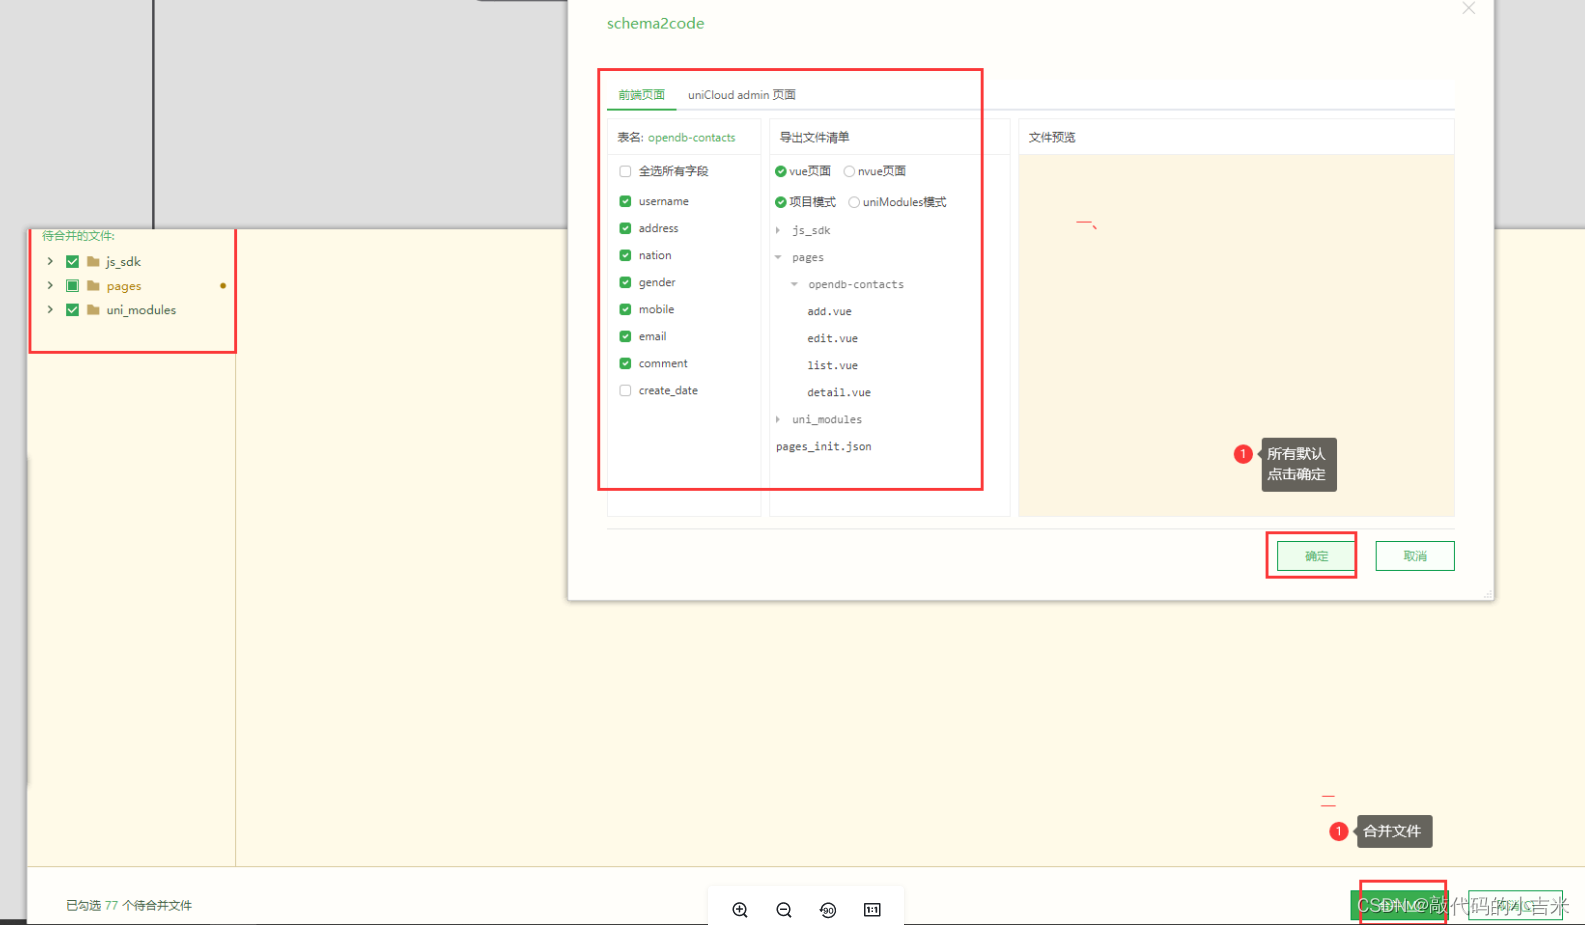
6.3 correr