foreword
At present, using chatgpt to help complete work has become the mainstream, but if you want to access, you must first face the blockade of the region, so use the official API provided by openai to deploy to the local server to use chatgpt more conveniently. This article mainly introduces how to deploy a private chatbot.
Condition preparation:
- One public network server (optional Alibaba Cloud, Tencent Cloud, etc.)
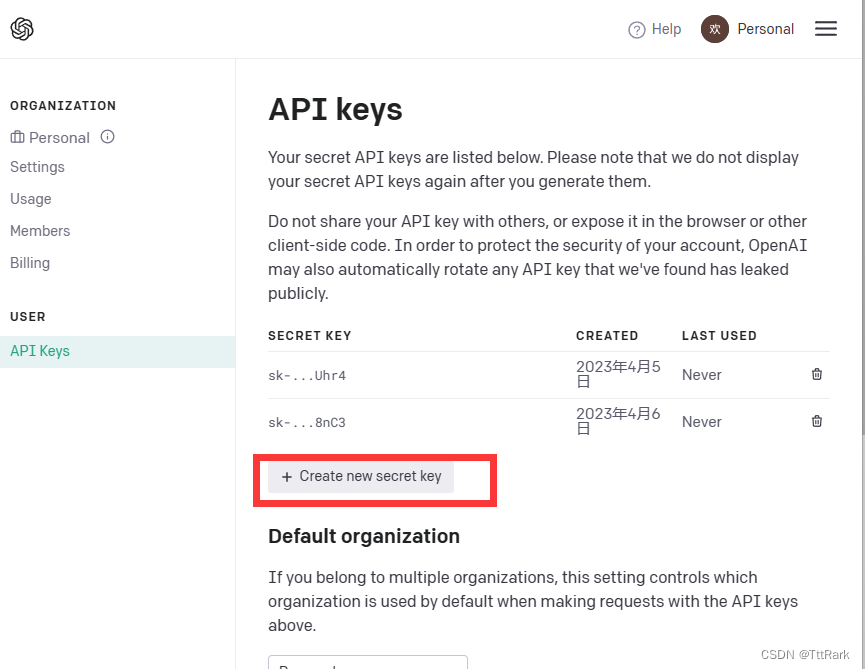
- The openai account is used to obtain a private apikey to call the api interface. Each account has a free quota. After the quota is used up, you need to recharge or change the account. You can check the balance of your personal account in Usage . After the apikey is created, it will only be displayed once due to security issues, please save it and do not share it with others
- Download OpenAI-based applications developed by third-party developers such as ChatGPT-Next-Web , ChatGPT-Web, OpenAI-Translator, etc., and package the code to the server for next-step deployment.
#导入代码仓库,也可打成ZIP导入 [root@TttRark ~]# git clone https://github.com/Yidadaa/ChatGPT-Next-Web.git #安装依赖,可以使用国内源 [root@TttRark ChatGPT-Next-Web-main]# yum install -y nodejs npm [root@TttRark ChatGPT-Next-Web-main]# npm install -y yarn - Enter the project folder scripts, execute the setup.sh script, and deploy and install with one click. Write the .env.local file to configure the required environment variables. Since the domestic server cannot be directly connected, the proxy must be modified. The proxy address can use api.openai-proxy.com
[root@TttRark ChatGPT-Next-Web-main]# sh scripts/setup.sh #编写环境文件 [root@TttRark ChatGPT-Next-Web-main]# cat .env.local OPENAI_API_KEY=你的APIkey CODE=项目验证码,用于验证 BASE_URL=你的代理IP -
Create a startup script for subsequent convenient maintenance, and write a systemd service file for booting or restarting.
[root@TttRark ChatGPT-Next-Web-main]# cat start.sh #!/bin/bash PORT=改成你自定义的端口 PORT=$PORT yarn start #创建service文件 [root@TttRark ChatGPT-Next-Web-main]# cat /etc/systemd/system/chatgpt.service [Unit] Description=ChatGPT Bot [Service] User=root Group=root Type=simple Restart=always RestartSec=20 StartLimitInterval=0 Nice=10 WorkingDirectory=/root/ChatGPT-Next-Web-main/ ExecStart=/usr/bin/bash /root/ChatGPT-Next-Web-main/start.sh StandardOutput=null TimeoutStartSec=30 [Install] RequiredBy=multi-user.target #设置开机自启 systemctl daemon-reload systemctl enable chatgpt systemctl start chatgpt -
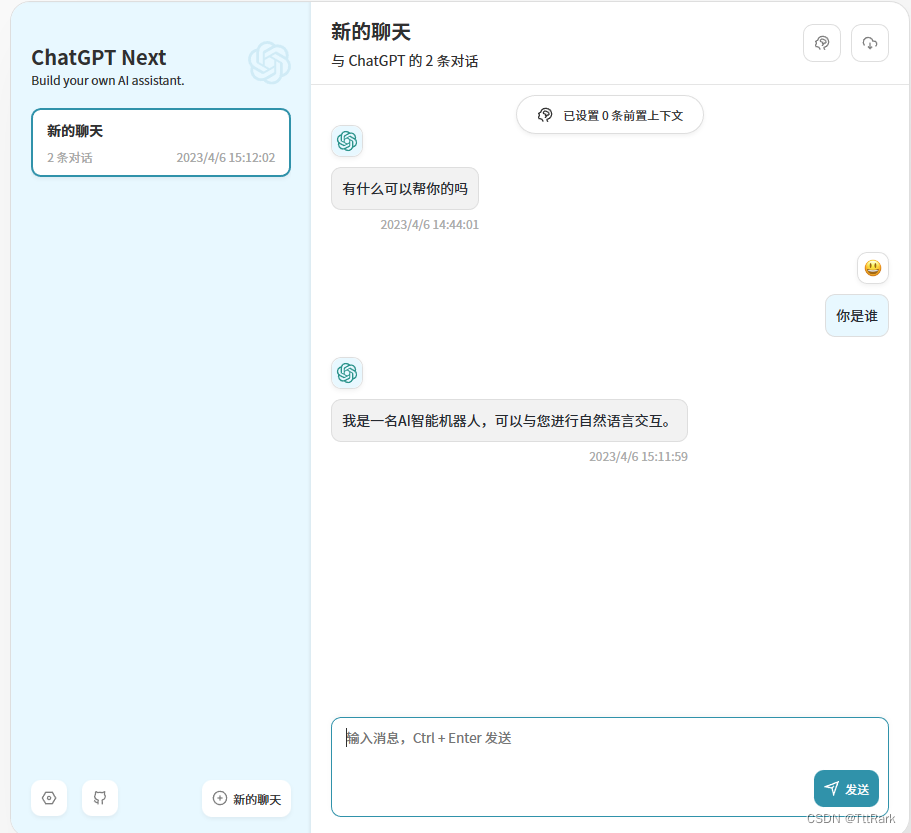
Access test
 Fill in the verification password set by yourself
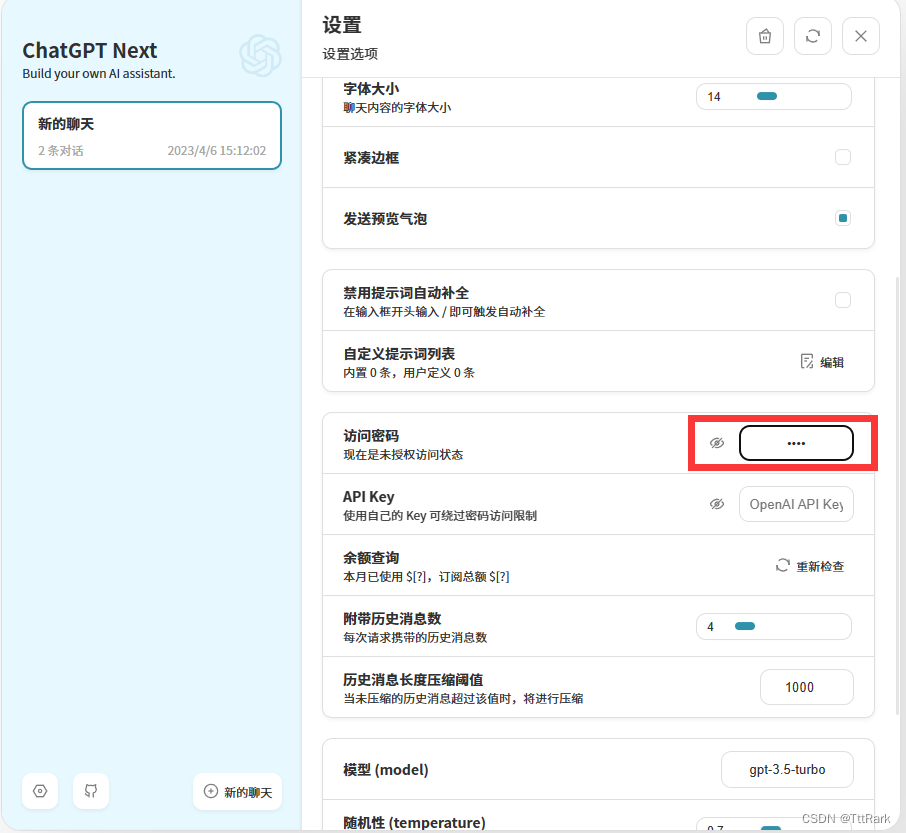
Communication contact q: 1257455837