Introduction to Graph
In Pixel Professional Edition, Graph is also called visual creation, which is mainly used to control some object entities and their corresponding parameters.
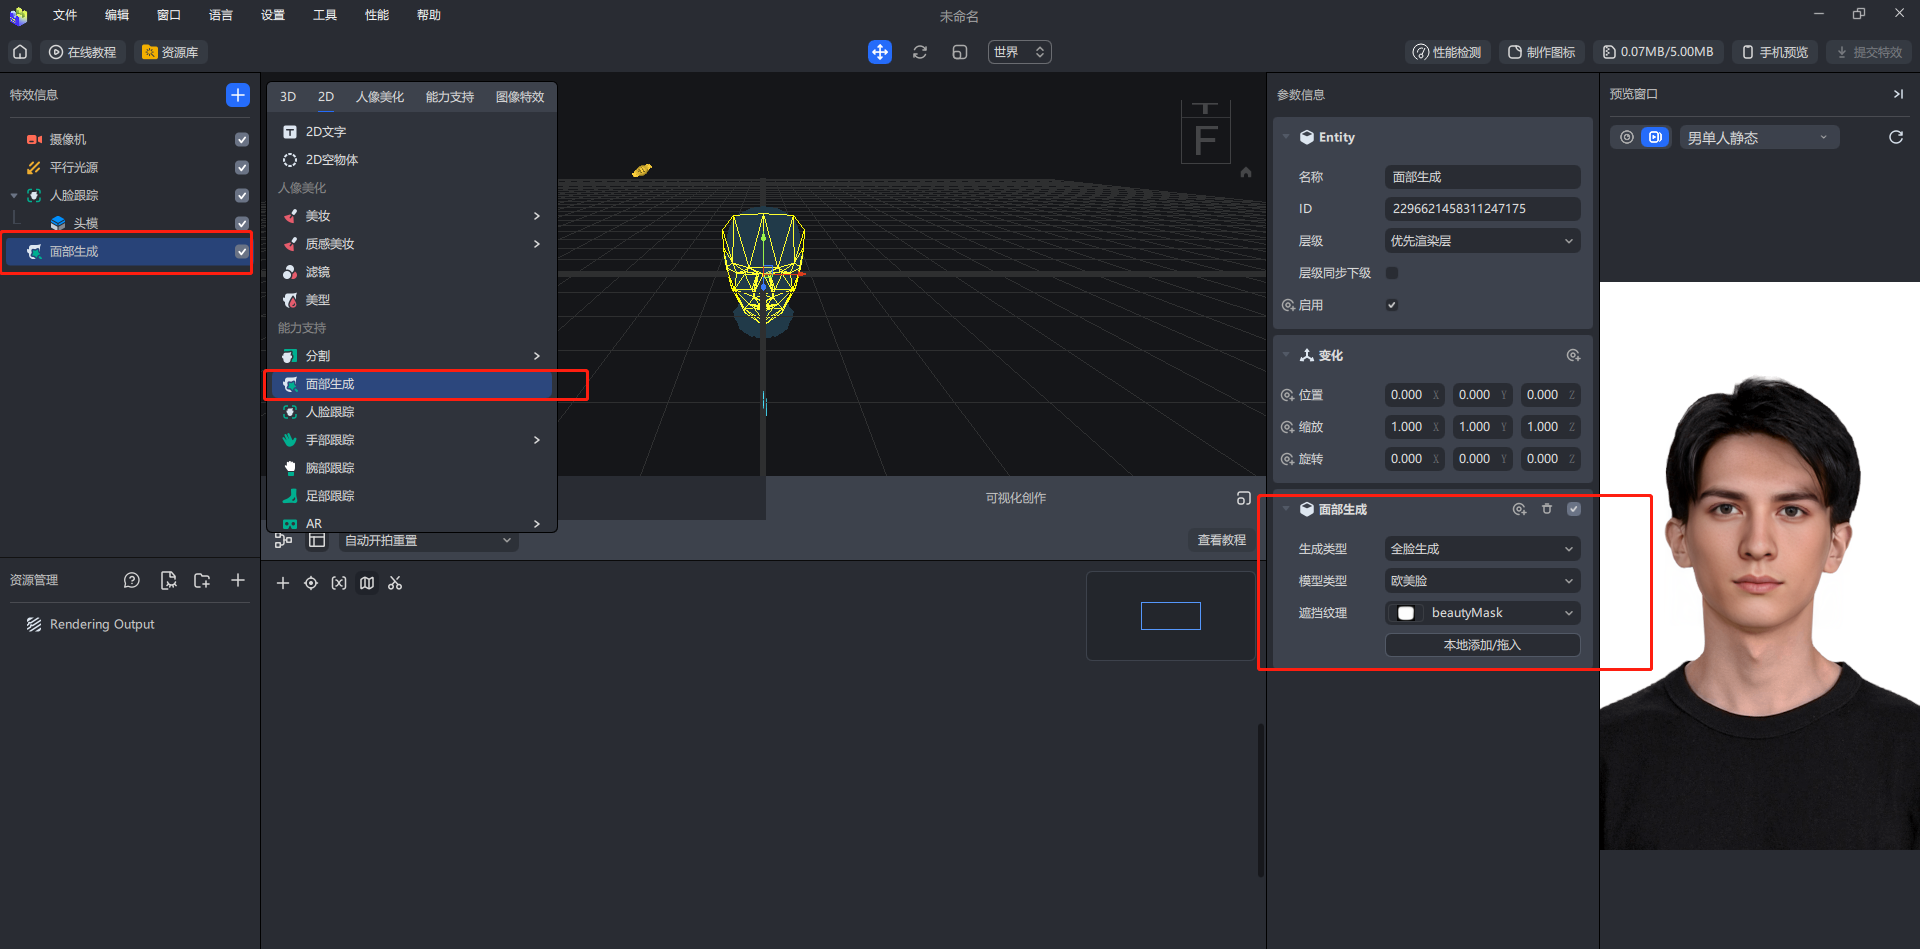
For example, here we create a new face generation object and add a European and American face effect. So now we want to switch between clicking the screen and changing the baby effect and the European and American face effect. How to do this? graph is doing just that. He will write a set of controls for these objects and complete a set of corresponding processes!
Getting Started with Graph
After knowing what Graph can do, let's take a look at how it is implemented through a few cases.
Case number one
The first case we want to achieve is that when the person in the camera nods, it will become bald. This logic is believed to be well understood by computer students who have a little programming foundation. Graph just encapsulates the code we write on weekdays into a visual panel, allowing us to complete a set of business logic through a simpler connection method.
If this operation is translated into a better way for developers to understand, it is shown in the following code.
if(检测点头){


	//执行变光头操作
}
So how to implement this operation in our Graph interface?
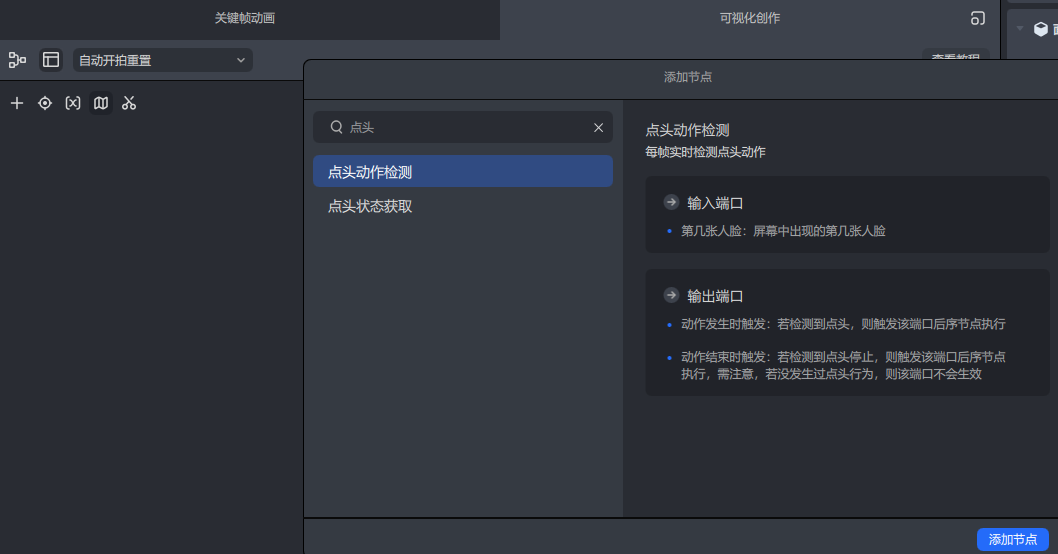
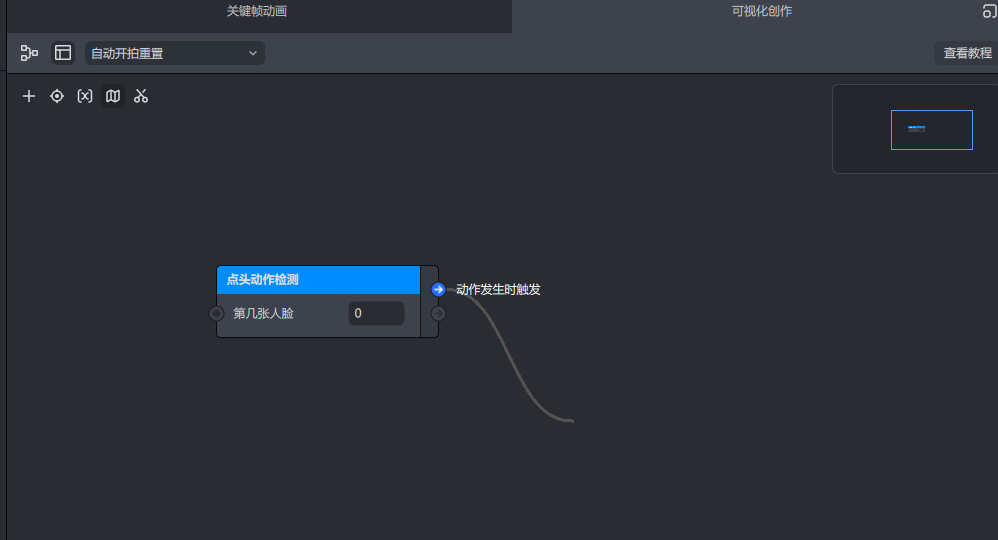
In the graph, we can detect the dynamic characteristics of people in the window by adding a nodding action detection node. If the nodding action is captured, the logic of this line will be triggered, and a rightward connection arrow will be generated. At this point, our The if judgment operation is completed.
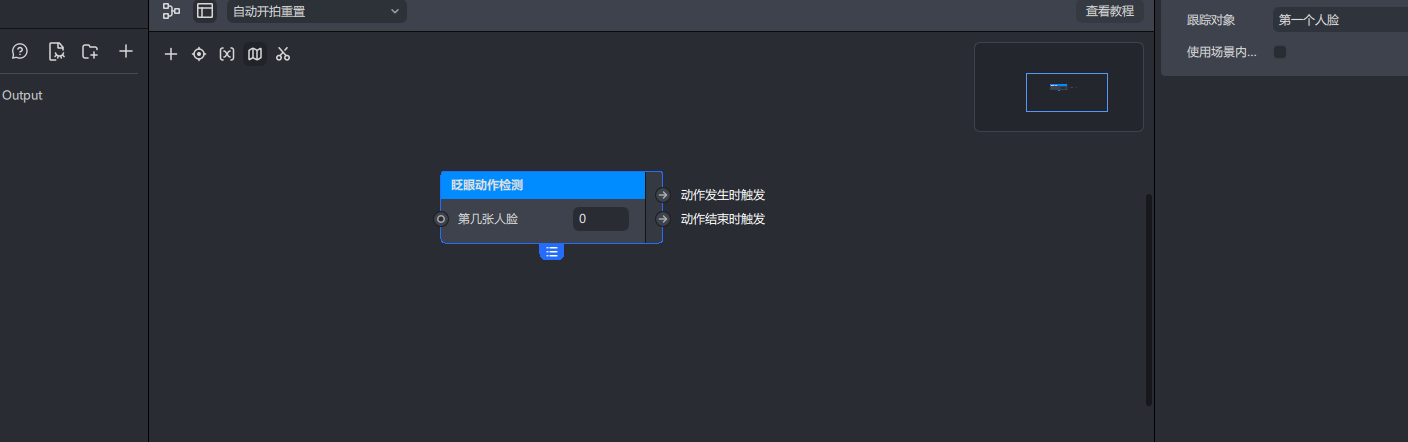
这里需要注意:我们窗口中的人脸是从0开始的,即第0个人脸就说明第一个
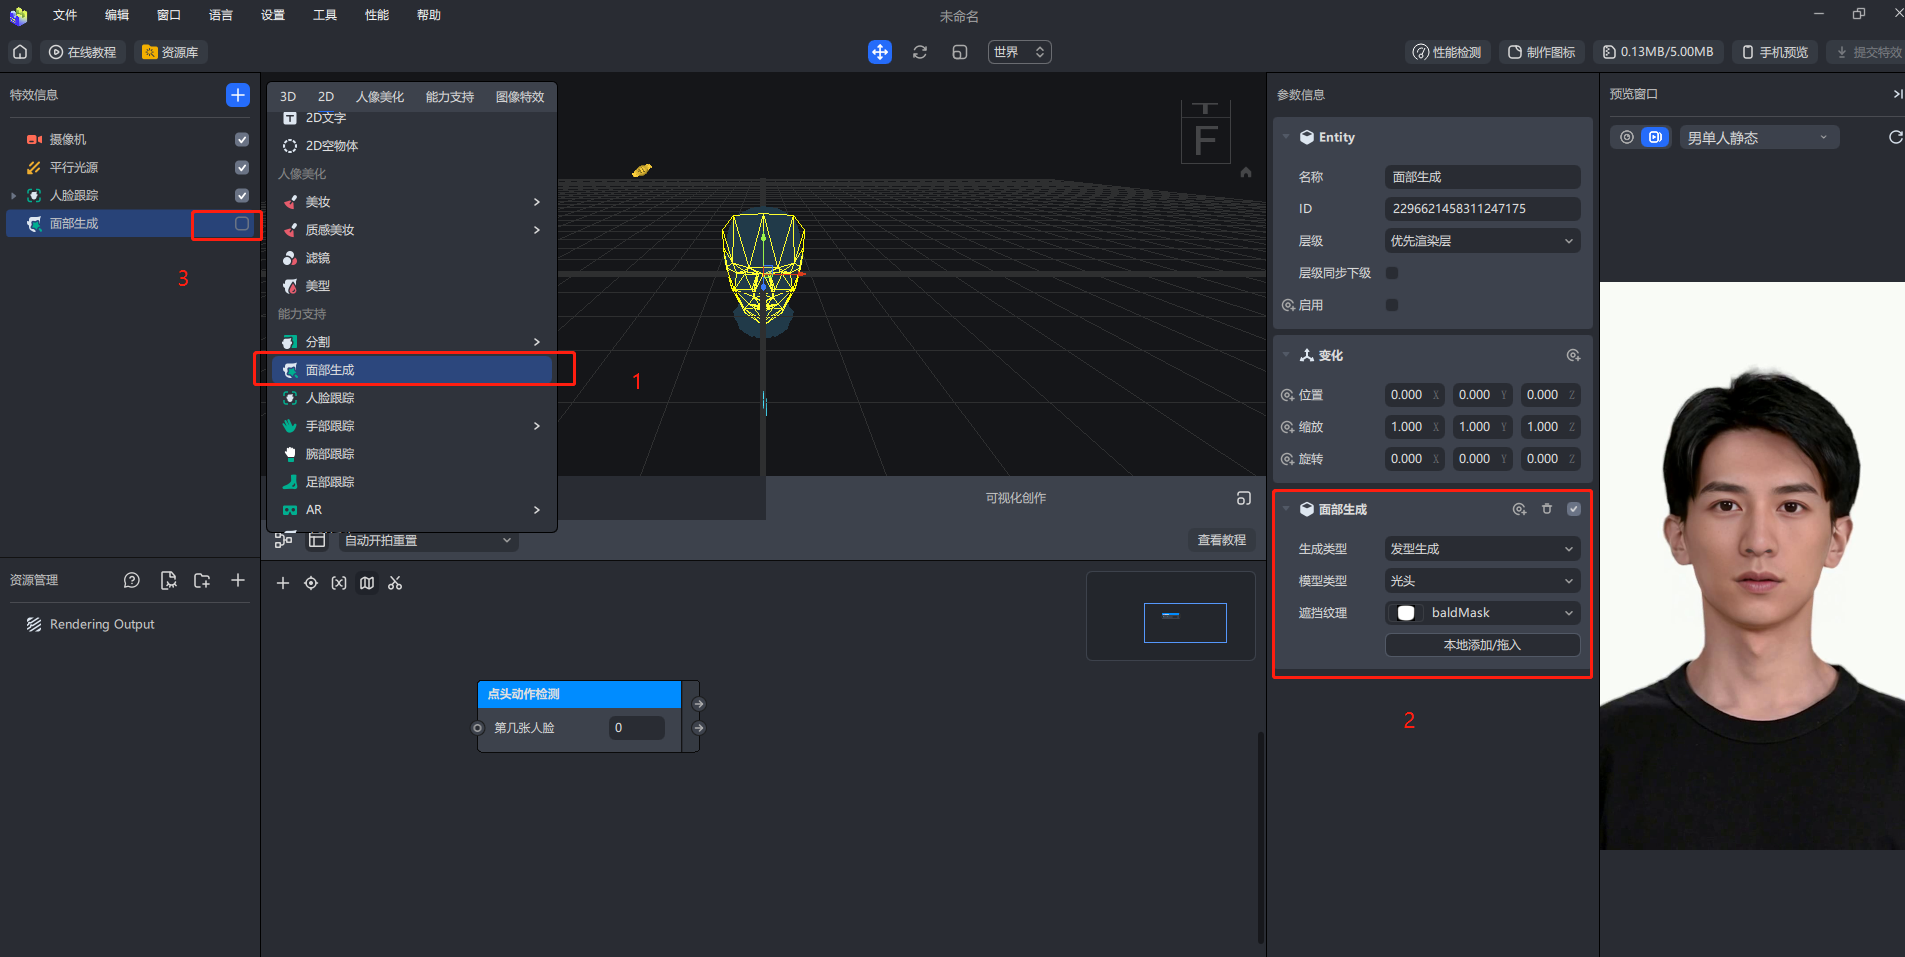
After completing the if judgment, let's add the shading head effect.
- Add a face generation effect object
- Adjust parameters for hairstyle generation/shading head
- Turn off the enable button and let's turn on the camera haircuts are normal at first.
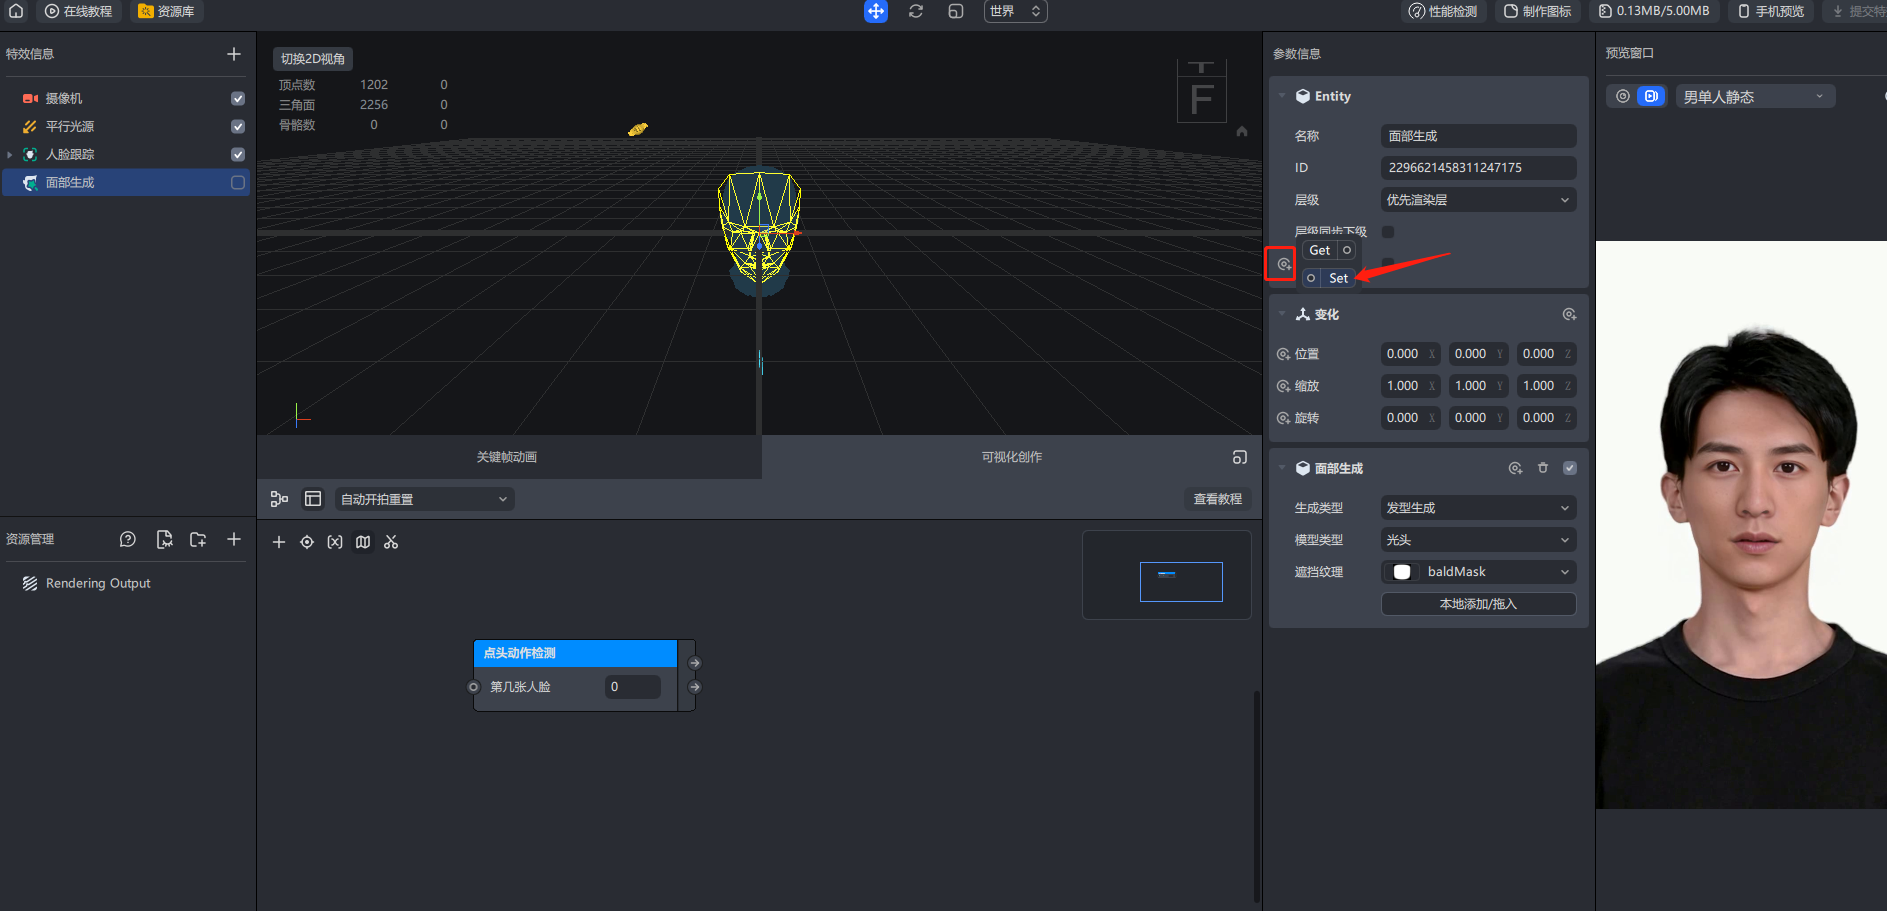
As mentioned above, graph is programmed by linking. How can we enable him to turn on the shading head effect while detecting the nod? So are we going to reassign the started set method? (get: get the value/set: assign) Let him turn on the bald head effect and link it with the detection operation?
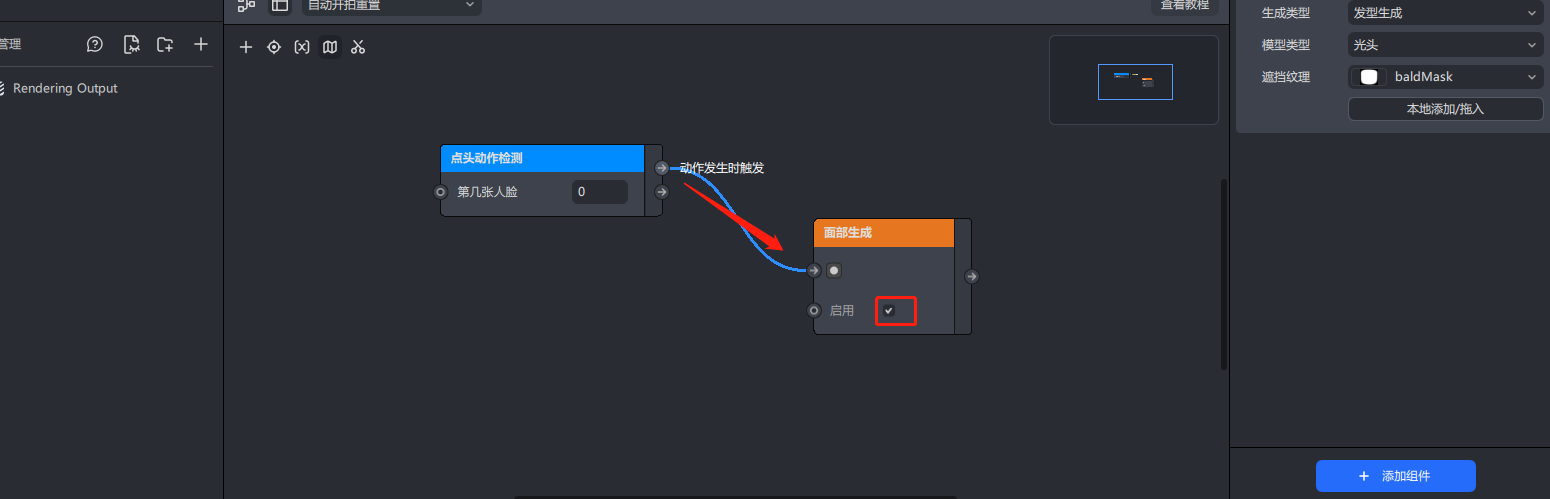
Now our bald head business process is reflected in the visualization window, and the bald head effect can be enabled by nodding in the lens. Below we conduct further tests.
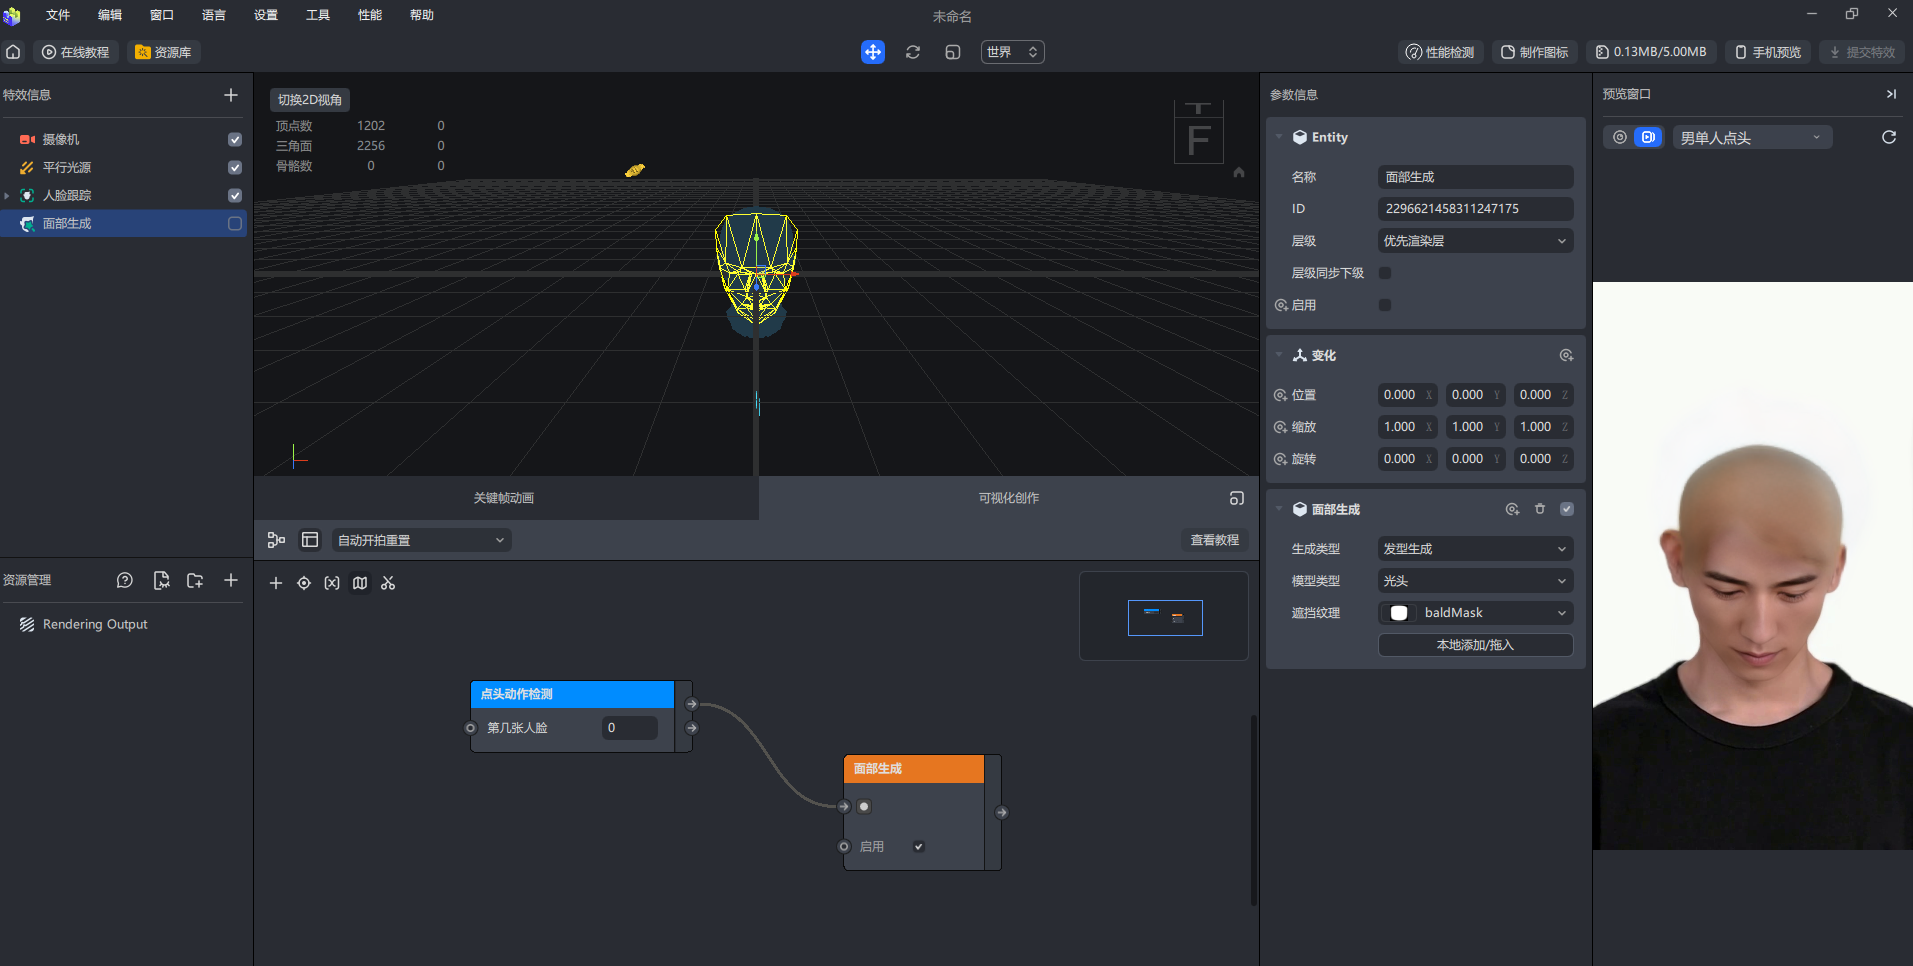
Achieving the effect we expected once the case is completed!
Case 2
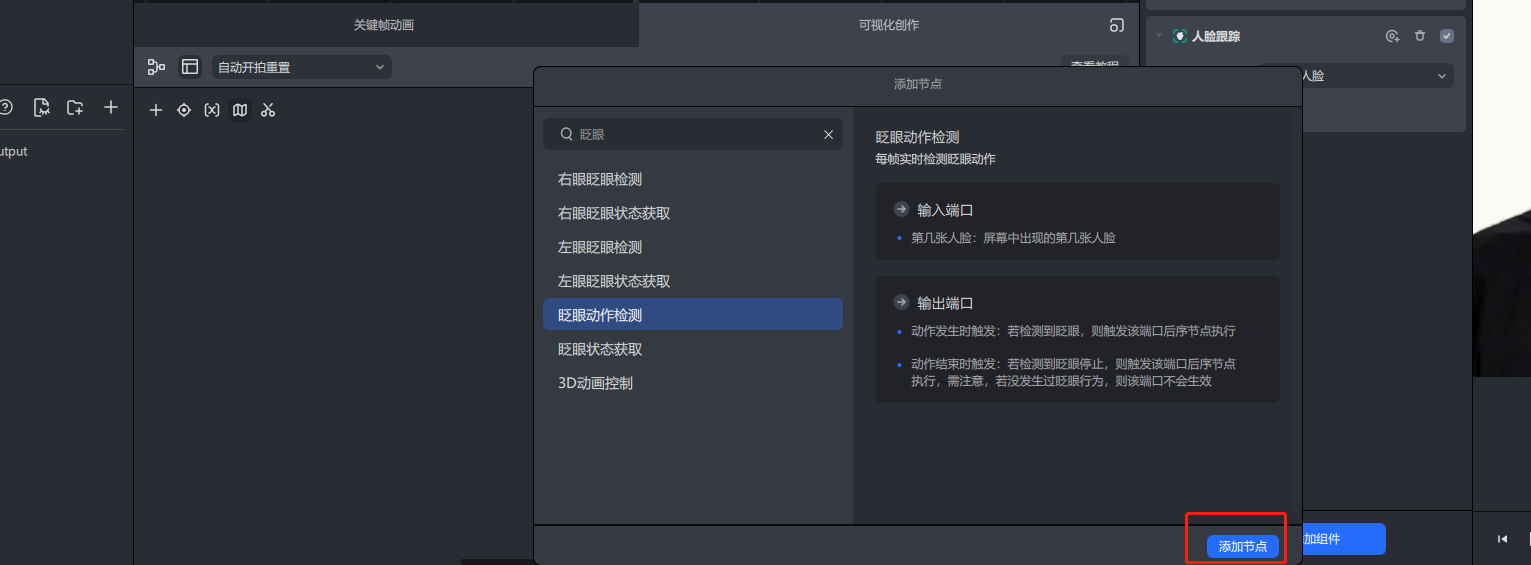
In the second case, let's implement the popular face zoom operation on Douyin. Take control with the blink of an eye!
The steps are basically the same as in case 1, the first step is to add eye blink motion detection
The second step is to add a face focus effect object, which is off by default
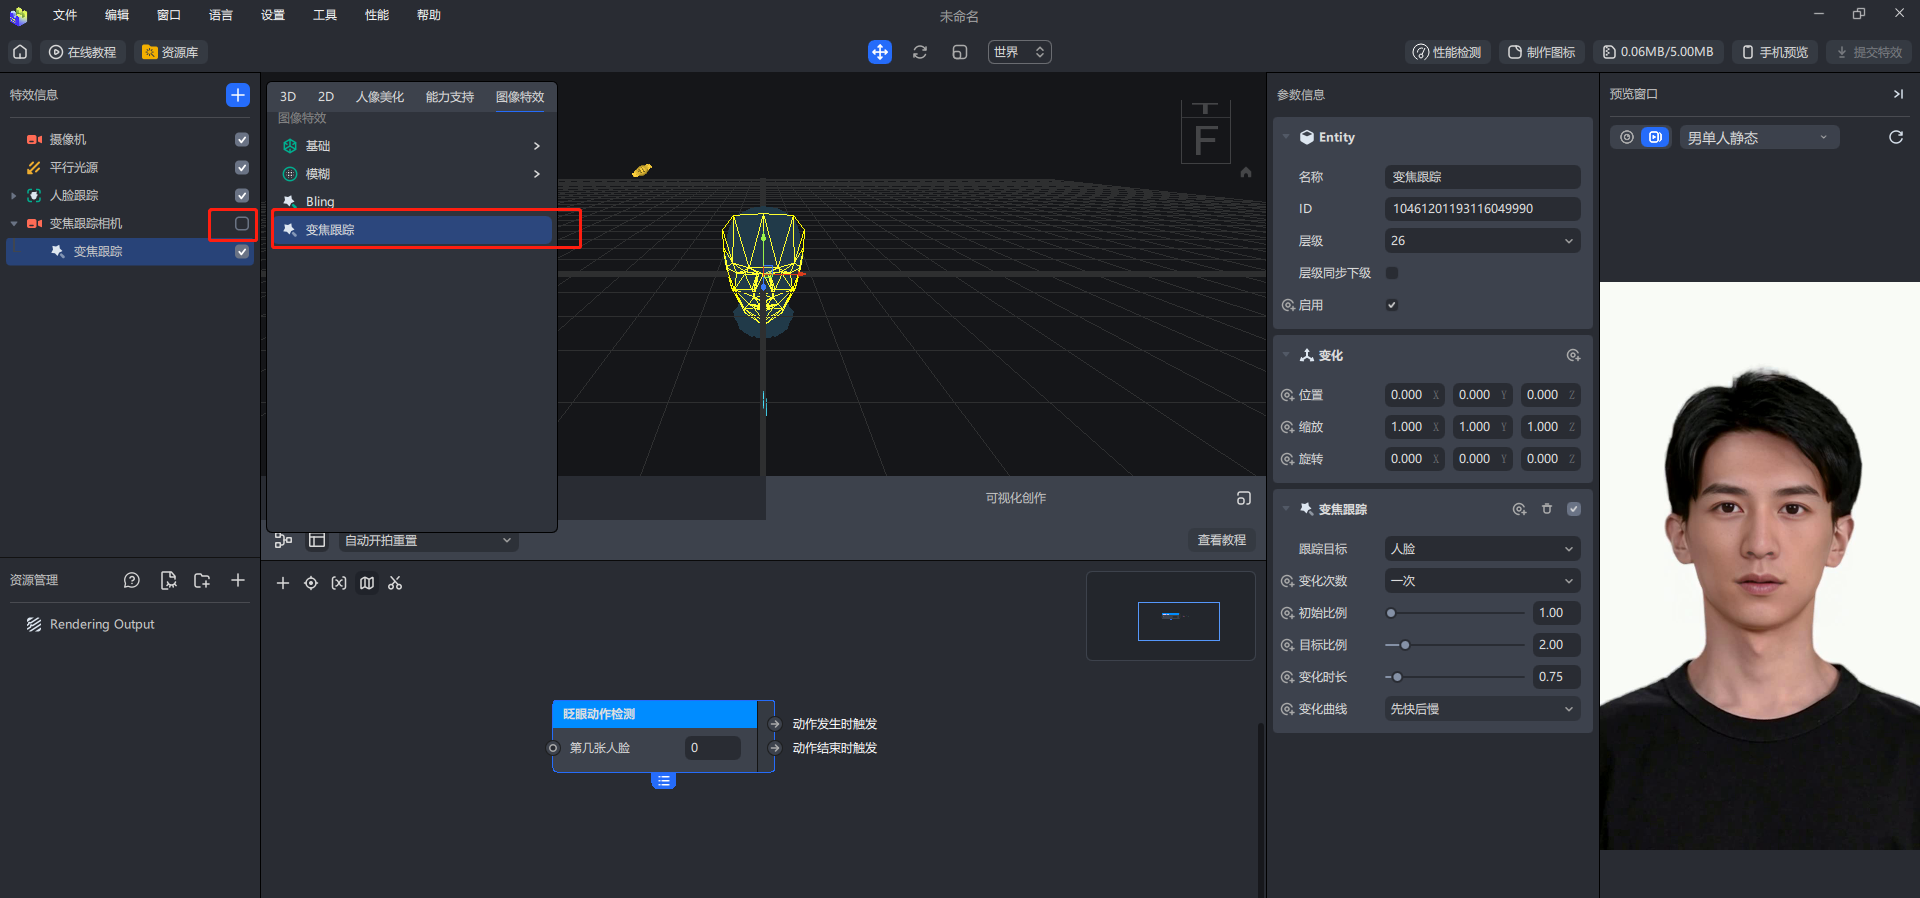
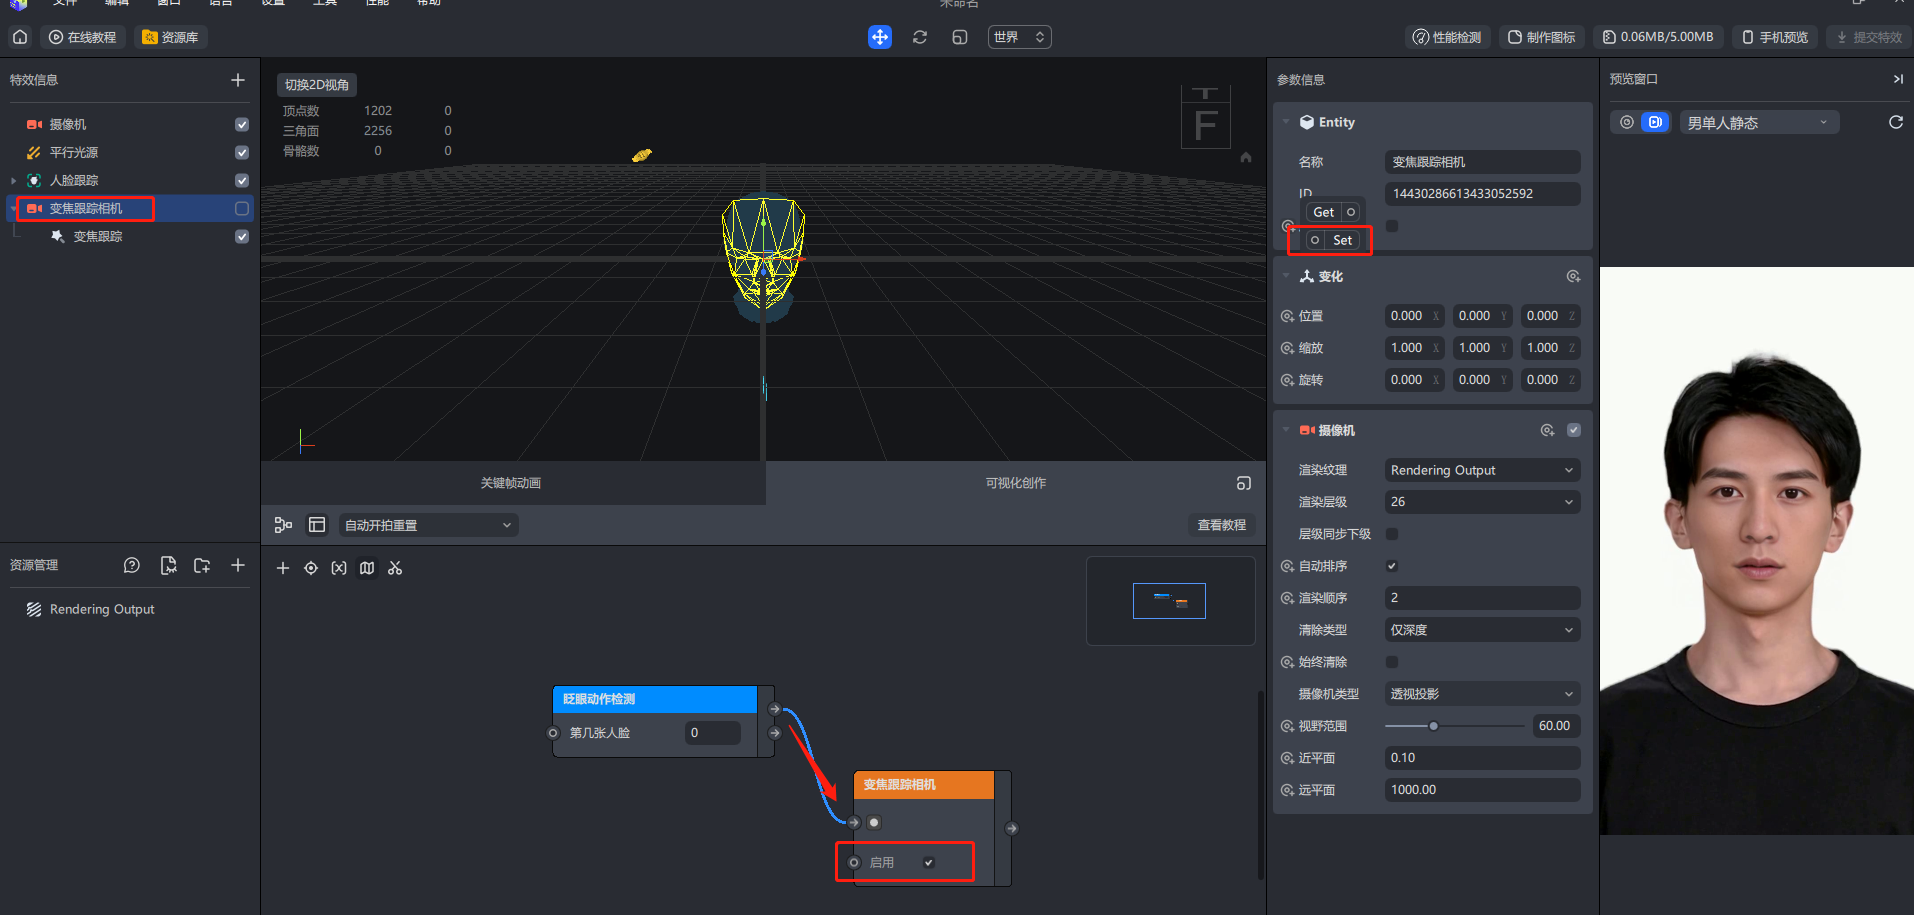
The third step is to select the focus tracking camera, set its set method, and link it with our eye blink detection. When we detect an eye blink, start focus tracking the camera object.
Let's do the blink action test
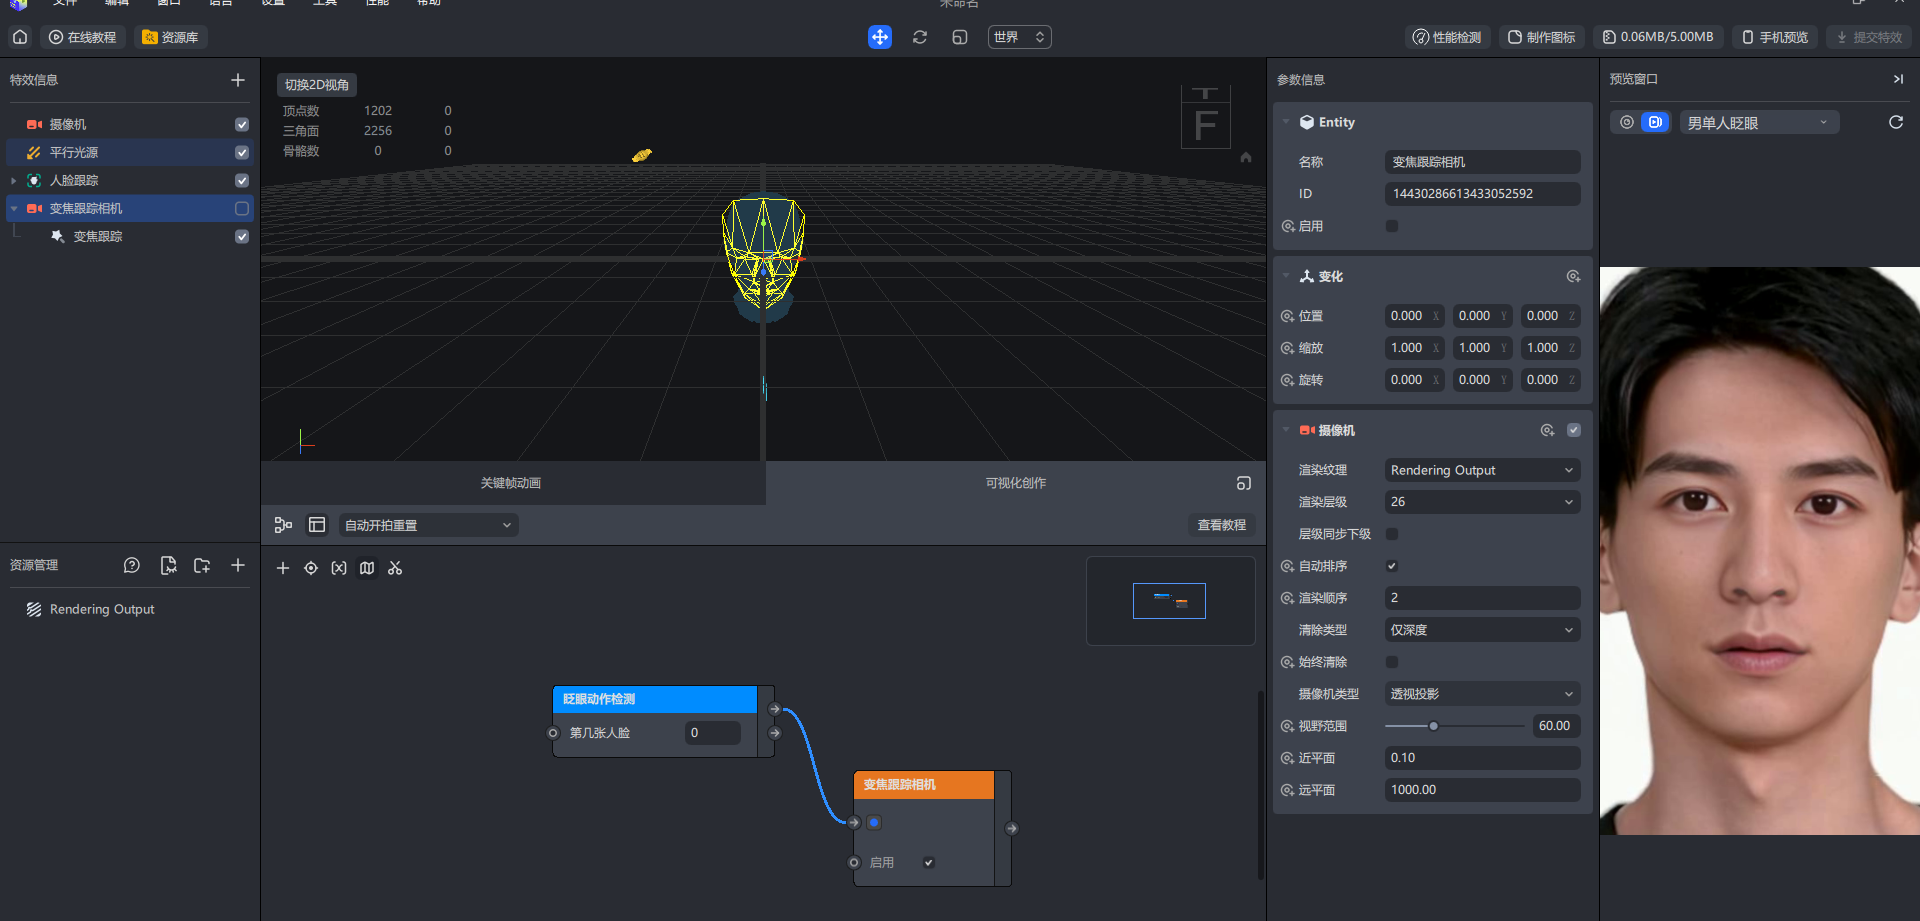
Achieved the effect we expected. Case 2 is completed!
Case 3
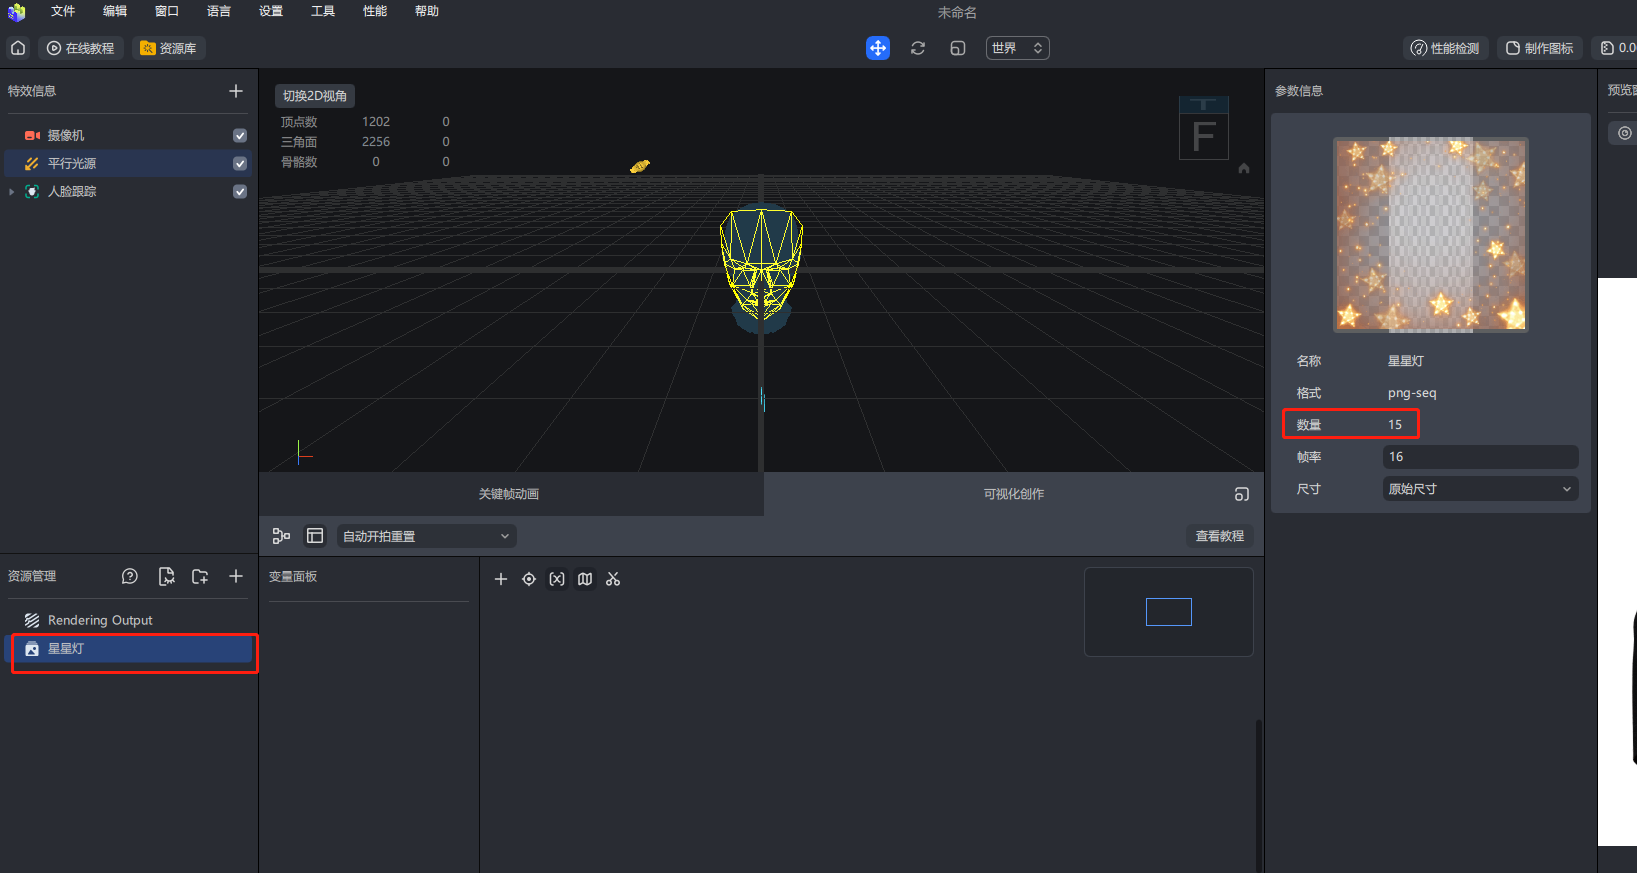
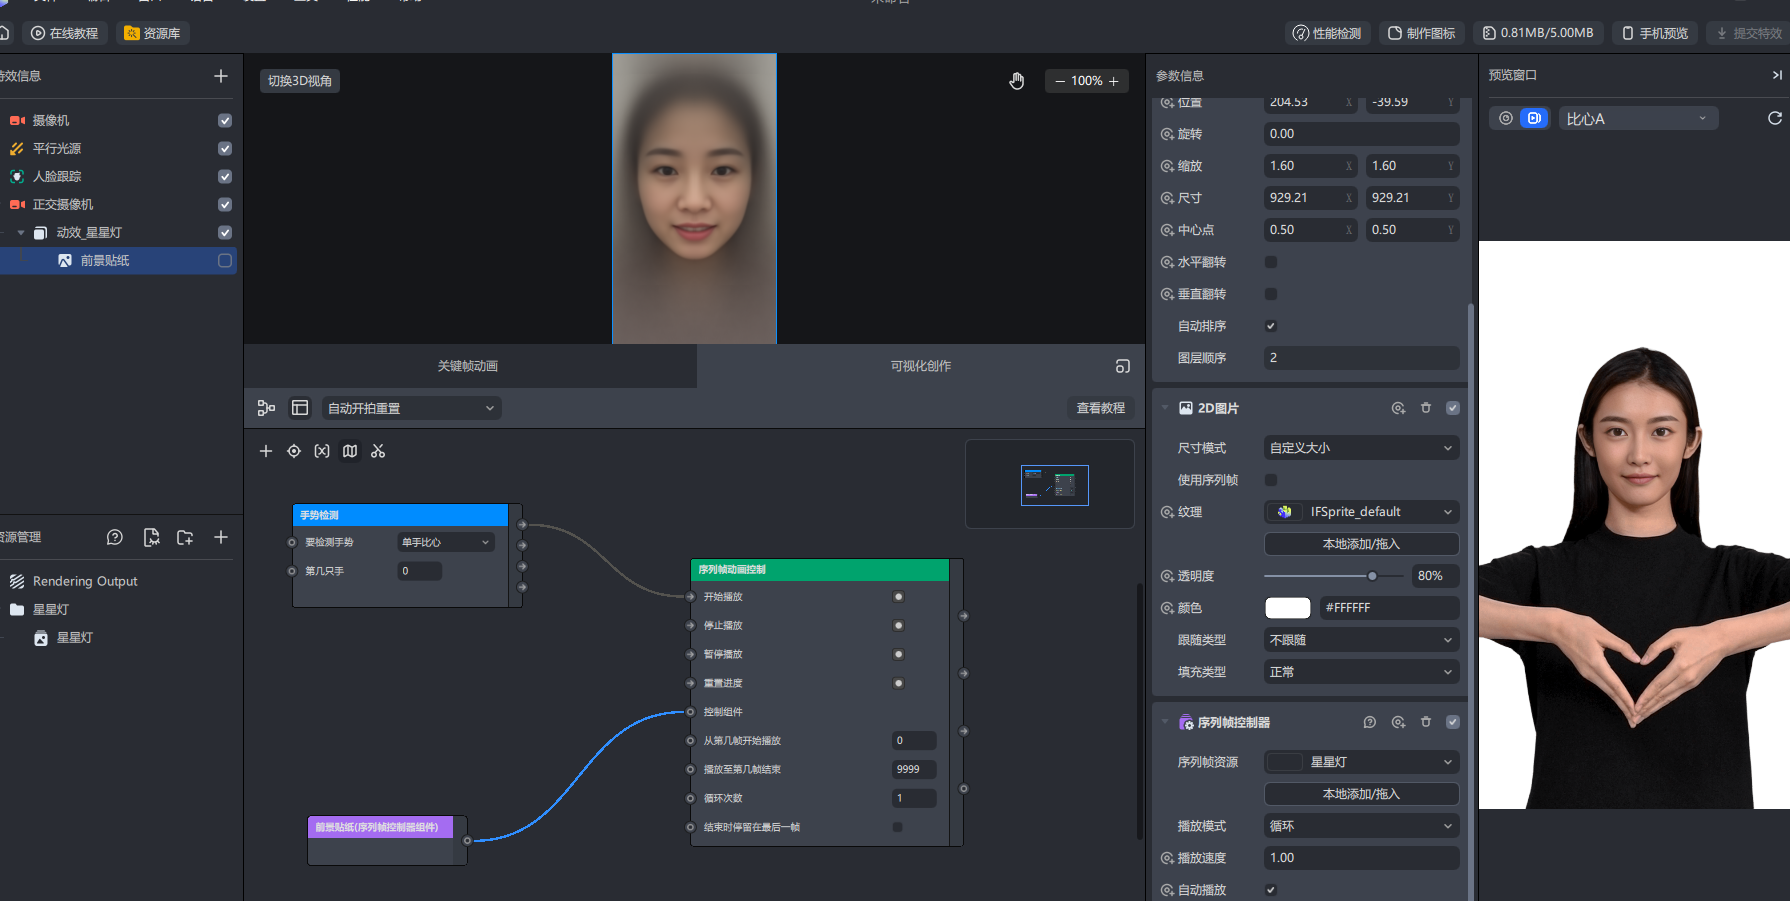
In the third case, let's go a little more complicated and control the sequence frame animation through heart gestures. To complete this case, the first step is to prepare a png sequence frame animation consisting of 15 pictures.
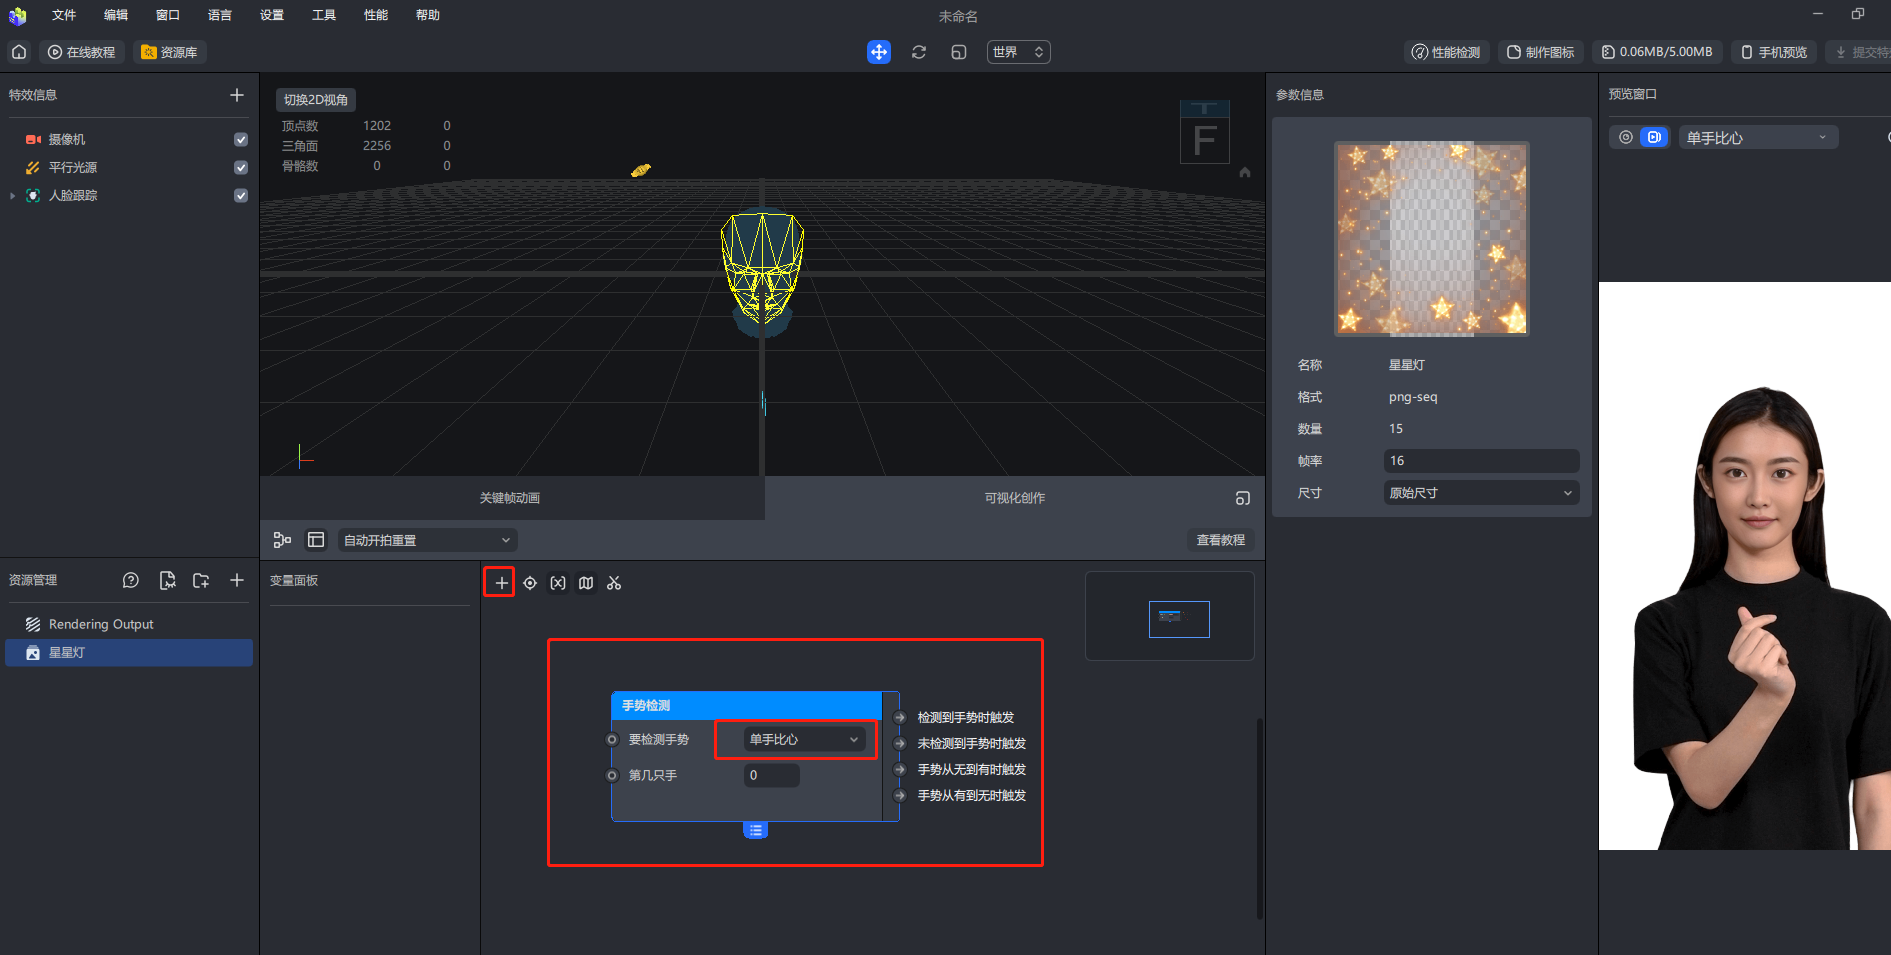
The second step is to create one-handed heart gesture detection
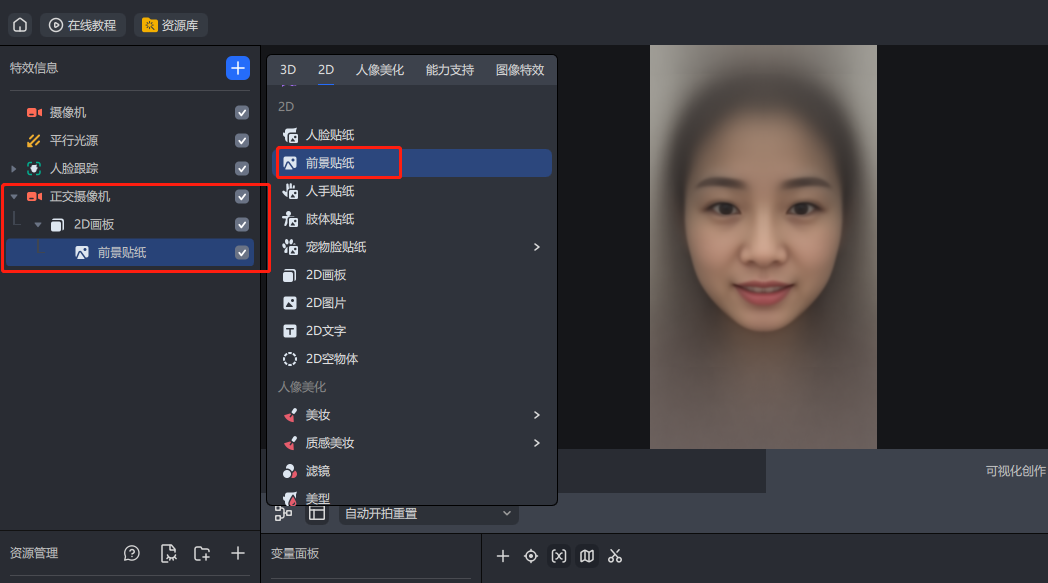
The third step is to create a new foreground sticker and add a sequence frame controller component.
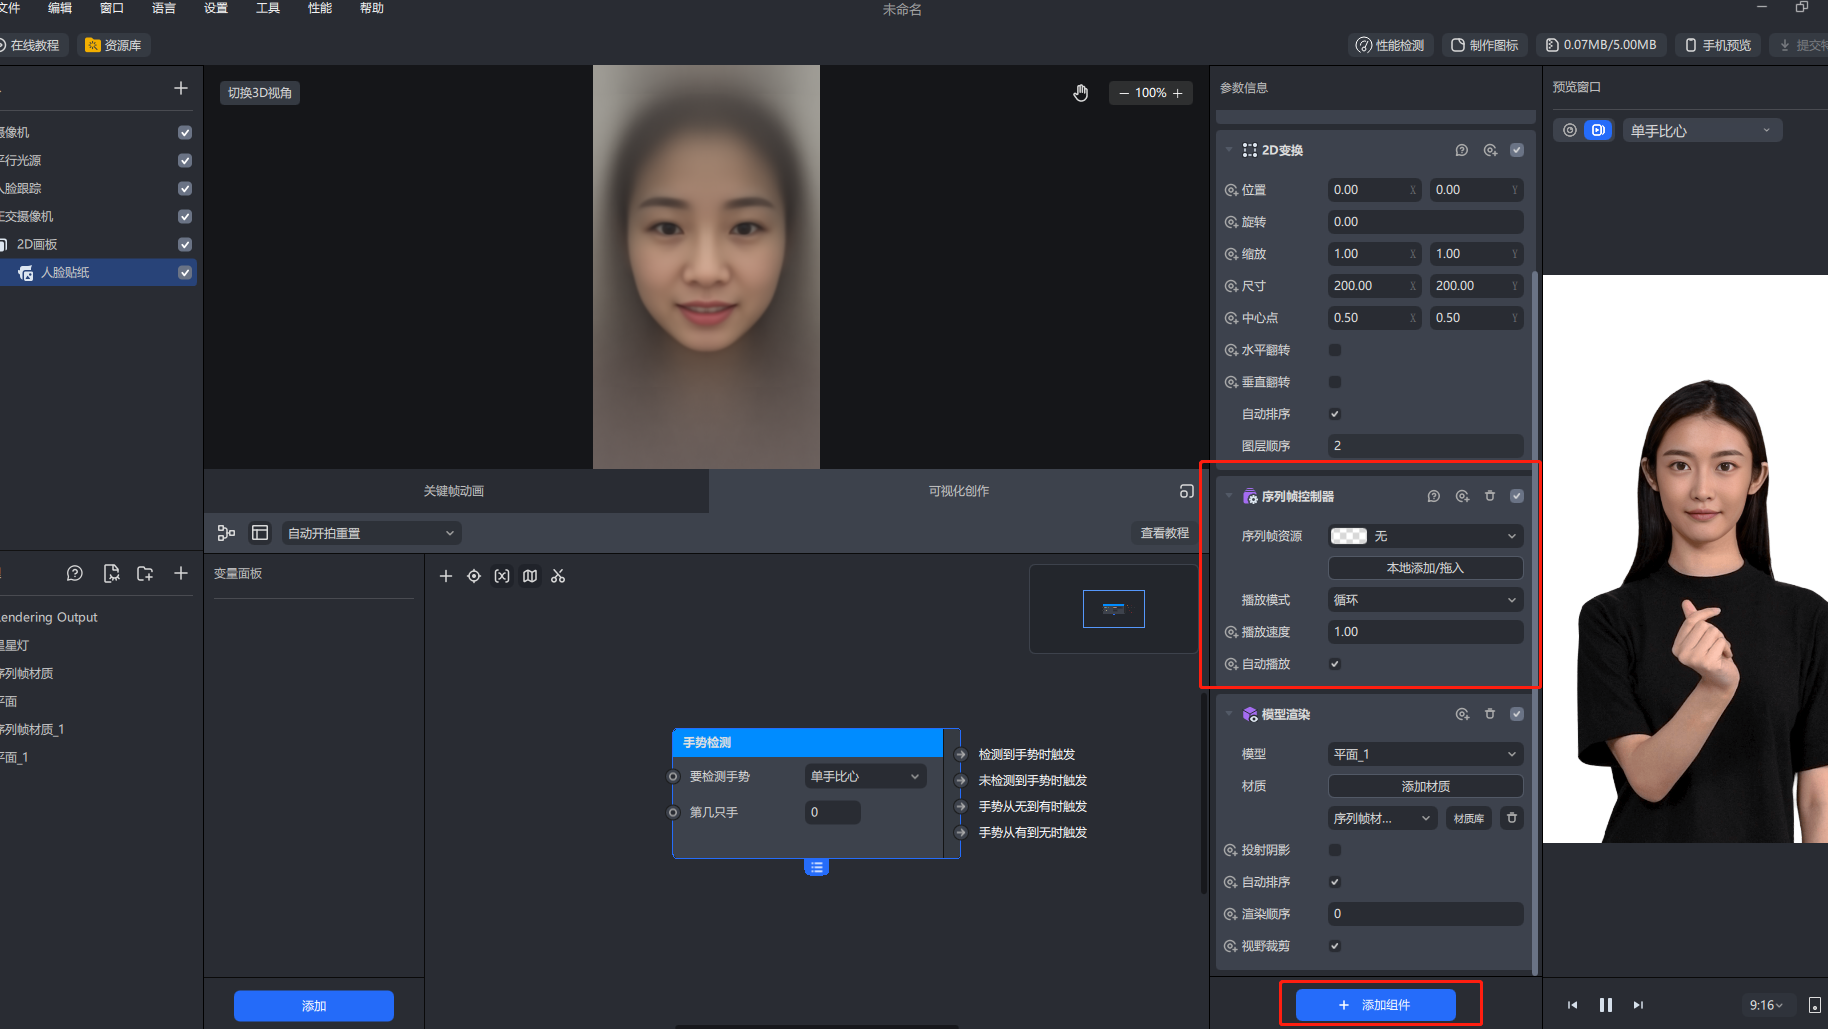
Step 4 Add and resize the 2d animation material for the sequence frame controller
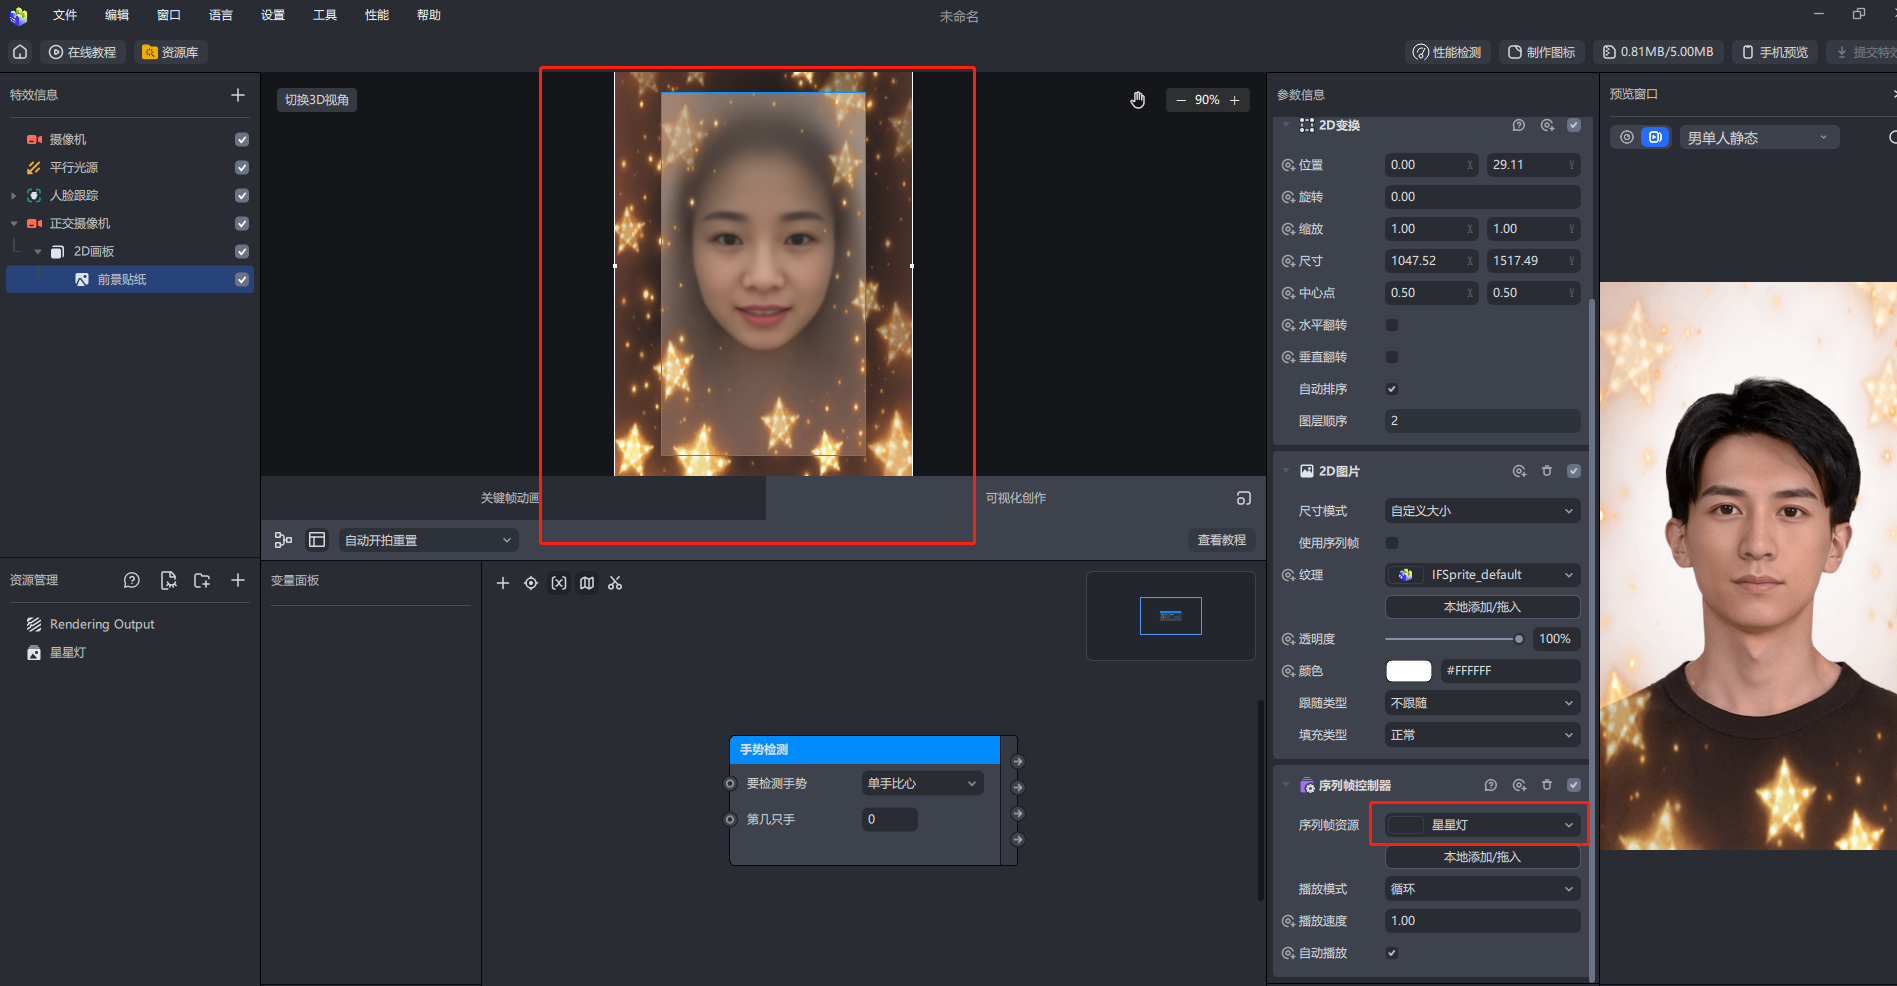
The fifth step is to add a sequence frame animation control in the visual authoring window
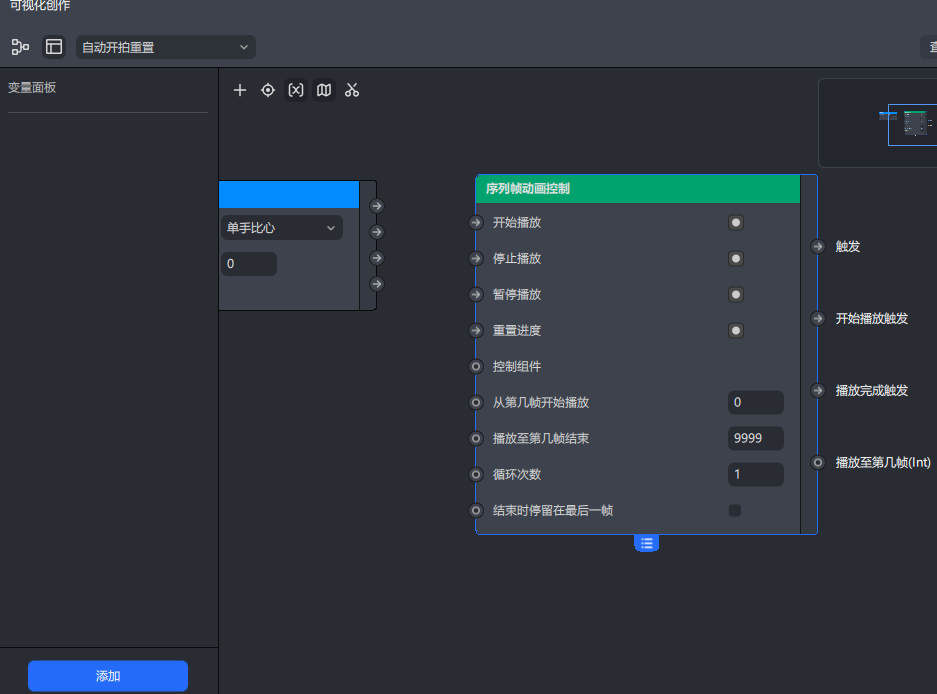
The sixth step is to add the sequence frame controller to the visualization window. The sequence frame controller here represents a resource. Pay attention to the difference between the sequence frame animation control and the sequence frame controller.
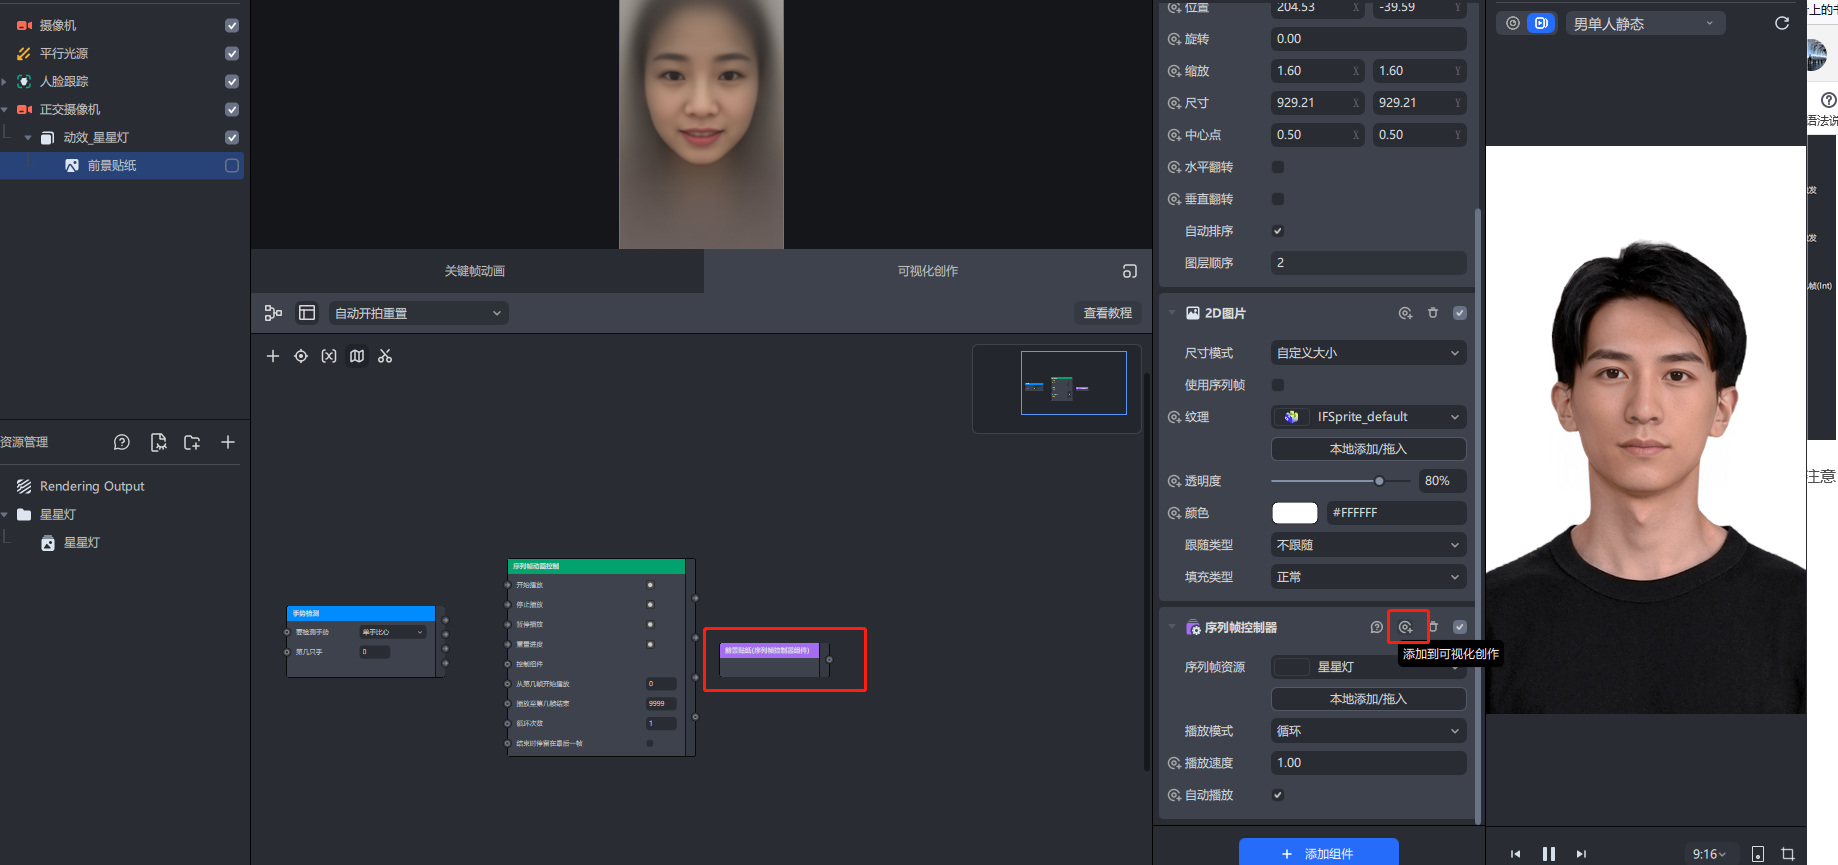
The seventh step is to link these controls. Trigger the sequence frame animation control and then execute the sequence frame controller component when one hand compares the heart
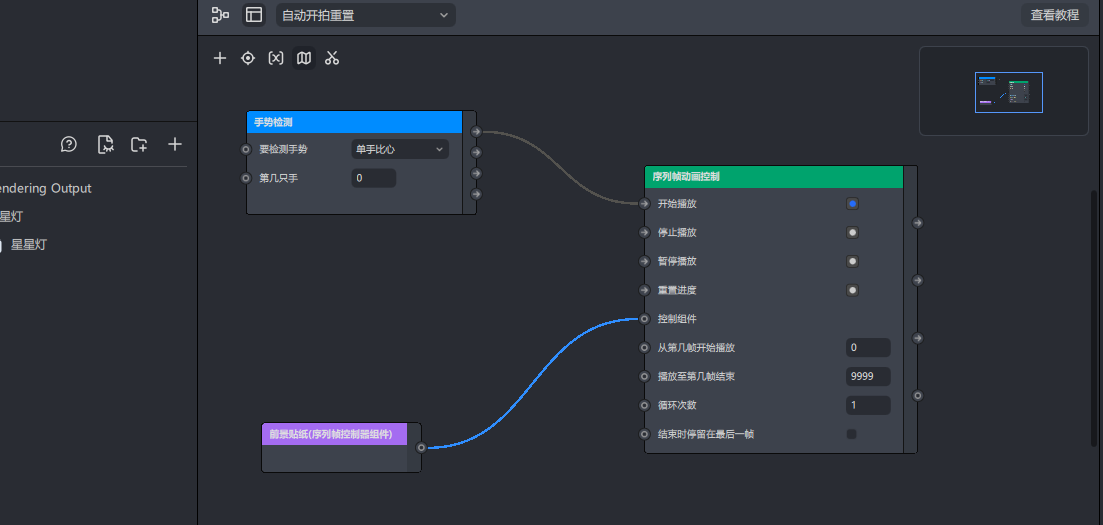
After testing, it was found that the effect we expected has been achieved

Through these two cases, our introductory operation is completed, and we will update the use of more Graphs in the future. Please continue to pay attention!