SelectorDialogFragment
Aquí hemos introducido controles de terceros en GitHub.
A excepción del código fuente del evento de clic en el paso 5, que debe modificarse de acuerdo con la situación real, el resto del código se ha ajustado y se puede reutilizar directamente en proyectos posteriores.
1. Diagrama de IU de demanda
No puedo encontrar el diagrama de IU anterior, así que dibujé a mano directamente un diagrama de IU de la siguiente manera.
Se puede ver que esta ventana emergente contiene un título TextView, un botón de cierre ImageView, dos botones que representan Aceptar y Cancelar, y se necesita una barra de opciones arrastrable en el medio. Aquí usamos un WheelView de terceros en GitHub .
Enlace de uso de WheelView de terceros GitHub
Hablando de esto, es solo un resumen del uso de controles de terceros en GitHub.
Tome la vista de selección en este proyecto como ejemplo:
ingrese la vista de selección para buscar, filtrar Java, ordenar, seleccionar La mayoría de las estrellas, seleccionar la primera, abrirla para verla, leer los documentos de uso, etc.

Dos, pasos de diseño de código
(1) Un elemento de diseño : dialog_background , que varias ventanas emergentes reutilizan como fondo.
(2) Un diseño: picker_dialog.xml
(3) PickerDialogFragment.java
(4) La clase de herramienta DialogUtils define el método showPickerDialog
(5) Configure el evento de clic para que aparezca la ventana emergente en la Actividad y use el método showPickerDialog para su reutilización.
Tres, código fuente
(1) dialog_background.xml
<?xml version="1.0" encoding="utf-8"?>
<shape xmlns:android="http://schemas.android.com/apk/res/android">
    <corners android:radius="15dp" />
    <solid android:color="@color/cardview_shadow_start_color" />
</shape>
(2) Un diseño: picker_dialog.xml
Debido a que queremos importar un control de barra de opciones deslizante de terceros WheelView , primero debemos importar la dependencia en build.gradle:
compile 'com.contrarywind:Android-PickerView:4.1.9'
Después de la importación, el control WheelView se puede utilizar directamente en el diseño.
Para conocer el método de uso específico del control de terceros, consulte el enlace proporcionado anteriormente.
El siguiente es el código de picker_dialog.xml:
<?xml version="1.0" encoding="utf-8"?>
<androidx.constraintlayout.widget.ConstraintLayout
    xmlns:android="http://schemas.android.com/apk/res/android"
    xmlns:app="http://schemas.android.com/apk/res-auto"
    android:layout_width="match_parent"
    android:layout_height="match_parent"
    android:background="@drawable/dialog_background">

    <ImageView
        android:id="@+id/close"
        android:layout_width="40dp"
        android:layout_height="40dp"
        android:layout_marginStart="20dp"
        android:layout_marginTop="20dp"
        app:layout_constraintStart_toStartOf="parent"
        app:layout_constraintTop_toTopOf="parent"
        app:srcCompat="@drawable/close" />

    <TextView
        android:id="@+id/title"
        android:layout_width="wrap_content"
        android:layout_height="wrap_content"
        android:layout_marginEnd="90dp"
        android:layout_marginStart="30dp"
        android:text="设定报警时速"
        android:textSize="26sp"
        app:layout_constraintBottom_toBottomOf="@+id/close"
        app:layout_constraintEnd_toEndOf="parent"
        app:layout_constraintStart_toEndOf="@+id/close"
        app:layout_constraintTop_toTopOf="@+id/close" />

    <LinearLayout
        android:layout_width="0dp"
        android:layout_height="0dp"
        android:orientation="vertical"
        app:layout_constraintBottom_toTopOf="@+id/sure"
        app:layout_constraintEnd_toEndOf="parent"
        app:layout_constraintStart_toStartOf="parent"
        app:layout_constraintTop_toBottomOf="@+id/title">

        <com.contrarywind.view.WheelView
            android:id="@+id/options"
            android:layout_width="match_parent"
            android:layout_height="match_parent" />

    </LinearLayout>

    <Button
        android:id="@+id/sure"
        android:layout_width="wrap_content"
        android:layout_height="wrap_content"
        android:layout_marginBottom="8dp"
        android:text="确定"
        app:layout_constraintBottom_toBottomOf="parent"
        app:layout_constraintEnd_toStartOf="@+id/guideline"
        app:layout_constraintStart_toStartOf="parent" />

    <androidx.constraintlayout.widget.Guideline
        android:id="@+id/guideline"
        android:layout_width="wrap_content"
        android:layout_height="wrap_content"
        android:orientation="vertical"
        app:layout_constraintGuide_percent="0.5" />

    <Button
        android:id="@+id/cancel"
        android:layout_width="wrap_content"
        android:layout_height="wrap_content"
        android:layout_marginBottom="8dp"
        android:text="取消"
        app:layout_constraintBottom_toBottomOf="parent"
        app:layout_constraintEnd_toEndOf="parent"
        app:layout_constraintStart_toStartOf="@+id/guideline" />
</androidx.constraintlayout.widget.ConstraintLayout>
(3) PickerDialogFragment.java:
public class PickerDialogFragment extends DialogFragment {


    List<String> items;
    PickerDialogFragmentListener pickerDialogFragmentListener;
    int index;

    @Nullable
    @Override
    public View onCreateView(LayoutInflater inflater,
                             @Nullable ViewGroup container, @Nullable Bundle savedInstanceState) {


        getDialog().requestWindowFeature(Window.FEATURE_NO_TITLE);

        View view = inflater.inflate(R.layout.picker_dialog, container, false);

        Bundle bundle = getArguments();
        items = bundle.getStringArrayList("data");
        String title = bundle.getString("title");
        index = bundle.getInt("index");

        ImageView close = view.findViewById(R.id.close);
        TextView titleText = view.findViewById(R.id.title);
        TextView sure = view.findViewById(R.id.sure);
        TextView cancel = view.findViewById(R.id.cancel);

        titleText.setText(title);
        sure.setOnClickListener(v -> {


            if (pickerDialogFragmentListener != null) {


                pickerDialogFragmentListener.getData(index);
            }
            getDialog().cancel();
        });
        cancel.setOnClickListener(v -> getDialog().cancel());
        close.setOnClickListener(v -> getDialog().cancel());
        initWheelView(view);
        return view;
    }

    private void initWheelView(View view) {


        WheelView options = view.findViewById(R.id.options);
        options.setCyclic(false);
        options.setTextColorCenter(Color.WHITE);
        options.setTextSize(26);
        options.setAdapter(new ArrayWheelAdapter(items));
        options.setOnItemSelectedListener(index -> this.index = index);
        options.setCurrentItem(index);
    }

    @Override
    public void onStart() {


        super.onStart();
        Dialog dialog = getDialog();
        if (dialog != null ) {


            DisplayMetrics dm = new DisplayMetrics();
            getActivity().getWindowManager().getDefaultDisplay().getMetrics(dm);
            int height = ViewGroup.LayoutParams.MATCH_PARENT;
            dialog.getWindow().setLayout((int) (dm.widthPixels * 0.5), height);
            dialog.getWindow().setBackgroundDrawable(new ColorDrawable(Color.TRANSPARENT));
        }
    }

    public void setPickerDialogFragmentListener(PickerDialogFragmentListener pickerDialogFragmentListener) {


        this.pickerDialogFragmentListener = pickerDialogFragmentListener;
    }

    public void setItems(List<String> items) {


        this.items = items;
    }

    public void setIndex(int index) {


        this.index = index;
    }

    public interface PickerDialogFragmentListener {


        void getData(int index);
    }
}
(4) La clase de herramienta DialogUtils define el método showPickerDialog
Métodos de la siguiente manera:
public static void showPickerDialog(
            AppCompatActivity activity,
            ArrayList<String> data,
            String title,
            int currentIndex,
            PickerDialogFragment.PickerDialogFragmentListener listener) {


        PickerDialogFragment fragment = new PickerDialogFragment();
        Bundle bundle = new Bundle();
        bundle.putStringArrayList("data", data);
        bundle.putString("title", title);
        bundle.putInt("index", currentIndex);
        fragment.setArguments(bundle);
        fragment.setPickerDialogFragmentListener(listener);
        fragment.show(activity.getSupportFragmentManager(), "fragment");
    }
(5) Configure el evento de clic para que aparezca la ventana emergente en la Actividad y use el método showPickerDialog para su reutilización.
Primero defina los datos que necesitamos en WheelView en arrays.xml:
<?xml version="1.0" encoding="utf-8"?>
<resources>
    <array name="alertSpeeds">
        <item>30</item>
        <item>35</item>
        <item>40</item>
        <item>45</item>
        <item>50</item>
        <item>55</item>
        <item>60</item>
        <item>65</item>
        <item>70</item>
        <item>75</item>
        <item>80</item>
        <item>85</item>
        <item>90</item>
        <item>95</item>
        <item>100</item>
        <item>105</item>
        <item>110</item>
        <item>115</item>
        <item>120</item>
        <item>125</item>
        <item>130</item>
        <item>135</item>
        <item>140</item>
        <item>145</item>
        <item>150</item>
        <item>155</item>
        <item>160</item>
        <item>165</item>
        <item>170</item>
        <item>175</item>
        <item>180</item>
        <item>185</item>
        <item>190</item>
        <item>195</item>
        <item>200</item>
        <item>205</item>
        <item>210</item>
        <item>215</item>
        <item>220</item>
    </array>
</resources>
Luego regrese a Activity y
declare una ArrayList primero:
ArrayList<String> alertSpeeds;
Luego, pase los datos a este ArrayList en el código:
alertSpeeds = new ArrayList<>();
        TypedArray alertSpeedsTypedArray = getResources().obtainTypedArray(R.array.alertSpeeds);

        for (int i = 0; i < alertSpeedsTypedArray.length(); i++) {


            alertSpeeds.add(alertSpeedsTypedArray.getInt(i, 0) + "km/h");
        }

        alertSpeedsTypedArray.recycle();
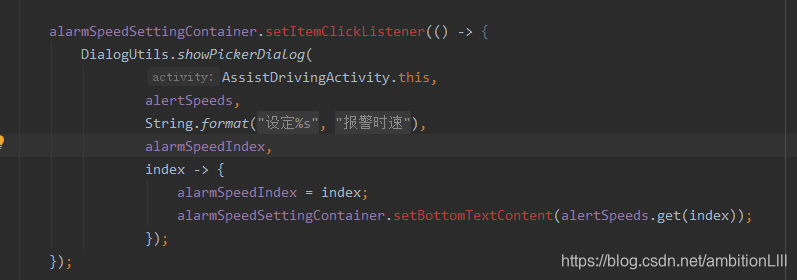
Lo siguiente es la realización del evento de clic, llamando al método ShowPickerDialog:

El código anterior es el siguiente:
alarmSpeedSettingContainer.setItemClickListener(() -> {


            DialogUtils.showPickerDialog(
                    AssistDrivingActivity.this,
                    alertSpeeds,
                    String.format(getString(R.string.setting_dialog_title), getString(R.string.alarm_speed)),
                    alarmSpeedIndex,
                    index -> {


                        alarmSpeedIndex = index;
                        alarmSpeedSettingContainer.setBottomTextContent(alertSpeeds.get(index));
                    });
        });