They taught you how to configure the Django framework on Ali cloud server
- 1 Ali cloud server and domain configuration
- 1.1 Ali cloud cloud server demand to buy the official website and domain name
- 1.2 Server Password Reset
- 1.3 Binding Ali cloud password
- 1.4 Open Server Port
- 1.5 Xshell use and management of cloud server Xftp
- 2 disposed on the server side python3
- 3 is disposed on the server side django
1 Ali cloud server and domain configuration
1.1 Ali cloud cloud server demand to buy the official website and domain name

1.2 Server Password Reset
Ali cloud cloud server purchases must reset the root password and restart the server before you can use specific methods of operation are as follows:
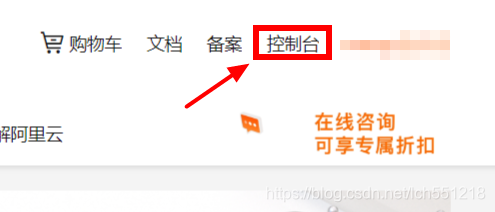
- Ali cloud into the official website, click on the upper right corner of the console
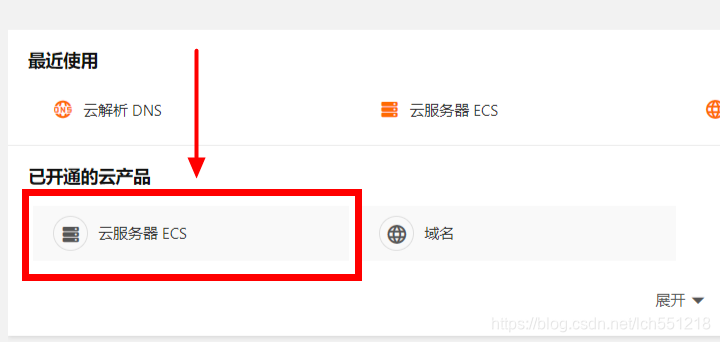
- In has opened cloud offerings to cloud servers
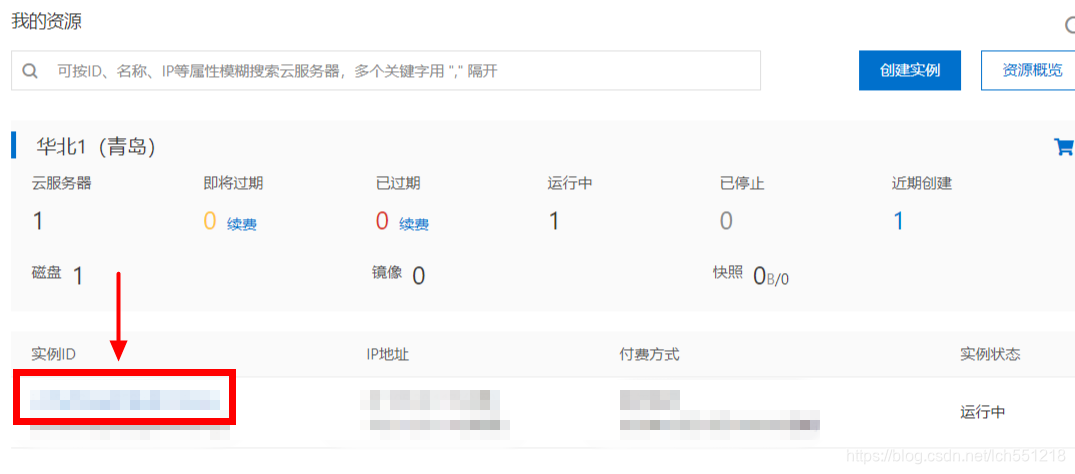
- In my resource , click the instance ID in the link
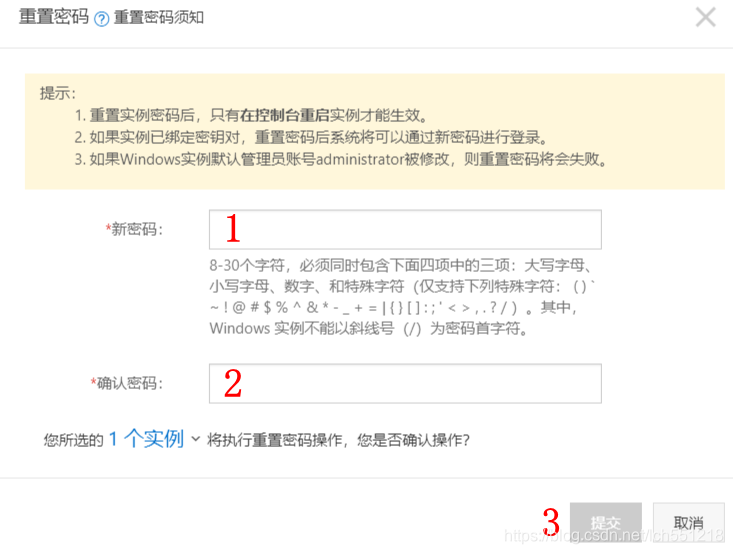
4. Basic information click on the more select Reset Password examples
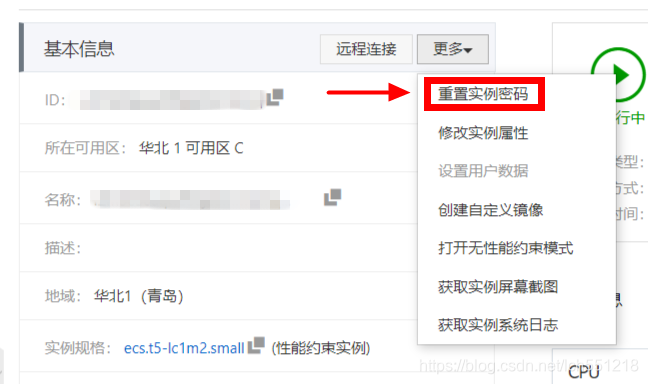
- And then in the pop-up page and reset the password required to submit to ok
1.3 Binding Ali cloud password
- Into the console -> cloud server ECS , copy my resources under the IP address of XXXX (public network)
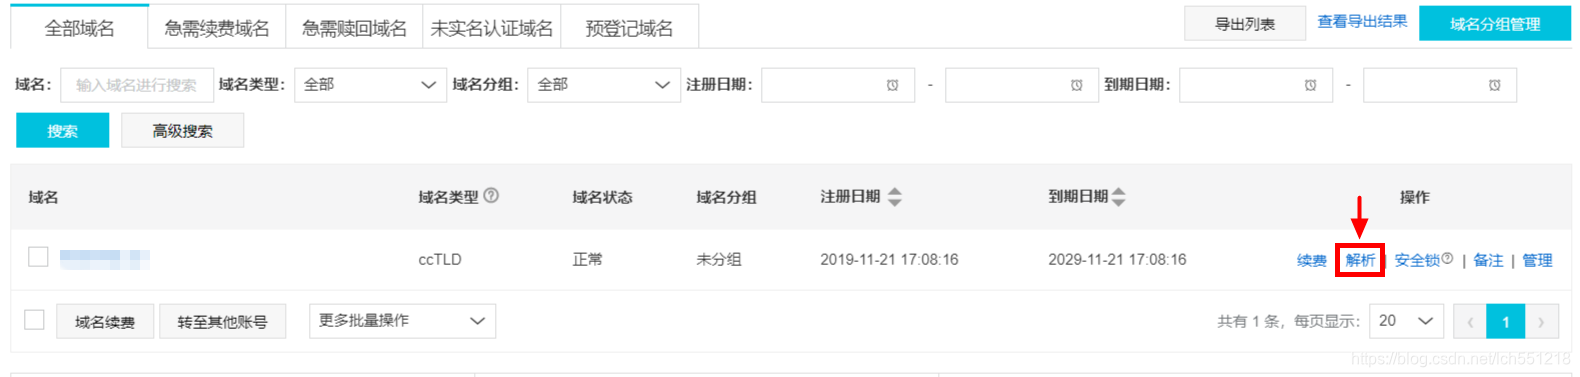
- Into the console -> domain name (If you have purchased a domain name, then)

- Click the domain name behind resolve
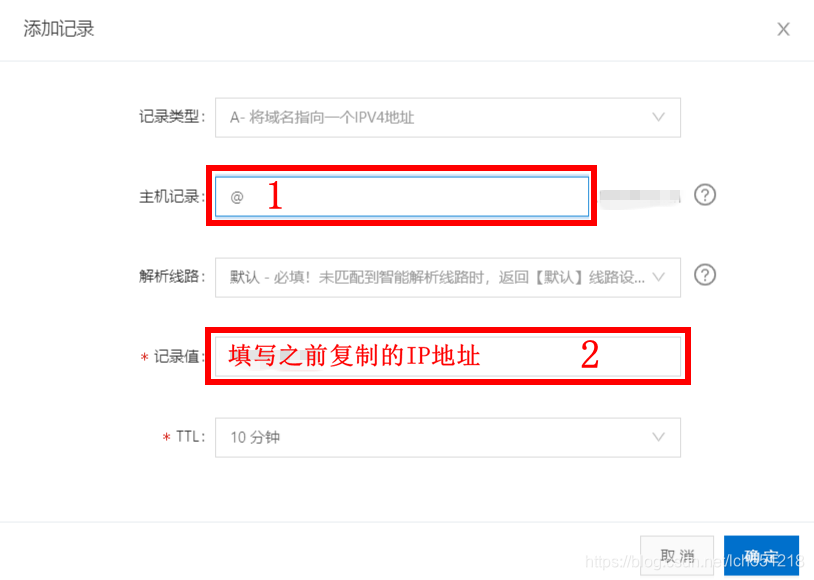
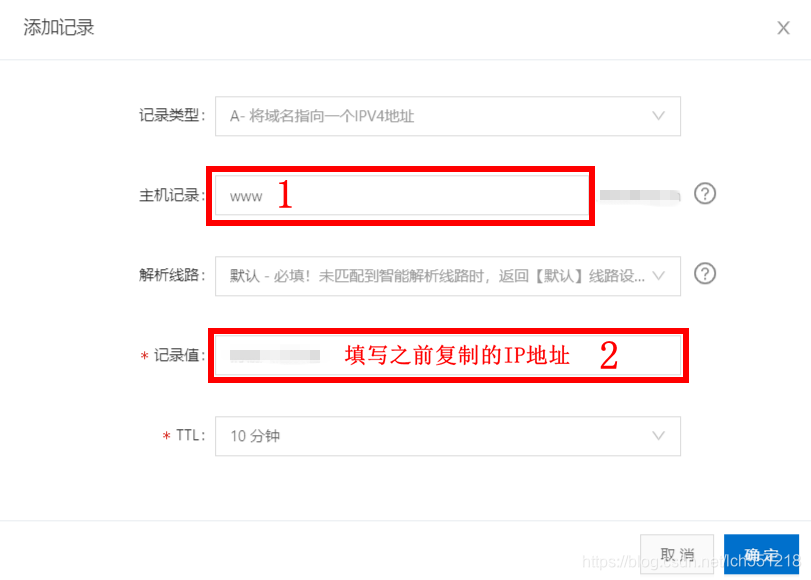
- Click to add a record , two records were added to
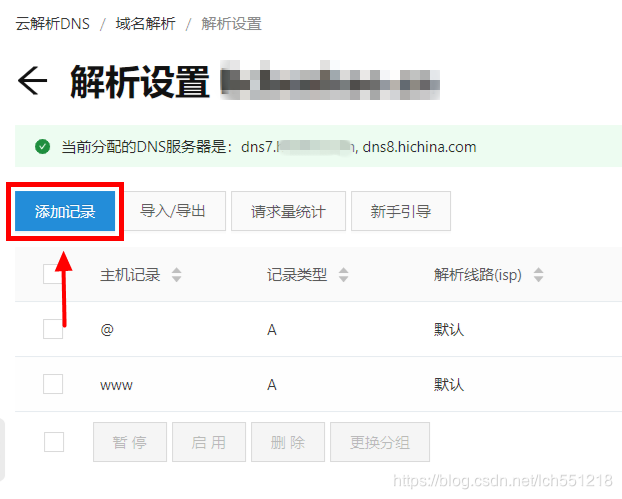
the first record in the host record fill out the "@", the record value previously copied to fill in the server IP address, and click Submit
second record in the host records to fill in "www" in in the recorded value previously copied to fill in the server IP address, and click submit
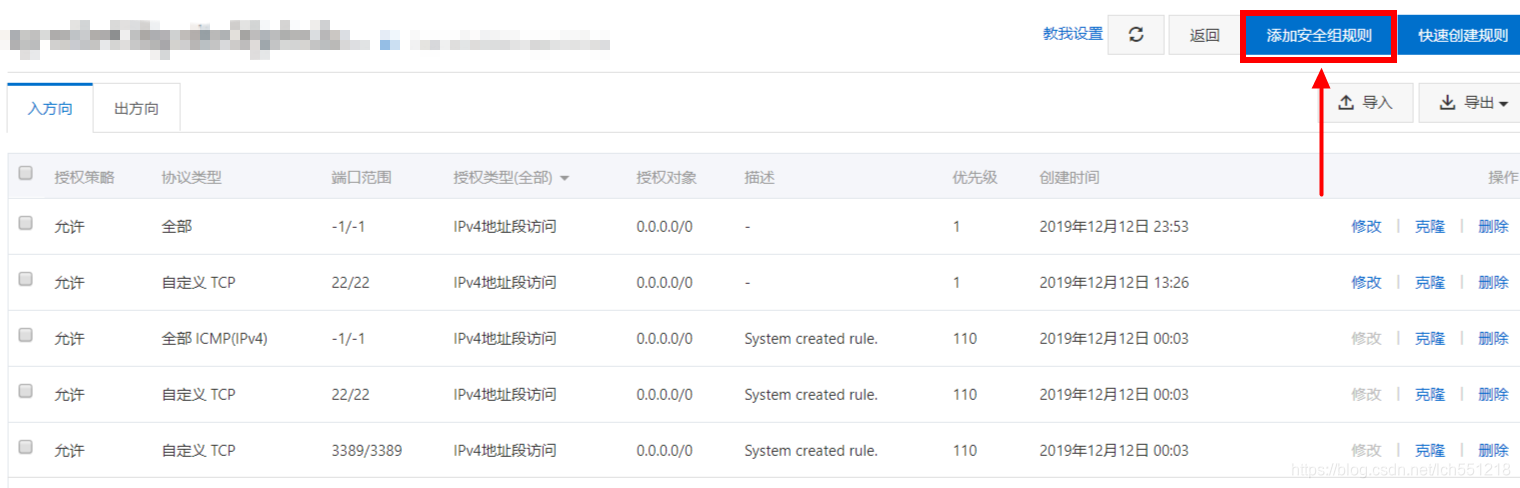
1.4 Open Server Port
Into the console -> cloud server ECS
click the instance of the link ,
the point selected on the left side in this instance security group
Click the security group ID / name in the link
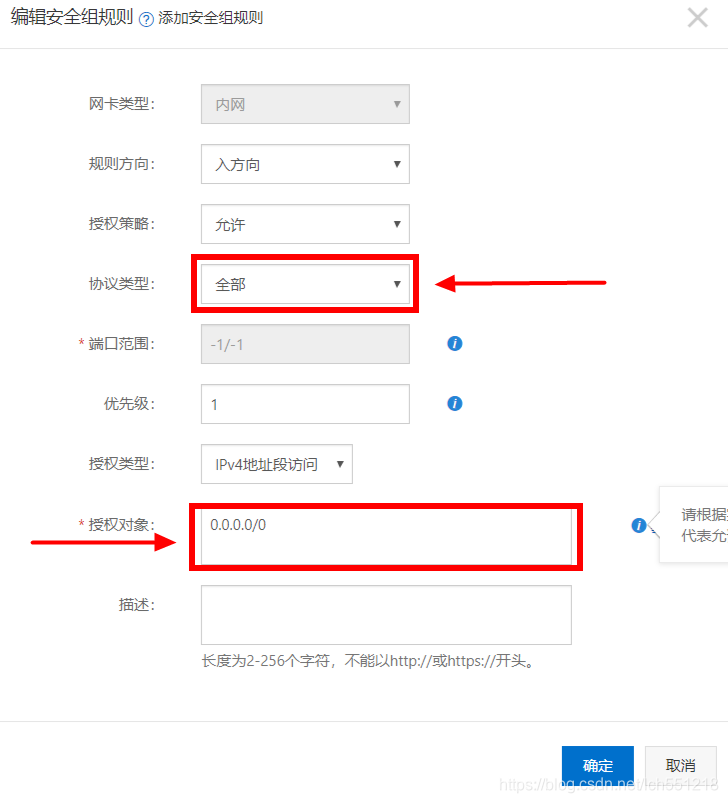
and then click on the upper right corner to add the security group rules
in the dialog box that pops , the protocol type selected all , in the authorization object fill dialog 0.0.0.0/0 , on behalf of all hosts can access the server
1.5 Xshell use and management of cloud server Xftp
Xshell for connection to a remote host to the remote control terminal. I mainly used to connect Ali cloud of Linux, project deployment.
Xftp used to transfer files remotely. Download or upload files from the terminal.
1.5.1 download Xshell and Xftp
Links: official website to download
or Baidu cloud download
link: Xshell + Xftp Baidu cloud download extraction code: uxdh
installation is very simple, the next step has been just fine.
1.5.2 Set Xshell
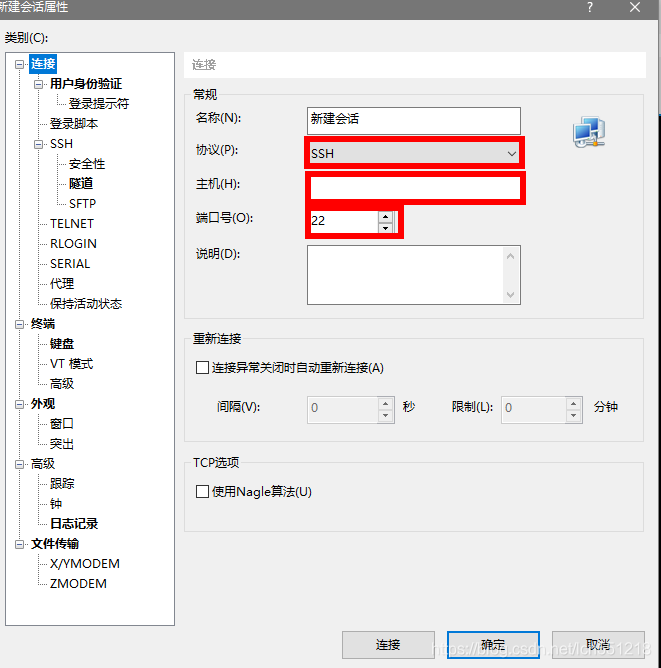
Xshell into the software, click on File -> New , protocol selection SSH , the host copy off before completing public IP address , and click OK
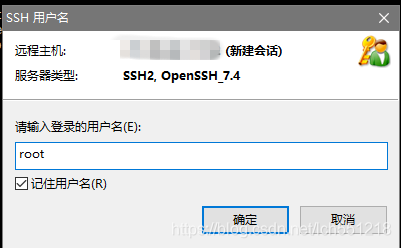
enter the user name root and check the Remember user name , click OK
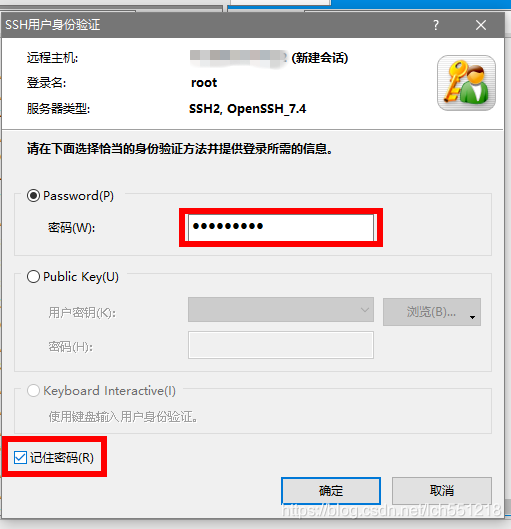
to reset the ever fill before Ali cloud server password and check Remember password , click OK

following interface you can use the command line to control the cloud server

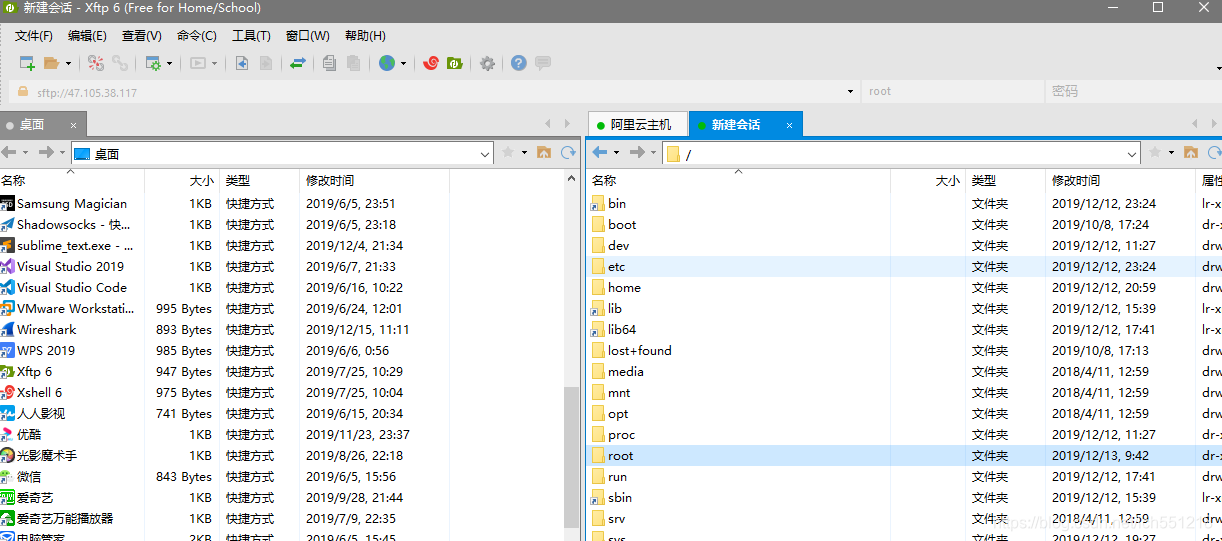
1.5.3 Set Xftp
Xftp into the software, click on File -> New
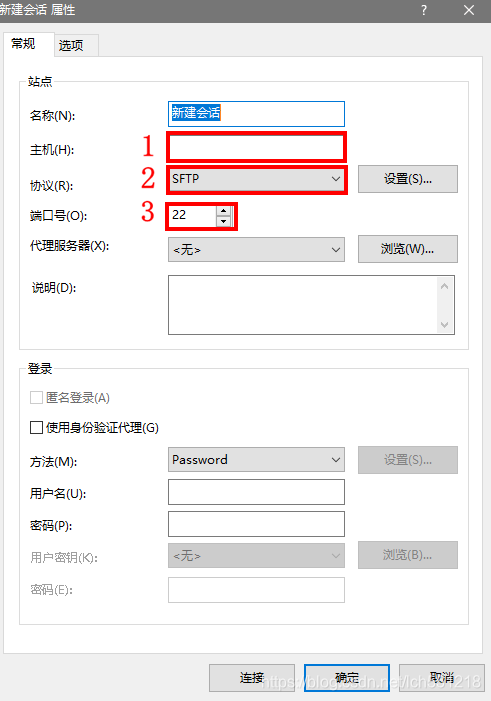
in the host before filling out a copy over the public IP address , protocol select SFTP , the port number select 22 , and then click OK
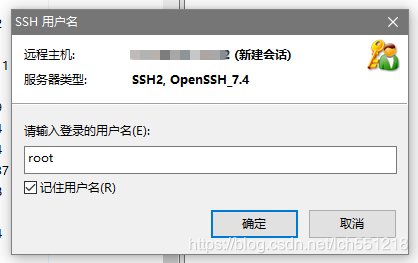
to enter a user name root and check the Remember user name , click OK
fill've just reset the server password and check the Remember password , click OK
at this time you will be able to achieve file transfers between the two systems by dragging
2 disposed on the server side python3
2.1 Installation
1. Copy the following code at the root user, install the required package
yum -y groupinstall "Development tools"
yum -y install zlib-devel bzip2-devel openssl-devel ncurses-devel sqlite-devel readline-devel tk-devel gdbm-devel db4-devel libpcap-devel xz-devel
yum install -y libffi-devel zlib1g-dev
yum install zlib* -y
The first batch development kit mounting
a second, three mounting is required Python3 dependencies,
wherein, libffi-devel call each other between a high-level language, such as the definition of the python ctypes; zlib-devel, zlib1g -dev, bzip2-devel, xz- devel is a library file compression; openssl-devel library encryption algorithm used in the communication network; ncurses-devel is a character terminal processing library; sqlite-devel package is lightweight database ( library); readline-devel libraries for reading text; tk-devel graphical user interface library; gdbm-devel, db4-devel also a package database; libpcap-devel for network packet capture;
third is mounted zlib * for file compression, and the difference zlib * zlib-devel zlib-devel is for software development, zlib * only include the header files, static libraries and even source code can not be used to develop software, you want to use in software development zlib library is necessary to install the devel-zlib
-Y parameter if the action instruction is to require user input y / n when installed, all according to the process y
2. Switch to an arbitrary directory, and then download the installation package Python3
cd /usr/home/local/tempfile
wget wget https://www.python.org/ftp/python/3.7.2/Python-3.7.2.tar.xz
3. Extract the installation package
tar -xvJf Python-3.7.2.tar.xz
4. Create compiler installation directory
mkdir / usr / local / python3
5. Compile
cd Python-3.7.2
./configure --prefix=/usr/local/python3 --enable-optimizations --with-ssl
The first specifies the path for the installation, not specified, the installation process may require software to copy files to other different directory, delete the software is very easy to copy software is not easy.
The second is the optimal installation, you can improve python10 Code% -20% speed.
The third is the need to use in order to install pip ssl, an error will be mentioned later.
6. Install
make && make install
7. Create soft links
ln -s /usr/local/python3/bin/python3 /usr/local/bin/python3
ln -s /usr/local/python3/bin/pip3 /usr/local/bin/pip3
8. Verify successful
python3 -V
pip3 -V
2.2 error process
2.1 Error 1
zipimport.ZipImportError: can't decompress data; zlib not available Makefile:1099: recipe for target 'install' failed make: *** [install] Error 1
You need to install dependencies
yum -y install zlib1g-dev
2.2 Error 2
ModuleNotFoundError: No module named '_ctypes'
You need to install dependencies
yum -y install libffi-devel
Both errors are required dependencies have been added to the beginning of the installation depends go up
2.3 Error 3
SQLite 3.8.3 or later is required (found 3.7.17).
Description SQLite version too, need more than 3.8.3 SQLite, so to upgrade
2.3.1 Source code (running in the main directory)
cd /usr/home/local/tempfile
wget https://www.sqlite.org/2019/sqlite-autoconf-3270200.tar.gz
tar -zxvf sqlite-autoconf-3270200.tar.gz
2.3.2 build and install
cd sqlite-autoconf-3270200
./configure --prefix=/usr/local
make && make install
Check the latest version of the installed version sqlite3
/usr/local/bin/sqlite3 --version
3.27.2 2019-02-25 16:06:06 bd49a8271d650fa89e446b42e513b595a717b9212c91dd384aab871fc1d0f6d7
Centos7 own version of sqlite3
/usr/bin/sqlite3 --version
3.7.17 2013-05-20 00:56:22 118a3b35693b134d56ebd780123b7fd6f1497668
You can see sqlite3 version or an older version, you need to update it.
sqlite3 --version
3.7.17 2013-05-20 00:56:22 118a3b35693b134d56ebd780123b7fd6f1497668
Changing old sqlite3
mv /usr/bin/sqlite3 /usr/bin/sqlite3_old
Soft link to a new sqlite3 set under / usr / bin directory
ln -s /usr/local/bin/sqlite3 /usr/bin/sqlite3
View the current global version of sqlite3
sqlite3 --version
3.27.2 2019-02-25 16:06:06 bd49a8271d650fa89e446b42e513b595a717b9212c91dd384aab871fc1d0f6d7
Pass the path to the shared library, set the boot from the start to perform the following written statement export
~/.bashrc 文件中,如果如果你想立即生效,可以执行source ~/.bashrc
export LD_LIBRARY_PATH="/usr/local/lib"
Check the version of Python SQLite3
python3
Python 3.7.3 (default, May 17 2019, 15:07:52)
[GCC 4.8.5 20150623 (Red Hat 4.8.5-36)] on linux
Type "help", "copyright", "credits" or "license" for more information.
>>> In [1]: import sqlite3
>>> In [2]: sqlite3.sqlite_version
>>> Out[2]: '3.27.2'
>>> exit()
problem solved!
3 is disposed on the server side django
3.1 Installation django
pip install django
3.2 build flexible connections
ln -s /usr/local/python3/bin/django-admin.py /usr/local/bin/django-admin
ln -s /opt/python35/bin/django-admin /usr/local/bin/django-admin
3.3 Creating a project django
django-admin.py startproject MyDjangoProject
If successful, you will see the following directory
MyDjangoProject/
├── manage.py
└── MyDjangoProject/
├── __ init __.py
├── settings.py
├── urls.py
└── wsgi.py
| file name | use |
|---|---|
| __ init __.py | Directory of python package must |
| settings.py | Project Settings |
| urls.py | The project url profile |
| wsgi.py | Used when deploying server files |
3.4 to create applications
Enter django project
cd MyDjangoProject
Creating app01 application, the following two methods can be created
django startapp app01
or
python3 manage.py startapp app01
Modify settings file
ALLOWED_HOSTS = [‘*’]
* ALLOWED_HOSTS role
ALLOWED_HOSTS defined host to request values to prevent hackers configured to send the request packet. Only host can access the list, [ '*'] means all hosts can access.
Property values with the ALLOWED_HOSTS followed by a list of strings value, this value represents the list of strings host this moment Django site may offer / domain (host / domain name). This is a safety measure, by submitting a request using a forged HTTP host header to prevent cache poisoning an attacker with a malicious host and trigger the password reset link to the email, even in the many seemingly secure Web server configuration is true .
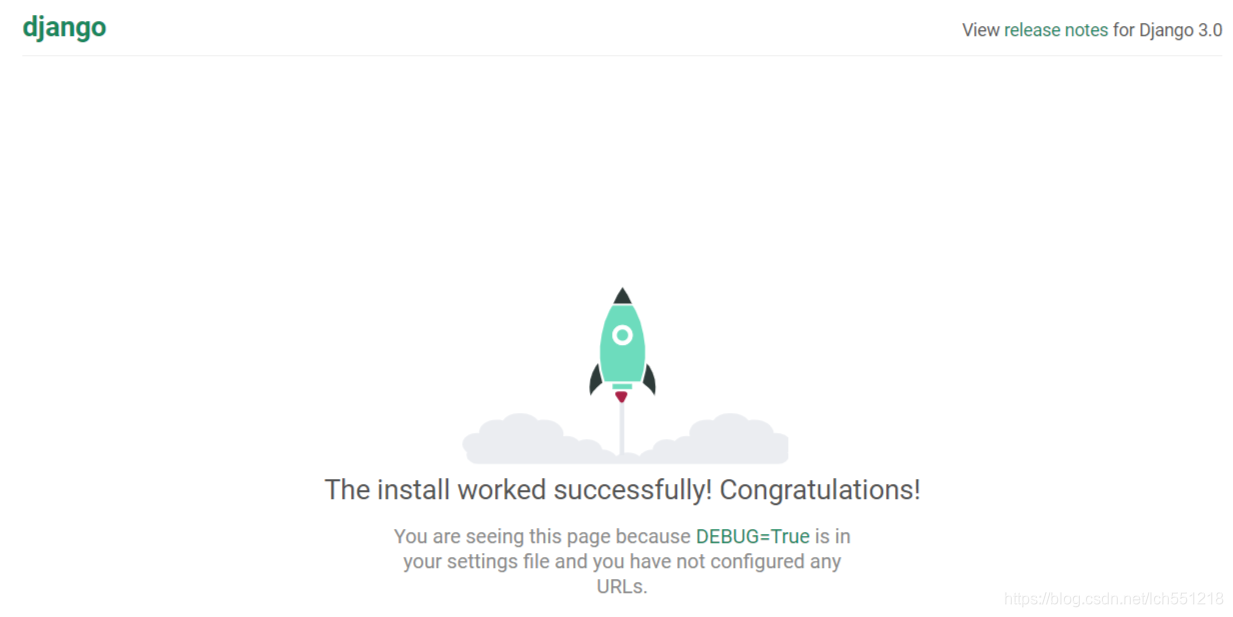
3.5 Running the Project
python3 manage.py runserver 0.0.0.0:8000
Then enter their name followed behind in the browser: 8000 (port number), if you see the following page it shows django already configured in the server