Article Source:
Linux DNS server configuration under test
Configuring DNS Forward Analysis:
When configuring Bind service, mainly used in the following three profiles:
-
The main configuration file (the /etc/named.conf) : used to define bind to run the service program.
-
Zone configuration file (/etc/named.rfc1912.zones) : used to save names and IP addresses corresponding to the location relations. Similar to the book catalog, to a specific location for each domain and the corresponding IP address belongs to, when you need to view or modify, in accordance with relevant documents can be found in this location.
-
Data configuration file directory (/ var / named) : the directory used to save the real correspondence between domain names and IP address data configuration file.
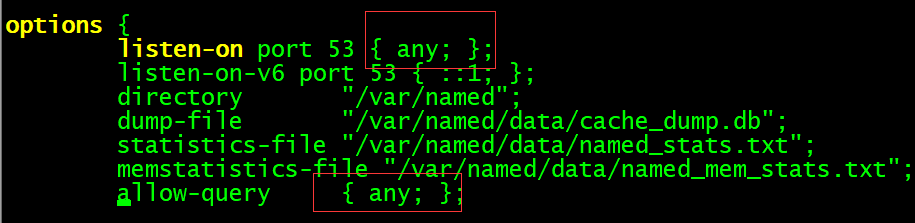
The first step: Modify the main configuration file the /etc/named.conf . The listen address and address are changed to run queries any, represent all IP addresses on the server can provide DNS domain name resolution services, and allow everyone to send DNS queries to this server.
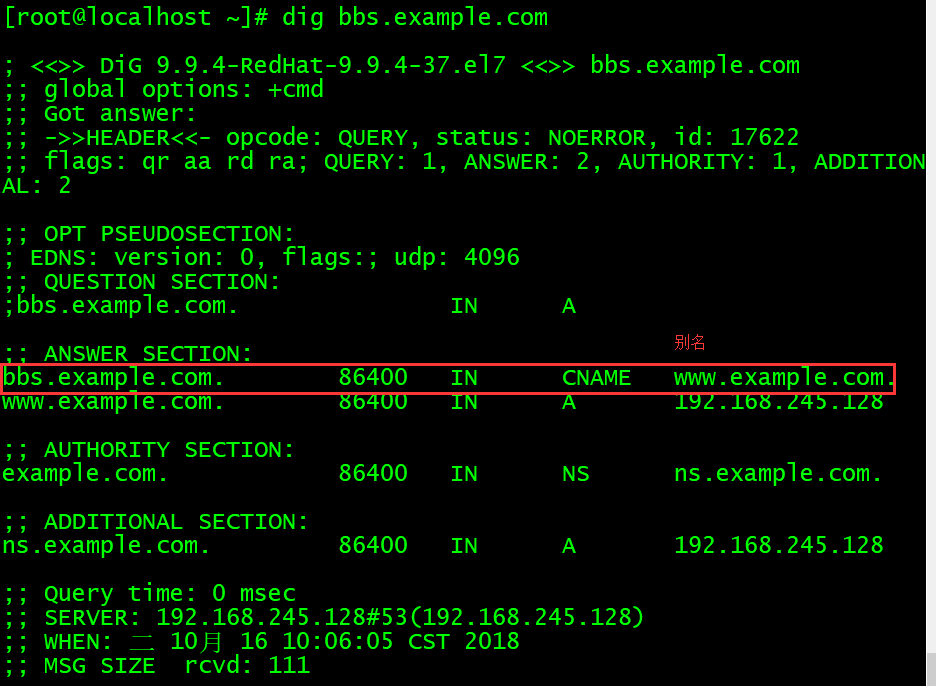
Step Two: Modify zone configuration file (/etc/named.rfc1912.zones) . To save names and IP addresses corresponding to the location relations. In this file, we define the domain name and IP address resolution to save the rule file location and type of service content, but does not contain a specific domain name, IP address correspondence information relations. There are three service types, namely hint (root region), master (main area), slave (auxiliary area), which commonly refers to the master and slave master and slave.
1 |
zone "example.com" IN { |
DNS is the default port 53 TCP and UPD, UDP is for users to query from the master copy with TCP and UDP port 53 are used.
BIND's ACL: bind has four built-acl:
none: no host
any: any host
localhost: Native
localnet: IP masking operation with the machine of the network addresses obtained
Note: You can define, after use; therefore generally defined in the configuration file, located in front of the options, of course, also be customized as follows
ACL and {
192.168.25.0/24
} ;
Access control:
Access control instructions: allow-query {}: host allows query; whitelist
allow-transfer {}: zone transfer allows the host; (white list, generally used for master-slave)
allow-recursion {}: allow recursive host is recommended to use the global
allow-update {}: allowing updates to the database area
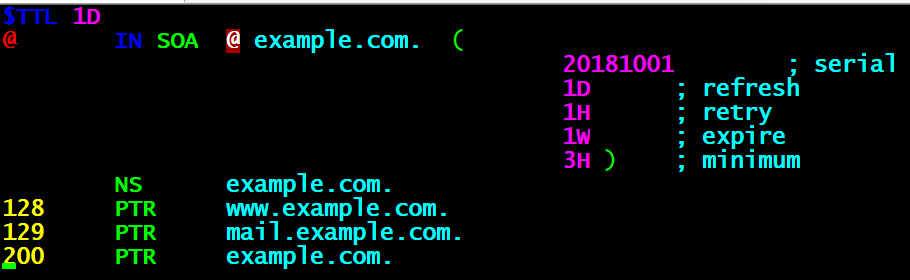
The third step: configuration file editing data. ** Copy the template file (named.localhost) a positive resolution from the / var / named directory, and the data corresponding to the domain name and IP address of the data to fill in the configuration file and save. Remember when the -a parameter copying, which can retain information owner, owning group, permissions and other attributes of the original file, so that bind service program successfully read the contents of the file:
1 |
[the named the root @ localhost] # CP -a named.localhost the example.com |

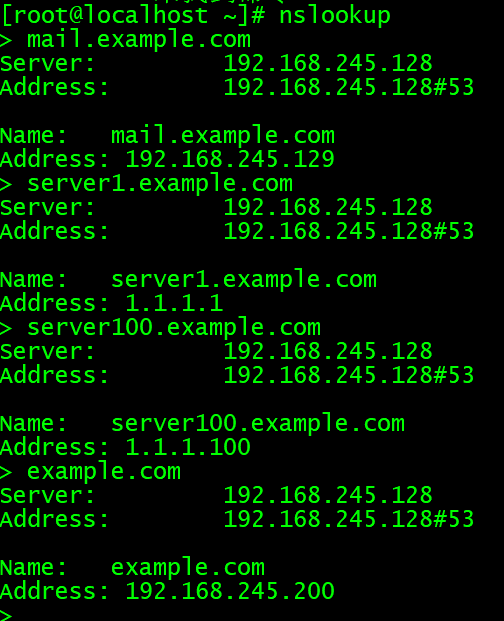
Step 4: Check the configuration, restart the service and testing.
Check and restart the service:
1 |
[root@localhost ~]# named-checkconf #检查主配置文件语法 |
测试:
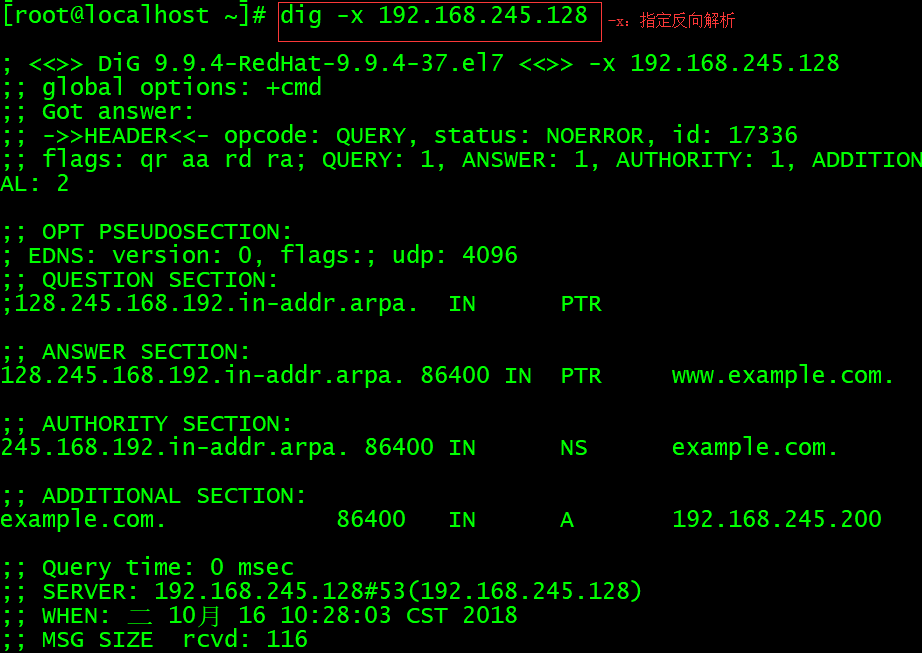
配置DNS反向解析:
在DNS域名解析服务中,反向解析的作用是将用户提交的IP地址解析为对应的域名信息,它一般用于对某个IP地址上绑定的所有域名进行整体屏蔽,屏蔽由某些域名发送的垃圾邮件。它也可以针对某个IP地址进行反向解析,大致判断出有多少个网站运行在上面。当购买虚拟主机时,可以使用这一功能验证虚拟主机提供商是否有严重的超售问题。
第一步:配置区域文件。
反向解析是把IP地址解析成域名格式,因此在定义zone(区域)时应该要把IP地址反写,比如原来是192.168.10.0,反写后应该就是10.168.192,而且只需写出IP地址的网络位即可。
1 |
[root@localhost ~]# vim /etc/named.rfc1912.zones |
第二步:编辑数据配置文件。
反向解析是把IP地址解析成域名格式,因此在定义zone(区域)时应该要把IP地址反写,比如原来是192.168.10.0,反写后应该就是10.168.192,而且只需写出IP地址的网络位即可。
1 |
[root@localhost ~]# cp -a /var/named/named.loopback /var/named/245.168.192.arpa |
第三步:检查配置文件,重启服务,测试。
1 |
[root@localhost ~]# named-checkconf |