In a previous blog post, I talked about this one will introduce Genymotion installation. As we all know, Genymotion is a simulator, might be questioned, direct connection to the real machine like, why do you have to configure the simulator? I also practice with real machine, before choosing simulator installed. The reason is: sdk comes uiautomatorviewer tool does not support android8.0 and above version. Social progress, is the rapid development of mobile devices, many now use mobile phones have been higher than this version. There are relatively solutions on the network, the solution is given at the end of the article, but I still feel trouble, so he is still choose to install the simulator.
Genymotion Configuration
When downloading genymotion, the official website account is required before they can download, so you can register an account, register themselves.
Genymotion Download
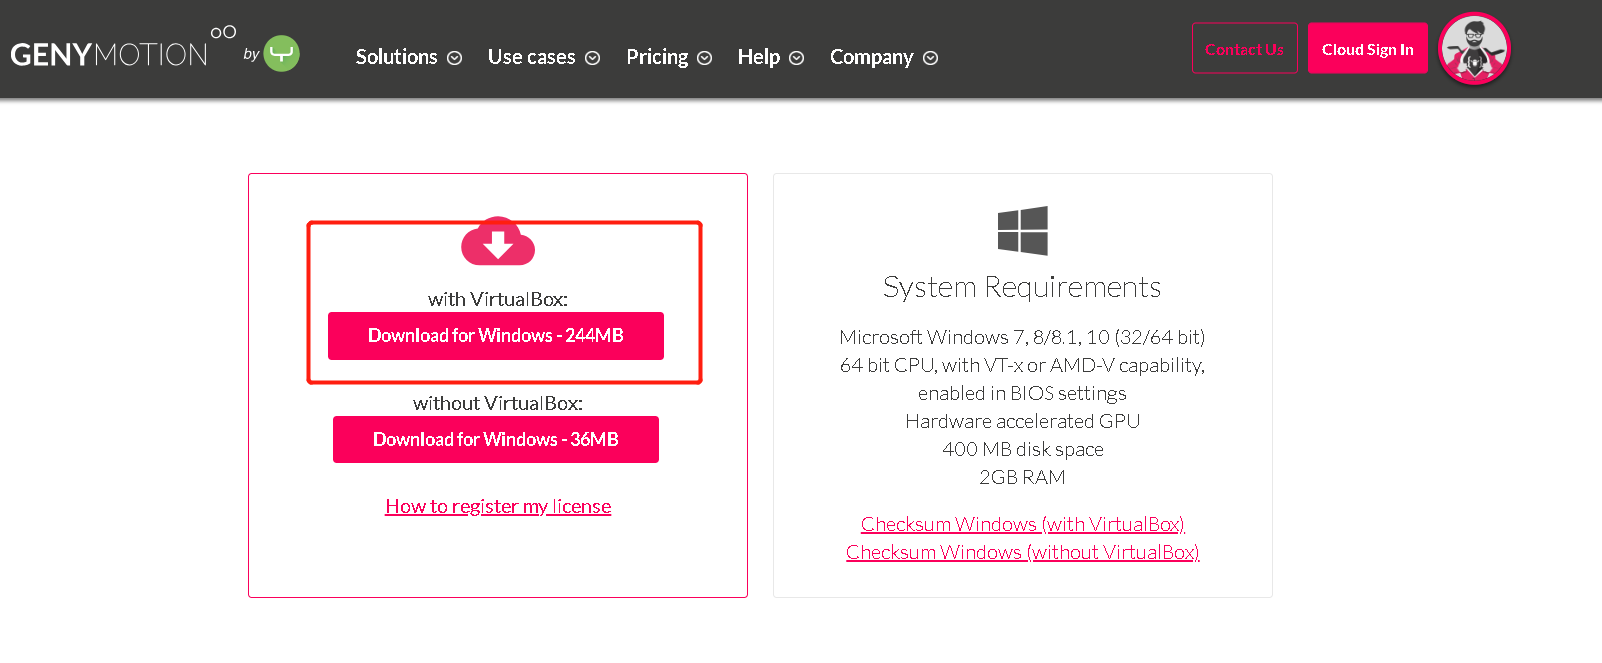
Download: https://www.genymotion.com/download/ , the system selects a corresponding download the corresponding genymotion, as shown below:
The official genymotion operating manual, you can use and reference: https://docs.genymotion.com/latest/Content/01_Get_Started/Get_started.htm .
Genymotion installation
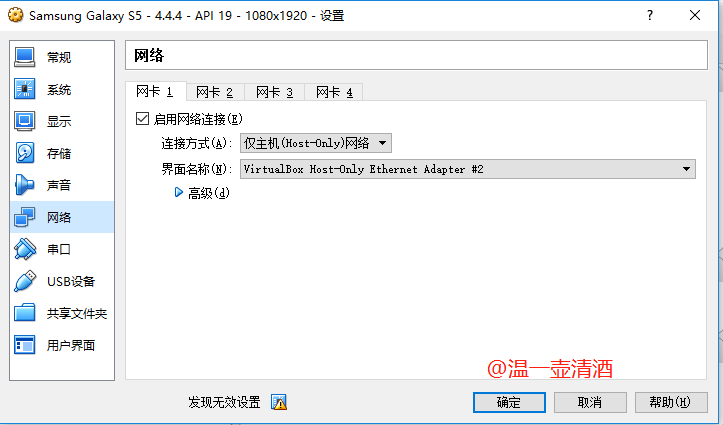
It's even easier installation process, open the downloaded installation file, all the way next, until the successful installation automatically installs Oracle VM VirtualBox, the software is a virtual machine that supports a very wide range of platforms. In genymotion you can use the software to configure the network system.
Genymotion add a phone system
Double-click the installed genymotion, into the start page, as follows:
Configure SDK
SDK is a blog post describes the configuration, not installed, see the blog post, configuration is as follows:
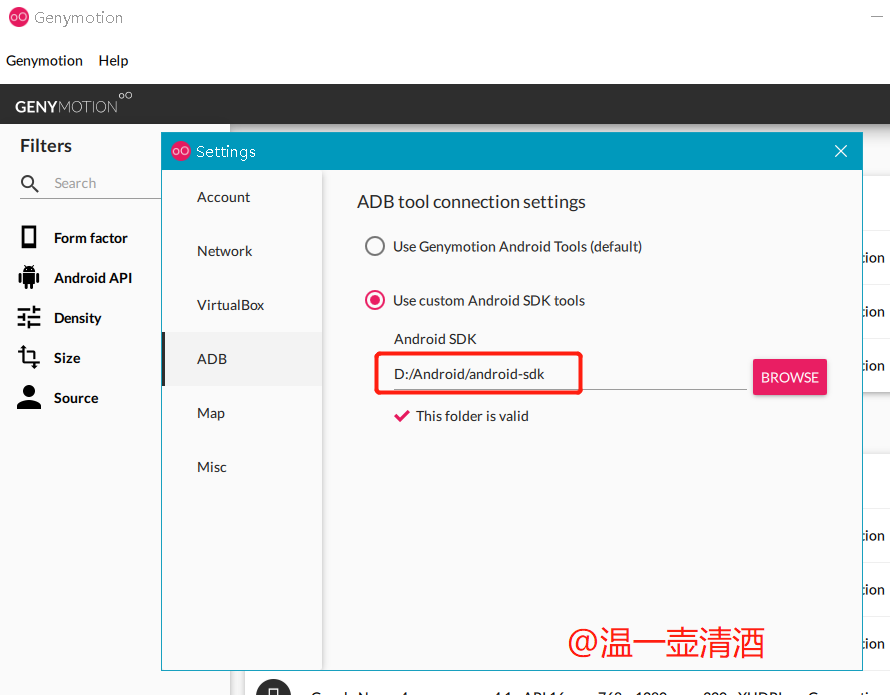
SDK's address, the address is the actual installation of the SDK, it is recommended not to include Chinese path.
After configuring the SDK, you can download various types of phone systems, as shown below, the new version of genymotion page, good-looking than the old version more

Phone system installed and enabled
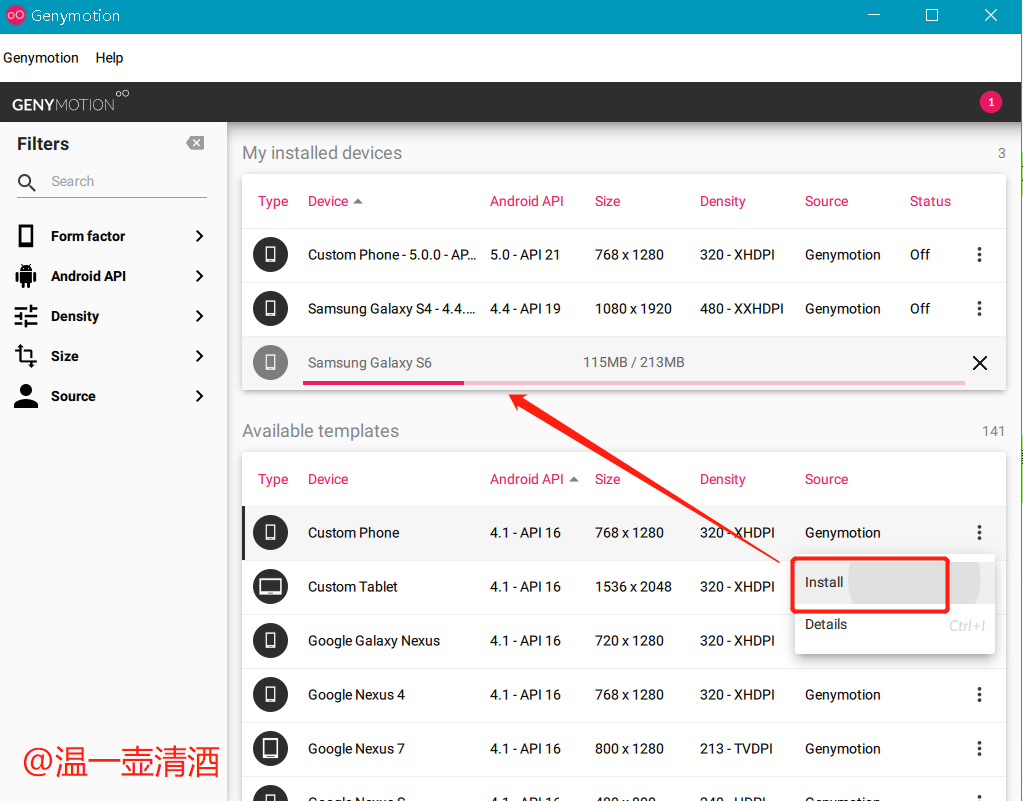
如何安装手机系统?选择自己需要的手机型号,点击右侧按钮处,点击install即可,如下:
静候,等待下载完,下载速度,看大家的网速了,大小也就一两百兆左右。
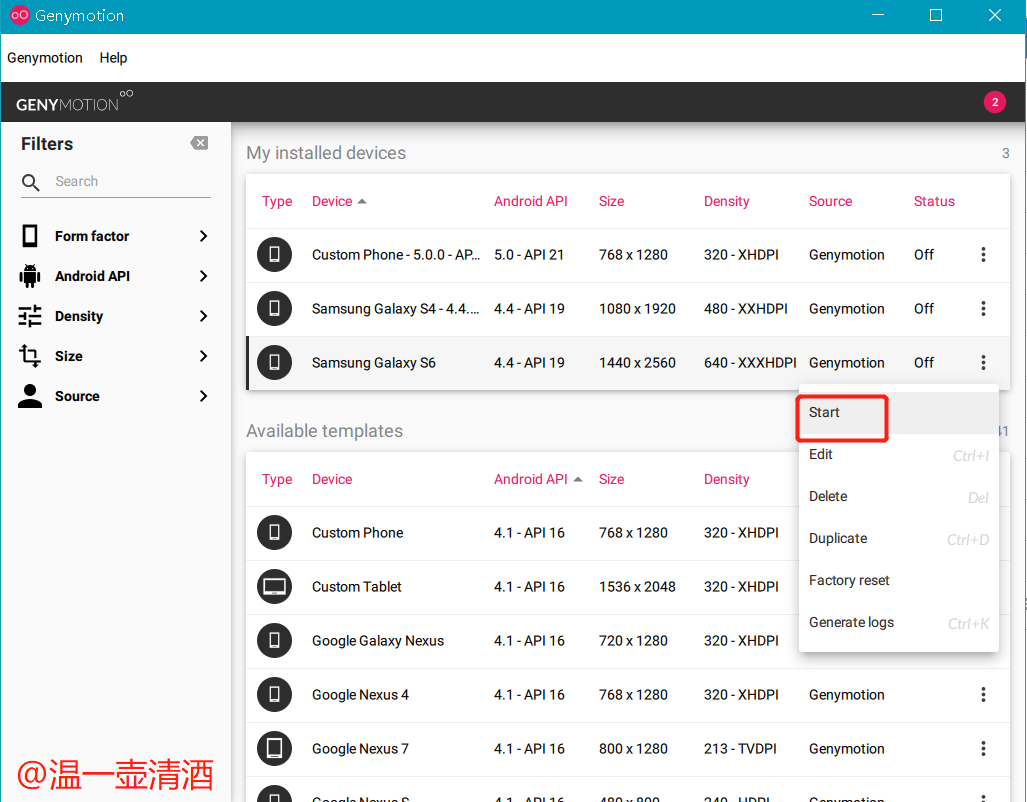
下载完成之后,如何使用?点击右侧的start按钮即可,如下:
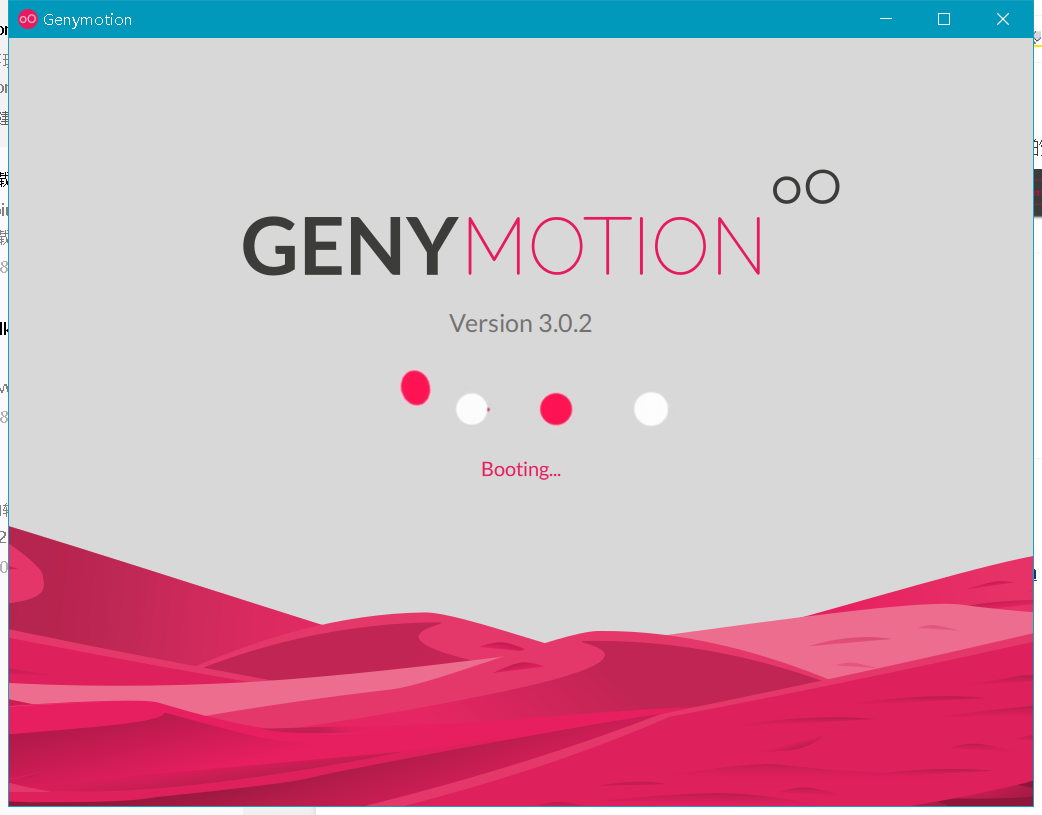
start相当于就是我们日常使用手机的时候,开机操作,系统启动成功之后,出现如下界面:
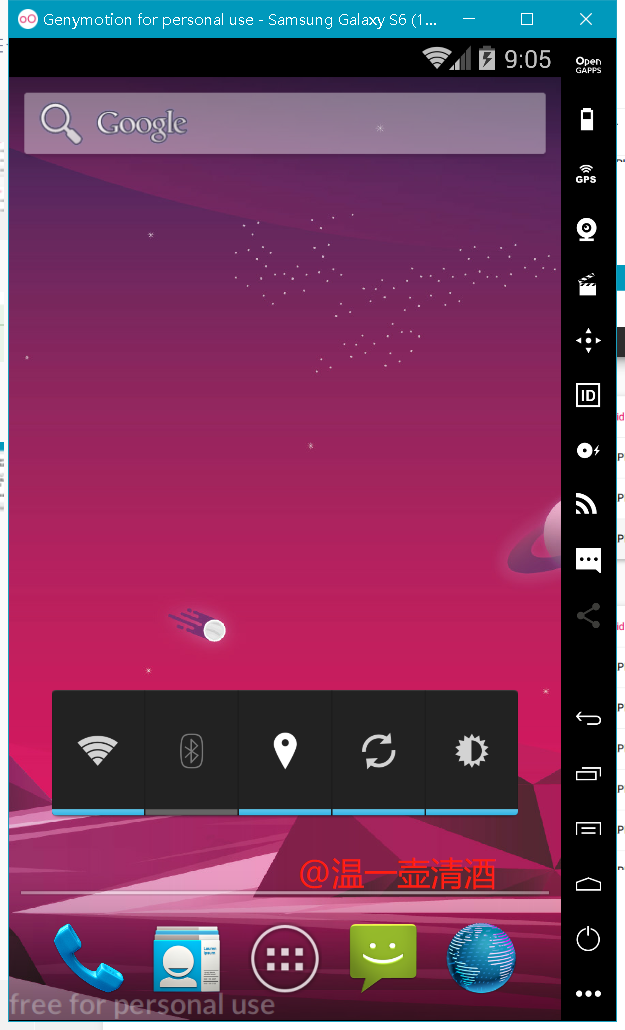
说明genymotion模拟器就安装好了,简单几步操作,安装还是很简单的。
查看连接设备
在查看设备之前,需要启用开发者模式,相当于,我们真机在传输数据时,也是需要开启开发者模式,并通过usb数据线连接电脑,完成数据的传输,是一个道理。
模拟器如何开启开发者模式?一看图就明白,如下图所示:

进入到关于手机页面,连续点击版本号七次,即可开启开发者模式,记住,一定是七次,不能少。
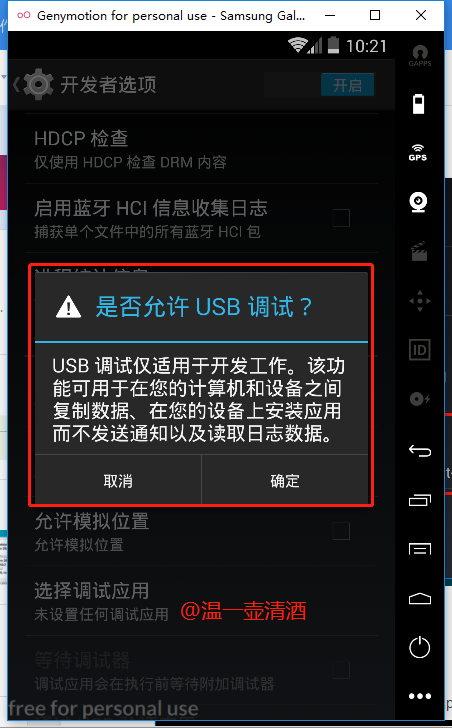
开启了开发者模式之后,USB调试也需要开启,跟真机操作一样的,如下图:
手机已经处于开发者模式,并允许调试了,那如何查看设备连接是否正常了?这就需要引用adb命令了,adb命令在安装sdk的时候,就会自动安装。今天不深入分享adb命令的使用,只做简单介绍。查看设备连接的命令是:
adb devices
输入该命令后,出现如下图所示,则说明有设备连接的

到这,genymotion模拟器就配置成功了,是不是非常的简单。
脚本制作
app安装
针对自家产品开发脚本,那自然是需要在模拟器中安装一个自家的app的,那如何安装呢,小小一个命令即可完成,命令如下:
adb install C:\Users\leo\Desktop\k.apk
adb依然是之前所提到的adb命令;install顾名思义,安装的意思;后面的路径则是apk包存放的位置。执行上述命令后,出现如下图所示,则说明app安装成功:

app卸载
刚描述了app的安装,那卸载又是如何操作呢?有些朋友可能会想到命令adb uninstall C:\Users\leo\Desktop\k.apk么?命令是这个,但却不是接路径了,需要对应app的包名。
包名如何获取,在模拟器中打开你将要卸载的app,输入命令:
adb shell dumpsys window w |findstr \/ |findstr name=
即可获得对应app的包名了,卸载app的命令则是:
adb uninstall com.XXX.XXX
执行该命令后,模拟器中对应的app则会被卸载。
元素定位
元素定位,跟UI自动化的定位差不多,也无非就是id、name、xpath那些,主要是看自己如何使用,能够简单却又准确无误的定位到元素。
元素定位,我们借助sdk中自带的工具:uiautomatorviewer.bat,工具路径在:D:\android-sdk-windows\tools文件夹下,具体路径看个人安装sdk的路径,我只是个举例。
先在模拟器中打开对应的app,再打开uiautomatorviewer.bat工具,在工具中则会看到app对应的界面,如下所示:
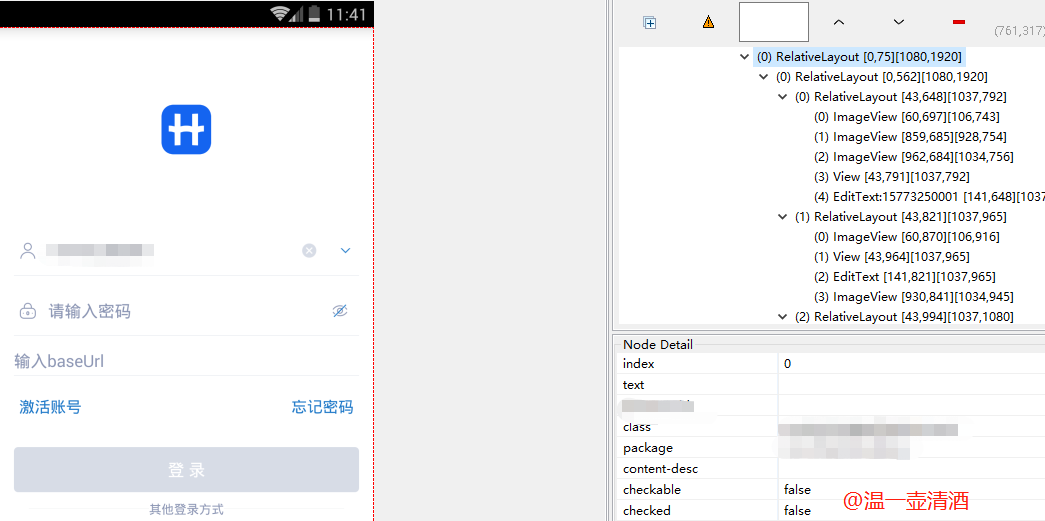
从上图可看出,左侧面板就是app对应的界面,右侧则是元素的层级显示,鼠标点击对应的元素,右侧就会展示对应的详情路径,便可实现元素的定位。该工具类似于火狐浏览器中的firebug工具一样,是便于进行元素提取,进行元素定位的。
代码示例
写到这,我已按耐不住的想上一段自己曾几何时的一段线性代码,很普通的一段线性代码。实现一个简单的登录操作,如下:
没有断言,没有特殊逻辑,不喜勿喷,基于python刚入门写的。做为新入门的朋友来说,可以参考一下,如果没有参考价值,那忽略即可。

import selenium
import time
from appium import webdriver


desired_caps = {
    'platformName': 'Android',
    'platformVersion': '4.4.4',
    'deviceName': 'S5',
    'appPackage': '',   #包名
    'appActivity': '',    #app入口
    'udid': '192.168.66.101:5555',  # genymotion设备
    'noReset': 'true',
    'unicodeKeyboard': 'True',
    'resetKeyboard': 'True',
}
print('selenium version = ', selenium.__version__)

driver = webdriver.Remote('http://192.168.1.103:4723/wd/hub', desired_caps)
print("服务启动成功")
time.sleep(3)


account = driver.find_element_by_id('id/rel_content')
account.find_element_by_id('id/edit_acount')
driver.press_keycode(61)
print("换行操作")

if driver.find_element_by_id('id/img_clear_acount'):
    clr_account = driver.find_element_by_id('id/img_clear_acount').click()
    print("账号清除成功")

account.send_keys('10086')
print("账号输入完毕")
time.sleep(2)

driver.press_keycode(61)
print("换行操作")

password = driver.find_element_by_id('id/rel_content')
password.find_element_by_id('id/edit_pass')
password.send_keys('123456')
print("密码输入完毕")
driver.find_element_by_xpath('//android.widget.TextView[@text="登 录"]').click()
print("点击登录按钮")


print('登录成功')
time.sleep(5)
driver.quit()
代码写到这,想要运行,还需要基于appium的配合,才能够运行起来。上述代码及appium的操作,下篇博文将继续分享。
问题总结
在博文一开始时,就讲到遇到的一个问题,现在来说下解决方式。
在使用真机连接,进行元素定位时,出现如下报错:unexpected error while obtaining UI hierarchy

询问度娘发现,该问题原因是:android 8.0导致的问题,需要更新 uiautomatorviewer 源码才能解决。个人还不会更新源码,所以继续度娘,发现了一个解决办法,如下:
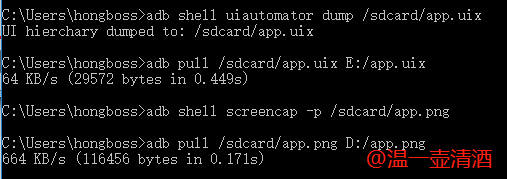
运行uiautomatorviewer.bat,导入文件,如下所示:
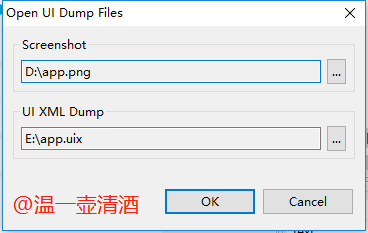
使用如上步骤,即可实现元素定位了,之前我说过,我不太喜欢用这种方式,是因为,每切换一个页面,则需要重复上述步骤,觉得麻烦,所以就借助模拟器来进行元素定位了,这只是我个人喜好罢了。命令一行一行的执行,很繁琐,不过可以写个bat文件脚本,一键执行即可。