SpringMVC a simple program:
Our first by creating a simple dynamic JavaWeb project "springmvc01" Meet SpringMVC, so help us analyze it.
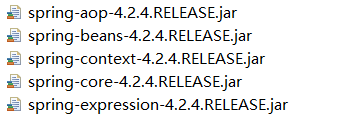
1, copy jar package:
For all frames, this step is essential, copy the following jar package lib folder we need to file in a web project "WEB-INF" directory, because the spring is SpringMVC family, we will use it essential to copy the frame spring jar package:
- a.Spring frame jar package:
- b.Spring frame dependencies:

- c.SpringMVC frame jar package:

- d.SpringMVC frame dependencies:

2, create a JSP view:
In the "WEB-INF" directory create a new folder "jsp" used to store the JSP view, the view in this directory is very safe, accessible only through a request forwarded by the way. We are here to create a view "hello.jsp", the view for the user in response to the browser client.
<%@ page language="java" contentType="text/html; charset=UTF-8" pageEncoding="UTF-8"%>
<!DOCTYPE html>
<html>
	<head>
		<meta charset="UTF-8">
		<title>Hello</title>
	</head>
	<body>
		${msg }
	</body>
</html>
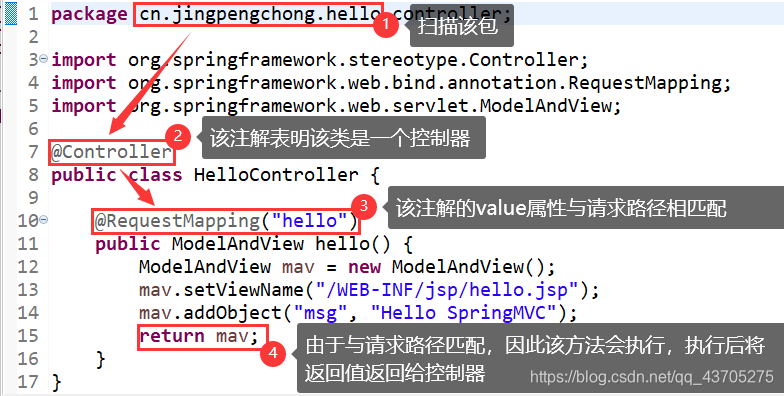
3, define an controller Controller:
This step is a concentrated expression SpringMVC framework, before many Servlet can now be written in a class (controller), which greatly simplifies the code. We create a new package "cn.jingpengchong.hello.controller" in the src directory, create a class HelloController in the package:
package cn.jingpengchong.hello.controller;

import org.springframework.stereotype.Controller;
import org.springframework.web.bind.annotation.RequestMapping;
import org.springframework.web.servlet.ModelAndView;

@Controller
public class HelloController {

	@RequestMapping("hello")
	public ModelAndView hello() {
		ModelAndView mav = new ModelAndView();
		mav.setViewName("/WEB-INF/jsp/hello.jsp");
		mav.addObject("msg", "Hello SpringMVC");
		return mav;
	}
}
- @Controller: After adding the class may be annotated to the scanner Spring, Spring and tells the class is a controller;
- @RequestMapping (): This annotation processor mapper for its value attribute value matching the request address, to determine the method to be executed;
- ModelAndView: see the class name EENOW, a package model and is trying classes, some of which may be encapsulated object attributes and the desired address in response to the view of view;
- setViewName (): the ultimate goal of the process is to tell the processor to the adapter address view response;
- addObject (): This method can be seen as the request setAttribute () method, so that its effect will be obvious.
4, the spring configuration xml core configuration file:
This step has been known in learning the Spring framework, we very much at home in which you can configure a scanner, after all, this is just a HelloWorld program:
<?xml version="1.0" encoding="UTF-8"?>
<beans xmlns="http://www.springframework.org/schema/beans"
	xmlns:xsi="http://www.w3.org/2001/XMLSchema-instance"
	xmlns:context="http://www.springframework.org/schema/context"
	xmlns:mvc="http://www.springframework.org/schema/mvc"
	xsi:schemaLocation="http://www.springframework.org/schema/mvc http://www.springframework.org/schema/mvc/spring-mvc-4.2.xsd
		http://www.springframework.org/schema/beans http://www.springframework.org/schema/beans/spring-beans.xsd
		http://www.springframework.org/schema/context http://www.springframework.org/schema/context/spring-context-4.2.xsd">

	<!-- 配置controller包扫描 -->
	<context:component-scan base-package="cn.jingpengchong.hello"></context:component-scan>
</beans>
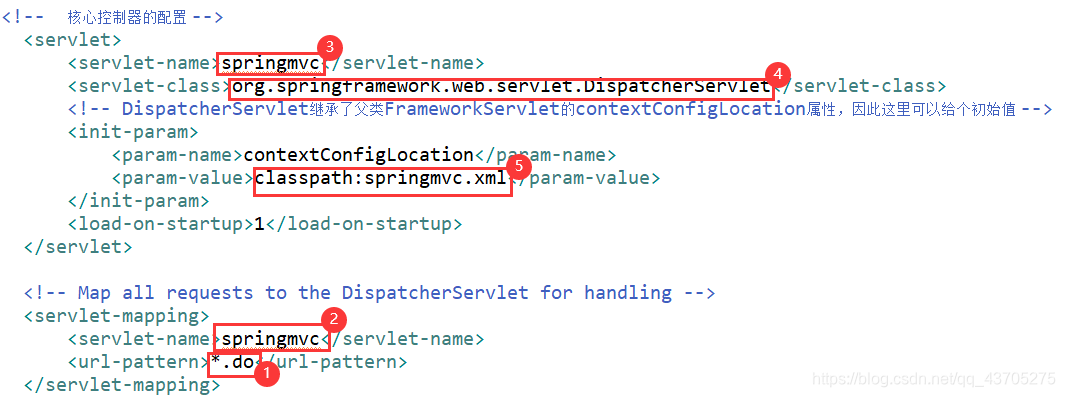
5, configure web.xml core configuration file:
To play the role of the controller, where the core need to configure the controller (or front-end controller), and sets a path which is matched to the request and processing:
<?xml version="1.0" encoding="UTF-8"?>
<web-app xmlns:xsi="http://www.w3.org/2001/XMLSchema-instance" xmlns="http://java.sun.com/xml/ns/javaee" xsi:schemaLocation="http://java.sun.com/xml/ns/javaee http://java.sun.com/xml/ns/javaee/web-app_2_5.xsd" id="WebApp_ID" version="2.5">
  <display-name>springmvc01</display-name>
  <welcome-file-list>
    <welcome-file>index.jsp</welcome-file>
  </welcome-file-list>

  <!--  核心控制器的配置 -->
	<servlet>
		<servlet-name>springmvc</servlet-name>
		<servlet-class>org.springframework.web.servlet.DispatcherServlet</servlet-class>
		<!-- DispatcherServlet继承了父类FrameworkServlet的contextConfigLocation属性,因此这里可以给个初始值 -->
		<init-param>
			<param-name>contextConfigLocation</param-name>
			<param-value>classpath:springmvc.xml</param-value>
		</init-param>
		<load-on-startup>1</load-on-startup>
	</servlet>

	<servlet-mapping>
		<servlet-name>springmvc</servlet-name>
		<url-pattern>*.do</url-pattern>
	</servlet-mapping>
</web-app>
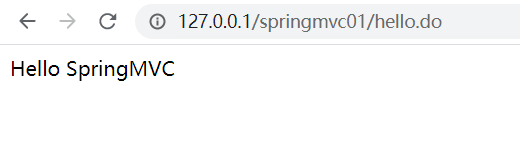
6, the test:
Add this project into tomcat tomcat server and start the server, open the browser and in the address bar enter a carriage return after "http://127.0.0.1/springmvc01/hello.do", as follows:
Execution of request:
1, in the address bar from "http://127.0.0.1/springmvc01/hello.do" and enter, send the request;

2, first locate the web.xml file:
The request for ".do" end, the url-pattern is matched to the tag, and then locate the core processor "DispatcherServlet" The servlet-name labels.
3, and then locate the file springmvc.xml:
Find springmvc.xml initialization file contextConfigLocation property core processor "DispatcherServlet".

4, and then find HelloController.java file:
Because the Spring configuration file springmvc.xml scanner, the scanner will go to "cn.jingpengchong.hello" under the package added one by one to find a specific annotation class, because the class HelloController added @Controller notes, so they are scanned, and according to the notes conclude this class is a processor.

5, DispatcherServlet internal code process:
DispatcherServlet继承了FrameworkServlet的service():

从@Override注解我们知道该方法还是父类的,由于“HttpMethod.PATCH == httpMethod || httpMethod == null”的返回值时false,所以调用了父类的service()方法,我们点开其父类HttpServletBean发现并没有service()方法,由此我们推断可能在HttpServletBean的父类中,因此我们再次点开HttpServletBean的父类HttpServlet,果然在此找到了service()方法:
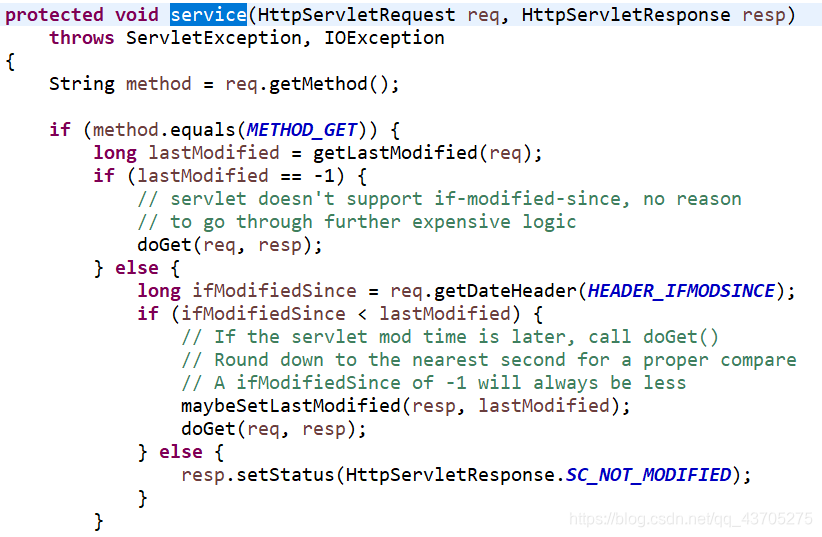
又由于我们的方法是get类型,因此执行“doGet(req, resp);”,又由于FrameworkServlet类中覆写了该方法,就近原则,必定调用的是FrameworkServlet中的doGet()方法:

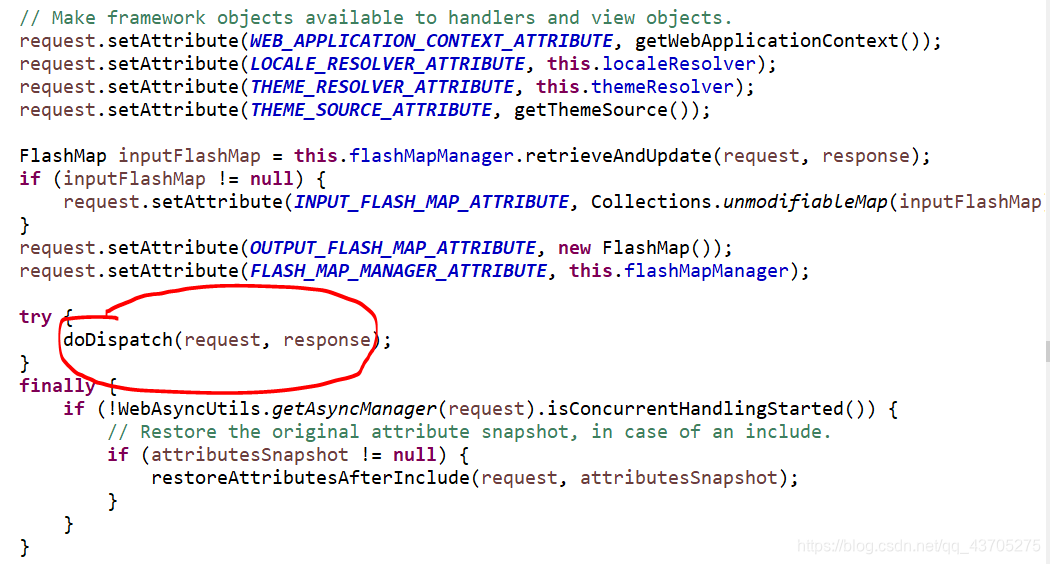
我们看到该方法又调用了processRequest()方法,我们点开看看:

我们看到该方法内又调用了doService()方法,同时我们想到DispatcherServlet类继承了FrameworkServlet类,FrameworkServlet类中的这个doService()方法,应该调用的是DispatcherServlet类中的,我们观察该方法又调用了doDispatch()方法:
我们点开doDispatch()方法,发现里面获得了一个处理器适配器HandlerAdapter:
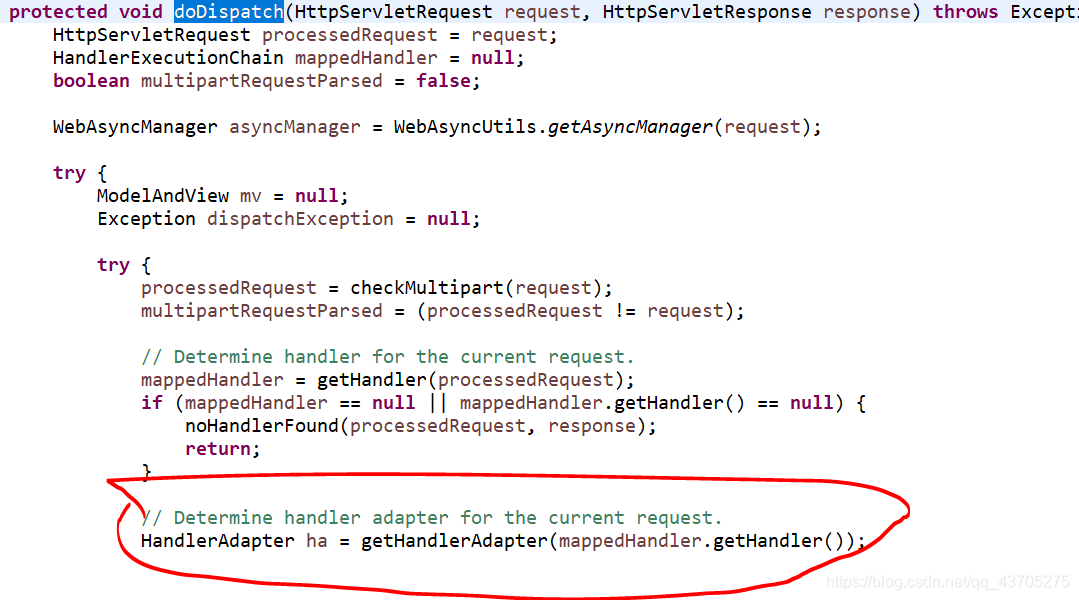
接着往下找,发现其又获得了一个处理器映射器:
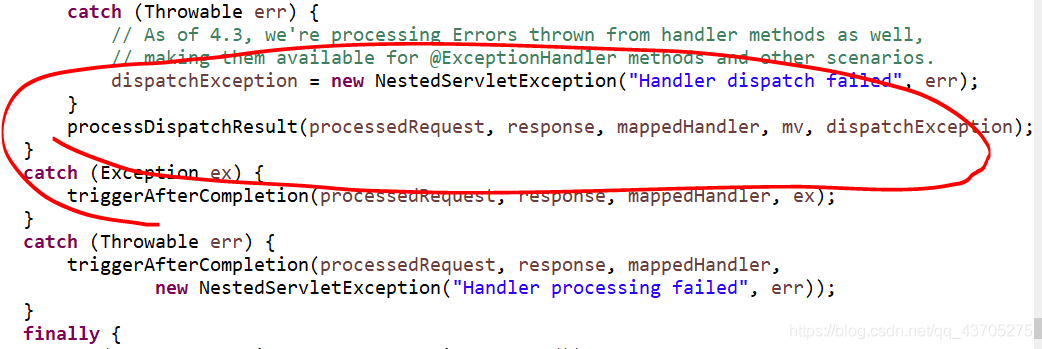
该方法执行完毕。
