Springboot + Activemq integration
Introduction integration required dependency:
<dependency>
            <groupId>org.springframework.boot</groupId>
            <artifactId>spring-boot-starter-activemq</artifactId>
        </dependency>
2 Create a file application.properties
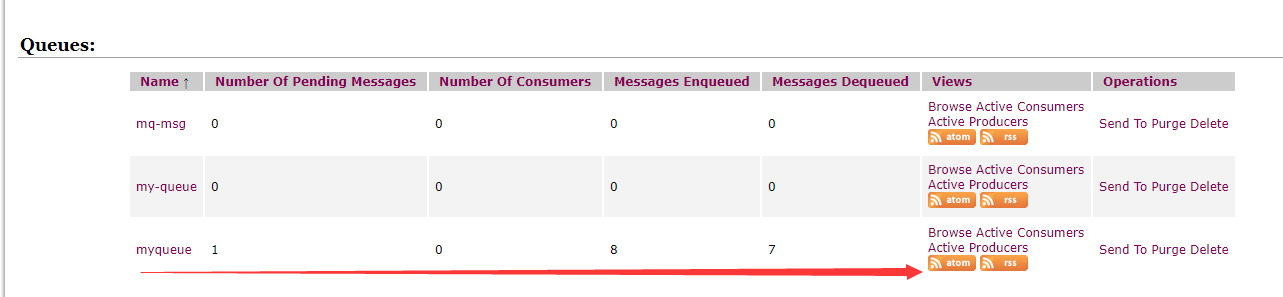
spring.activemq.broker-url=tcp://127.0.0.1:61616
spring.activemq.user=admin
spring.activemq.password=admin
server.port=8080
queue=myqueue
3. custom profiles QueueConfig read queue name of the configuration file, create a Queue according to the queue name
package com.example.demo;

import javax.jms.Queue;

import org.apache.activemq.ActiveMQConnectionFactory;
import org.apache.activemq.command.ActiveMQQueue;
import org.springframework.beans.factory.annotation.Value;
import org.springframework.context.annotation.Bean;
import org.springframework.context.annotation.Configuration;
import org.springframework.jms.config.DefaultJmsListenerContainerFactory;
import org.springframework.jms.core.JmsTemplate;

@Configuration
public class QueueConfig {

    @Value("${queue}")
    private String queue;

    @Bean
    public Queue logQueue() {
        return new ActiveMQQueue(queue);
    }
}
4. Create a producer, you can directly use the template provided by JmsMessagingTemplate message is sent:
package com.example.demo.producter;

import javax.jms.Queue;

import org.slf4j.Logger;
import org.slf4j.LoggerFactory;
import org.springframework.beans.factory.annotation.Autowired;
import org.springframework.jms.core.JmsMessagingTemplate;
import org.springframework.stereotype.Component;

import com.example.demo.SpringbootActivemqApplication;

@Component
public class Producter {
    @Autowired
    private JmsMessagingTemplate jmsMessagingTemplate;
    @Autowired
    private Queue queue;
    private static Logger logger = LoggerFactory.getLogger(
Producter
.class); public void send () {String str = "Manufacturer Production Data:" + System.currentTimeMillis (); jmsMessagingTemplate.convertAndSend (queue, str); logger.info ( "Manufacturer data: {}", str );}}
5. Start categories:
package com.example.demo;

import org.springframework.beans.factory.annotation.Autowired;
import org.springframework.boot.SpringApplication;
import org.springframework.boot.autoconfigure.SpringBootApplication;
import org.springframework.context.ApplicationListener;
import org.springframework.context.event.ContextRefreshedEvent;
import org.springframework.scheduling.annotation.EnableScheduling;

import com.example.demo.producter.Producter;
import com.example.demo.producter.consumer.Consumer;

@SpringBootApplication
@EnableScheduling
public class SpringbootActivemqApplication implements ApplicationListener<ContextRefreshedEvent> {
    @Autowired
    Producter Producter public;
    @Autowired
    public Consumer Consumer;

    public static void main (String [] args) {
        SpringApplication.run (SpringbootActivemqApplication.class, args);
        // onApplicationEvent method springboot runs at startup of the process, according to the actual item case of selecting a suitable transmission method invocation message

    }

    @Override
    public void onApplicationEvent (ContextRefreshedEvent Event) {
        producter.send ();
    }

}
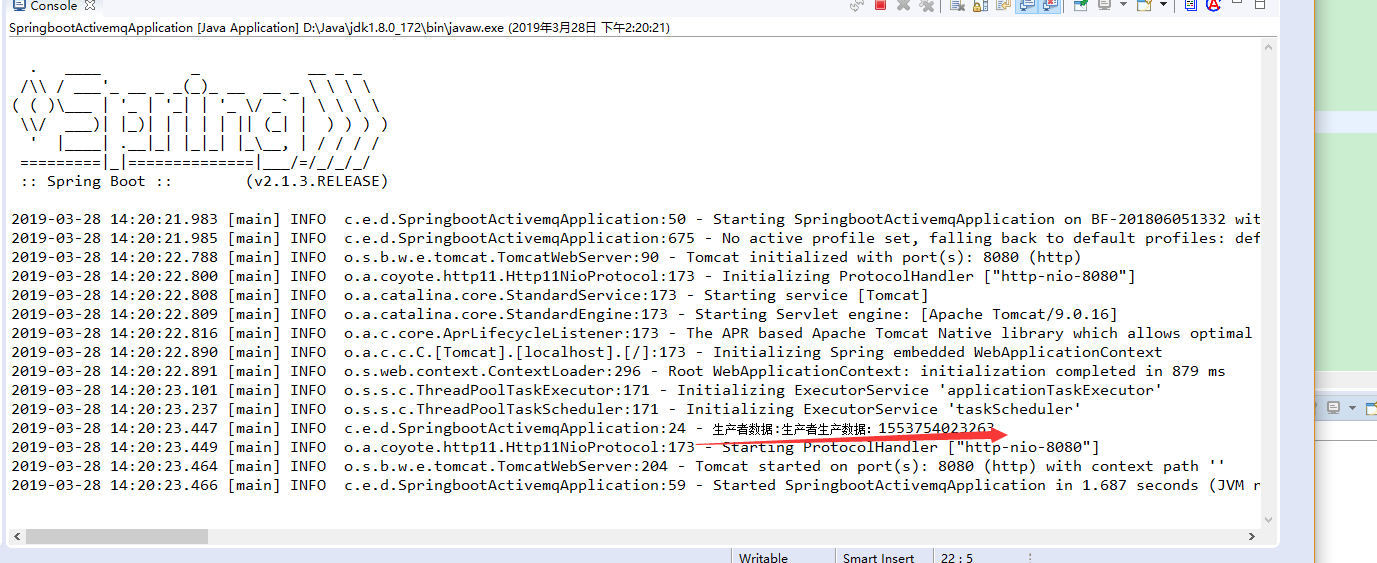
6. Start project, console output:
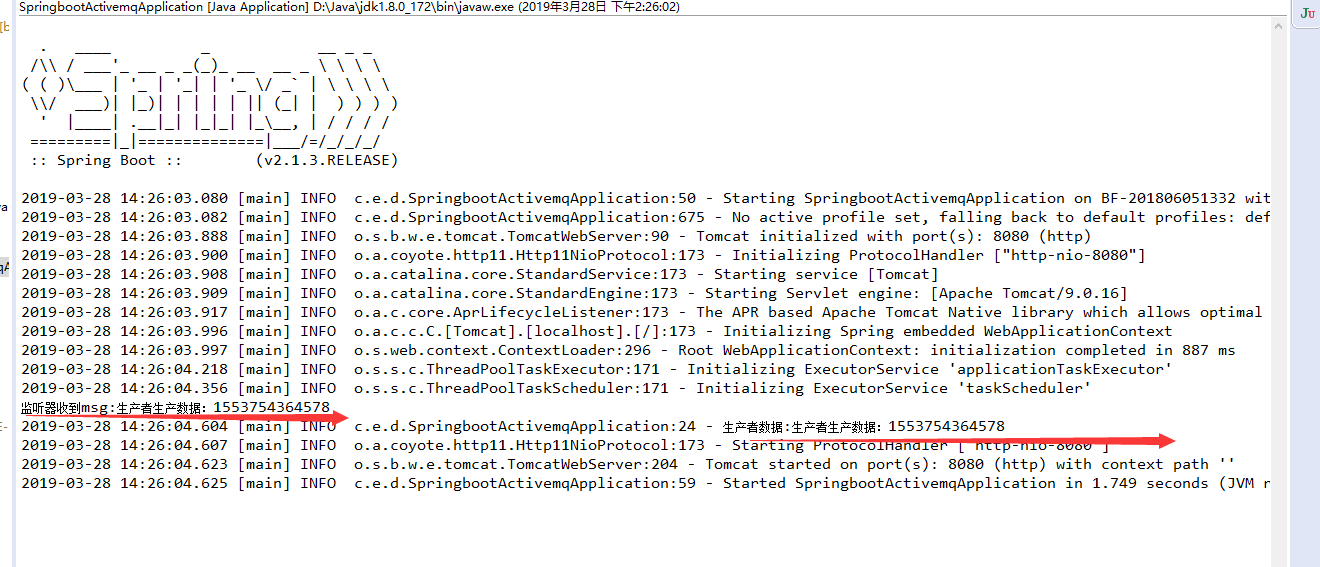
7. Creating consumer, the consumer is relatively easy to create, just listen queue can:
package com.example.demo.producter.consumer;

import org.springframework.jms.annotation.JmsListener;
import org.springframework.stereotype.Component;

@Component
public class Consumer {

    @JmsListener(destination = "${queue}")
    public void receive(String msg) {
        System.out.println("监听器收到msg:" + msg);
    }

}
8.最后结果: