1. Uninstall Linux system comes on mysql plug-in (old version)
1, first check the version number of Linux servers to be installed cglib, command strings /lib64/libc.so.6 | grep GLIBC, see if they have the appropriate cglib version, as follows:
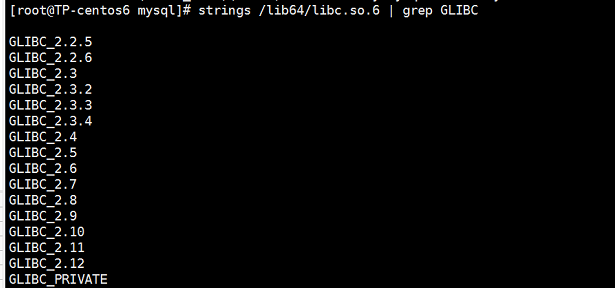
Only cglib in the system list before they can install, so you do not need to upgrade the system cglib
2, find the relevant installation mysql:
rpm -qa|grep -i mysql

The following may occur one or more, not better, that your system is clean, but just in case, in any case following a change operation or inspection
perl-DBD-MySQL-4.013-3.el6.x86_64
mysql-libs-5.1.71-1.el6.x86_64
qt-mysql-4.6.2-26.el6_4.x86_64
mysql-5.1.71-1.el6.x86_64
mysql-server-5.1.71-1.el6.x86_64
mysql-community-common-5.7.23-1.el7.x86_64
If one or more of the above occurs, do not worry, use the uninstall command, there are a few to get rid of a few!
Uninstall command: rpm -ev {} package name, such as:
rpm -ev mysql-community-common-5.7.23-1.el7.x86_64
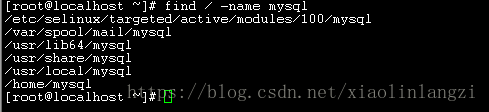
Find the old version of the mysql command related to the installation directory:
find / -name mysql
If it can find the relevant directory using the command: rm -rf {directory name}

Finally, use the command: rpm -qa | grep -i mysql, the system re-check again whether to install mysql.

If centos7, then the default will install a mysql branch product mariadb, you must first uninstall this product branch
rpm -qa | grep mariadb
A copy of the list of found, uninstall one by one, as
rpm -e --nodeps mariadb-libs-5.5.35-3.el7.x86_64
2.安装包处理
新建software目录,切换到software目录,下载到该目录:
mkdir /root/software
cd/root/software

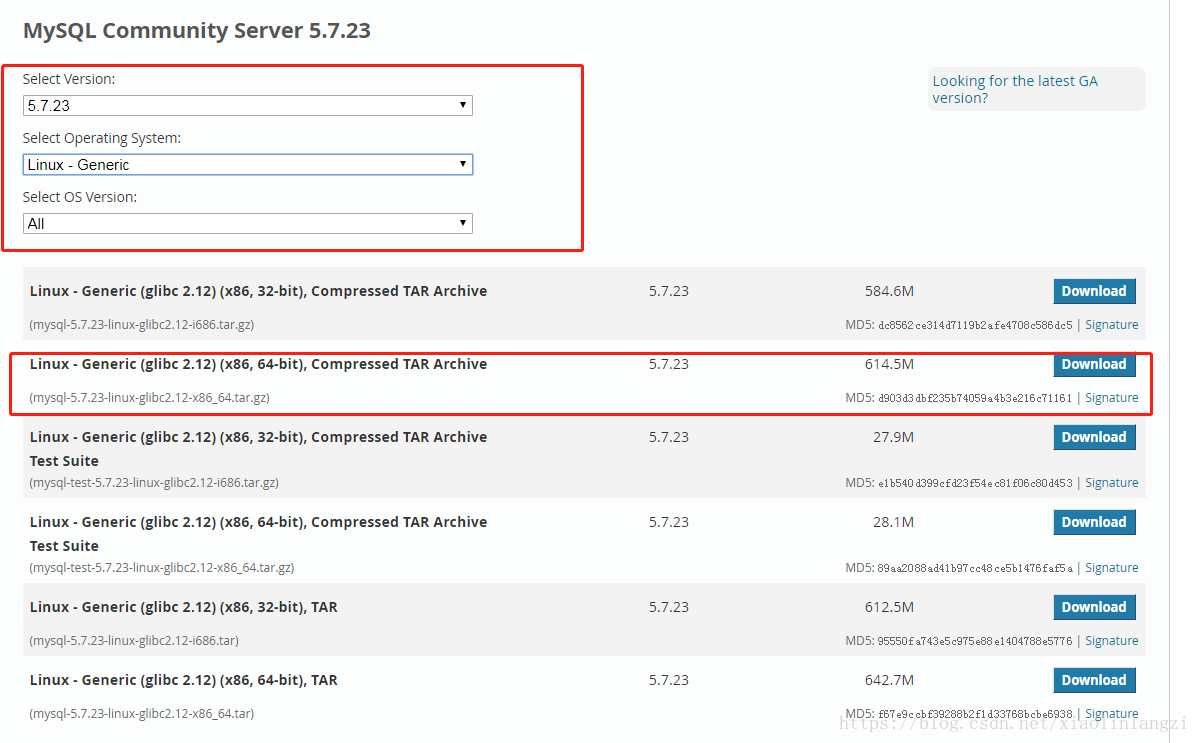
下载:(600M左右,下载需要点时间)
(mysql-5.7.23-linux-glibc2.12-x86_64.tar.gz)
wget https://cdn.mysql.com//Downloads/MySQL-5.7/mysql-5.7.23-linux-glibc2.12-x86_64.tar.gz
注:问题?
-bash: wget: command not found
然后在执行就可以了,或者可以去官网下载。

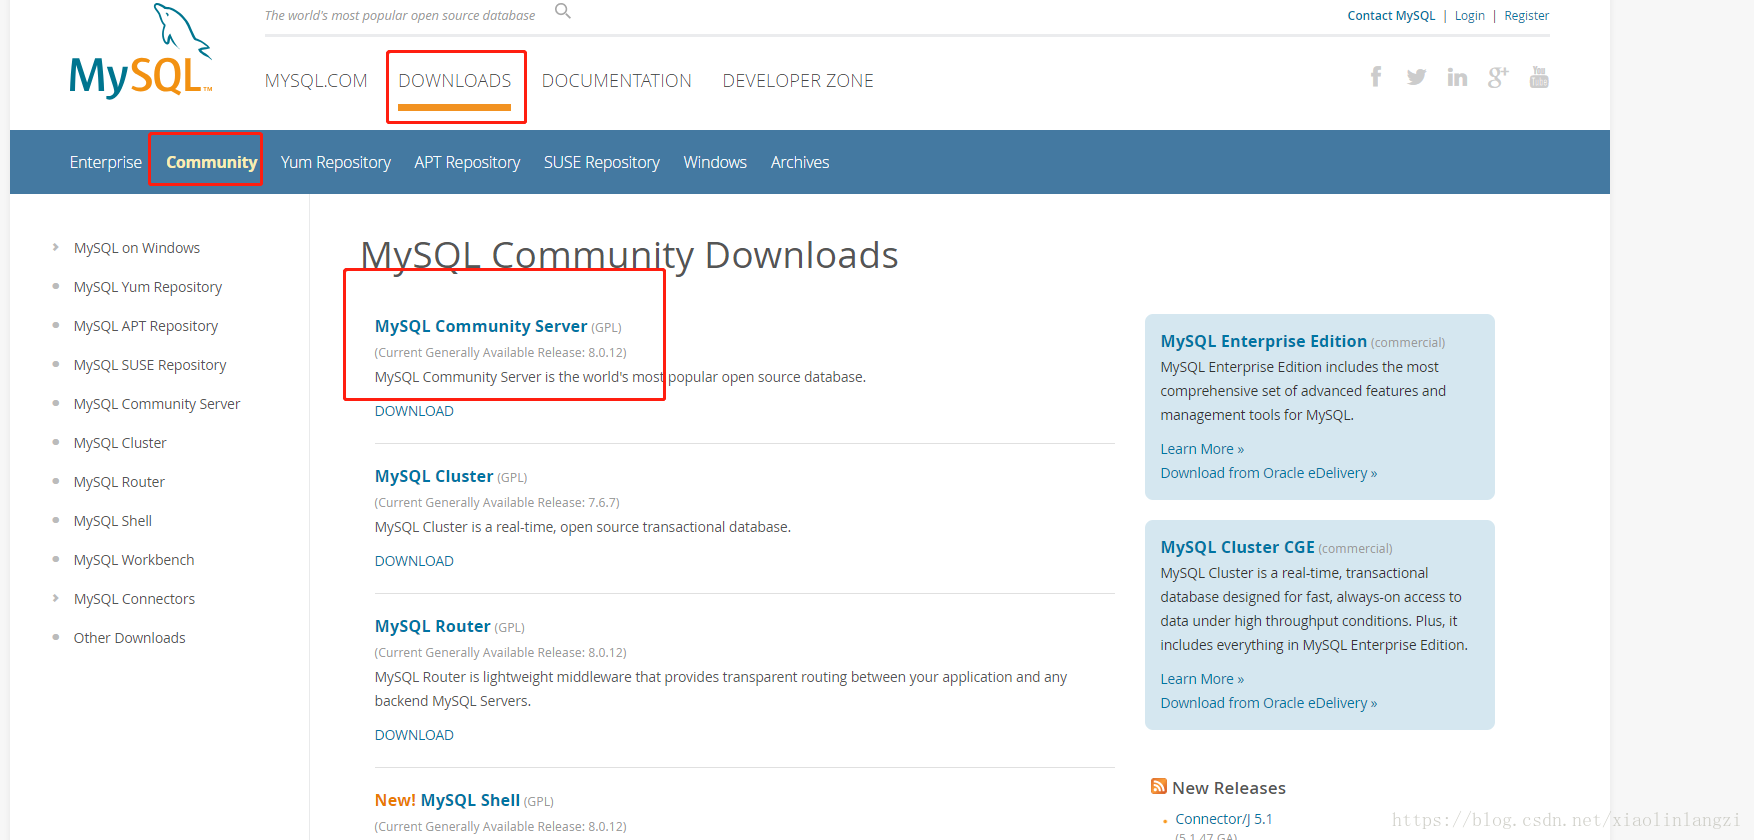
官网下载
地址:
https://dev.mysql.com/downloads/mysql/
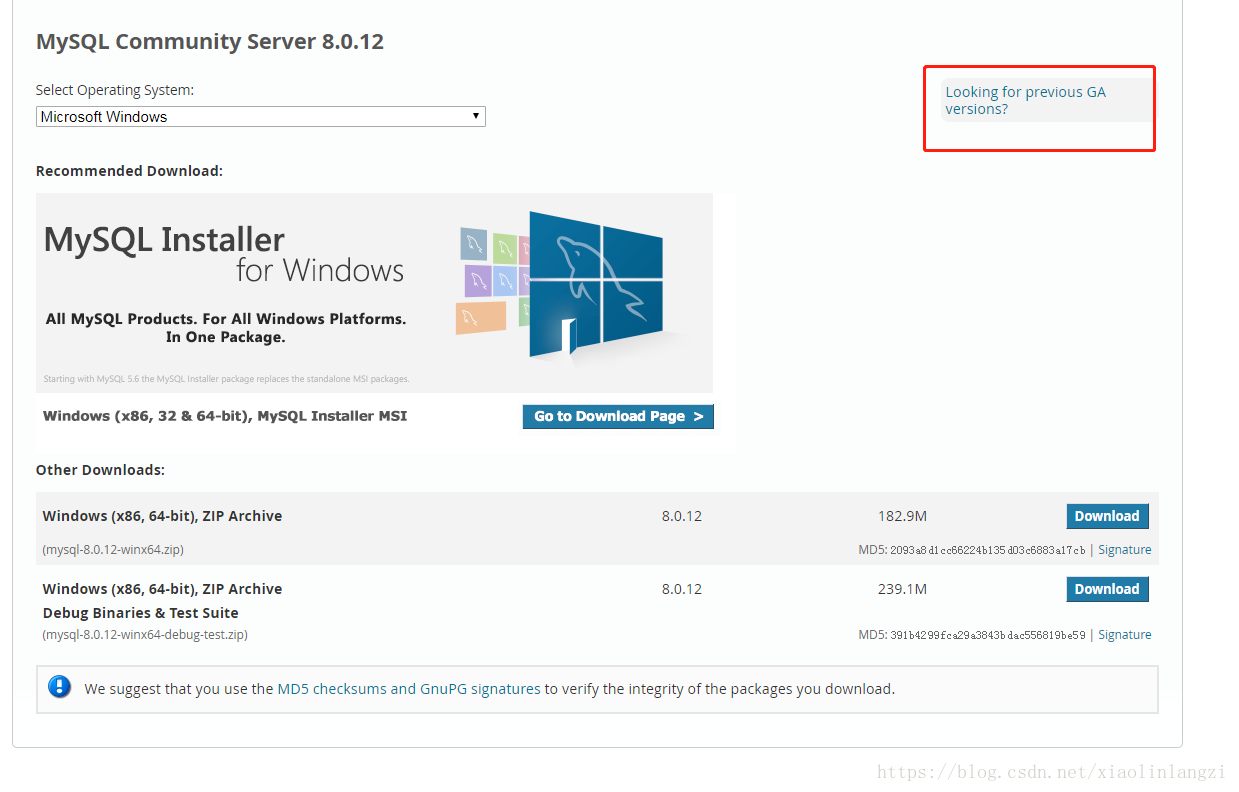
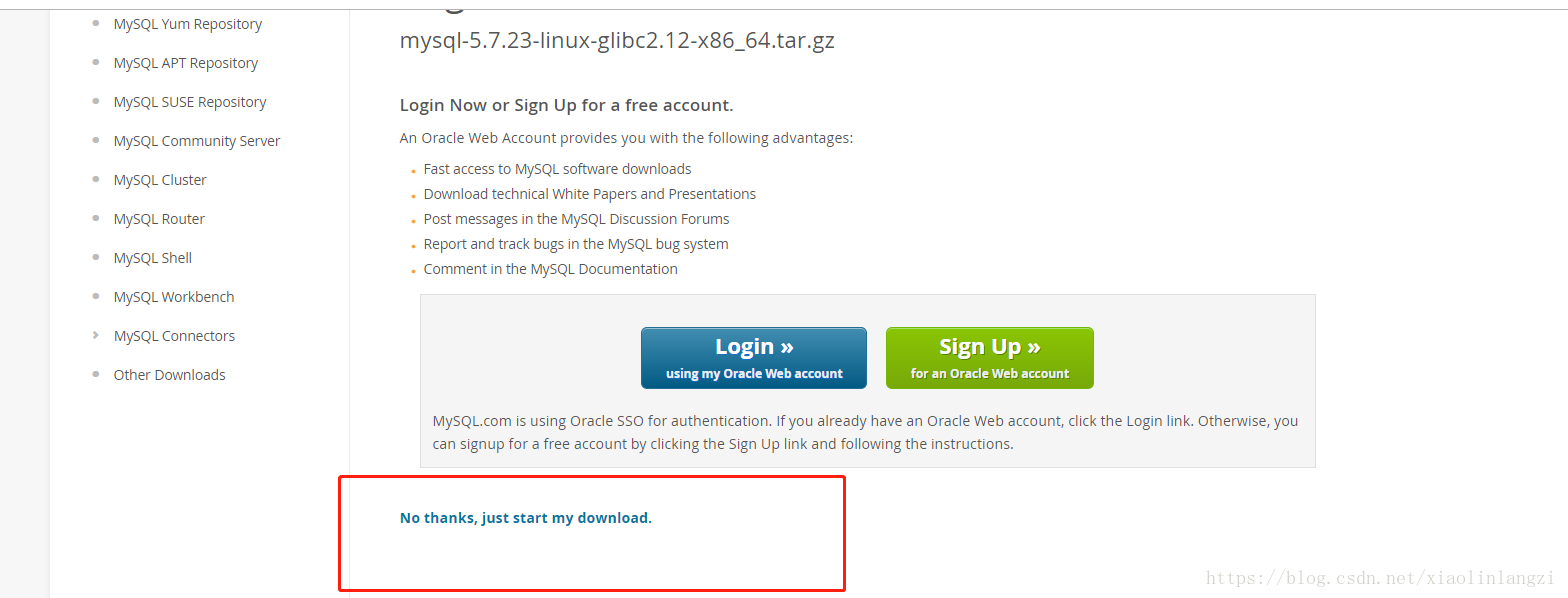
或者直接找历史版本:https://downloads.mysql.com/archives/community/
国内镜像: http://mirrors.ustc.edu.cn/mysql-ftp/Downloads/MySQL-5.7/
(ps:最简单的是Windows的安装版,选择历史档案左侧的installer就可以选择下载:https://downloads.mysql.com/archives/installer/)
下载完

解压到当前目录:
tar -xzvf mysql-5.7.23-linux-glibc2.12-x86_64.tar.gz 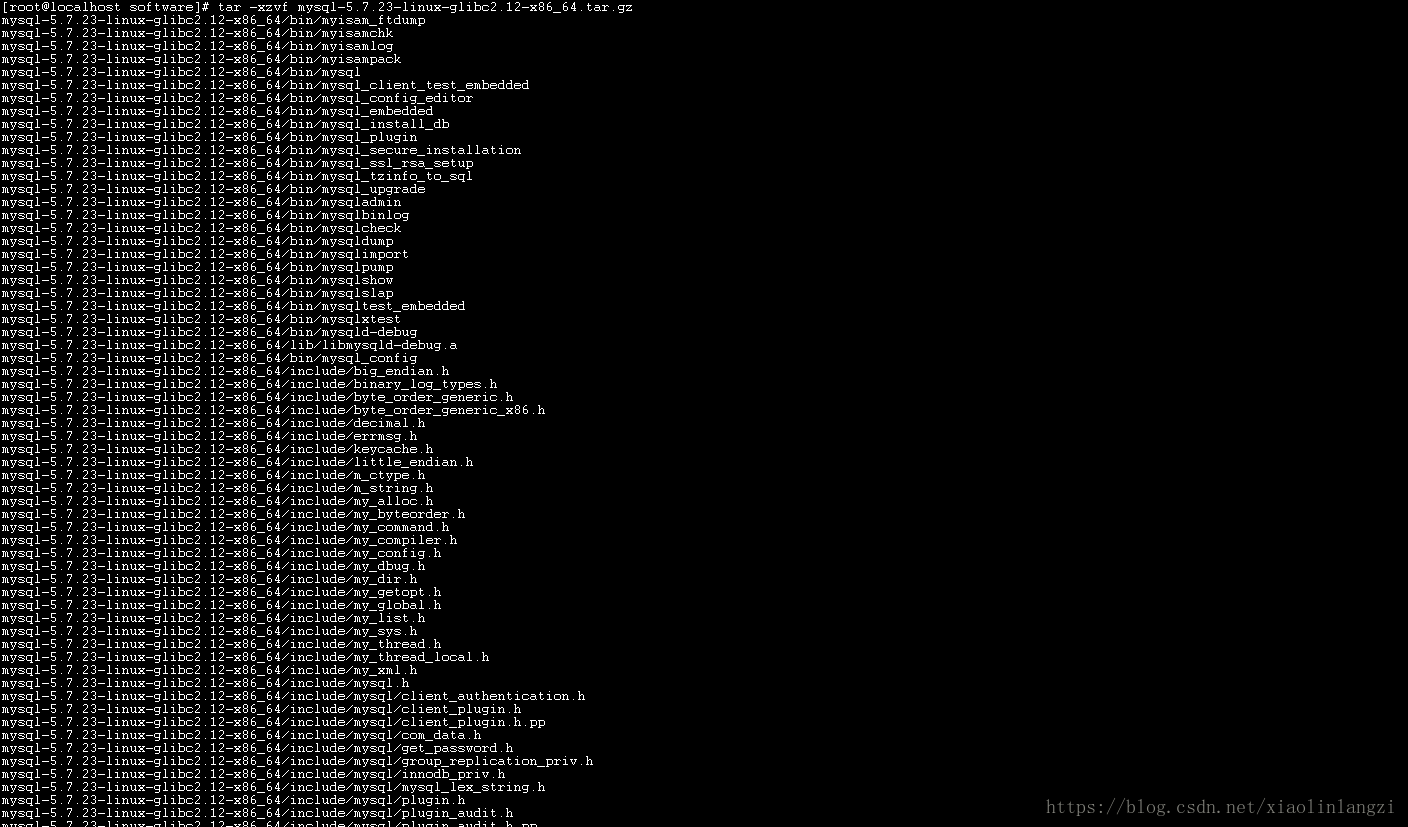
mysql主目录处理
在software目录下移动文件到/usr/local/mysql:
mv mysql-5.7.23-linux-glibc2.12-x86_64/usr/local/mysql

cd/usr/local/mysql
mkdir data

主目录权限处理
查看组和用户情况
cat /etc/group | grep mysql
cat /etc/passwd |grep mysql

若存在,则删除原mysql用户:userdel -r mysql,会删除其对应的组和用户。

在查看就会发现没有,说明你已经删掉了

创建mysql组和mysql用户
groupadd mysql
useradd -r -g mysql mysql
chown -R mysql:mysql /usr/local/mysql

创建配置文件及相关目录
修改配置文件:/etc/my.cnf,配置不对的话,后面初始化不全,会拿不到默认密码。
vim /etc/my.cnf
修改内容:
:wq! 保存退出。
创建文件/tmp/mysql.sock:设置用户组及用户,授权
cd /tmp
touch mysql.sock
chown mysql:mysql mysql.sock
chmod 755 mysql.sock

创建文件/tmp/mysqld/mysqld.pid:
mkdir mysqld
cd mysqld
touch mysqld.pid
cd ..
chown -R mysql:mysql mysqld
cd mysqld
chmod 755 mysqld.pid

创建文件/var/log/mysqld.log:
touch /var/log/mysqld.log
chown -R mysql:mysql /var/log
cd log
chmod 755 mysqld.log

配置文件其他参数,仅供参考:https://blog.csdn.net/u011823494/article/details/74548642
安装和初始化数据库
进入bin目录:
cd /usr/local/mysql/bin/

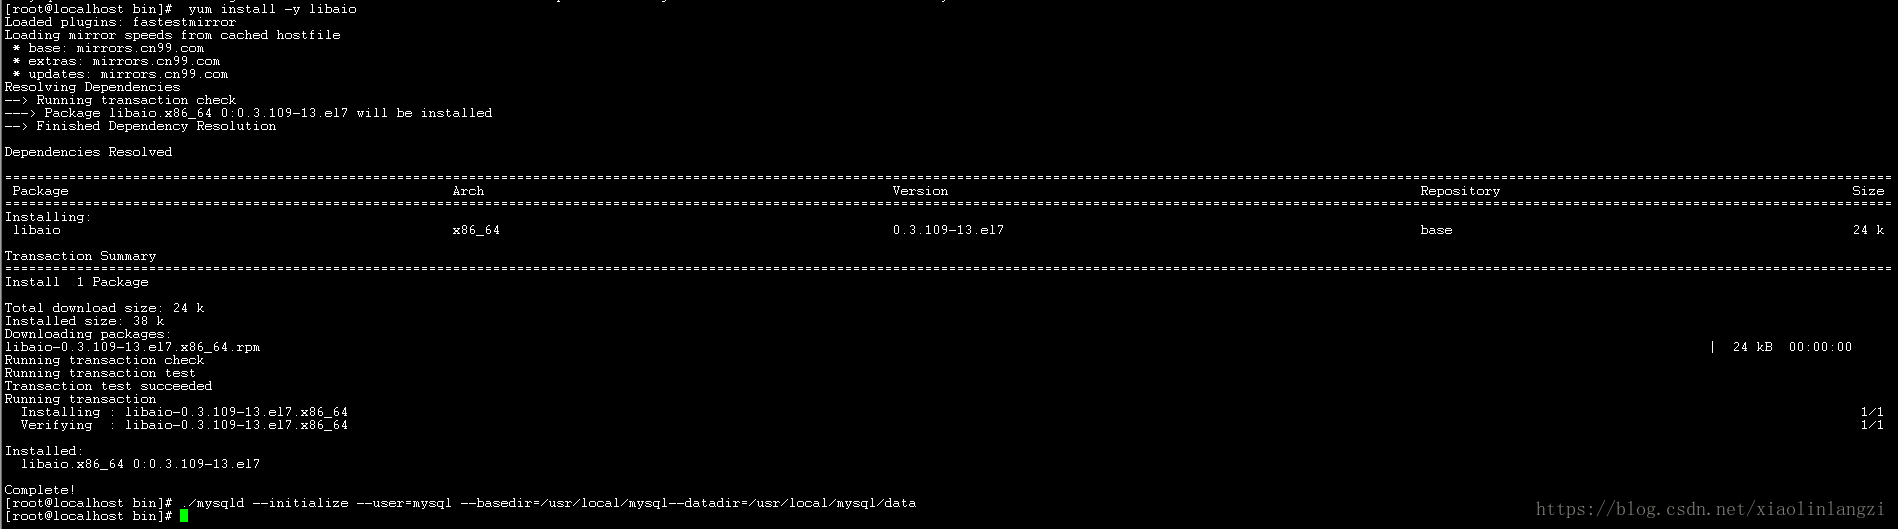
初始化数据库:
./mysqld --initialize --user=mysql --basedir=/usr/local/mysql--datadir=/usr/local/mysql/data
注:
这时会出现错误
./mysqld: error while loading shared libraries: libaio.so.1: cannot open shared object file: No such file or directory
解决方案:
yum install -y libaio
如果是内网不能上网的环境,那么就得手动安装 numactl-2.0.9-2.el6.x86_64.rpm 和 libaio-0.3.109-13.el7.x86_64.rpm 这两个rpm包
rpm -ivh numactl-2.0.9-2.el6.x86_64.rpm
rpm -ivh libaio-0.3.109-13.el7.x86_64.rpm
然后在执行./mysqld --initialize --user=mysql --basedir=/usr/local/mysql--datadir=/usr/local/mysql/data

安全启动:
./mysqld_safe --user=mysql &

是否启动成功,可以通过查看mysql进程,ps -ef | grep mysql

默认密码在mysqld.log日志里, 找到后保存到安全的地方:
cat /var/log/mysqld.log
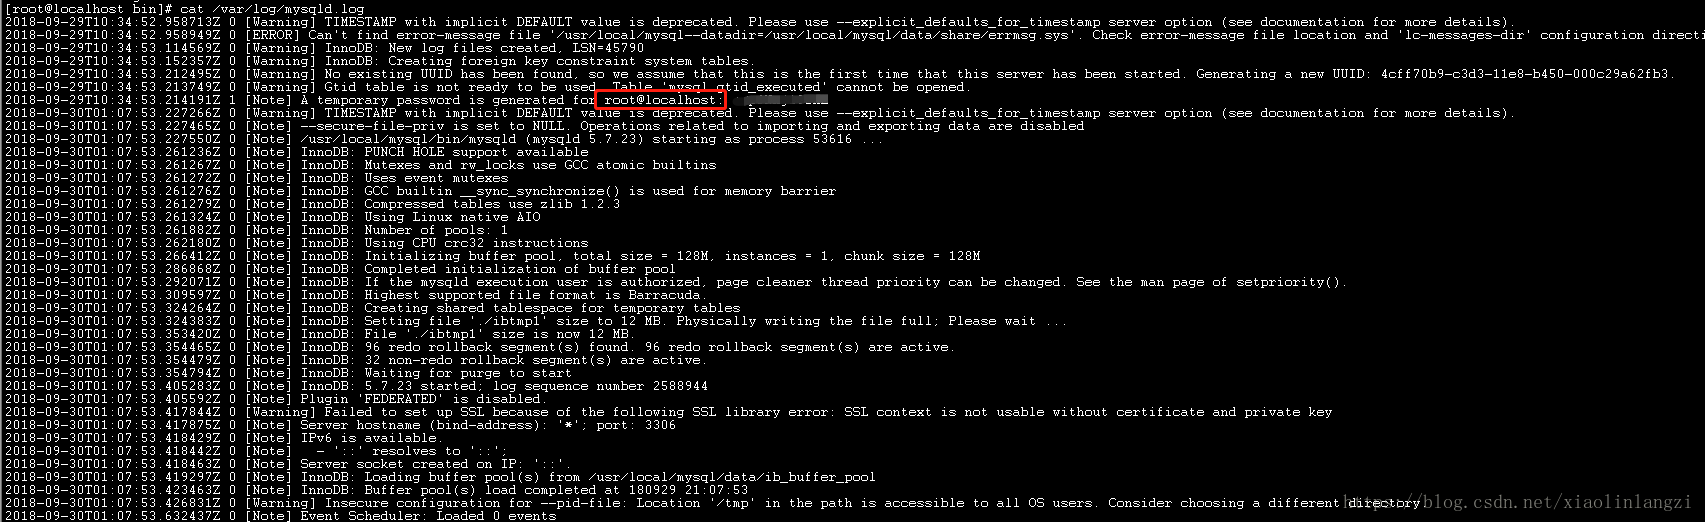
其中root@localhost: 后面的就是默认密码,后面登录用.(如果找不到可能默认是空,登录时密码直接回车,否则可能安装有问题)
进入bin目录:
cd /usr/local/mysql/bin/

登录mysql:
./mysql -u root -p
拷贝或者输入mysqld.log中获得的默认密码,即可进入mysql命令客户端。

但是,若输入相关命令,则会提示你修改用户密码(注意后面一定要加;)。
show databases;

假设密码修改为xh2018
mysql> set password=password("xh2018");

设置远程登录权限
mysql>grant all privileges on *.* to 'root'@'%' identified by 'xh2018'; 
立即生效:
mysql> flush privileges;

退出quit 或者 exit;
mysql> quit;

至此,mysql安装流程已结束,后续如果通过远程ip进行root用户授权,还需要到mysql库下的user表中把%对应的root用户所有权限改为Y,否则远程授权会失败,参考:https://blog.csdn.net/nininininiabc222/article/details/80090384。
开机服务启动设置:
把support-files/mysql.server 拷贝为/etc/init.d/mysql:
cp -a /usr/local/mysql/support-files/mysql.server /etc/init.d/mysql
查看是否拷贝成功

查看mysql服务是否在服务配置中
chkconfig --list mysql

若没有,则把mysql注册为开机启动的服务,然后在进行查看
chkconfig --add mysql
chkconfig --list mysql

启动 或 停止
service mysql start

service mysql stop
创建快捷方式:
服务启动后,直接运行mysql -u root -p即可登录,不需要进入到对应的目录。
ln -s /usr/local/mysql/bin/mysql /usr/bin

打开3306防火墙
