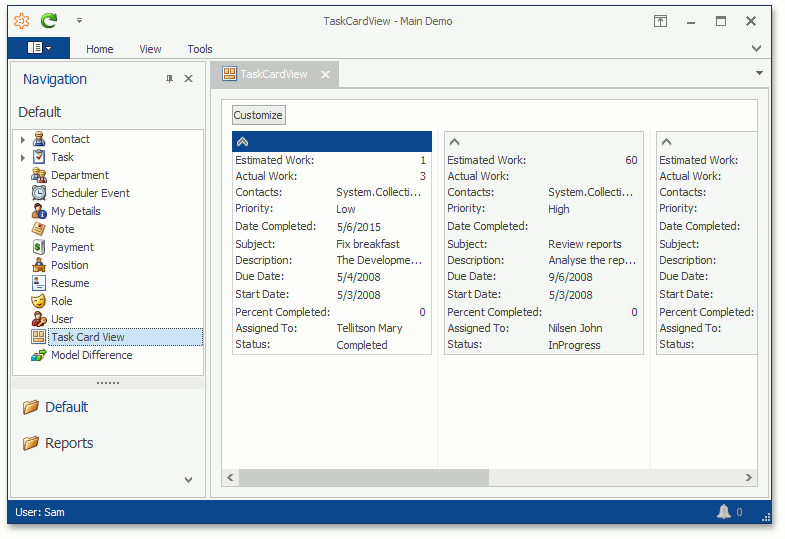
This example demonstrates how you can add a custom data-bound (data-aware) control to a View and display this View from the navigation in a WinForms XAF application. For demo purposes, in this example you will add the GridControl control with the CardView to the EFDemo application (installed to %PUBLIC%\Documents\DevExpress Demos 19.2\Components\eXpressApp Framework\EFDemoCodeFirst by default). However, you can use the same approach with any other custom control in your own XAF application.
This example shows how to customize the data binding (data-aware) control to view and display the view from WinForms XAF application navigation. For demonstration purposes, in this example, you will use CardView add GridControl control to EFDemo application (installed% PUBLIC% _ documents _DevExpress presentation 19.2_ components eXpressApp framework _EFDemoCodeFirst default). However, you can use the same method for any other custom controls in their XAF application.
Tip Tip
A similar example for ASP.NET is available in the How to: Show a Custom Data-Bound Control in an XAF View (ASP.NET)
ASP.NET provides a similar example: "The custom data-bound control displays in XAF view of how" (ASP.NET) in
Create a User Control
Create a user control
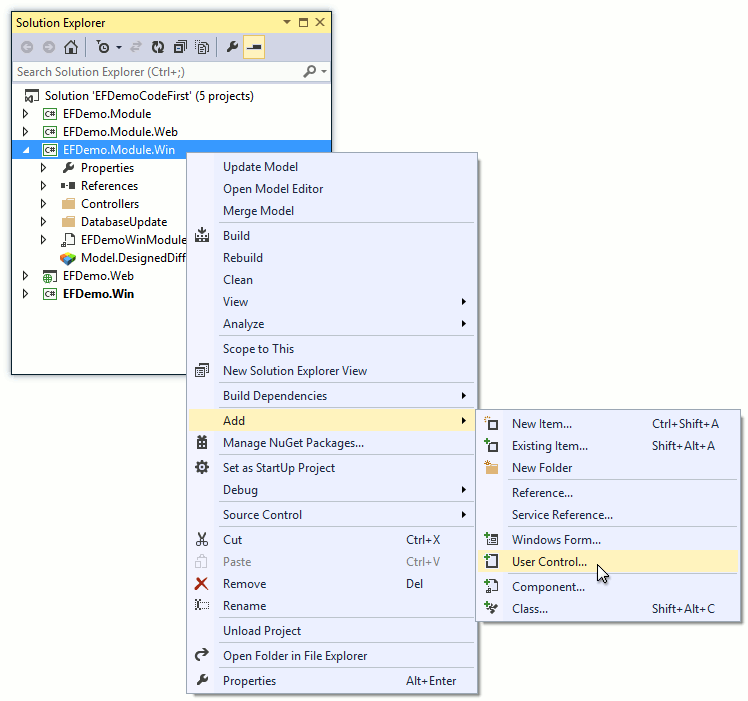
In the WinForms module project, create a User Control. Right-click the project and choose Add | User Control...
In WinForms module project, create a user control. Right-click the project and select "Add | User Control ...
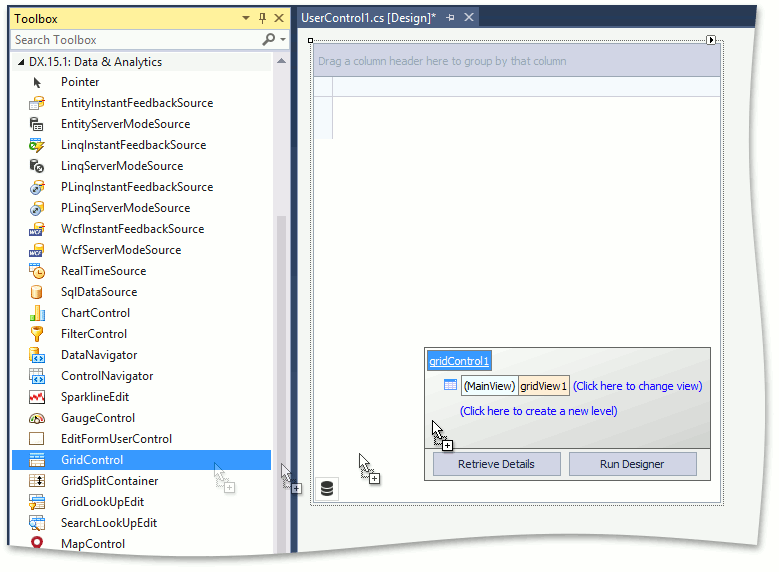
Add the required control, e.g., GridControl from the Toolbox to the designer.
The desired control (e.g., from the toolbox to the designer of GridControl).
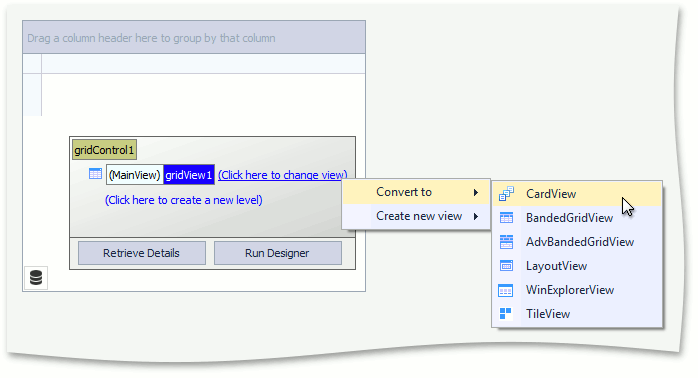
Customize the control as required; e.g., convert the GridControl.MainView to CardView.
根据需要自定义控件;例如,将网格控制.MainView 转换为卡视图。
Tip 提示
You can also add the CollectionDataSource component from the DX.19.2: XAF Data Sources for Reports toolbox group and then bind the control to this component. Use the DataSourceBase.ObjectTypeName property to specify the required business object type. This will allow you to see the data columns in the designer and customize them as required. Actual data binding will be performed further in code.
还可以从 DX.19.2:用于报表的工具箱组添加收集数据源组件,然后将控件绑定到此组件。使用 DataSourceBase.ObjectTypeName 属性指定所需的业务对象类型。这将允许您在设计器中查看数据列,并根据需要对其进行自定义。实际数据绑定将在代码中进一步执行。
Bind the Control to Data Using Object Space
使用对象空间将控件绑定到数据
Close the designer, right-click the UserControl1.cs (UserControl1.vb) file and choose View Code to edit the User Control code. Implement the IComplexControl interface. In the IComplexControl.Setup method, you can access the Object Space using the objectSpace parameter, use the Object Space API to read the required data and then initialize the control's data source. In the IComplexControl.Refresh method (that is executed when a user clicks the Refresh Action), you can recreate the control's data source. The code below demonstrates the collection of DemoTask objects assigned to the GridControl.DataSource property.
关闭设计器,右键单击UserControl1.cs (UserControl1.vb) 文件,然后选择"查看代码"以编辑用户控制代码。实现 I复杂控制接口。在 IComplexControl.setup 方法中,可以使用对象空间参数访问对象空间,使用对象空间 API 读取所需的数据,然后初始化控件的数据源。在 IComplexControl.Refresh 方法(当用户单击刷新操作时执行)中,可以重新创建控件的数据源。下面的代码演示了分配给 GridControl.DataSource 属性的 DemoTask 对象的集合。
using DevExpress.ExpressApp;
using DevExpress.ExpressApp.Editors;
// ...
public partial class UserControl1 : UserControl, IComplexControl {
    public UserControl1() {
        InitializeComponent();
    }
    private IObjectSpace objectSpace;
    void IComplexControl.Setup(IObjectSpace objectSpace, XafApplication application) {
        gridControl1.DataSource = objectSpace.GetObjects<EFDemo.Module.Data.DemoTask>();
        this.objectSpace = objectSpace;
    }
    void IComplexControl.Refresh() {
        gridControl1.DataSource = objectSpace.GetObjects<EFDemo.Module.Data.DemoTask>();
    }
}
Tip 提示
You can also use the application parameter to access certain Application Model settings using the XafApplication.Model property and customize the control accordingly.
您还可以使用应用程序参数使用 XafApplication.Model 属性访问某些应用程序模型设置,并相应地自定义控件。
Add a ControlViewItem View Item to a View
将控件视图项视图项添加到视图
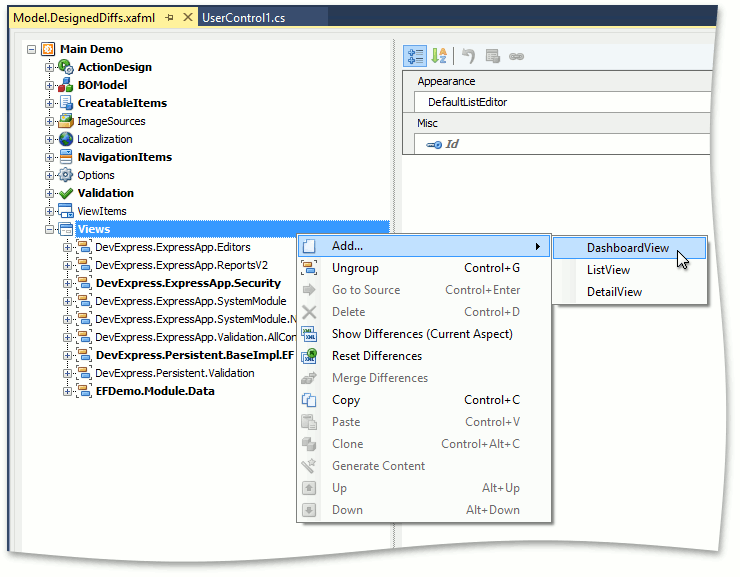
In the WinForms module project, double-click the Model.DesignedDiffs.xafml file to start the Model Editor. Right-click the Views node and choose Add | DashboardView.
在 WinForms 模块项目中,双击"模型.设计Diffs.xafml"文件以启动模型编辑器。右键单击"视图"节点并选择"添加 |仪表板视图。
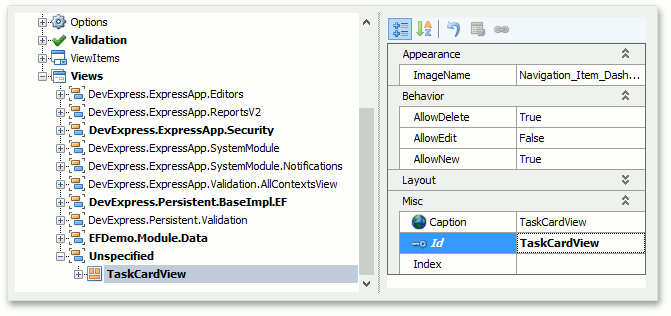
Set the Id property to TaskCardView.
将 Id 属性设置为任务卡视图。
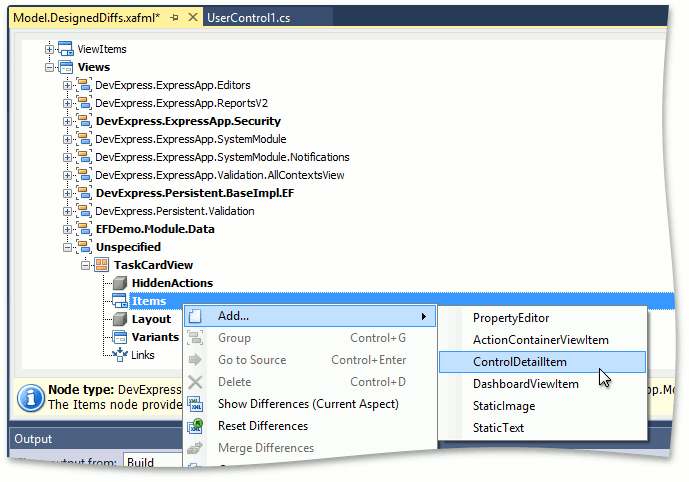
Right-click the Views | TaskCardView | Items node and choose Add... | ControlDetailItem.
右键单击视图 |任务卡视图 |项目节点并选择"添加..." |控件详细信息Item。
Set the Id property to TaskCardView, and the IModelControlDetailItem.ControlTypeName property - to the type of the custom User Control you created (e.g., EFDemo.Module.Win.UserControl1).
将 Id 属性设置为 TaskCardView,将 IModelControl 详细信息项目.ControlTypeName 属性设置为您创建的自定义用户控件的类型(例如,EFDemo.Module.Win.UserControl1)。

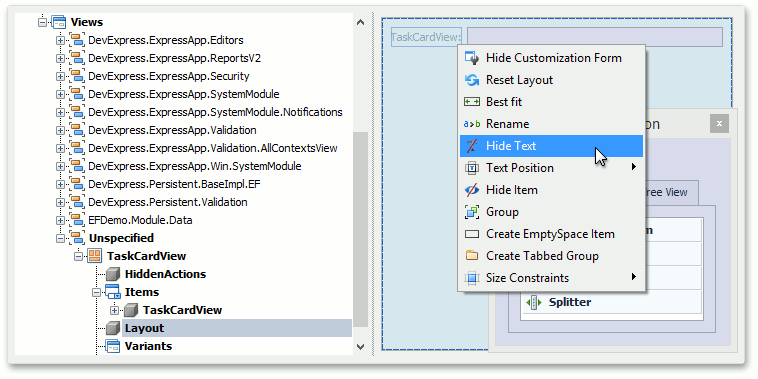
Focus the Layout node. Right click the designer surface to the right and choose Customize Layout. Then, right-click the TaskCardView layout item and choose Hide Text.
聚焦布局节点。右键单击右侧的设计器表面并选择"自定义布局"。然后,右键单击 TaskCardView 布局项目并选择"隐藏文本"。
Note 注意
You can add the ControlViewItem View Item to any existing Detail View or Dashboard View instead of creating a new Dashboard View.
您可以将 ControlViewItem 视图项添加到任何现有详细信息视图或仪表板视图,而不是创建新的仪表板视图。
Create a Navigation Item that Shows the View with the Custom Control
创建使用自定义控件显示视图的导航项
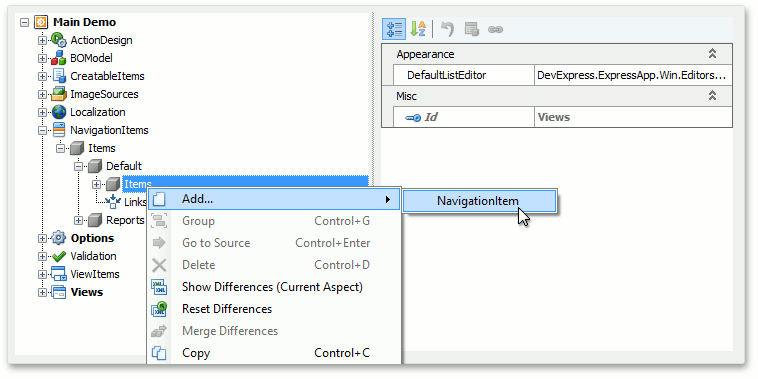
Navigate to the NavigationItems | Items | Default | Items node. Right-click the Items node and select Add… | NavigationItem from the invoked context menu.
导航到导航项 |项目 |默认值 |项目节点。右键单击"项目"节点并选择"添加..." |从调用的上下文菜单导航项。
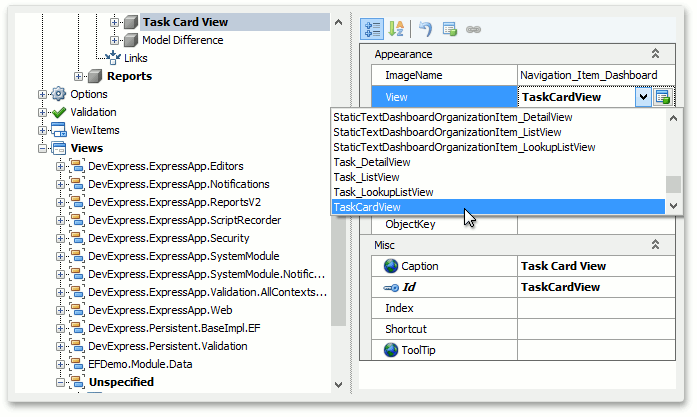
For the newly added node, in the IModelNavigationItem.View dropdown list, select the View you created earlier (TaskCardView).
For newly added node, in IModel navigation project. View drop-down list, select the view (task card view) you created earlier.
Run the WinForms application and click Task Card View in the navigation. The Card View bound to the DemoTask collection will be displayed (see the image in the beginning of this topic).
Run WinForms application, and then click the task card view navigation. The show is bound to card view (see image at the beginning of this topic) DemoTask collection.