table of Contents
- Integrated project to pay [scan code to pay] the treasure (scan code to pay) business
Integrated project to pay [scan code to pay] the treasure (scan code to pay) business
Description: This demo use Alipay provided, but no test demo ip public network, means of payment so Bao sandbox environment provides.
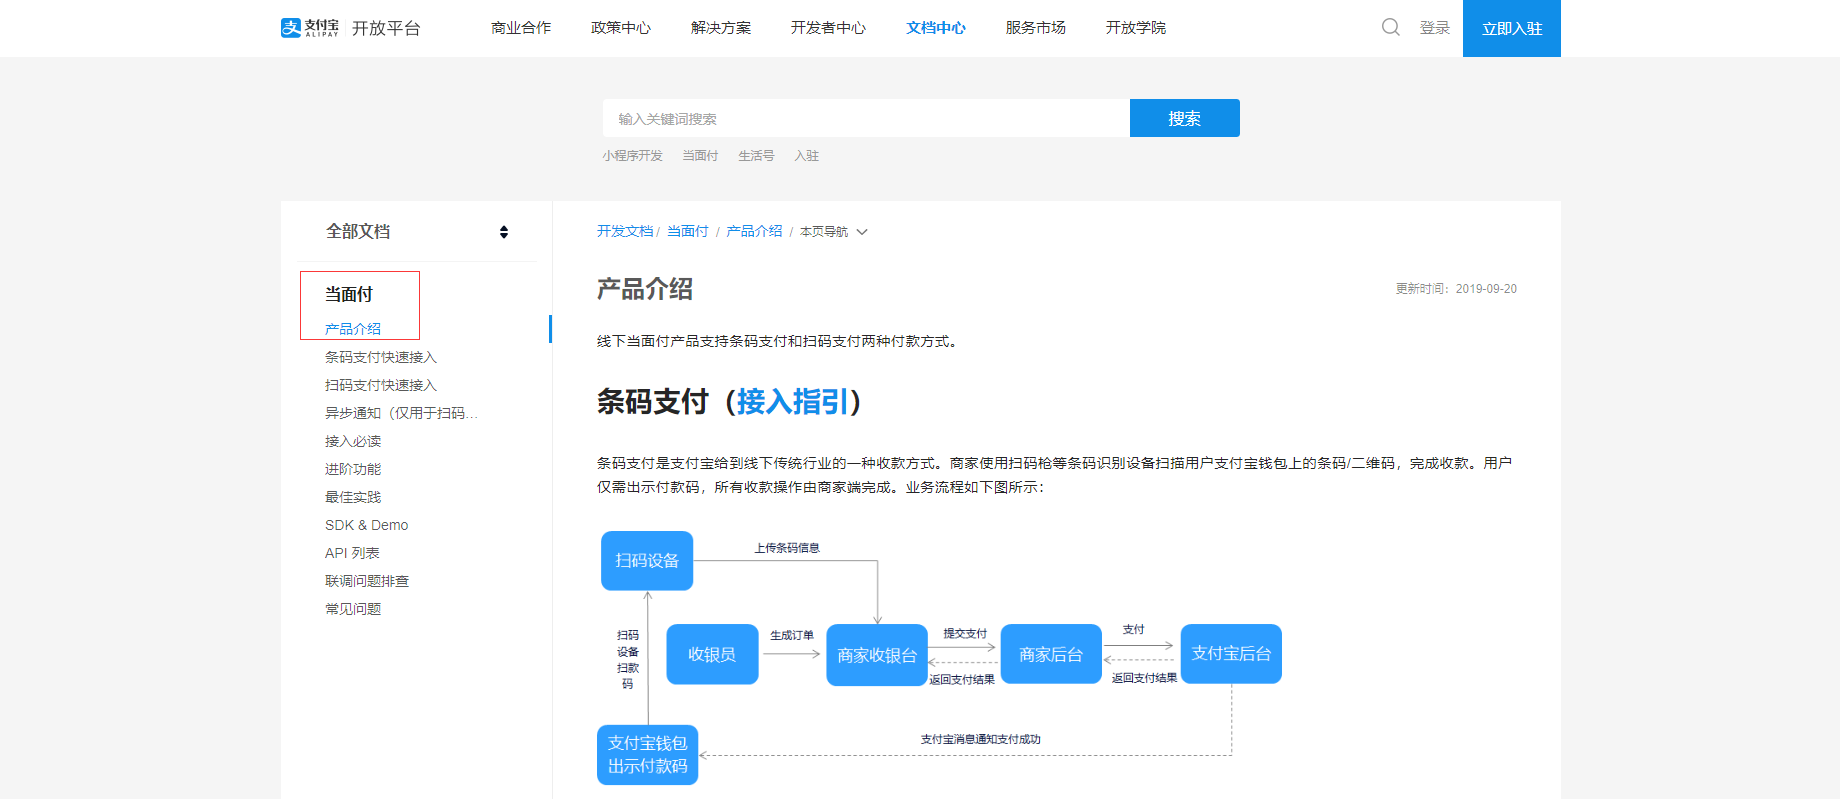
1. Open the document describes the scan code to pay
Address: https://docs.open.alipay.com/194/105072/
Can be found in the document scan code to pay, there are two scenarios, one is the local system by means of infrared product bar code machine to scan the user's payment, the other is the local system by means of Alipay api receivables generated two-dimensional code, users scan the code after payment, Specifies the callback request to change the local system and the order status response processing.
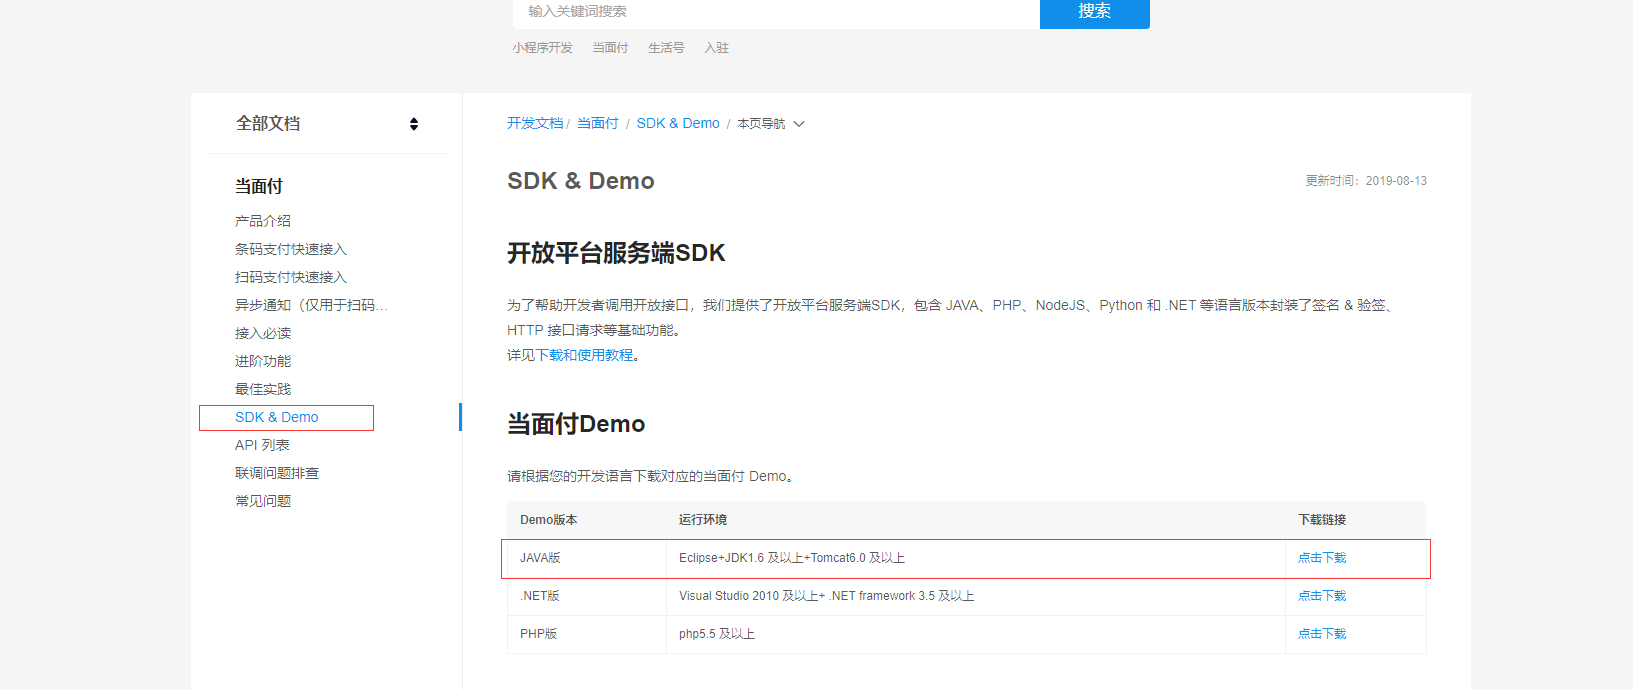
2. download sdk-demo scan code to pay
Address: https://docs.open.alipay.com/194/105201/
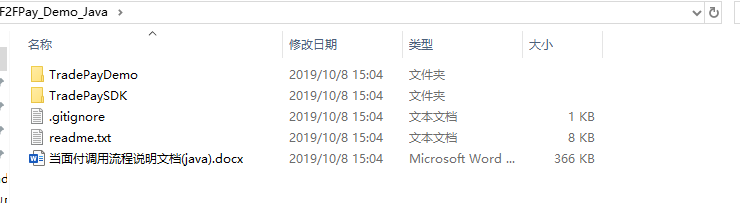
Depending on the selected programming language different demo download, download directory after extracting two, which is the relevant code Alipay service, another project similar to the code to test various scenarios of class.
3. Create a new maven project, we will provide integration into demo
Create a new project, the demo two projects are integrated into the following steps:
3.1 Add dependence
<!--支付宝接口依赖-->
<dependency>
    <groupId>com.alipay.sdk</groupId>
    <artifactId>alipay-sdk-java</artifactId>
    <version>3.0.0</version>
    <exclusions>
        <exclusion>
            <artifactId>commons-logging</artifactId>
            <groupId>commons-logging</groupId>
        </exclusion>
    </exclusions>
</dependency>
<dependency>
    <groupId>commons-lang</groupId>
    <artifactId>commons-lang</artifactId>
    <version>2.6</version>
</dependency>
<dependency>
    <groupId>commons-configuration</groupId>
    <artifactId>commons-configuration</artifactId>
    <version>1.10</version>
    <!--<exclusions>
                <exclusion>
                    <artifactId>commons-logging</artifactId>
                    <groupId>commons-logging</groupId>
                </exclusion>
            </exclusions>-->
</dependency>
<dependency>
    <groupId>commons-codec</groupId>
    <artifactId>commons-codec</artifactId>
    <version>1.11</version>
</dependency>
<dependency>
    <groupId>com.google.zxing</groupId>
    <artifactId>core</artifactId>
    <version>3.2.1</version>
</dependency>
<dependency>
    <groupId>org.hamcrest</groupId>
    <artifactId>hamcrest-core</artifactId>
    <version>1.3</version>
    <scope>test</scope>
</dependency>
<dependency>
    <groupId>com.google.code.gson</groupId>
    <artifactId>gson</artifactId>
    <version>2.8.5</version>
</dependency>
3.2 Add Alipay entity and service resource files
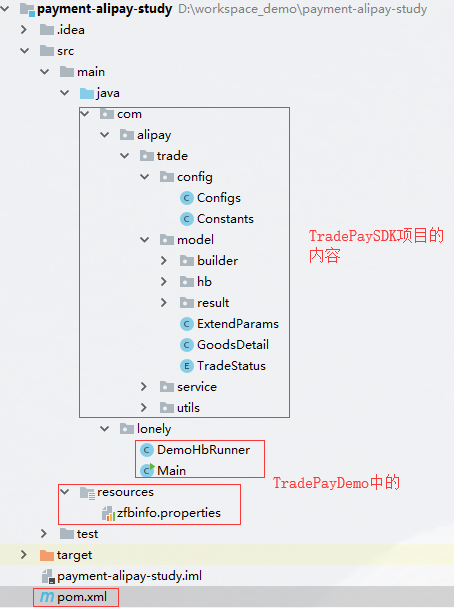
- Download demo in TradePaySDK project resources into new projects
- New Resource Directory resources, download the demo of TradePayDemo the Properties file into which
- 将TradePayDemo工程的测试启动类放入到新项目中
最终的新项目结构如下:
4. 使用沙箱环境
文档地址:https://docs.open.alipay.com/200/105311/
什么是沙箱环境,可以想象成在支付宝的研发环境中调用接口,沙箱环境会提供一个商家appid(正式环境中是需要通过资格认证申请的),以及测试的沙箱支付宝登陆账号密码,支付密码,等,随后通过支付宝提供的工具生成商家的RSA公钥和私钥,在通过生成的公钥生成支付宝的SHA公钥,然后替换提供的配置文件(zfbinfo.properties)中的各种资源信息(网关地址以及key等),下面将会一步步的使用该环境。
4.1 进入到沙箱环境
在地址:https://docs.open.alipay.com/200/105311/ 中有沙箱环境的超链接,点击链接条件到支付宝登陆页面
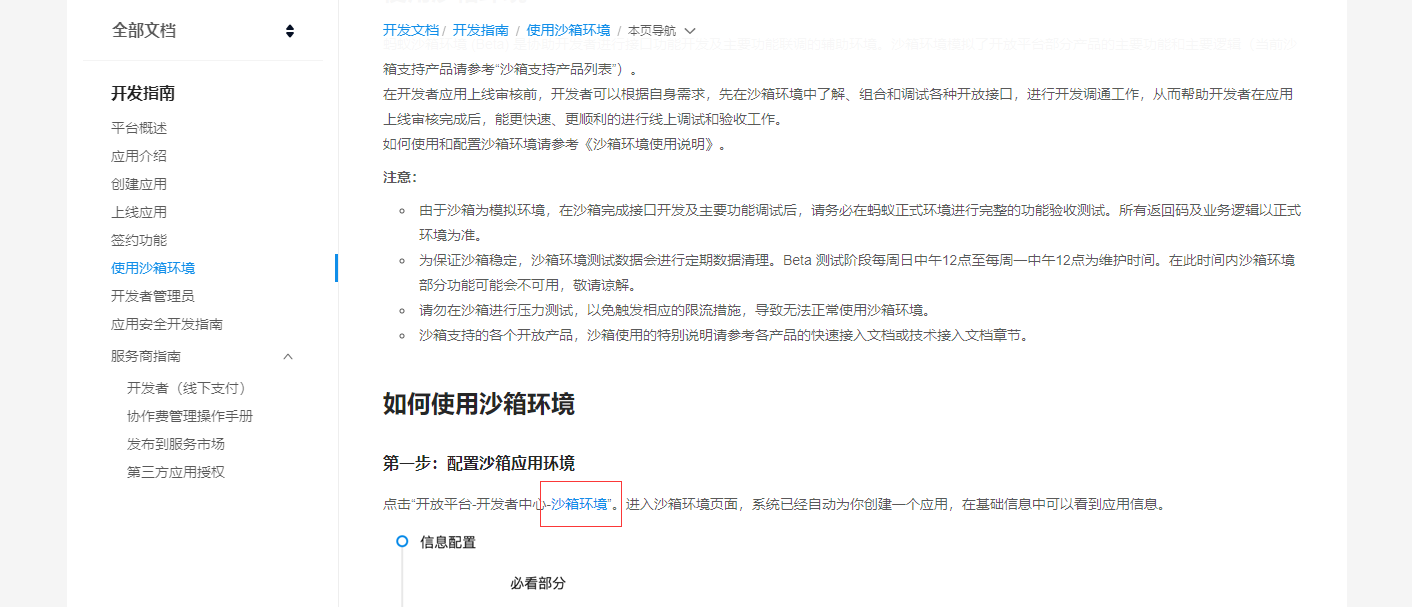
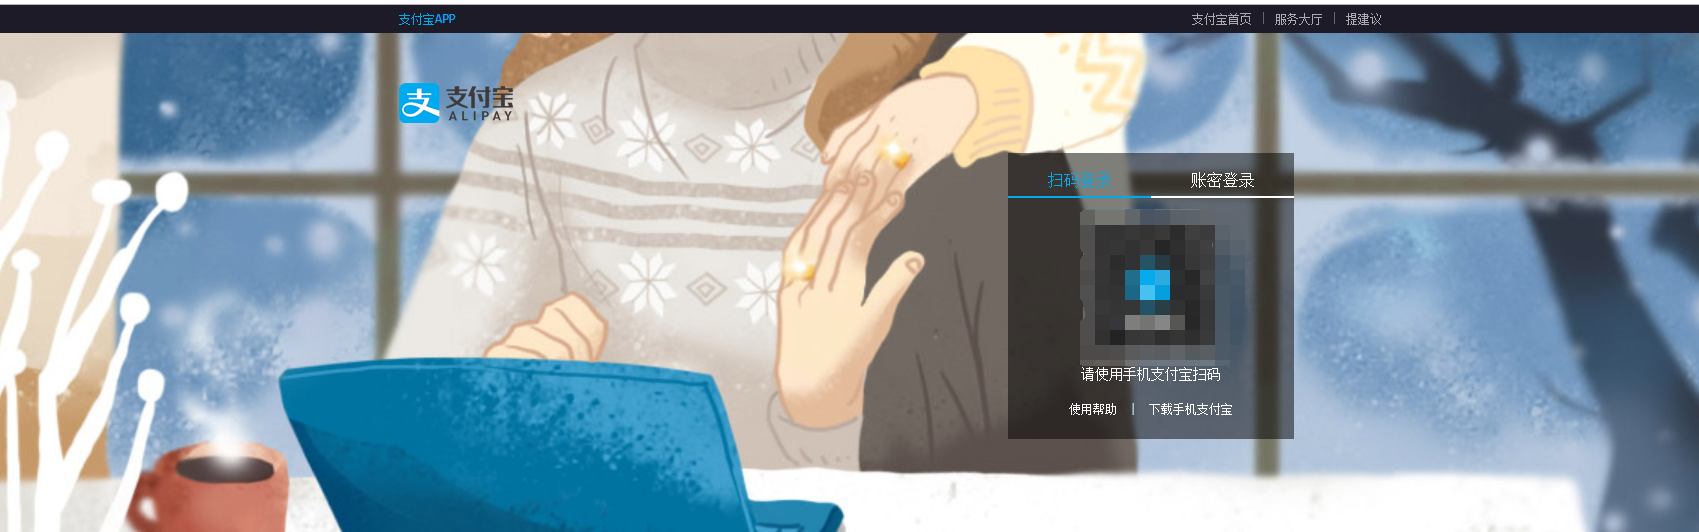
扫码登陆后,如何没有加入到支付宝的开放平台的需要先加入到支付宝开放平台,然后在重新进入到沙箱环境。
沙箱环境应该如下图:
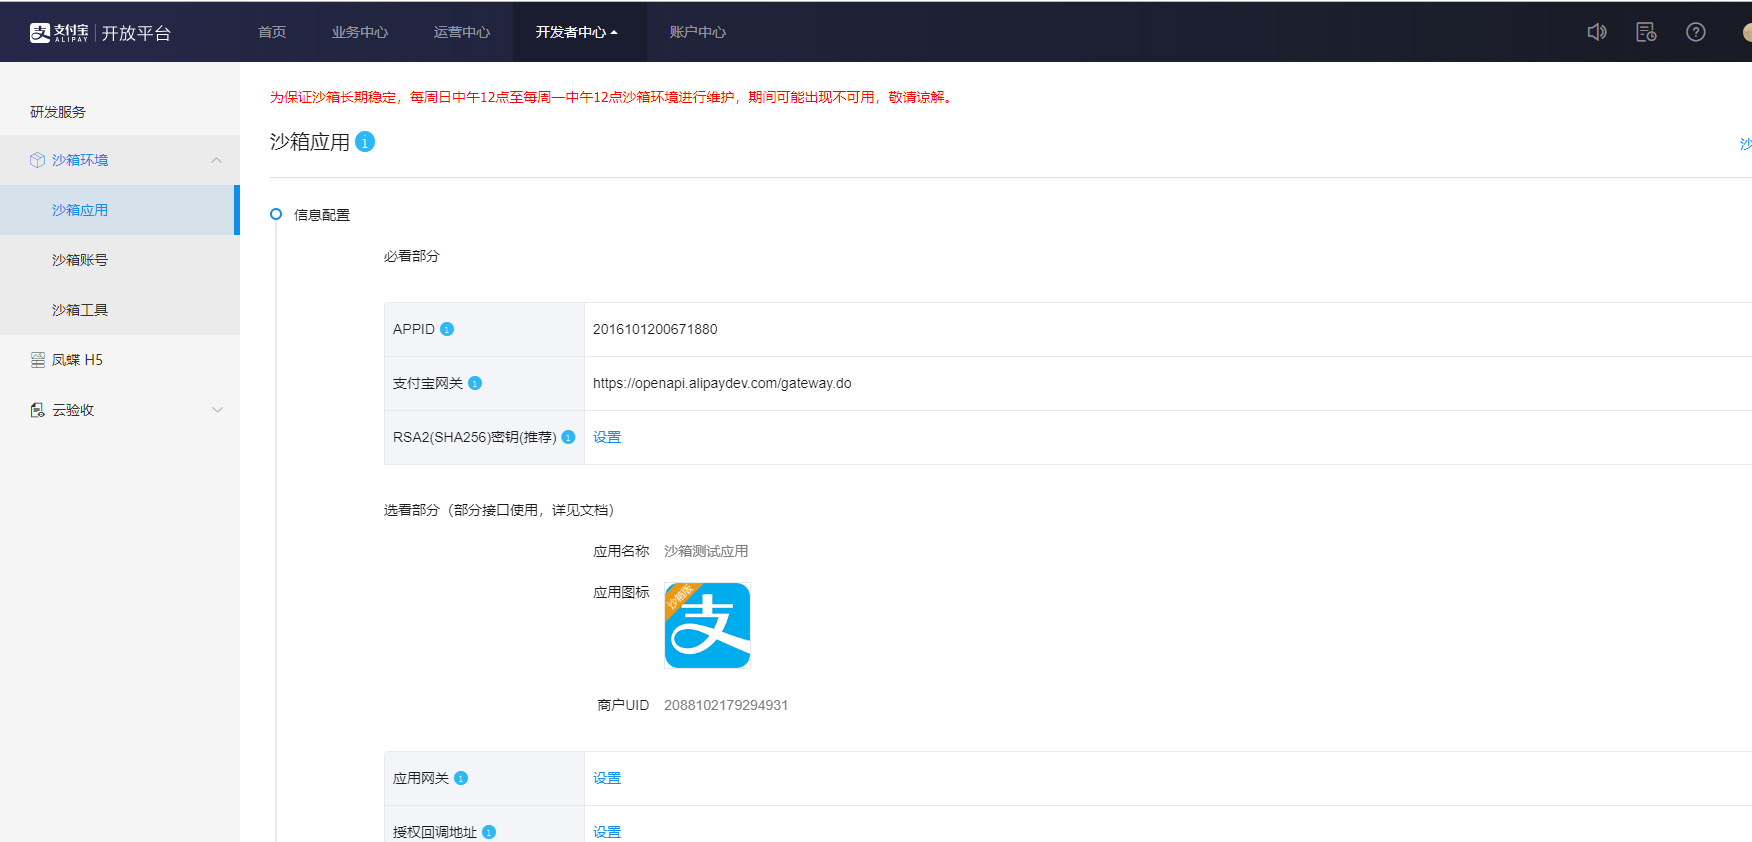
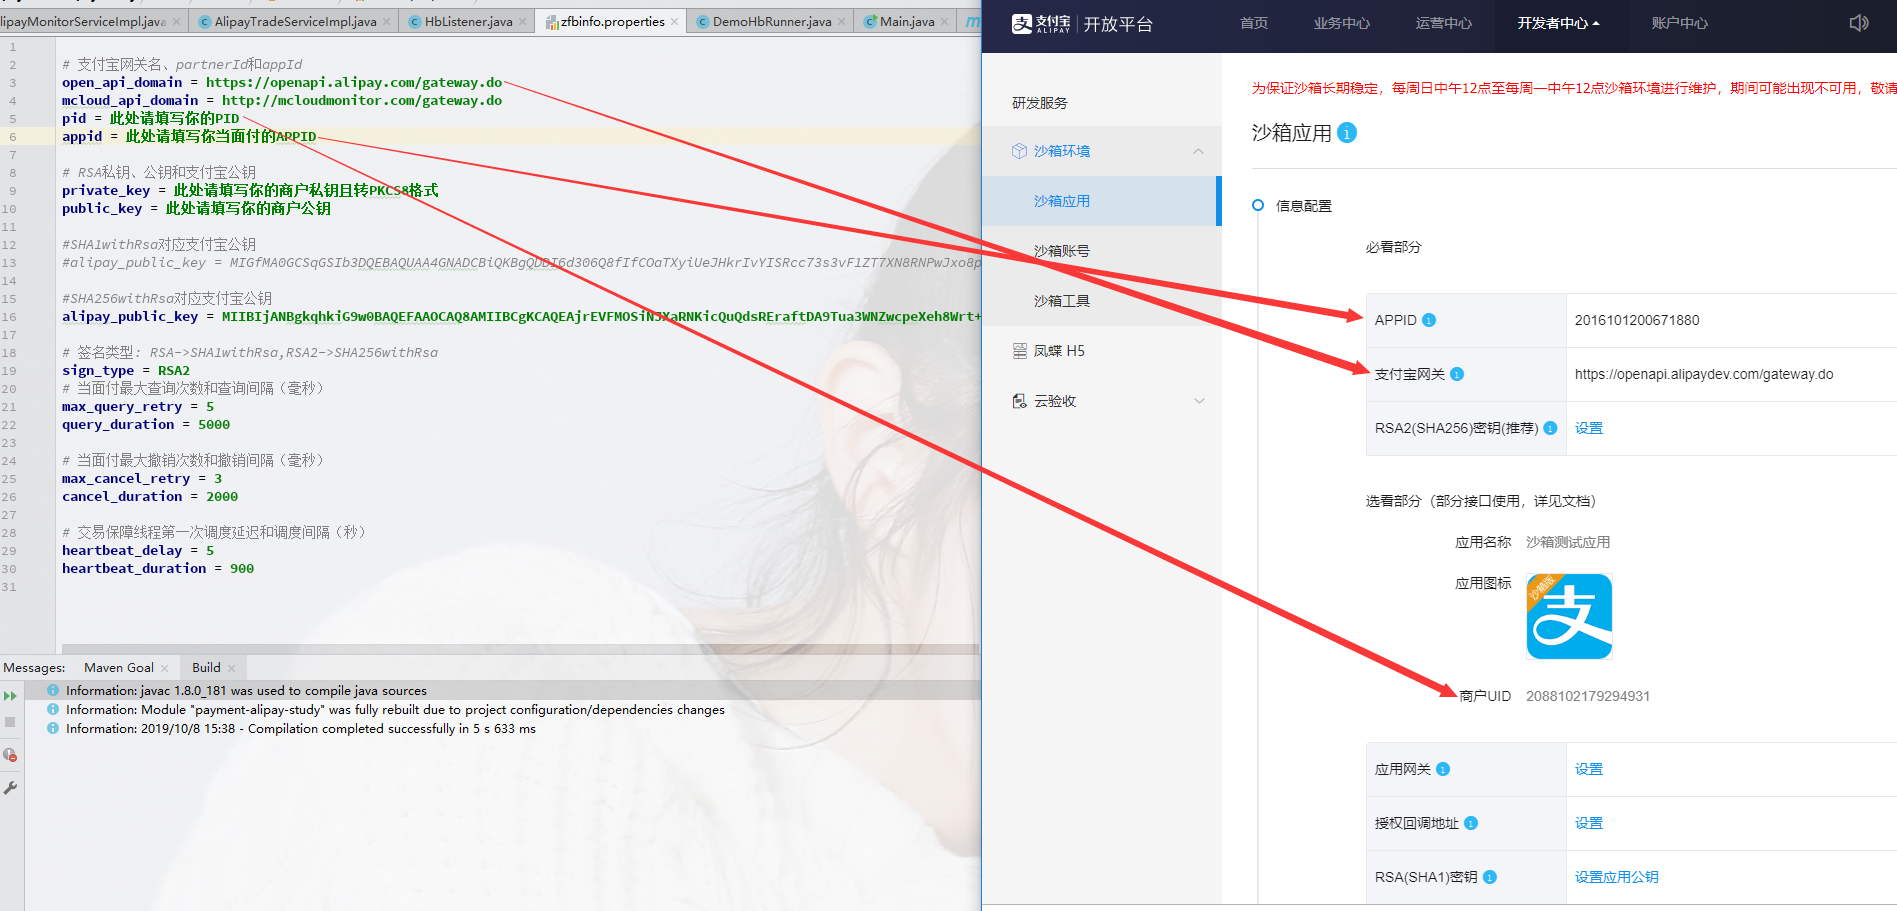
4.2 替换商家的appid(唯一),open_api_domain,以及pid信息
将项目中的配置文件中的三个属性按照下图来替换
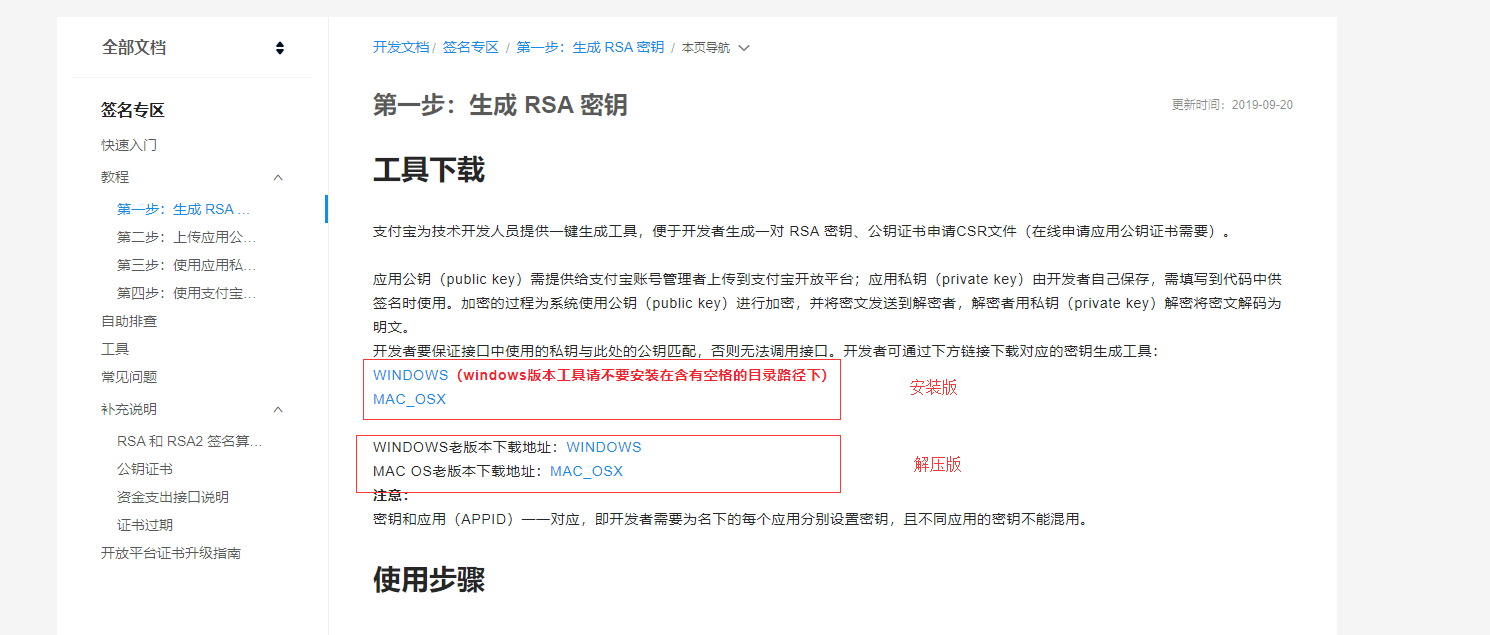
4.3 借助工具生成商家的公钥和私钥
工具地址:https://docs.open.alipay.com/291/105971
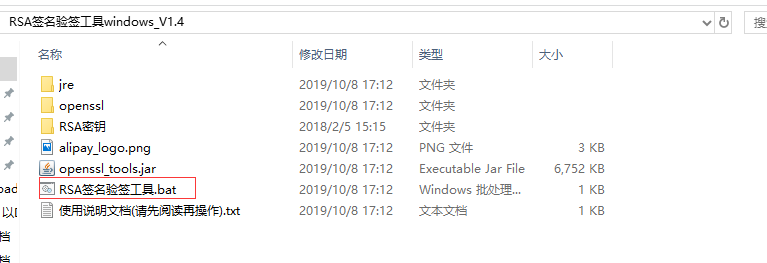
4.3.1 根据不同的操作系统选择对应的版本下载
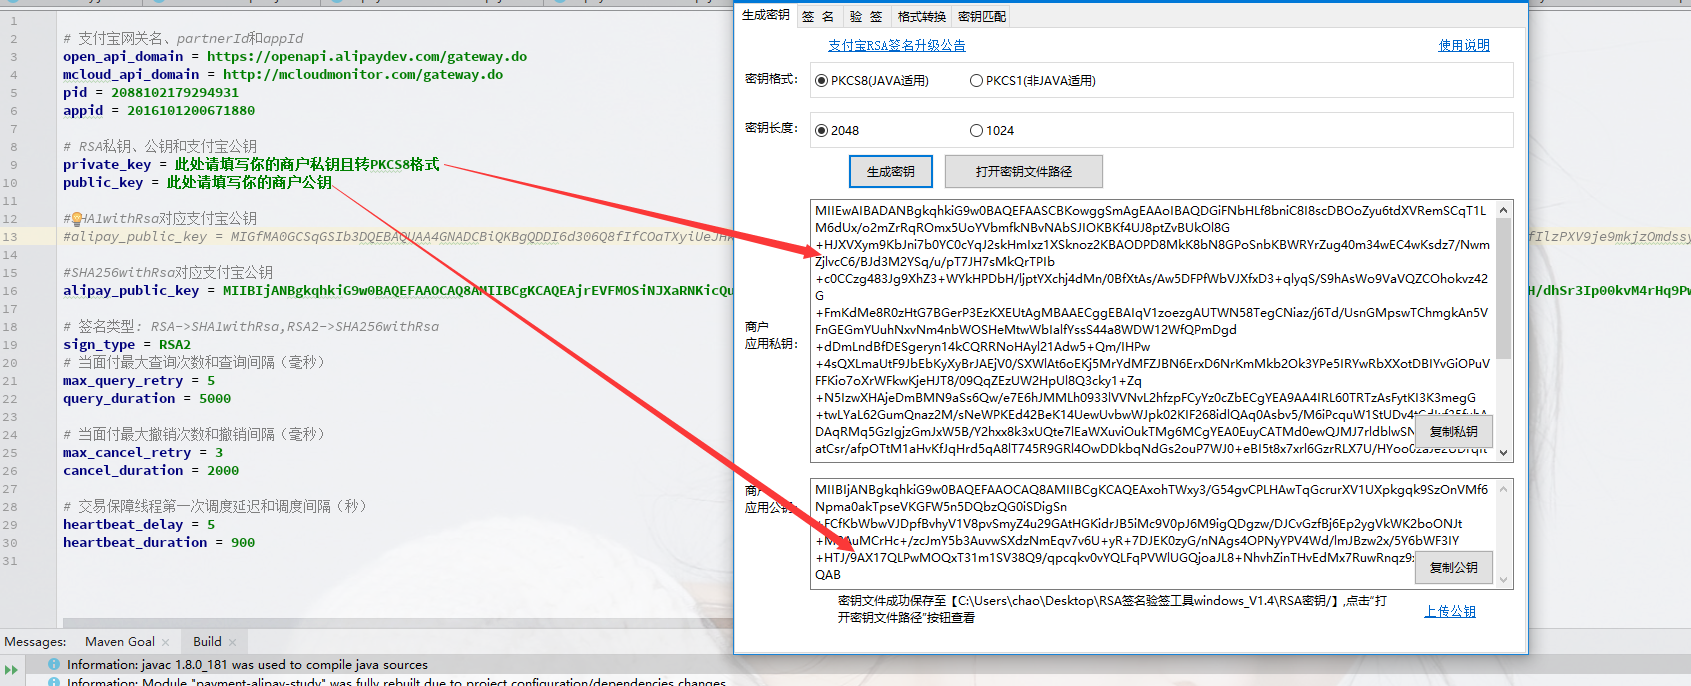
4.3.2 运行软件

4.3.3 替换配置文件中的商家的公钥和私钥
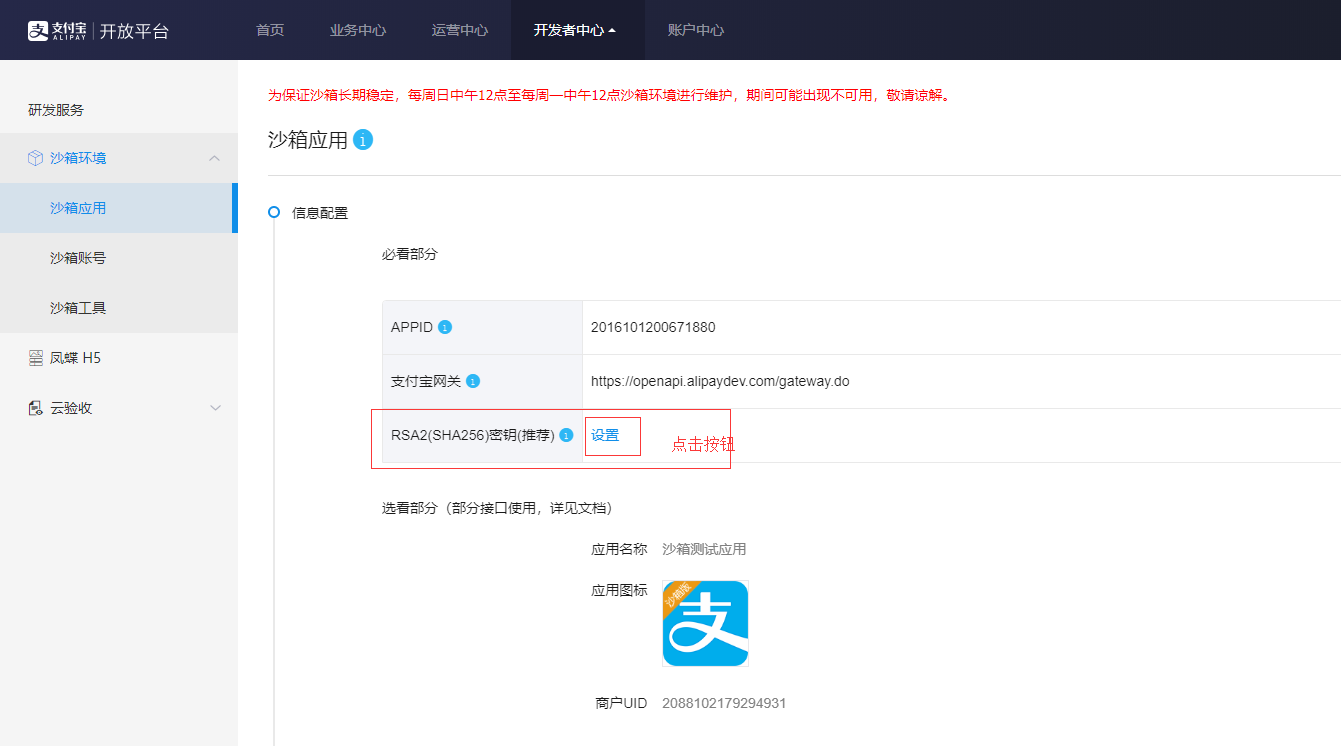
4.4 根据生成的商家的公钥生成对应的支付宝公钥
4.4.1 借助商家公钥生成支付宝公钥
处理地址:https://openhome.alipay.com/platform/appDaily.htm?tab=info
回到沙箱环境,点击 RSA2(SHA256)密钥(推荐) 属性的设置按钮,根据刚才生成的商家公钥来生成支付宝公钥信息,操作如下图:

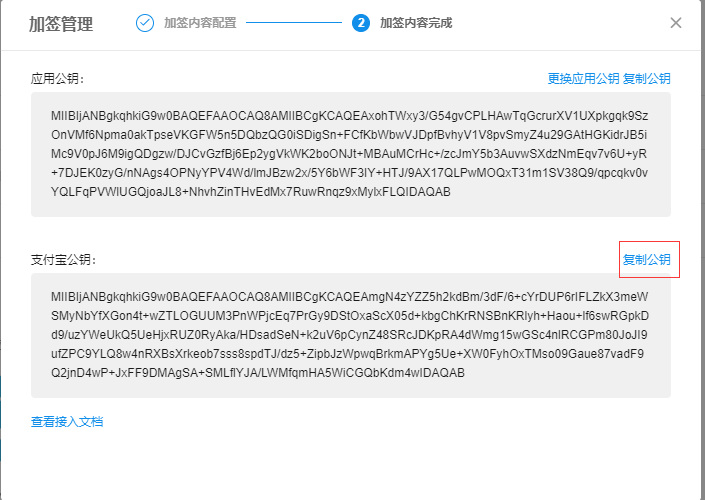
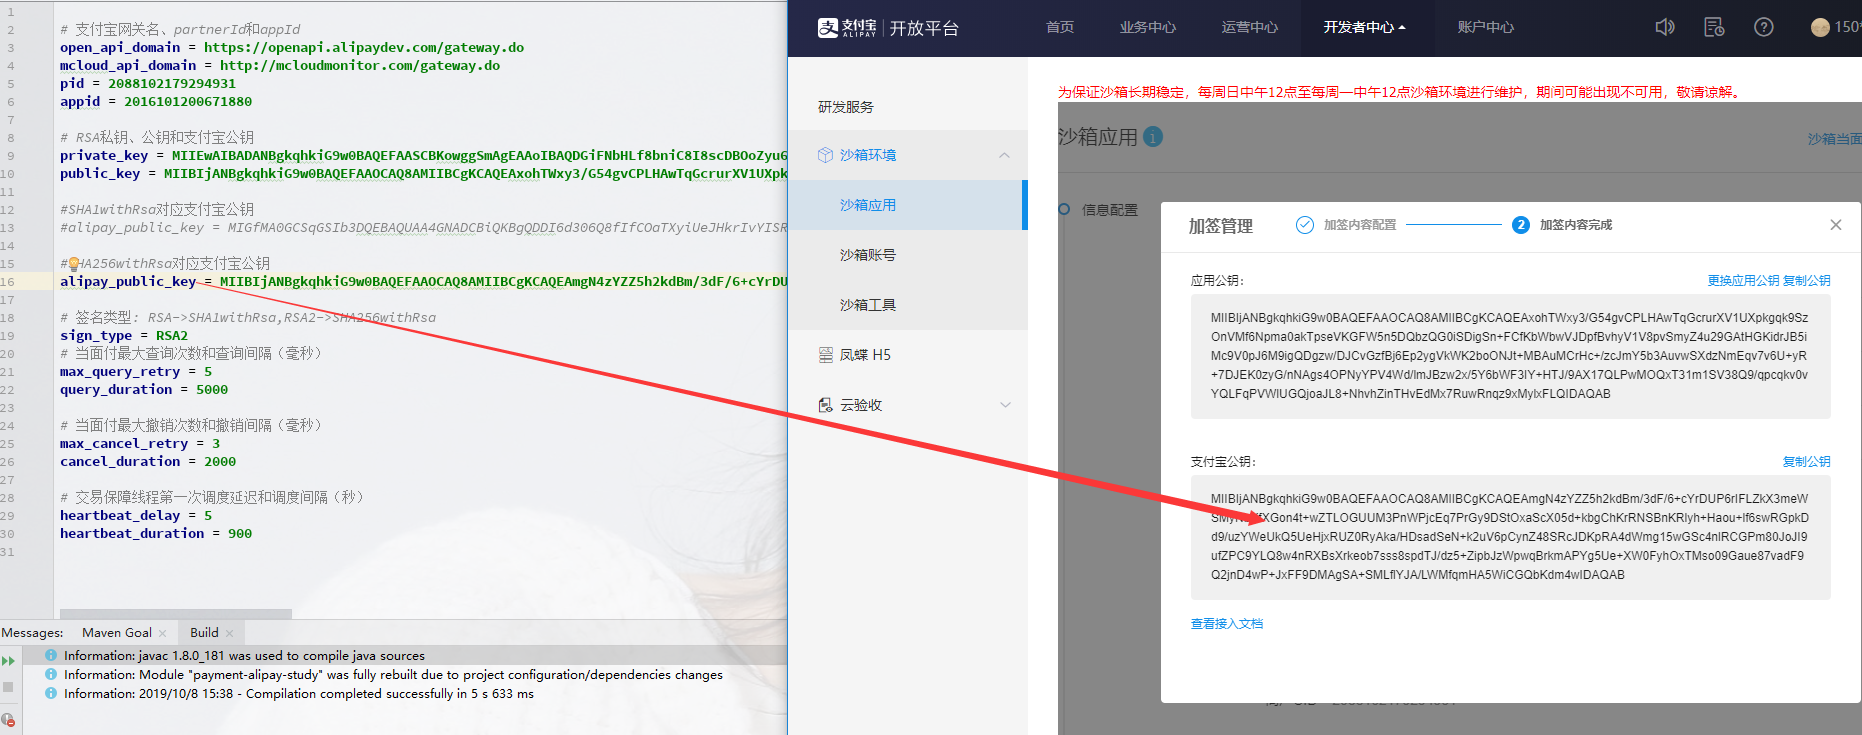
4.4.2 替换配置文件中的支付宝公钥信息
5. 沙箱环境下的支付宝软件
软件地址:https://openhome.alipay.com/platform/appDaily.htm?tab=tool
5.1 下载沙箱环境下的支付宝软件,目前只支持安卓系统
5.2 根据支付宝提供的买家信息登陆支付宝

6. 测试场景
6.1 测试生成支付二维码场景
6.1.1 修改二维码图片生成路径
打开工程中的Main这个类,进入 [test_trade_precreate()]方法中,修改二维码生成路径,修改自己指定的地址即可,
未修改前:
// 需要修改为运行机器上的路径
String filePath = String.format("/Users/sudo/Desktop/qr-%s.png",
response.getOutTradeNo());
修改后:
// 需要修改为运行机器上的路径
String filePath = String.format("D:/qrCode/qr-%s.png",response.getOutTradeNo());
6.1.2 开启生成二维码功能
修改完生成二维码图片路径后,发现生成二维码图片的功能被注释了,现在取消注释,开启功能。
未修改前:
//ZxingUtils.getQRCodeImge(response.getQrCode(), 256, filePath);修改后:
ZxingUtils.getQRCodeImge(response.getQrCode(), 256, filePath);6.1.3 测试程序
启动main方法,运行后发现成功的在指定目录下生成了支付二维码图片
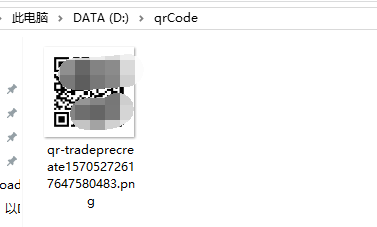
然后支付即可。