First, the system requirements
① Mirror: win10
②1C, 4G, 20G can
③ only host mode (shared card online)
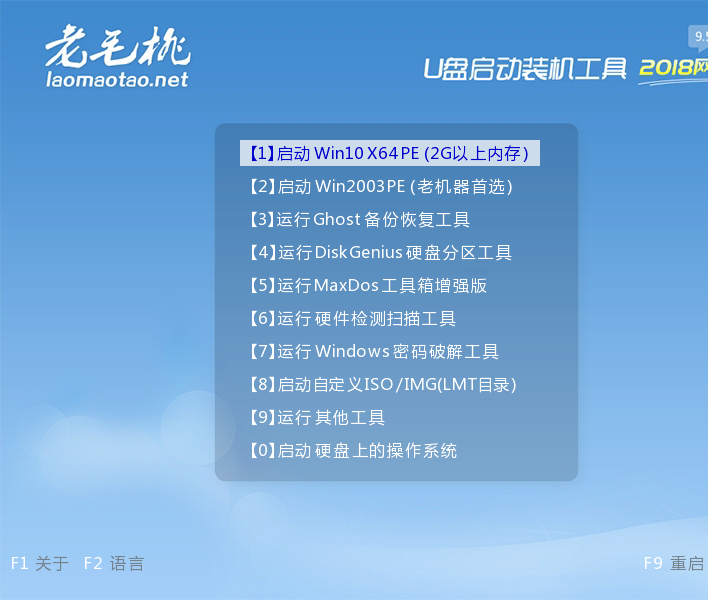
④ old peach PE
⑤ip is 192.168.66 segment (because other nodes K8S I also set up for the network segment) --- koolshare default is 192.168.1.1 ip
⑥ required image: https://pan.baidu.com/share/init?surl=qCoNCvcB5Sw16BJDtYlWFw , extraction code: cw1d
Second, build process
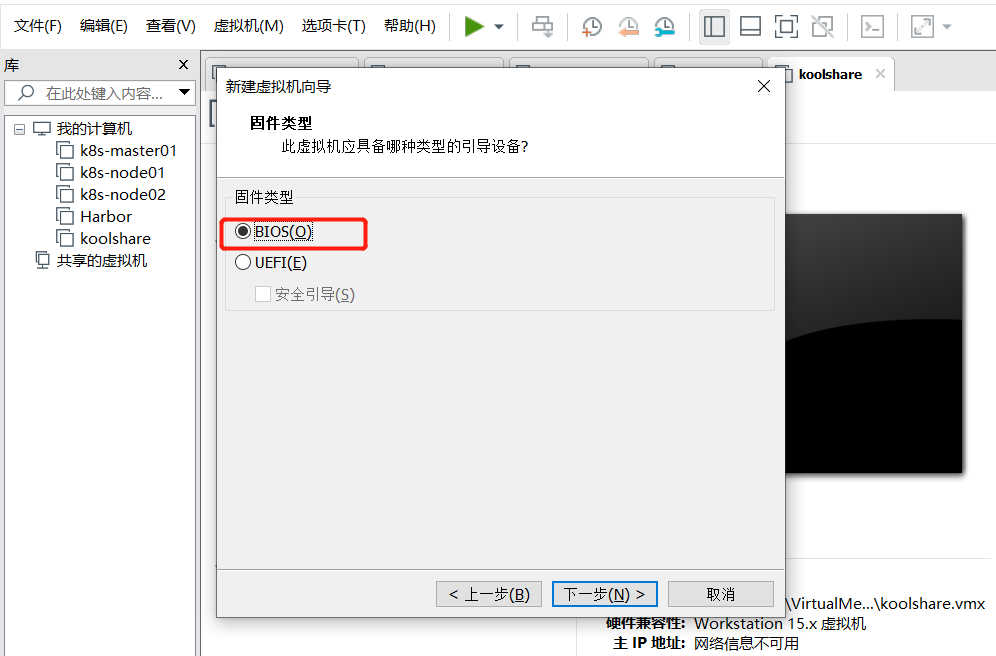
1, a new virtual machine, the system selects win10x64, the other the default, select the type of BIOS firmware
2, select only the type of network host mode (shared card online)

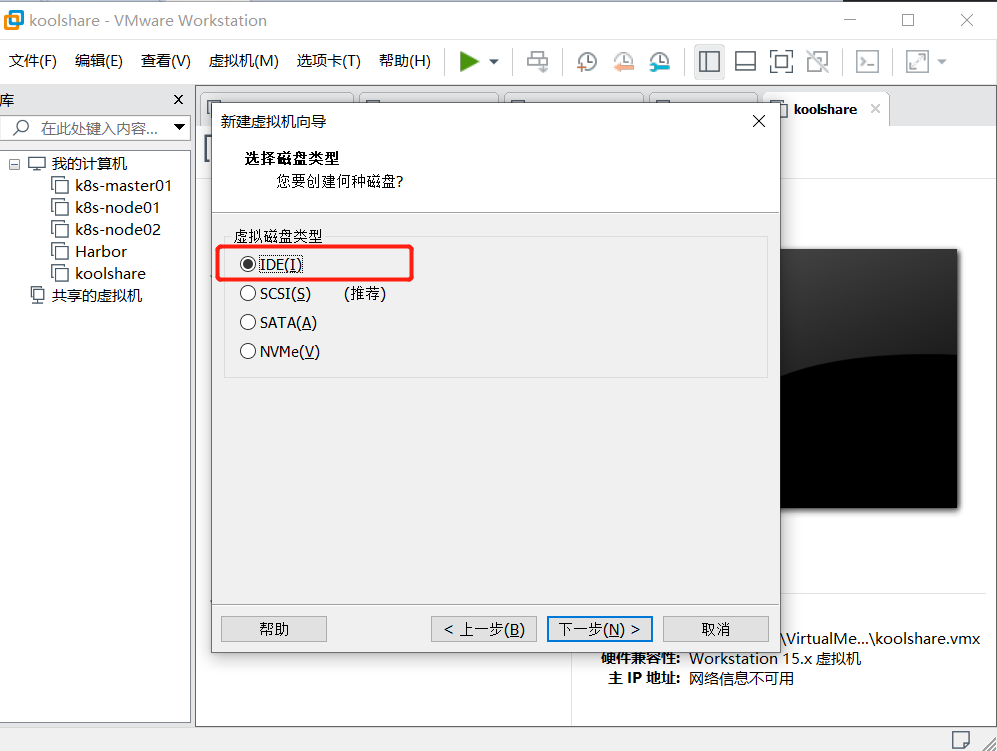
3, select the type of virtual disk IDE, other default can
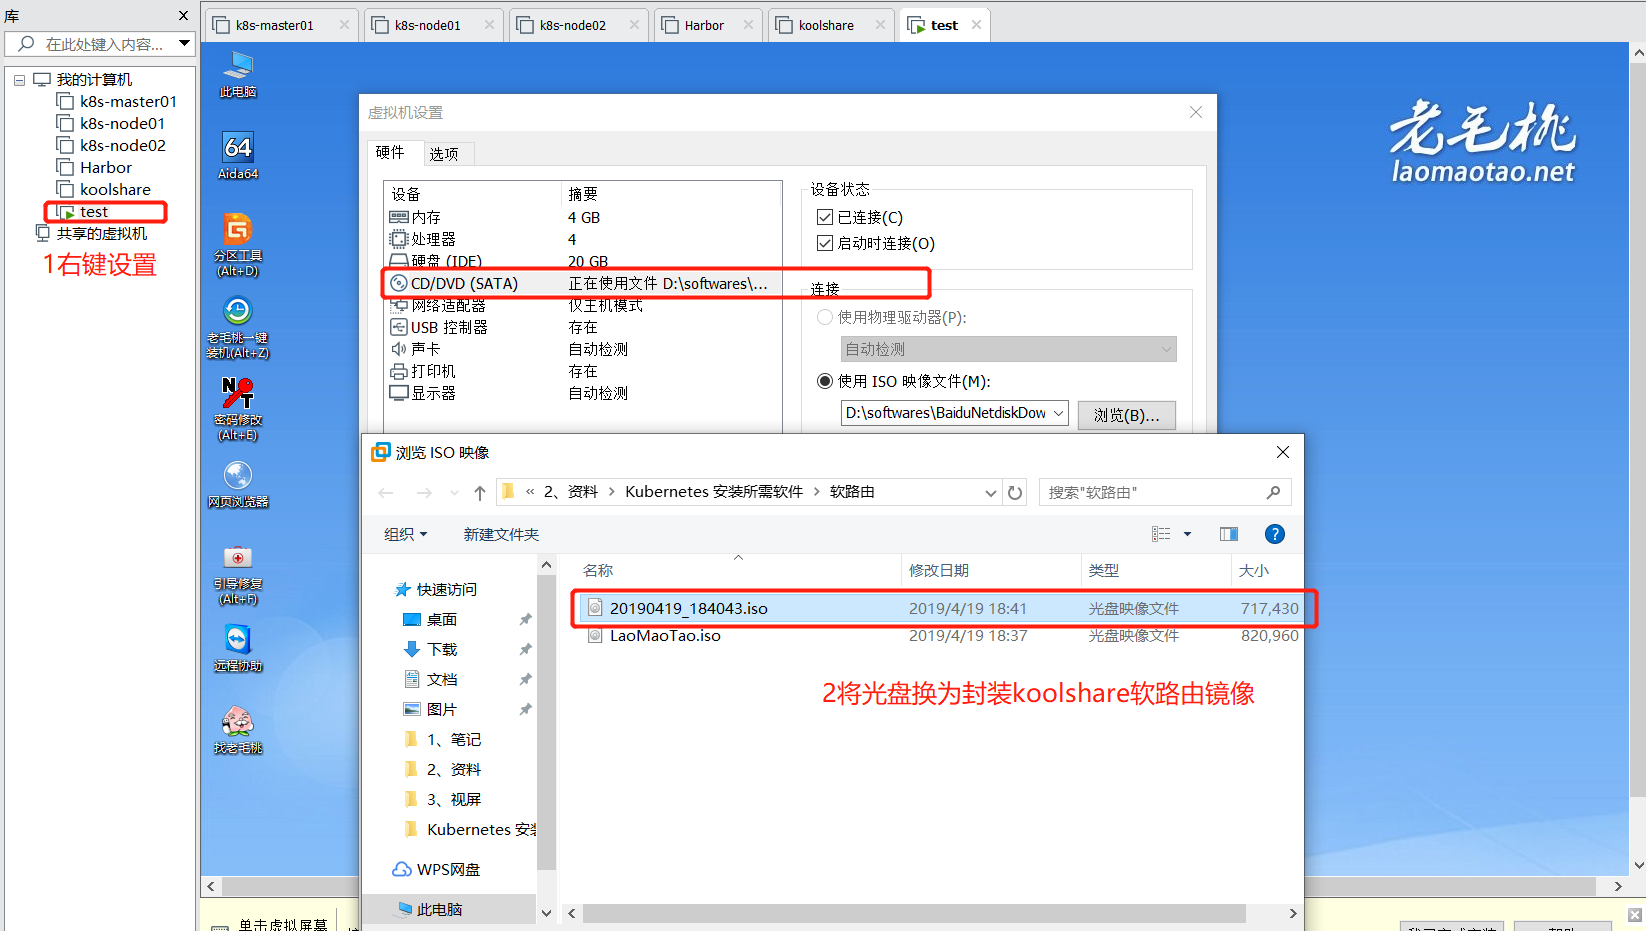
4. Edit virtual machine settings, CD / DVD to select old peach PE and open the virtual machine
5, select the first boot
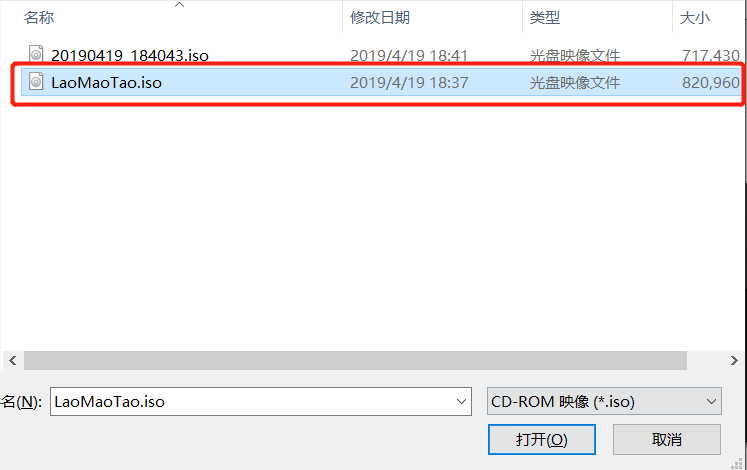
6, into the desktop, the CD / DVD package replaced the koolshare routing software mirroring, click OK, open the computer (without rebooting)
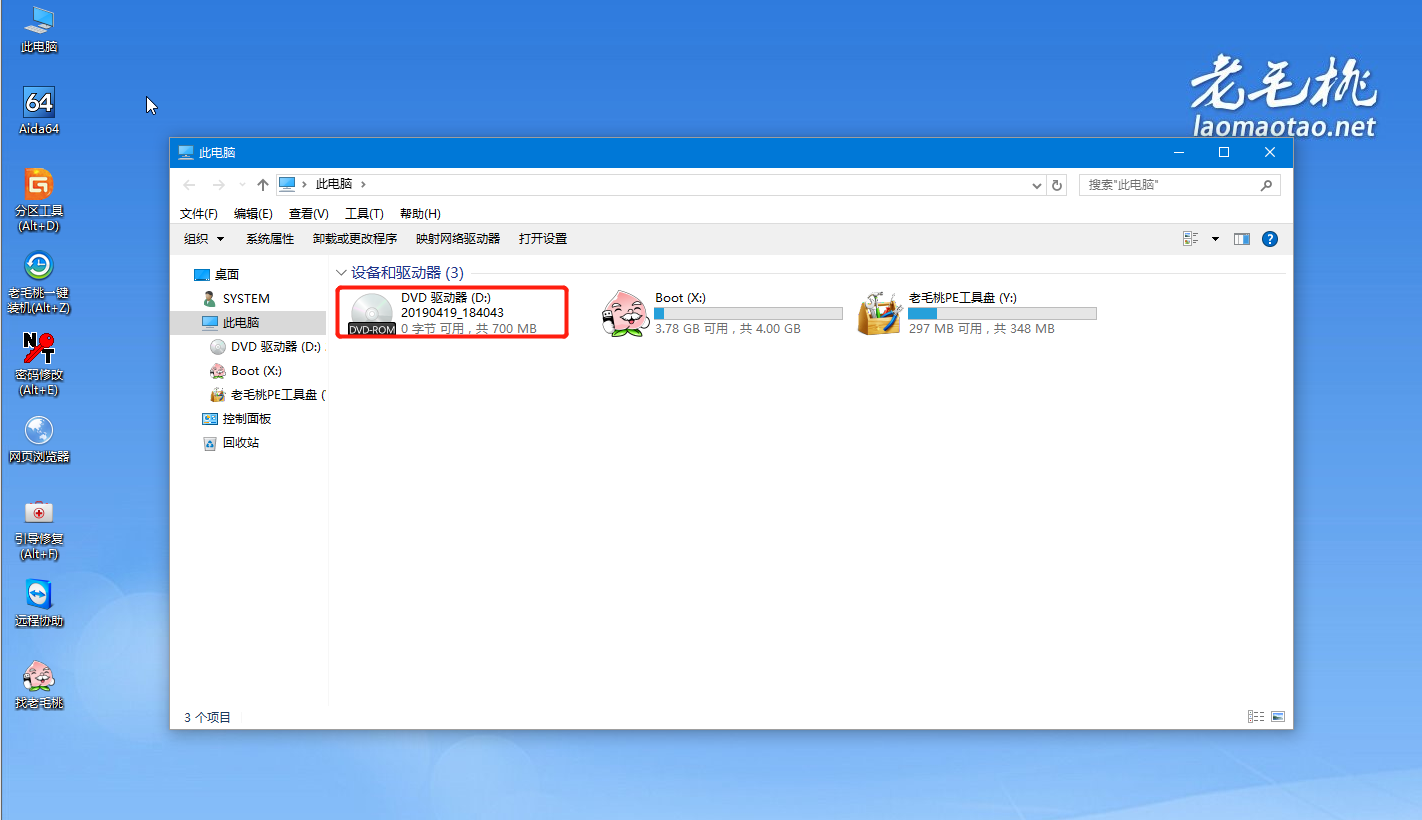
7, open the computer, continue to open the DVD drive
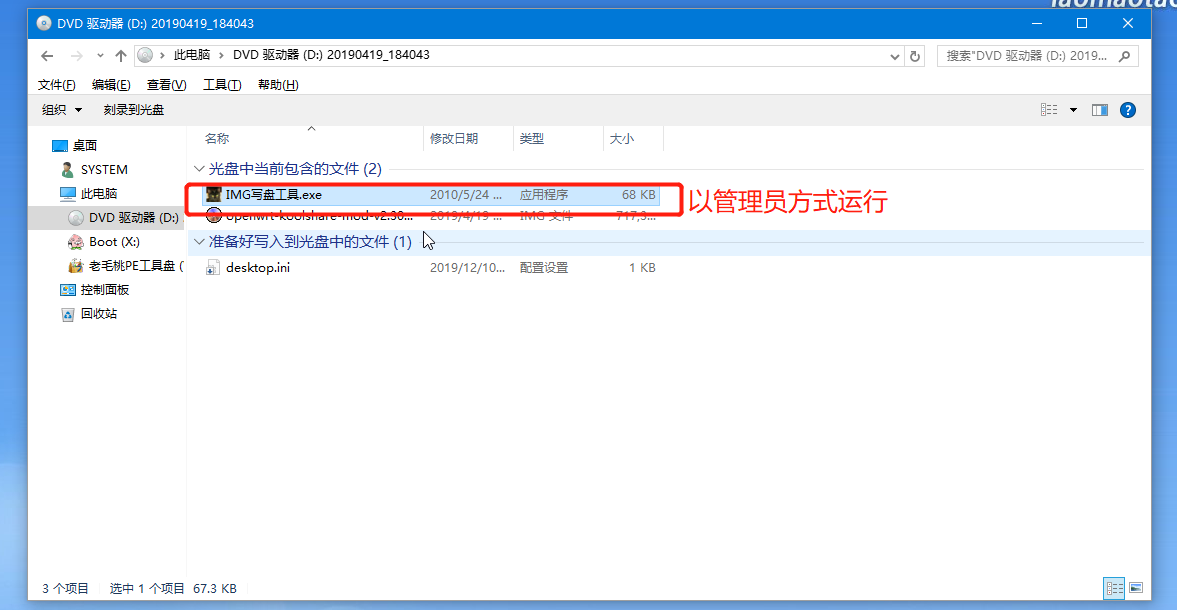
8, as an administrator to run the .exe write disk tool
9, open the routing software img file
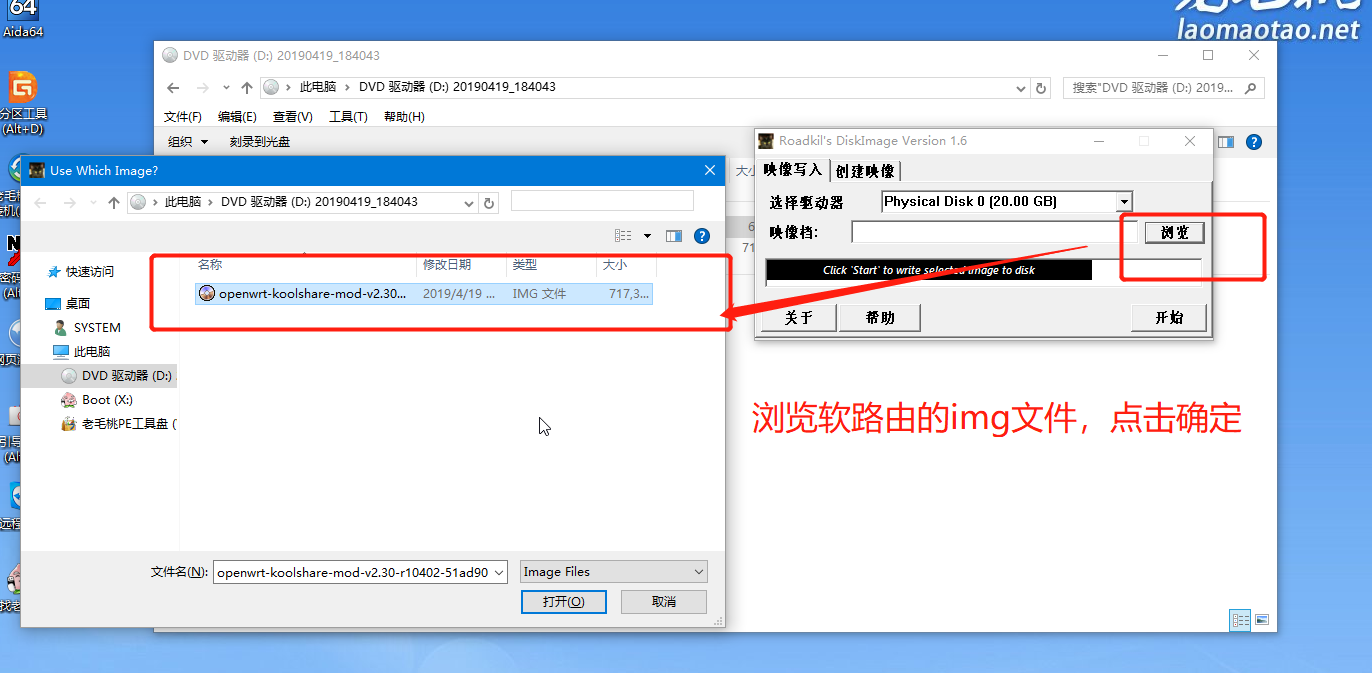
10, click Start, written to disk, wait for the completion of the write image
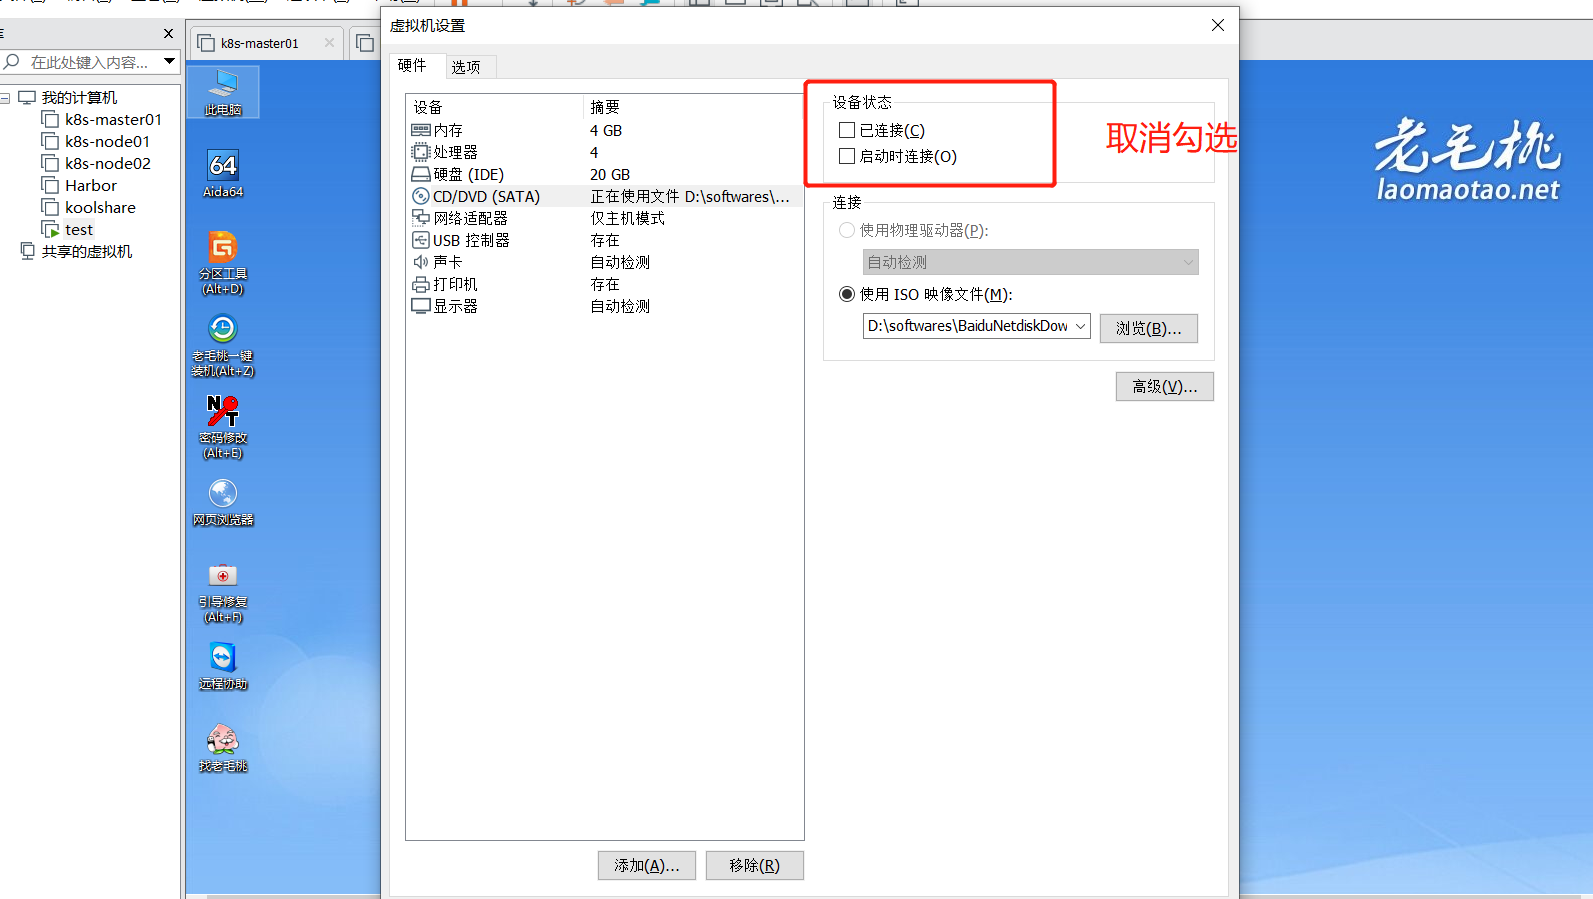
11, the virtual machine settings: CD / DVD uncheck device status, click OK
12, off, adjust the resource status: 1C, 1G and add a NIC NAT mode selection
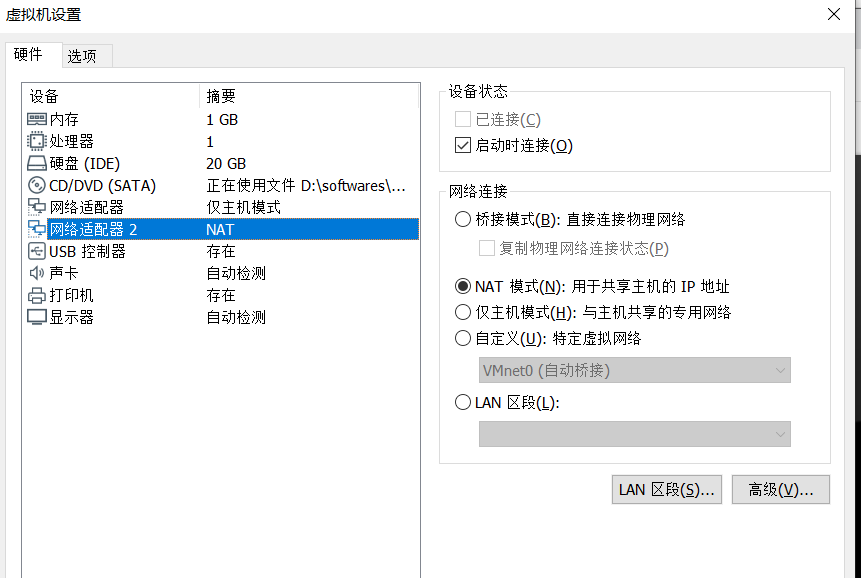
NOTE: NAT mode the card for sharing Internet host IP; only the master node of the Ethernet adapter for connecting K8S
13, turn on the virtual machine, koolshare default IP address is 192.168.1.1, so only need to modify the host card configuration mode
13.1 Viewing Virtual Network Editor, uncheck dhcp, click OK
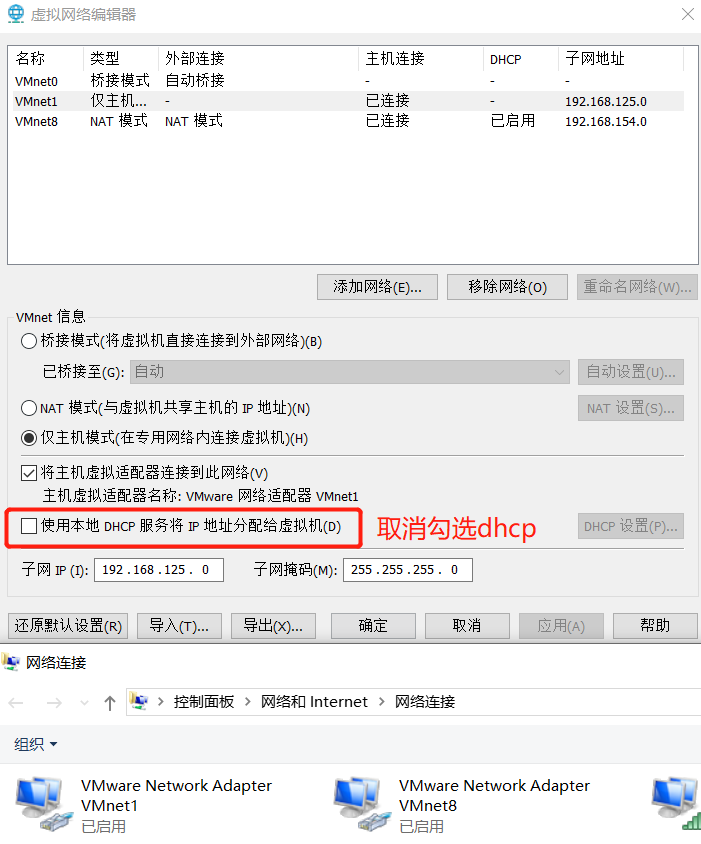
13.2 select the host mode corresponding card only, I have here is VMnet1, so configure
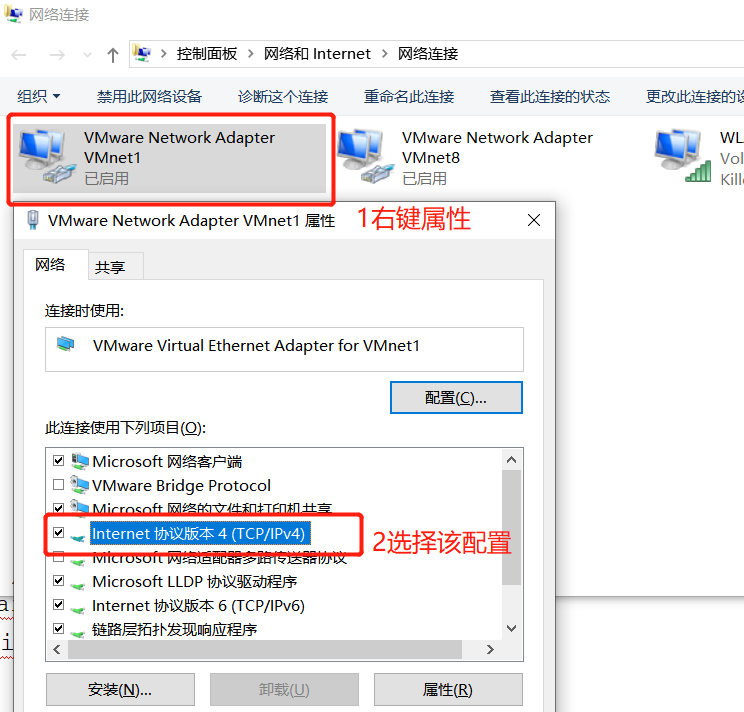
13.3, select Advanced, two new 192.168.1.240/192.168.66.240 IP with a network card, and finally click OK to

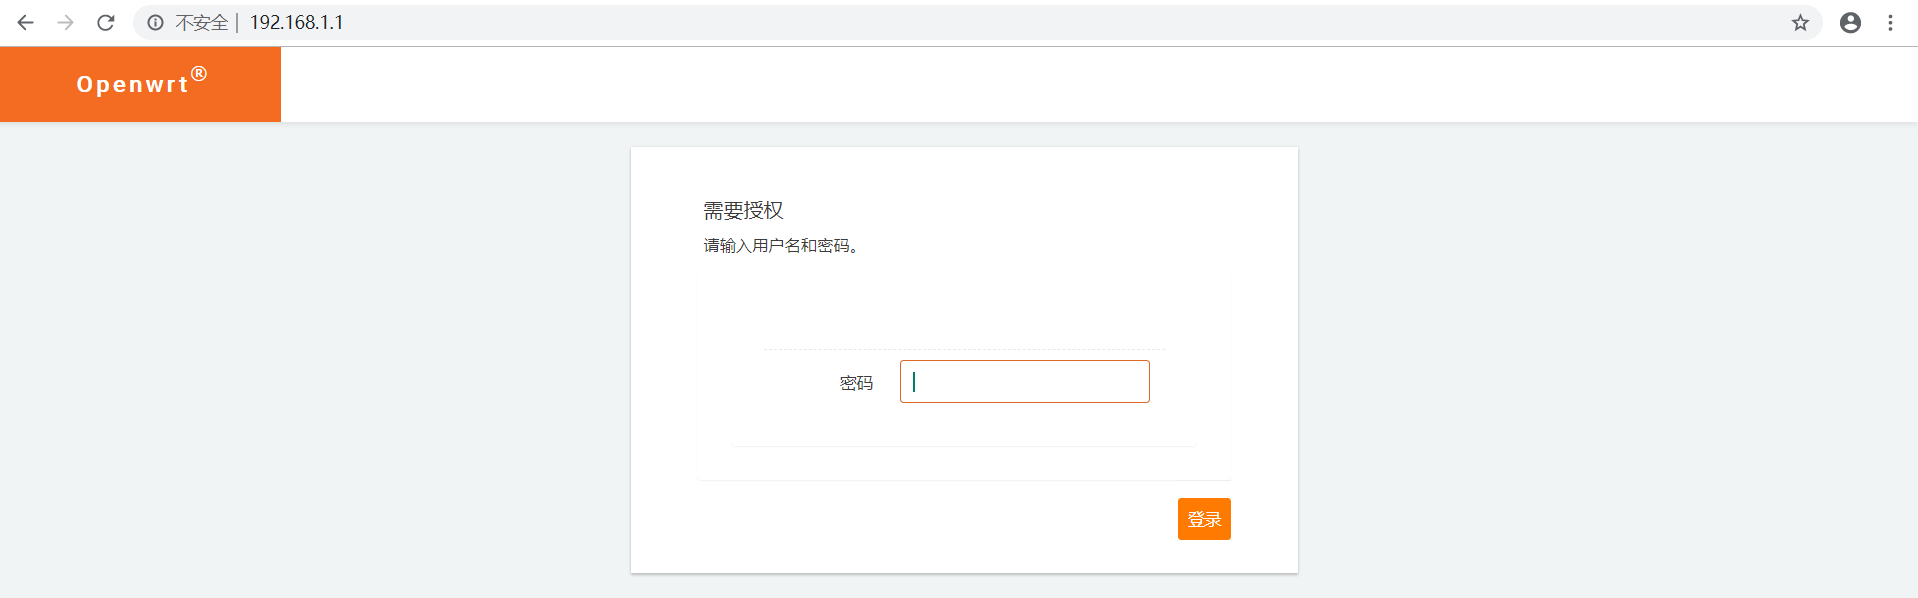
13.4, browser access: http://192.168.1.1/ , Password: koolshare
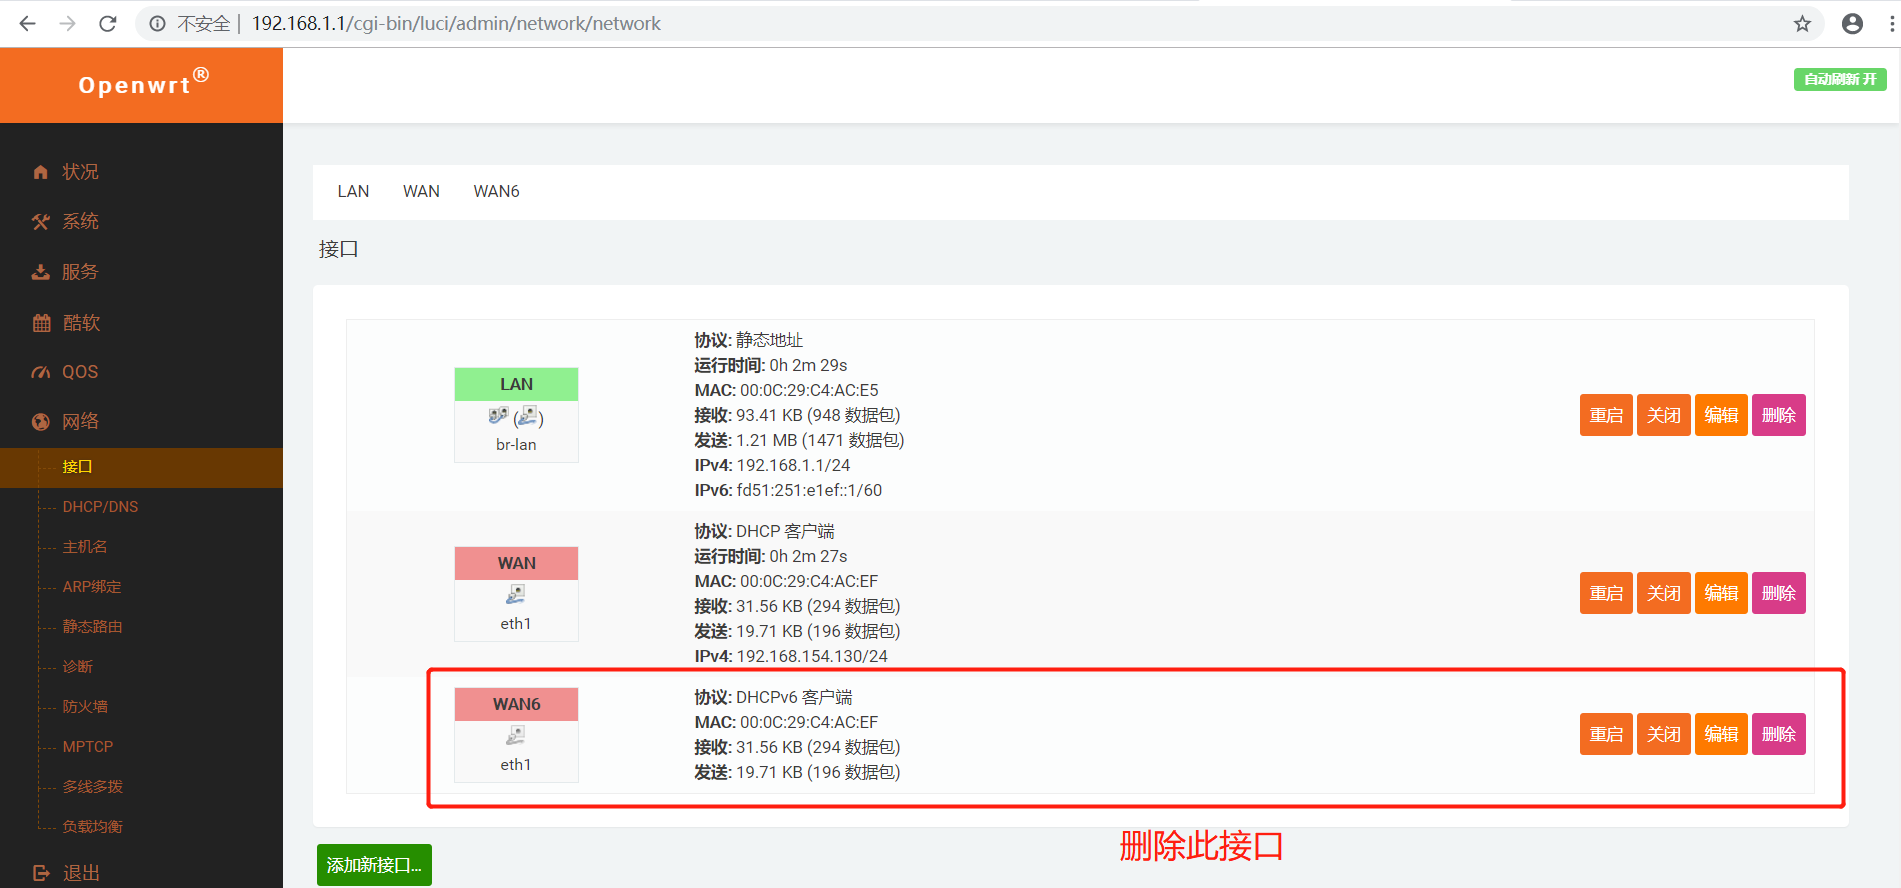
13.5、点击网络->接口,删除以下内容
13.6、编辑:LAN接口,点击物理设置,点击保存并应用

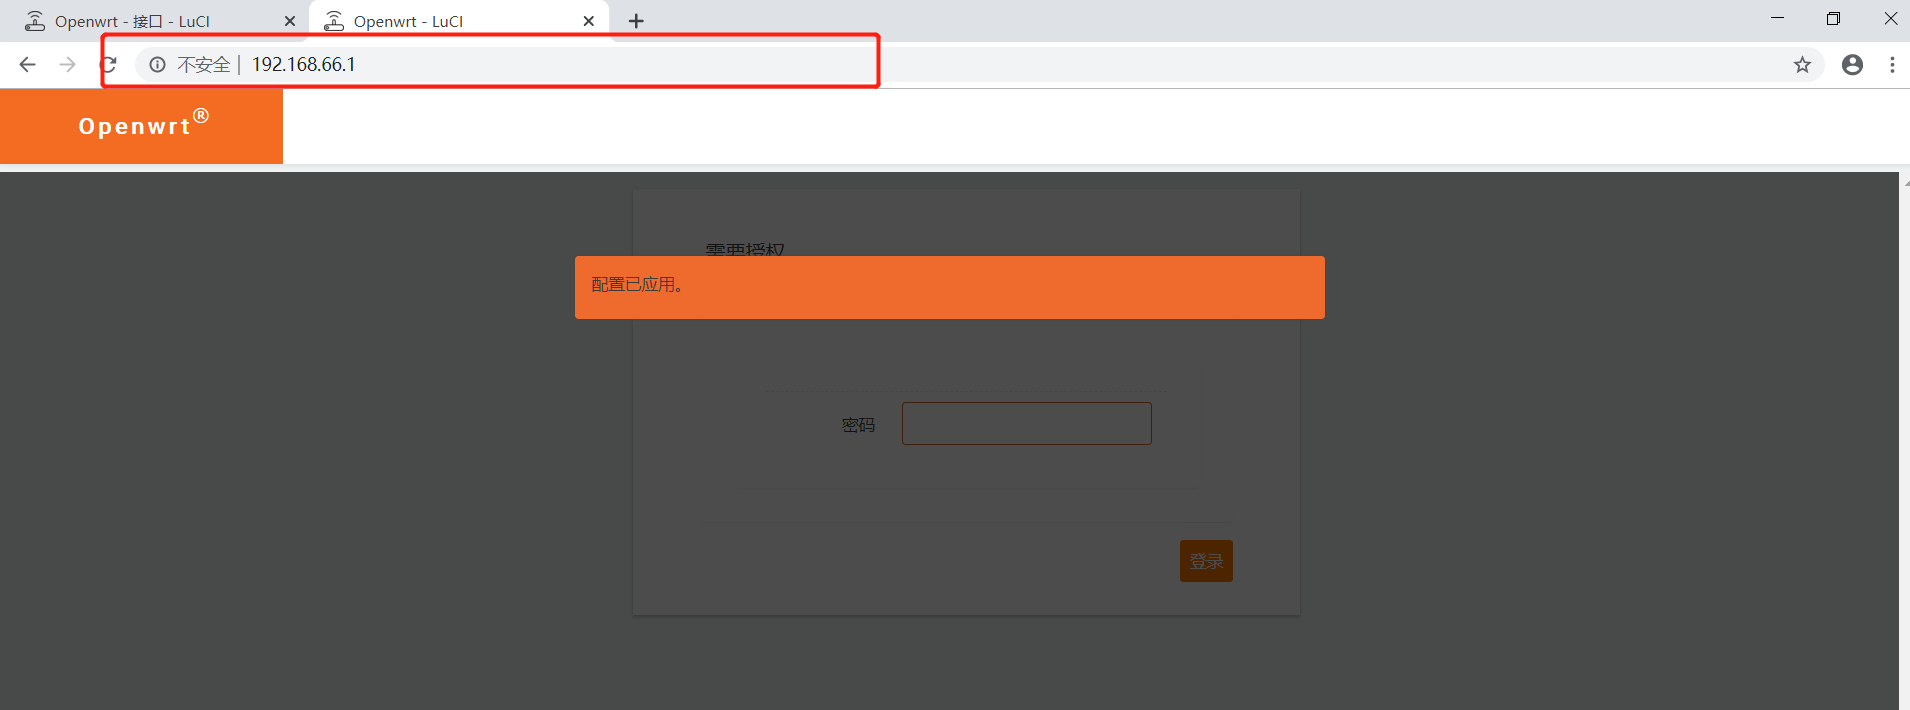
13.7、编辑LAN接口:基本设置,修改IPv4地址为开局指定的66网段,保存并应用

13.8使用新IP访问:http://192.168.66.1/,出现以下界面说明网段修改成功。
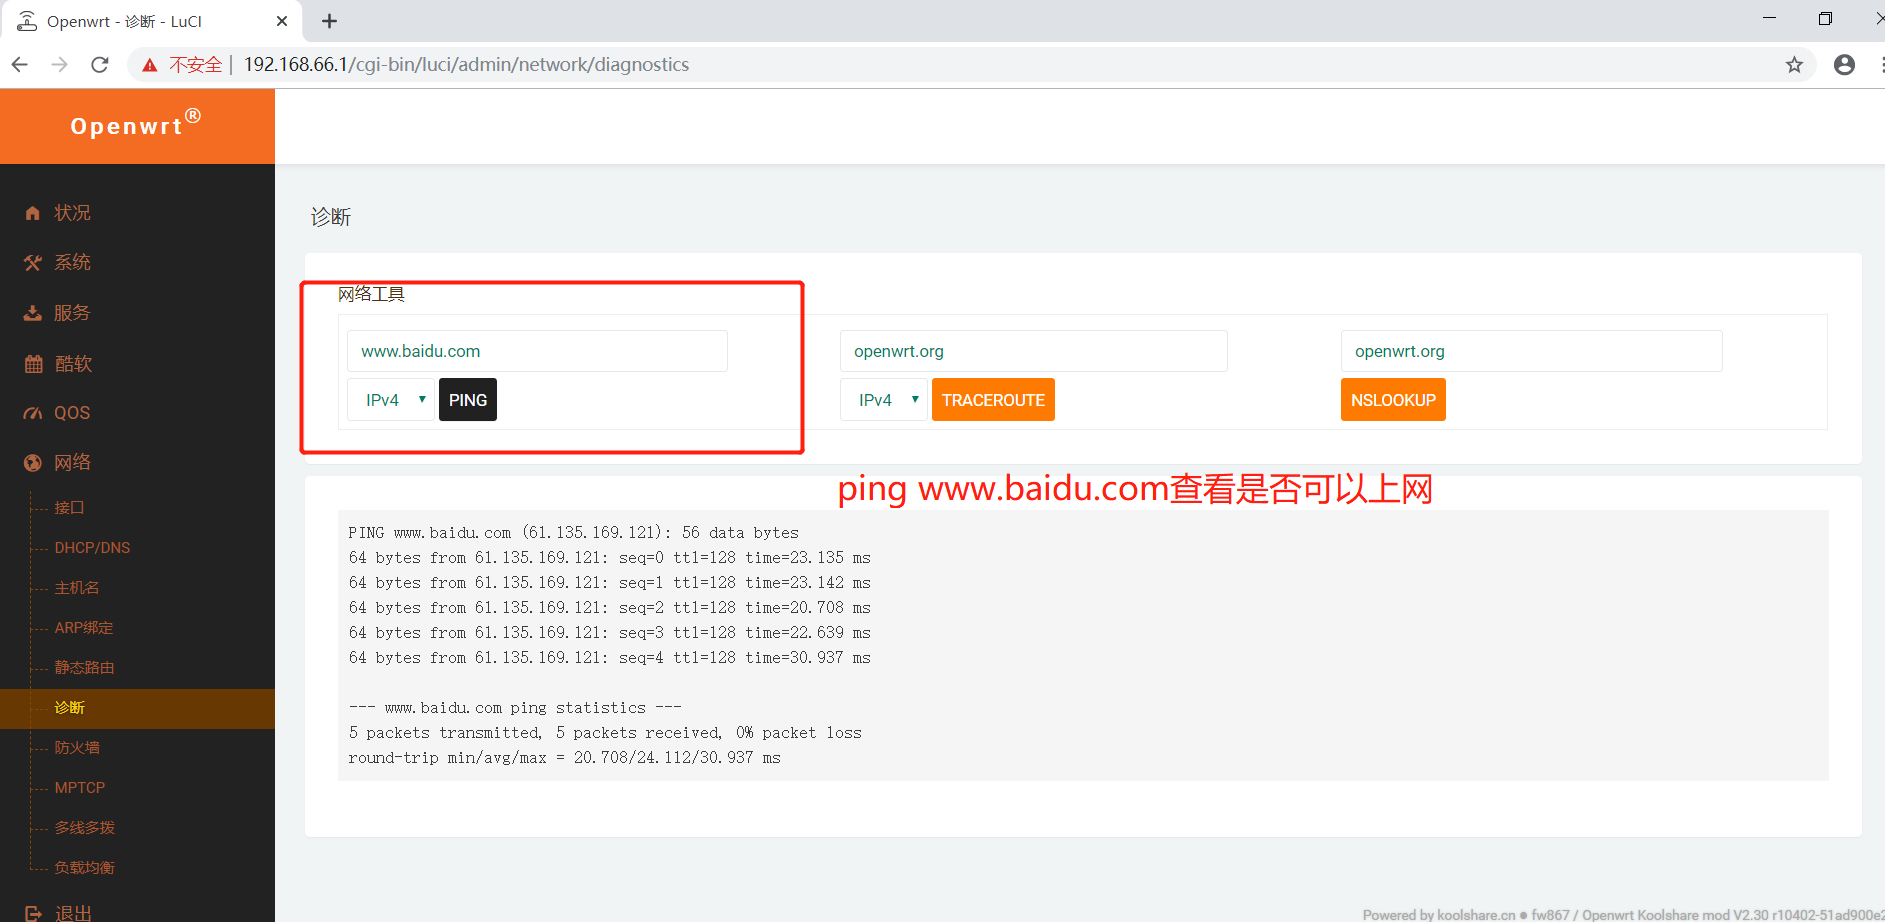
13.9诊断查看是否可以上网
注:如果想访问国外,点击酷软菜单进行kexue上网配置即可。
至此,koolshare软路由搭建完成。