1 Overview
Because use spring boot, just recently learning. This is a simple example of a web project with mysq + Hibernate + tomcat's demo, it is easy to expand into their projects on this basis.
2. Create an initial spring demo
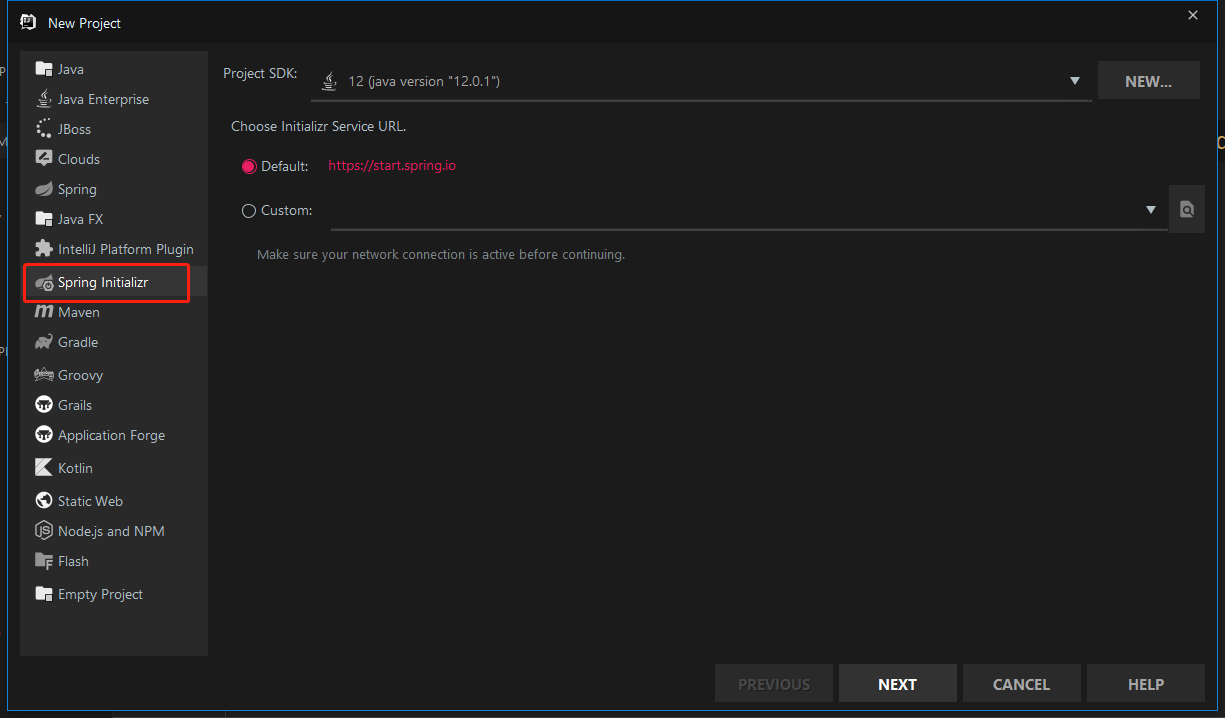
The authors used the IDE is IDEA, create a new project, select Spring Initalizer.
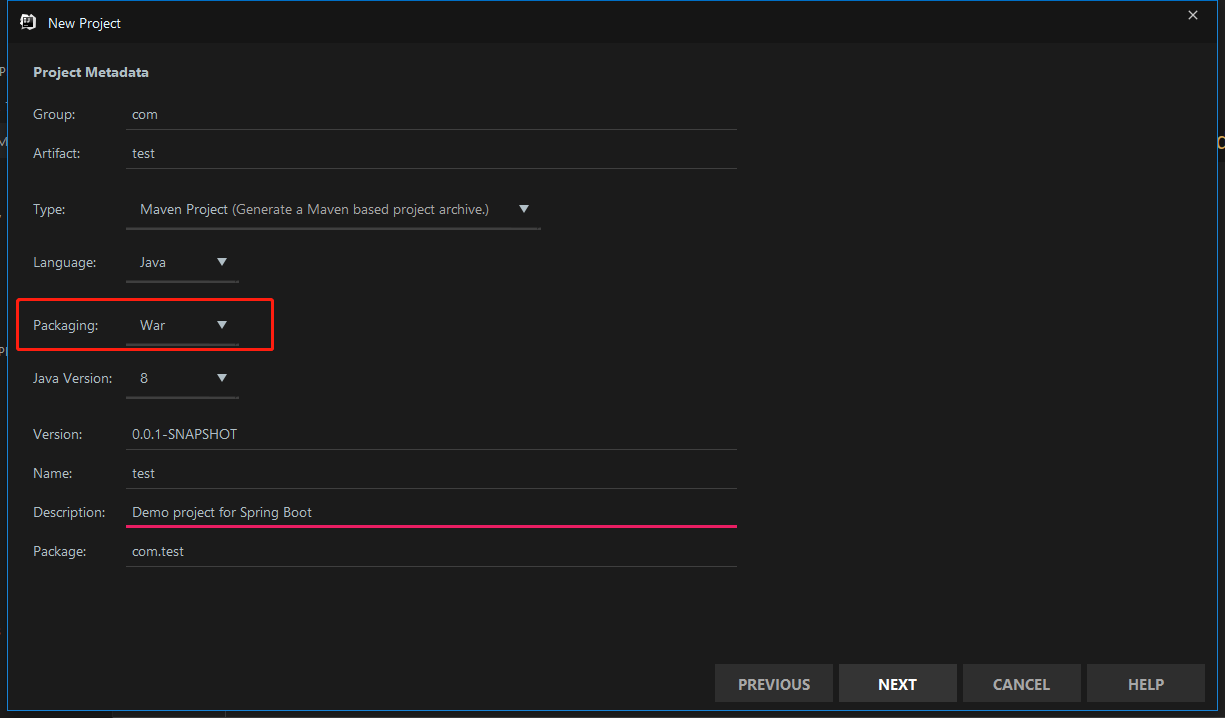
The next step, then as the author of the above need to be deployed to the server, select the war. Do not need, then you can choose jar.
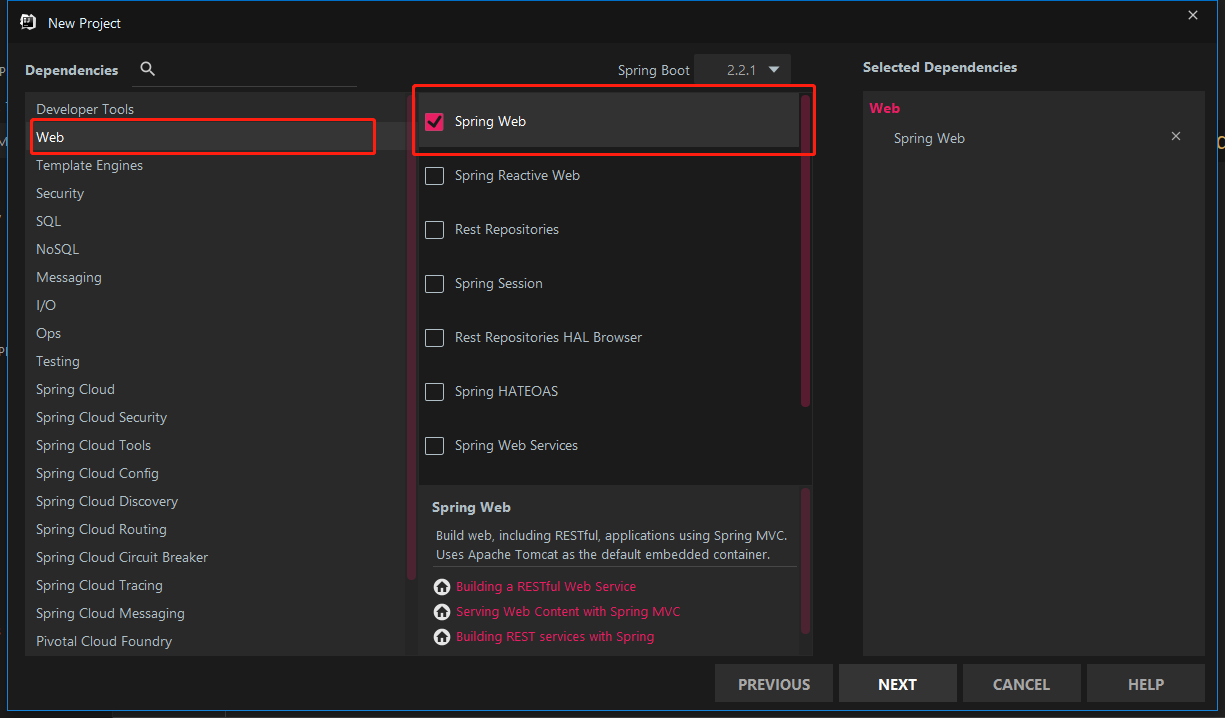
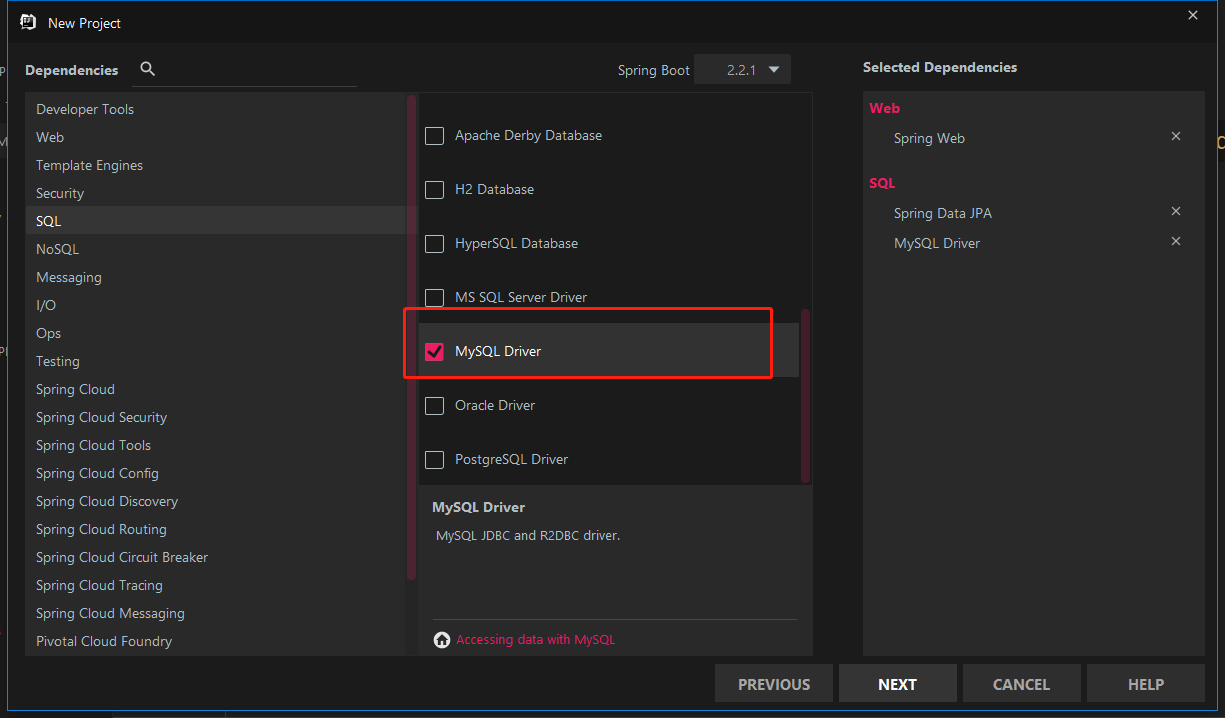
Select the spring web + spring Data JPA + Mysql Driver.

Then you can complete, if the first-run configuration relies take a little time, please be patient.
Configuration data source
Configuration data source is divided into two parts, is built with the user to build the table, the other part is disposed in the application.properties.
(1) building a database
create database test;Note that do not create a table, because Hibernate automatically create a table of the same name from the entity classes.
(2) build user
create user 'db'@'%' identified by 'xxxxx';(3) User Authorization
grant all on test.* to 'db'@'%';It is recommended that authorized all, because behind Hibernate will be used to build tables authority, not just authorize additions and deletions to change search.
(4) arranged application.properties
Configuration four properties:
spring.jpa.hibernate.ddl-auto=
spring.datasource.url=
spring.datasource.username=
spring.datasource.password=
The first property is the value
- none
- update
- create
- create-drop
a.none
none is the default for mysql will not change the database structure.
b.update
Hibernate will change the database according to the given entity class.
c.create
Create a database but not deleted when it is closed.
d.create-drop
Create a database, delete the database when the SessionFactory is closed. This is the default option for H2 and other embedded databases.
The first run must be set to update or create, because do not know the exact type of entity, after the first run, can be set to update or none.
Url if it is for mysql
jdbc:mysql://ip:3306/database剩下的两个为用户名与密码.
以下是作者的配置,供参考:

4.创建实体类
这里创建一个简单的User实体类,需要用到javax中的Entity,Id,GeneratedValue与GenerationType注解.
Entity用于标识实体类,Id用于标识主键,GeneratedValue与GenerationType用于配置主键.
package com.test;

import javax.persistence.Entity;
import javax.persistence.GeneratedValue;
import javax.persistence.GenerationType;
import javax.persistence.Id;

@Entity
public class User {
    @Id
    @GeneratedValue(strategy = GenerationType.AUTO)
    private Integer id;
    private String name;

    public Integer getId() {
        return id;
    }

    public void setId(Integer id) {
        this.id = id;
    }

    public String getName() {
        return name;
    }

    public void setName(String name) {
        this.name = name;
    }
}
除了主键之外,可以加上自己想要的属性,还有setter与getter,Hibernate会自动将实体类制作成一个数据表.
5.创建Repository
创建仓库保存用户记录.需要继承CrudRepository<T,ID>,第一个类型为实体类,第二个类型为主键类型.
package com.test;

import org.springframework.data.repository.CrudRepository;

public interface UserRepository extends CrudRepository<User,Integer>
{
}
6.创建控制器
控制器用于控制Http请求,在控制器中可以配置不同的路径实现不同的操作.
package com.test;

import org.springframework.beans.factory.annotation.Autowired;
import org.springframework.stereotype.Controller;
import org.springframework.web.bind.annotation.*;

@Controller
@RequestMapping(path = "/demo")
public class MainController {
    @Autowired
    private UserRepository userRepository;

    @PostMapping(path = "/add")
    public @ResponseBody String addNewUser(@RequestParam String name)
    {
        User user = new User();
        user.setName(name);
        userRepository.save(user);
        return "Saved.";
    }

    @GetMapping(path = "/all")
    public @ResponseBody Iterable<User> getAllUsers()
    {
        return userRepository.findAll();
    }
}
@RequestMapping中的值表示url以此值开头.
@PostMapping是仅处理post请求的路径.
@ResponseBody表示返回的类型.
@RequestParam表示一个从get或post中获取的参数.
getAllUsers()会返回一个json或者xml.
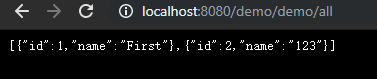
7.IDE上测试
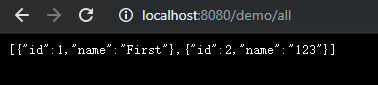
首先输入
localhost:8080/demo/all由于作者先前已经有一行数据所以有显示.

否则的话应该显示为[]
接下来可以添加数据:
curl localhost:8080/demo/add -d name=123回应:

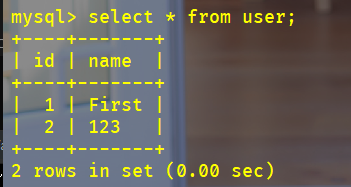
接下来可以选择再次查看:
在看看数据库:
8.打包发布
Build-> Build Artifacts.

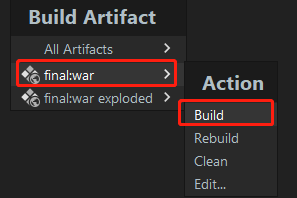
Build can be.
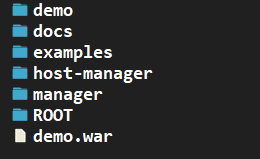
Then there will be a test-0.0.1-xxx war file in the target directory of the project, this is a.

Change the name into tomcat's webapps / under, such as author changed demo.war:
then you can go visit, note the path, the path here is the path plus the path of war in @RequestMapping plus @PostMapping or @GetMapping path:
complete!