First talk about the general idea:
1. password CentOS system
2. Configure ssh
3. xshell generated secret key
4. Free-tight login
Software, equipment:
xshell ( Download (free version) , you can also download their own Baidu)
CentOS7.5 (Baidu cloud server)
Then get down to business:
1. The password for the remote connection CentOS
Open xshell - File - New, the following interface will pop up

Explain where there needs to be modified
- Name: To distinguish the server, the name just play
- Protocol: default ssh just fine
- IP address of the machine where the CentOS system: Host
- Port: Default 22 can
- Reconnect: the need to be checked, after accidentally disconnected, xshell will automatically reconnect
Select <User Authentication> in the directory on the left, the following screen display
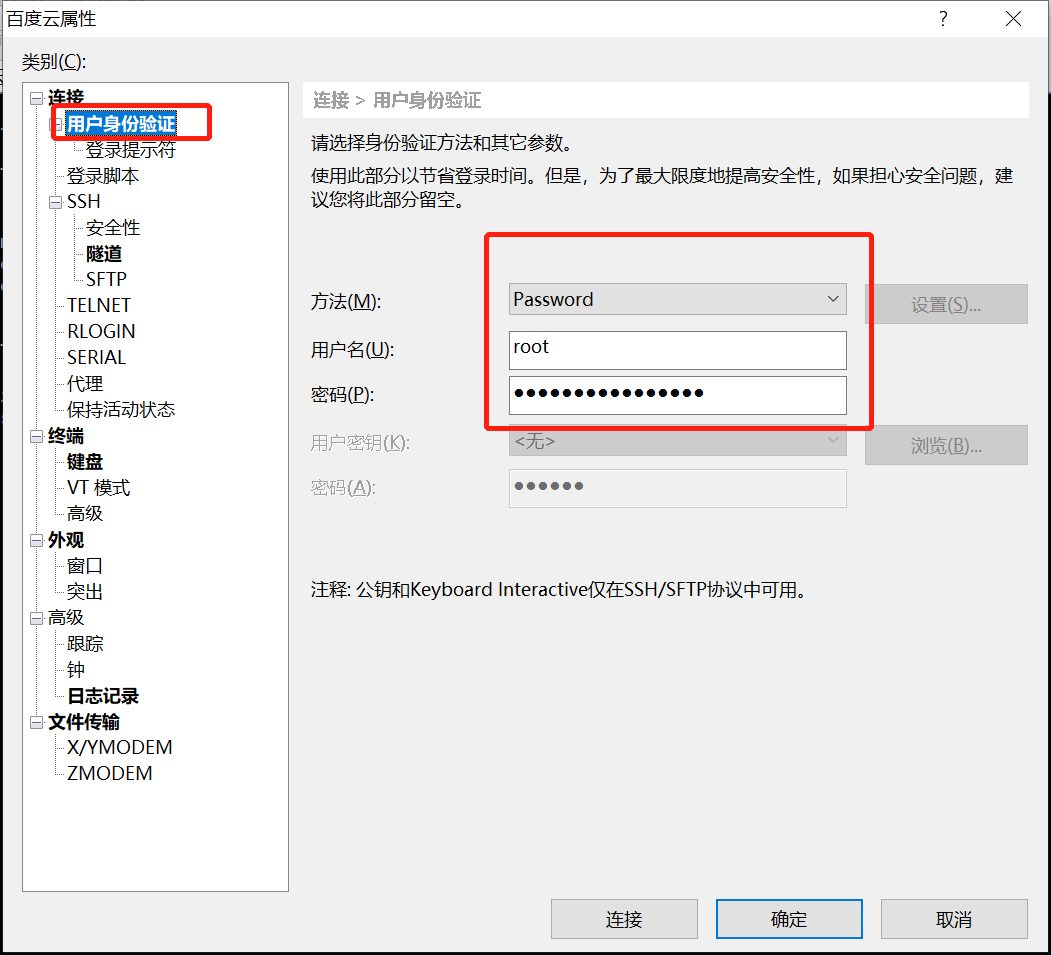
Parameter Description:
- Method: When the connection authentication xshell and CentOS, first select the first Password
- Username: CentOS user name, here is my direct use of the root account
- Password: password to login accounts
Then connect successfully log will show the user name before you log on the command line, as shown below

If the login fails, first check whether there is a login account, password is correct, if there is no problem, check whether the port is open CentOS
2. Installation, Configuration ssh
1. Install openssh-server
yum install -y openssl openssh-server
2. Modify ssh configuration
Use Open vim / etc / ssh / sshd-config
sudo vim /etc/ssh/sshd_config
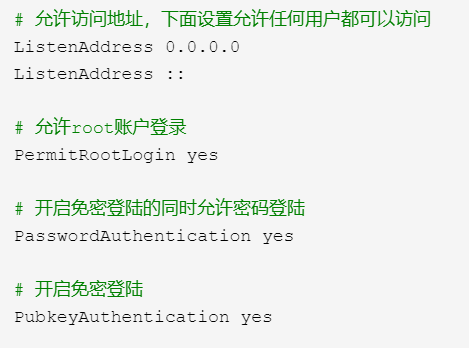
After editing, save
3. Start the ssh service
systemctl start sshd.service
4. Set the boot from Kai ssh
systemctl enable sshd.service
5. Create a folder .ssh
Create the .ssh folder in the user's home directory
mkdir ~/.ssh
Ssh configuration thus far come to an end
3. xshell generated secret key
1. Open xshell - Tools - User secret key managers
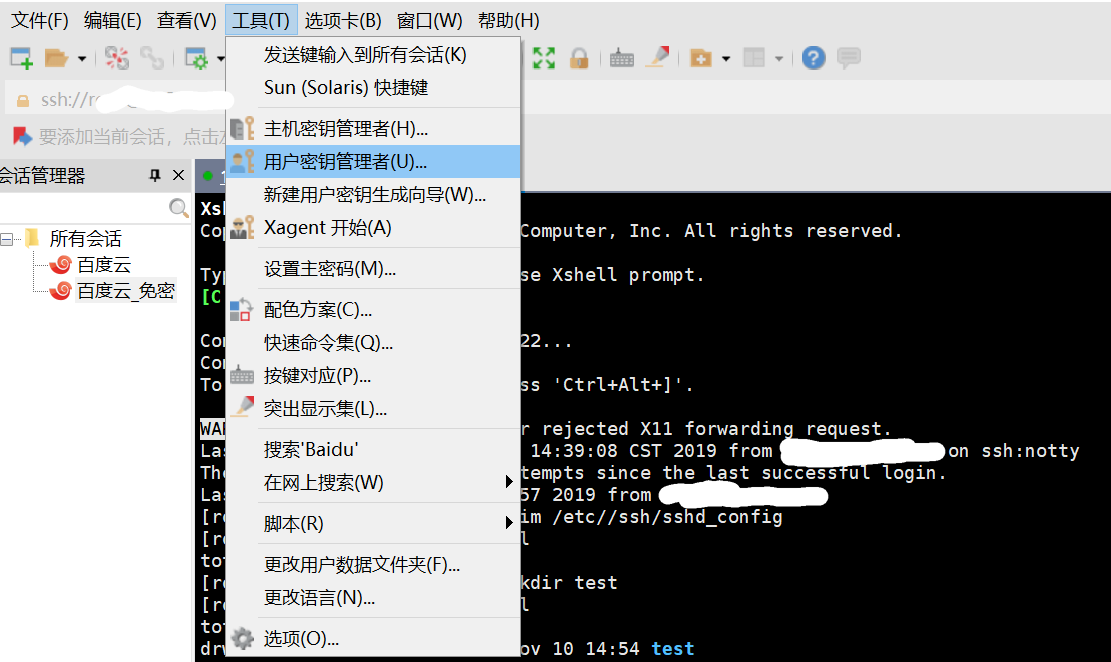
The following window will pop up

On the right side, select the option to generate row

Select Next, you do not need to be modified
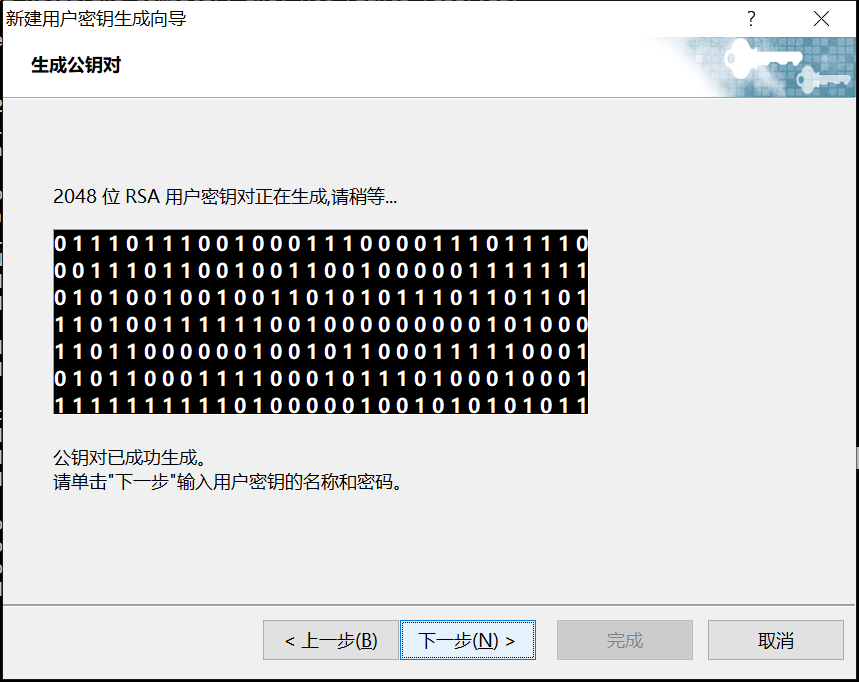
Secret key has been generated, click Next
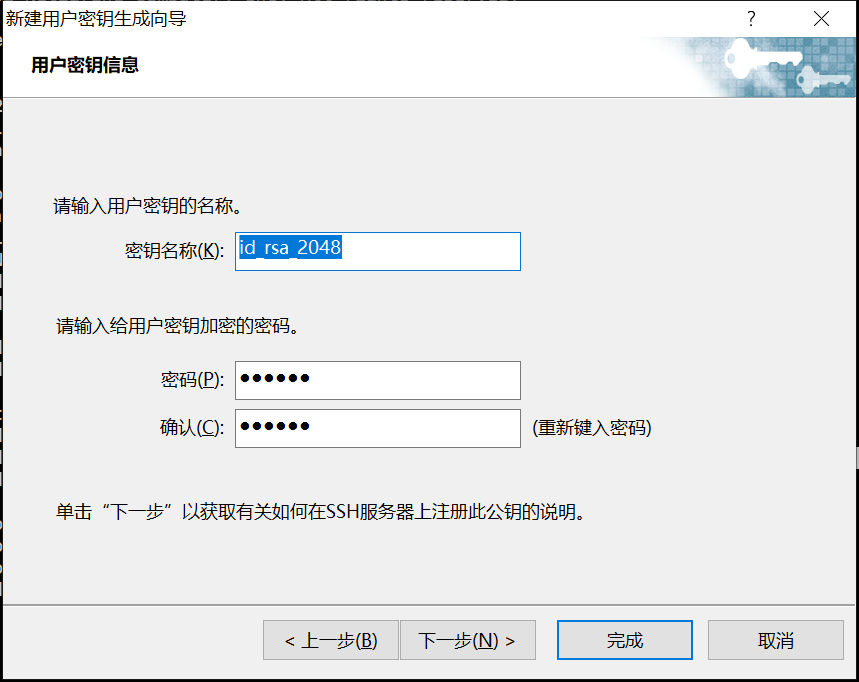
Parameter Description
- Keys Name: easily play, they can distinguish can
- Password: This is the password to verify our identity is encrypted by RSA, here I use 123456
- Confirmation: above and password as you can, we aim to detect whether the same password twice
Click Next, will pop up as shown below

Then select Save File to save the public key information down here, I saved as test.pub, after saving click Finish (xshell automatically record test.pub)
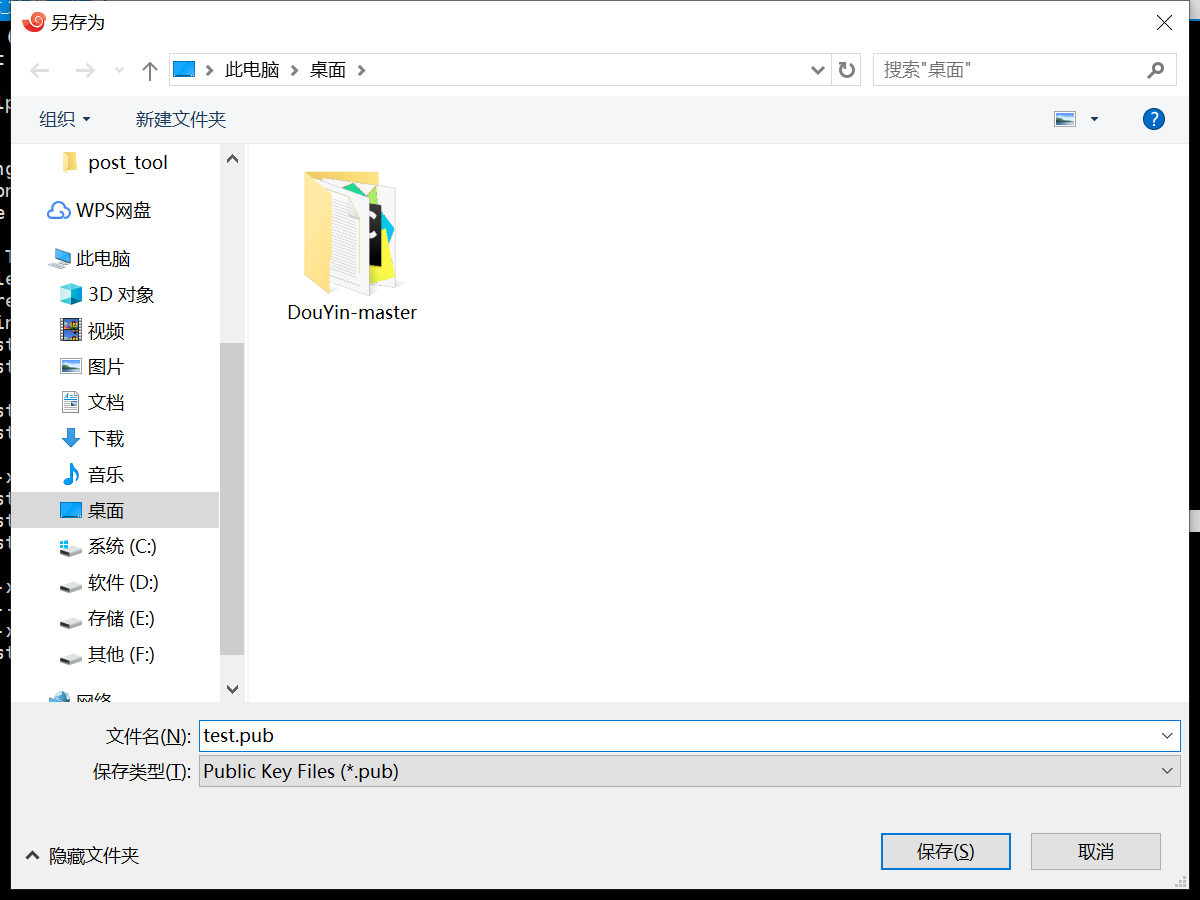
Test.pub then uploaded to the .ssh file we created in the second step in a folder
Here I use the rz command (install yum install -y lrzsz, file transfer command)
First cd ~ / .ssh .ssh into the folder, and then perform rz, will pop up a file selection window, select just generated test.pub
Then use ll check whether the upload was successful

Finally, add test.pub public key to the authorized_keys (authorized_keys public key is stored)
cat test.pub >> authorized_keys
4. xshell disposed densely Free login
A new connection, the same information set name, host, port, etc., to be noted that the name is not set to the same, in order to distinguish

Set User Authentication
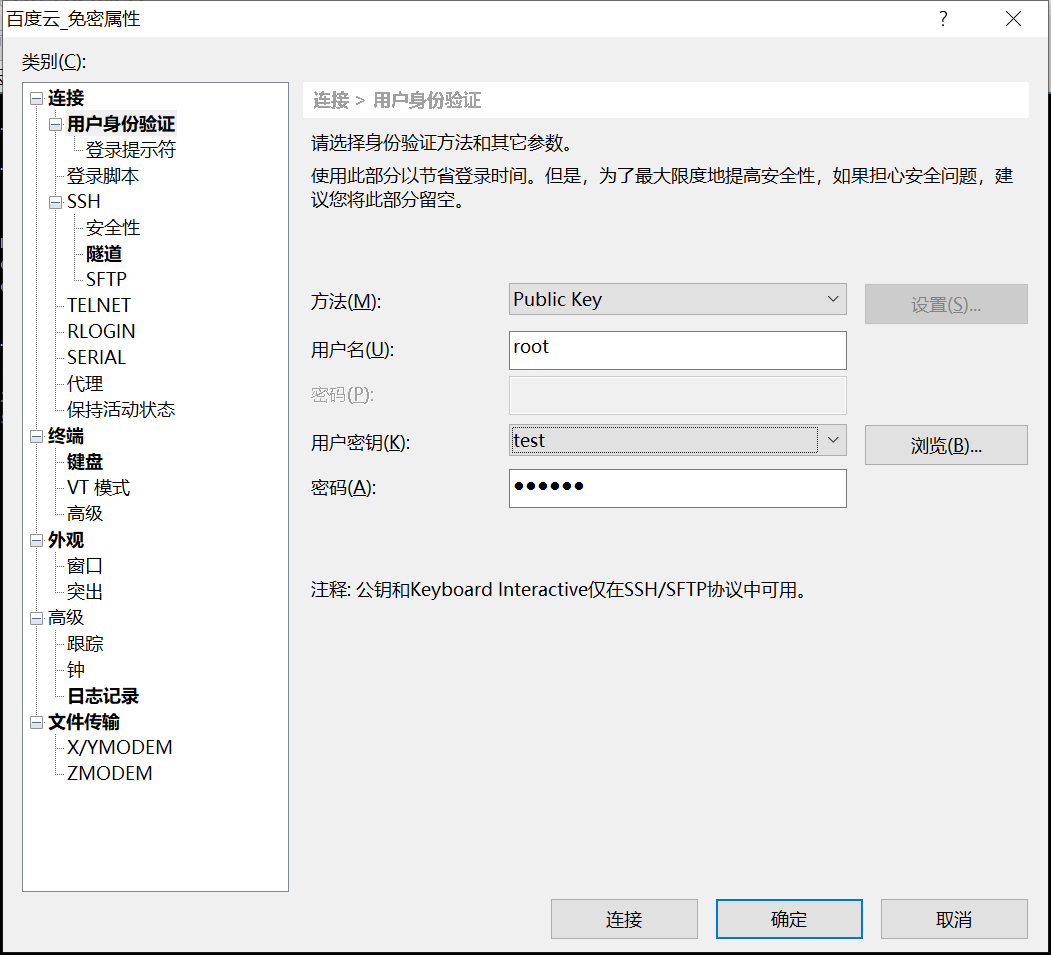
Parameter Description:
- Methods: Public key
- Username: Create user .ssh folder, I have here is the root account, the user name is the root
- User keys: Select the test in the drop-down box (that is, test.pub just created)
- Password: password that is generated when the input keys
And then connect, you can be free secret landing
I Novice, if you have any questions please leave a message in the comments section!