1. Why do you want to back up and use percona
Common MySQL backup tool
- Cross-platform poor
- Long time backup, redundancy, waste of storage space
mysqldump backup Disadvantages:
- low efficiency, slow backup and restore, lock table (i.e., a backup of the database table, the other table can not be used)
- backup process, data insertion and update operations are blocked
xtraBackup Tools
Powerful money online hot backup tool
- the backup process does not lock the library table, suitable for the production environment
- by professional organizations percona
It consists of two main components
-xtrabackup: C program. Support innoDB / XtreDB storage system
-innobackupex: Perl script to packing xtrabackup, also supports mylsam
2. Install the software
- root@host50 ~]# rpm -ivh libev-4.15-1.el6.rf.x86_64.rpm
- [root@host50 ~]# yum -y install percona-xtrabackup-24-2.4.7-1.el7.x86_64.rpm
3. Command Format
] # Innobackupex options
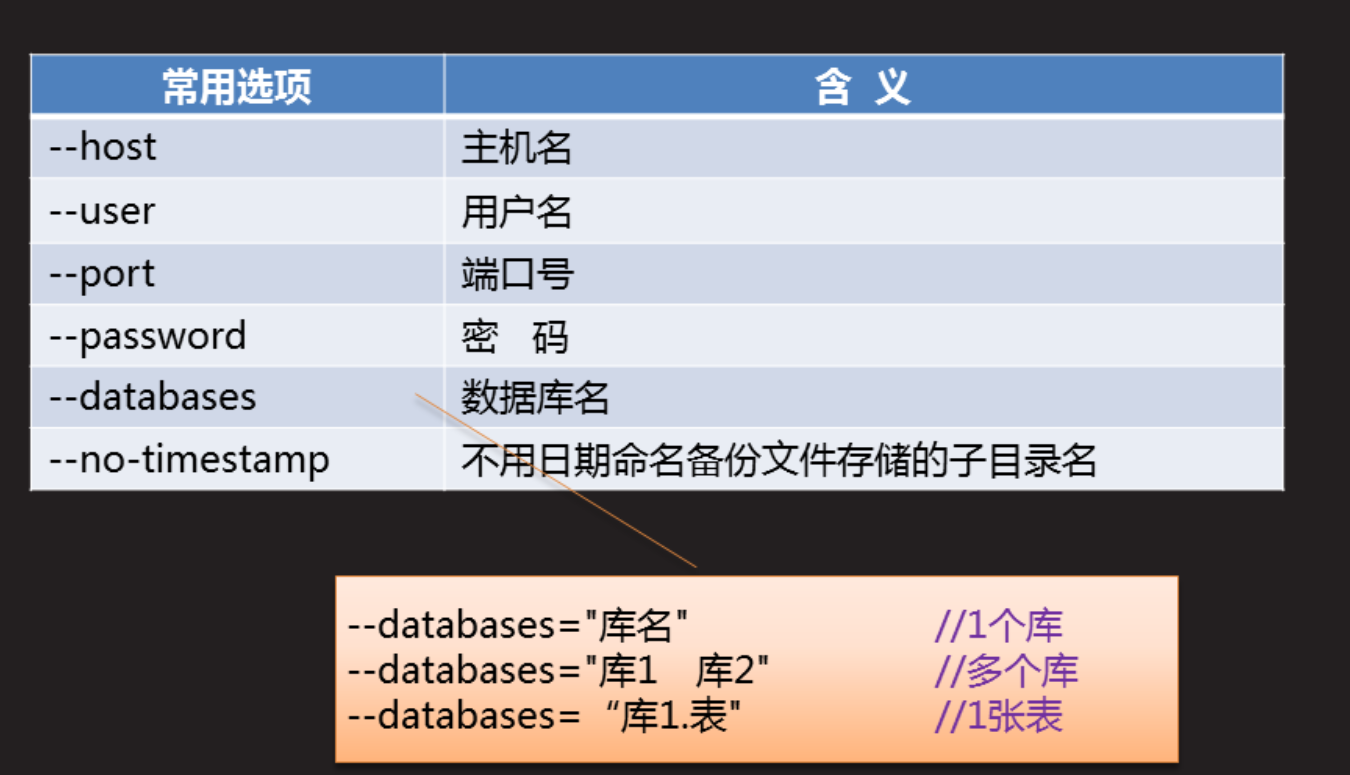
Command Common Options
command:
* Full backup (database name is not specified, all libraries will have to back up the entire database down)
] # innobackupex --user username --password password backup directory name --no-timestamp
(File name when the default backup automatically named after the date and time format, available --no-timestamp to cancel)
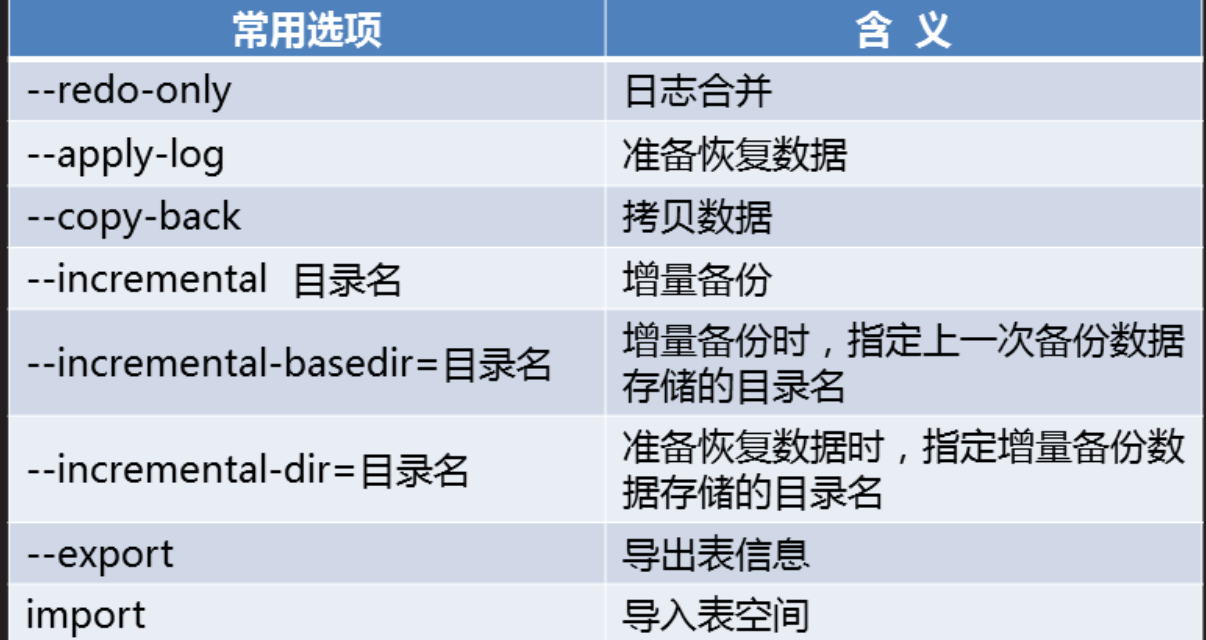
] #Innobackupex --apply-log directory name // ready to resume data
This is the directory name for your backup, the backup is complete, the directory not only the data in the database, as well as descriptions backup configuration file information (at the beginning of xtrabackup)
[root@host50 ~]# ls /allbak
backup-my.cnf  ib_buffer_pool  mysql      sys                   xtrabackup_info
db1  ibdata1      performance_schema  xtrabackup_checkpoints  xtrabackup_logfile
* Full recovery (carried out on the need to restore the client, before the first of all to the data directory database backup (assuming / alldbk) scp to the client)
] # Innobackupex --copy-back directory name // restore data
Recovery Steps:
1) Stop the database service
]#systemctl stop mysqld
2) empty the database directory
rm -rf /var/lib/mysql/*
3) ready to resume data
(After the completion of the merger information backup changed data file has been completed and the backup data to one, which is why the backup does not lock table)
innobackupex --apply-log /alldbk
4) copy data (copy files in the backup directory will be ready after the database directory after completion)
innobackupex --copy-back /alldbk
5) your Lord and your group to modify the database file is mysql
chown -R mysql:mysql /var/lib/mysql
6) Start Service
systemctl start mysqld
netstat -utnlp | grep: 3306 There are no open look
7) Check the data administrator rights
Because the database where the primary database server, and all mysql -uroot -p password This password fill password the original database, rather than the client's password now
############################################################################################################
In the full backup and restore a single table (a table of similar data is missing)
step:
1) does not delete the data table space
Table space: store data files, the file name of the database in the database directory
Each table has a corresponding .frm (storage table structure) and .ibd (data table space, the storage table) file
[root@localhost ~]# ls /var/lib/mysql/abc123
db.opt  gz.frm  gz.ibd  T1.frm  T1.ibd  T2.frm  T2.ibd  T3.frm  T3.ibd  T4.frm  T4.ibd  yg.frm  yg.ibd
There will be no table space data file deletion
> Mysql alter table library name table discard tablespace.;
2) export table information
In a backup copy of the database also has .ibd table space, table space data in the backup file is complete
innobackupex --apply-log --export /allbak
3) Copy information file to the database catalog
root@host50 ~]# cp /allbak/db3/user2.{cfg,exp,ibd} /var/lib/mysql/db3/
Owner and user group 4) modify the information file for mysql
root@host50 ~]# chown mysql:mysql /var/lib/mysql/db3/user2.*
5) into the tablespace
mysql> alter table db3.user2 import tablespace;
6) Delete information file in the database directory
[root@host50 ~]# rm -rf /var/lib/mysql/db3/user2.cfg
[root@host50 ~]# rm -rf /var/lib/mysql/db3/user2.exp
7) Check table records
mysql> select * from db3.user2;
3 Case 3: incremental backup and recovery
3.1 problem
- Specific requirements are as follows:
- Back up all data
- Generate new backup data
- delete data
- Backup file recovery data
Step 3.2
This case needs to be achieved in the following steps.
Step a: back up all data is performed in host 50
1) full backup (backup of all data to / fullbak directory)
- [root@host50 ~]# innobackupex --user root --password 123456 /fullbak --no-timestamp
Step two: an incremental backup (backup every execution, the value of the new backup data, the host performs 50)
1) Insert a new record, and do incremental backups
- MySQL > INSERT INTO db3 .user2 values ( 5 , "Jack" ); // insert a new record, write a few
- [host50 the root @ ~] # innobackupex --user the root --password 123456 - the incremental / new1dir --incremental -basedir = / fullbak --no-timestamp // first incremental backup data storage directory / new1dir
2) Insert a new record, and do incremental backups
mysql> insert into db3.user2 values (6, "jack"); // insert a new record, write a few
[Root @ host50 ~] # innobackupex --user root --password 123456 --incremental / new2dir --incremental-basedir = / newdir1 --no-timestamp // second incremental backup data storage directory / new2dir
3) copy the backup file to the target host 51
- [root@host50 ~]# scp -r /fullbak root@192.168.4.51:/root/
- [root@host50 ~]# scp -r /new1dir/ root@192.168.4.51:/root/
- [root@host50 ~]# scp -r /new2dir/ root@192.168.4.51:/root/
Step Three: recover the data in the host 51
1) stop the service, and erase
- [root@host51 ~]# systemctl stop mysqld
- [root@host51 ~]# rm -rf /var/lib/mysql/*
2) Merge log
- [root @ host51 ~ ] # innobackupex --apply -log --redo - only / root / fullbak // ready to resume data
- [host51 the root @ ~ ] # innobackupex --apply -log --redo - only / the root / fullbak --incremental -dir = / the root / new1dir // Merge log
- [host51 the root @ ~ ] # innobackupex --apply -log --redo - only / the root / fullbak --incremental -dir = / the root / new2dir // Merge log
- [root host51 @ ~ ] # RM - the RF / root / new2dir // After recovery, you can delete the
- [root host51 @ ~ ] # RM - the RF / root / new1dir // After recovery, you can delete the
3) data recovery
- [host51 the root @ ~ ] # innobackupex --copy - Back / the root / fullbak // copy the file to the database catalog
- [host51 the root @ ~ ] # chown -R & lt MySQL : MySQL / var / lib / MySQL // Modify owner and user group
- [root @ host51 ~ ] # systemctl Start mysqld // start the service
- [root @ host51 ~ ] # MySQL -uroot- -p123456 // Login
- MySQL > the SELECT COUNT (*) from db3 .user ; // View data