table of Contents
models supplement field
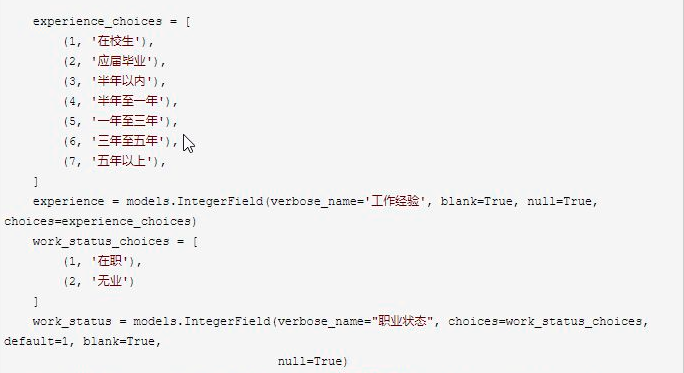
Parameter choices / field (with the lot)
Gender, user education, work status, marital status (within a limited range can be set out, and are available)
app01/models.py
from django.db import models


# Create your models here.
class User(models.Model):
    username = models.CharField(max_length=32)
    age = models.IntegerField()
    choices = (
        (1, '男'), (2, '女'), (3, '其他')
    )
    gender = models.IntegerField(choices=choices)

    """
    1 存choice里面罗列的数字与中文对应关系
         print(user_obj.get_gender_display())
            只要是choices字段 在获取数字对应的注释 固定语法
            get_choices字段名_display()

    2 存没有罗列迟来的数字
        不会报错 还是展示数字
    """


class Book(models.Model):
    title = models.CharField(max_length=32)
Synchronized to the database, and add a few test data
Test test file
As long as the choice field, corresponding to the acquired digital notes, fixed syntax:
get_choices字段名_display(), Kept no list of numbers, does not complain or display digital
Value Features
We have come up with correspondence between the corresponding relationship
If there is no corresponding relationship, it directly to the original value out
Common cases in CRM

MVC model and MTV science
django claiming MTV frame (in fact, is the essence of MVC)
M:models
T:templates
V: views
MVC
- M:models
- V: views
- C: controller controller (URLs)
Ajax
AJAX (Asynchronous Javascript And XML asynchronous Javascript and XML)
Features: asynchronous submission, partial refresh
For example: instant check when a registered user, the user name exists in the github
Send GET, POST request of several common ways
a 标签的 href 属性                   GET请求
直接在浏览器窗口输入 url 敲回车       GET请求
form 表单提交                       GET/POST
ajax 提交                           GET/POST
The following request is transmitted primarily through ajax
ajax this technology is in Javascript, but Javascript native operation more complicated, we are here for convenience, directly to use jQuery's ajax
The biggest advantage Ajax: without reloading the entire page, you can exchange data with the server and update parts of the page content. (This feature is the feeling to the user request and the completion of the corresponding process unknowingly)
Make a small case with Ajax
There are three input boxes, input boxes first two digital input, click on the send button ajax request page, without refreshing the page, and automatically fills in the number of two in the third box
Here we are jQuery's ajax, do not forget to include jQuery
Ready to work
- Create a new project, to complete the basic configuration
- Because use to post the request, so the settings temporarily in the middleware commented csrf
- The first to write a url address to match the user's browser input
- And then view function to achieve page to the browser, rendered into a page, a page is returned to the user input box contents.
day57/settings.py
"""
Django settings for day57 project.

Generated by 'django-admin startproject' using Django 1.11.11.

For more information on this file, see
https://docs.djangoproject.com/en/1.11/topics/settings/

For the full list of settings and their values, see
https://docs.djangoproject.com/en/1.11/ref/settings/
"""

import os

# Build paths inside the project like this: os.path.join(BASE_DIR, ...)
BASE_DIR = os.path.dirname(os.path.dirname(os.path.abspath(__file__)))


# Quick-start development settings - unsuitable for production
# See https://docs.djangoproject.com/en/1.11/howto/deployment/checklist/

# SECURITY WARNING: keep the secret key used in production secret!
SECRET_KEY = 'p0d7eiqh64wgd#!!rso@!wv#4w(%-)6%hb6q^4ci=+h54h@syx'

# SECURITY WARNING: don't run with debug turned on in production!
DEBUG = True

ALLOWED_HOSTS = []


# Application definition

INSTALLED_APPS = [
    'django.contrib.admin',
    'django.contrib.auth',
    'django.contrib.contenttypes',
    'django.contrib.sessions',
    'django.contrib.messages',
    'django.contrib.staticfiles',
    'app01.apps.App01Config',  # 1.检查 APP 是否已注册
]

MIDDLEWARE = [
    'django.middleware.security.SecurityMiddleware',
    'django.contrib.sessions.middleware.SessionMiddleware',
    'django.middleware.common.CommonMiddleware',
    # 'django.middleware.csrf.CsrfViewMiddleware',  # 2.检查 csrf中间件 是否已注释掉
    'django.contrib.auth.middleware.AuthenticationMiddleware',
    'django.contrib.messages.middleware.MessageMiddleware',
    'django.middleware.clickjacking.XFrameOptionsMiddleware',
]

ROOT_URLCONF = 'day57.urls'

TEMPLATES = [
    {
        'BACKEND': 'django.template.backends.django.DjangoTemplates',
        'DIRS': [os.path.join(BASE_DIR, 'templates')]
        ,  # 3.检查 templates 文件夹是否已注册
        'APP_DIRS': True,
        'OPTIONS': {
            'context_processors': [
                'django.template.context_processors.debug',
                'django.template.context_processors.request',
                'django.contrib.auth.context_processors.auth',
                'django.contrib.messages.context_processors.messages',
            ],
        },
    },
]

WSGI_APPLICATION = 'day57.wsgi.application'


# Database
# https://docs.djangoproject.com/en/1.11/ref/settings/#databases

DATABASES = {
    'default': {
        'ENGINE': 'django.db.backends.sqlite3',  # 4.检查 数据库配置信息(本文打算采用 django 自带的 sqlite3 进行测试,就不额外配置数据库了(__init__.py 文件里也就不配了))
        'NAME': os.path.join(BASE_DIR, 'db.sqlite3'),
    }
}

LOGGING = {  # 5.添加数据库操作语句打印(一有数据库操作就会在 pycharm 控制台打印对应的 SQL 语句)
    'version': 1,
    'disable_existing_loggers': False,
    'handlers': {
        'console':{
            'level':'DEBUG',
            'class':'logging.StreamHandler',
        },
    },
    'loggers': {
        'django.db.backends': {
            'handlers': ['console'],
            'propagate': True,
            'level':'DEBUG',
        },
    }
}

# Password validation
# https://docs.djangoproject.com/en/1.11/ref/settings/#auth-password-validators

AUTH_PASSWORD_VALIDATORS = [
    {
        'NAME': 'django.contrib.auth.password_validation.UserAttributeSimilarityValidator',
    },
    {
        'NAME': 'django.contrib.auth.password_validation.MinimumLengthValidator',
    },
    {
        'NAME': 'django.contrib.auth.password_validation.CommonPasswordValidator',
    },
    {
        'NAME': 'django.contrib.auth.password_validation.NumericPasswordValidator',
    },
]


# Internationalization
# https://docs.djangoproject.com/en/1.11/topics/i18n/

LANGUAGE_CODE = 'en-us'

TIME_ZONE = 'UTC'

USE_I18N = True

USE_L10N = True

USE_TZ = True


# Static files (CSS, JavaScript, Images)
# https://docs.djangoproject.com/en/1.11/howto/static-files/

STATIC_URL = '/static/'
STATICFILES_DIRS = [  # 6.配置静态资源路径(方便使用静态资源路径动态解析)
    os.path.join(BASE_DIR, 'static')
]
The bootstrap into the project root directory create a static folder
Configuring url, paper, route distribution (Well a lot of practice)
day57/urls.py
"""day57 URL Configuration

The `urlpatterns` list routes URLs to views. For more information please see:
    https://docs.djangoproject.com/en/1.11/topics/http/urls/
Examples:
Function views
    1. Add an import:  from my_app import views
    2. Add a URL to urlpatterns:  url(r'^$', views.home, name='home')
Class-based views
    1. Add an import:  from other_app.views import Home
    2. Add a URL to urlpatterns:  url(r'^$', Home.as_view(), name='home')
Including another URLconf
    1. Import the include() function: from django.conf.urls import url, include
    2. Add a URL to urlpatterns:  url(r'^blog/', include('blog.urls'))
"""
from django.conf.urls import url, include  # 下面用到了 include ,要自己导入这个模块
from django.contrib import admin

urlpatterns = [
    url(r'^admin/', admin.site.urls),
    url(r'^user/', include('app01.urls')),  # 写成字符串就会根据配置信息自动去查找,就不需要自己导模块过来了
]
app01/urls.py
from django.conf.urls import url
from django.contrib import admin
from app01 import views

urlpatterns = [
    url(r'^index/', views.index, name='user_index'),  # 匹配路由并取别名,方便后期反向解析 url
]
app01/views.py
from django.shortcuts import render


# Create your views here.
def index(request):
    return render(request, 'index.html')  # 用户访问 http://127.0.0.1:8000/user/index/ 直接给他返回 index.html 这个页面
templates/index.html
<!DOCTYPE html>
<html lang="en">
<head>
    <meta charset="UTF-8">
    <title>测试页</title>
{#    为了测试方便,这里就用网上的 jquery 了,用 CDN 的形式引入#}
    <script src="https://cdn.bootcss.com/jquery/3.4.1/jquery.min.js"></script>
{#    下面练习一下静态资源路径动态解析,并且 boostrap 放在本地会有语法提示,可以加快开发效率#}
    {% load static %}
    <link rel="stylesheet" href="{% static 'bootstrap-3.3.7-dist/css/bootstrap.min.css' %}">
    <script src="{% static 'bootstrap-3.3.7-dist/js/bootstrap.min.js' %}"></script>
</head>
<body>
{#随便搭一个页面#}
    <div class="container">
        <div class="row">
            <div class="text-center">
                <input type="text"> +
                <input type="text"> =
                <input type="text">
                <button class="btn btn-primary">计算</button>
            </div>
        </div>
    </div>
</body>
</html>
Test whether a browser to access the basic work ready (successfully)

Hands achieve results with Ajax
Ideas analysis
We are entering information, then click on the calculate button and send a request to the backend of ajax, backend to get the request and return the data to the front end, the front end of the data to fill in the results box
As can be seen, our breakthrough is to calculate button click event
app01/urls.py
from django.conf.urls import url
from django.contrib import admin
from app01 import views

urlpatterns = [
    url(r'^index/', views.index, name='user_index'),
    url(r'^compute/', views.compute, name='user_compute'),  # 用来处理用户的计算请求
]
app01/views.py
from django.shortcuts import render, HttpResponse


# Create your views here.
def index(request):
    return render(request, 'index.html')  # 用户访问 http://127.0.0.1:8000/user/index/ 直接给他返回 index.html 这个页面


from django.http import JsonResponse  # 下面发json数据要用到


def compute(request):
    # 判读是否是 ajax 请求
    if request.is_ajax():
        # 定义一个空的字典,用来存放一会儿的返回信息
        back_dic = {

        }
        # 前端 ajax采用的是 post 请求,所以这里这样获取数据
        num1 = request.POST.get('num1')
        num2 = request.POST.get('num2')
        # 判断数据格式是否正确
        if num1.isdigit() and num2.isdigit():
            try:
                res = int(num1) + int(num2)
                back_dic['status'] = 200
                back_dic['res'] = res
            except Exception as e:
                print(e)
                back_dic['status'] = 100
                back_dic['err'] = e
        # 格式不正确返回错误信息
        else:
            back_dic['status'] = 100
            back_dic['err'] = '请输入合法数字!'
        # 用 JsonResponse 将字典打包成 json 格式数据返回给前端
        #   json 格式的数据前端可以直接解析成 前端的自定义对象
        return JsonResponse(back_dic)
templates/index.html
<!DOCTYPE html>
<html lang="en">
<head>
    <meta charset="UTF-8">
    <title>测试页</title>
    {#    为了测试方便,这里就用网上的 jquery 了,用 CDN 的形式引入#}
    <script src="https://cdn.bootcss.com/jquery/3.4.1/jquery.min.js"></script>
    {#    下面练习一下静态资源路径动态解析,并且 boostrap 放在本地会有语法提示,可以加快开发效率#}
    {% load static %}
    <link rel="stylesheet" href="{% static 'bootstrap-3.3.7-dist/css/bootstrap.min.css' %}">
    <script src="{% static 'bootstrap-3.3.7-dist/js/bootstrap.min.js' %}"></script>
</head>
<body>
{#随便搭一个页面#}
<div class="container">
    <div class="row">
        <div class="text-center">
            <input type="text" id="num1"> +
            <input type="text" id="num2"> =
            <input type="text" id="res">
            <button class="btn btn-primary" id="button1">计算</button>
        </div>
    </div>
</div>
<script>
    {#    1.为了能够获取到对应输入框和按钮以及输入框的值,我们需要先给他们加上 id #}
    $('#button1').click(function (e) {  {# 2.给我们的 计算 按钮绑定点击事件,点击时用 ajax 发送请求,然后后端计算并返回数值,放在 id 为 res 的 input 里 #}
        $.ajax({  {# 3.Jquery 的 ajax,需要下面几个参数,记得写上(Ajax 的括号内是一个大括号,然后再写的参数) #}
            url: '{% url "user_compute" %}', {# 4.写 ajax 发送请求的地址,这里用的 url 反向解析 #}
            type: 'post', {# 5.采用 post 请求发送数据 #}
            data: {  {# 6.把要发送过去的数据打包 #}
                'num1': $('#num1').val(),  {# 7.获取到 id 为 num1 的标签的 value值 #}
                'num2': $('#num2').val()
            },
            success: function (data) {  {# 8.请求成功的回调函数 #}
                if (data.status == 200) {  {# 9.后端手动设置的码, 200 表示数据类型没问题 #}
                    $('#res').val(data.res);  {# 数据没问题就打印出来 #}
                } else {  {# 10.码不是 200 表示数据类型有误等,弹窗提示错误信息 #}
                    alert(data.err);
                }
            }
        })
    })
</script>
</body>
</html>
Request page View results

request.is_ajax()Way to determine whether the current request is an ajax request (either get or post, as long as the ajax submit, can be identified)ajax request submitted by post, no name tag attribute it does not matter, we've already specified key value pairs (the main role name in the form of the form)
contentType front end of the transmission data coding format
Encoding format front and rear ends of the transmission data (common)
application/x-www-form-urlencoded- form form default encoding format
- Data format: name = jason & pwd = 123
- django backend will automatically parse urlencoded encoding format for data and put request.POST for users to get (file transfer when he got the file name)
- form form default encoding format
multipart/form-data- django backend will automatically parse the data for as long as is consistent with urlencoded encoding format and put request.POST, as long as you specify the encoding is formdata will automatically parse and put in request.FILES for users to get
- json
Summary: The front and rear end of the transmission of data, be sure to ensure that your data formats and encoding format is the same, not recklessly, otherwise it will not take data
ajax submit data
ajax default data submission is urlencoded
Do not conform to the format on the front and rear end coding and data formats agreement on this issue does not occur
Data formats sent ajax json
django backend json format for the data, and does not automatically parse into request.POST or request.FILES inside, it does not parse json format data, but it was intact on the request.body
$('#b1').on('click',function () {
    // 点击按钮 朝后端发送post请求
    $.ajax({
        url: '',  // 控制发送给谁 不写就是朝当前地址提交
        type: 'post',  // 发送方式是post请求
        data: JSON.stringify({'username': 'jason', 'password': 123}),  // 发送的数据
        contentType: 'application/json',  // 告诉后端你这次的数据是json格式

        success: function (data) {  // data形参用来接收异步提交的结果
            // 将后端计算好的结果 通过DOM操作 渲染到第三个input矿中
            $('#i3').val(data)
        }
    })
})
Backend need to manually request.body in json format data acquisition, processing their own
from django.shortcuts import render,HttpResponse
from app01 import models
# Create your views here.
def index(request):
    # 验证前后端传输数据的编码格式
    if request.method == 'POST':
        print(request.body)
        # 后端 需要手动去request.body中获取json格式数据  自己处理
        json_str = request.body
        import json
        s = json_str.decode('utf-8')
        ral_d = json.loads(s)
        print(ral_d, type(ral_d))
        return HttpResponse('OK')
    return render(request, 'index.html')
ajax transfer files
How to obtain the file object file tags stored?
- First find use jQuery to input tag stored files
- The jQuery object into a target native js
- Js using native object's method .files [0] obtained file object is stored inside the label
- Be sure to specify the two parameters (processData, contentType) are false
 // ajax传输文件
$('#b1').on('click',function () {
    // ajax 传输文件 建议使用内置对象 formdata
    var formData = new FormData();  // 既可以传普通的键值对 也可以传文件
    // 添加普通键值(后续可以改成 for 循环填充)
    formData.append('username','jason');
    formData.append('password','123');
    formData.append('my_file',$('#d1')[0].files[0]);
    $.ajax({
        url:'',  // 控制发送给谁 不写就是朝当前地址提交
        type:'post',  // 发送方式是post请求
        data:formData, // 发送的数据

        // ajax发送文件需要指定两个额外的参数
        processData:false,  // 告诉前端不要处理数据
        contentType:false,  // 不适用任何编码  因为formdata对象自身自带编码 django后端也能够识别formdata对象

        success:function (data) {  // data形参用来接收异步提交的结果
            {# alert(data) #}
            // 将后端计算好的结果 通过DOM操作 渲染到第三个input矿中
            $('#i3').val(data)
        }

    })
})
Serialization assembly
Before and after the end of the separation of knowledge
Separate analog front end, a front end to a transmission format of a large dictionary json
from django.core import serializers  # django自带的一个小型的序列化工具
from app01 import models
import json


def reg(request):
    user_list = models.User.objects.all()
    # 将所有的数据都组织成一个符合 json 格式的一个个的字典
    # user_l = []
    # for user_obj in user_list:
    #     user_l.append(
    #         json.dumps({
    #             'username': user_obj.username,
    #             'age': user_obj.age,
    #             'gender': user_obj.get_gender_display()
    #         })
    #     )
    res = serializers.serialize('json', user_list)  # 指定序列化格式为 json
    return render(request, 'index.html', locals())
Json format data received from the preceding paragraph
[{
"model": "app01.user",
"pk": 1,
"fields": {
"username": "jason",
"age": 18,
"gender": 1
}
}, {
"model": "app01.user",
"pk": 2,
"fields": {
"username": "tank",
"age": 24,
"gender": 3
}
}, {
"model": "app01.user",
"pk": 3,
"fields": {
"username": "egon",
"age": 73,
"gender": 2
}
}, {
"model": "app01.user",
"pk": 7,
"fields": {
"username": "kevin",
"age": 29,
"gender": 4
}
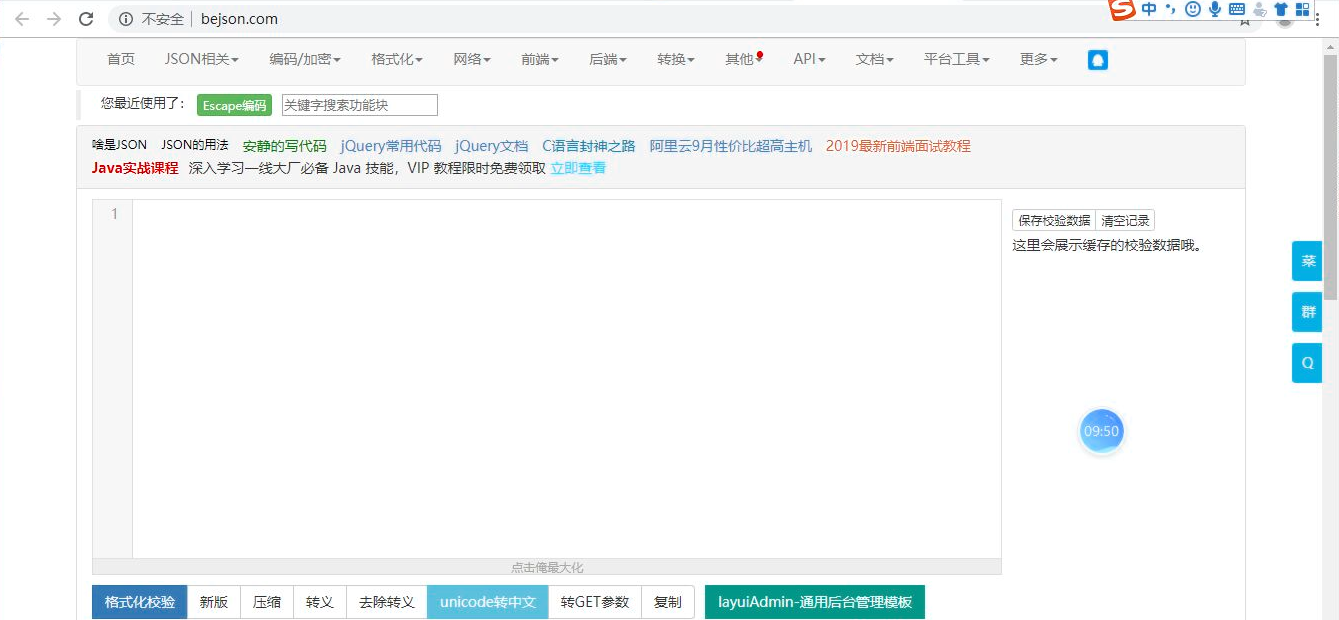
}]If the format was chaotic all in a row, you can find a tool to help resolve what website ( online check json format )
Currently small serialization module serializers
There are better, rest_framework. . . Later would involve
from app01 import models
from django.core import serializers  # django 自带的一个小型的序列化工具

def reg(request):
    user_list = models.User.objects.all()
    res = serializers.serialize('json', user_list)
    return render(request, 'index.html', locals())
Sweetalert use to build the page (pop)
- Make sure to configure static resource files settings.py
- Under the sweetalert over, put under static
- Incorporated dynamic resolution corresponding to the page: jq, bootstrap (css / js), sweetalert (css / js) (we use depends on the bootstrap)
Buttons below have not written, but also bind id, etc.
Pop Chinese support is not very good, manually modify the style
Adjust the style, Google browser to see the hierarchy, and then overwrite handwriting style (this will not affect other places)
<style>
    div.sweet-alert h2{
        padding-top: 10px;
    }
</style>
sweetalert official website to find a style to come, on the script, the binding event to a button, it triggers
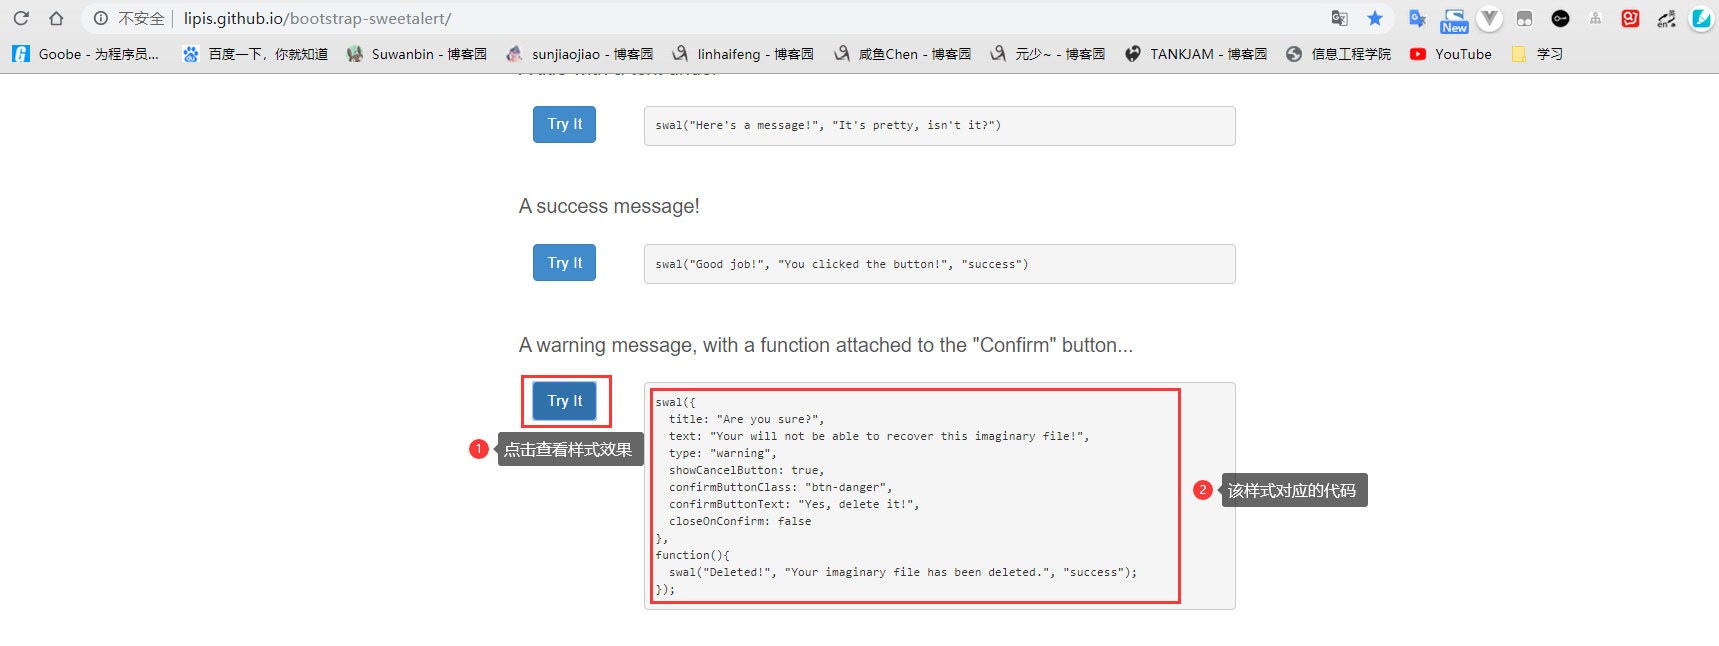
cancelButtonText modify cancel text (added their own)
Button to add custom properties, binding user_id, pop confirm the deletion write ajax where to get past user_id hair ajax
<!DOCTYPE html>
<html lang="en">
<head>
<meta charset="UTF-8">
<title>Title</title>
<script src="https://cdn.bootcss.com/jquery/3.4.1/jquery.min.js"></script>
{% load static %}
<link rel="stylesheet" href="{% static 'bootstrap-3.3.7-dist/css/bootstrap.min.css' %}">
<link rel="stylesheet" href="{% static 'dist/sweetalert.css' %}">
<script src="{% static 'bootstrap-3.3.7-dist/js/bootstrap.min.js' %}"></script>
<script src="{% static 'dist/sweetalert.min.js' %}"></script>
<style>
div.sweet-alert h2{
padding-top: 10px;
}
</style>
</head>
<body>
<div class="container">
<div class="row">
<div class="col-md-8 col-md-offset-2">
<h2 class="text-center">数据展示</h2>
<table class="table-striped table table-hover table-bordered">
<thead>
<tr>
<th>序号</th>
<th>主键</th>
<th>用户名</th>
<th>年龄</th>
<th>性别</th>
<th>操作</th>
</tr>
</thead>
<tbody>
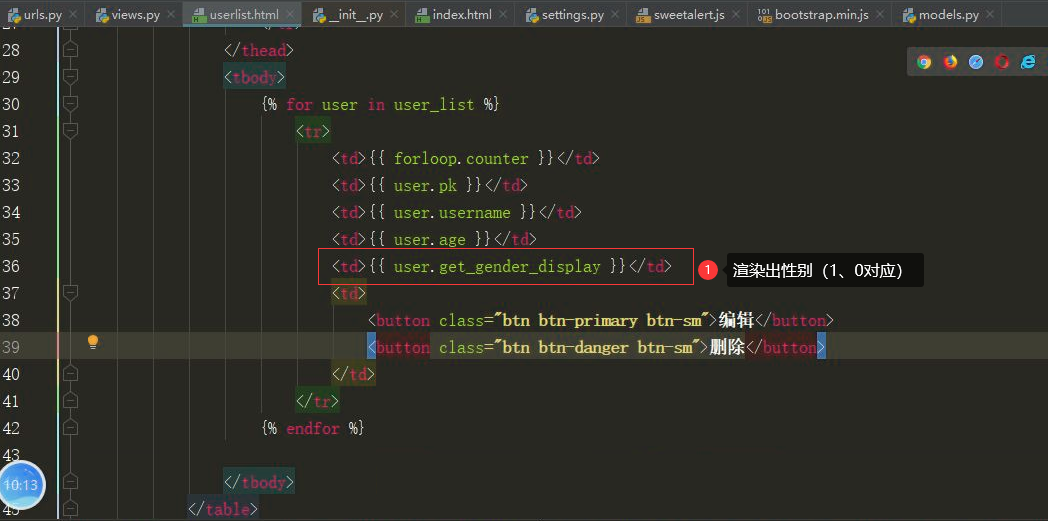
{% for user in user_list %}
<tr>
<td>{{ forloop.counter }}</td>
<td>{{ user.pk }}</td>
<td>{{ user.username }}</td>
<td>{{ user.age }}</td>
<td>{{ user.get_gender_display }}</td>
<td>
<button class="btn btn-primary btn-sm">编辑</button>
<button class="btn btn-danger btn-sm del" user_id="{{ user.pk }}">删除</button>
</td>
</tr>
{% endfor %}
</tbody>
</table>
</div>
</div>
</div>
<script>
$('.del').click(function () {
// 获取当前标签对象
var $btnEle = $(this);
swal({
title: "你确定要删吗?",
text: "你要是删了,你就准备跑路吧!",
type: "warning",
showCancelButton: true,
confirmButtonClass: "btn-danger",
confirmButtonText: "是的,老子就要删!",
cancelButtonText: "算了,算了!",
closeOnConfirm: false,
showLoaderOnConfirm: true
},
function(){
// 朝后端发送ajax请求
$.ajax({
url:'',
type:'post',
data:{'delete_id':$btnEle.attr('user_id')},
success:function (data) { // 后端发字典过来 前端不需要你手动转 会自动帮你转换成js自定义对象
if (data.code == 100){
{#window.location.href = ''; // 不写就是条到当前页面#}
// 通过DOM操作 实时改变页面
// 将被点击的删除按钮所在的那一行直接从DOM树中删掉
$btnEle.parent().parent().remove();
swal("删掉了!", "赶紧回去收拾行李吧,准备跑路!", "success");
}else{
swal('发生了未知的错误','估计是有bug了','info')
}
}
});
});
})
</script>
</body>
</html>The rear end of the transmission jsonResponse dictionary, and the front end can get resolved to automatically custom object, its attributes can be directly operate with dot syntax
from django.http import JsonResponse
import time
def userlist(request):
    if request.is_ajax():
        time.sleep(3)
        """
        一般情况下 针对ajax请求 后端通常都是返回一个字典
        """
        back_dic = {'code':100,'msg':''}
        # 直接获取用户想删除的数据的id值
        delete_id = request.POST.get('delete_id')
        # 直接利用queryset方法 批量删除
        models.User.objects.filter(pk=delete_id).delete()
        # 要给前端ajax返回一个消息(字典)
        back_dic['msg'] = '真的删除了!'
        return JsonResponse(back_dic)


    user_list = models.User.objects.all()
    return render(request,'userlist.html',locals())
Page data is not refreshed problem
Refresh is the most direct way to lazy
This method is not very good (the second paragraph of pop animation is done and it has not refresh the page)
Delete the entire line
Get Parent tag (full line), and then remove it off from the DOM tree by the DOM operation $btnEle.parent().parent().remove()
No. no continuous first matter, the focus is not here (-> 1,3,4,5)
Custom pager
Bulk Insert test data bulk_create
An insertion and an effect, not a little faster (an insertion section 1000, to more than a minute, second plug batch)
l = []

for i in range(10000):
    l.append(models.Book(title=f'书籍{i}'))
models.Book.objects.bulk_create()  # 批量插入数据
Paging
There are several key parameters: how many per page, start page, start bar number, the number of end
Derive their relations law
"""
per_page_num = 10

current_page                start_page                  end_page
    1                           0                           10
    2                           10                          20
    3                           20                          30
    4                           30                          40

per_page_num = 5

current_page                start_page                  end_page
    1                           0                           5
    2                           5                           10
    3                           10                          15
    4                           15                          20

start_page = (current_page - 1) * per_page_num
end_page =  current_page* per_page_num


10000
10

1000


10001
10

1001

"""
Can use built-in functions divmod (101, 10) - 10 1 calculates the number of pages>
In the rear circulating rendering html tag (do not distal)
Page edge determination
Using the final version of the realization pager
General third party generic file will create a new utils folder, then inside the python code into
rear end
Creating folders and files, the paged code into them, to import over, use
app01 / utils / mypage.py written paging class, directly used enough
class Pagination(object):
    def __init__(self, current_page, all_count, per_page_num=2, pager_count=11):
        """
        封装分页相关数据
        :param current_page: 当前页
        :param all_count:    数据库中的数据总条数
        :param per_page_num: 每页显示的数据条数
        :param pager_count:  最多显示的页码个数

        用法:
        queryset = model.objects.all()
        page_obj = Pagination(current_page,all_count)
        page_data = queryset[page_obj.start:page_obj.end]
        获取数据用page_data而不再使用原始的queryset
        获取前端分页样式用page_obj.page_html
        """
        try:
            current_page = int(current_page)
        except Exception as e:
            current_page = 1

        if current_page < 1:
            current_page = 1

        self.current_page = current_page

        self.all_count = all_count
        self.per_page_num = per_page_num

        # 总页码
        all_pager, tmp = divmod(all_count, per_page_num)
        if tmp:
            all_pager += 1
        self.all_pager = all_pager

        self.pager_count = pager_count
        self.pager_count_half = int((pager_count - 1) / 2)

    @property
    def start(self):
        return (self.current_page - 1) * self.per_page_num

    @property
    def end(self):
        return self.current_page * self.per_page_num

    def page_html(self):
        # 如果总页码 < 11个:
        if self.all_pager <= self.pager_count:
            pager_start = 1
            pager_end = self.all_pager + 1
        # 总页码  > 11
        else:
            # 当前页如果<=页面上最多显示11/2个页码
            if self.current_page <= self.pager_count_half:
                pager_start = 1
                pager_end = self.pager_count + 1

            # 当前页大于5
            else:
                # 页码翻到最后
                if (self.current_page + self.pager_count_half) > self.all_pager:
                    pager_end = self.all_pager + 1
                    pager_start = self.all_pager - self.pager_count + 1
                else:
                    pager_start = self.current_page - self.pager_count_half
                    pager_end = self.current_page + self.pager_count_half + 1

        page_html_list = []
        # 添加前面的nav和ul标签
        page_html_list.append('''
                    <nav aria-label='Page navigation>'
                    <ul class='pagination'>
                ''')
        first_page = '<li><a href="?page=%s">首页</a></li>' % (1)
        page_html_list.append(first_page)

        if self.current_page <= 1:
            prev_page = '<li class="disabled"><a href="#">上一页</a></li>'
        else:
            prev_page = '<li><a href="?page=%s">上一页</a></li>' % (self.current_page - 1,)

        page_html_list.append(prev_page)

        for i in range(pager_start, pager_end):
            if i == self.current_page:
                temp = '<li class="active"><a href="?page=%s">%s</a></li>' % (i, i,)
            else:
                temp = '<li><a href="?page=%s">%s</a></li>' % (i, i,)
            page_html_list.append(temp)

        if self.current_page >= self.all_pager:
            next_page = '<li class="disabled"><a href="#">下一页</a></li>'
        else:
            next_page = '<li><a href="?page=%s">下一页</a></li>' % (self.current_page + 1,)
        page_html_list.append(next_page)

        last_page = '<li><a href="?page=%s">尾页</a></li>' % (self.all_pager,)
        page_html_list.append(last_page)
        # 尾部添加标签
        page_html_list.append('''
                                           </nav>
                                           </ul>
                                       ''')
        return ''.join(page_html_list)
In app01 / views.py use
# ...其他代码
from app01.utils.mypage import Pagination
def book(request):
    # 使用封装好的自定义分页器
    book_list = models.Book.objects.all()
    current_page = request.GET.get("page", 1)
    all_count = book_list.count()
    page_obj = Pagination(current_page=current_page, all_count=all_count, per_page_num=10)
    page_queryset = book_list[page_obj.start:page_obj.end]

    return render(request, 'booklist.html', locals())
# ...其他代码
templates / booklist.html page
<!DOCTYPE html>
<html lang="en">
<head>
    <meta charset="UTF-8">
    <title>Title</title>
    <script src="https://cdn.bootcss.com/jquery/3.4.1/jquery.min.js"></script>
    {% load static %}
    <link rel="stylesheet" href="{% static 'bootstrap-3.3.7-dist/css/bootstrap.min.css' %}">
    <link rel="stylesheet" href="{% static 'dist/sweetalert.css' %}">
    <script src="{% static 'bootstrap-3.3.7-dist/js/bootstrap.min.js' %}"></script>
    <script src="{% static 'dist/sweetalert.min.js' %}"></script>
</head>
<body>
<div class="container">
    <div class="row">
        <div class="col-md-8 col-md-offset-2">
            {% for book in page_queryset %}
                <p>{{ book.title }}</p>
            {% endfor %}
            {{ page_obj.page_html|safe }}  {# 支持转义,让 html 格式的字符串可以渲染出来 #}
        </div>
    </div>
</div>
</body>
</html>