A, caffe Profile
Caffe, is an expression of both, speed and modular thinking deep learning framework .
By the Berkeley development of artificial intelligence research group at Berkeley and visual and learning centers.
Although its kernel is written in C ++, but there Caffe Python and Matlab related interfaces.
Caffe support multiple types of deep learning architecture for image classification and image segmentation, also supports CNN, RCNN, LSTM and fully connected neural network design.
Caffe supports Accelerated Computing GPU and CPU core library, such as NVIDIA cuDNN and Intel MKL.
Two, ubuntu16.04 build python Conda environment
conda is an open source package management system and environmental management system for software packages to install multiple versions of their dependencies.
conda is created for python program for Linux, OS X and Windows, you can also package and distribute other software.
conda is the most popular python environmental management tools.
(A) Download
- Select the official website to download https://www.anaconda.com/download/
- In the open-source software mirror sites Tsinghua download the appropriate version of the anaconda
(B) my installation order
cd / workdisk / software # to switch to the download directory that you have created
/ workdisk / Software # wget  https://mirrors.tuna.tsinghua.edu.cn/anaconda/archive/Anaconda3-5.3.1-Linux-x86_64.sh
/ workdisk / Software # LS
Anaconda3-5.3.1-Linux-x86_64.sh

installation process Follow the prompts and enter yes or press the enter no, half-way prompted for the environment variable, if not configured, can also be configured after installation.
Manually configure the environment variables:
/ workdisk / Software Vim ~ # / .bashrc
Increase export PATH = / root / anaconda3 / bin: $ PATH
The environment variables to take effect
/workdisk/software# source ~/.bashrc
Conda verify whether the installation was successful
/workdisk/software# conda -V
conda 4.5.11(C) create tensorflow1.5 environment
/workdisk/software# conda create -n tensorflow1.5 python=3.5
/workdisk/software# conda create -n tensorflow1.5 python=3.5
Solving environment: done


==> WARNING: A newer version of conda exists. <==
  current version: 4.5.11
  latest version: 4.7.11

Please update conda by running

    $ conda update -n base -c defaults conda


## Package Plan ##

  environment location: /root/anaconda3/envs/tensorflow1.5

  added / updated specs:
    - python=3.5


The following packages will be downloaded:

    package                    |            build
    ---------------------------|-----------------
    libgcc-ng-9.1.0            |       hdf63c60_0         8.1 MB
    libstdcxx-ng-9.1.0         |       hdf63c60_0         4.0 MB
    wheel-0.31.1               |           py35_0          63 KB
    sqlite-3.29.0              |       h7b6447c_0         1.9 MB
    ca-certificates-2019.5.15  |                1         134 KB
    python-3.5.6               |       hc3d631a_0        28.3 MB
    zlib-1.2.11                |       h7b6447c_3         120 KB
    libedit-3.1.20181209       |       hc058e9b_0         188 KB
    certifi-2018.8.24          |           py35_1         139 KB
    setuptools-40.2.0          |           py35_0         571 KB
    _libgcc_mutex-0.1          |             main           3 KB
    pip-10.0.1                 |           py35_0         1.8 MB
    ncurses-6.1                |       he6710b0_1         958 KB
    openssl-1.0.2s             |       h7b6447c_0         3.1 MB
    ------------------------------------------------------------
                                           Total:        49.4 MB

The following NEW packages will be INSTALLED:

    _libgcc_mutex:   0.1-main
    ca-certificates: 2019.5.15-1
    certifi:         2018.8.24-py35_1
    libedit:         3.1.20181209-hc058e9b_0
    libffi:          3.2.1-hd88cf55_4
    libgcc-ng:       9.1.0-hdf63c60_0
    libstdcxx-ng:    9.1.0-hdf63c60_0
    ncurses:         6.1-he6710b0_1
    openssl:         1.0.2s-h7b6447c_0
    pip:             10.0.1-py35_0
    python:          3.5.6-hc3d631a_0
    readline:        7.0-h7b6447c_5
    setuptools:      40.2.0-py35_0
    sqlite:          3.29.0-h7b6447c_0
    tk:              8.6.8-hbc83047_0
    wheel:           0.31.1-py35_0
    xz:              5.2.4-h14c3975_4
    zlib:            1.2.11-h7b6447c_3

Proceed ([y]/n)? y


Downloading and Extracting Packages
libgcc-ng-9.1.0      | 8.1 MB    | ##################################### | 100%
wheel-0.31.1         | 63 KB     | ##################################### | 100%
pip-10.0.1           | 1.8 MB    | ##################################### | 100%
sqlite-3.29.0        | 1.9 MB    | ##################################### | 100%
ca-certificates-2019 | 134 KB    | ##################################### | 100%
libedit-3.1.20181209 | 188 KB    | ##################################### | 100%
_libgcc_mutex-0.1    | 3 KB      | ##################################### | 100%
libstdcxx-ng-9.1.0   | 4.0 MB    | ##################################### | 100%
setuptools-40.2.0    | 571 KB    | ##################################### | 100%
openssl-1.0.2s       | 3.1 MB    | ##################################### | 100%
python-3.5.6         | 28.3 MB   | ##################################### | 100%
certifi-2018.8.24    | 139 KB    | ##################################### | 100%
ncurses-6.1          | 958 KB    | ##################################### | 100%
zlib-1.2.11          | 120 KB    | ##################################### | 100%
Preparing transaction: done
Verifying transaction: done
Executing transaction: done
#
# To activate this environment, use
#
#     $ conda activate tensorflow1.5 激活虚拟环境
#
# To deactivate an active environment, use
#
#     $ conda deactivate  停用虚拟环境
(Iv) create caffe2 environment
root@ranxf-TEST:/workdisk/software# conda create -n caffe2 python=3.5Solving environment: done


==> WARNING: A newer version of conda exists. <==
  current version: 4.5.11
  latest version: 4.7.11

Please update conda by running

    $ conda update -n base -c defaults conda


## Package Plan ##

  environment location: /root/anaconda3/envs/caffe2

  added / updated specs:
    - python=3.5


The following NEW packages will be INSTALLED:

    _libgcc_mutex:   0.1-main
    ca-certificates: 2019.5.15-1
    certifi:         2018.8.24-py35_1
    libedit:         3.1.20181209-hc058e9b_0
    libffi:          3.2.1-hd88cf55_4
    libgcc-ng:       9.1.0-hdf63c60_0
    libstdcxx-ng:    9.1.0-hdf63c60_0
    ncurses:         6.1-he6710b0_1
    openssl:         1.0.2s-h7b6447c_0
    pip:             10.0.1-py35_0
    python:          3.5.6-hc3d631a_0
    readline:        7.0-h7b6447c_5
    setuptools:      40.2.0-py35_0
    sqlite:          3.29.0-h7b6447c_0
    tk:              8.6.8-hbc83047_0
    wheel:           0.31.1-py35_0
    xz:              5.2.4-h14c3975_4
    zlib:            1.2.11-h7b6447c_3

Proceed ([y]/n)? y

Preparing transaction: done
Verifying transaction: done
Executing transaction: done
#
# To activate this environment, use
#
#     $ conda activate caffe2
#
# To deactivate an active environment, use
#
#     $ conda deactivate

(base) root@ranxf-TEST:/workdisk/software#
(E) activating a virtual environment
root @ ranxf-TEST: / workdisk / software # conda activate tensorflow1.5 activate tensorflow1.5 virtual environment
(tensorflow1.5) root @ ranxf-the TEST: / workdisk / Software #

(Base) root @ ranxf-the TEST: / workdisk / software # conda activate caffe2 activate caffe2 virtual environment
(caffe2) root @ ranxf-TEST : / workdisk / software #
(F) to disable the virtual environment
/workdisk/software# conda deactivate
(base) root@ranxf-TEST:/workdisk/software#
(Vii) reviewing existing environmental
(base) root@ranxf-TEST:/workdisk/software# conda info -e
# conda environments:
#
base                  *  /root/anaconda3
caffe2                   /root/anaconda3/envs/caffe2
tensorflow1.5            /root/anaconda3/envs/tensorflow1.5
Third, the installation caffe virtual environment
gpu版:conda install -c defaults caffe-gpu
cpu版:conda install -c defaults caffe
/workdisk/software# conda install -c defaults caffe
Solving environment: done


==> WARNING: A newer version of conda exists. <==
  current version: 4.5.11
  latest version: 4.7.11
…………
Internet search a lot of ways (source installation) to install caffe2, toss all day, the last command to
Under (a) virtual environment installation caffe2
Information Sources:
https://github.com/pytorch/pytorch
Caffe2 original source code is now located PyTorch repository .
the install pytorch torchvision cudatoolkit = Conda 10.0 -C # pytorch mounted pytorch
It is relatively simple, just because caffe2 integrated into the pytorch them, so the installation pytorch caffe2 on the installation, and if the graphics card in your computer and install a cuda, will be automatically installed to gpu version.
But this way there is no c / c ++ version of the library, if you want to use caffe2 write c / c ++ program can only be compiled by caffe2 source.
(B) source installation caffe
(base) root@ranxf-TEST:/workdisk/caffe# conda activate caffe_src
(caffe_src) root@ranxf-TEST:/workdisk/caffe# apt-get update

安装caffe之前需要安装一些依赖库:
    sudo apt-get install libprotobuf-dev
    sudo apt-get install libleveldb-dev
    sudo apt-get install libsnappy-dev
    sudo apt-get install libopencv-dev
    sudo apt-get install libhdf5-serial-dev
    sudo apt-get install protobuf-compiler
    sudo apt-get install libgflags-dev
    sudo apt-get install libgoogle-glog-dev
    sudo apt-get install liblmdb-dev
    sudo apt-get install libatlas-base-dev
    sudo apt-get install --no-install-recommends libboost-all-
Download Source 1
git clone git://github.com/BVLC/caffe.git
1. generate Makefile.config file:
cp Makefile.config.example Makefile.config
2. modify the configuration Makefile.config file
1) Edit Makefile.config file:
vim Makefile.config
2) removing CPU_ONLY: = 1 # zenkakugo:
3) references the configuration file path :( most of the increase is to solve the new version, the routing problem HDF5)
将 INCLUDE_DIRS := $(PYTHON_INCLUDE) /usr/local/include
换成 INCLUDE_DIRS := $(PYTHON_INCLUDE) /usr/include/hdf5/serial/
(In fact, this conversion can be carried out according to a specific path, this path is usually, and if the problem still occurs, use the command line to find the correct path to the file)
3 . Modify the Makefile
In the Makefile, and the hdf5_hl hdf5 modify hdf5_serial_hl and hdf5_serial, i.e. below the first line to the second line.
LIBRARIES += glog gflags protobuf boost_system boost_filesystem m hdf5_hl hdf5
变成
LIBRARIES += glog gflags protobuf boost_system boost_filesystem m hdf5_serial_hl hdf5_serial
4. Perform compilation
make all
make test
make runtest
Compile case
(Caffe_src) root @ ranxf-TEST: Part screenshot / workdisk / caffe # make test after
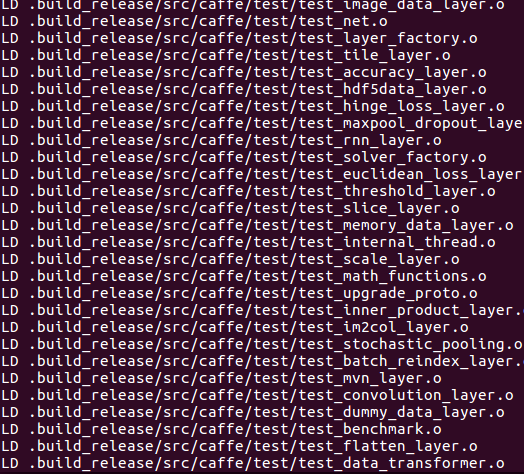
(caffe_src) root @ ranxf-the TEST: / workdisk / Caffe # the make runTest the beginning part of the screenshot (my current installed the CPU version)

The intermediate portion is omitted, the rearmost screenshot

If the compiler error
/ usr / local / bin / LD:. /root/anaconda3/lib/libpng16.so 16 :. Reference to undefined `inflateValidate @ ZLIB_1 2.9 ' collect2: error: LD returned Status 1 Exit
the wrong solution to
the problem may be python anaconda is installed rather than directly through the installation

solution: Add the following information in Makefile.config:
LINKFLAGS := -Wl,-rpath,/root/anaconda3/libFourth, uninstall
(caffe2) root@ranxf-TEST:/workdisk/software# conda list
(caffe2) root@ranxf-TEST:/workdisk/software# conda remove caffe
V. compile Python Interface
First, if there is no Python interface to import caffe is being given
(caffe_src) root@ranxf-TEST:/workdisk/caffe# python
Python 3.5.6 |Anaconda, Inc.| (default, Aug 26 2018, 21:41:56)
[GCC 7.3.0] on linux
Type "help", "copyright", "credits" or "license" for more information.
>>>
>>>
>>> import caffe
Traceback (most recent call last):
  File "<stdin>", line 1, in <module>
  File "/workdisk/caffe/python/caffe/__init__.py", line 1, in <module>
    from .pycaffe import Net, SGDSolver, NesterovSolver, AdaGradSolver, RMSPropSolver, AdaDeltaSolver, AdamSolver, NCCL, Timer
  File "/workdisk/caffe/python/caffe/pycaffe.py", line 11, in <module>
    import numpy as np
ImportError: No module named 'numpy'
(A) Install and pip numpy
1. Install and pip numpy
(caffe_src) root@ranxf-TEST:/workdisk/caffe# sudo apt-get install python-pip
2. Install the python interfaces dependent libraries:
Before installing dependencies, you need to install gfortran Editor:
(caffe_src) root@ranxf-TEST:/workdisk/caffe#sudo apt-get install gfortran
Then install the dependencies first entry caffe python file in the directory:
(caffe_src) root@ranxf-TEST:/workdisk/caffe# cd python/
(caffe_src) root@ranxf-TEST:/workdisk/caffe/python# for req in $(cat requirements.txt); do pip install $req; done
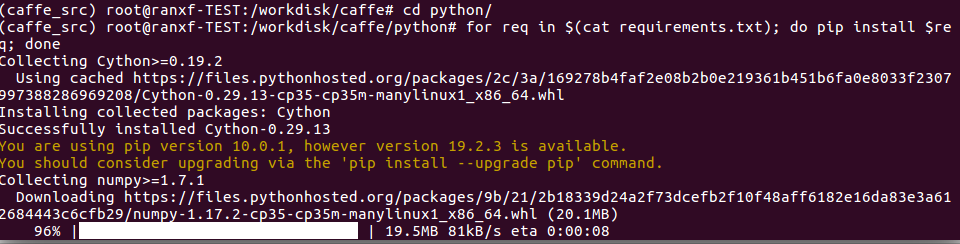
Designated iPython version
sudo pip install ipython==5.3.0
After installation, execute the following statement, the statement of the role is to check whether the dependent libraries have been installed successfully, and if successful will appear requirement already saitisfied, if not successful will continue the installation:
sudo pip install -r requirements.txt
3. Add the environment variable :( probably already exists, open to confirm)
Open the configuration file bashrc:sudo vim ~/.bashrc
Or may be directly open the file, the file is added the final surface:

Export the PYTHONPATH = / workdisk / Caffe / Python: $ the PYTHONPATH
After saving the file is closed, and then enter the following statement so that the environment variables to take effect:
source ~/.bashrc 4. Compile the interface :( python in caffe directory)
(caffe_src) root@ranxf-TEST:/workdisk/caffe# make pycaffe
CXX/LD -o python/caffe/_caffe.so python/caffe/_caffe.cpp
touch python/caffe/proto/__init__.py
PROTOC (python) src/caffe/proto/caffe.proto
After compilation, without error, then compile successfully.
5. Verify python Interface:
Python into the environment, the introduction of caffe package
(caffe_src) root@ranxf-TEST:/workdisk/caffe# python
Python 3.5.6 |Anaconda, Inc.| (default, Aug 26 2018, 21:41:56)
[GCC 7.3.0] on linux
Type "help", "copyright", "credits" or "license" for more information.
>>> import caffe
>>>
As shown above, indicating python interface to compile successfully. If the no model named caffe then the compilation python interfaces fails, the step of re-inspecting the solution or Baidu. At this point the entire installation process caffe compiled on all over.
caffe_CPU版本编译安装参考文章:ubuntu16.04下安装caffe(cpu only)
Sixth, whether the installation was successful
That is not being given on behalf of the installation was successful.
(caffe2) root@ranxf-TEST:/workdisk/software# python
Python 3.5.6 |Anaconda, Inc.| (default, Aug 26 2018, 21:41:56)
[GCC 7.3.0] on linux
Type "help", "copyright", "credits" or "license" for more information.
>>> import caffe
>>>
The above is the detailed steps to install caffe
The following is scattered notes while learning, you can skip, finishing late again
Seven, caffe use
See the training picture article:
https://blog.csdn.net/u013832707/article/details/52943935
https://www.cnblogs.com/denny402/p/5083300.html
Basics - Learn the basics of caffe
Actual articles - related tips for engineering practice understanding of caffe
caffe Introduction
Deep learning framework, pure C ++ CUDA architecture to support command line, python and MATLAB interface, you can switch seamlessly between the CPU and GPU.
You need to write their own procedures.
caffe compared to other frameworks
Easy to use (for the novice, and are based on the profile to achieve)
Training speed
Modular components
tensorFlow on github downloaded the most. Senior engineer depth learning algorithm can be used ,, flexibility than other frameworks. For starters, it is harder.
caffe contrast caffe2
caffe2 is April 18, 2017 opening of the F8年度开发者大会上, deep learning a new open-source framework for Facebook post;
A lightweight and modular depth learning framework. caffe2 original Caffe basis fully considered in the design of the expression, the speed and modularity. Emphasizing portability, while also maintaining the scalability and computing performance.
caffe2: There are tools to support the caffe turn caffe2 model
Official website: http: //caffe2.ai/
Source: http: //github.com/caffe2/caffe2
Support distributed training
Support IOS system, Android system and raspberries come in training and deployment model
Simply call caffe2 pre-trained model Model Zoo
caffe2 framework has been applied on Facebook Platform
NVIDIA (NVIDIA), Qualcomm (Qualcomm), intel (Intel), Amazon (Amazon) and Microsoft (Microsoft) and other companies have been supported cloud platform.
Simplify rely, on-demand configuration, the perfect solution to the problem of dependence
Using the operator mode, a combination of more fine-grained operator from
The Blob for caffe be extended to support additional types, which allows the quantification BinarynNe, model compression becomes feasible.
For engineering practice, the compression model has a very important meaning for a large model and the need for a run on the chip network, the original network design require more network resources, and by later quantization compression can significantly reduce network the scale parameter, can increase the calculation speed of the network. For embedded systems, it is important, especially for the current AI product landing.
In many cases, the calculation bottleneck is a key factor in determining whether the product can be market-oriented.
The basic concept of caffe
caffe module comprises four parts,
Blob: caffe data structure encapsulated, and the encapsulated data layer for flowing the layer, that may be used as the data input and output of the network layer.
Blob basic concepts: Blob thinking continuous array, generally indicated as (n, k, w, h) is based on a data structure, where n represents a milipit, that is to say the number of a batch sample size, the sample is. k represents the number of channels. w denotes the width of the image. h is the height of the image. May represent the network layer data input and output, parameter data may also be expressed;
Layer: The main definition of a network structure. Particular network configuration is quite rich, abstract input layer, an output layer, a layer of the neural network. The transport network layer data depends on the data structure of such a Blob.
layer neural network base unit, the same definition of various classes. Different layers of each class defines three Calculated:
Initialize the network parameters
Complete the creation of blobs and layers
The call setup layers function to initialize layers
Forward propagation
Forward-defined function
Back-propagation
The definition of backward function
Net: After the entire layer by layer composition, it is possible to construct a corresponding network, and the network can be represented by a data net structure, can associate layer layer, which depends on certain criteria associated.
Net caffe the directed graph is loop-free,
Solver: training and testing on parts of the network is done by Solver. Given the network training and testing various parameters in the Solver configuration file.
Create a training network and test network
Periodically testing the network (to the network through a cycle test profile)
Before calling the optimization and parameter updates to iteration and response functions of
slover each iteration are calculated and output by the forward function loss (Loss), also used to update the back-propagation relationship gradient calculation (the gradient parameter, such as the common network optimization algorithm SGD, RPMS, etc., optimization of these algorithms is done by slovers)
caffe model is mainly used to save and restore the network parameters, the suffix .caffemodel. The main model is obtained after network training, which is usually the model we want to interact with.
solver save and restore operational status, the suffix .solverstate.
caffe Configuration
Cuda and cudnn need to install, can be downloaded separately from the official website, at the time of installation, attention cuda and cudnn versions need to drink,
caffe source Interpretation (slightly)
After installing caffe dependencies, download the source code compiler, first you need to modify makefile.config. Join python, cuda and other support items in it, modify support GPU.
Compile caffe, caffe into the project directory, use make all -j32 (multi-threaded command), if there is an error, then remove the multi-threaded, directly makefile.
Enter caffe
caffe is to complete the network build, training and testing process by some configuration files.
What documents must be equipped with a complete caffe network needs, except for some of the tools we compiled, we need additional configuration files are:
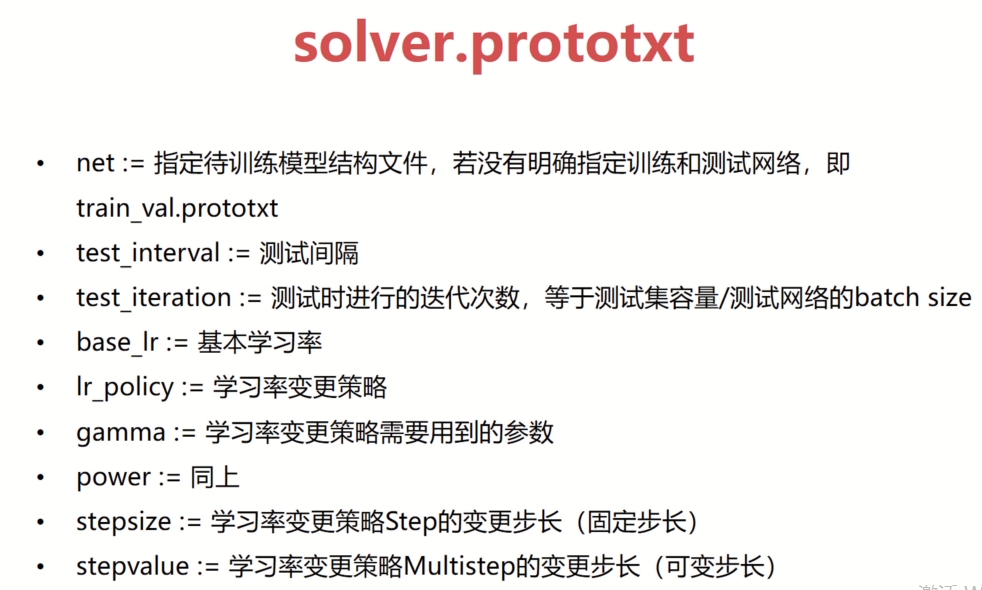
solver.prototxt-- configuration parameter model training super - the middle of the rules defined Network Training
train_test.prototxt-- training network


The screenshots above illustrate a basic configuration of the network training, defines the data layer, the data layer, only needs to define the top layer, should he output layer, the input layer corresponds. In addition to the training network and test network, how do we distinguish whether a layer used in the training network or test network by defining include this parameter, if the phase is defined as TRAIN, on the application of the train network. If the phase is defined as TEST (note the capital), so long used in the test network. If we get rid of this parameter phase, this layer will also appear in the test network and training network. For these problems which layers will, that is, loss layer. In training the network, the need to use to calculate the loss gradient layer, and in the test network, the layers do not need the accuracy loss, only the first will be needed to spread.
In the test network, the accuracy level needed for us to directly calculate the precision
deploy.prototxt-- test network
deploy.prototxt for network training is completed, the network often tested by deploy.prototxt file

linux_caffe script instructions
pycaffe example uses
Learning is defined in the standard layer depth of caffe
Special add layers caffe
caffe how fine_tuning
Learning rate in caffe tips
caffe parameters share tips
caffe Network Universal Design Tips (problems encountered in project realization)
Caffe training data network package
Caffe design a network and for the classification task