table of Contents
Nginx four Load Balancing Overview
What is a four Load Balancing
Load balancing is based on four transport layer protocol packet is encapsulated (for example: TCP / IP), and that the use of our previous seven refers to the application layer, assembled on the basis of his on four layers, four layers or whether seven refer to the OSI network model.
Four load-balancing scenarios
1, four + seven do load balancing, four can ensure high availability load balancing of seven; such as: nginx could not guarantee their service availability, need to rely on LVS or keepalive.
2, such as: load balancing tcp agreement, some requests are TCP protocol (mysql, ssh), or that these requests are forwarded only need to use four ports on it, so the use of four load balancing.
+ Four-story building seven large-scale use of cluster architecture scene
 

Four load balancing summary
1, four load balancer can forward TCP / IP protocol, UDP protocol, port forwarding commonly used, such as: TCP / 22 is, UDP / 53 is;
2, four load balancing load balancing can be used to solve the seven-port restrictions ; (seven largest load balancing using port number 65535)
3, four load balancing can solve the problem of high availability load balancing seven; (multiple back-end load balancing can use seven colleagues)
4, four-layer forwarding efficiency much higher than seven, but only supports tcp / ip protocol does not support http and https protocols;
5, usually large concurrency scenarios often choose to increase the use of four load-balancing load in front seven.
nginx load balancing four scenarios practice
How to configure Nginx four load balancing
1, 5555 through the access port load balancing, port 22 is actually the back end of web01 in the provision of services;
2, 6666 through the access port load balancing, mysql port 3306 is actually the rear end of the service.
Two lb configure load balancing
[root@lb02 ~]# cat /etc/yum.repos.d/nginx.repo
[nginx-stable]
name=nginx stable repo
baseurl=http://nginx.org/packages/centos/7/$basearch/
gpgcheck=0
enabled=1
gpgkey=https://nginx.org/keys/nginx_signing.key

#在lb02上安装nginx
[root@lb02 yum.repos.d]# yum install -y nginx

#在lb02上同步lb01的所有nginx相关配置
[root@lb02 ~]# scp -r [email protected]:/etc/nginx /etc/


#启动nginx
[root@lb02 conf.d]# nginx -t
nginx: the configuration file /etc/nginx/nginx.conf syntax is ok
nginx: configuration file /etc/nginx/nginx.conf test is successful
[root@lb02 conf.d]# systemctl enable nginx
Created symlink from /etc/systemd/system/multi-user.target.wants/nginx.service to /usr/lib/systemd/system/nginx.service.
[root@lb02 conf.d]# nginx
1. Create a directory to store four load-balancing configuration file
[root@lb03 ~]# vim /etc/nginx/nginx.conf
events {
        ....
}
include /etc/nginx/conf.c/*.conf;
http {
        .....
}

[root@lb03 ~]# mkdir /etc/nginx/conf.c
Configuring Load Balancing four
[root@lb03 conf.c]# cat lb_domain.conf
stream {
    upstream lb {
            server 172.16.1.5:80 weight=5 max_fails=3 fail_timeout=30s;
            server 172.16.1.6:80 weight=5 max_fails=3 fail_timeout=30s;
    }

    server {
            listen 80;
            proxy_connect_timeout 3s;
            proxy_timeout 3s;
            proxy_pass lb;
    }
}
[root@lb03 conf.c]# nginx -t
nginx: the configuration file /etc/nginx/nginx.conf syntax is ok
nginx: configuration file /etc/nginx/nginx.conf test is successful
[root@lb03 conf.c]# nginx -s reload

#配置本机hosts解析后浏览器访问并查看nginx日志
3. Load balancing four open log
#四层负载均衡是没有access的日志的,因为在nginx.conf的配置中,access的日志格式是配置在http下的,而四层复杂均衡配置实在http以外的;

#如果需要日志则需要配置在stream下面
[root@web03 conf.c]# cat lb_domain.conf
stream {
    log_format  proxy '$remote_addr $remote_port - [$time_local] $status $protocol '
                  '"$upstream_addr" "$upstream_bytes_sent" "$upstream_connect_time"' ;
    access_log /var/log/nginx/proxy.log proxy;
    upstream lb {
            server 172.16.1.5:80 weight=5 max_fails=3 fail_timeout=30s;
            server 172.16.1.6:80 weight=5 max_fails=3 fail_timeout=30s;
    }

    server {
            listen 80;
            proxy_connect_timeout 3s;
            proxy_timeout 3s;
            proxy_pass lb;
    }
}
DNS to lb03, log in again
View Log:
[root@lb03 ~]# tail -f /var/log/nginx/proxy.log

541055 - lb03 - TCP - 10.0.0.1 - 1656 - 80 - 75.856 - 200 - 28/Aug/2019:03:22:50 +0800
344557 - lb03 - TCP - 10.0.0.1 - 1658 - 80 - 75.850 - 200 - 28/Aug/2019:03:22:50 +0800
284545 - lb03 - TCP - 10.0.0.1 - 1654 - 80 - 75.957 - 200 - 28/Aug/2019:03:22:50 +0800
225560 - lb03 - TCP - 10.0.0.1 - 1659 - 80 - 75.858 - 200 - 28/Aug/2019:03:22:50 +0800
Nginx load balancing achieved using four forwards tcp
请求负载均衡 5555    --->     172.16.1.7:22;
请求负载均衡 6666    --->     172.16.1.51:3306;
Configuring nginx load balancing to achieve four of forwarding tcp
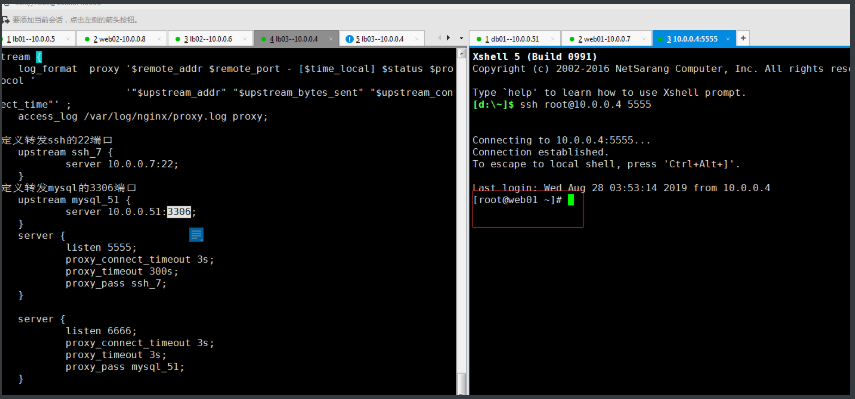
[root@lb4-01 ~]# cat /etc/nginx/conf.c/lb_domain.conf
stream {
    log_format  proxy '$remote_addr $remote_port - [$time_local] $status $protocol '
                      '"$upstream_addr" "$upstream_bytes_sent" "$upstream_connect_time"' ;
    access_log /var/log/nginx/proxy.log proxy;

#定义转发ssh的22端口
    upstream ssh_7 {
            server 10.0.0.7:22;
    }
#定义转发mysql的3306端口
    upstream mysql_51 {
            server 10.0.0.51:3306;
    }
    server {
            listen 5555;
            proxy_connect_timeout 3s;
            proxy_timeout 300s;
            proxy_pass ssh_7;
    }

    server {
            listen 6666;
            proxy_connect_timeout 3s;
            proxy_timeout 3s;
            proxy_pass mysql_51;
    }
}
Use local connection
ssh [email protected] 5555
会自动跳转到端口所指定的服务器上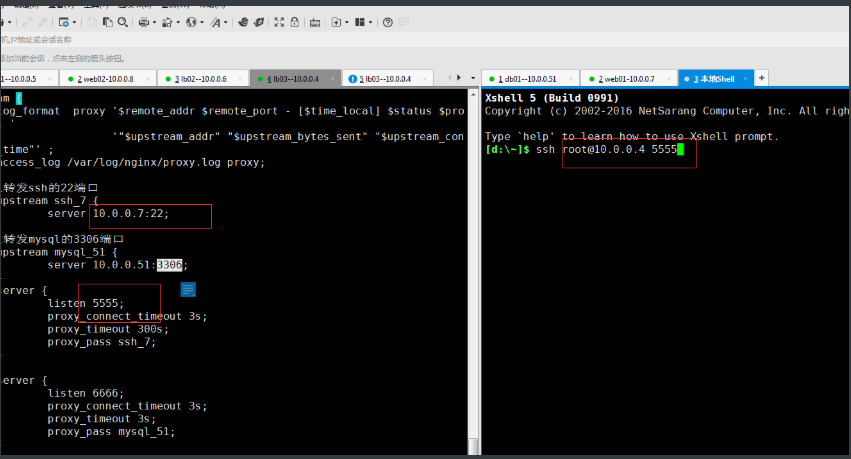
enter password

Automatically connect to the specified server port 5555, jump to web01