Starting from today, the blogger will open a new column to explain the popular technology "Hongmeng Development" on the market. For those who are new to this technology, it is necessary to understand Hongmeng first before learning Hongmeng Development. From you From the perspective of Hongmeng, what do you think it is? What is the significance of its appearance? Is Hongmeng just a mobile operating system? Can its emergence separate the world from Android and IOS? Can its future potential dominate the entire mobile phone market?
With such questions and curiosity about HarmonyOS development, let us enter the wonderful world of HarmonyOS development together!
Table of contents
First introduction to Hongmeng Development
Development tools installation
Project directory introduction
First introduction to Hongmeng Development
Before introducing Hongmeng, let me first introduce the general development history of mobile communication technology:
The first generation of communication technology appeared in the 1980s: 1G (Big Brother)
The second generation of communication technology appeared in the 1995s: 2G (Motorola-Nokia)
The third generation of communication technology appeared in the 2009s: 3G (Android-IOS)
The fourth generation of communication technology appeared in 2013: 4G (Android-IOS)
The fifth generation of communication technology emerged in the 2020s: 5G (Internet of Everything)
Hongmeng does not focus on 4G, but directly targets 5G and wants to become the benchmark in the 5G era. Hongmeng also exists for the interconnection of everything. After the Hongmeng system is installed on the mobile phone, we can connect to various smart phones through the mobile phone. devices, but these smart phones also need to install the corresponding Hongmeng system. When these devices installed with the Hongmeng system are logged in to the same Huawei account, they will be automatically connected together. Huawei engineers have taken a Named "soft bus", the Hongmeng system connects these smart devices to each other through the soft bus.
Therefore, the complete Hongmeng development includes two parts : Hongmeng application development (mobile app); Hongmeng device development (hardware development)
Let’s recall that we used to use Android to control some smart devices, but to control these devices most of them required downloading some specific apps. If there are many smart devices in the home, you may need to download many different apps, and Hongmeng controls these installations. The device of Hongmeng system is very simple. It does not require downloading an app. You only need to touch the chip in the device with your mobile phone to directly open the control interface of the device on the mobile phone. In the future, you can directly control the device on the mobile phone, and Huawei can also use big data to provide you with the most appropriate nutrition and health advice based on your usual eating habits and physical condition. In this way, the home is no longer just a cold machine, but a machine. Became a healthy living consultant. Of course, Hongmeng's ecology is not limited to what I call home smart home. Hongmeng involves all aspects of life. Food, clothing, housing, and transportation can be easily handled by Hongmeng. In the future, more manufacturers will cooperate with Huawei. Only when all the devices you come into contact with are equipped with the Hongmeng system, you will understand what an amazing technology Hongmeng is. It can be said that Hongmeng is the benchmark for the Internet of Everything in the 5G era. To sum up : HarmonyOS is a full-scenario and future-oriented operating system. To learn more about Hongmeng’s advantages, please refer to the official website .
The following are the characteristics of Hongmeng system:
Unified OS, flexible deployment :
One operating system meets the needs of all devices, large and small, from headphones to cars, allowing different devices to communicate seamlessly using the same language.
Hardware mutual assistance and resource sharing :
Every device equipped with Harmonyos is not isolated. Terminals can help and share their capabilities, bringing a seamless collaborative experience. At the system layer, multiple terminals can be integrated into one, becoming a “super terminal. Terminals can help and share their capabilities, bringing a seamless experience. Collaborative experience.
Develop once and deploy on multiple terminals :
Based on the distributed application framework, developers can write logical code once and deploy it on multiple terminals.
Make your application cross-device free :
Harmonyos atomized service is a new species of lightweight service, which provides new services and interaction methods. It can be divided, combined, transferred, and supports installation-free features, which can simplify applications and make services within reach.
Activate your device intelligence with "Easy" :
The device can realize new functions such as connecting to the Internet with one touch, changing from no screen to having a screen, visual operation, and direct access to original factory services with one click. Through simple and intelligent services, we realize the industrial upgrading of equipment intelligence.
The following is a comparison between Hongmeng and installation:
Comparison of system kernels :
Android system:
It is a macro kernel design based on Linux. The macro kernel contains most of the functions and modules of the operating system. Moreover, these functions and modules have the highest permissions. As long as one module fails, the entire system will collapse.
Hongmeng OS:
It is based on a microkernel design, which only includes the necessary functional modules of the operating system (task management, memory allocation, etc.). The necessary modules are at the core and have the highest permissions, while other modules do not have the highest permissions. In other words, problems with other modules will not hinder the operation of the entire system. The microkernel is very stable, and the Hongmeng system contains two kernels:
1) Linux kernel. (kernel of mobile operating system)
2) LiteoS kernel. (The core of intelligent hardware)
Comparison of running speed of lightweight (core less than 10k) low power consumption (one AA battery can work for up to 5 years) :Android system:
Android programs cannot directly communicate with the bottom layer of the system and run on a virtual machine. If there is a problem with the virtual machine, the system will be stuck.
Hongmeng OS:
The Ark compiler in Hongmeng system solves this problem. It will directly compile the code into machine code recognized by the machine, run it directly in the operating system, and can directly communicate with the bottom layer of the system.
As a comparison of mobile operating systems :Both Android and Hongmeng are developed based on the Android Open Source Project (AOSP). The code in AOSP is jointly maintained and developed by many programmers around the world. Google and Huawei are also one of the providers. Anyone can freely use and modify it under an open source license. Many mobile phone manufacturers at home and abroad have developed their own operating systems based on this set of codes
to compare with other devices :Android system:
It is very troublesome both in terms of app development and usage. Need to go through discovery-pairing-connection-combination-verification.
Hongmeng OS:
From the aspect of app development, you only need to write very little code to call third-party hardware. From the perspective of use, no matter how many devices are connected together, Hongmeng's ultimate goal is to make it as easy as using one device.
The following are the future development prospects of Hongmeng Development:
For a long time in the future, we will be in the era of 5G and the Internet of Everything, and Hongmeng exists for the Internet of Everything. Currently, except for Hongmeng, no other operating system can closely integrate with the Internet of Things. So, The current Hongmeng development can be a relatively good development direction in the future.
On August 29 this year, Huawei launched the mate60 series of mobile phones. The most distinctive feature is that it is equipped with the Kirin 9000s chip. This is a purely domestic machine with a new 7nm process. The emergence of this Chinese chip has also broken the United States’ technology Blockade, at Huawei’s autumn conference on September 25 of the same year, the HarmonyOS Next development preview version was officially unveiled. In the future, Hongmeng will completely get rid of Android and open a new era of Hongmeng native application development. This also means that both hardware and software , Huawei has gotten rid of the technical styles of other countries and blazed its own path. It is foreseeable that Hongmeng system will become the most mainstream full-terminal operating system in the future.
The latest version is currently harmonyos 4. The harmonyos next version is still in the development preview stage and will not be officially launched until next year. Here we still use harmonyos 4 as the main explanation object. harmonyos provides us with a systematic development kit that can be applied to both current and future versions. As Hongmeng developers, the main tools we use are tools related to code development and preparation.

Development tools installation
If you want to do your job well, you must first sharpen your tools. Next, we will briefly describe the specific process of Hongmeng development, introduce the process of tool installation environment configuration, and point the way to becoming a real Hongmeng developer.
Account registration and authentication : Before development preparation, we need to register a Huawei account and perform real-name authentication. Open the official website and click the login button in the upper right corner. After entering the login page, click the registration button to register an account. Here we can choose a commonly used mobile phone number to register. :

After successful registration, log in to the account and click Real-name Authentication in the drop-down box of the user button in the upper right corner. The page jumps to the developer authentication interface. Here we select personal developer authentication:

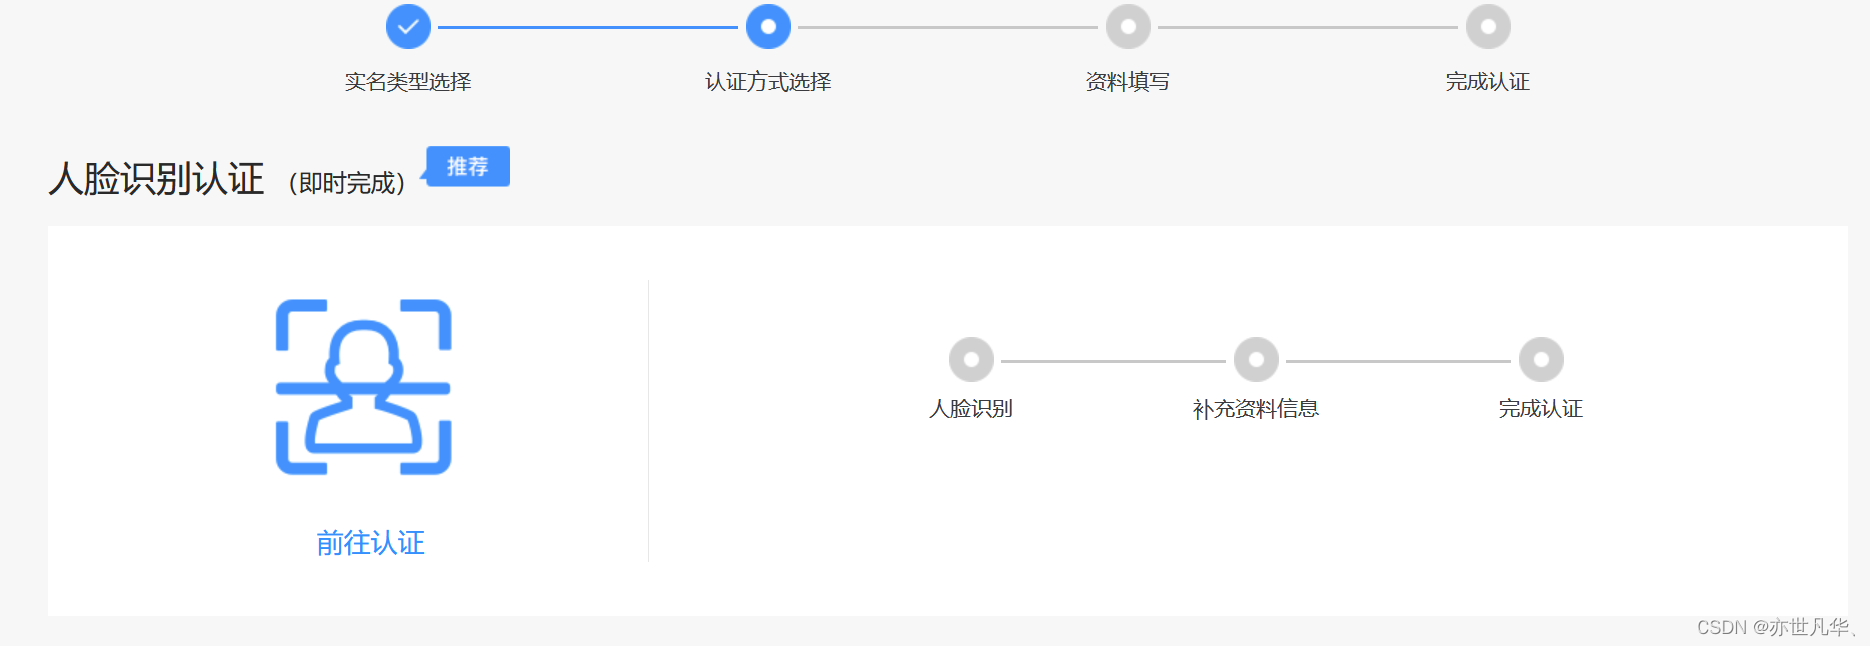
In the second step of authentication method selection, we can choose face recognition authentication, which is the most efficient:
After filling in the information, you can finally complete the real-name authentication successfully:
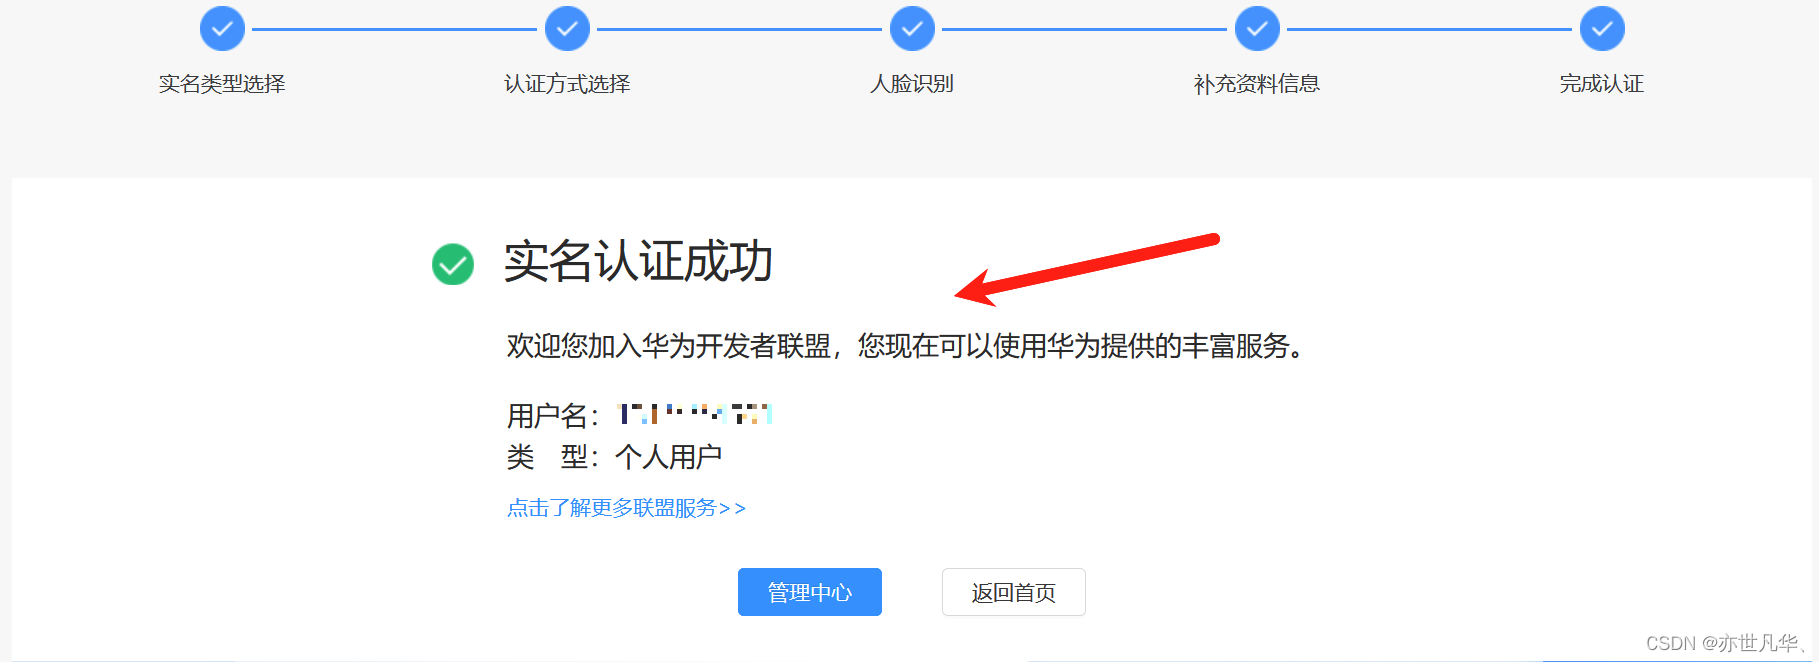
At this point, the registration and certification of the Huawei developer account are completed. Then click on the personal and management center to complete the corresponding personal account repairs.
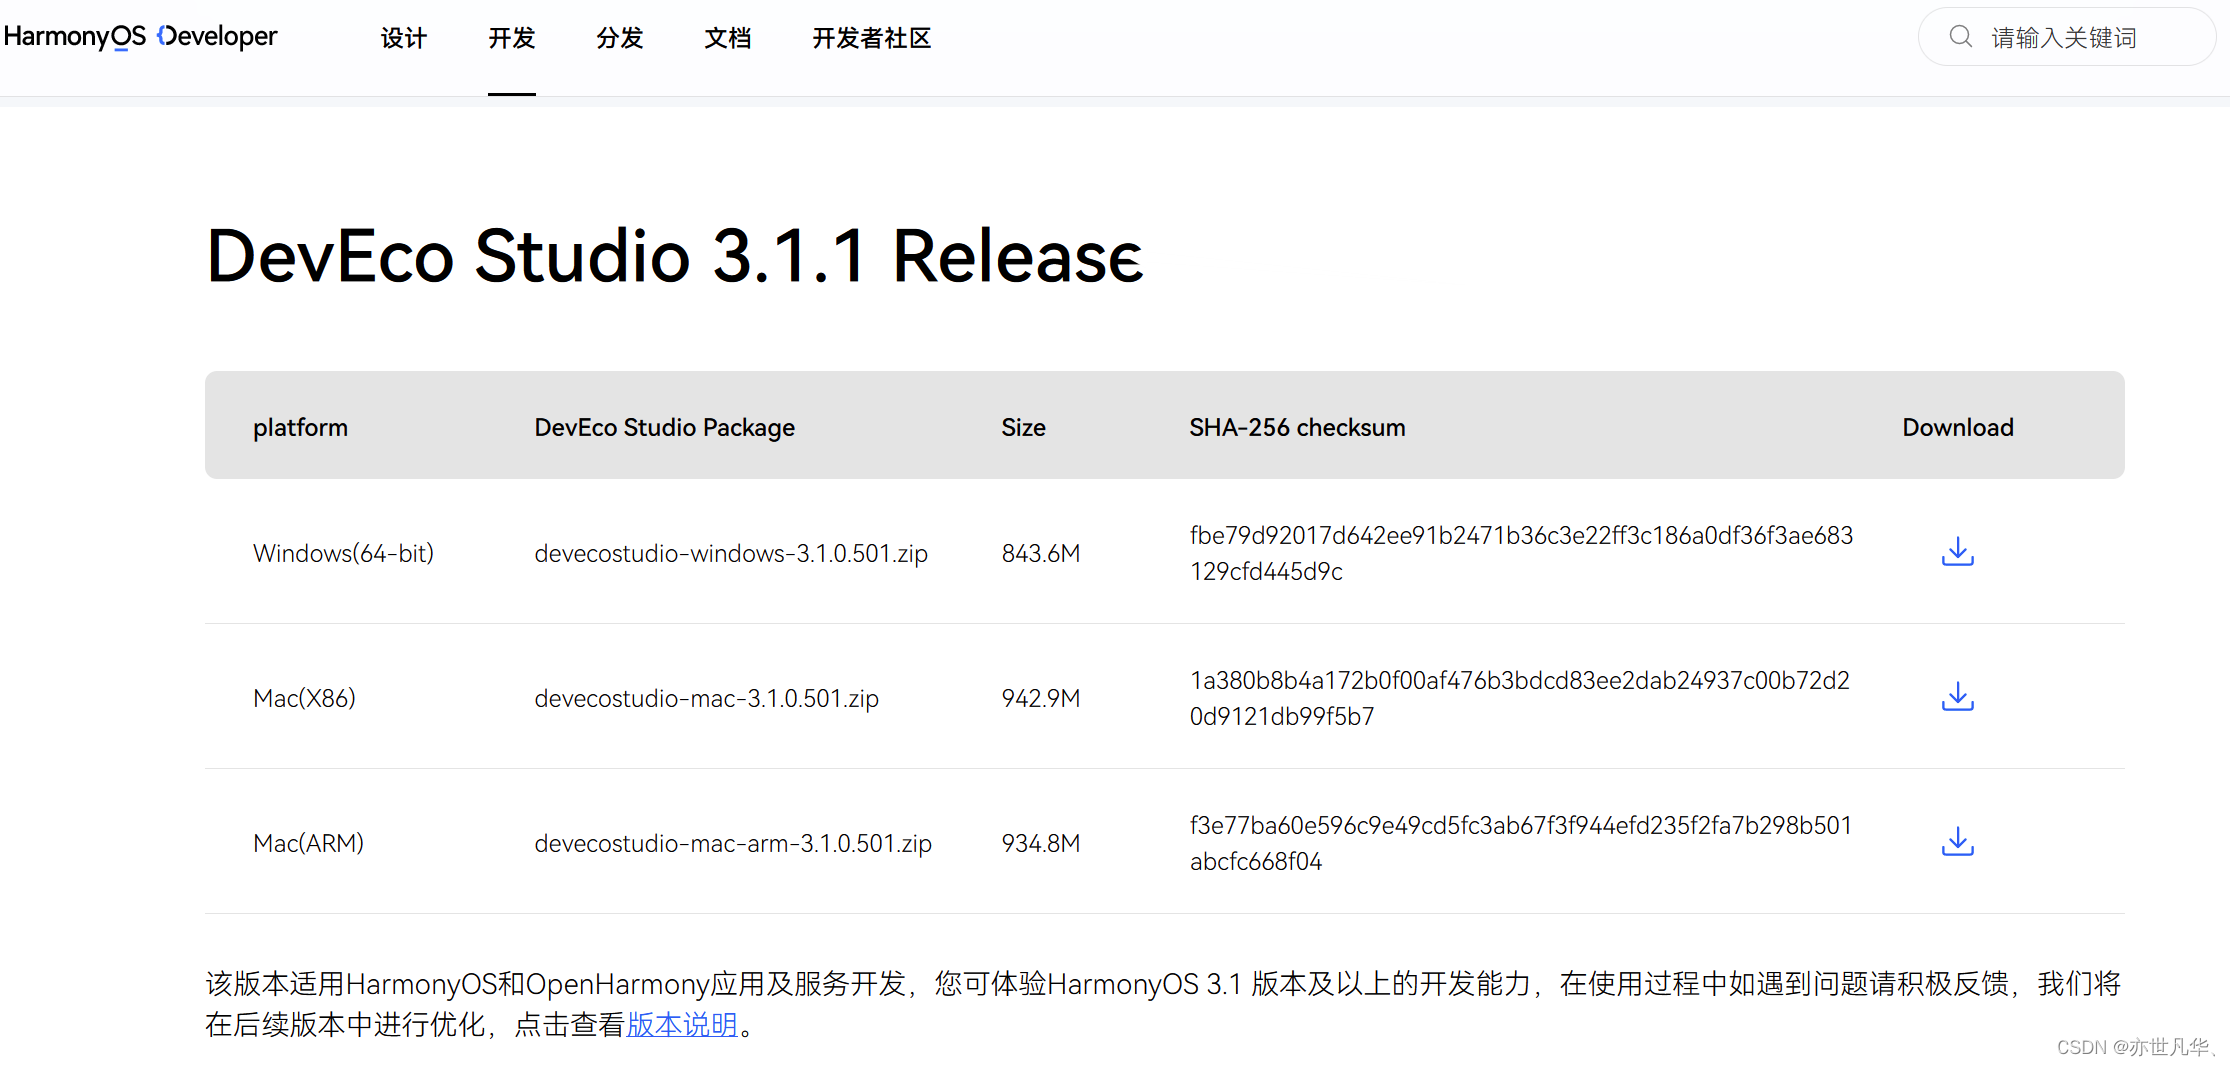
Development tool installation : Next we need to install the corresponding developer tools to write code. During the subsequent tool download process, Hongmeng Development will let us choose a development language. Hongmeng Development has three languages to choose from: respectively Java, JS and C/C++. If we choose Hongmeng application development (mobile app), the above three languages are suitable; if we choose Hongmeng device development (hardware development), we mainly use C/C++. Gossip Let’s not talk about it. Let’s open the Hongmeng development official website, click on the document to find the DevEco Studio tool documentation, click the download link after entering , and enter the following interface to download. Here we can download according to our own operating system:
Here we take window as an example. After downloading and decompressing, double-click the exe file to install:

Next, select the installation path. D drive is recommended here:

Next, you can choose to add a desktop shortcut and add bin to the path directory, click Add, and then click Next:

After the installation is successful, double-click the installed tool on the desktop. When using it for the first time, a window like the following will pop up, asking you if you need to import some settings of the development tool. Here, just choose not to import by default and click OK:

Then the following interface pops up requiring us to install two things:
The first one is node.js. We may need to rely on it for later project operation. If node is already installed on this machine, we can select local and then select the path of the node package we installed. If it is not installed, select install to download
The second one is ohpm (open harmony package manager), which is Hongmeng’s package management system. If we need some additional third-party libraries during development in the future, we can use it to install them. This is generally not available for beginners. Here We can choose install to install:

Next, we also need to install a harmoryos sdk. This sdk is currently version 3.1.0, which contains project preview tools, and then some toolkits in various languages. These are necessary recommendations to install and distribute by yourself. Just set the installation path, the default c drive is also fine:

Finally, we enter a protocol selection page, which means that all the content we are going to install must agree to this agreement. Just select accept here:

Enter the confirmation interface and ask if the directories you just selected are confirmed. If you think there is no problem, just click next:

We need to wait a few minutes to install all sdk and dependencies. After completion, the following window will pop up. Here we come to the developer tool interface of deveco studio. If there are some errors during the development process, for example, the sdk was not installed successfully. It doesn't matter, we click help in the lower left corner. There is a Diagnose Development Enviroment option to determine whether the current development environment is complete. Select it and the environment test will be performed.

I have successfully installed everything here. If you make an error, click the fix on the right to reinstall it. If there are no problems, the interface below will be full of ticks. At this point, the installation of the development tools is complete.

Basic code try
The main language developed by Hongmeng is the ArkTS language. arkts is based on typescript, and typescript is based on javascript. Therefore, the arkts language is enhanced and expanded on the js language, so the arkts language has the js language. Ability, if we want to realize the implementation logic of page functions, we can completely experiment with arkts language, and arkts is an enhancement of ts language, so arkts language also has the type checking function of ts.
To master the language of arkts first, you need to master the syntax of typescript. If you have not learned the language ts, I recommend reading my previous article column: typescript column . After mastering ts, you can learn the arkts language. Said to take off directly from the spot. Next, we try a simple code through the deveco studio we just downloaded:
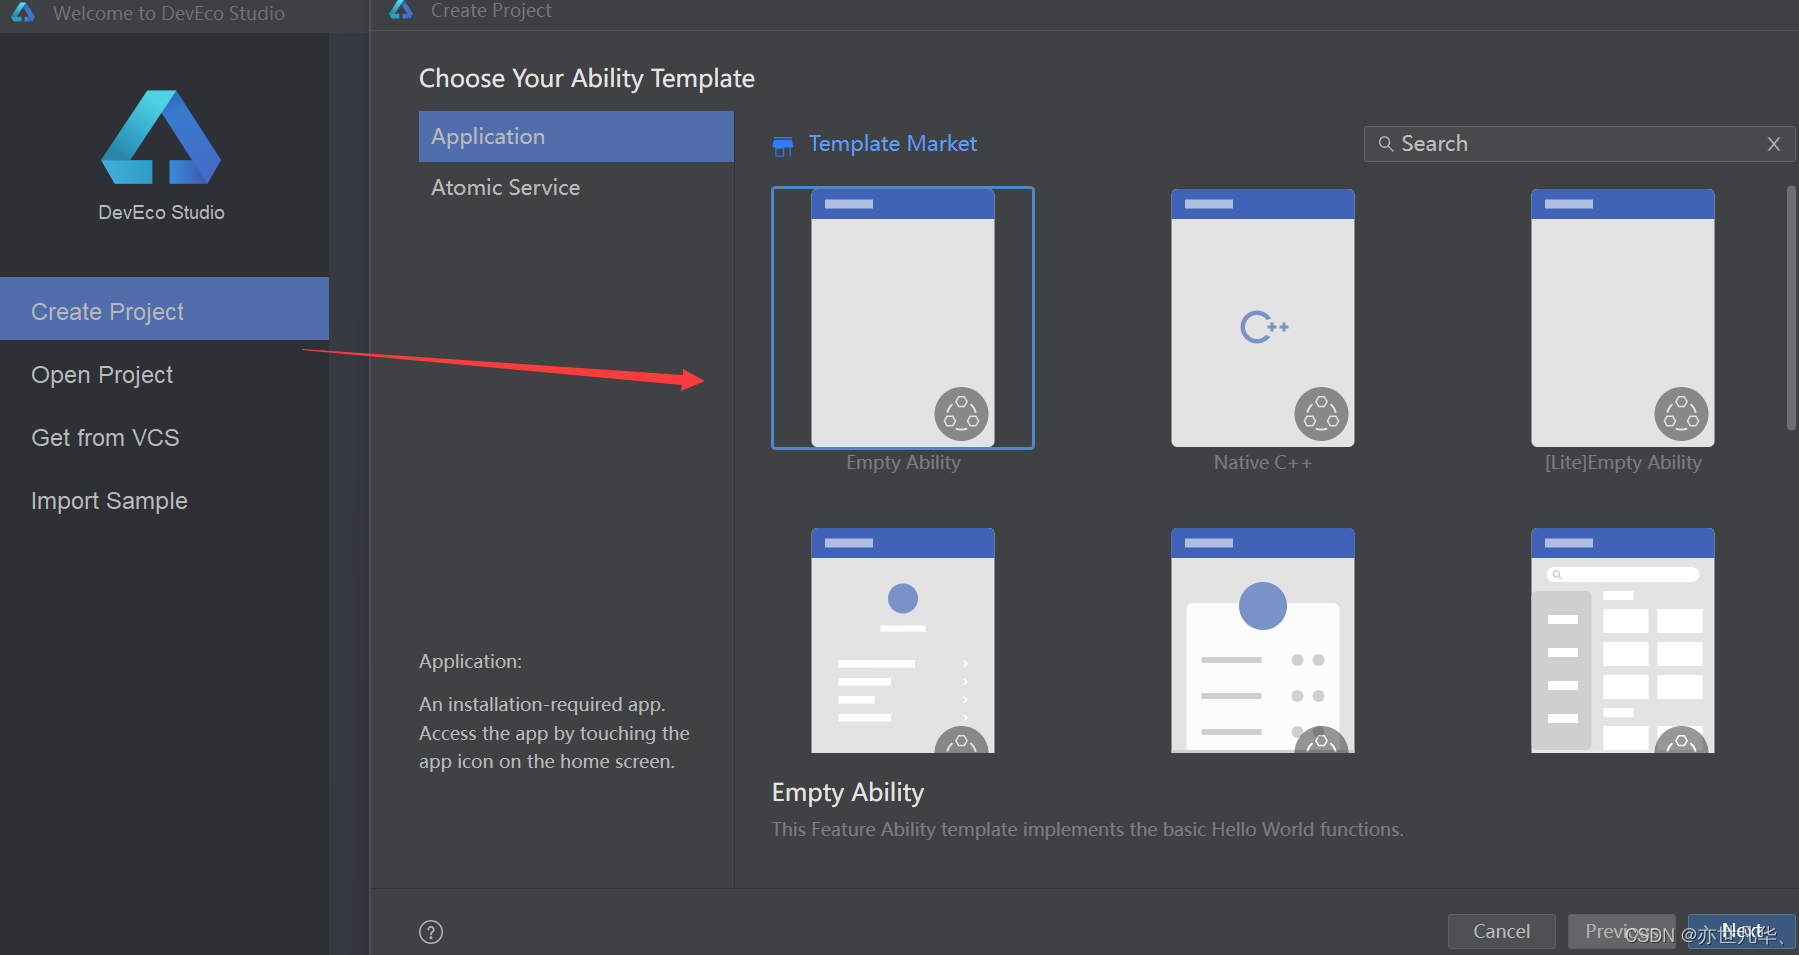
We open the project based on creation, and the pop-up box allows us to select the application. Here we can just default:
Later, enter the basic information configuration of the project. Here, select the project name according to your own situation, and the path can be the environment that has been used. Of course, this tool also supports low-code development. Just select Enable Super Visual, which can realize drag-and-drop of component applications. , of course, for beginners, it is better not to choose low-code development here. Knowing what the components mean is the focus of our learning:

After clicking finish, you will enter the creation of the project. After the creation is completed, the layout style of its tools is as follows. The suffix name of arkts language is ets. Our main code files are placed in the entry file entry. The following ets is the main code input. Resources are files where static resources are stored. The specific file introduction will be explained one by one later, so I won’t go into details here:
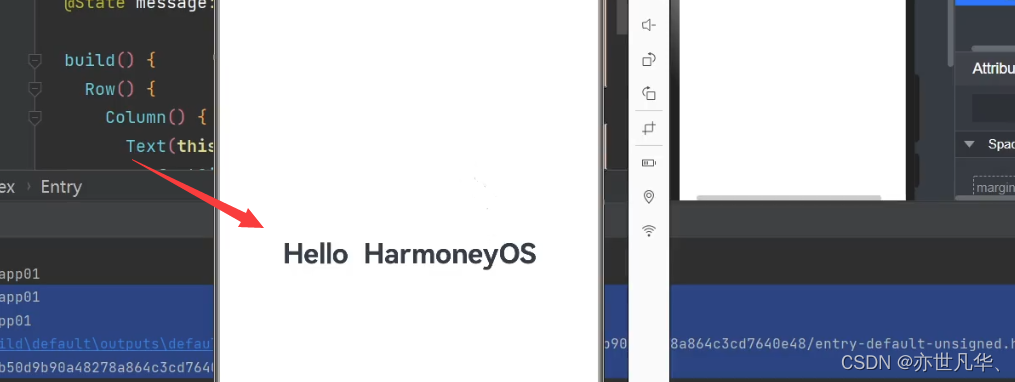
Next, we start running this initial project and click the preview option on the rightmost menu of the developer tools to preview the project:
After waiting patiently, a window like the one below will pop up, which looks like a mobile phone. The displayed content is helloworld. This is a mobile phone page previewer. It can directly preview and display the corresponding effects of the code we wrote to the preview page on the right. , what you see is what you get, and there is no need to watch it on your mobile phone, similar to the model of small program development:

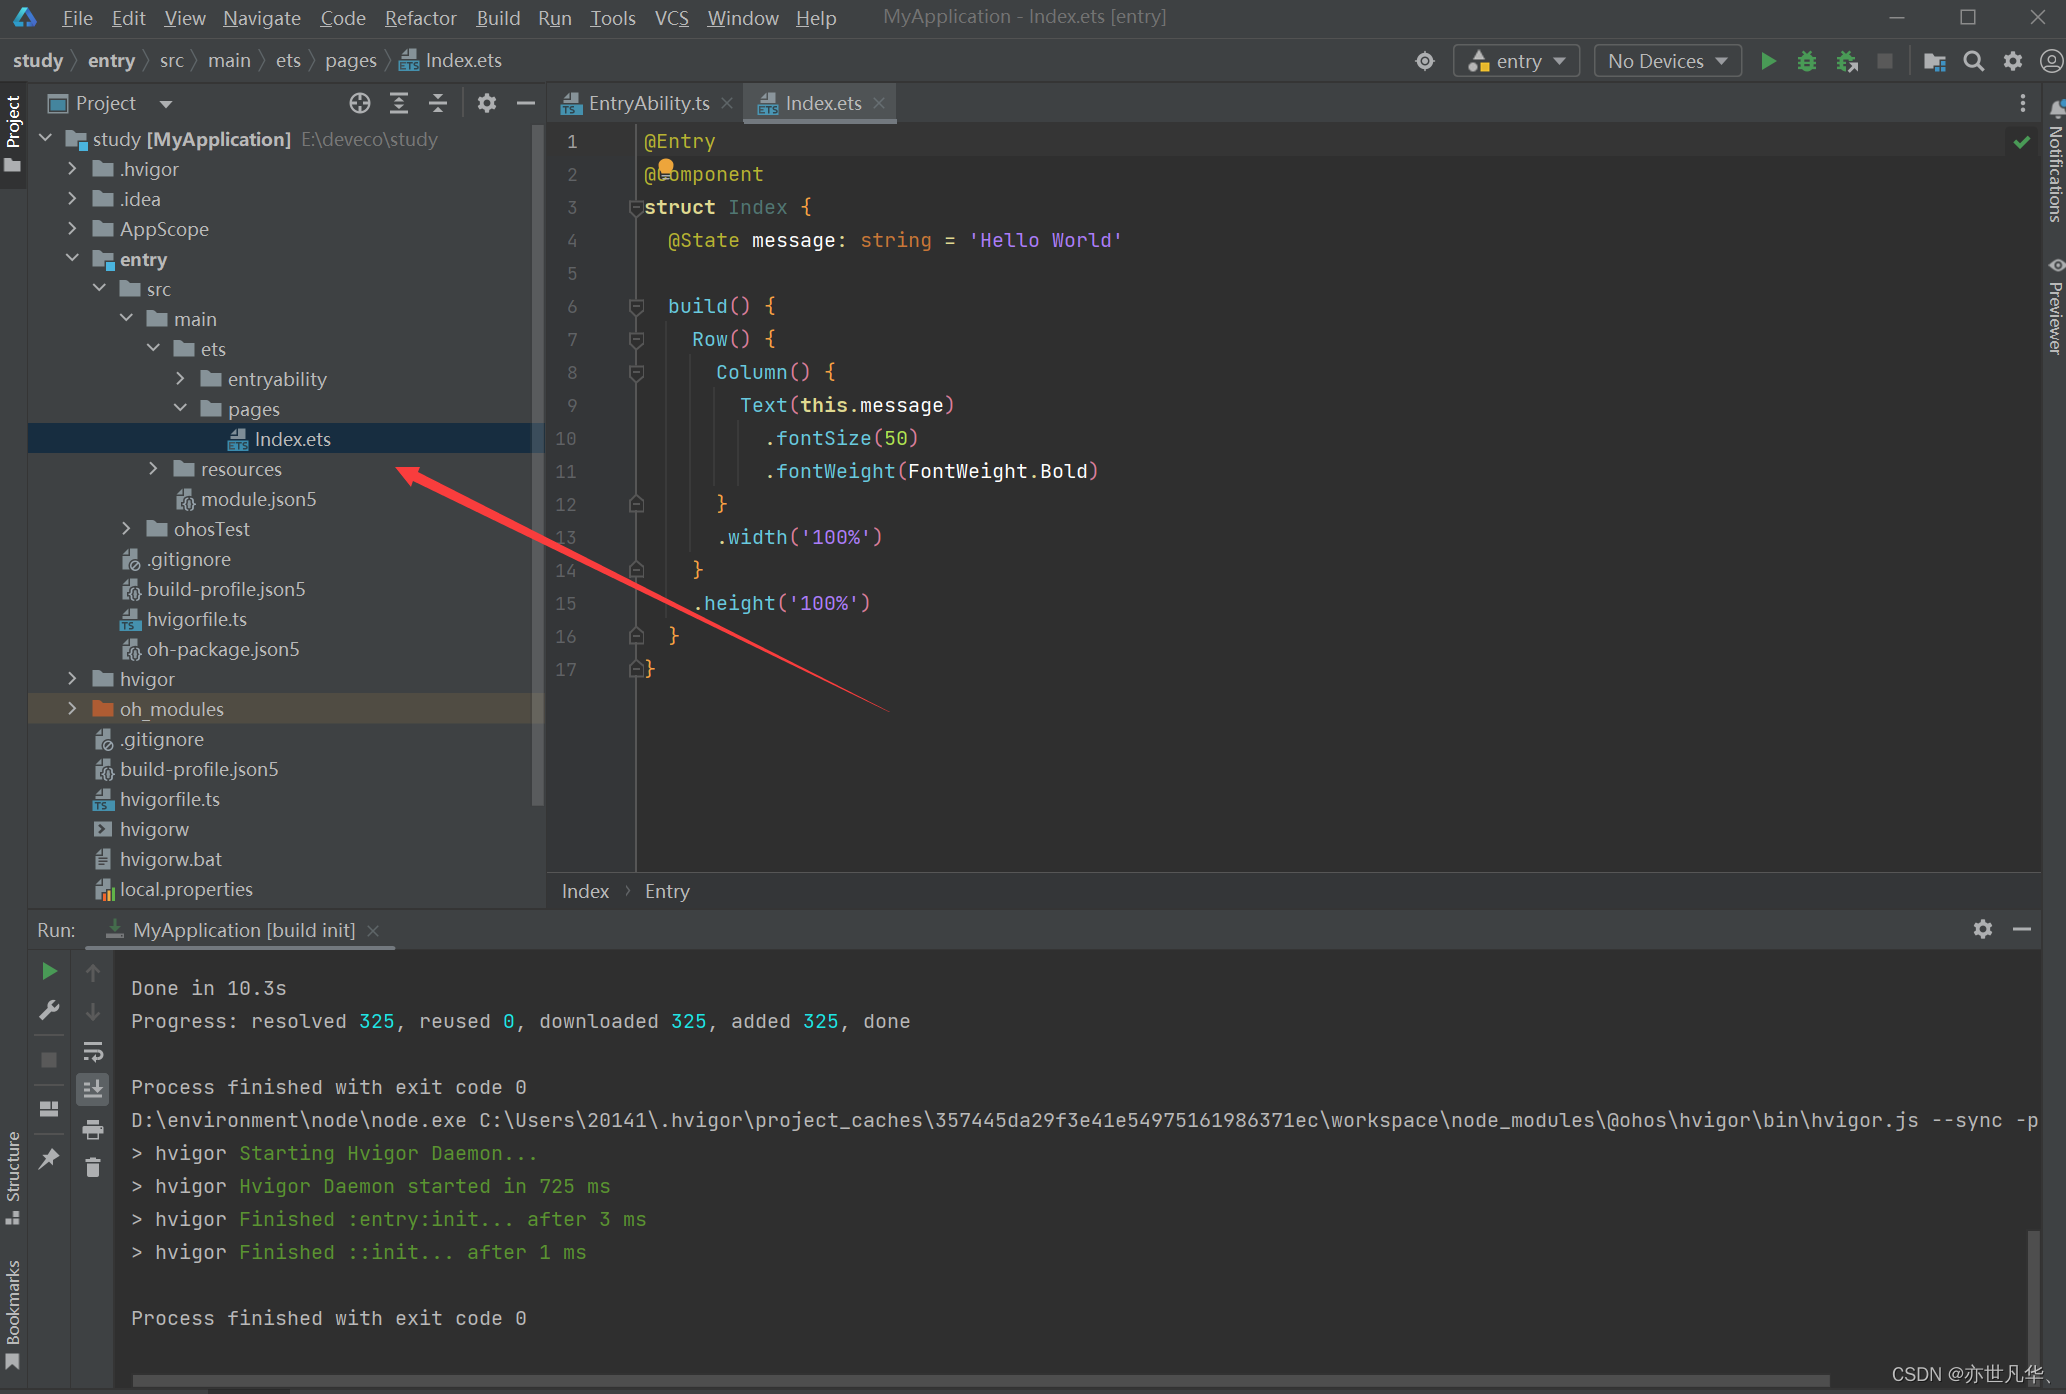
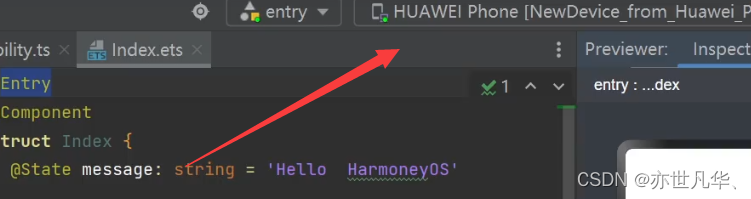
Next, we will conduct a simple analysis of the basic code in the entry file index.ets to know what the code does:
// @+字母 这种类型为装饰器,用来装饰类结构、方法、变量
@Entry // 标记当前组件为入口组件
@Component // 标记当前组件为自定义组件,是可复用的ui单元

struct Index { // 当前组件为自定义组件
  // @State:标记该变量是状态变量,值变化时就会触发ui刷新
  @State message: string = 'Hello World'

  build() { // build():代表ui描述,其内部以声明式方式描述ui结构
    /*
     * 还有一些arkUI提供的一些内置组件如下面书写
     * 容器组件:用来完成页面布局,例如 Row、Column
     * 基础组件:自带样式和功能的页面元素,例如 Text
     * */
    Row() {
      Column() {
        Text(this.message)
          .fontSize(50) // 属性方法:设置组件的UI样式
          .fontWeight(FontWeight.Bold)
      }
      .width('100%')
    }
    .height('100%')
  }
}
Here we add an attribute style to the current code to modify its color, and then set a click event to modify the attribute value of the message. When the variable changes, the page will automatically refresh in real time, without us having to operate the page view personally. This is declarative UI A major feature : changes in status data drive the page UI to automatically refresh.

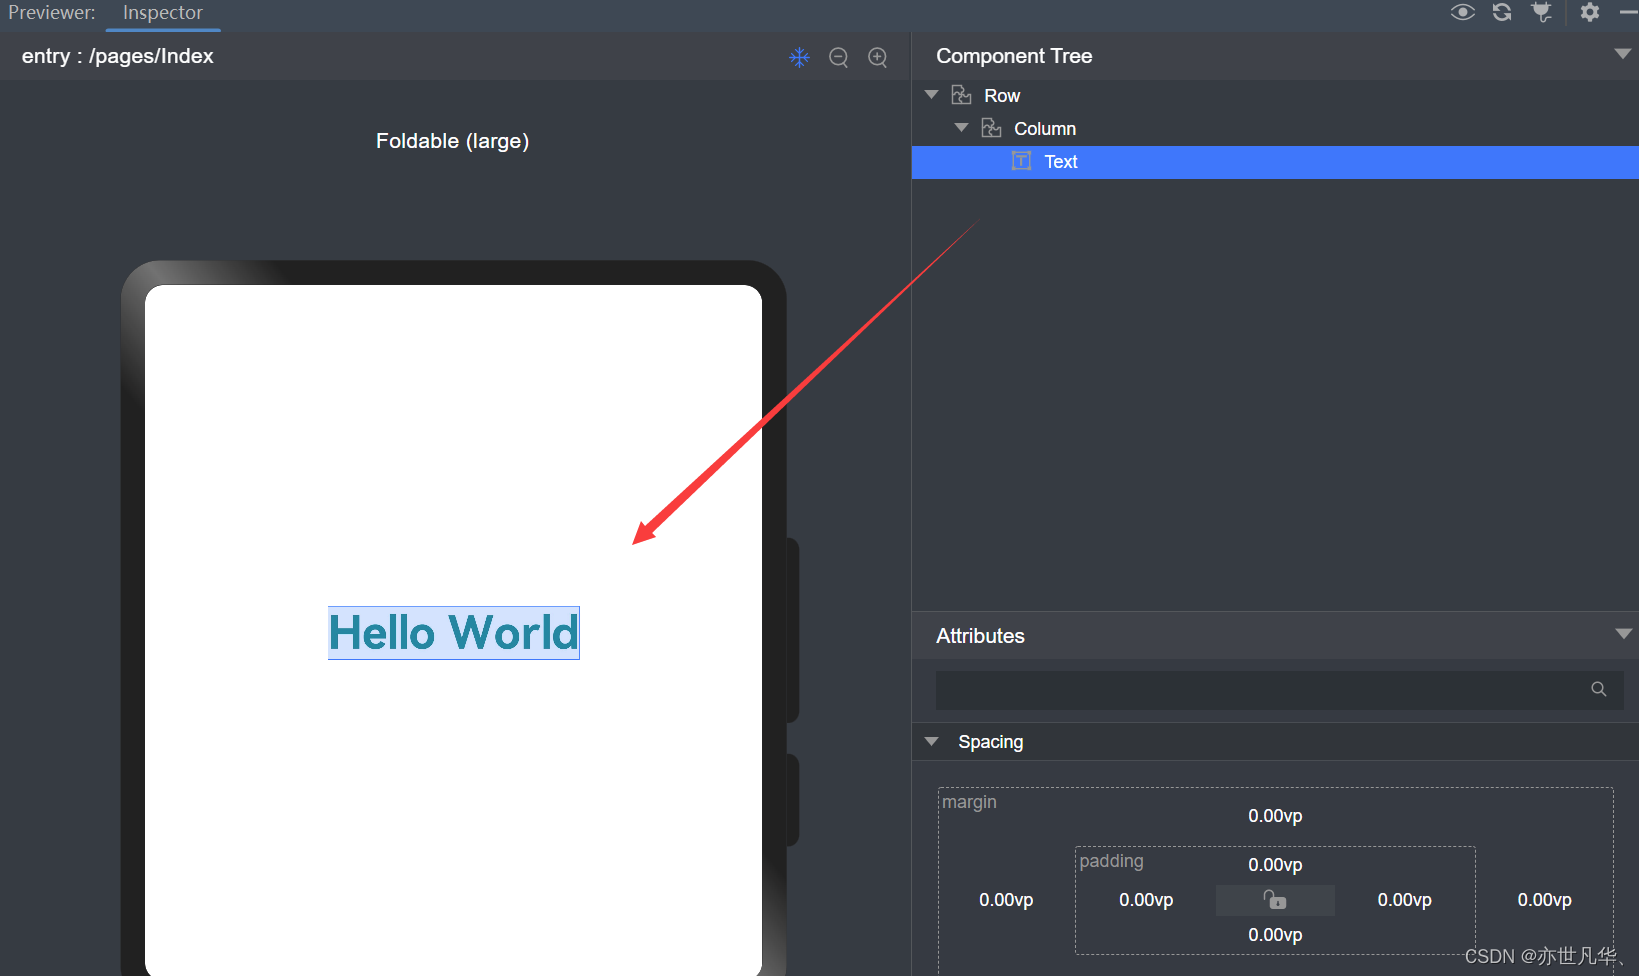
Of course, we can also make a choice on the device. Here we can choose the folding screen to see the effect:

Of course, we can also open the component tree to display the current preview:

The effect is as follows:
For explanations of the specific components used by harmonyos and related code functions, you can also refer to the official website for introduction, as follows:

Use of emulator
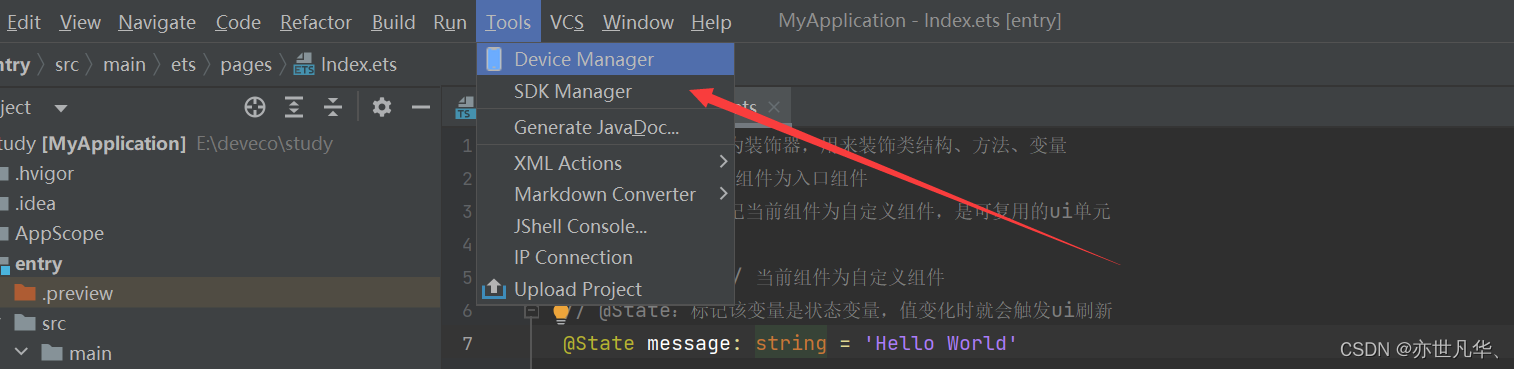
Above we used code to run a hello world case, but how do we make the project run on our mobile phones? It is also troublesome to use a real mobile phone to verify each project test. Here we need to use the simulator. Achieved, the current developer tools also provide us with such an emulator. We need to download and install the local emulator first, and then proceed with the running process. Click Tools->Device Manager on the top toolbar
Next we select a device. There are three options in the pop-up box, and their meanings are as follows:
Local Emulator: Local emulator (generally choose this for development environment)
Remote Emulator:Remote emulator
Remote Device:Remote device
Here we need to click Install first to install the local simulator:

After the creation is completed, the following interface will appear. Here we first change the path of the local emulator. It is recommended to drive D. After selecting the path, click +New Emulator next to it to create an emulator:

After entering this page, we are provided with some choices of Huawei devices. Here we choose Huawei mobile phones and click next:

Go to this page and click on the latest device to download:

After the installation is complete, just give the installed emulator a name:

After configuring the name, we next go to the device platform to start the project we downloaded:

The effect after the startup is completed is roughly as follows:

There are some menu options on the right side of the simulator for us to choose some operations of the simulator:

Next, if you want to start our presentation, just click the green start button in the upper right corner to start:
In this way, our project running code will run in the Huawei mobile phone simulator:
Project directory introduction
The above is just a simple run of the project to demonstrate how the project runs, but the file directory where the overall code is located is not explained in too much detail. Next, we will make a simple project directory code produced in the developer tools. Introduction to the role of . Only if we know what our files are used for can we develop the project. The following is an introduction to the project directory:
.hvigor: File that stores build configuration information (used when publishing and packaging, has nothing to do with normal development)
.idea: development tool-related configuration files
AppScope: global shared resource storage directory
entry: Project module directory ( main file for future development )
hvigor: stores front-end build configuration information files (front-end build and task orchestration based on ts)
oh-modules: files that store all third-party packages used in the project
.gitignore: Files excluded from code version management
build-profile.json5: a file that configures product signatures and other information
hvigorfile.ts: script that performs compilation and build tasks
hvigorw: some command scripts executed under linux or unix (script program used as ohpm editing and building tool)
hvigorw.bat: Some command scripts executed under windows (script program used as ohpm editing and building tool)
local.properties: Configuration file for some basic local information
oh-package.json5: Some basic configurations such as the current project name and dependencies of third-party packages
oh-package-lock.json5: basic information configuration of tree dependency tree
Next, we introduce the main files of the module directory (entry):
src: source code resource directory
main: core project code
ets: source code directory of arkts
entryability: logic and life cycle management
pages: source code interface development
resources: module-level public resource files
ohosTest: unit test code