The following content comes from Shang Silicon Valley. I wrote this series of articles mainly to facilitate my own subsequent viewing. I don’t have to carry around a PDF to find it, which is too troublesome!
Chapter 15 InfluxDB service process parameters (usage of influxd command)
15.1 influxd command list
1. After our InfluxDB is downloaded, the influxd in the decompressed directory is the startup command of our InfluxDB service process. This article will not introduce all the commands of influxd. Through the following command list, you can have a glimpse of some configurable capabilities of InfluxDB. For details, please refer to: https://docs.influxdata.com/influxdb/v2.4/reference/cli/influx/
| Order | literal translation | explain |
|---|---|---|
| downgrade | Downgrade | Downgrade metadata format to match older releases |
| help | help | Print help information for the influxd command |
| inspect | examine | Check the data of the database on disk |
| print-config | Print configuration | (This command has been deprecated in 2.4) Prints the complete influxd configuration information for the current environment |
| breath | ||
| recovery | recover | Restore operating permissions to InfluxDB and manage tokens, organizations and users |
| run | run | Run influxd service (default) |
| upgrade | upgrade | Upgrade InfluxDB from 1.x to InfluxDB2.4 |
| version | Version | Print the current version of InfluxDB |
2. It is not necessary to use the influxd command to view the current configuration of InfluxDB. You can also use the influx-cli command:
influx server-config
15.2 Two important commands of influxd
1. The two commands most likely to be used under production conditions are inspect and recovery. Below, we will give a detailed introduction to these two commands.
15.2.1 inspect command
1. You can use the following command to view the help information of the inspect subcommand.
./influxd inspect -h
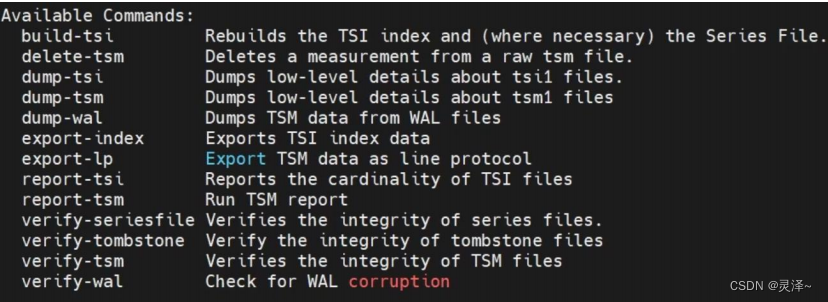
2. You will find that there are many subcommands under the inspect subcommand. The tsi, tsm, and wal appearing here are all related to the underlying storage engine of InfluxDB. This article does not cover this part. With a little click here, you can use the following command to view the general situation of data storage in InfluxDB.
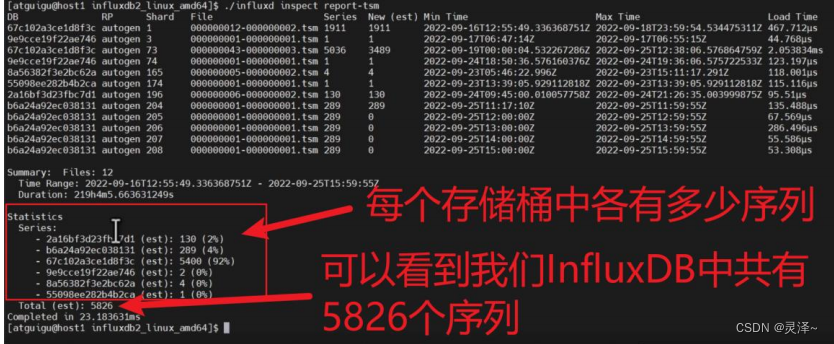
./influd inspect report-tsm
3. The execution result is shown in the figure below. The information displayed includes the data storage situation of InfluxDB, such as how many sequences there are in the entire InfluxDB, how many sequences there are in each bucket, etc.
4. In addition, there is a more important export-tsm command, which can export all the data in a certain bucket to the InfluxDB row protocol. We will demonstrate its use in detail in an example later.
15.2.2 recovery command
1. Recovery means recovery. You can first use the following command to view the help information of the recovery subcommand.
./influd recovery -h
2. As shown in the figure, the influxd recovery command is mainly used to repair or regenerate the operator permissions required to operate InfluxDB.
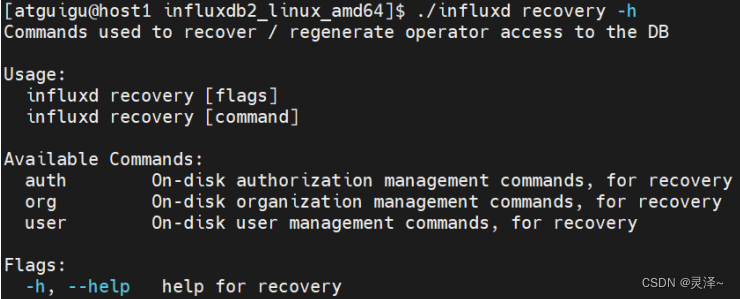
3. There are three subcommands under recovery, namely auth, org and user. They are related to token, organization and user respectively. The following mainly explains the usage of the auth subcommand. Use the following command to further view the help information of the auth subcommand.
./influxd recovery auth -h
4. The returned result is as shown below:
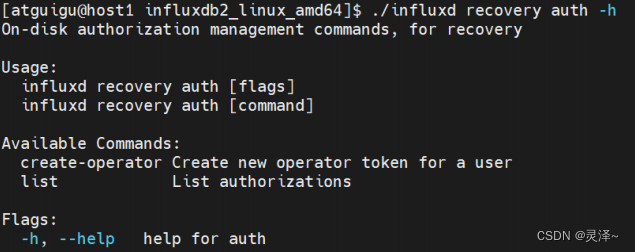
5. You can see that it has two subcommands.
- create-operator: Create a new operator token for a user.
- list: List all tokens in the current database.
6. Use the following command to create an operator-token again for user tony.
.atguigu/influxd recovery auth create - operator --username tony --org
7. After the command is executed, the terminal will display the content as shown in the figure below. You can see that an operator token named tony’sRecovery Token is created here.

15.3 Influxd common configuration items
1. There are so many available configuration items for influxd that this article will not explain them all. For details, please refer to: https://docs.influxdata.com/influxdb/v2.4/reference/config-options/#assets-path
2. The following are some commonly used parameters
- bolt-path: The path of the BoltDB file.
- engine-path: path to the InfluxDB file
- sqlit-path: The path of sqlite. InfluxDB also uses sqllite, which stores some metadata about task execution.
- flux-log-enabled: Whether to enable the log, the default is false.
- og-level: log level, supports debug, info, error, etc. The default is info.
15.4 How to configure influxd
1. There are 3 ways to configure influxd. Here we use http-bind-address to perform the operation and demonstrate it for everyone.
15.4.1 Command line parameters
1. Before performing the following operations, remember to close the currently running influxd. You can use the following command to kill the influxd process of course. Otherwise, the original influxd process will lock the BoltDB database and other processes cannot access it. Of course you can also modify the BlotDB path, but that would be too troublesome.
ps -ef | grep influxd | grep -v grep | awk '{print $2}' | xargs kill
2. When the user starts InfluxDB with the influxd command, a configuration item is passed through the command line parameters. for example:
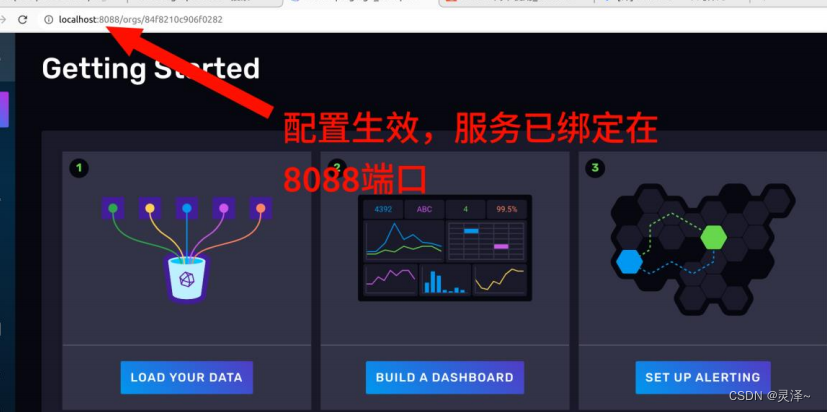
./influxd --http-bind-address=:8088
3. You can try to access port 8088 to see if the service is connected to the port.
15.4.2 Environment variables
1. Similarly, kill the previous influxd process first. Run the following command.
ps -ef | grep influxd | grep -v grep | awk '{print $2}' | xargs kill
2. Users can declare an environment variable to configure influxd. For example: Now, let's start influxd to see the effect.
export INFLUXD_HTTP_BIND_ADDRESS=:8089

3. Finally, because we are using the export command, we temporarily set up an environment variable. If you feel that the current shell session is not important, you can close the current shell session. Otherwise, you can use the unset command to destroy this environment variable.
unset INFLUXD_HTTP_BIND_ADDRESS
15.4.3 Configuration files
1. You also place a config file in the directory where nfluxd is located. It can be config.json, config.toml, or config.yaml. Influxd can recognize these 3 formats, but the content in the file must be legal. Influxd will automatically detect this file when it starts.
2. Create a config.json file in the InfluxDB installation directory.
vim /opt/module/influxdb2_linux_amd64/config.json
3. Edit the following content.
{


"http-bind-address": ":9090"
}
4. Remember to stop the previous InfluxDB process before starting it.
ps -ef | grep influxd | grep -v grep | awk '{print $2}' | xargs kill
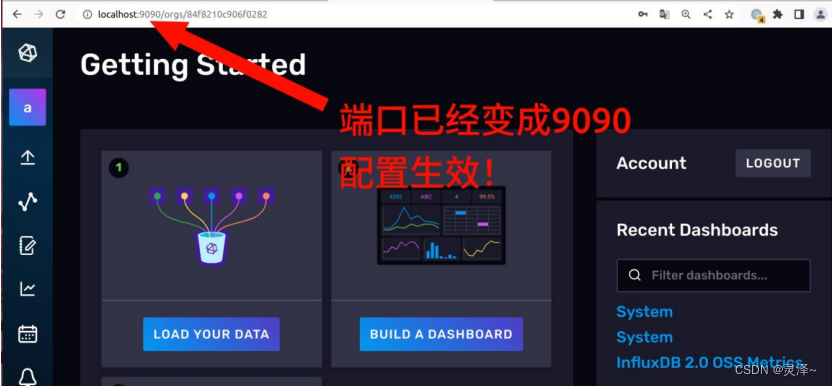
5. Now start it again and see the effect.
./influxd
6. You can see that the port has changed to 9090. The configuration is also effective.
15.4.4 Summary
1. Finally, if you want to modify the configuration, it is recommended to refer to the official documentation of InfluxDB. This part is very clearly written, and the official website has provided various templates for configuration. Making good use of official documents can greatly improve development efficiency.
