Summary:
Web Service technology enables different applications to run on different machines without the need for additional, specializedthird-party software or hardware. data can be exchanged or integrated with each other. Applications implemented according to Web Service specifications can exchange data with each other regardless of the language, platform or internal protocol they use. Web Service is a self-describing, self-contained available network module that can perform specific business functions. Web Services are also easy to deploy because they are based on some common industry standards and existing technologies, such as a subset of the Standard Generalized Markup Language< /span>. Web Services reduce the cost of application interfaces. Web Service provides a common mechanism for the integration of business processes across an entire enterprise or even between multiple organizations. HTTP, XML
1. Install Web software (Apache)
yum -y install httpd
2. Firewall configuration
firewall-cmd --permanent --add-service=http
firewall-cmd --reload
3. Web site publishing--Configuration of virtual host based on host header
Plan: Publish a website based on http protocol - web1.junyi.com
Configuration:
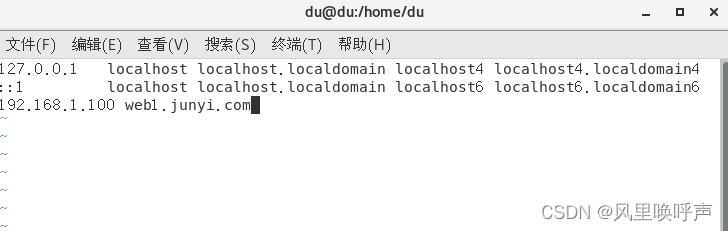
① Modify the /etc/hosts file to realize the mapping of IP addresses to domain names (this is also to avoid the trouble of remembering IP addresses)
②Enter the /etc/httpd/conf.d directory, create a configuration file with the .conf suffix and write the content
Code explanation:
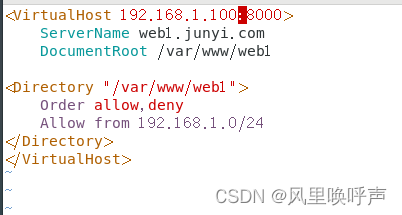
This code is the Apache access control policy, which only allows users in the 192.168.1.0/24 network segment to access.
③Write some content to the website (convenient for testing)
mkdir /var/www/web1 //Create a directory consistent with the directory in ②
vim /var/www/web1/index.html //Create an hmlt file based on the created directory and write the content
④Restart the web service
systemctl restart httpd
At this point in practice, we can simply access a site (based on http protocol)
⑤Test
http://web1.junyi.com //Open the browser and enter the built website


4. Web site publishing--based on ports
We continue to build the website based on the above:
①Secure kernel and firewall configuration
semanage port -a -t http_port_t -p tcp 8000
firewall-cmd --permanent --add-port=8000/tcp
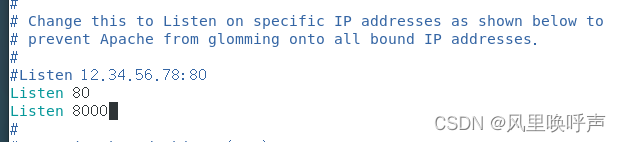
②Enter the Apache main configuration file and add the port number (port number customization-I will take 8000 as an example)
③Modify the contents of the configuration file /etc/httpd/conf.d/web1.conf
④Restart the Web service after modification
systemctl restart httpd
⑤Test
http://web1.junyi.com:8000 //Open in browser (based on http protocol)


However, a website built with a simple HTTP protocol is not safe, so how do we make a safe and secure website? HTTP+SSL (ie HTTPS) is extended here.
5. Build an encrypted website based on https protocol
Planning: Build a website based on https protocol-https:web2.junyi.com:8008 (default port is 443)
1. Install software related to https
yum install mod_ssl -y
2. Security kernel and firewall configuration
firewall-cmd --permanent --add-service=https
semanage port -a -t http_port_t -p tcp 8008
firewall-cmd --permanent --add-port=8008/tcp
firewall-cmd --reload
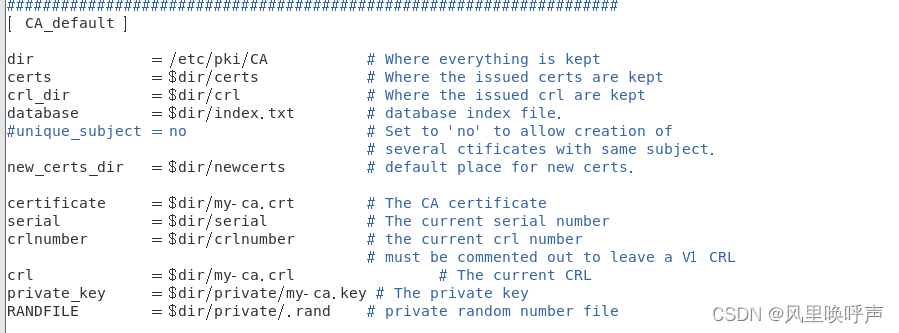
3. Construction of CA certificate server (to issue a certificate to ourselves, we can also find a formal organization to obtain a certificate)
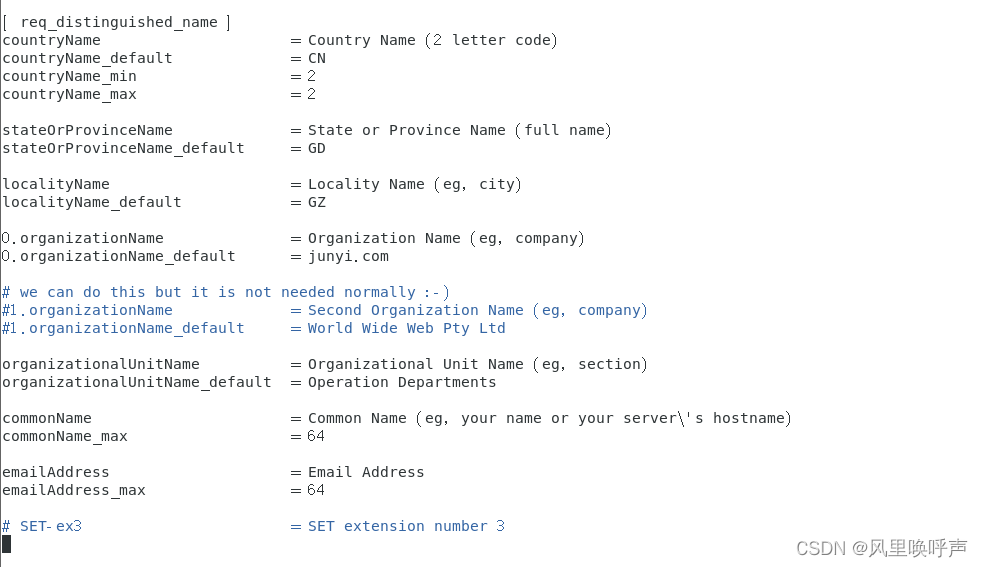
vim /etc/pki/tls/openssl.cnf //Modify the configuration file of CA certification (modify some contents)
cd /etc/pki/CA
touch /etc/pki/CA/index.txt   //生成证书索引数据库文件
echo 01 > /etc/pki/CA/serial   //指定一个颁发证书的序列号


openssl genrsa -out private/my-ca.key -des3 1024  //为CA创建私钥

openssl req -new -x509 -key private/my-ca.key -days 365 > my-ca.crt      //生成证书请求文件,并自签署证书

【
    openssl req -new -key my-ca.key -out my-ca.csr
    openssl x509 -rea -sha256 -days 365 -in my-ca.csr -signkey my-ca.key -out my-ca.crt
    (这两个结合即是上面的步骤)----这部分是解释说明,不必重复操作
 】
4. Issue server certificate
cd /etc/pki/CA
openssl genrsa -des3 -out server.key 1024  //创建服务器私钥
openssl rsa -noout -text -in server.key  //以文本的形式输出密钥
openssl req -new -key server.key -out server.csr  //生成证书请求文件
openssl ca -in server.csr -out server.crt  //使用CA证书进行签署生成crt文件(证书)
5. Modify the /etc/hosts configuration file
vim /etc/hosts
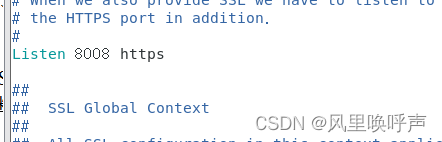
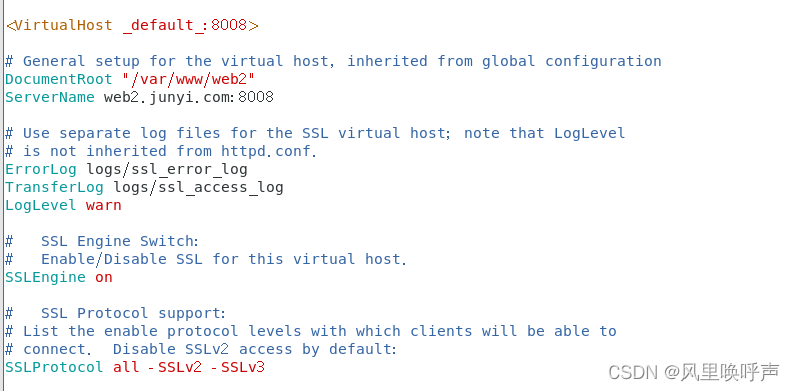
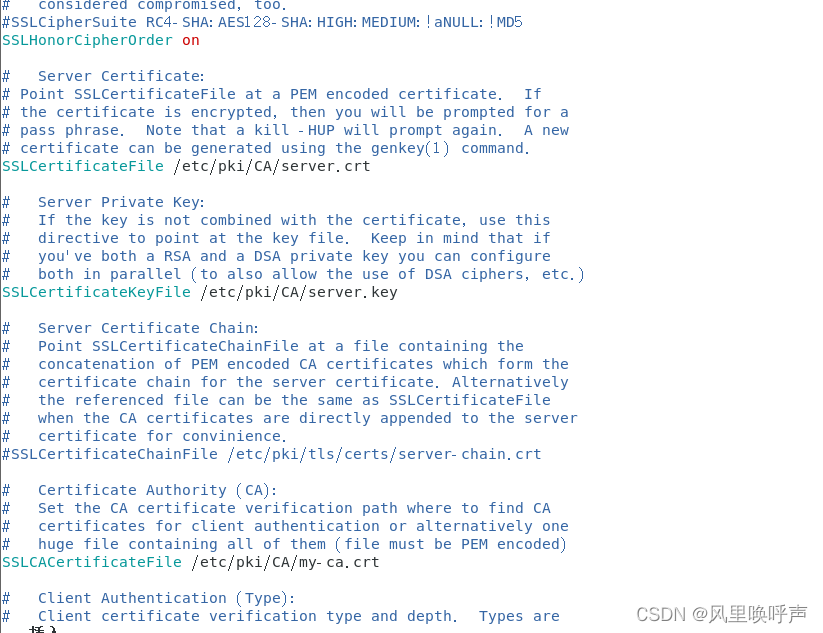
6. Enter the directory /etc/http/conf.modules.d and modify the configuration file ssl.conf
7. Write some content to the website (convenient for testing)
mkdir /var/www/web2 //Create directory
vim /var/www/web2/index.html //Create the html file based on the directory that has been created and write the content
8. Restart the Web service
systemctl restart httpd
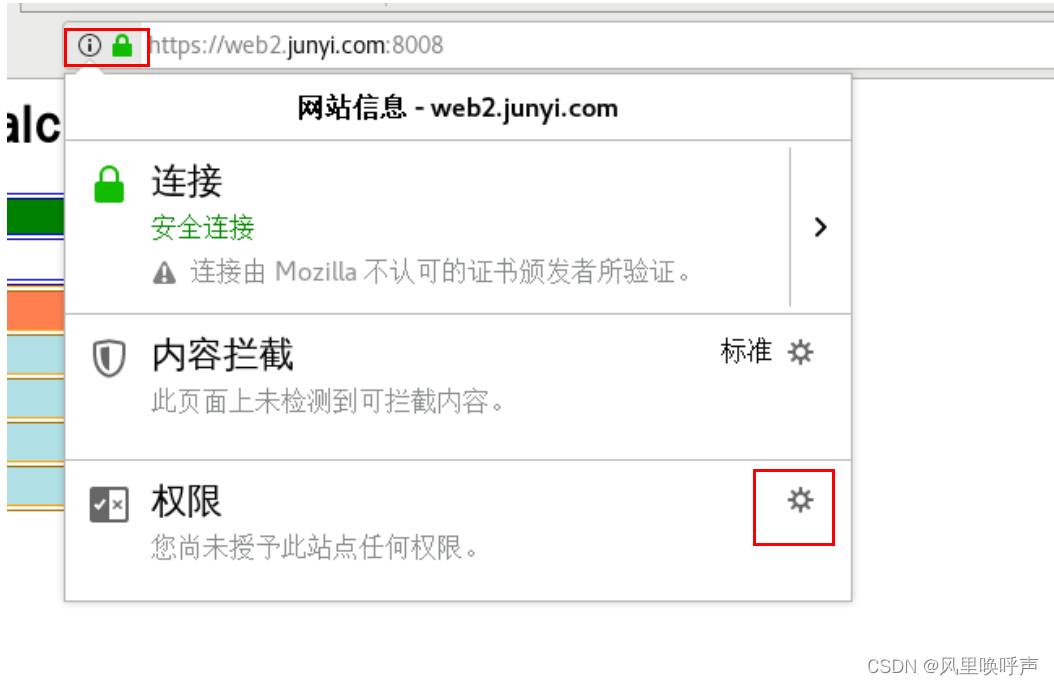
9. Test
https://web2.junyi.com:8008
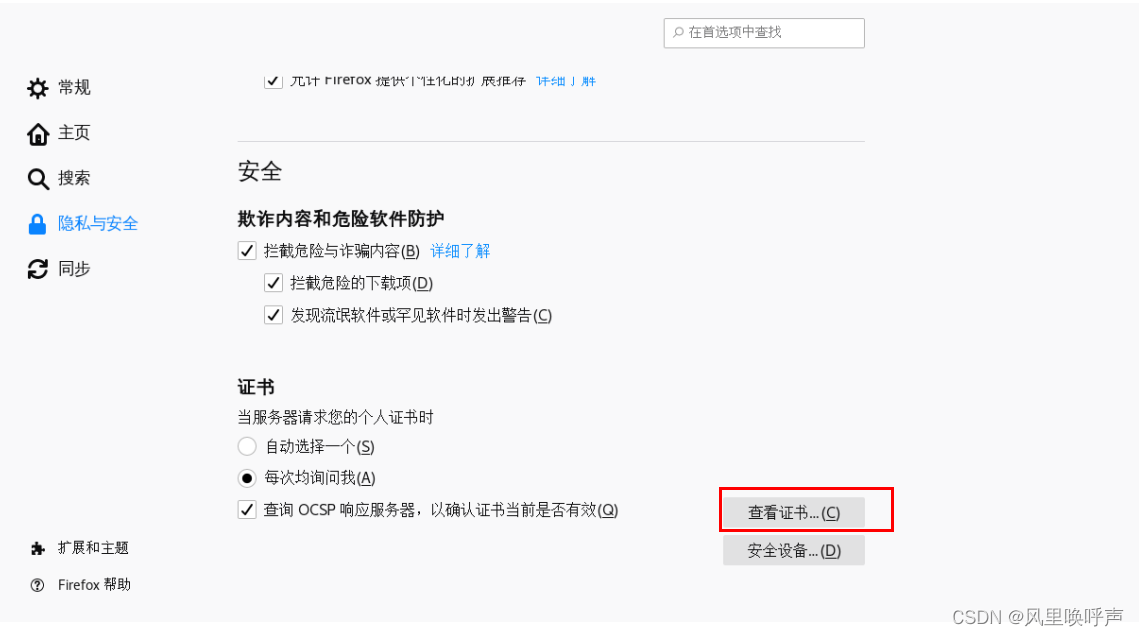
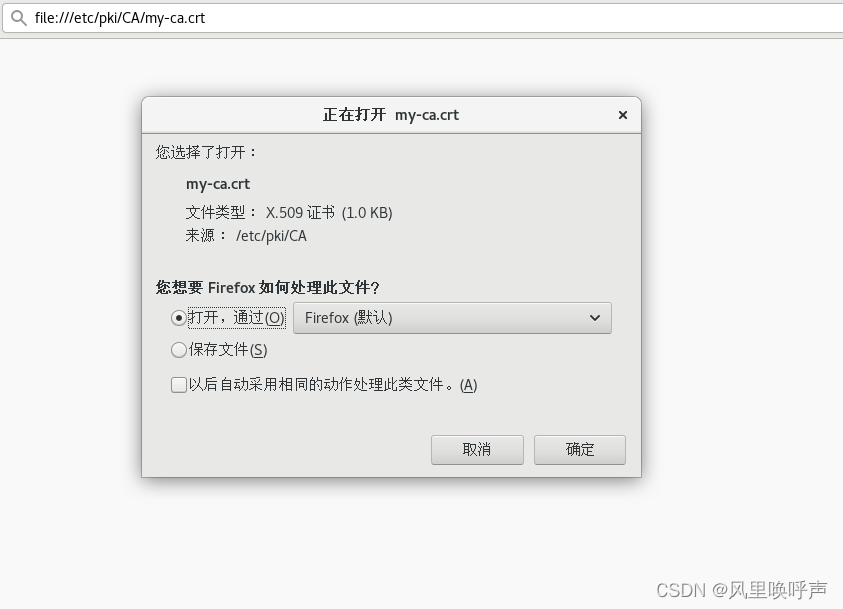
10.Download certificate
Open the directory where your digital certificate is saved and click to save the file.
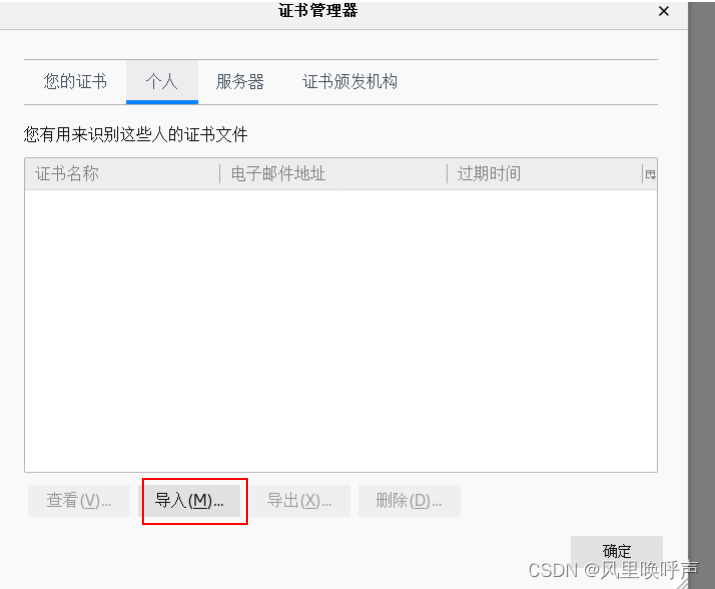
11. Import the certificate (the small lock turns green to indicate success)

Notice:
The construction of the WEB server is based on the DNS server. We can build a DNS server to serve it. To build a DNS server, go to:https://mp.csdn.net/mp_blog/creation/editor/129963557
Details:
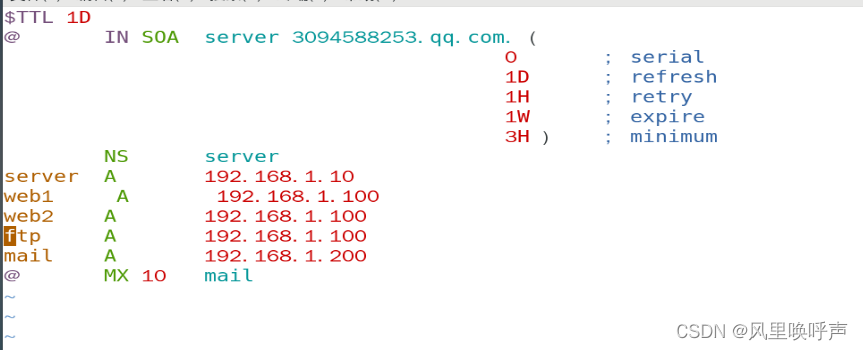
The forward zone file in the DNS server is very important. It determines whether you can effectively access the URL created on the WEB server.
cd /var/named
vim junyi.com.zone //junyi.com.zone is my forward zone file
for example:
①If the URL you create at the WEB service point is web1.xxx.com, please note that
②If the URL you create at the WEB service point is www.xxx.com, then please note that
Restart the DNS service after configuring:
systemctl restart named


At this point, the experiment is over!
If there is anything I did wrong or something I don’t understand, please feel free to comment.