Table of contents
Ansible is a configuration management and application deployment tool developed based on Python, and it is now also shining in the field of automated management. It combines the advantages of many established operation and maintenance tools. Ansible can basically implement all the functions that Pubbet and Saltstack can achieve.
Ansible can configure, deploy, and manage thousands of hosts in batches. For example, in the past, it was necessary to switch to one or more operations performed on each host. Using Ansible, you only need to complete the operations of all hosts on a fixed Ansible control node.
Ansible works based on modules. It only provides a running framework. It does not have the ability to complete tasks. It is Ansible's modules that actually perform operations. For example, the copy module is used to copy files to the remote host, and the service module is used for management. Starting, stopping, restarting services, etc.
One of the more distinctive features of Ansible is Agentless, that is, there is no Agent. It is just like an ordinary command, not a C/S software. Ansible only needs to be installed once on a host as a control node. Usually it is based on SSH connection is used to control the remote host. Ansible or other additional services do not need to be installed on the remote host.
When the user enters commands or playbooks in the server terminal, the playbooks will be disassembled into plays through predetermined rules, and then organized into tasks that can be recognized by ansible, calling modules and plug-ins, and sending temporary files through SSH according to the host list. Execute and return the results to the remote client, and automatically delete them after execution.
Another distinctive feature of Ansible is that most of its modules are idempotent. The so-called idempotence means that no matter how many times the same operation is executed, the result is the same. That is, the impact of any multiple executions of a command is the same as the impact of one execution. For example, if you execute the systemctl stop xxx command to stop a service, when it is found that the target service to be stopped is already in a stopped state, it will do nothing. Therefore, the result of multiple stops is still stop, which will not change the result. It is idempotent. And systemctl restart xxx is non-idempotent.
Many modules of Ansible will first determine whether the target node wants to perform the task when executing. Therefore, you can confidently let Ansible perform the task. Repeated execution of a task will not produce any side effects most of the time.
ansible environment installation and deployment
//管理端安装 ansible
yum install -y epel-release			//先安装 epel 源
yum install -y ansible
//ansible 目录结构
/etc/ansible/
├── ansible.cfg			#ansible的配置文件,一般无需修改
├── hosts				#ansible的主机清单,用于存储需要管理的远程主机的相关信息
└── roles/				#公共角色目录
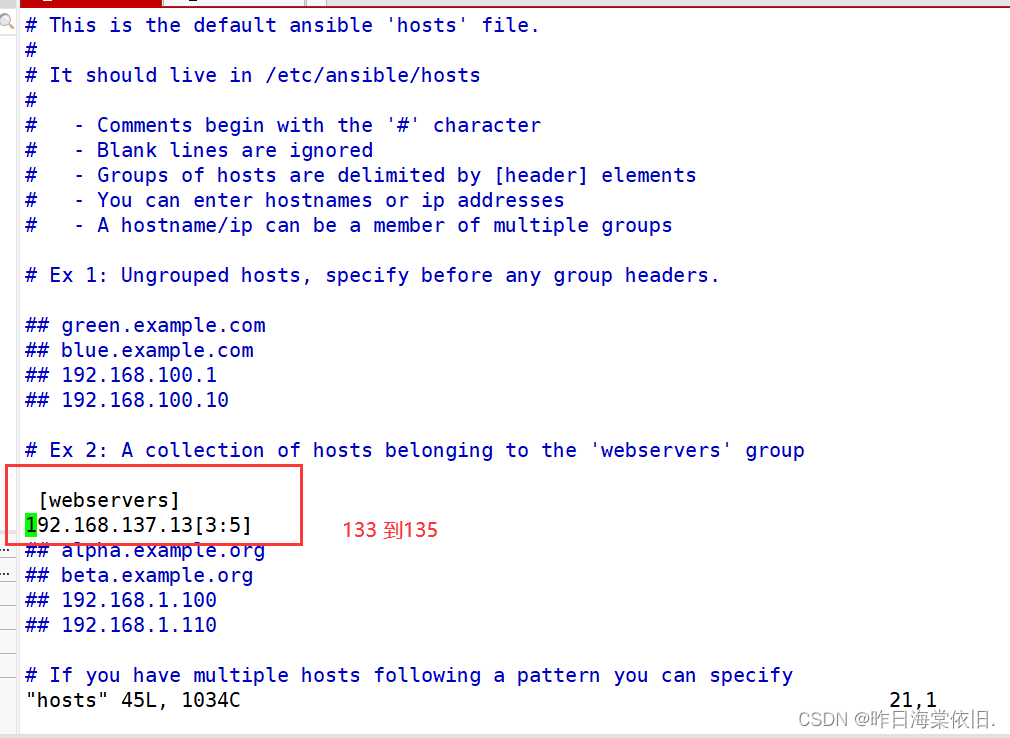
//配置主机清单
cd /etc/ansible
vim hosts
[webservers]			#配置组名
192.168.80.11			#组里包含的被管理的主机IP地址或主机名(主机名需要先修改/etc/hosts文件)

[dbservers]
192.168.80.12
//配置密钥对验证
ssh-keygen -t rsa -P '' -f ~/.ssh/id_rsa

yum install -y sshpass
sshpass -p 'abc1234' ssh-copy-id -o StrictHostKeyChecking=no [email protected]
sshpass -p 'abc1234' ssh-copy-id -o StrictHostKeyChecking=no [email protected]
ansible command line module
命令格式:ansible <组名> -m <模块> -a <参数列表>
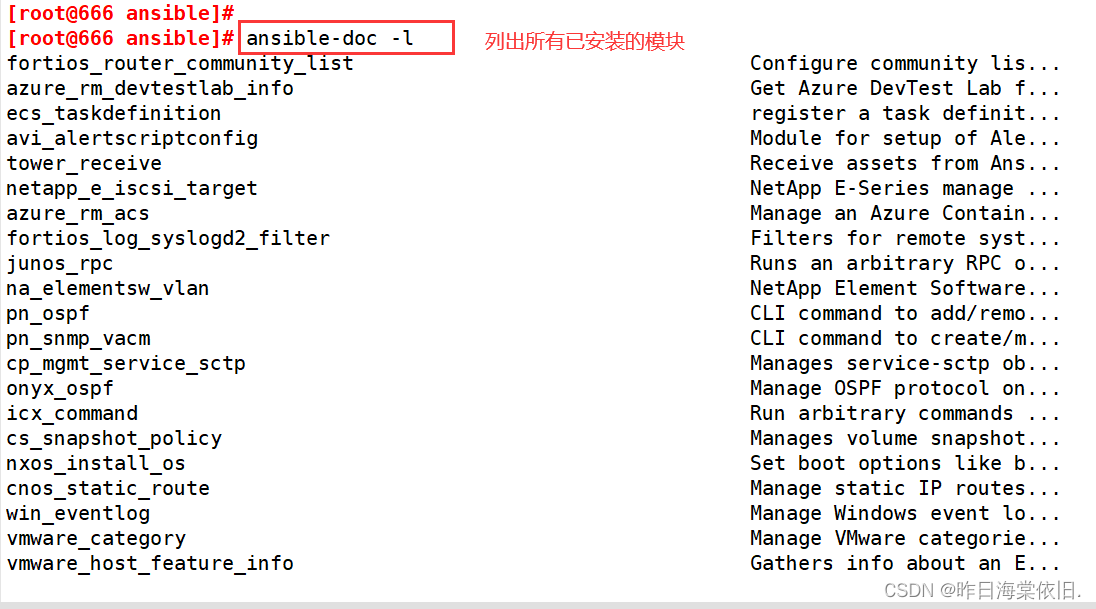
ansible-doc -l #列出所有已安装的模块,按q退出
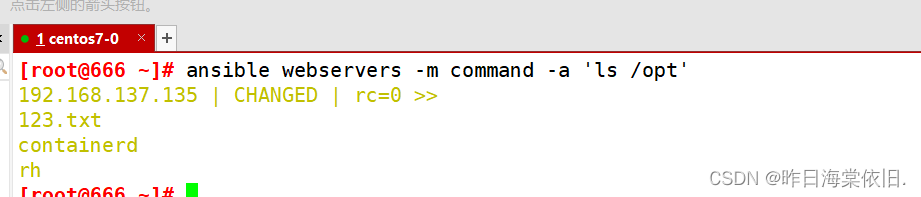
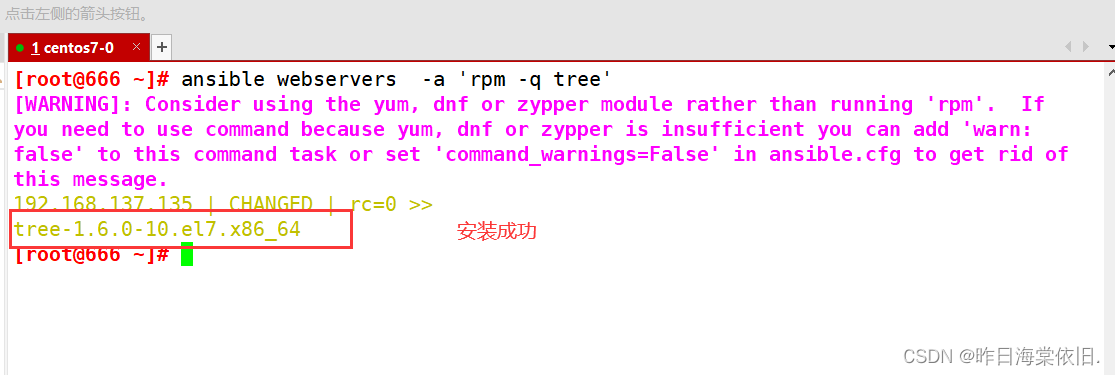
1.command 模块
//在远程主机执行命令,不支持管道,重定向等shell的特性。
ansible-doc -s command #-s 列出指定模块的描述信息和操作动作
ansible 192.168.80.11 -m command -a 'date' #指定 ip 执行 date
ansible webservers -m command -a 'date' #指定组执行 date
ansible dbservers -m command -a 'date'
ansible all -m command -a 'date' #all 代表所有 hosts 主机
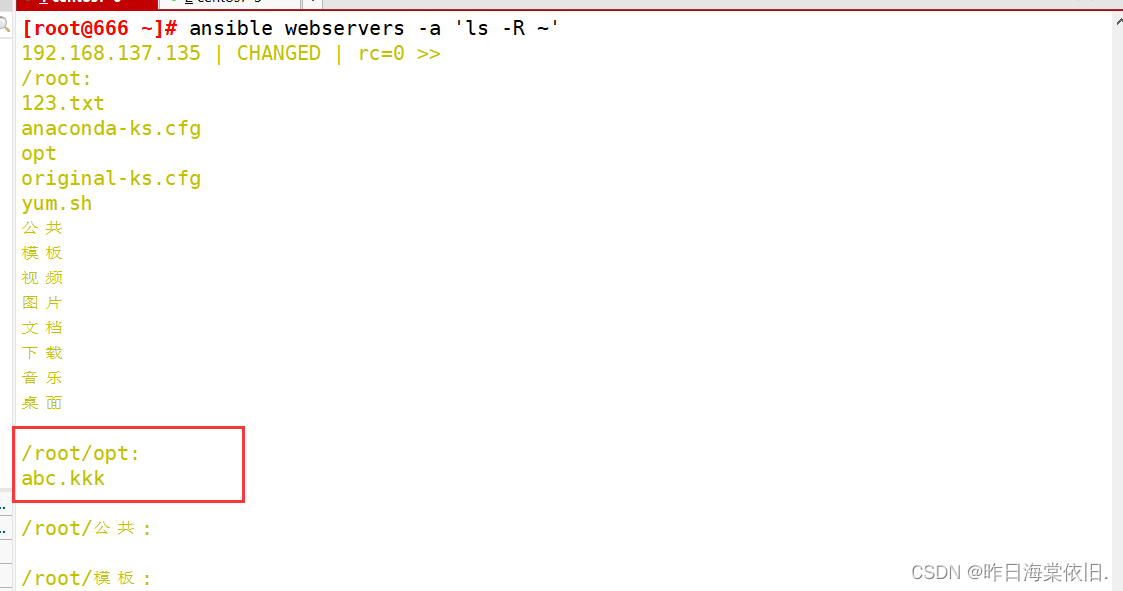
ansible all -a 'ls /' #如省略 -m 模块,则默认运行 command 模块
//常用的参数:
chdir:在远程主机上运行命令前提前进入目录
creates:判断指定文件是否存在,如果存在,不执行后面的操作
removes:判断指定文件是否存在,如果存在,执行后面的操作
ansible all -m command -a "chdir=/home ls ./"
2.shell 模块
//在远程主机执行命令,相当于调用远程主机的shell进程,然后在该shell下打开一个子shell运行命令(支持管道符号等功能)
ansible-doc -s shell

ansible dbservers -m shell -a 'echo 123456 | passwd --stdin test"'
ansible dbservers -m shell -a 'echo $(ifconfig ens33 | awk "NR==2 {print $2}") | cut -d " " -f2'
ansible dbservers -m shell -a 'echo $(ifconfig ens33 | awk "NR==2 {print \$2}")'

3.cron 模块
//在远程主机定义任务计划。其中有两种状态(state):present表示添加(可以省略),absent表示移除。
ansible-doc -s cron				#按 q 退出

//常用的参数:
minute/hour/day/month/weekday:分/时/日/月/周
job:任务计划要执行的命令
name:任务计划的名称
user:指定计划任务属于哪个用户,默认是root用户

ansible webservers -m cron -a 'minute="*/1" job="/bin/echo helloworld" name="test crontab"'
ansible webservers -a 'crontab -l'
ansible webservers -m cron -a 'name="test crontab" state=absent'

4.user 模块
//用户管理的模块
ansible-doc -s user

//常用的参数:
name:用户名,必选参数
state=present|absent:创建账号或者删除账号,present表示创建,absent表示删除
system=yes|no:是否为系统账号
uid:用户uid
group:用户基本组
groups: 用户所属附加组
shell:默认使用的shell
create_home=yse|no: 是否创建家目录
password:用户的密码,建议使用加密后的字符串
remove=yes|no:当state=absent时,是否删除用户的家目录

ansible dbservers -m user -a 'name="test01"'				#创建用户test01
ansible dbservers -m command -a 'tail /etc/passwd'
ansible dbservers -m user -a 'name="test01" state=absent'	#删除用户test01

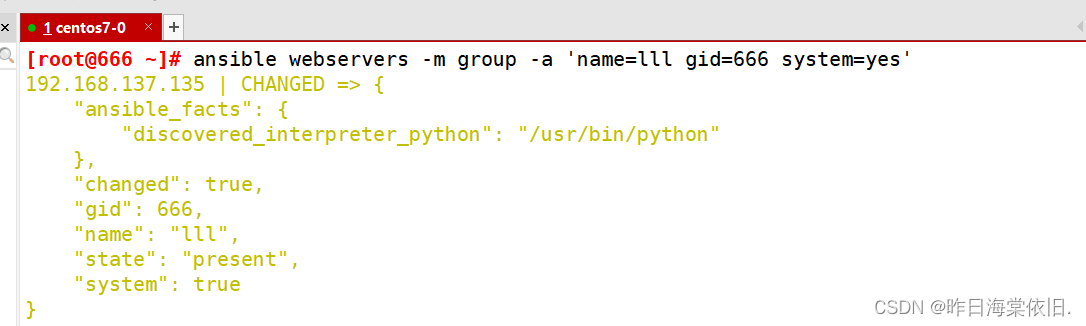
5.group 模块
//用户组管理的模块
ansible-doc -s group

ansible dbservers -m group -a 'name=mysql gid=306 system=yes'	#创建mysql组
ansible dbservers -a 'tail /etc/group'
ansible dbservers -m user -a 'name=test01 uid=306 system=yes group=mysql'	#将test01用户添加到mysql组中
ansible dbservers -a 'tail /etc/passwd'
ansible dbservers -a 'id test01'

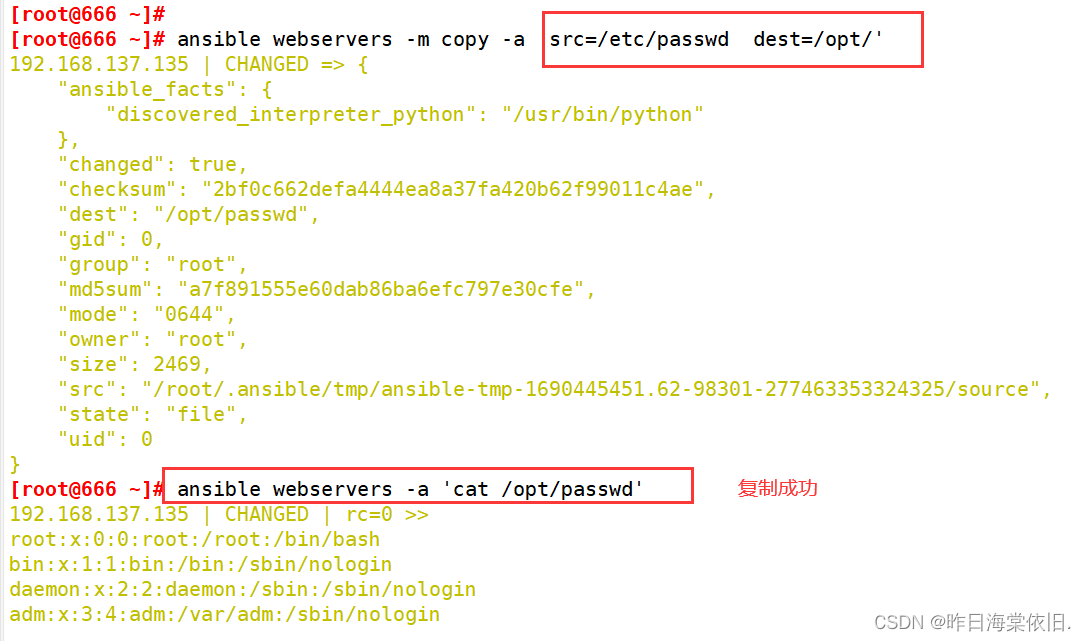
6.copy 模块
//用于复制指定主机文件到远程主机的
ansible-doc -s copy

//常用的参数:
dest:指出复制文件的目标及位置,使用绝对路径,如果源是目录,指目标也要是目录,如果目标文件已经存在会覆盖原有的内容
src:指出源文件的路径,可以使用相对路径或绝对路径,支持直接指定目录,如果源是目录则目标也要是目录
mode:指出复制时,目标文件的权限
owner:指出复制时,目标文件的属主
group:指出复制时,目标文件的属组
content:指出复制到目标主机上的内容,不能与src一起使用

ansible dbservers -m copy -a 'src=/etc/fstab dest=/opt/fstab.bak owner=root mode=640'
ansible dbservers -a 'ls -l /opt'
ansible dbservers -a 'cat /opt/fstab.bak'

ansible dbservers -m copy -a 'content="helloworld" dest=/opt/hello.txt'  #将helloworld写入/opt/hello.txt文件中
ansible dbservers -a 'cat /opt/hello.txt'
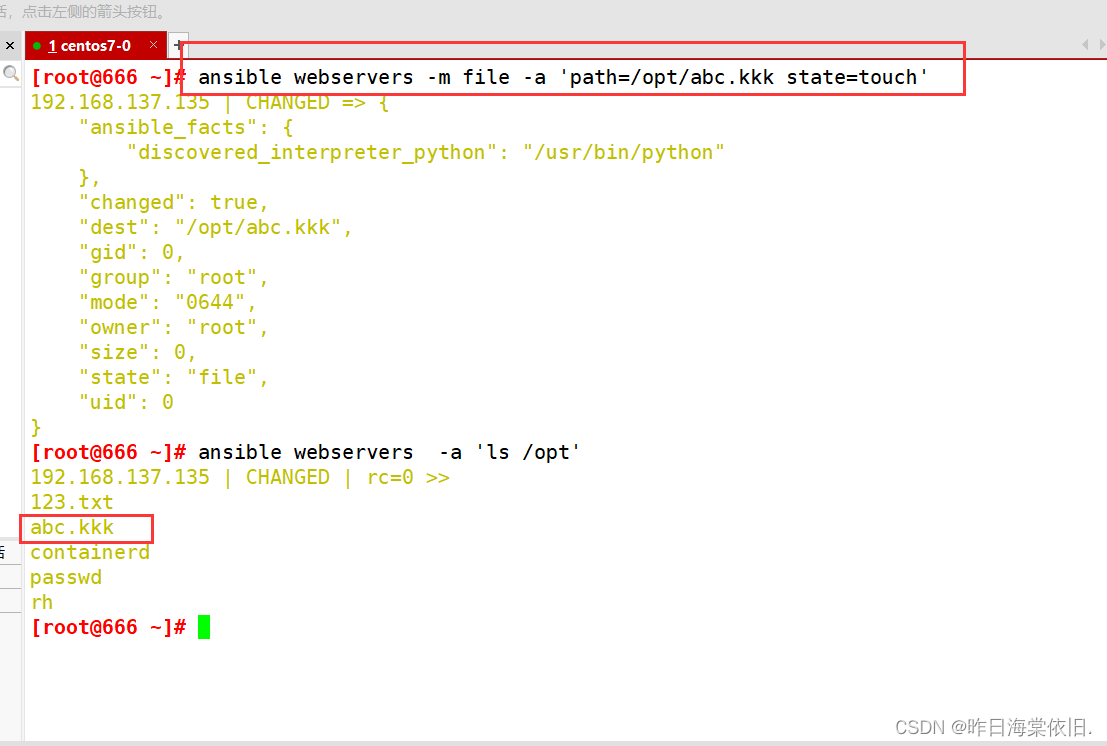
7.file 模块
//设置文件属性
ansible-doc -s file

ansible dbservers -m file -a 'owner=test01 group=mysql mode=644 path=/opt/fstab.bak'	#修改文件的属主属组权限等
ansible dbservers -m file -a 'path=/opt/fstab.link src=/opt/fstab.bak state=link'    #设置/opt/fstab.link为/opt/fstab.bak的链接文件
ansible dbservers -m file -a "path=/opt/abc.txt state=touch"			#创建一个文件
ansible dbservers -m file -a "path=/opt/abc.txt state=absent"			#删除一个文件
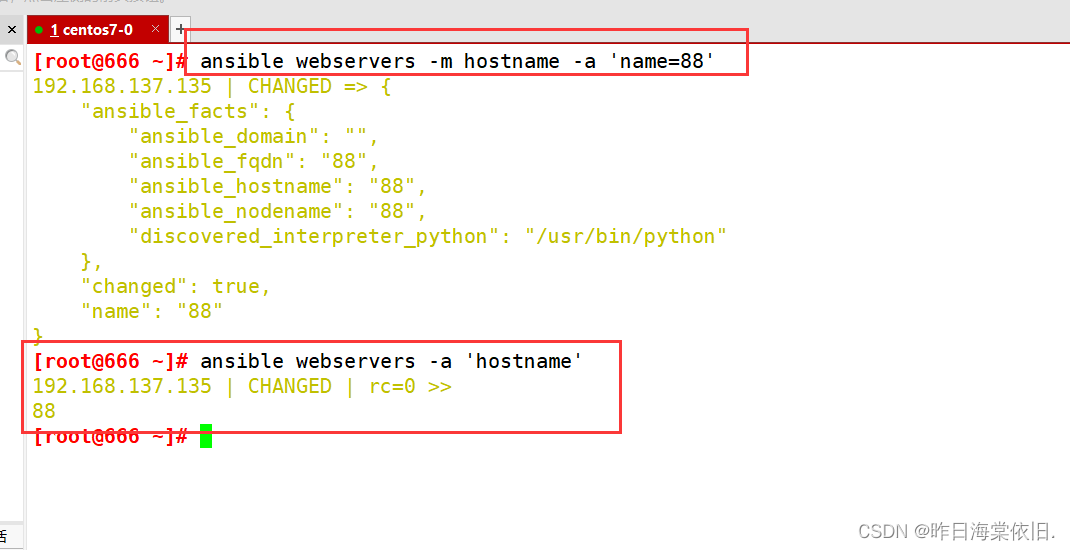
8.hostname 模块
//用于管理远程主机上的主机名
ansible dbservers -m hostname -a "name=mysql01"
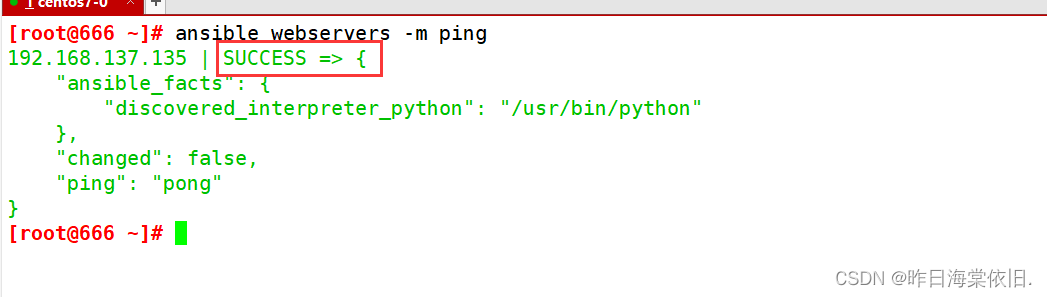
9.ping 模块
//检测远程主机的连通性
ansible all -m ping
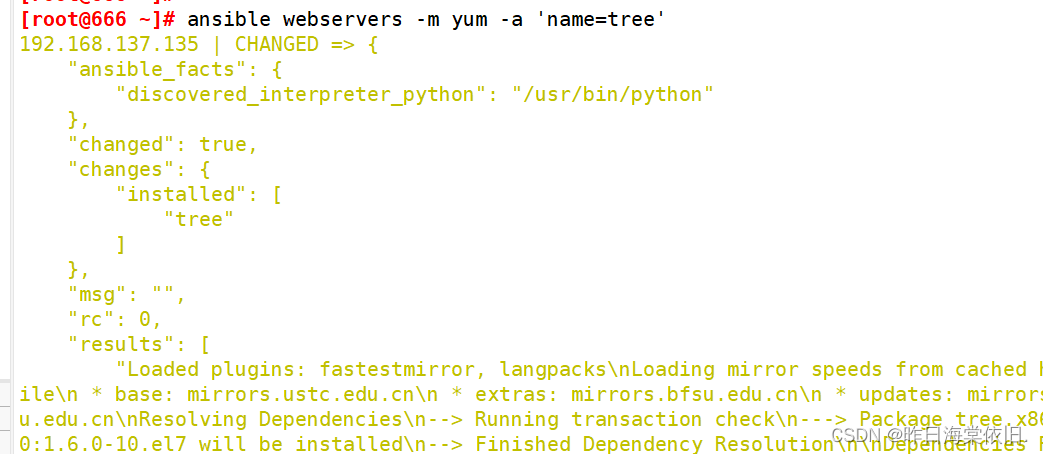
10.yum 模块
//在远程主机上安装与卸载软件包
ansible-doc -s yum

ansible webservers -m yum -a 'name=httpd'					#安装服务
ansible webservers -m yum -a 'name=httpd state=absent'		#卸载服务
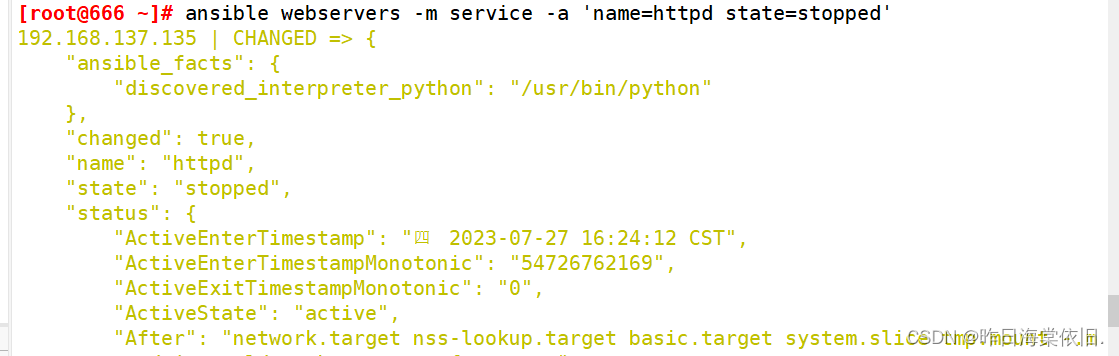
11.service/systemd 模块
//用于管理远程主机上的管理服务的运行状态
ansible-doc -s service
//常用的参数:
name:被管理的服务名称
state=started|stopped|restarted:动作包含启动关闭或者重启
enabled=yes|no:表示是否设置该服务开机自启
runlevel:如果设定了enabled开机自启去,则要定义在哪些运行目标下自启动
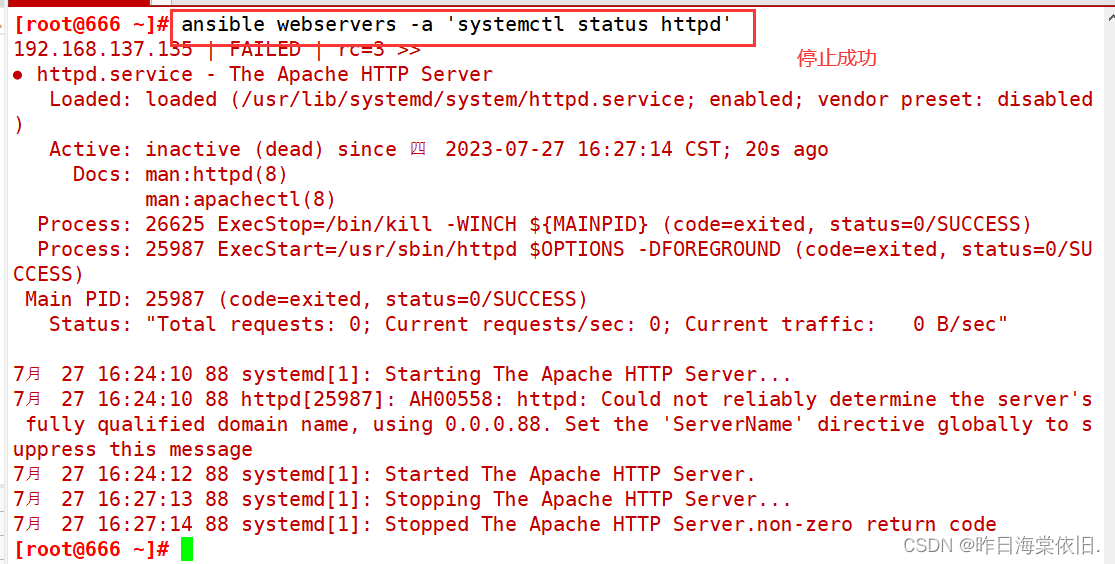
ansible webservers -a 'systemctl status httpd' #查看web服务器httpd运行状态
ansible webservers -m service -a 'enabled=true name=httpd state=started' #启动httpd服务

12.script 模块
//实现远程批量运行本地的 shell 脚本
ansible-doc -s script

vim test.sh
#!/bin/bash
echo "hello ansible from script" > /opt/script.txt

chmod +x test.sh
ansible webservers -m script -a 'test.sh'
ansible webservers -a 'cat /opt/script.txt'

vim test.sh
#!/bin/bash
echo $1 > /opt/test.txt
echo s2 >> /opt/test .txt

ansible dbservers -m script -a 'test.sh abc 123!

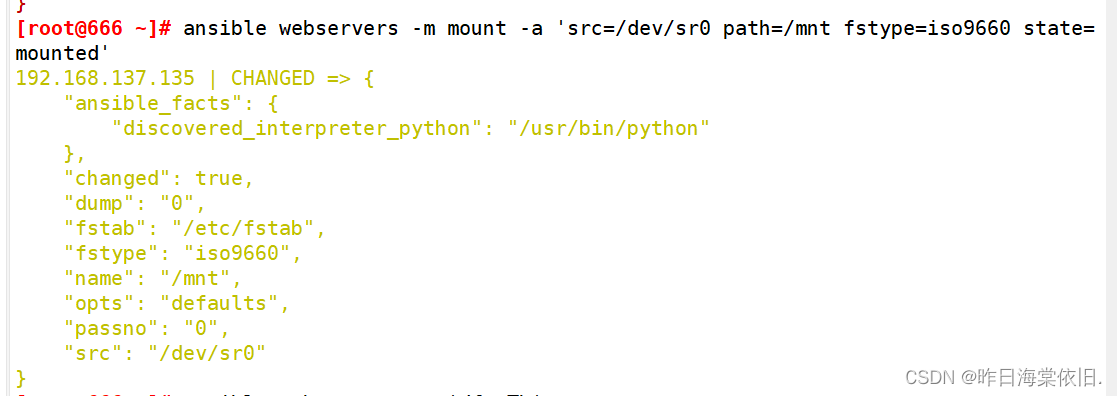
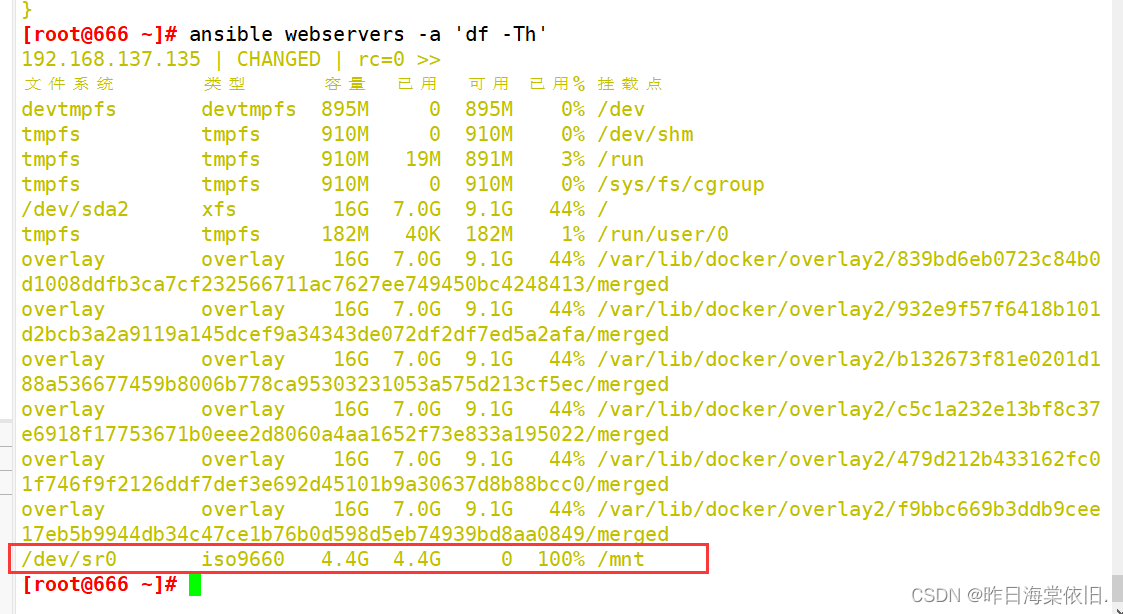
13. mount 模块
//挂载文件系统
ansible-doc -s mount

//常用的参数:
src:定义挂载设备的路径
path:定义挂载到哪个目录,必须指定
fstype:指定挂载文件的系统类型,必须指定,xfs、iso9660、nfs...
opts:定义挂载的参数,defaults、rw、ro...
state:定义挂载的状态,mounted(进行挂载,修改/etc/fstab信息)、absent(永久性卸载,并修改 /etc/fstab信息)、unmounted(临时卸载,不修改/etc/fstab信息)

ansible dbservers -m mount -a 'src=/dev/sr0 path=/mnt state=mounted fstype=iso9660'
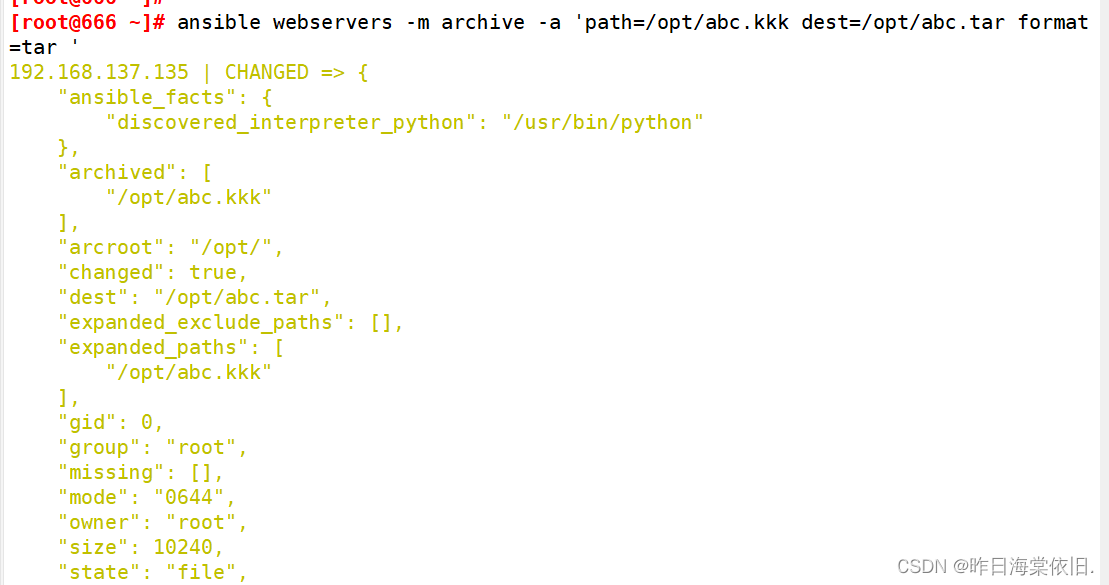
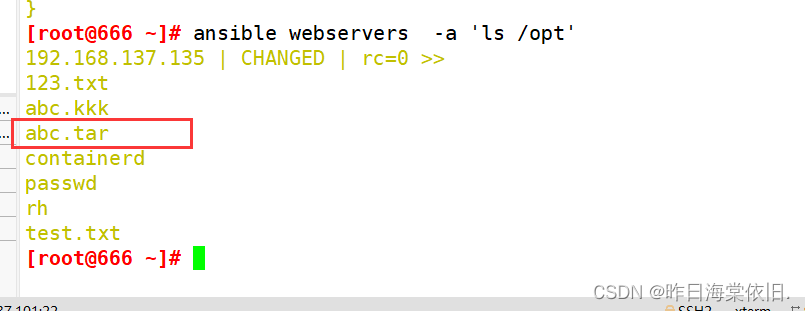
14. archive 模块
//打包压缩
ansible-doc -s archive

//常用的参数:
path: 必须参数,远程主机上需要被打包压缩的源文件/目录
dest: 打包压缩后的包文件路径(包文件的父目录必须存在);如果包文件已存在,则会被覆盖
format: 指定压缩类型,包括: bz2、gz(默认)、tar、xz、zip
remove=yes|no: 是否删除源文件

ansible dbservers -m archive -a "path=/etc/yum.repos.d/ dest=/opt/repo.zip format=zip"
ansible dbservers -m archive -a "path=/opt/abc.txt,/opt/123.txt dest=/opt/abc123.tar.gz format=gz remove=yes"
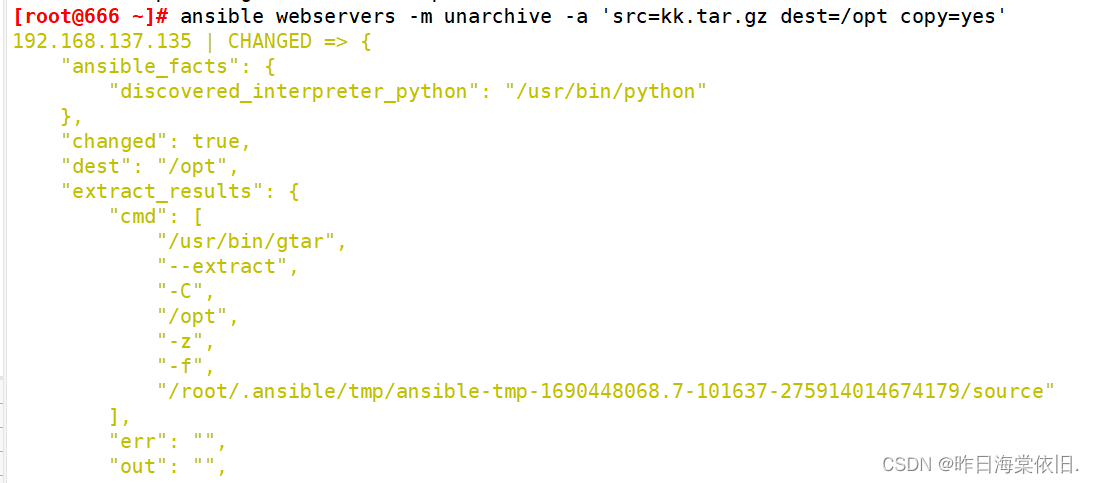
15. unarchive 模块
//解包解压缩
ansible-doc -s unarchive

//常用的参数:
copy:默认为 copy=yes ,拷贝的文件从 ansible 主机复制到远程主机,copy=no 表示在远程主机上寻找源文件解压
src:tar包源路径,可以是 ansible 主机上的路径,也可以是远程主机上的路径,如果是远程主机上的路径,则需设置 copy=no
dest:解压后文件的目标绝对路径
remote_src: 和 copy 功能一样且互斥,设置 remote_src=yes 表示文件在远程主机上,设置为 remote_src=no 表示文件在 ansible 主机上

#将 ansible 主机的压缩文件拷贝到到远程主机并解压,修改文件所属组和用户
ansible dbservers -m unarchive -a "src=/opt/abc.tar.gz dest=/root copy=yes"
或者
ansible dbservers -m unarchive -a "src=/opt/abc.tar.gz dest=/root remote_src=no"

#在远程主机解包
ansible dbservers -m unarchive -a "src=/opt/123.tar.gz dest=/root copy=no"
或者
ansible dbservers -m unarchive -a "src=/opt/123.tar.gz dest=/root remote_src=yes"


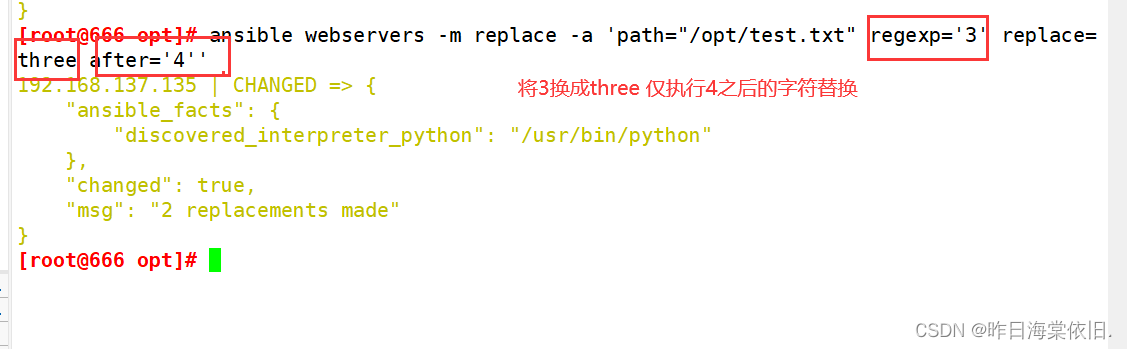
16. replace 模块
//类似于sed命令,主要也是基于正则进行匹配和替换
ansible-doc -s replace

//常用的参数:
path:必须参数,指定要修改的文件
regexp:必须参数,指定一个正则表达式
replace:替换regexp参数匹配到的字符串
backup=yes|no: 修改源文件前创建一个包含时间戳信息的备份文件
before:如果指定,则仅替换/删除此匹配之前的内容,可以和after参数结合使用
after:如果指定,则仅替换/删除此匹配之后的内容,可以和before参数结合使用
owner:修改文件用户名
group:修改文件组名
mode:修改文件权限

vim /opt/test.txt
11 22 33 44 55 66
aa bb cc dd ee ff
1a 2b 3c 4d 5e 6f

#匹配 333 并修改为 ccc
ansible dbservers -m replace -a "path=/opt/test.txt regexp='33' replace='cc'"
#匹配到任意一个或多个开头的行增加注释
ansible dbservers -m replace -a "path=/opt/test.txt regexp='^(.*)' replace='#\1'"
#取消注释
ansible dbservers -m replace -a "path=/opt/test.txt regexp='^#(.*)' replace='\1'"
#匹配以 a 开头的后面有一个或者多个字符的行,并在前面添加 # 注释
ansible dbservers -m replace -a "path=/opt/test.txt regexp='^(a.*)' replace='#\1'"

ansible dbservers -m replace -a "path=/opt/test.txt regexp='3' replace='three' before=cc"
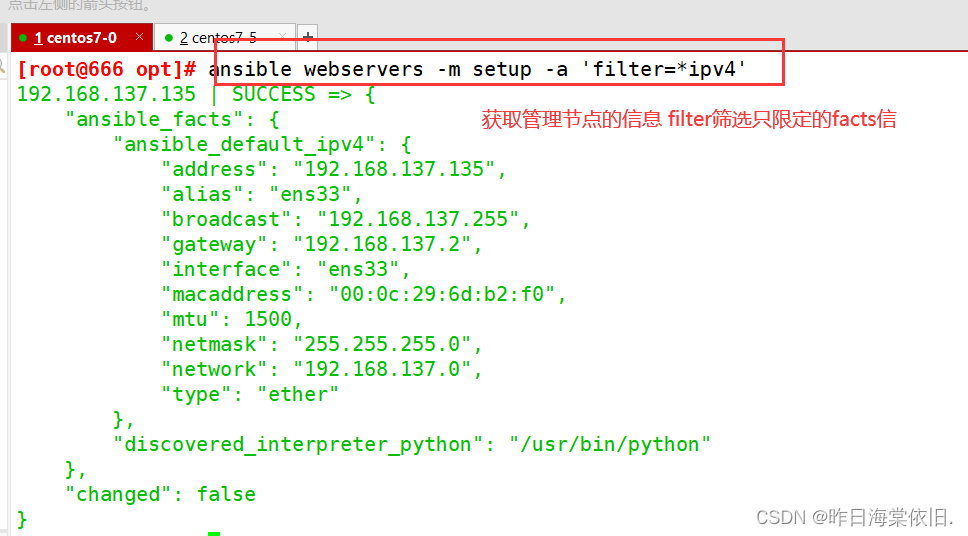
17.setup 模块
//facts 组件是用来收集被管理节点信息的,使用 setup 模块可以获取这些信息
ansible-doc -s setup

ansible webservers -m setup				#获取mysql组主机的facts信息
ansible dbservers -m setup -a 'filter=*ipv4'    #使用filter可以筛选指定的facts信息
inventory host list
//Inventory支持对主机进行分组,每个组内可以定义多个主机,每个主机都可以定义在任何一个或多个主机组内。

//如果是名称类似的主机,可以使用列表的方式标识各个主机。
vim /etc/ansible/hosts
[webservers]
192.168.80.11:2222		#冒号后定义远程连接端口,默认是 ssh 的 22 端口
192.168.80.1[2:5]

[dbservers]
db-[a:f].example.org	#支持匹配 a~f
//inventory 中的变量
Inventory变量名	              含义
ansible_host                  ansible连接节点时的IP地址
ansible_port                  连接对方的端口号,ssh连接时默认为22
ansible_user                  连接对方主机时使用的用户名。不指定时,将使用执行ansible或ansible-playbook命令的用户
ansible_password              连接时的用户的ssh密码,仅在未使用密钥对验证的情况下有效
ansible_ssh_private_key_file  指定密钥认证ssh连接时的私钥文件
ansible_ssh_common_args       提供给ssh、sftp、scp命令的额外参数
ansible_become                允许进行权限提升
ansible_become_method         指定提升权限的方式,例如可使用sudo/su/runas等方式
ansible_become_user           提升为哪个用户的权限,默认提升为root
ansible_become_password       提升为指定用户权限时的密码
(1)主机变量
[webservers]
192.168.80.11 ansible_port=22 ansible_user=root ansible_password=abc1234


(2)组变量
[webservers:vars]			#表示为 webservers 组内所有主机定义变量
ansible_user=root
ansible_password=abc1234

[all:vars]					#表示为所有组内的所有主机定义变量
ansible_port=22

(3)组嵌套
[nginx]
192.168.80.20
192.168.80.21
192.168.80.22

[apache]
192.168.80.3[0:3]

[webs:children]		#表示为 webs 主机组中包含了 nginx 组和 apache 组内的所有主机
nginx
apache
 Accessing the parent group name is equivalent to accessing the following nesting. The group variable is transferred to the group as the definition variable of the group name.