VM virtual machine installation and configuration of fixed IP and network
1. Preparation work
vm software
Software official website download address:https://customerconnect.vmware.com/cn/downloads/#all_products
windows version: search workstation< /span>

License: YF390-0HF8P-M81RQ-2DXQE-M2UT6
mac version: search for fusion

Image file
centos mirror download address:http://mirrors.aliyun.com/centos/7/isos/x86_64/

2. Create a virtual machine
- Create a new virtual machine and select Custom

- Hard drive compatibility, just select the default

- Install the guest operating system and choose to install it later (because tfwf needs to delete unnecessary hardware after the virtual machine installation is completed, so choose to install the operating system later)

- Select the guest operating system, select linux -> CentOS 7 64-bit; note the corresponding downloaded image file version

- Name the virtual machine and location; it is best to put the location in the same folder

- Processor configuration (note that the number of cores of the host cannot be exceeded)

- Memory configuration, generally 2G is sufficient. If you need to install Gitlab, Jenkins, etc., you must increase the memory.

- Network configuration Select bridged network (the virtual machine can use the same network as the host)

-
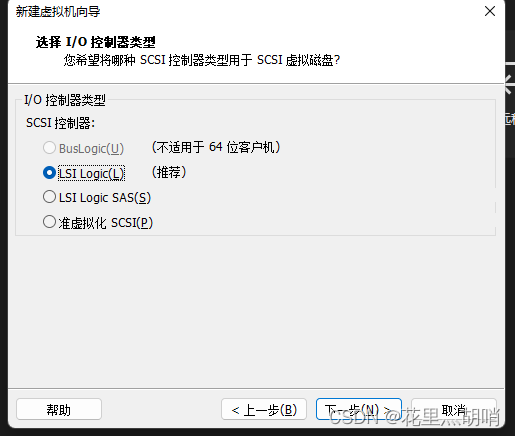
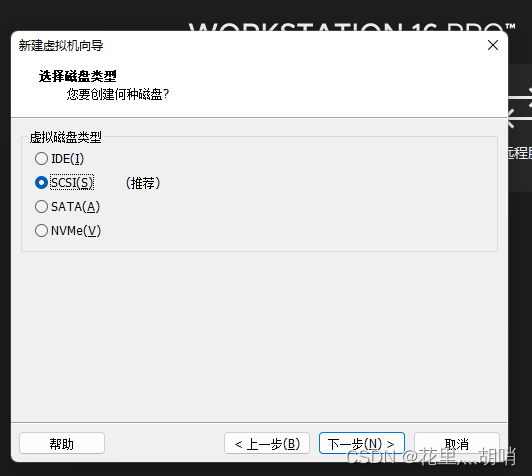
Select I/O controller type Default option; Disk type Default option
-
Select disk -> Create new disk

- Specify disk capacity (here is the maximum capacity, virtual, does not occupy host memory)

- Specify disk file (preferably not in Chinese)


-
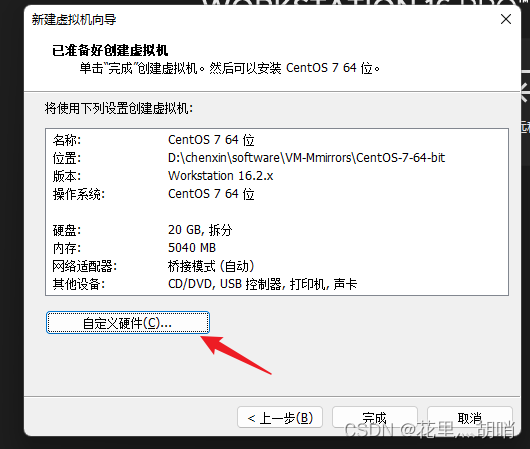
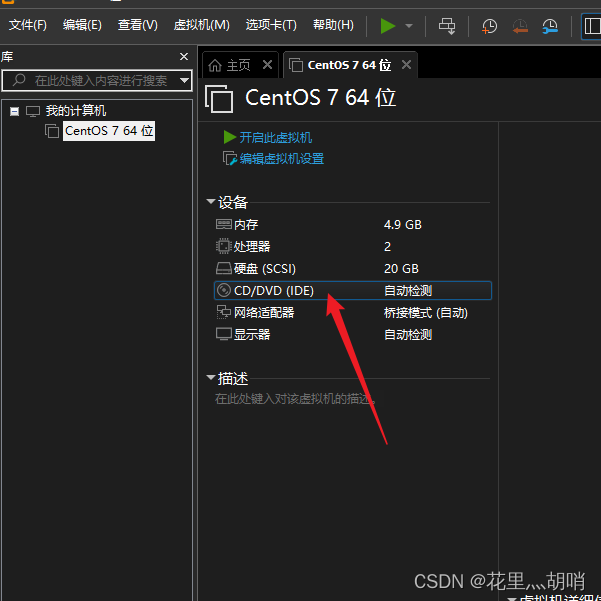
Customize the hardware and remove the USB controller, sound card, and printer (this will make the startup faster)

-
Install image

-
Start installing the virtual machine system


-
Set time zone


- system partition


- Configure local address


- Set root administrator password


- This page appears after restarting, which means the installation is successful. Just log in with the root account.

3. Build VMnet8 virtual LAN

Open the VMware software, click Edit, and click Virtual Network Editor in the list

Enter the virtual network editor page
- Select NAT mode
- Check Connect host virtual adapter to this network
- Cancel DHCP service

Write down the subnet IP and gateway IP first.

4. CentOS system network configuration
1. Configure the IP address and other information in /etc/sysconfig/network-scripts/ifcfg-ens33

vi /etc/sysconfig/network-scripts/ifcfg-ens33/
The configuration is as follows: (If the original file does not have quotation marks, add them without quotation marks. If not, add them)
TYPE="Ethernet" # The network type is Ethernet< a i=2> BOOTPROTO="static" # Manually assign ip NAME="ens33" # Network card device name, the device name must be consistent with the file name DEVICE = "ens33" # Network card device name, the device name must be consistent with the file name ONBOOT="yes" # Whether the network card starts with the network service IPADDR= "192.168.×.×" # The ip address of the network card is the fixed IP you want to configure GATEWAY="192.168.×.×" # Gateway NETMASK= "255.255.255.0" # Subnet mask DNS1="8.8.8.8" # DNS, 8.8.8.8 is the IP address of the free DNS server provided by Google

2. Configure network work
Add the following configuration to the /etc/sysconfig/network file
NETWORKING=yes
3. Configure public DNS service (optional) (no need to select)
Add the following configuration to the /etc/resolv.conf file
nameserver 8.8.8.8
4. Close the protective wall
systemctl stop firewalld # 临时关闭防火墙
systemctl disable firewalld # 禁止开机启动
5. Restart network service
service network restart
6. Check network services
ping 163.com
If there is no problem, you can use the server connection tool to connect to the virtual machine
5. Connect to the virtual machine
Use the network card ip address just configured (IPADDR)


Then you can use it happily!