Article directory
- Two ways to develop PyQt interface: visual UI + programmatic UI
- 1. Introduction to PyQt
- 2. Mona Lisa of PyQt and Qt
- 3. PyQt layout manager
-
- 3.1. Introduction
- 3.2. Project actual combat
-
- 3.2.0. Add stretch items layout.addStretch: Control the spacing between components in the layout.
- 3.2.1. Vertical layout manager QVBoxLayout: Controls are arranged in order from top to bottom.
- 3.2.2. Horizontal layout manager QHBoxLayout: controls are arranged in order from left to right
- 3.2.3. Grid layout manager QGridLayout: Specify the row and column where each control is located
- 3.2.4. Form layout manager QFormLayout: Align labels and input fields, usually used to create form-based user interfaces.
- 3.2.5. Stacked Layout Manager QStackedLayout: Manage multiple windows in one window and only display one window (such as tab interface)
- 4. PyQt common components
-
- 4.1. Introduction
- 4.2. Project actual combat
-
- [Menu Class - Component] Menu + Menu Bar + Toolbar + Status Bar QMenuBar + QMenu + QToolBar + QStatusBar
- [Dialog Class - Component] Input Dialog + Color Dialog + Font Dialog + File Selection Dialog + Progress Dialog + Message Dialog: QInputDialog + QColorDialog + QFontDialog + QFileDialog + QProgressDialog + QMessageBox
- 4.2.0. Adjust the size of the component: setFixedSize + setFixedWidth + setFixedHeight
- 4.2.1, Show text QLabel:Hello, PyQt!
- 4.2.2. Button QPushButton:User login interface (account and password)
- 4.2.3. Text box QLineEdit + QTextEdit (single line + multiple lines)
- 4.2.4. Validator QRegExpValidator: used to limit the text (English/numeric) entered by users in QLineEdit
- 4.2.5. Validator QIntValidator + QDoubleValidator (integer + floating point number): used to restrict the text entered by the user in QLineEdit to be numbers.
- 4.2.6. Input box QSpinBox + QDoubleSpinBox (integer + floating point number): supports up and down button adjustment
- 4.2.7. Slider QSlider: Get the value before and after clicking the slider
- 4.2.8. Progress bar QProgressBar: Create a progress bar window (0~100%)
- 4.2.9. Drop-down box QComboBox: Create a drop-down box and add options
- 4.2.10. Check Box: Get the checked status
- 4.2.11. Radio button QRadioButton: Get the checked status
- 4.2.12. Print log QTextEdit: Get the current time + set the text color
- 4.2.13. Message prompt box QMessageBox: four types of prompt boxes (information/query/warning/error)
- 4.2.14, Tab interface QTabWidget
- 4.2.14.1. Display multiple pages in one window
- 4.2.14.2. In the main interface, display other .py interface class files
- 4.2.14.3. In the main interface, display other .py interface class files and perform data interaction
- 4.2.15, Call other .py files and perform data interaction
- ·Test file.py
- Method 1: subprocess (subprocess.run)
- Method 2: QProcess (process.start)
- 4.2.16,In the current virtual environment, call .py files in other virtual environments
- 4.2.17,In the current virtual environment, call .py files in other virtual environments and pass parameters
Two ways to develop PyQt interface: visual UI + programmatic UI
Article recommendation
- Programmatic UI:
Introduces the properties of each component in detail, which can be used as an encyclopedia for learning- Visual UI:
PyQt5 nanny-level tutorial (from entry to proficiency)
PyQt5 beginners start from scratch (summary)
Get started quickly with PyQt5 (basic knowledge)
Get started quickly with PyQt5 (bilibili video tutorial)
(1)可视化UI: Create an interface based on the Qt Designer visual editing tool for component drag-and-drop, property setting, layout management and other operations. One is to save it as a .ui file and then load and use the .ui file in your PyQt application. The second is Use the pyuic tool to convert .ui to .py, and then use the Python code directly.
(2) 编程式UI or 手写UI: Use Python code directly to create and configure user interface components without relying on visual editing tools .
编程式UIadvantage:
Flexibility: Fully master the creation and interaction process of the interface, and can dynamically create, modify or delete components at any time as needed to meet specific requirements. need.Customization: Precisely control the properties, style, and behavior of each component without the limitations of the visual editor. This allows highly customized interfaces to be created to meet specific design needs.Dynamics: Dynamically create, modify, and delete components at runtime in response to user interaction or changes in application state. Very useful for applications that need to dynamically update the interface.Version Control: The definition of the entire application interface can be saved in a code file, which makes version control easier and can track and manage changes to the interface.Cross-platform: Python code is used to create interfaces, which can implement cross-platform GUI applications, because PyQt is cross-platform and can run on different operating systems.
编程式UIshortcoming:
Poor readability: For people who are not familiar with the code, the interface layout and configuration in the code may not be easy to understand, and the visual editor can provide a more intuitive view. View feedback.Difficult to preview: You need to run the program to see the interface, but the visual editor can see the interface in real time.Time consumption: More code needs to be written. Such as: layout, style and more complex interfaces.
1. Introduction to PyQt
PyQt official website homepage:https://www.riverbankcomputing.com/software/pyqt/
Install PyQt through pip:pip install pyqt5
PyQt定义
(1) is a GUI (graphical user interface) toolkit for the Python programming language, which allows developers to create desktop applications using the Python language. PyQt provides many classes and functions for creating rich and diverse user interfaces, as well as tools for handling user input and interaction.
(2) It is a Python package based on the Qt library. Qt is a popular C++ framework for developing cross-platform applications.
PyQt版本
provides Python bindings to the Qt application framework. Each version of PyQt is designed for a different Qt version. Currently PyQt only supports two versions:
- PyQt6: Only supports Python 3.6 and higher, only supports Qt6 version. (1) Module name changes: In PyQt6, the module names were changed to better match the standard Qt module names. For example, the QtWidgets module is called QtWidgets in PyQt6, not PyQt5.QtWidgets. (2) New features: PyQt6 introduces some new features and improves existing functions to adapt to the changes in Qt6. This includes new signals and slots syntax, etc. (3) Unlike PyQt5, PyQt6 no longer supports Qt4.
- PyQt5: only supports Python 2.7 and Python 3.x, only supports Qt5 version. But Python 2 is no longer officially supported in 2020. (
广泛使用) PyQt5 is the most widely used version and is used by many applications and projects.- PyQt4: Mainly supports Python 2.x, only supports Qt4 version. Although it also has a version for Python 3, it is relatively rarely used. (
已经过时) is no longer officially supported, so its use in new projects is not recommended.
2. Mona Lisa of PyQt and Qt
Qt and PyQt are toolkits for creating graphical user interfaces (GUIs). They provide a rich set of classes and features that can be used to develop cross-platform desktop applications.
Qt(跨平台的C++应用程序开发框架):
(1) Qt was developed by the Norwegian company Trolltech (now part of the Qt Corporation). It was originally designed to solve the problem of C++ developers writing duplicate code on different platforms.
(2)Support multiple operating systems (cross-platform) : Windows, macOS, Linux, iOS, Android, etc. , so cross-platform development and deployment can be achieved.
(3) User interaction and events:Qt is an object-oriented framework that uses signals and slots to handle user interactions and events.。
PyQt(Qt的Python绑定,使用Python语言调用和使用Qt框架的功能):
(1) PyQt is developed and maintained by Riverbank Computing Company.
(2)Supports multiple operating systems (cross-platform): Because PyQt is based on Qt and can be used on Runs on various operating systems.
(3)User interaction and events:PyQt uses Qt's signals and slots mechanism to handle user interactions and events, while also supporting Python's syntax and features.。Note: PyQt also supports Qt Designer (graphical interface designer). Developers can visually design the interface through Qt Designer and then convert it into Python code.
The difference between Qt and PyQt:
- Programming language:Qt is written in C++, and PyQt is written in Python of Qt.
- Development experience: PyQt is easier to get started than Qt, and Python code is usually more concise and readable than C++ code.
- Performance difference: Since Qt is written in C++, its performance may be slightly better than PyQt. However, for most applications, the performance difference is not significant, and development efficiency is more important.
- Application fields: Since both Qt and PyQt are used for GUI development, they are widely used in various application fields, including desktop applications, embedded systems, game development, data visualization, etc.
- Ecosystem: Qt has an extensive C++ community and ecosystem, where you can find more third-party libraries and resources. In comparison, PyQt is slightly inferior.
3. PyQt layout manager
3.1. Introduction
Definition of layout manager (Layout): In the graphical user interface, the position and size of the component (Widget) is automatically managed and adjusted according to the size of the window without manual setting (but it can also be set at the same time), and can adapt to different screen and window sizes.
Advantages of layout managers
- Automatically adapt to window size: No need to manually adjust the position and size of each control, the layout manager will handle it automatically.
- Dynamic adjustment: When the window size changes, the layout manager automatically adjusts the position and size of the controls to adapt to the new window size.
- Simplify code: Using a layout manager can reduce manual layout code and make the code clearer and concise.
- Cross-platform compatibility: The layout manager ensures that the interface behaves consistently across different operating systems and screen sizes.
Types of layout managers
- Box layout manager
QBoxLayout: It cannot be used alone. It is the base class ofQVBoxLayout和QHBoxLayout. For specific usage, please refer to the vertical and horizontal layout managers.- Vertical layout manager
QVBoxLayout: Arrange controls从上到下vertically in a column.- Horizontal layout manager
QHBoxLayout: Arrange controls从左到右horizontally in a row.- Grid Layout Manager
QGridLayout: Arranges controls指定顺序in a grid. For example: For multiple components in the same row, you can specify a component to be distributed in the specified column position(3 3 3)变换为(33 3).- Form Layout Manager
QFormLayout: Pair and align pairs of labels and input controls. Typically used to create form-based user interfaces.- Stacked layout manager
QStackedLayout: A layout manager that manages multiple widgets, but only displays one of them at any given moment. Different controls can be displayed by switching. Such as: tab interface.
Usage:In PyQt, add the control to the layout manager, and then set the layout manager as the main layout of the window or component to achieve automatic layout.
"""
(1)管理子组件
(2)将子组件给到主组件
(3)窗口显示主组件
"""

layout = QVBoxLayout()  				# 创建一个垂直布局管理器对象(用于管理垂直排列的子组件)
layout.addWidget(container_widget)  	# 将名为container_widget的组件添加到垂直布局中

central_widget = QWidget()  			# 创建一个QWidget对象(用作主窗口的中央组件)
central_widget.setLayout(layout)  		# 将垂直布局设置为central_widget的布局管理器,使垂直布局成为central_widget的主要布局
self.setCentralWidget(central_widget)  	# 将central_widget设置为主窗口(通常是QMainWindow)的中央组件,以便显示在窗口中
3.2. Project actual combat
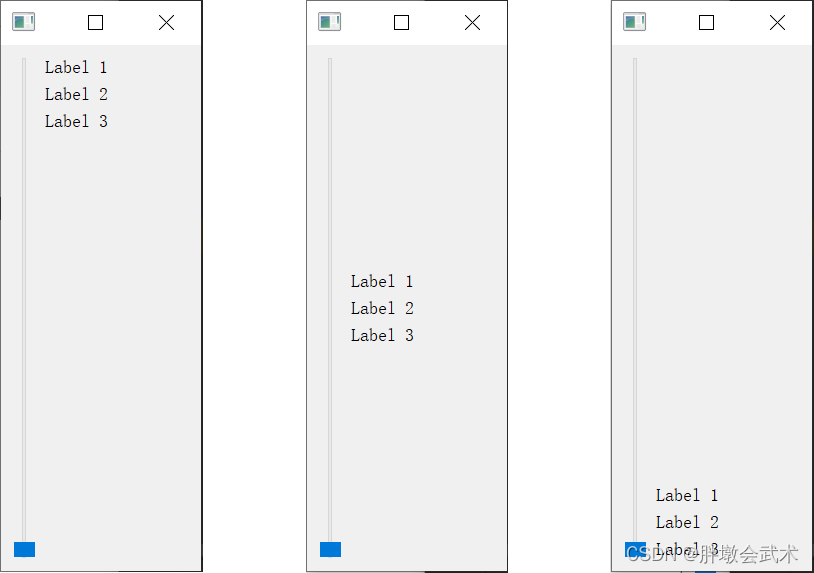
3.2.0. Add stretch items layout.addStretch: Control the spacing between components in the layout.
import sys
from PyQt5.QtWidgets import QApplication, QMainWindow, QVBoxLayout, QHBoxLayout, QPushButton, QLabel, QWidget, QSlider


class MainWindow(QMainWindow):
    def __init__(self):
        super().__init__()

        VBox_layout = QVBoxLayout()
        HBox_Layout = QHBoxLayout()

        # 添加组件到布局
        slider = QSlider()
        slider.setFixedHeight(500)
        label1 = QLabel("Label 1")
        label2 = QLabel("Label 2")
        label3 = QLabel("Label 3")

        # (1)若在组件之前添加伸缩项,组件跟在伸缩项的后面,从而实现将组件布局到底部
        VBox_layout.addStretch(8)

        HBox_Layout.addWidget(slider)
        VBox_layout.addWidget(label1)
        VBox_layout.addWidget(label2)
        VBox_layout.addWidget(label3)
        HBox_Layout.addLayout(VBox_layout)

        VBox_layout.addStretch(1)
        # (2)若在组件之后添加伸缩项,组件被伸缩项顶在前面,从而实现将组件布局到顶部

        # (3)若在组件之前及之后分别添加伸缩项:将组件布局到中间

        central_widget = QWidget()
        central_widget.setLayout(HBox_Layout)
        self.setCentralWidget(central_widget)


if __name__ == "__main__":
    app = QApplication(sys.argv)
    window = MainWindow()
    window.show()
    sys.exit(app.exec_())


"""##########################################################################
函数简介:在布局中创建一个弹性空间,用于调整布局中各个组件的间距,以实现更好的分布和对齐效果。
函数说明:layout.addStretch()
输入参数:
        伸缩项的权重为0(默认),这意味着它不会占用任何额外的空间。
        伸缩项的权重为1(常用),将会根据权重在布局中占据一部分空间,从而将其他组件推向布局的边缘。
        备注:若为其余数字,则权重值越大,伸缩空间越大。
##########################################################################"""
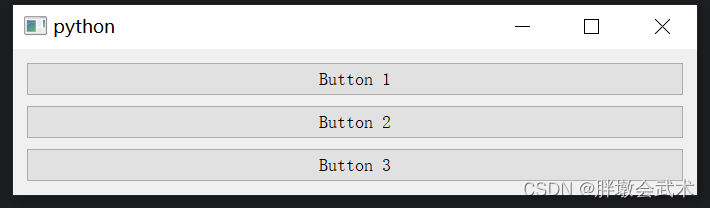
3.2.1. Vertical layout manager QVBoxLayout: Controls are arranged in order from top to bottom.
import sys
from PyQt5.QtWidgets import QApplication, QMainWindow, QVBoxLayout, QWidget, QPushButton

class MainWindow(QMainWindow):
    def __init__(self):
        super().__init__()

        # 创建一个中心窗口
        central_widget = QWidget()

        # 创建一个垂直布局
        vbox = QVBoxLayout()

        # 创建并添加按钮到布局
        button1 = QPushButton("Button 1")
        button2 = QPushButton("Button 2")
        button3 = QPushButton("Button 3")

        vbox.addWidget(button1)
        vbox.addWidget(button2)
        vbox.addWidget(button3)

        # 将布局应用于中心窗口
        central_widget.setLayout(vbox)
        self.setCentralWidget(central_widget)

if __name__ == "__main__":
    app = QApplication(sys.argv)
    window = MainWindow()
    window.show()
    sys.exit(app.exec_())
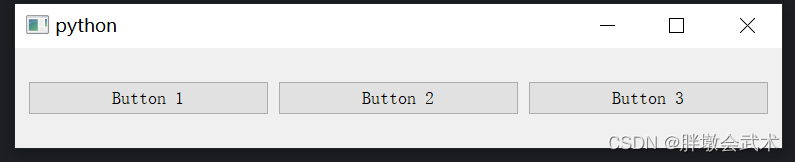
3.2.2. Horizontal layout manager QHBoxLayout: controls are arranged in order from left to right
import sys
from PyQt5.QtWidgets import QApplication, QMainWindow, QWidget, QHBoxLayout, QPushButton

class MainWindow(QMainWindow):
    def __init__(self):
        super().__init__()

        # 创建一个中心窗口
        central_widget = QWidget()

        # 创建一个水平布局
        hbox = QHBoxLayout()

        # 创建两个按钮并添加到水平布局中
        button1 = QPushButton("Button 1")
        button2 = QPushButton("Button 2")
        button3 = QPushButton("Button 3")
        hbox.addWidget(button1)
        hbox.addWidget(button2)
        hbox.addWidget(button3)

        # 将水平布局应用于中心窗口
        central_widget.setLayout(hbox)
        self.setCentralWidget(central_widget)

if __name__ == "__main__":
    app = QApplication(sys.argv)
    window = MainWindow()
    window.show()
    sys.exit(app.exec_())
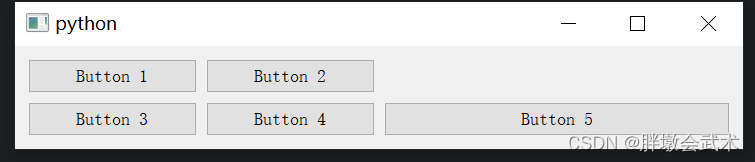
3.2.3. Grid layout manager QGridLayout: Specify the row and column where each control is located
import sys
from PyQt5.QtWidgets import QApplication, QMainWindow, QWidget, QGridLayout, QPushButton

class MainWindow(QMainWindow):
    def __init__(self):
        super().__init__()

        central_widget = QWidget()
        self.setCentralWidget(central_widget)

        grid_layout = QGridLayout()
        central_widget.setLayout(grid_layout)

        # 创建并添加多个按钮到网格布局
        button1 = QPushButton("Button 1")
        button2 = QPushButton("Button 2")
        button3 = QPushButton("Button 3")
        button4 = QPushButton("Button 4")
        button5 = QPushButton("Button 5")

        grid_layout.addWidget(button1, 0, 0)        # 第一行第一列
        grid_layout.addWidget(button2, 0, 1)        # 第一行第二列
        grid_layout.addWidget(button3, 1, 0)        # 第二行第一列
        grid_layout.addWidget(button4, 1, 1)        # 第二行第二列
        grid_layout.addWidget(button5, 1, 2, 1, 2)  # 第二行的第三和第四列

if __name__ == "__main__":
    app = QApplication(sys.argv)
    window = MainWindow()
    window.show()
    sys.exit(app.exec_())
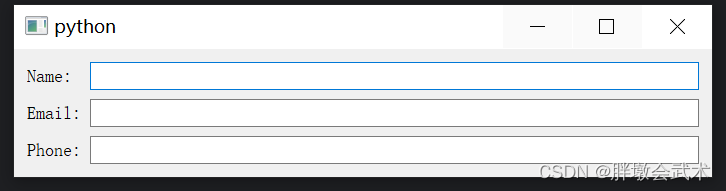
3.2.4. Form layout manager QFormLayout: Align labels and input fields, usually used to create form-based user interfaces.
import sys
from PyQt5.QtWidgets import QApplication, QMainWindow, QWidget, QFormLayout, QLineEdit, QLabel


class MainWindow(QMainWindow):
    def __init__(self):
        super().__init__()

        # 创建一个中心窗口
        central_widget = QWidget()

        # 创建一个QFormLayout
        form_layout = QFormLayout()

        # 创建标签和相应的文本输入框,并将它们添加到QFormLayout
        label1 = QLabel("Name:")
        name_input = QLineEdit()
        form_layout.addRow(label1, name_input)

        label2 = QLabel("Email:")
        email_input = QLineEdit()
        form_layout.addRow(label2, email_input)

        label3 = QLabel("Phone:")
        phone_input = QLineEdit()
        form_layout.addRow(label3, phone_input)

        # 将QFormLayout应用于中心窗口
        central_widget.setLayout(form_layout)
        self.setCentralWidget(central_widget)


if __name__ == "__main__":
    app = QApplication(sys.argv)
    window = MainWindow()
    window.show()
    sys.exit(app.exec_())
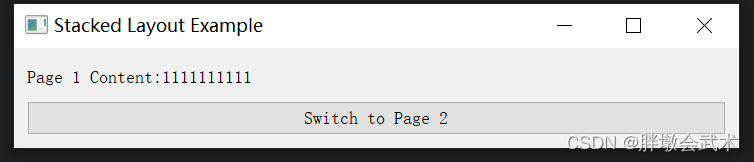
3.2.5. Stacked Layout Manager QStackedLayout: Manage multiple windows in one window and only display one window (such as tab interface)

import sys
from PyQt5.QtWidgets import QApplication, QMainWindow, QWidget, QPushButton, QLabel, QVBoxLayout, QStackedLayout

class MainWindow(QMainWindow):
    def __init__(self):
        super().__init__()

        self.setWindowTitle("Stacked Layout Example")

        # 创建两个页面的内容
        self.page1 = self.create_page("Page 1 Content", "Switch to Page 2")
        self.page2 = self.create_page("Page 2 Content", "Switch to Page 1")

        # 创建一个堆叠布局管理器
        self.stacked_layout = QStackedLayout()

        # 将页面添加到堆叠布局
        self.stacked_layout.addWidget(self.page1)
        self.stacked_layout.addWidget(self.page2)

        # 创建一个主窗口部件并将堆叠布局设置为其布局
        central_widget = QWidget()
        central_widget.setLayout(self.stacked_layout)
        self.setCentralWidget(central_widget)

    def create_page(self, content_text, switch_button_text):
        page = QWidget()
        layout = QVBoxLayout()

        content_label = QLabel(content_text)
        switch_button = QPushButton(switch_button_text)
        switch_button.clicked.connect(self.switch_page)

        layout.addWidget(content_label)
        layout.addWidget(switch_button)

        page.setLayout(layout)
        return page

    def switch_page(self):
        # 切换页面
        current_index = self.stacked_layout.currentIndex()
        next_index = (current_index + 1) % 2  # 切换到下一页(循环切换)
        self.stacked_layout.setCurrentIndex(next_index)

if __name__ == "__main__":
    app = QApplication(sys.argv)
    window = MainWindow()
    window.show()
    sys.exit(app.exec_())
4. PyQt common components
4.1. Introduction
PyQt provides a rich set of components (also called controls or widgets) for building graphical user interfaces.
| Component (Widget) | Introduction | |
|---|---|---|
| widget | QWidget | Base class for all user interface objects, used for creating windows and widgets. |
| QMainWindow | The class of the main window, usually used as the main interface of the application. | |
| Basic components | QLabel | Display text or images. |
| QLineEdit | Enter a single line of text. | |
| QTextEdit | Enter multiple lines of text. | |
| QSpinBox | (Number) Integer input box. | |
| QDoubleSpinBox | (Number) Floating point input box. | |
| QPushButton | button. | |
| QRadioButton | single button. Make a single selection among multiple options. | |
| QCheckBox | checkbox. Make multiple selections from multiple options. | |
| QSlider | Slider. | |
| QTabWidget | Tabbed interface. | |
| QComboBox | Drop-down list box. | |
| Dialog Class - Component | QDialog | Custom dialog box |
| QInputDialog | Get user input dialog | |
| QFontDialog | Font dialog box. | |
| QColorDialog | Color dialog box. | |
| QProgressDialog | Progress dialog. | |
| QFileDialog | Opens the file/folder dialog box. | |
| QMessageBox | Message prompt box. | |
| Menu class - component | QMenu | menu. |
| QMenuBar | Menu Bar. | |
| QToolBar | toolbar. | |
| QStatusBar | Status Bar. | |
| QProgressBar | progress bar. | |
| Drawing Class - Component | QGraphicsScene | Scenes that manage 2D graphics items. |
| QGraphicsView | Displays 2D graphics and images. | |
| QGraphicsItem | Display graphics items in QGraphicsScene. | |
| QTableView | Display tabular data. | |
| QTreeWidget | Display tree data. | |
| QListWidget | Display list data. | |
| QCalendarWidget | Show calendar. | |
| QDockWidget | Create dockable panels. | |
| QSplitter | Create resizable split areas in the interface. | |
| QScrollArea | Display content that exceeds the size of the container and supports scrolling. |
4.2. Project actual combat
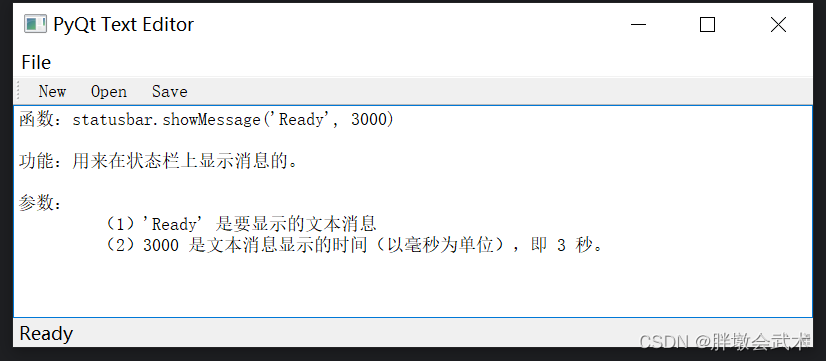
[Menu Class - Component] Menu + Menu Bar + Toolbar + Status Bar QMenuBar + QMenu + QToolBar + QStatusBar
QAction is used to represent actions or operations on the user interface. It is often used with user interface elements such as menus, toolbars, and shortcut keys so that users can perform various actions.
import sys
from PyQt5.QtWidgets import QApplication, QMainWindow, QMenu, QMenuBar, QToolBar, QStatusBar, QAction, QTextEdit, QFileDialog

class MyWindow(QMainWindow):
    def __init__(self):
        super().__init__()
        ###################################################
        # 创建菜单栏
        menubar = self.menuBar()
        # 创建文件菜单
        file_menu = menubar.addMenu('File')
        # 创建文件菜单项
        new_action = QAction('New', self)
        open_action = QAction('Open', self)
        save_action = QAction('Save', self)
        exit_action = QAction('Exit', self)
        # 添加文件菜单项到文件菜单
        file_menu.addAction(new_action)
        file_menu.addAction(open_action)
        file_menu.addAction(save_action)
        file_menu.addSeparator()  # 分隔线
        file_menu.addAction(exit_action)
        # 连接菜单项和工具按钮的槽函数
        new_action.triggered.connect(self.newFile)
        open_action.triggered.connect(self.openFile)
        save_action.triggered.connect(self.saveFile)
        exit_action.triggered.connect(self.exitApp)
        ###################################################
        # 创建工具栏
        toolbar = self.addToolBar('Toolbar')
        # 在工具栏中添加工具按钮
        new_button = toolbar.addAction('New')       # 清空(当前)文本编辑框
        open_button = toolbar.addAction('Open')     # 打开txt文本并添加到文本编辑框
        save_button = toolbar.addAction('Save')     # 保存文本编辑框到txt文本
        # 连接菜单项和工具按钮的槽函数
        new_button.triggered.connect(self.newFile)
        open_button.triggered.connect(self.openFile)
        save_button.triggered.connect(self.saveFile)
        ###################################################
        # 创建状态栏
        statusbar = self.statusBar()
        # 在状态栏中显示消息: 'Ready' 是要显示的文本消息,30000 是消息显示的时间(以毫秒为单位),即30秒。
        statusbar.showMessage('Ready', 30000)
        ###################################################
        # 创建文本编辑框
        self.text_edit = QTextEdit(self)
        self.setCentralWidget(self.text_edit)  # 将文本编辑框设置为主窗口的中心组件

    def newFile(self):
        self.text_edit.clear()  # 清空文本编辑框

    def openFile(self):
        try:
            # 打开文件对话框,选择txt文件并读取内容,然后显示在文本编辑框中
            file_dialog = QFileDialog(self)
            file_path, _ = file_dialog.getOpenFileName()
            if file_path:
                with open(file_path, 'r', encoding='utf-8') as file:
                    file_contents = file.read()
                    self.text_edit.setPlainText(file_contents)
        except Exception as e:
            # 处理异常,例如显示错误消息
            print(f"Error opening file: {

      str(e)}")

    def saveFile(self):
        try:
            # 保存文件对话框,将文本编辑框中的内容保存到txt文件中
            file_dialog = QFileDialog(self)
            file_path, _ = file_dialog.getSaveFileName()
            if file_path:
                with open(file_path, 'w') as file:
                    file_contents = self.text_edit.toPlainText()
                    file.write(file_contents)
        except Exception as e:
            # 处理异常,例如显示错误消息
            print(f"Error saving file: {

      str(e)}")

    def exitApp(self):
        self.close()

if __name__ == '__main__':
    app = QApplication(sys.argv)
    window = MyWindow()
    window.setWindowTitle('PyQt Text Editor')
    window.setGeometry(100, 100, 800, 300)
    window.show()
    sys.exit(app.exec_())
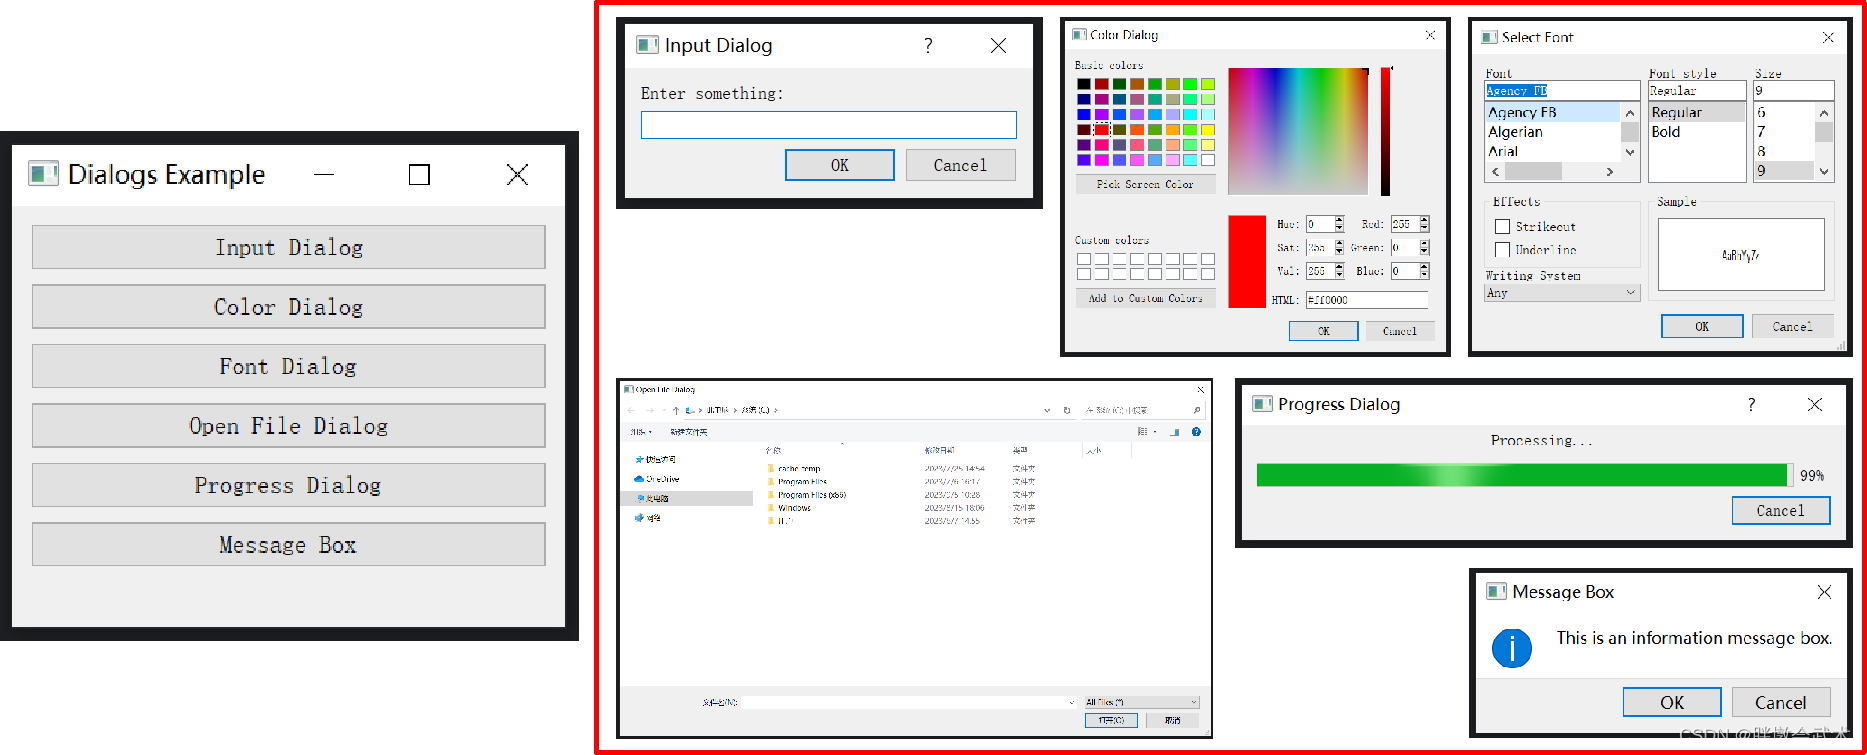
[Dialog Class - Component] Input Dialog + Color Dialog + Font Dialog + File Selection Dialog + Progress Dialog + Message Dialog: QInputDialog + QColorDialog + QFontDialog + QFileDialog + QProgressDialog + QMessageBox
import sys
from PyQt5.QtWidgets import QApplication, QMainWindow, QVBoxLayout, QWidget, QPushButton, QLabel, QInputDialog, QColorDialog, QFontDialog, QFileDialog, QProgressDialog, QMessageBox
from PyQt5.QtCore import Qt
from PyQt5.QtGui import QColor


class MainWindow(QMainWindow):
    def __init__(self):
        super().__init__()

        self.initUI()

    def initUI(self):
        self.setWindowTitle("Dialogs Example")
        self.setGeometry(100, 100, 400, 300)

        layout = QVBoxLayout()

        # 显示输入对话框按钮
        input_btn = QPushButton("Input Dialog")
        input_btn.clicked.connect(self.show_input_dialog)
        layout.addWidget(input_btn)

        # 颜色对话框按钮
        color_btn = QPushButton("Color Dialog")
        color_btn.clicked.connect(self.show_color_dialog)
        layout.addWidget(color_btn)

        # 字体对话框按钮
        font_btn = QPushButton("Font Dialog")
        font_btn.clicked.connect(self.show_font_dialog)
        layout.addWidget(font_btn)

        # 打开文件对话框按钮
        open_file_btn = QPushButton("Open File Dialog")
        open_file_btn.clicked.connect(self.show_file_dialog)
        layout.addWidget(open_file_btn)

        # 进度对话框按钮
        progress_btn = QPushButton("Progress Dialog")
        progress_btn.clicked.connect(self.show_progress_dialog)
        layout.addWidget(progress_btn)

        # 消息框按钮
        message_btn = QPushButton("Message Box")
        message_btn.clicked.connect(self.show_message_box)
        layout.addWidget(message_btn)

        # 标签用于显示结果
        self.result_label = QLabel()
        layout.addWidget(self.result_label)

        central_widget = QWidget()
        central_widget.setLayout(layout)
        self.setCentralWidget(central_widget)

    def show_input_dialog(self):
        text, ok = QInputDialog.getText(self, "Input Dialog", "Enter something:")
        if ok and text:
            self.result_label.setText(f"Input: {

      text}")
        else:
            self.result_label.setText("Input Dialog Canceled")

    def show_color_dialog(self):
        color = QColorDialog.getColor(QColor(255, 0, 0), self, "Color Dialog")
        if color.isValid():
            self.result_label.setStyleSheet(f"background-color: {

      color.name()}")
            self.result_label.setText(f"Selected Color: {

      color.name()}")

    def show_font_dialog(self):
        font, ok = QFontDialog.getFont(self)
        if ok:
            self.result_label.setFont(font)
            self.result_label.setText(f"Selected Font: {

      font.family()}, {

      font.pointSize()}pt")

    def show_file_dialog(self):
        file_name, _ = QFileDialog.getOpenFileName(self, "Open File Dialog", "", "All Files (*);;Text Files (*.txt)")
        if file_name:
            self.result_label.setText(f"Selected File: {

      file_name}")

    def show_progress_dialog(self):
        progress_dialog = QProgressDialog("Processing...", "Cancel", 0, 100, self)
        progress_dialog.setWindowModality(Qt.WindowModal)
        progress_dialog.setWindowTitle("Progress Dialog")

        for i in range(100):
            progress_dialog.setValue(i)
            if progress_dialog.wasCanceled():
                break

        self.result_label.setText("Progress Dialog Completed")

    def show_message_box(self):
        msg_box = QMessageBox()
        msg_box.setIcon(QMessageBox.Information)
        msg_box.setWindowTitle("Message Box")
        msg_box.setText("This is an information message box.")
        msg_box.setStandardButtons(QMessageBox.Ok | QMessageBox.Cancel)
        result = msg_box.exec_()

        if result == QMessageBox.Ok:
            self.result_label.setText("Message Box: Ok button clicked")
        else:
            self.result_label.setText("Message Box: Cancel button clicked")


if __name__ == "__main__":
    app = QApplication(sys.argv)
    window = MainWindow()
    window.show()
    sys.exit(app.exec_())
4.2.0. Adjust the size of the component: setFixedSize + setFixedWidth + setFixedHeight
self.button.setFixedSize(100, 35)  	# 设置组件的尺寸
self.button.setFixedWidth(35)		# 设置组件的宽度
self.button.setFixedHeight(100)		# 设置组件的高度

self.checkbox.stateChanged.connect(self.function_checkbutton)      	# 使用connect方法将(复选框)信号连接到槽
self.slider.valueChanged.connect(self.function_slider)        	 	# 使用connect方法将(滑动条)信号连接到槽
self.LineEdit.returnPressed.connect(self.function_LineEdit)       	# 使用connect方法将(输入框)信号连接到槽
self.button.clicked.connect(self.function_button)  					# 使用connect方法将(按钮)信号连接到槽
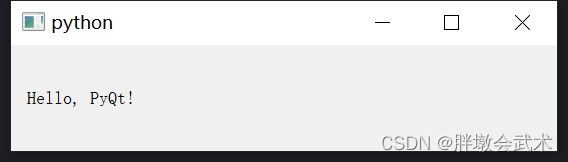
4.2.1, Show text QLabel:Hello, PyQt!
from PyQt5.QtWidgets import QApplication, QWidget, QLabel, QVBoxLayout

app = QApplication([])				# 创建应用程序对象

window = QWidget()					# 创建窗口对象
layout = QVBoxLayout()				# 创建布局对象(垂直布局管理器)
label = QLabel('Hello, PyQt!')		# 创建标签对象
layout.addWidget(label)				# 将标签添加到布局中

window.setLayout(layout)			# 将布局设置给窗口
window.show()						# 显示窗口
app.exec_()							# 运行应用程序
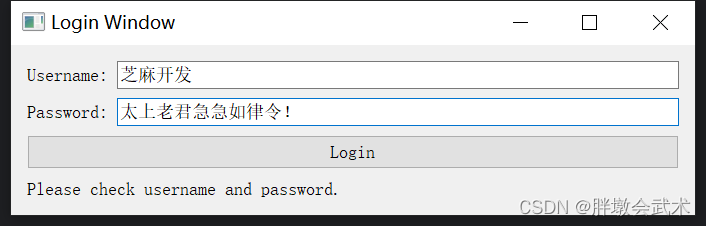
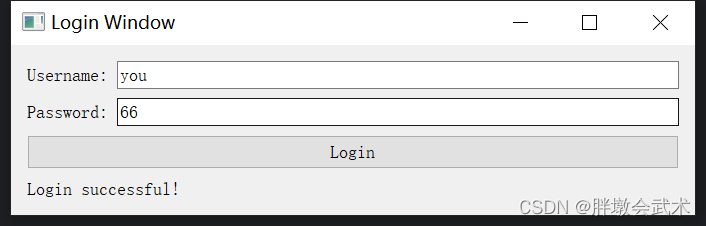
4.2.2. Button QPushButton:User login interface (account and password)
import sys
from PyQt5.QtWidgets import QApplication, QWidget, QLabel, QLineEdit, QPushButton, QVBoxLayout, QHBoxLayout


class LoginWindow(QWidget):
    def __init__(self):
        super().__init__()
        self.setWindowTitle("Login Window")
        # 创建控件
        self.username_label = QLabel("Username:")
        self.username_edit = QLineEdit()

        self.password_label = QLabel("Password:")
        self.password_edit = QLineEdit()

        self.login_button = QPushButton("Login")
        self.login_button.clicked.connect(self.login)  # 连接按钮点击事件到槽函数
        self.result_label = QLabel("")

        # 将容器部件添加到主布局中
        layout = QVBoxLayout()  # 垂直布局管理器

        self.username_layout = QHBoxLayout()  # 水平布局管理器
        self.username_layout.addWidget(self.username_label)  # 将文本框添加到水平布局管理器中
        self.username_layout.addWidget(self.username_edit)  # 将按钮添加到水平布局管理器中
        layout.addLayout(self.username_layout)  # layout.addLayout

        self.password_layout = QHBoxLayout()  # 水平布局管理器
        self.password_layout.addWidget(self.password_label)  # 将文本框添加到水平布局管理器中
        self.password_layout.addWidget(self.password_edit)  # 将按钮添加到水平布局管理器中
        layout.addLayout(self.password_layout)  # layout.addLayout

        # 将登录按钮和结果标签添加到垂直布局中
        layout.addWidget(self.login_button)  # layout.addWidget
        layout.addWidget(self.result_label)  # layout.addWidget

        # 设置窗口的主布局
        self.setLayout(layout)

    def login(self):
        username = self.username_edit.text()
        password = self.password_edit.text()

        # 在这里可以编写登录验证逻辑,这里只是简单地判断用户名和密码是否为空
        if username == 'you' and password == '66':
            self.result_label.setText("Login successful!")
        else:
            self.result_label.setText("Please check username and password.")


if __name__ == "__main__":
    app = QApplication(sys.argv)
    window = LoginWindow()
    window.show()
    sys.exit(app.exec_())
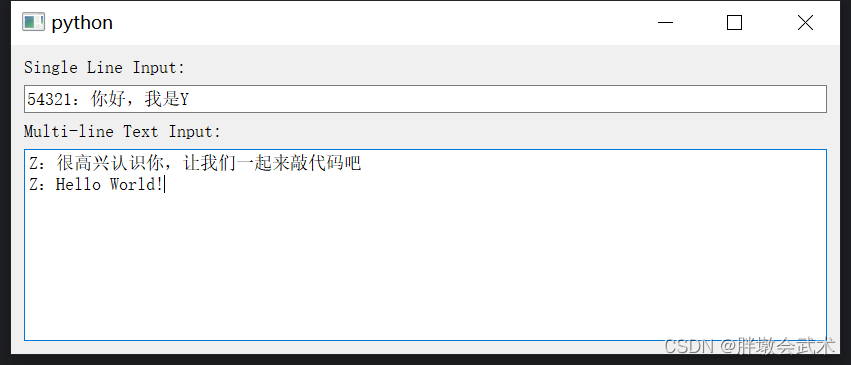
4.2.3. Text box QLineEdit + QTextEdit (single line + multiple lines)
import sys
from PyQt5.QtWidgets import QApplication, QMainWindow, QVBoxLayout, QWidget, QLabel, QLineEdit, QTextEdit

class MainWindow(QMainWindow):
    def __init__(self):
        super().__init__()

        layout = QVBoxLayout()

        # QLineEdit 示例
        self.line_edit = QLineEdit(self)
        layout.addWidget(QLabel("Single Line Input:"))
        layout.addWidget(self.line_edit)

        # QTextEdit 示例
        self.text_edit = QTextEdit(self)
        layout.addWidget(QLabel("Multi-line Text Input:"))
        layout.addWidget(self.text_edit)

        central_widget = QWidget()
        central_widget.setLayout(layout)
        self.setCentralWidget(central_widget)

        # 连接槽函数
        self.line_edit.textChanged.connect(self.show_line_edit_text)
        self.text_edit.textChanged.connect(self.show_text_edit_text)

    def show_line_edit_text(self, text):
        print("Line Edit Text:", text)

    def show_text_edit_text(self):
        text = self.text_edit.toPlainText()  # 获取 QTextEdit 的文本
        print("Text Edit Text:", text)


if __name__ == "__main__":
    app = QApplication(sys.argv)
    window = MainWindow()
    window.show()
    sys.exit(app.exec_())
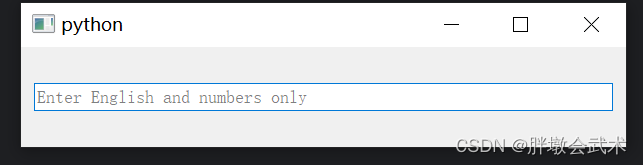
4.2.4. Validator QRegExpValidator: used to limit the text (English/numeric) entered by users in QLineEdit
import sys
from PyQt5.QtWidgets import QApplication, QMainWindow, QVBoxLayout, QWidget, QLineEdit
from PyQt5.QtCore import QRegExp
from PyQt5.QtGui import QRegExpValidator


class MainWindow(QMainWindow):
    def __init__(self):
        super().__init__()

        layout = QVBoxLayout()

        self.line_edit = QLineEdit(self)
        self.line_edit.setPlaceholderText("Enter English and numbers only")

        # english_only = QRegExp("[a-zA-Z]+")  # 创建一个正则表达式,用于匹配只包含英文字符的文本
        # numbers_only = QRegExp("[0-9]+")  # 创建一个正则表达式,用于匹配只包含数字的文本
        regex = QRegExp("[A-Za-z0-9]+")  # 创建一个正则表达式,只允许输入英文和数字

        validator = QRegExpValidator(regex)
        self.line_edit.setValidator(validator)

        layout.addWidget(self.line_edit)

        central_widget = QWidget()
        central_widget.setLayout(layout)
        self.setCentralWidget(central_widget)


if __name__ == "__main__":
    app = QApplication(sys.argv)
    window = MainWindow()
    window.show()
    sys.exit(app.exec_())

"""
函数功能:QRegExp 类是 Qt 中用于处理正则表达式的类。
函数说明:QRegExp(pattern: str,
                caseSensitivity: Qt.CaseSensitivity = Qt.CaseSensitive,
                syntax: QRegExp.PatternSyntax = QRegExp.RegExp)
输入参数:
        pattern             构造一个 QRegExp 对象,使用给定的正则表达式 pattern。
        caseSensitivity     指定是否区分大小写,默认为区分大小写。
        syntax              指定正则表达式的语法,默认为正则表达式语法。
"""

"""
函数功能:QRegExpValidator 类是 Qt 中用于输入验证的工具之一。它允许您使用正则表达式来限制用户在 QLineEdit 等控件中输入的文本。
函数说明:QRegExpValidator(regexp: QRegExp,
                         parent: QObject = None)
输入参数:
        regexp              构造一个 QRegExpValidator 对象,使用给定的正则表达式 regexp 进行验证。
        parent              用于设置对象的父级。
"""
4.2.5. Validator QIntValidator + QDoubleValidator (integer + floating point number): used to restrict the text entered by the user in QLineEdit to be numbers.

import sys
from PyQt5.QtWidgets import QApplication, QMainWindow, QVBoxLayout, QHBoxLayout, QWidget, QLabel, QLineEdit
from PyQt5.QtGui import QIntValidator, QDoubleValidator


class MainWindow(QMainWindow):
    def __init__(self):
        super().__init__()

        int_label = QLabel("Enter an int between [0, 100]:")
        int_label.setFixedWidth(350)  # 设置固定的宽度
        int_validator = QIntValidator(0, 100)       # 创建QIntValidator,设置范围:[0, 100]
        int_lineedit = QLineEdit()                  # 创建一个 QLineEdit 控件
        int_lineedit.setValidator(int_validator)    # 设置校验器
        # 将校验器应用到QLineEdit控件中,用于限制用户只能输入 0 到 100 之间的整数。

        double_label = QLabel("Enter an double between [0.0, 100.0]:")
        double_label.setFixedWidth(350)  # 设置固定的宽度
        double_validator = QDoubleValidator(0.0, 100.0, 2)       # 创建QDoubleValidator,设置范围:[0.0, 100.0],保留两位小数
        double_lineedit = QLineEdit()                         # 创建一个 QLineEdit 控件
        double_lineedit.setValidator(double_validator)           # 设置校验器
        # 将校验器应用到QDoubleValidator控件中,用于限制用户只能输入 0.0 到 100.0 之间的浮点数。

        # 布局管理器
        V_layout = QVBoxLayout()
        H1_layout = QHBoxLayout()
        H2_layout = QHBoxLayout()

        H1_layout.addWidget(int_label)
        H1_layout.addWidget(int_lineedit)
        H2_layout.addWidget(double_label)
        H2_layout.addWidget(double_lineedit)
        V_layout.addLayout(H1_layout)
        V_layout.addLayout(H2_layout)

        # 将布局应用于主窗口的中心区域
        central_widget = QWidget()
        central_widget.setLayout(V_layout)
        self.setCentralWidget(central_widget)


if __name__ == "__main__":
    app = QApplication(sys.argv)
    window = MainWindow()
    window.show()
    sys.exit(app.exec_())

"""##########################################################################
from PyQt5.QtGui import QIntValidator

函数简介:在输入框中,限制用户输入的内容必须是符合一定范围的整数。
函数说明:QIntValidator(bottom, top, parent=None)
输入参数:
        bottom:         校验的最小值。
        top:            校验的最大值。
        parent:         可选,父对象。

属性:   bottom():               获取校验的最小值。
        top():                  获取校验的最大值。
方法:   setBottom(bottom):      设置校验的最小值。
        setTop(top):            设置校验的最大值。
##########################################################################"""

"""##########################################################################
from PyQt5.QtGui import QDoubleValidator

函数简介:在输入框中,限制用户输入的内容必须是符合一定范围的整数。
函数说明:QDoubleValidator(bottom, top, decimals, parent=None)
输入参数:
        bottom:         浮点数的最小值,用户输入的浮点数不能小于该值。
        top:            浮点数的最大值,用户输入的浮点数不能大于该值。
        decimals:       小数位数,表示允许的小数点后的位数。
        parent:         可选参数,父级 QObject。

方法:   bottom():                       返回校验器设置的最小值。
        top():                          返回校验器设置的最大值。
        decimals():                     返回校验器设置的小数位数。
        setBottom(bottom: float):       设置校验器的最小值。
        setTop(top: float):             设置校验器的最大值。
        setDecimals(decimals: int):     设置校验器的小数位数。
##########################################################################"""
4.2.6. Input box QSpinBox + QDoubleSpinBox (integer + floating point number): supports up and down button adjustment

import sys
from PyQt5.QtWidgets import QApplication, QMainWindow, QVBoxLayout, QHBoxLayout, QWidget, QSpinBox, QDoubleSpinBox, QLabel


class MainWindow(QMainWindow):
    def __init__(self):
        super().__init__()

        # 使用 QSpinBox 限制整数范围
        QSpinBox_label = QLabel("int input:")
        int_spinbox = QSpinBox()
        int_spinbox.setRange(0, 100)  # 限制范围:[0, 100]

        # 使用 QDoubleSpinBox 限制浮点数范围
        QDoubleSpinBox_label = QLabel("double input:")
        double_spinbox = QDoubleSpinBox()
        double_spinbox.setRange(0.0, 100.0)  	# 限制范围:[0.0, 100.0]
        double_spinbox.setDecimals(2)  			# 保留2位小数

        # 布局管理器
        V_layout = QVBoxLayout()  	# 垂直布局
        H1_layout = QHBoxLayout()  	# 水平布局
        H2_layout = QHBoxLayout()  	# 水平布局

        H1_layout.addWidget(QSpinBox_label)
        H1_layout.addWidget(int_spinbox)
        V_layout.addLayout(H1_layout)
        H2_layout.addWidget(QDoubleSpinBox_label)
        H2_layout.addWidget(double_spinbox)
        V_layout.addLayout(H2_layout)

        # 将布局应用于主窗口的中心区域
        central_widget = QWidget()
        central_widget.setLayout(V_layout)
        self.setCentralWidget(central_widget)


if __name__ == "__main__":
    app = QApplication(sys.argv)
    window = MainWindow()
    window.show()
    sys.exit(app.exec_())
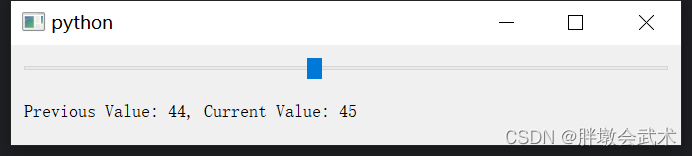
4.2.7. Slider QSlider: Get the value before and after clicking the slider
from PyQt5.QtWidgets import QApplication, QMainWindow, QVBoxLayout, QWidget, QSlider, QLabel
from PyQt5.QtCore import Qt


class MainWindow(QMainWindow):
    def __init__(self):
        super().__init__()

        layout = QVBoxLayout()

        self.slider = QSlider()
        self.slider.setOrientation(Qt.Horizontal)
        self.slider.setRange(0, 100)
        layout.addWidget(self.slider)

        self.label = QLabel("Previous Value: 0, Current Value: 0")
        layout.addWidget(self.label)

        self.previous_value = 0
        self.slider.valueChanged.connect(self.slider_value_changed)

        central_widget = QWidget()
        central_widget.setLayout(layout)
        self.setCentralWidget(central_widget)

    def slider_value_changed(self, new_value):
        self.label.setText(f"Previous Value: {

      self.previous_value}, Current Value: {

      new_value}")
        self.previous_value = self.slider.value()
        # self.slider.value():获取的是点击slider之后的值,而不是当前slider显示的值


if __name__ == "__main__":
    app = QApplication([])
    window = MainWindow()
    window.show()
    app.exec_()
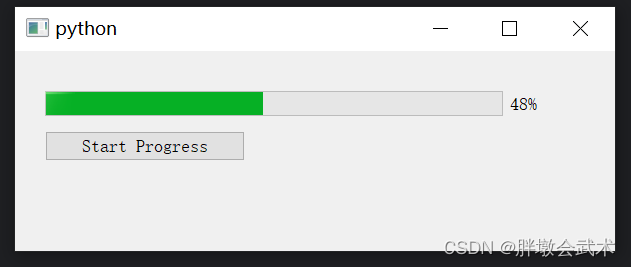
4.2.8. Progress bar QProgressBar: Create a progress bar window (0~100%)
import sys
from PyQt5.QtWidgets import QApplication, QMainWindow, QPushButton, QProgressBar
from PyQt5.QtCore import QTimer

class MainWindow(QMainWindow):
    def __init__(self):
        super().__init__()

        # 设置窗口的几何属性
        self.setGeometry(100, 100, 600, 200)

        # 创建一个进度条并设置其几何属性
        self.progress_bar = QProgressBar(self)
        self.progress_bar.setGeometry(30, 40, 500, 25)

        # 创建一个 "Start Progress" 按钮
        start_button = QPushButton('Start Progress', self)
        # 连接按钮的点击事件到 startProgress 函数
        start_button.clicked.connect(self.startProgress)
        # 设置按钮的固定宽度和位置
        start_button.setFixedWidth(200)
        start_button.move(30, 80)

    def startProgress(self):
        # 初始化进度为0
        self.progress = 0
        # 创建一个定时器
        self.timer = QTimer(self)
        # 连接定时器的超时事件到 updateProgress 函数
        self.timer.timeout.connect(self.updateProgress)
        # 每0.1秒触发一次定时器
        self.timer.start(100)

    def updateProgress(self):
        # 增加进度
        self.progress += 1
        # 设置进度条的值
        self.progress_bar.setValue(self.progress)
        # 当进度达到100%时,停止定时器
        if self.progress >= 100:
            self.timer.stop()

if __name__ == '__main__':
    app = QApplication(sys.argv)
    window = MainWindow()
    window.show()
    sys.exit(app.exec_())
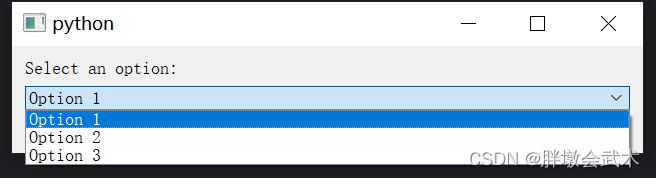
4.2.9. Drop-down box QComboBox: Create a drop-down box and add options
import sys
from PyQt5.QtWidgets import QApplication, QMainWindow, QVBoxLayout, QWidget, QLabel, QComboBox

class MainWindow(QMainWindow):
    def __init__(self):
        super().__init__()

        layout = QVBoxLayout()

        label = QLabel("Select an option:")
        layout.addWidget(label)

        combo_box = QComboBox()
        combo_box.addItem("Option 1")
        combo_box.addItem("Option 2")
        combo_box.addItem("Option 3")
        combo_box.currentIndexChanged.connect(self.selection_changed)  # 连接选项变更事件
        layout.addWidget(combo_box)

        self.result_label = QLabel("", self)
        layout.addWidget(self.result_label)

        central_widget = QWidget()
        central_widget.setLayout(layout)
        self.setCentralWidget(central_widget)

    def selection_changed(self, index):
        selected_option = self.sender().currentText()
        self.result_label.setText(f"Selected: {

      selected_option}")

if __name__ == "__main__":
    app = QApplication(sys.argv)
    window = MainWindow()
    window.show()
    sys.exit(app.exec_())
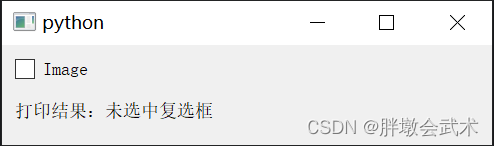
4.2.10. Check Box: Get the checked status
Get the check box status:
self.checkbox.stateChanged.connect()
You can get the current status value of the check box through its checkState() method:0、1 或 2. Represents the status of未选中、选中和部分选中(半选中)respectively.
from PyQt5.QtWidgets import QApplication, QMainWindow, QVBoxLayout, QWidget, QCheckBox, QLabel


class MainWindow(QMainWindow):
    def __init__(self):
        super().__init__()

        layout = QVBoxLayout()
        self.checkbox = QCheckBox("Image", self)
        self.checkbox.setChecked(True)  # 默认选中复选框
        self.checkbox.stateChanged.connect(self.invert_load_image)

        self.label = QLabel("")  # 创建一个用于显示图像名称的QLabel

        layout.addWidget(self.checkbox)
        layout.addWidget(self.label)

        central_widget = QWidget()
        central_widget.setLayout(layout)
        self.setCentralWidget(central_widget)

    def invert_load_image(self, state):
        if state == 2:  # 部分选中状态
            self.label.setText("选中复选框")
        elif state == 0:  # 未选中状态
            self.label.setText("未选中复选框")

            # 连接到加载图像的槽函数
            self.load_image()

    def load_image(self):
        # 加载图像的相关操作
        print("加载图像...")


if __name__ == "__main__":
    app = QApplication([])
    window = MainWindow()
    window.show()
    app.exec_()
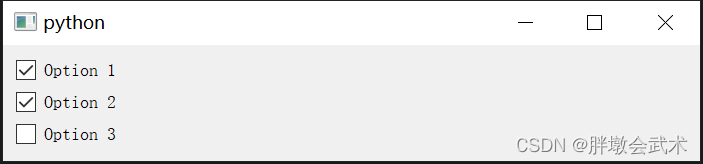
Get checkbox status:
self.checkbox.isChecked()
from PyQt5.QtWidgets import QApplication, QMainWindow, QVBoxLayout, QWidget, QCheckBox

class MainWindow(QMainWindow):
    def __init__(self):
        super().__init__()

        layout = QVBoxLayout()

        # 创建多个复选框
        self.checkbox1 = QCheckBox("Option 1", self)
        self.checkbox2 = QCheckBox("Option 2", self)
        self.checkbox3 = QCheckBox("Option 3", self)

        layout.addWidget(self.checkbox1)
        layout.addWidget(self.checkbox2)
        layout.addWidget(self.checkbox3)

        central_widget = QWidget()
        central_widget.setLayout(layout)
        self.setCentralWidget(central_widget)

        # 连接按钮的点击信号到槽函数
        self.checkbox1.clicked.connect(self.show_states)
        self.checkbox2.clicked.connect(self.show_states)
        self.checkbox3.clicked.connect(self.show_states)

    def show_states(self):
        # 获取每个复选框的状态并显示
        state1 = self.checkbox1.isChecked()
        state2 = self.checkbox2.isChecked()
        state3 = self.checkbox3.isChecked()

        print("Option 1 is checked:", state1)
        print("Option 2 is checked:", state2)
        print("Option 3 is checked:", state3)

if __name__ == "__main__":
    app = QApplication([])
    window = MainWindow()
    window.show()
    app.exec_()
4.2.11. Radio button QRadioButton: Get the checked status

import sys
from PyQt5.QtWidgets import QApplication, QMainWindow, QVBoxLayout, QHBoxLayout, QWidget, QRadioButton, QLabel, QButtonGroup


class MainWindow(QMainWindow):
    def __init__(self):
        super().__init__()

        layout = QVBoxLayout()
        # 新建单选按钮。在多个选项中进行单选。
        self.group_radio_buttons = []
        self.group_label = []

        group_options = ["Option1", "Option2", "Option3"]  # 单选按钮名称
        group_label_options = ["signal", "double", "double"]  # 初始化标签值
        self.group_button_group = QButtonGroup()
        for index, option in enumerate(group_options):
            hbox = QHBoxLayout()
            radio_button = QRadioButton(option)  # 添加单选按钮
            radio_button.setFixedWidth(150)  # 设置宽度
            label = QLabel(group_label_options[index])  # 添加标签

            self.group_radio_buttons.append(radio_button)  # 保存三个radio按钮
            self.group_label.append(label)  # 保存三个label标签
            self.group_button_group.addButton(radio_button, index)
            # 添加布局
            hbox.addWidget(radio_button)
            hbox.addWidget(label)
            layout.addLayout(hbox)
            # if option == "Option1":  # 设置 "YZ" 默认选中
            #     radio_button.setChecked(True)
        self.group_button_group.buttonClicked.connect(self.update_result_label)

        # 新建结果打印标签
        self.result_label = QLabel("Selected:", self)
        layout.addWidget(self.result_label)

        central_widget = QWidget()
        central_widget.setLayout(layout)
        self.setCentralWidget(central_widget)

    def update_result_label(self):
        selected_option = None
        for index, button in enumerate(self.group_radio_buttons):
            if button.isChecked():
                selected_option = button.text()
                break
        if selected_option is not None:
            self.result_label.setText(f"Selected: {

      selected_option}")
        else:
            self.result_label.setText("No option selected")

        if selected_option == "Option1":
            self.group_label[0].setText(str(1))
        else:
            self.group_label[0].setText("")
        if selected_option == "Option2":
            self.group_label[1].setText(str(2))
        else:
            self.group_label[1].setText("")
        if selected_option == "Option3":
            self.group_label[2].setText(str(3))
        else:
            self.group_label[2].setText("")


if __name__ == "__main__":
    app = QApplication(sys.argv)
    window = MainWindow()
    window.show()
    sys.exit(app.exec_())
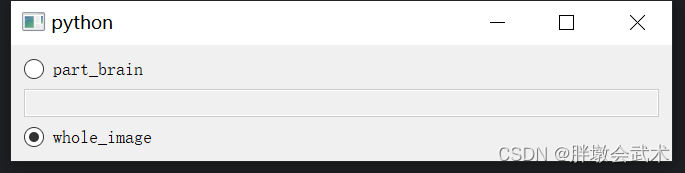
Only add a text box to part_brain; and only when part_brain is selected, text box shape = True.
import sys
from PyQt5.QtWidgets import QApplication, QMainWindow, QVBoxLayout, QWidget, QRadioButton, QLineEdit, QButtonGroup


class MainWindow(QMainWindow):
    def __init__(self):
        super().__init__()

        layout = QVBoxLayout()

        self.group_radio_buttons = []
        self.group_line = []

        group_options = ["part_brain", "whole_image"]
        self.group_button_group = QButtonGroup()

        for index, option in enumerate(group_options):
            radio_button = QRadioButton(option)
            self.group_radio_buttons.append(radio_button)
            self.group_button_group.addButton(radio_button, index)

            layout.addWidget(radio_button)

            if option == "part_brain":
                line_edit = QLineEdit(self)
                self.group_line.append(line_edit)
                line_edit.setEnabled(False)  # 只有 "part_brain" 被选中时启用文本框
                layout.addWidget(line_edit)

            if option == "whole_image":
                radio_button.setChecked(True)

        self.group_button_group.buttonClicked.connect(self.update_line_edit_status)

        central_widget = QWidget()
        central_widget.setLayout(layout)
        self.setCentralWidget(central_widget)

    def update_line_edit_status(self):
        for index, button in enumerate(self.group_radio_buttons):
            if button.isChecked():
                if index < len(self.group_line):
                    self.group_line[index].setEnabled(True)
                else:
                    for line_edit in self.group_line:
                        line_edit.setEnabled(False)


if __name__ == "__main__":
    app = QApplication(sys.argv)
    window = MainWindow()
    window.show()
    sys.exit(app.exec_())
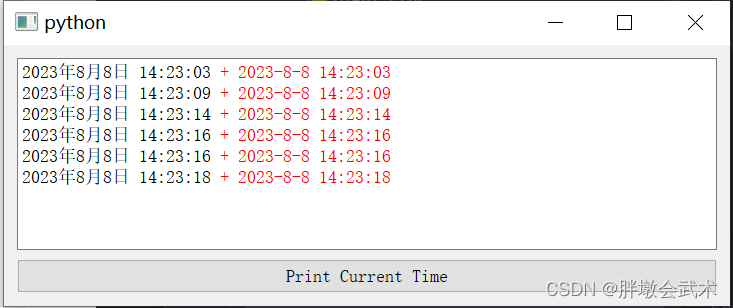
4.2.12. Print log QTextEdit: Get the current time + set the text color
from PyQt5.QtWidgets import QApplication, QTextEdit, QVBoxLayout, QPushButton, QMainWindow, QWidget
from PyQt5.QtCore import Qt, QDateTime


class MainWindow(QMainWindow):
    def __init__(self):
        super().__init__()

        layout = QVBoxLayout()

        self.log_text_edit = QTextEdit()
        layout.addWidget(self.log_text_edit)

        self.button = QPushButton("Print Current Time")
        self.button.clicked.connect(self.print_current_time)
        layout.addWidget(self.button)

        widget = QWidget()
        widget.setLayout(layout)
        self.setCentralWidget(widget)

    def print_current_time(self):
        current_time1 = QDateTime.currentDateTime().toString(Qt.DefaultLocaleLongDate)  # 指定默认格式
        current_time2 = QDateTime.currentDateTime().toString("yyyy-M-d hh:mm:ss")  # 指定日期格式

        message = current_time1 + r'<font color="red"> + {}</font>'.format(current_time2)
        self.log_text_edit.append(message)


if __name__ == '__main__':
    app = QApplication([])
    window = MainWindow()
    window.show()
    app.exec()
from datetime import datetime

current_time = datetime.now()  # 获取当前时间
formatted_time = current_time.strftime("%Y-%m-%d %H:%M:%S")
print("Time:", formatted_time)  # 打印格式化后的时间
# Time: 2023-08-08 14:25:29
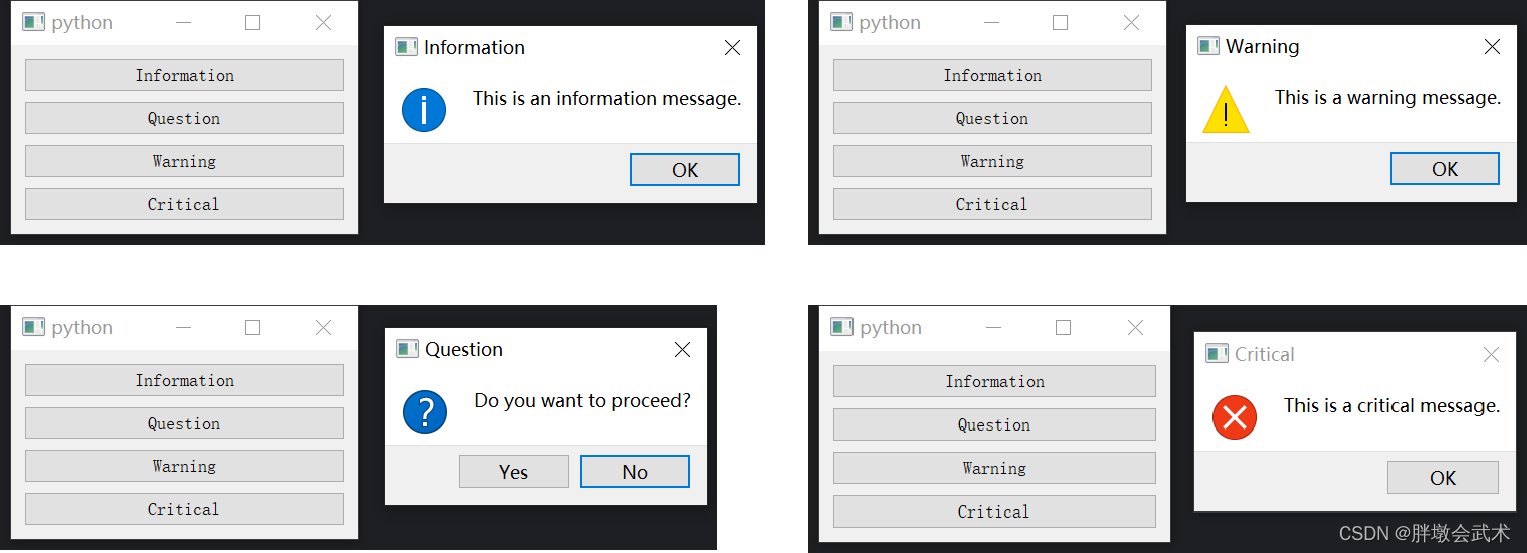
4.2.13. Message prompt box QMessageBox: four types of prompt boxes (information/query/warning/error)
import sys
from PyQt5.QtWidgets import QApplication, QMainWindow, QPushButton, QVBoxLayout, QWidget, QMessageBox


class MainWindow(QMainWindow):
    def __init__(self):
        super().__init__()

        central_widget = QWidget(self)
        self.setCentralWidget(central_widget)

        layout = QVBoxLayout(central_widget)

        info_button = QPushButton("Information")
        info_button.clicked.connect(self.show_information)
        layout.addWidget(info_button)

        question_button = QPushButton("Question")
        question_button.clicked.connect(self.show_question)
        layout.addWidget(question_button)

        warning_button = QPushButton("Warning")
        warning_button.clicked.connect(self.show_warning)
        layout.addWidget(warning_button)

        critical_button = QPushButton("Critical")
        critical_button.clicked.connect(self.show_critical)
        layout.addWidget(critical_button)

    def show_information(self):
        QMessageBox.information(self, "Information", "This is an information message.", QMessageBox.Ok, QMessageBox.Ok)

    def show_question(self):
        result = QMessageBox.question(self, "Question", "Do you want to proceed?", QMessageBox.Yes | QMessageBox.No, QMessageBox.No)
        if result == QMessageBox.Yes:
            print("User clicked Yes")
        else:
            print("User clicked No")

    def show_warning(self):
        QMessageBox.warning(self, "Warning", "This is a warning message.", QMessageBox.Ok, QMessageBox.Ok)

    def show_critical(self):
        QMessageBox.critical(self, "Critical", "This is a critical message.", QMessageBox.Ok, QMessageBox.Ok)


if __name__ == "__main__":
    app = QApplication(sys.argv)
    window = MainWindow()
    window.show()
    sys.exit(app.exec_())

"""##########################################################################
from PyQt5.QtWidgets import QMessageBox

函数简介:用于显示消息框、询问框、警告框等用户交互提示框的类。
函数说明:
        信息消息框        QMessageBox.information(parent, title, message, buttons, defaultButton)
        询问消息框        QMessageBox.question(parent, title, message, buttons, defaultButton)
        警告消息框        QMessageBox.warning(parent, title, message, buttons, defaultButton)
        严重错误消息框     QMessageBox.critical(parent, title, message, buttons, defaultButton)
输入参数:
        parent:         可选参数,父级窗口。
        title:          消息框的标题。
        message:        消息框中显示的消息文本。
        buttons:        消息框中显示的按钮类型,如 QMessageBox.Yes、QMessageBox.No 等。
        defaultButton:  可选参数,指定默认按钮。
##########################################################################"""
4.2.14, Tab interface QTabWidget
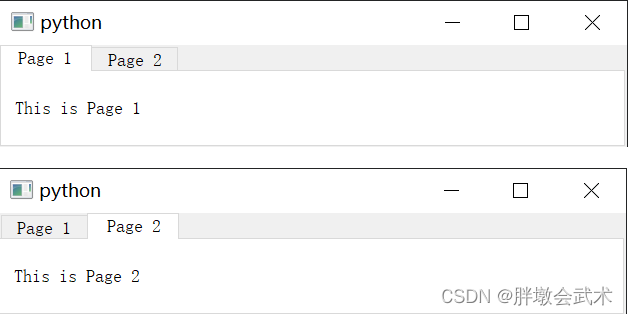
4.2.14.1. Display multiple pages in one window
Tab control: Multiple pages can be displayed in one window. Each page corresponds to a tab. The user can switch to different pages by clicking on the tab.
from PyQt5.QtWidgets import QApplication, QMainWindow, QTabWidget, QWidget, QVBoxLayout, QLabel

class MyWindow(QMainWindow):
    def __init__(self):
        super().__init__()

        # 创建Tab控件
        self.tab_widget = QTabWidget()
        self.setCentralWidget(self.tab_widget)

        # 创建页面并添加到Tab控件中
        self.page1 = QWidget()
        self.page2 = QWidget()
        self.tab_widget.addTab(self.page1, "Page 1")
        self.tab_widget.addTab(self.page2, "Page 2")

        # 设置页面的布局和内容
        layout1 = QVBoxLayout()
        layout1.addWidget(QLabel("This is Page 1"))
        self.page1.setLayout(layout1)

        layout2 = QVBoxLayout()
        layout2.addWidget(QLabel("This is Page 2"))
        self.page2.setLayout(layout2)


if __name__ == "__main__":
    app = QApplication([])
    window = MyWindow()
    window.show()
    app.exec_()
4.2.14.2. In the main interface, display other .py interface class files
To implement tabs to automatically display different interfaces, you can create and add different interface class instances during the initialization process of the main interface, and display the corresponding interface according to the switching of tabs.

# main.py

import sys
from PyQt5.QtWidgets import QApplication, QMainWindow, QTabWidget, QVBoxLayout, QWidget, QPushButton
from other_file import OtherWindow  # 导入其他文件中的界面类

class MainWindow(QMainWindow):
    def __init__(self):
        super().__init__()
        self.setWindowTitle("Main Window")
        self.setGeometry(200, 200, 300, 200)

        # 创建一个QTabWidget控件
        self.tab_widget = QTabWidget(self)
        self.setCentralWidget(self.tab_widget)

        # 创建页面1和页面2
        self.page1 = QWidget()
        self.page2 = OtherWindow()  # 调用其他文件中的界面类

        # 将页面1和页面2添加到QTabWidget控件中
        self.tab_widget.addTab(self.page1, "Page 1")
        self.tab_widget.addTab(self.page2, "Page 2")


if __name__ == "__main__":
    app = QApplication(sys.argv)
    main_window = MainWindow()
    main_window.show()
    sys.exit(app.exec_())
# other_file.py

import sys
from PyQt5.QtWidgets import QApplication, QWidget, QLabel, QVBoxLayout, QHBoxLayout, QPushButton, QFileDialog

class OtherWindow(QWidget):
    def __init__(self):
        super().__init__()
        # (1)QVBoxLayout垂直界面
        layout = QVBoxLayout()
        # (2)QHBoxLayout水平界面
        button_layout = QHBoxLayout()
        # (3)新建按钮
        self.button = QPushButton("load:", self)  # 创建"Load Image"按钮,
        self.button.clicked.connect(self.load_image)  # 使用connect方法将信号连接到槽
        button_layout.addWidget(self.button)  # 将load_button添加到button_layout布局中
        # (4)新建标签
        self.label = QLabel("")  # 创建一个用于显示图像名称的QLabel
        button_layout.addWidget(self.label)  # 将image_name_label添加到button_layout布局中
        # (5)水平界面添加到垂直界面
        layout.addLayout(button_layout)  # 将button_layout布局添加到主布局中
        self.setLayout(layout)  # 设置窗口的主布局

    def load_image(self):
        self.folder_path = QFileDialog.getExistingDirectory(self, 'Select Folder', './')

        if self.folder_path:
            print('Selected Folder:', self.folder_path)
            self.label.setText(self.folder_path)


if __name__ == '__main__':
    app = QApplication(sys.argv)
    window = OtherWindow()
    window.show()
    sys.exit(app.exec_())
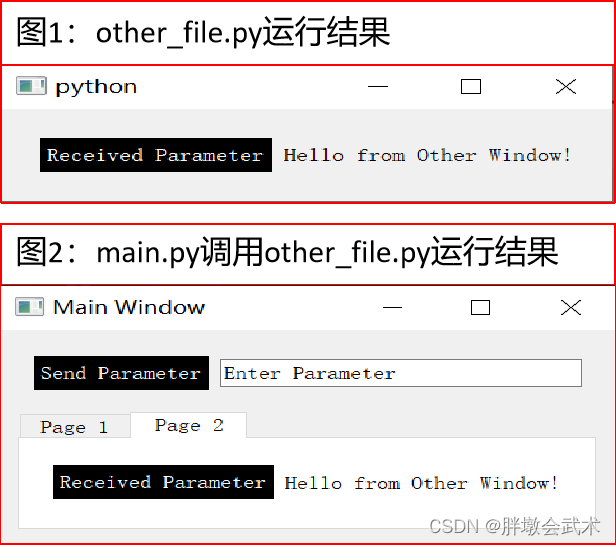
4.2.14.3. In the main interface, display other .py interface class files and perform data interaction
# main.py

import sys
from PyQt5.QtWidgets import QApplication, QMainWindow, QTabWidget, QVBoxLayout, QWidget, QLineEdit, QPushButton, QHBoxLayout
from other_file import OtherWindow


class MainWindow(QMainWindow):
    def __init__(self):
        super().__init__()
        self.setWindowTitle("Main Window")
        self.setGeometry(200, 200, 300, 200)
        #####################################################################
        # 创建一个容器部件,用于放置按钮和文本框
        self.button_layout = QHBoxLayout()  # 水平布局管理器
        self.send_button = QPushButton("Send Parameter", self)  # 新建按钮,并设置初始参数
        self.send_button.clicked.connect(self.send_parameter)  # 使用connect方法将信号连接到槽
        self.send_button.setStyleSheet("background-color: black; color: white;")  # 设置按钮的背景和字体颜色

        self.input_line_edit = QLineEdit("Enter Parameter", self)  # 新建文本框,并设置初始参数

        self.button_layout.addWidget(self.send_button)  # 将按钮添加到水平布局管理器中
        self.button_layout.addWidget(self.input_line_edit)  # 将文本框添加到水平布局管理器中
        #####################################################################
        # 创建一个QTabWidget控件
        self.tab_widget = QTabWidget(self)
        self.setCentralWidget(self.tab_widget)

        # 创建页面1和页面2
        self.page1 = QWidget()
        self.other_window = OtherWindow()  # 调用其他文件中的界面类

        # 将页面1和页面2添加到QTabWidget控件中
        self.tab_widget.addTab(self.page1, "Page 1")
        self.tab_widget.addTab(self.other_window, "Page 2")
        #####################################################################
        # 将容器部件添加到主布局中
        layout = QVBoxLayout()  # 垂直布局管理器
        layout.addLayout(self.button_layout)
        layout.addWidget(self.tab_widget)

        central_widget = QWidget()
        central_widget.setLayout(layout)
        self.setCentralWidget(central_widget)

    def send_parameter(self):
        parameter = self.input_line_edit.text()
        self.other_window.receive_parameter(parameter)  # 调用其他界面类other_window中的函数receive_parameter


if __name__ == "__main__":
    app = QApplication(sys.argv)
    window = MainWindow()
    window.show()
    sys.exit(app.exec_())
# other_file.py

from PyQt5.QtWidgets import QApplication, QWidget, QVBoxLayout, QHBoxLayout, QPushButton, QLabel
import sys


class OtherWindow(QWidget):
    def __init__(self):
        super().__init__()
        layout = QVBoxLayout()

        button_layout = QHBoxLayout()  # 水平布局管理器
        self.Received_button = QPushButton("Received Parameter", self)  # 新建按钮,并设置初始参数
        self.Received_button.setStyleSheet("background-color: black; color: white;")  # 设置按钮的背景和字体颜色
        self.label = QLabel("Hello from Other Window!")
        button_layout.addWidget(self.Received_button)
        button_layout.addWidget(self.label)

        layout.addLayout(button_layout)
        self.setLayout(layout)

    def receive_parameter(self, parameter):
        self.label.setText(f"{

      parameter}")


if __name__ == "__main__":
    app = QApplication(sys.argv)
    window = OtherWindow()
    window.show()
    sys.exit(app.exec_())
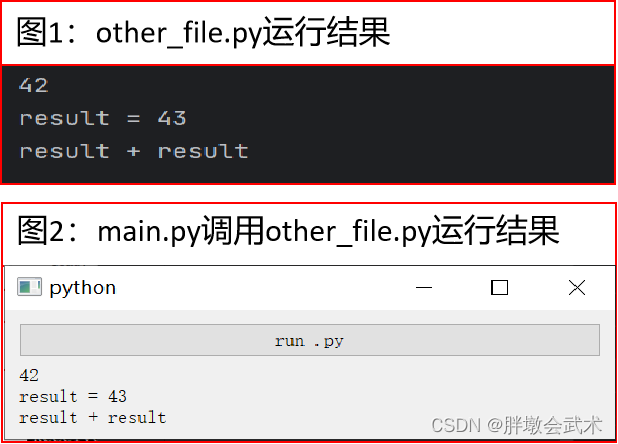
4.2.15, Call other .py files and perform data interaction
There are two methods:
- (1)
QProcess(process.start):Need to rely on Qt library. Implement functions such as interaction, startup and management with external applications, making it more flexible. Suitable for more complex interactions and process management. - (2)
subprocess(subprocess.run):Methods provided by the Python standard library, simpler and more convenient. Suitable for executing external commands or scripts in Python scripts and obtaining their results.
·Test file.py
# other_file.py

# 在这里进行运算或其他处理
result = 42
# 将结果打印到控制台
print(result)
print("result =", result + 1)
print("result" + " + " + "result")
Method 1: subprocess (subprocess.run)
# main.py

import sys
import subprocess

from PyQt5.QtWidgets import QApplication, QMainWindow, QVBoxLayout, QWidget, QPushButton, QLabel


class MainWindow(QMainWindow):
    def __init__(self):
        super().__init__()

        layout = QVBoxLayout()
        self.run_button = QPushButton("run .py")
        self.run_button.clicked.connect(self.run)
        self.run_label = QLabel("", self)
        layout.addWidget(self.run_button)
        layout.addWidget(self.run_label)

        central_widget = QWidget()
        central_widget.setLayout(layout)
        self.setCentralWidget(central_widget)

    def run(self):
        try:
        	#########################################################
        	# 注意:若不确定other_file.py是否调用成功,可以使用绝对路径。
        	#########################################################
            result = subprocess.run(["python", "other_file.py"], capture_output=True, text=True, check=True)
            output = result.stdout.strip()  # 获取输出结果并去除首尾空格
            self.run_label.setText(output)
        except subprocess.CalledProcessError as e:
            # 如果出现错误,可以在这里进行处理
            self.run_label.setText(str(e))


if __name__ == "__main__":
    app = QApplication(sys.argv)
    window = MainWindow()
    window.show()
    sys.exit(app.exec_())

"""##########################################################################
import subprocess

函数简介:Python标准库subprocess模块中的一个函数,用于运行一个子进程并等待其完成。
		 可以执行系统命令或其他可执行文件,并可以通过参数来控制进程的行为和交互。
函数说明:subprocess.run(args, *, stdin=None, input=None, stdout=None,
		 				stderr=None, shell=False, cwd=None, timeout=None,
		 				check=False, encoding=None, errors=None, text=None,
		 				env=None, universal_newlines=None, start_new_session=False)
输入参数:
		args: 要运行的命令或可执行文件,以列表或字符串形式传递。如果shell=True,可以传递一个字符串,使用Shell运行命令。
		stdin: 用于传递子进程的标准输入的文件对象。
		input: 用于传递子进程的标准输入的字节或字符串数据。
		stdout: 用于接收子进程的标准输出的文件对象。
		stderr: 用于接收子进程的标准错误输出的文件对象。
		shell: 是否在Shell中运行命令。如果为True,可以使用通配符等Shell特性。
		cwd: 子进程的当前工作目录。
		timeout: 等待子进程完成的超时时间,如果子进程在此时间内未完成,将会被终止。
		check: 是否检查返回代码。如果为True,如果子进程返回的代码非零,将会引发CalledProcessError异常。
		encoding: 用于解码子进程输出的编码。
		errors: 用于处理解码错误的策略。
		text: 是否使用文本模式传递数据,相当于同时设置universal_newlines和encoding。
		env: 用于指定子进程的环境变量。
		universal_newlines: 是否使用通用换行符模式,相当于同时设置stdin、stdout和stderr的text参数。
		start_new_session: 是否在新的会话(session)中启动子进程。
输出参数:
		返回一个CompletedProcess对象,它包含有关子进程执行的信息,如返回代码、标准输出、标准错误等。
##########################################################################"""
Method 2: QProcess (process.start)
# main.py

import sys
from PyQt5.QtWidgets import QApplication, QMainWindow, QVBoxLayout, QWidget, QPushButton, QLabel
from PyQt5.QtCore import QProcess


class MainWindow(QMainWindow):
    def __init__(self):
        super().__init__()

        layout = QVBoxLayout()
        self.run_button = QPushButton("run .py")
        self.run_button.clicked.connect(self.run)
        self.run_label = QLabel("", self)
        layout.addWidget(self.run_button)
        layout.addWidget(self.run_label)

        central_widget = QWidget()
        central_widget.setLayout(layout)
        self.setCentralWidget(central_widget)

    def run(self):
        # 清空结果标签
        self.run_label.setText("")
        #########################################################
        # (1)启动进程执行外部脚本
        process = QProcess()
        python_script = r'other_file.py'  # 注意:若不确定other_file.py是否调用成功,可以使用绝对路径。
        para1 = str(9)  # (1)传递参数只能是字符串(2)与外部脚本完成交互。
        process.start("python", [python_script, para1])
        process.waitForFinished(-1)  # 用于等待进程执行完成。传入参数-1表示无限等待

        # (2)进程的退出代码:(1)0表示进程成功执行完成;(2)非零值表示出现错误。
        exit_code = process.exitCode()
        if exit_code == 0:
            self.run_label.setText("调用【成功】,退出代码:{}".format(exit_code))
        else:
            self.run_label.setText("调用【失败】,退出代码:{}".format(exit_code))


if __name__ == "__main__":
    app = QApplication(sys.argv)
    window = MainWindow()
    window.show()
    sys.exit(app.exec_())

"""######################################################################################
# 函数介绍:QProcess 是 Qt 框架中用于创建和管理外部进程的类。它允许你启动外部应用程序,并与其进行通信。
# 常见方法:
#       (1)启动外部进程:         使用start()方法启动一个外部进程
#       (2)与进程通信:           使用write()方法向进程的标准输入写入数据,并使用readAllStandardOutput()和readAllStandardError()方法读取进程的标准输出和标准错误输出。
#       (2)等待进程执行完成:     使用waitForFinished()方法来等待进程执行完成
#       (3)获取进程退出代码:     使用exitCode()方法可以获取进程的退出代码
#       (4)支持信号与槽机制:     使用readyReadStandardOutput()信号在进程有标准输出可读时发出
#       (5)中断进程:            使用terminate()方法尝试终止进程的执行。不一定会立即停止进程,具体行为取决于操作系统和进程本身。
#
#               process = QProcess()
#               process.start("python", ["script.py", "arg1", "arg2"])
#               if process.waitForFinished():
#                   print("Process finished")
#               exit_code = process.exitCode()
#               if exit_code == 0:
#                   print("调用成功")
#               else:
#                   print("调用失败,退出代码:", exit_code)
#
#               process.write(b"input data")
#               output = process.readAllStandardOutput()
#               error_output = process.readAllStandardError()
#               process.readyReadStandardOutput.connect(handle_output)
#               process.terminate()
######################################################################################"""

"""######################################################################################
# 函数介绍:waitForFinished 是 QProcess 类的一个成员函数。用于阻塞当前线程,直到关联的进程完成执行为止。
# 函数说明:bool QProcess.waitForFinished(int msecs = 30000)
# 输入参数:     msecs:等待的时间(以毫秒为单位)。默认值是 30000 毫秒(30 秒)。如果设置为 -1,表示无限等待。
# 输出参数:     如果进程在给定的时间内完成执行,则返回 True,否则返回 False。
#
# (1)主要用于等待 QProcess 执行外部程序的过程完成。程序会阻塞当前线程,阻塞在当前行,直到被调用的进程执行完毕。
# (2)如果进程执行的时间很长,这会导致界面冻结,因为界面线程会被阻塞。
# (3)如果你需要在界面上显示进度或状态,或者想要允许用户继续操作界面,而不阻塞界面线程,可以考虑使用多线程、异步编程等技术,以避免界面的冻结。
######################################################################################"""
4.2.16,In the current virtual environment, call .py files in other virtual environments
import subprocess

virtual_env_name = "tensorflow36"  							# (1)指定要激活的虚拟环境名称
cmd_activate_env = f"conda activate {

      virtual_env_name}"  	# (2)构建激活虚拟环境的命令

script_path = r"other_file.py"  							# (3)指定.py文件路径
cmd_script_file = f"python {

      script_path}"  					# (4)构建激活调用py文件的命令

# (5)组合两个命令并在子进程中执行
combined_cmd = f"{

      cmd_activate_env} && {

      cmd_script_file}"

# (6)使用subprocess执行命令
try:
    subprocess.run(combined_cmd, shell=True, check=True)
except subprocess.CalledProcessError as e:
    print(f"Error: {

      e}")
4.2.17,In the current virtual environment, call .py files in other virtual environments and pass parameters
import subprocess
import os

virtual_env_name = "tensorflow36"                           # (1)指定要激活的虚拟环境名称
cmd_activate_env = f"conda activate {

      virtual_env_name}"     # (2)构建激活虚拟环境的命令

script_path = r"C:\Users\Administrator\Desktop\py\deeplearning.py"  # (3)指定.py文件路径
path = os.getcwd() + 'image.tif'             # (4)指定.py文件的参数

# (4)构建激活调用.py文件的命令,包括传递 image_path 参数
cmd_script_file = f"python {

      script_path} --image_path {

      path}"
# (5)组合两个命令并在子进程中执行
combined_cmd = f"{

      cmd_activate_env} &&{

      cmd_script_file}"
# (6)使用subprocess执行命令
try:
    subprocess.run(combined_cmd, shell=True, check=True)
except subprocess.CalledProcessError as e:
    print(f"Error: {

      e}")

"""
######################################################################
import argparse                             # 导入argparse模块

if __name__ == "__main__":
    parser = argparse.ArgumentParser()      # 创建解析对象
    parser.add_argument('--image_path')     # 添加命令行参数和选项
    args = parser.parse_args()              # 解析添加的参数
    image_path = args.image_path            # 获取添加的参数
######################################################################
"""