Universal backend management system
This system mainly combines
Elementcomponent editing front-end and back-end to implement business logic, forming a simple front-end and back-end separation project.
This part introduces the implementation of the function of calling the remote server python code
Scenario: There is a remote Linux server that stores the yolo detection code, and this function is packaged into the project
front end
page
<template>
<div>
<el-col :span="12" style="padding-right: 50px;padding-left: 50px">
<el-card class="select-card">
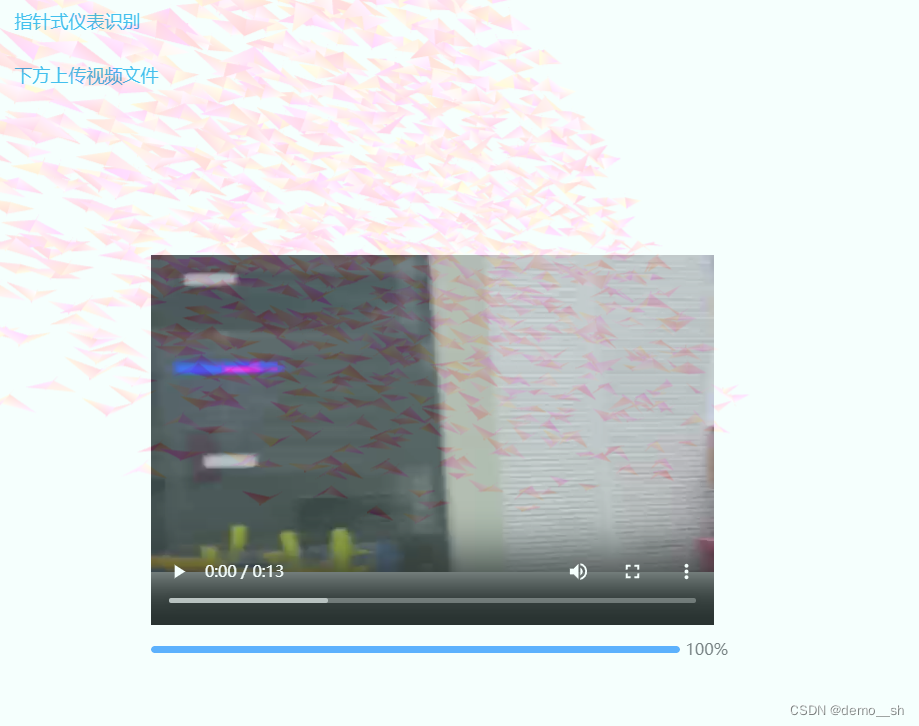
<p style="color: #1fb1ec"> 指针式仪表识别</p>
<p style="color: #1fb1ec; margin-top:5px; margin-bottom: 30px"><br> 下方上传视频文件</p>
<!--上传视频部分-->
<el-upload
class="avatar-uploader"
:action=uploadPath
:file-list="fileList"
:before-upload="beforeUploadVideo"
:on-progress="uploadVideoProcess"
:on-success="uploadSuccess"
:show-file-list="false"
style="padding-top: 10px">
<video
v-if="videoForm.showVideoPath !== '' && !videoFlag"
v-bind:src="videoForm.showVideoPath"
class="avatar video-avatar"
controls="controls">
您的浏览器不支持视频播放
</video>
<i v-else-if="videoForm.showVideoPath === '' && !videoFlag"
class="el-icon-plus avatar-uploader-icon"
></i>
</el-upload>
<el-progress v-if="isShowUploadVideo" :percentage="videoUploadPercent"
style="margin-top: 7px; width: 520px; margin-left: 10vh"></el-progress>
<!--分析部分-->
<div class="vid">
</div>
</el-card>
</el-col>
<el-col :span="8" style="padding-right: 10px">
<el-card class="select-card">
<!--结果部分-->
<div style="top: 15vh; position: absolute">
<span style="color: #1fb1ec; margin-top: 50px">识别结果为:</span>
<span class="video-res">{
{ waterRes }}</span>
</div>
</el-card>
</el-col>
</div>
</template>
Card effect: Click in the box to select a video to upload (the UI is rough)
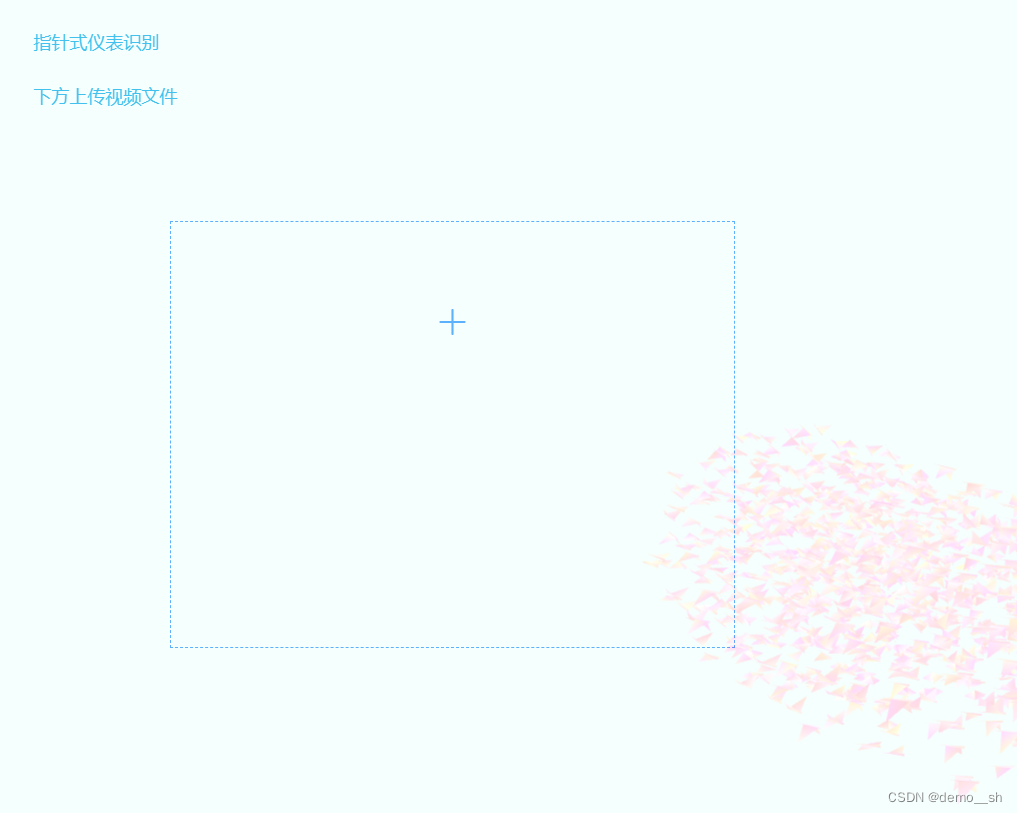
A progress bar will be displayed when uploading, and the video can be played after the upload is completed.
Judgment before uploading:
	beforeUploadVideo(file) {


      const fileSize = file.size / 1024 / 1024 < 50;   //控制大小  修改50的值即可
      if (
          [
            "video/mp4",
            "video/ogg",
            "video/flv",
            "video/avi",
            "video/wmv",
            "video/rmvb",
            "video/mov",
          ].indexOf(file.type) === -1     //控制格式
      ) {


        layer.msg("请上传正确的视频格式");
        return false;
      }
      if (!fileSize) {


        layer.msg("视频大小不能超过50MB");
        return false;
      }
      this.isShowUploadVideo = false;
    },
When the upload is completed: The yolo detection interface is called after the upload is completed.clockRec
	uploadSuccess(response, file) {


      console.log(file)
      if (response.message === 'success') {


        // 进度条
        this.videoUploadPercent = 100;
        setTimeout(() => {


          this.isShowUploadVideo = false;
        }, 2000) // 两秒钟之后将进度条去掉
        this.videoForm.showVideoPath = "http://xxx.xxx.xx.x/xx/xx/" + file.name;    //上传成功后端返回视频地址 回显
        this.videoMessage.filename = file.name;
        console.log(file.name)
        clockRec({

    params: {

    ...this.videoMessage}}).then(({

     data}) => {


          console.log(data)
          this.waterRes = data.data
        })
      }
    },
Progress bar part:
	uploadVideoProcess(event) {


      this.isShowUploadVideo = true;
      this.videoUploadPercent = parseInt(event.percent);
      if (this.videoUploadPercent >= 100) {


        this.videoUploadPercent = 99;
      }
    },
CSS
<style lang="less" scoped>
.el-col {


  .select-card {


    padding: 10px;
    height: 80vh;
    .avatar-uploader-icon {


      border: 1px dashed #409eff !important;
    }
    .avatar-uploader .el-upload {


      border: 1px dashed #409eff !important;
      border-radius: 6px !important;
      position: relative !important;
      overflow: hidden !important;
    }
    .avatar-uploader .el-upload:hover {


      border-color: #409eff;
    }
    .avatar-uploader-icon {


      margin-left: 10vh;
      margin-top: 5vh;
      font-size: 28px;
      color: #409eff;
      width: 300px+200px;
      height: 178px+200px;
      line-height: 178px;
      text-align: center;
    }
    .avatar {


      margin-left: 10vh;
      margin-top: 5vh;
      width: 300px+200px;
      height: 178px+200px;
      display: block;
    }
  }
}
</style>
rear end
Backend interface used by the front end:import {clockRec} from "@/api"
Interface: cmd string is the shell statement running on the Linux server, where
pythonEnvPathcorresponds to the path of the conda virtual environment python.exe on the server,pythonCodePathis the code path on the server, –source is the parameter of yolo running configuration, and all paths use absolute path format.
	@GetMapping("/clockRec")
    public ResultHelper recognizePic(@RequestParam(value = "filename", required = false) String filename) throws IOException {


        String cmd = pythonEnvPath + " " + pythonCodePath + " --source " + videoPath + filename;
        log.info("cmd: " + cmd);
        Shell shell = new Shell(host, user, password);
        String execLog = shell.execCommand(cmd);
        log.info("execLog: " + execLog);
        return ResultHelper.success(execLog);
    }
Shell.java:
package com.example.generalback.util;
import com.jcraft.jsch.ChannelExec;
import com.jcraft.jsch.JSch;
import com.jcraft.jsch.Session;

import java.io.BufferedReader;
import java.io.IOException;
import java.io.InputStreamReader;

public class Shell {


    private String host;
    private String username;
    private String password;
    private int port = xx;
    private int timeout = 60 * 60 * 1000;

    public Shell(String host, String username, String password, int port, int timeout) {


        this.host = host;
        this.username = username;
        this.password = password;
        this.port = port;
        this.timeout = timeout;
    }

    public Shell(String host, String username, String password) {


        this.host = host;
        this.username = username;
        this.password = password;
    }

    public String execCommand(String cmd) {


        JSch jSch = new JSch();
        Session session = null;
        ChannelExec channelExec = null;
        BufferedReader inputStreamReader = null;
        BufferedReader errInputStreamReader = null;
        StringBuilder runLog = new StringBuilder("");
        StringBuilder errLog = new StringBuilder("");
        try {


            // 1. 获取 ssh session
            session = jSch.getSession(username, host, port);
            session.setPassword(password);
            session.setTimeout(timeout);
            session.setConfig("StrictHostKeyChecking", "no");
            session.connect();  // 获取到 ssh session

            // 2. 通过 exec 方式执行 shell 命令
            channelExec = (ChannelExec) session.openChannel("exec");
            channelExec.setCommand(cmd);
            channelExec.connect();  // 执行命令

            // 3. 获取标准输入流
            inputStreamReader = new BufferedReader(new InputStreamReader(channelExec.getInputStream()));
            // 4. 获取标准错误输入流
            errInputStreamReader = new BufferedReader(new InputStreamReader(channelExec.getErrStream()));

            // 5. 记录命令执行 log
            String line = null;
            while ((line = inputStreamReader.readLine()) != null) {


                runLog.append(line).append("\n");
            }

            // 6. 记录命令执行错误 log
            String errLine = null;
            while ((errLine = errInputStreamReader.readLine()) != null) {


                errLog.append(errLine).append("\n");
            }

        } catch (Exception e) {


            e.printStackTrace();
        } finally {


            try {


                if (inputStreamReader != null) {


                    inputStreamReader.close();
                }
                if (errInputStreamReader != null) {


                    errInputStreamReader.close();
                }

                if (channelExec != null) {


                    channelExec.disconnect();
                }
                if (session != null) {


                    session.disconnect();
                }
            } catch (IOException e) {


                e.printStackTrace();
            }
        }
        return runLog.toString();
    }
}