Article directory
x11vnc is a tool for remote desktop control in Linux systems. Its principle is to realize remote desktop display and control through the X Window system protocol. In Linux systems, the X Window system is the infrastructure for graphical interface display. It works in a client-server manner. x11vnc runs as a server program, accepting client connections and providing remote desktop services.
Cpolar intranet penetration is a secure intranet penetration cloud service that can expose local servers under the intranet to the public network through a secure tunnel, so that public network users can normally access intranet services. It supports HTTP, HTTPS, and TCP protocol port mapping.
The following describes how to install the x11vnc tool in Deepin, and combine it with the Cpolar intranet penetration tool to achieve remote connection to Deepin's exquisite desktop without a public IP.
1. Install x11vnc
Update the repository first
sudo apt update
Execute the following command to install x11vnc
sudo apt install x11vnc -y
After the installation is complete, set a password. Note that this password is the password you need to enter when connecting!
x11vnc -storepasswd
After execution, you will be prompted to enter the password twice. Just enter it as prompted.

After setting the above password, save it in this location/home/jon/.vnc/passwd (the specific path is subject to your own display path). You need to copy this password file to /etc/x11vnc.passThis path, execute the following command to copy
sudo cp /home/jon/.vnc/passwd /etc/x11vnc.pass
After the copy is completed, set x11vnc to start up and create the system service file
sudo vim /lib/systemd/system/x11vnc.service
Copy the following content into it, remember to save it after copying is completed
[Unit]
Description=Start x11vnc at startup.
After=multi-user.target

[Service]
Type=simple
ExecStart=/usr/bin/x11vnc -auth guess -forever -loop -noxdamage -repeat -rfbauth /etc/x11vnc.pass -rfbport 5900 -shared

[Install]
WantedBy=multi-user.target
After setting up, use the following series of commands to set startup and auto-start at boot
#设置开机自启
sudo systemctl enable x11vnc
#启动x11vnc
sudo systemctl start x11vnc
#查看状态
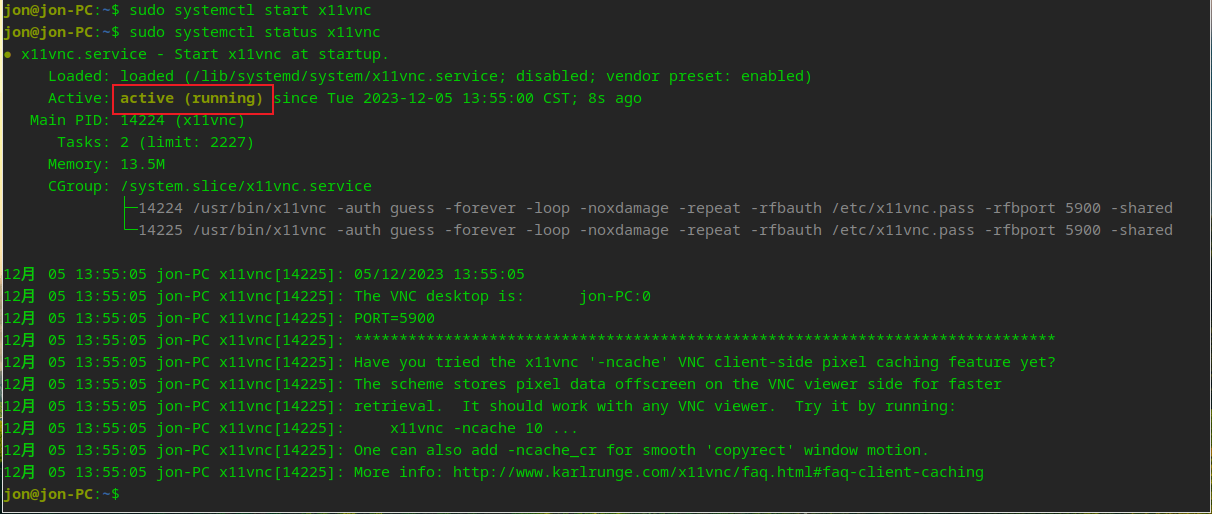
sudo systemctl status x11vnc
After executing the above startup and settings to start automatically at boot, execute the view status command. You can see that x11vnc is running normally and x11vnc is installed. Next, perform a local test connection.
2. Local remote connection test
Windows needs to download the vnc client, go to the official website to download https://www.realvnc.com/en/connect/download/viewer/
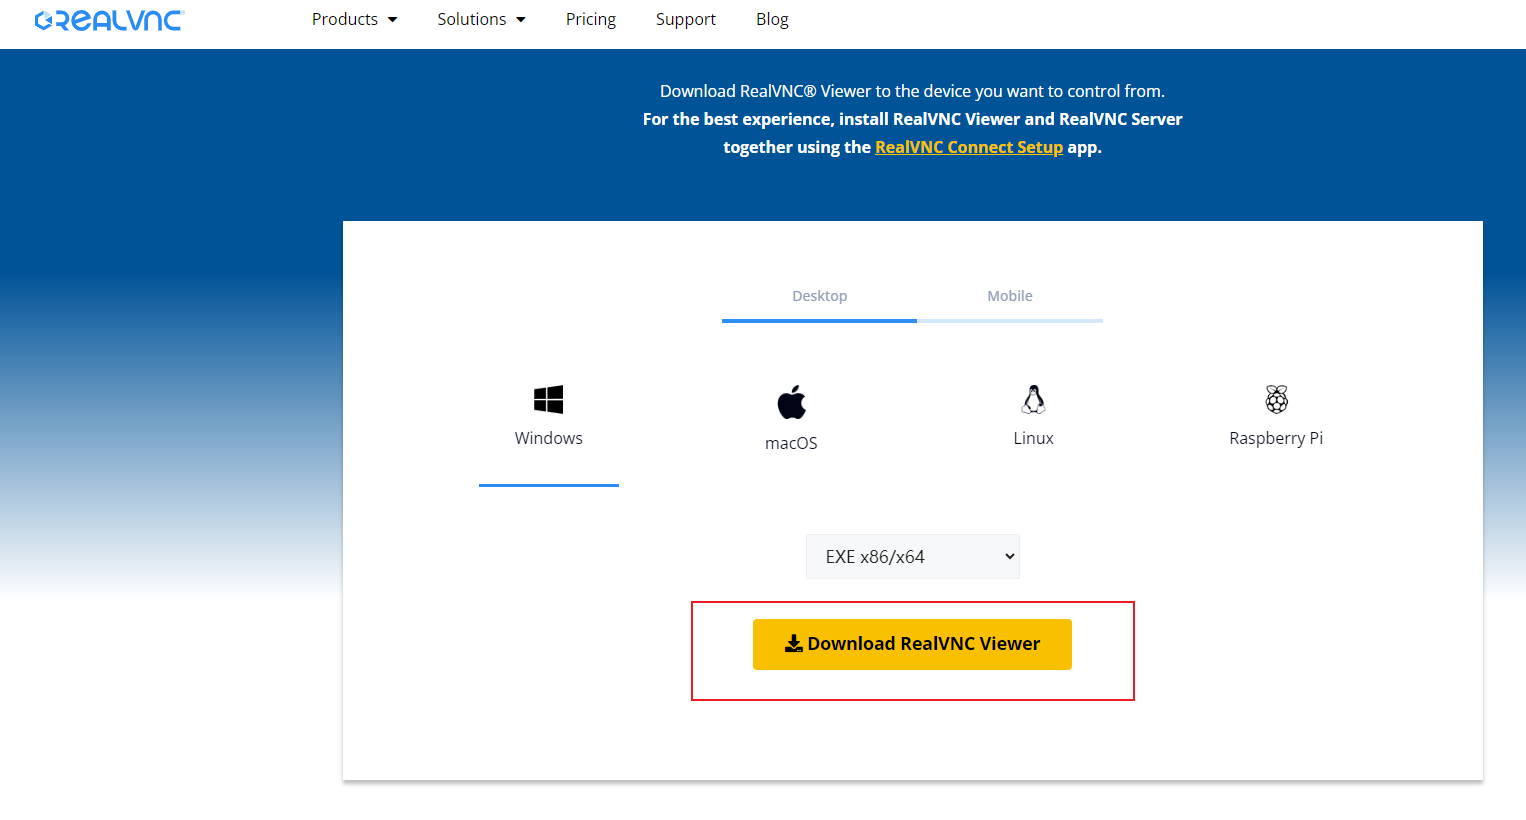
After downloading, you can install it directly. After the installation is completed, open the software, enter the LAN IP, and press Enter.
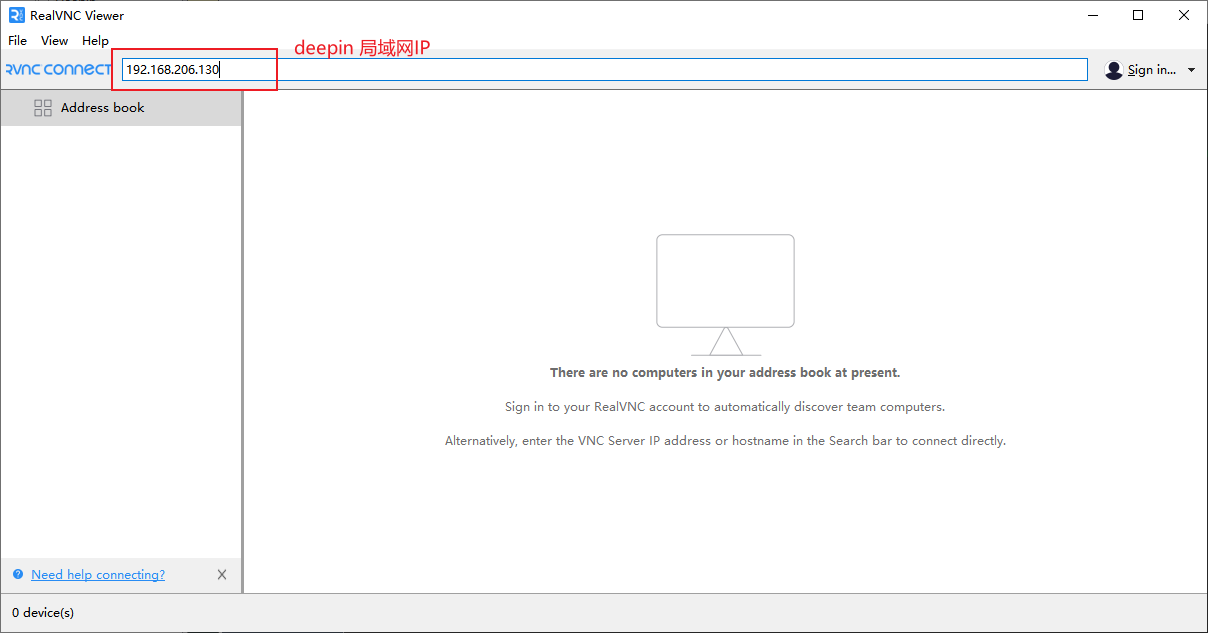
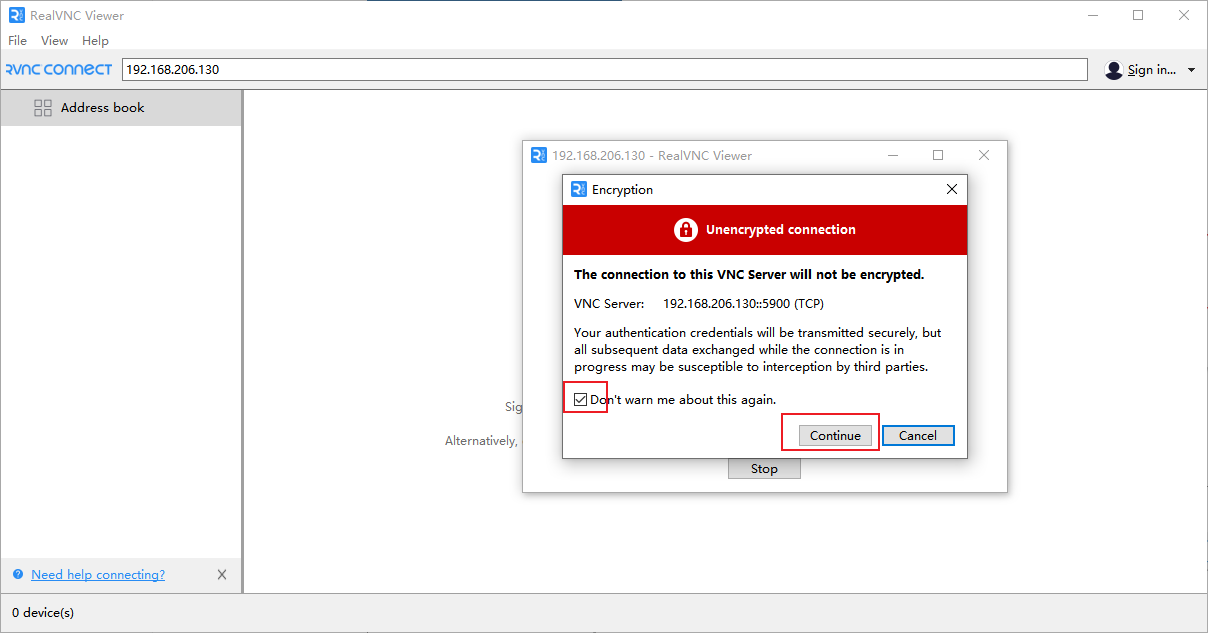
A prompt box appears, select the check box to not prompt again, and clickcontinue
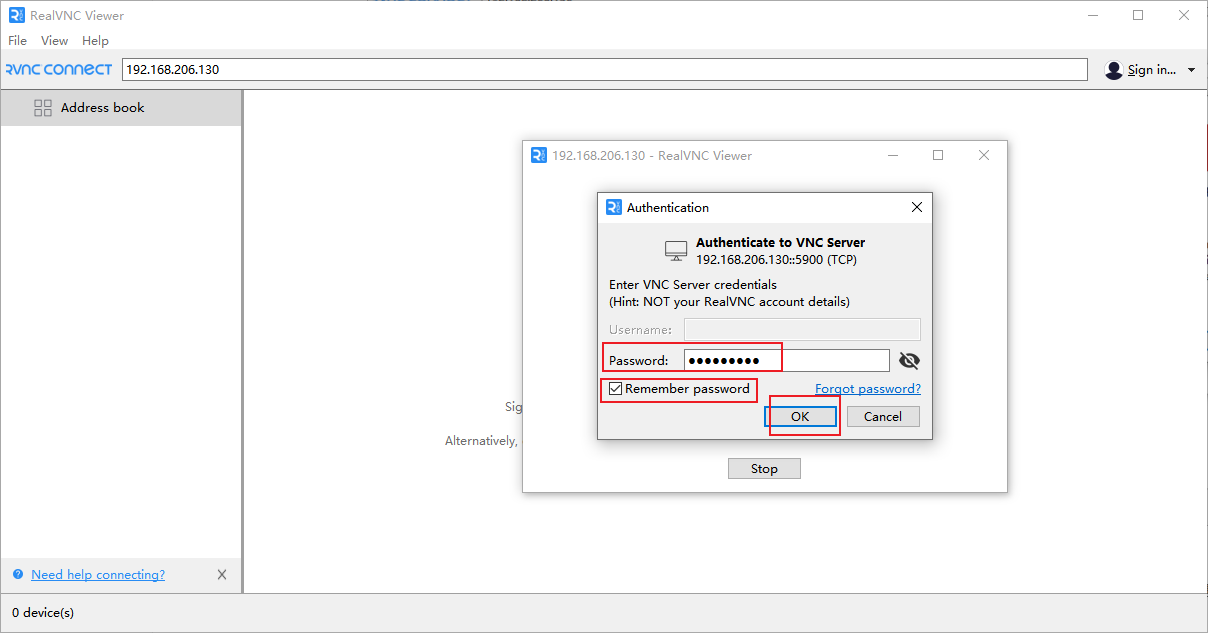
Then enter the password you set during installation. You can choose to save the password and click OK.
In this way, you can see the beautiful desktop of Deepin. Even if the local installation test is completed, let's set up the remote access connection. First, install the cpolar intranet penetration tool.

3. Deepin install Cpolar
Deepin is a Linux-based system. You can use the cpolar Linux installation method to quickly install it with one click. In the command terminal interface of Deepin, we enter the following command. If you are using it for the first time, you can register an account in the official website link below!
cpolar official website address: https://www.cpolar.com
- Use a one-click script to install the command (if it gets stuck after executing the command, it means you need to enter the Deepin sudo password)
curl -L https://www.cpolar.com/static/downloads/install-release-cpolar.sh | sudo bash
- Add services to the system
sudo systemctl enable cpolar
- Start cpolar service
sudo systemctl start cpolar
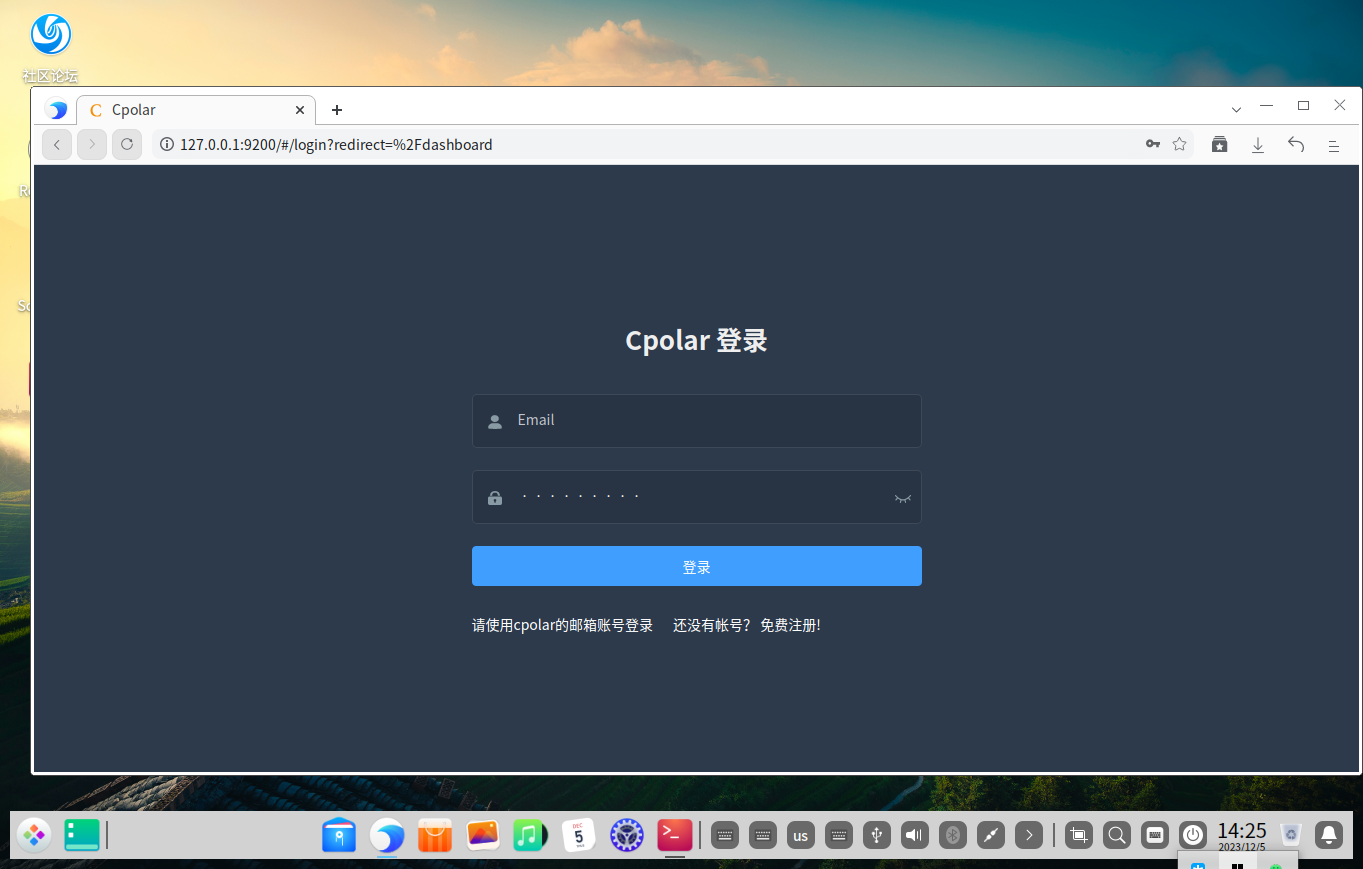
After cpolar is installed and the service is successfully started, access the 9200 port on the browser: [http://127.0.0.1:9200], log in using the account logged out of the cpolar official website, and you can see the cpolar web configuration interface after logging in. Next, go to Just configure via web interface
4. Configure the public network remote address
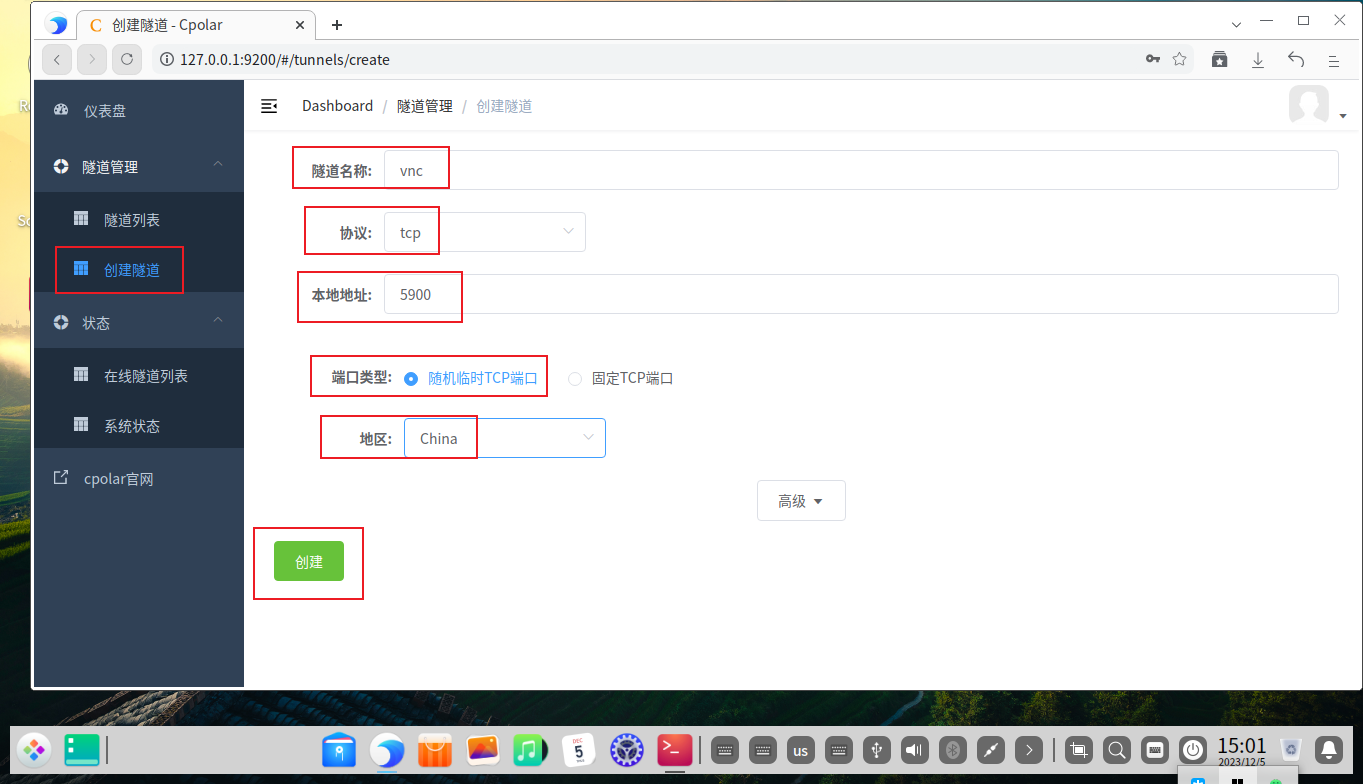
After logging in to the cpolar web UI management interface, click Tunnel Management - Create Tunnel on the left dashboard:
- Tunnel name: It can be customized. Be careful not to duplicate the existing tunnel name.
- Protocol: tcp
- Local address: 5900 (x11vnc default port)
- Domain name type: Temporary random TCP port
- Region: Select China
Click创建
Then open the online tunnel list on the left and check the address of the remote tcp connection generated after the tunnel was just created. This address is the public network connection address. We can use this address on any device to make a remote desktop connection on the VNC client.

5. Remotely connect to Deepin desktop via public network
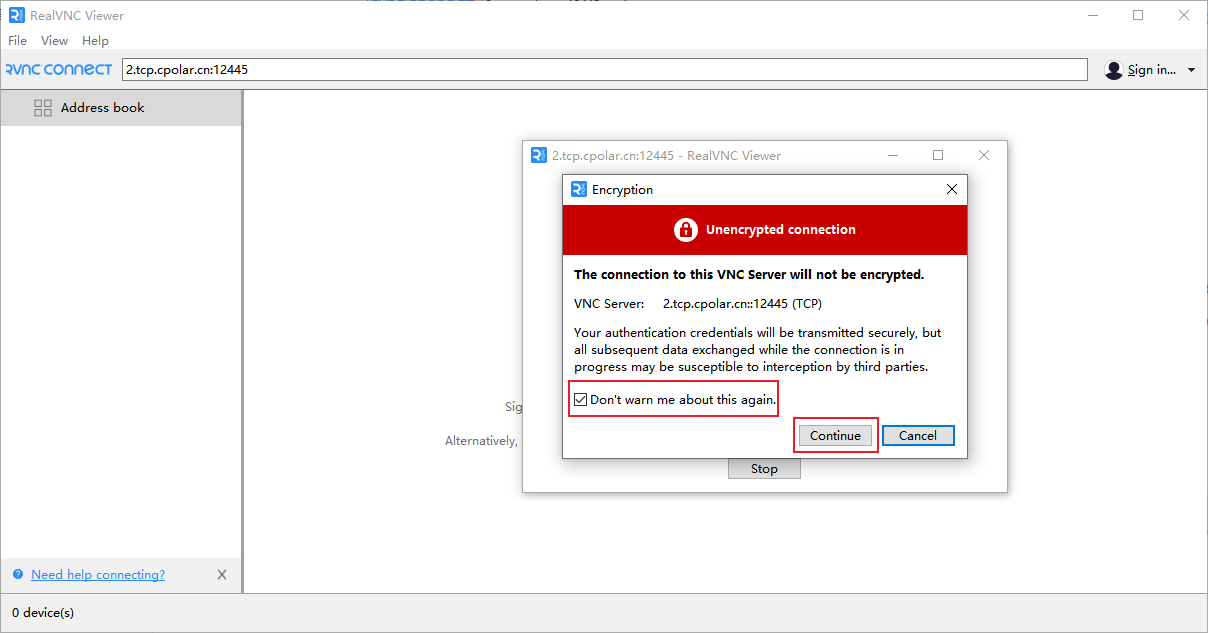
The VNC public network address of the remote Deepin desktop was created in Cpolar above. Now open the VNC client again, enter the public network address in Cpolar, and press Enter.
A prompt box appears, check Do not prompt again, and then clickcontinue

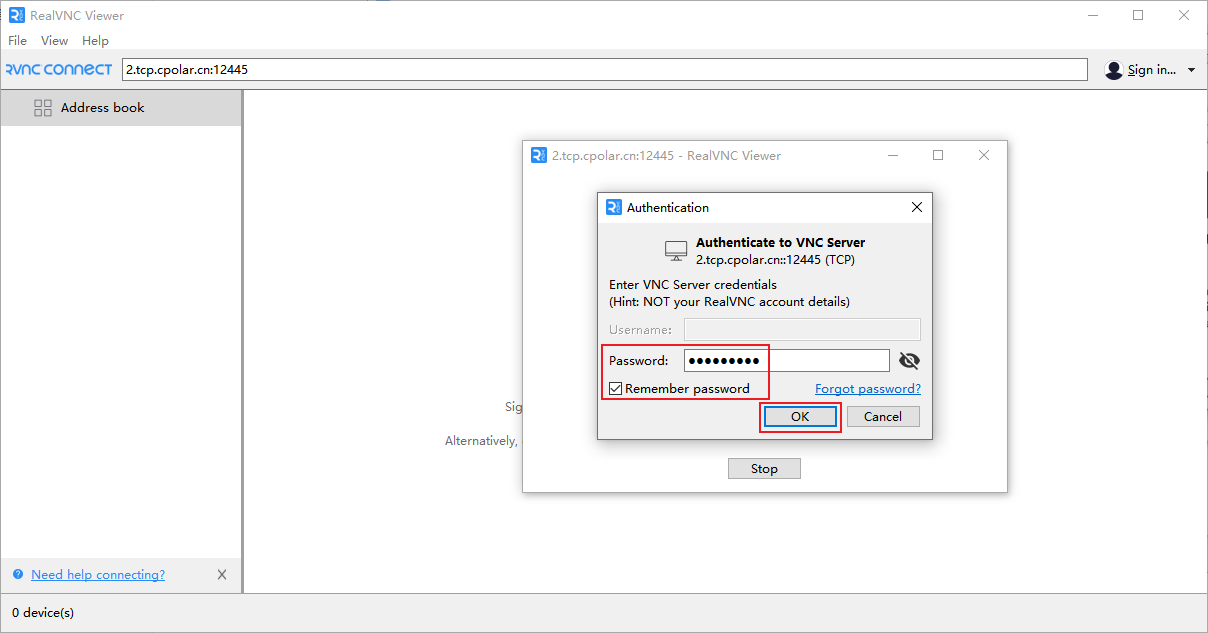
Enter your login password
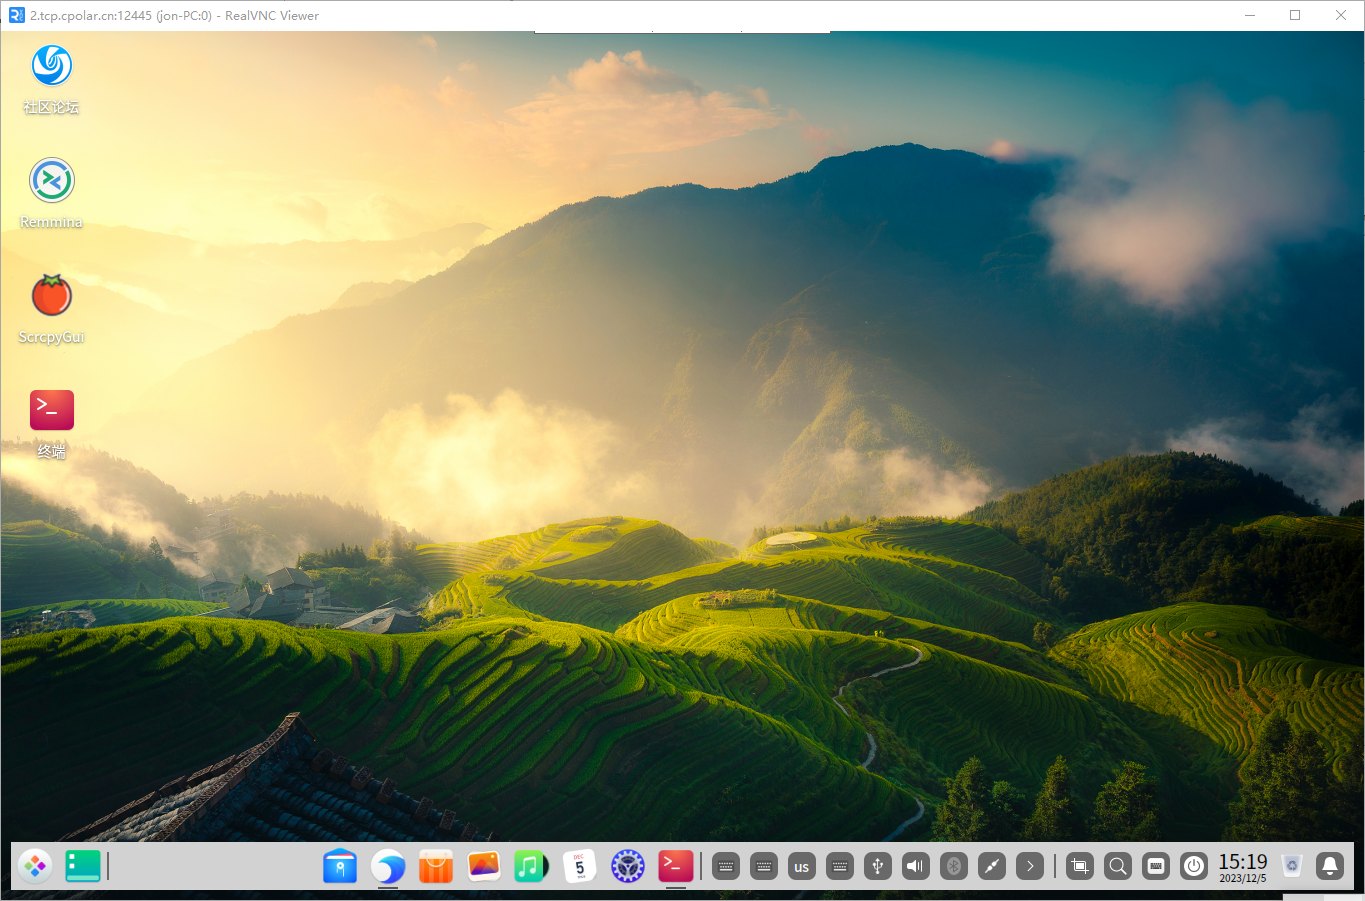
We can see that the remote connection is successful and our beautiful Deepin desktop. In this way, the public network address of our remote Deepin desktop is set.

summary
For better demonstration, we used the tunnel generated by Cpolar in the aforementioned process, and its public network address was randomly generated.
The advantage of this random address is that it is established quickly and can be used immediately. However, its disadvantage is that the URL is randomly generated and this address will change randomly within 24 hours, making it more suitable for temporary use.
I usually use a fixed TCP domain name because I hope that when I send the address to colleagues or customers, it will be a fixed and easy-to-remember public network address, which will make it more formal and facilitate communication and collaboration.
6. Fixed connection public network address
It should be noted that the above steps use a random temporary TCP port address, and the generated public network address is a random temporary address, which will change randomly within 24 hours. Next, we configure a fixed TCP port address for it. This address will not change. After setting it, there will be no need to modify the address repeatedly every day.
Configuring a fixed TCP port address requires upgrading Cpolar to the Professional Edition package or above.
Reserve a fixed tcp address
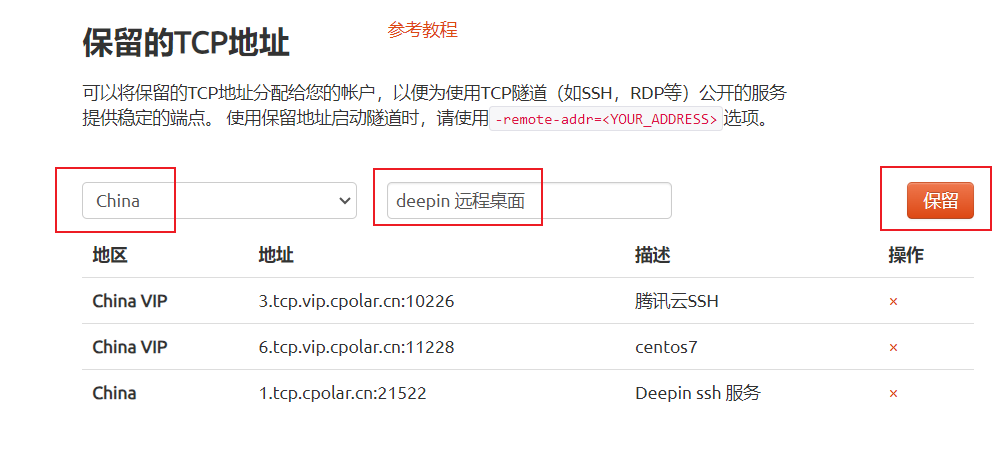
Log inCpolar official website, click Reserve on the left, find the reserved tcp address, and reserve a fixed tcp address for the VNC tunnel: < /span>
- Region: Select China vip
- Description: Notes, customizable
Click保留
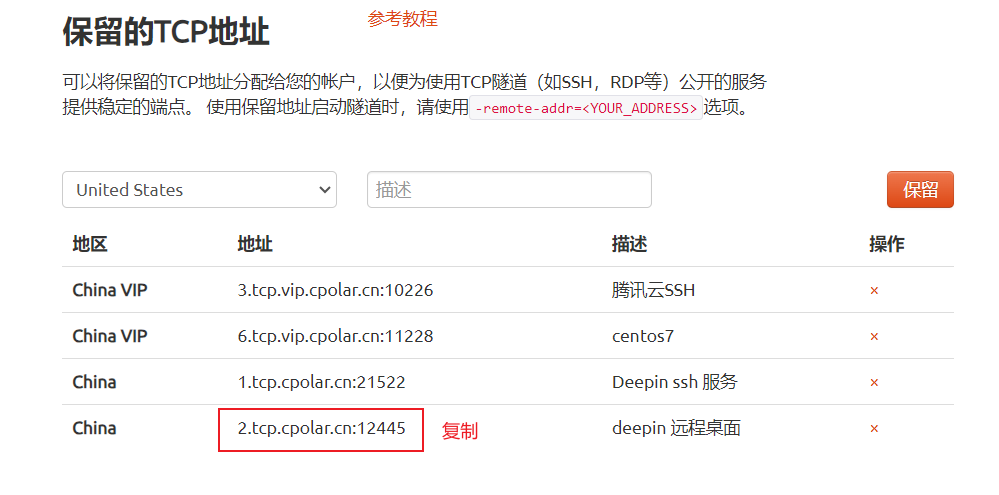
After the address is successfully reserved, the system will generate the corresponding fixed public address and copy it.
Open the Cpolar web ui management interface, click Tunnel Management - Tunnel List on the left dashboard, find the TCP tunnel we created above, and click on the right编辑
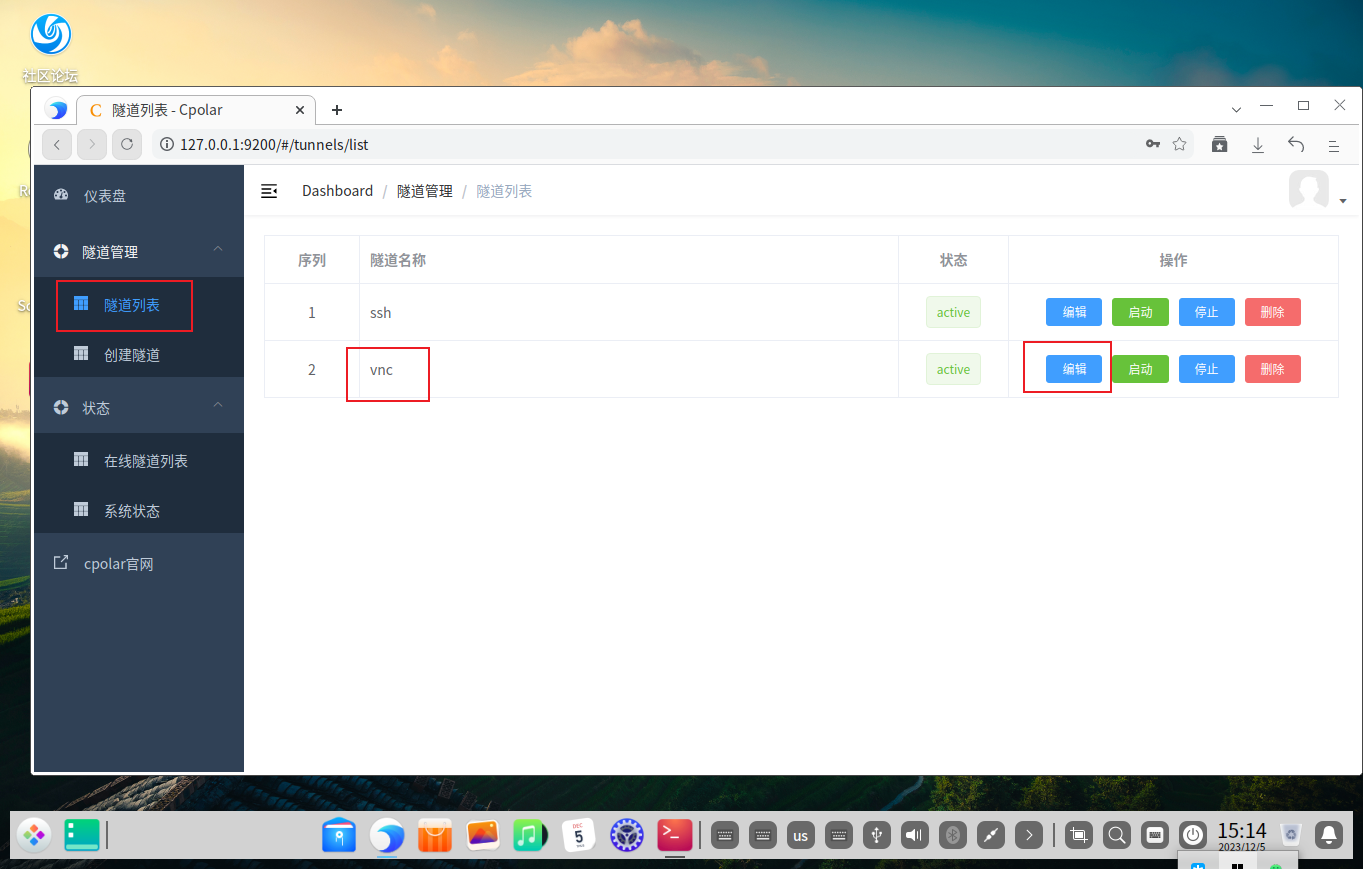
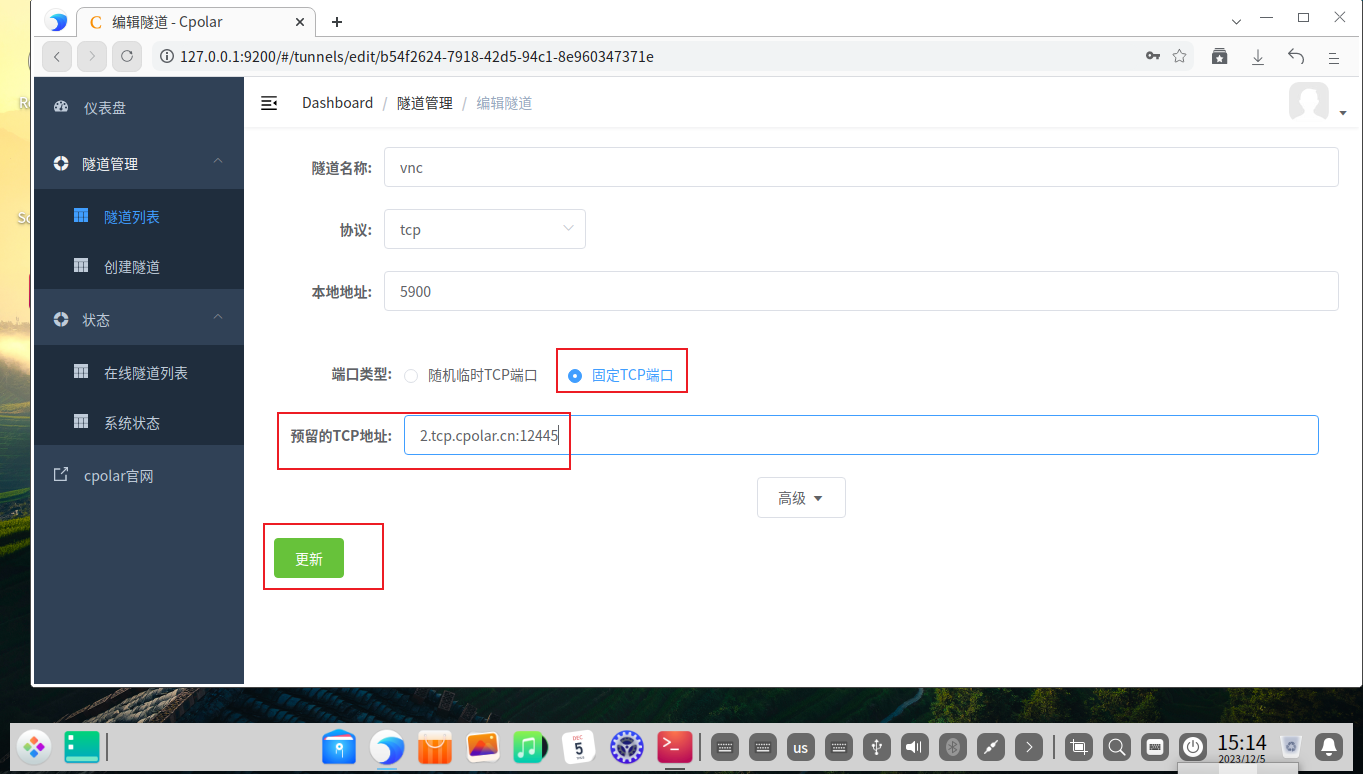
Modify the tunnel information and configure the successfully reserved fixed tcp address into the tunnel.
- Port type: modified to fixed tcp port
- Reserved tcp address: fill in the address successfully reserved by the official website,
Click更新
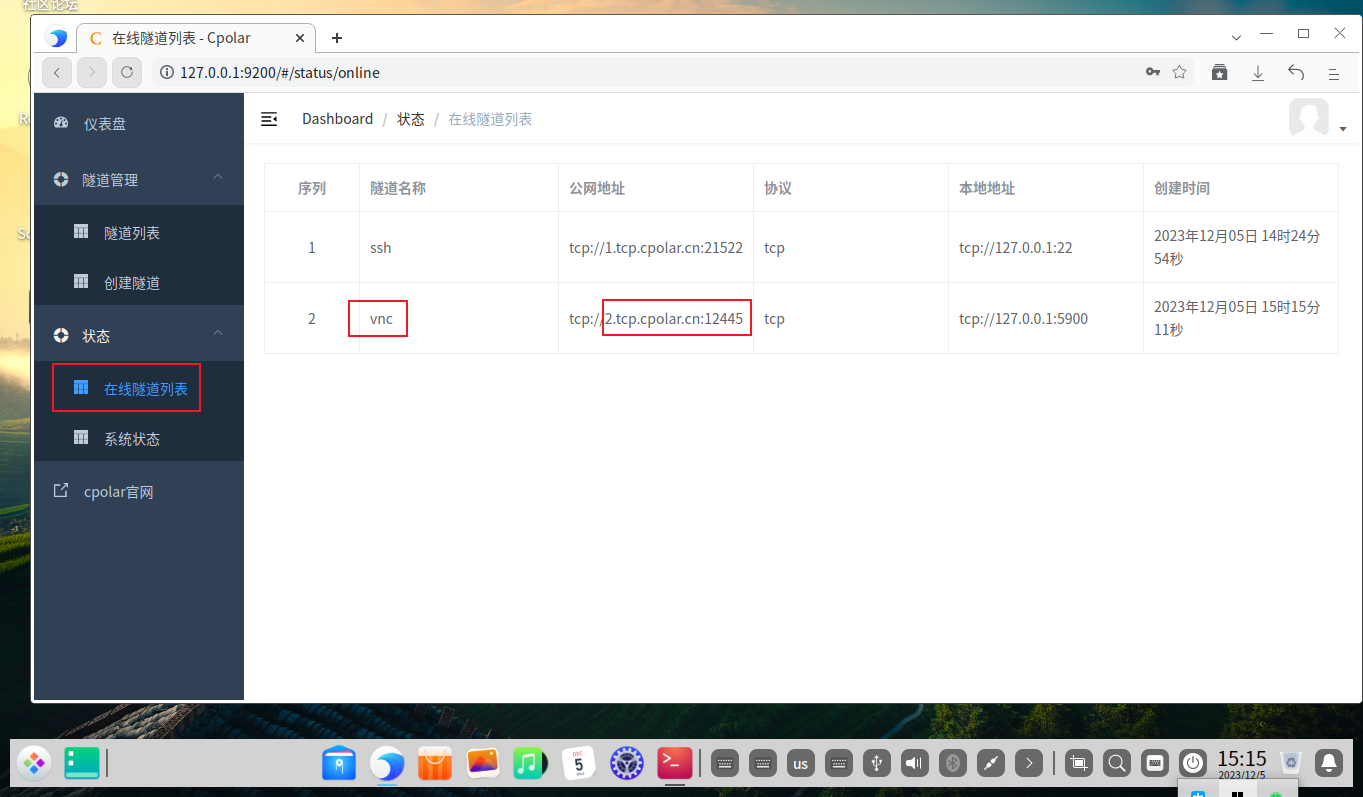
After the tunnel is successfully updated, click the status on the left dashboard - Online Tunnel List, and you can see that the public network address has been updated to a fixed TCP address.
7. Fixed public network address connection test
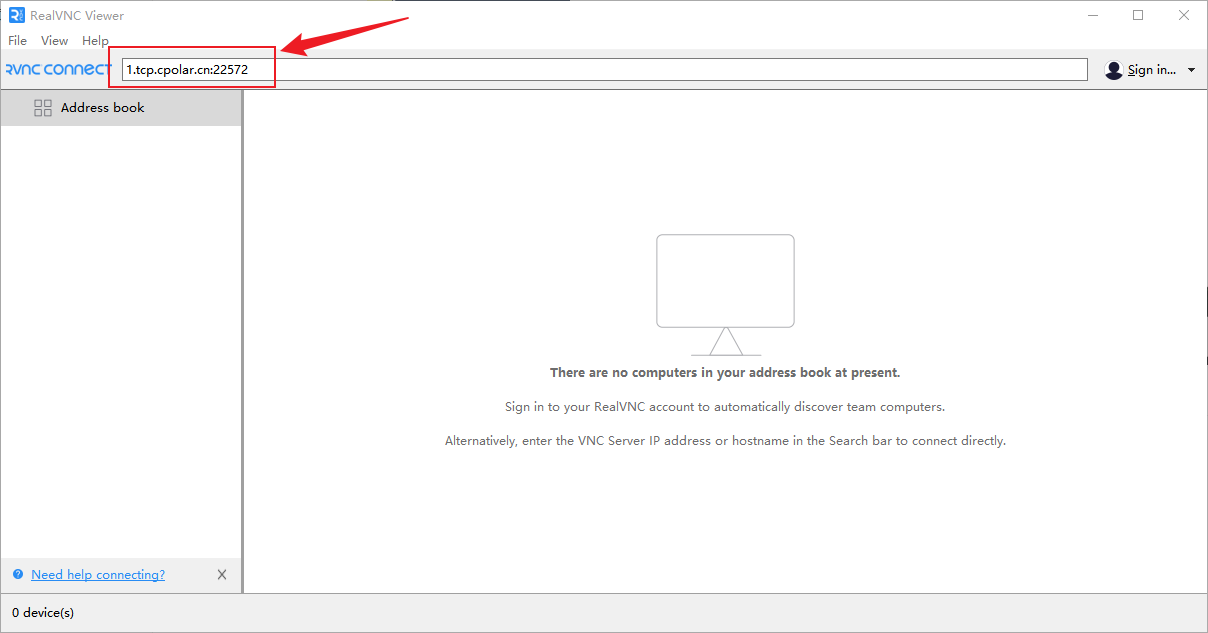
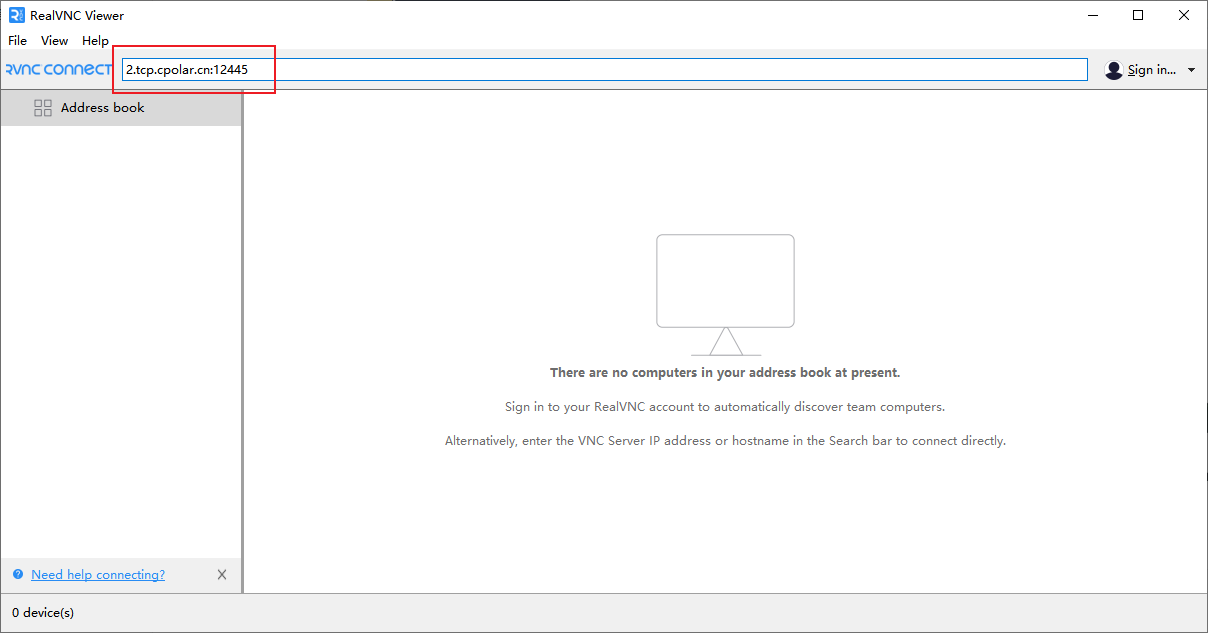
After fixing the address, use our fixed TCP address to connect, open the VNC client, enter the fixed public network address in Cpolar, and press Enter
Also check Don't prompt again, then clickcontinue
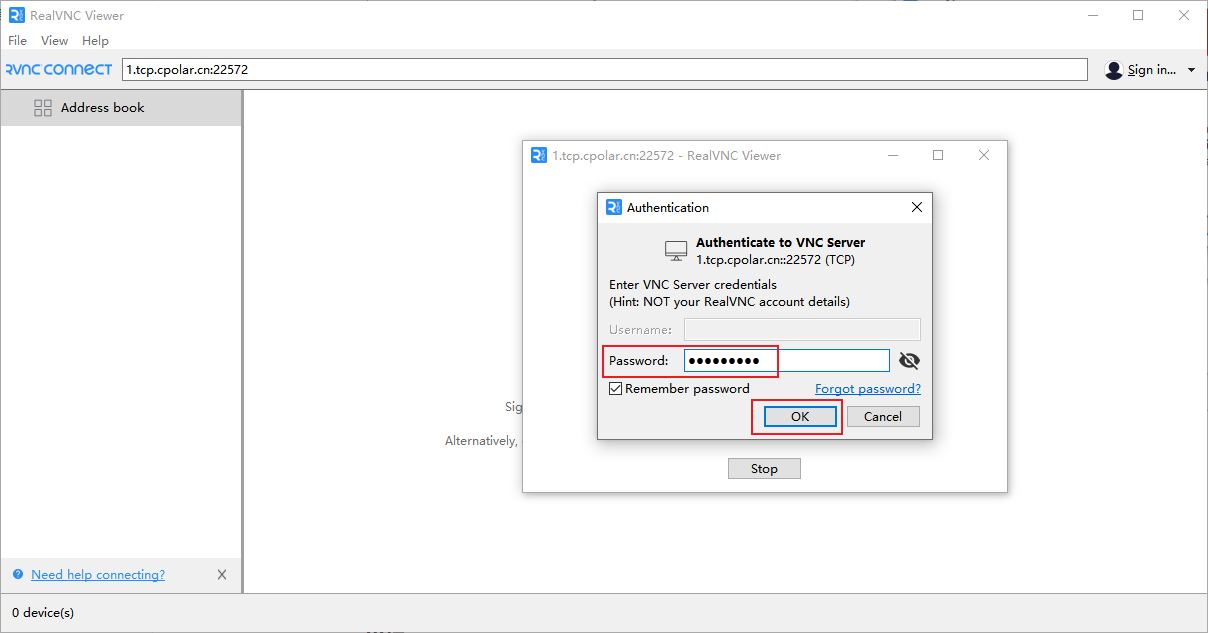
Enter the vnc password, this time you can choose to remember the password, and then click OK
It can be seen that the fixed address remote desktop is successful. In this way, a fixed remote Deepin desktop public network address has been set up. All settings have been configured. Next, you can use the public network address to remotely use Deepin on any device anytime, anywhere. Desktop