1.Knowledge points
(1) Master the use of RadioGroup class and RadioButton class.
2.Specific content
How to use radio buttons in html?
<html>
	<body>
		<input type="radio" name="init" vlaue="boy">男
		<input type="radio" name="init" vlaue="girl">女
	</body>
</html>
The above is how to write radio buttons in html. So how do we implement radio buttons in Android?
In Android, the radio button component is RadioButton, and all RadioButtons must be placed in RadioGroup. Indicates that only one of all radio buttons in this RadioGroup can be selected.
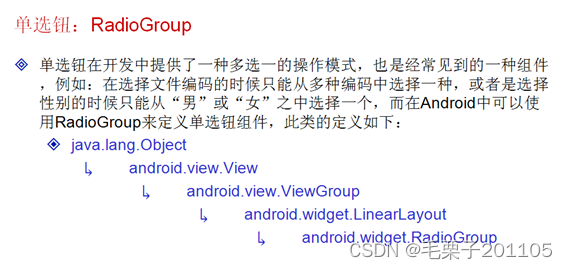
Found that RadioGroup is a subclass of LinearLayout, then all our previous definitions in LinearLayout can be placed in RadioGroup.

It can be found through the inheritance relationship that RadioButton is a special button component.
Example: Select gender:
<LinearLayout xmlns:android="http://schemas.android.com/apk/res/android"
    xmlns:tools="http://schemas.android.com/tools"
    android:layout_width="match_parent"
    android:layout_height="match_parent"
    android:orientation="vertical">

    <TextView
        android:id="@+id/getSex"
        android:layout_width="wrap_content"
        android:layout_height="wrap_content"
        android:text="请选择性别:" />
    <RadioGroup
        android:layout_width="match_parent"
    	android:layout_height="match_parent"
		android:orientation="vertical"
        >
        <!-- 这里就是放置RadioButton -->
        <RadioButton
            android:checked="true"—默认选中
            android:id="@+id/boy"
            android:text="男"
            />
        <RadioButton
            android:id="@+id/girl"
            android:text="女"
            />
    </RadioGroup>
</LinearLayout>
The current content is stacked vertically, but of course it can also be stacked horizontally.
<RadioGroup
        android:layout_width="match_parent"
    	android:layout_height="match_parent"
		android:orientation="horizontal"    --设置水平码放
        >
        <!-- 这里就是放置RadioButton -->
        <RadioButton
            android:checked="true"
            android:id="@+id/boy"
            android:text="男"
            />
        <RadioButton
            android:id="@+id/girl"
            android:text="女"
            />
    </RadioGroup>
Now the program only performs simple display settings. If you want to make these components more meaningful, you need to combine them with the event processing you will learn in the future.
3. Summary
(1) Mastering the RadioGroup class is equivalent to defining a container for radio buttons;
(2) The RadioButton class is used to define the content of the radio button.