mind Mapping

Select all cases
Big button controls small button
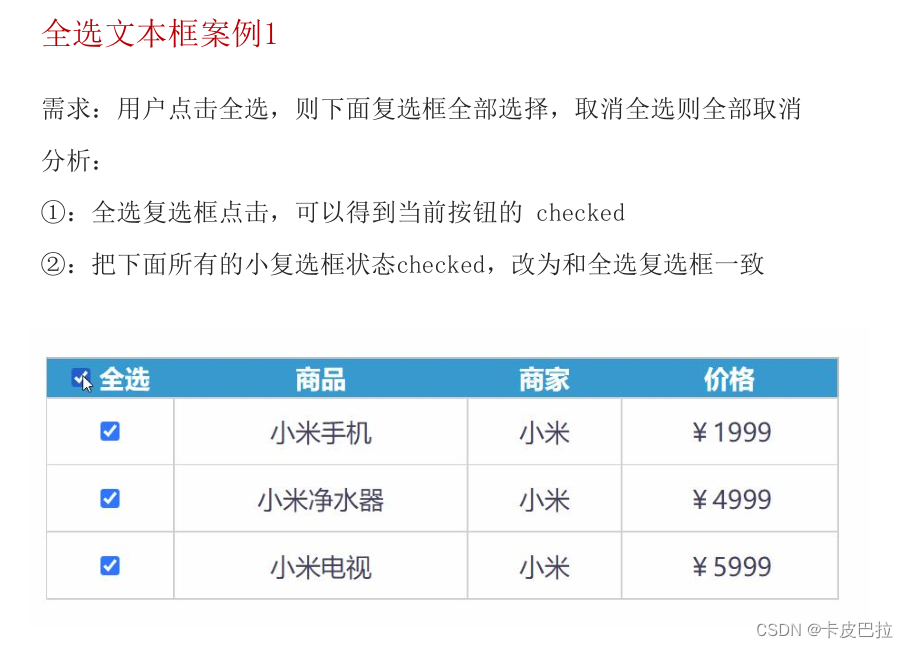
Small button controls big button

css pseudo class selector checked
<!DOCTYPE html>
<html lang="en">

<head>
  <meta charset="UTF-8">
  <meta http-equiv="X-UA-Compatible" content="IE=edge">
  <meta name="viewport" content="width=device-width, initial-scale=1.0">
  <title>Document</title>
  <style>
    /* 选择被勾选的复选框 */
    .ck:checked {
      width: 20px;
      height: 20px;
    }
  </style>
</head>

<body>
  <input type="checkbox" name="" id="" class="ck">
  <input type="checkbox" name="" id="" class="ck">
  <input type="checkbox" name="" id="" class="ck">
  <input type="checkbox" name="" id="" class="ck">
</body>

</html>
Check to make it bigger

Key points:

Complete code:
<!DOCTYPE html>
<html>
<head lang="en">
<meta charset="UTF-8">
<title></title>
<style>
* {
margin: 0;
padding: 0;
}
table {
border-collapse: collapse;
border-spacing: 0;
border: 1px solid #c0c0c0;
width: 500px;
margin: 100px auto;
text-align: center;
}
th {
background-color: #09c;
font: bold 16px "微软雅黑";
color: #fff;
height: 24px;
}
td {
border: 1px solid #d0d0d0;
color: #404060;
padding: 10px;
}
.allCheck {
width: 80px;
}
</style>
</head>
<body>
<table>
<tr>
<th class="allCheck">
<input type="checkbox" name="" id="checkAll"> <span class="all">全选</span>
</th>
<th>商品</th>
<th>商家</th>
<th>价格</th>
</tr>
<tr>
<td>
<input type="checkbox" name="check" class="ck">
</td>
<td>小米手机</td>
<td>小米</td>
<td>¥1999</td>
</tr>
<tr>
<td>
<input type="checkbox" name="check" class="ck">
</td>
<td>小米净水器</td>
<td>小米</td>
<td>¥4999</td>
</tr>
<tr>
<td>
<input type="checkbox" name="check" class="ck">
</td>
<td>小米电视</td>
<td>小米</td>
<td>¥5999</td>
</tr>
</table>
<script>
// 1. 获取大复选框
const checkAll = document.querySelector('#checkAll')
// 2. 获取所有的小复选框
const cks = document.querySelectorAll('.ck')
// 3. 点击大复选框 注册事件
checkAll.addEventListener('click', function () {
// 得到当前大复选框的选中状态
// console.log(checkAll.checked) // 得到 是 true 或者是 false
// 4. 遍历所有的小复选框 让小复选框的checked = 大复选框的 checked
for (let i = 0; i < cks.length; i++) {
cks[i].checked = this.checked
}
})
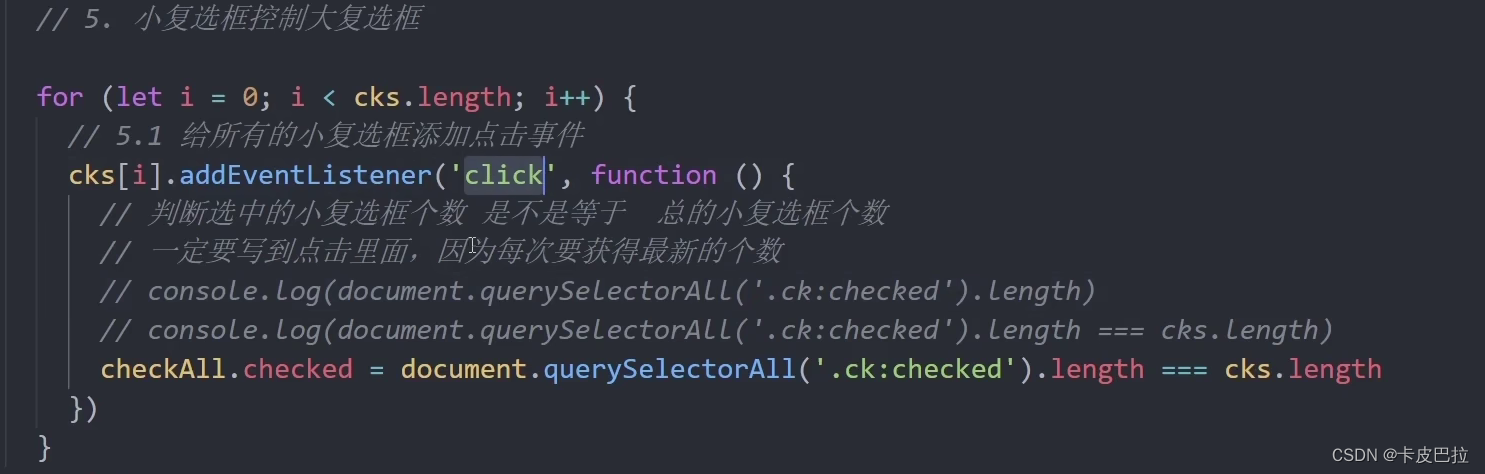
// 5. 小复选框控制大复选框
for (let i = 0; i < cks.length; i++) {
// 5.1 给所有的小复选框添加点击事件
cks[i].addEventListener('click', function () {
// 判断选中的小复选框个数 是不是等于 总的小复选框个数
// 一定要写到点击里面,因为每次要获得最新的个数
// console.log(document.querySelectorAll('.ck:checked').length)
// console.log(document.querySelectorAll('.ck:checked').length === cks.length)
checkAll.checked = document.querySelectorAll('.ck:checked').length === cks.length
})
}
</script>
</body>
</html>Dom event advanced

1. Event flow
1.1 Event flow and two-stage description

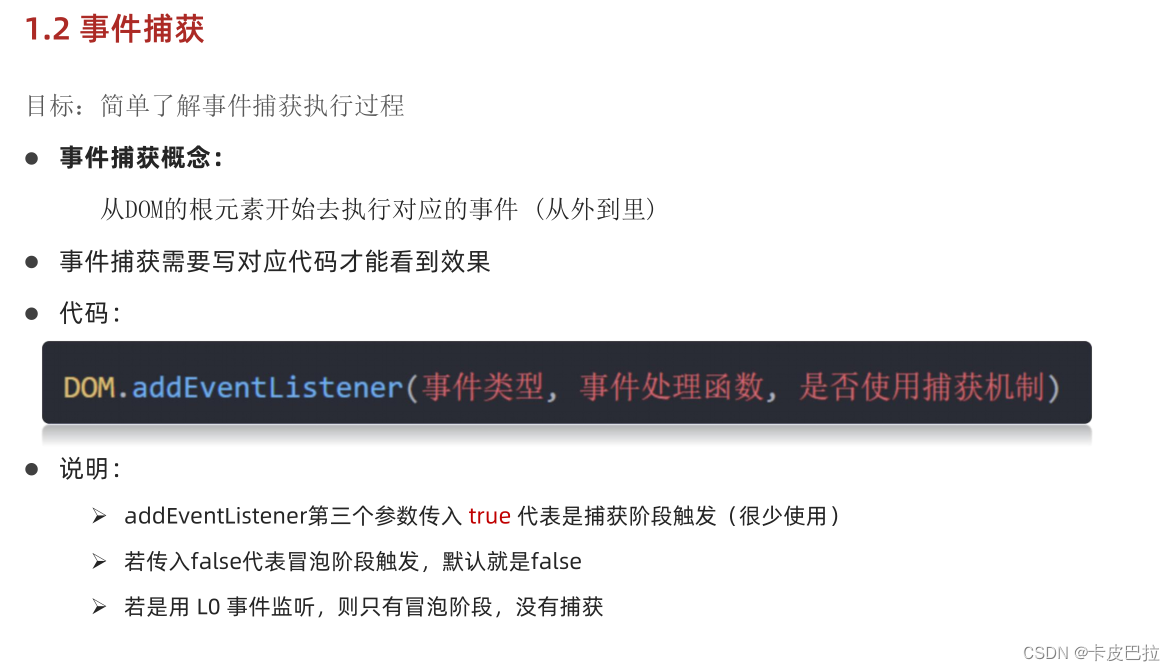
1.2 Event capture
<!DOCTYPE html>
<html lang="en">
<head>
<meta charset="UTF-8">
<meta http-equiv="X-UA-Compatible" content="IE=edge">
<meta name="viewport" content="width=device-width, initial-scale=1.0">
<title>Document</title>
<style>
.father {
width: 500px;
height: 500px;
background-color: pink;
}
.son {
width: 200px;
height: 200px;
background-color: purple;
}
</style>
</head>
<body>
<div class="father">
<div class="son"></div>
</div>
<script>
const fa = document.querySelector('.father')
const son = document.querySelector('.son')
// 山东 济南 蓝翔 目标(pink老师) 捕获阶段
// 蓝翔 济南 山东 冒泡阶段
document.addEventListener('click', function () {
alert('我是爷爷')
}, true)
fa.addEventListener('click', function () {
alert('我是爸爸')
}, true)
son.addEventListener('click', function () {
alert('我是儿子')
}, true)
</script>
</body>
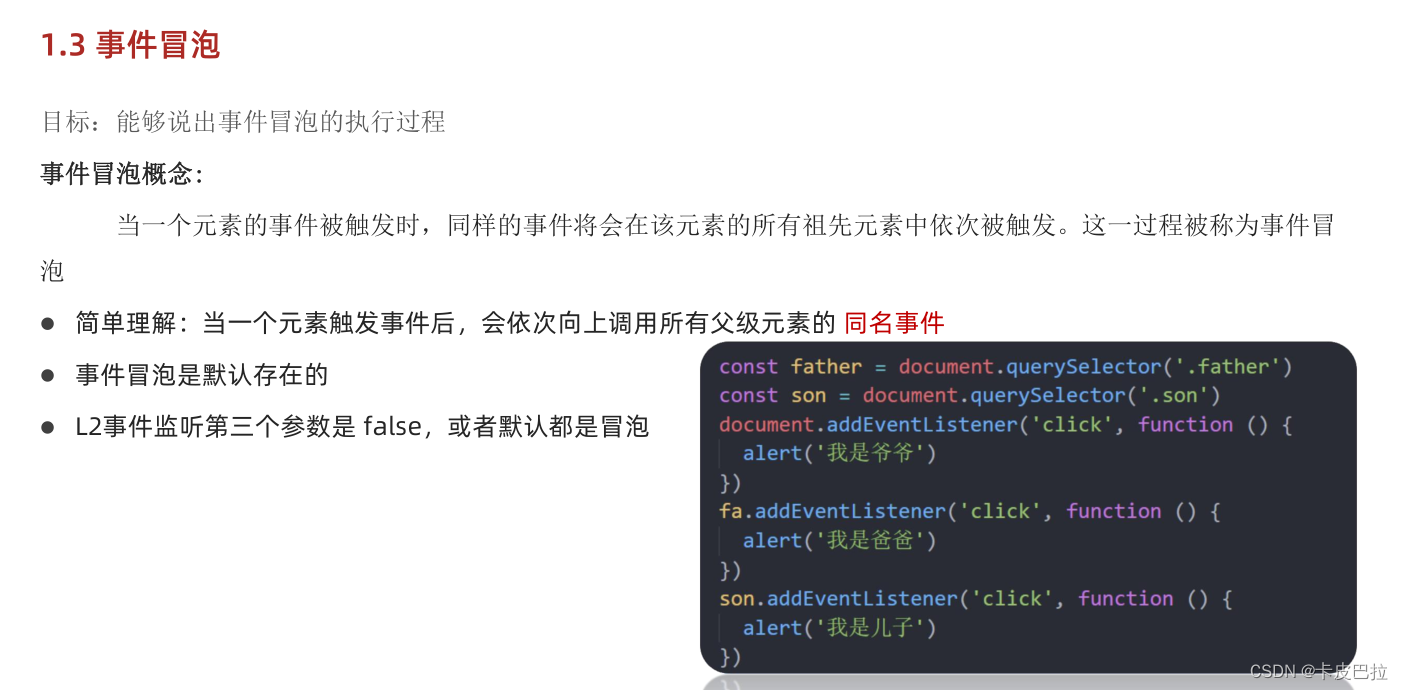
</html>1.3 Event bubbling
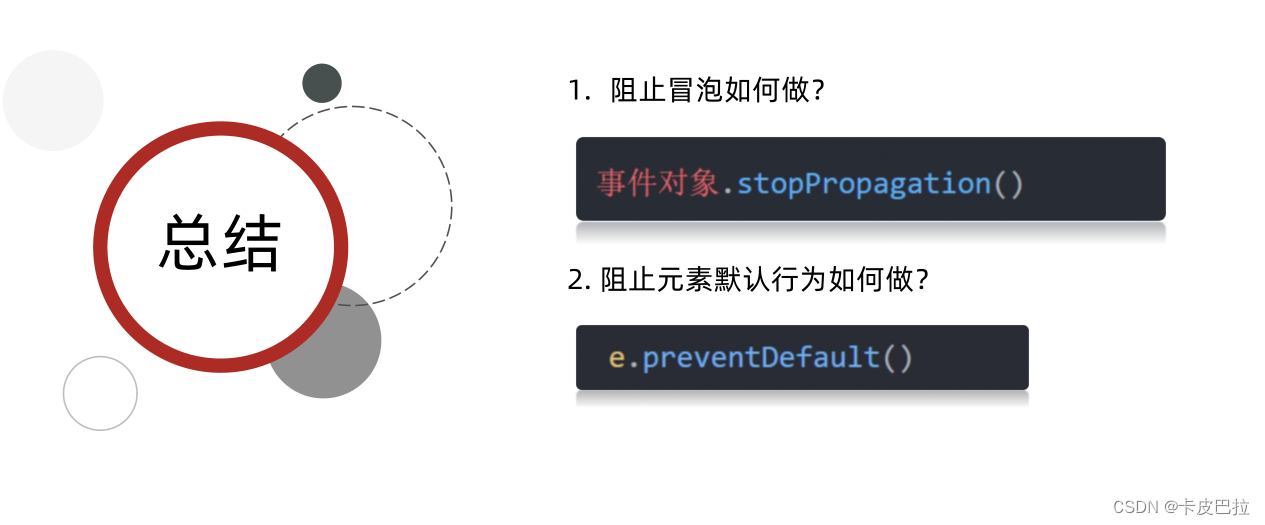
1.4 Prevent bubbling

<!DOCTYPE html>
<html lang="en">
<head>
<meta charset="UTF-8">
<meta http-equiv="X-UA-Compatible" content="IE=edge">
<meta name="viewport" content="width=device-width, initial-scale=1.0">
<title>Document</title>
<style>
.father {
width: 500px;
height: 500px;
background-color: pink;
}
.son {
width: 200px;
height: 200px;
background-color: purple;
}
</style>
</head>
<body>
<div class="father">
<div class="son"></div>
</div>
<script>
const fa = document.querySelector('.father')
const son = document.querySelector('.son')
// 山东 济南 蓝翔 目标(pink老师) 捕获阶段
// 蓝翔 济南 山东 冒泡阶段
document.addEventListener('click', function () {
alert('我是爷爷')
})
fa.addEventListener('click', function () {
alert('我是爸爸')
})
son.addEventListener('click', function (e) {
alert('我是儿子')
// 组织流动传播 事件对象.stopPropagation()
e.stopPropagation()
})
</script>
</body>
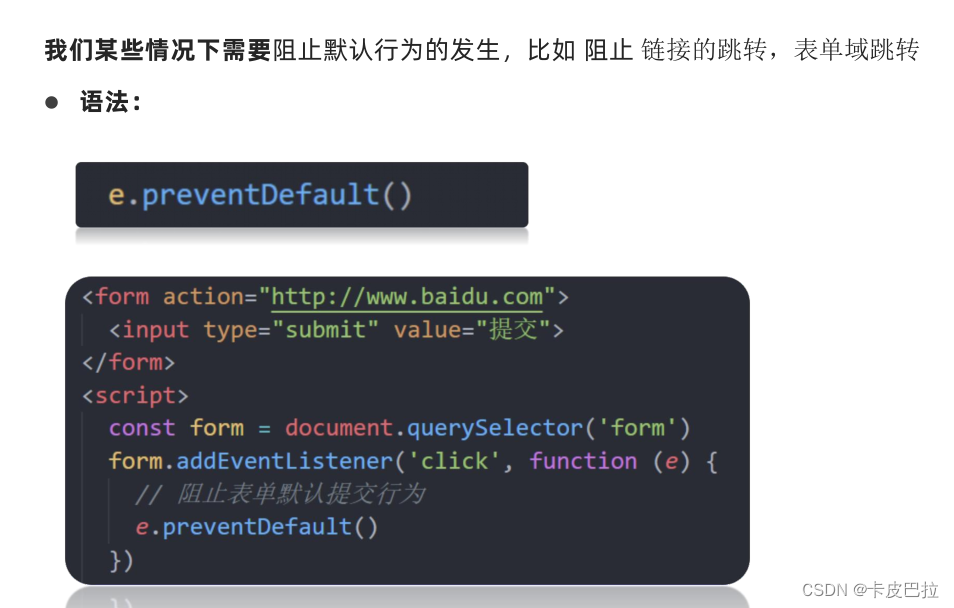
</html>1.4.2 Prevent default behavior
1.5 Unbinding event

<!DOCTYPE html>
<html lang="en">

<head>
  <meta charset="UTF-8">
  <meta http-equiv="X-UA-Compatible" content="IE=edge">
  <meta name="viewport" content="width=device-width, initial-scale=1.0">
  <title>Document</title>
</head>

<body>
  <button>点击</button>
  <script>
    const btn = document.querySelector('button')
    // btn.onclick = function () {
    //   alert('点击了')
    //   // L0 事件移除解绑
    //   btn.onclick = null
    // }
    function fn() {
      alert('点击了')
    }
    btn.addEventListener('click', fn)
    // L2 事件移除解绑
    btn.removeEventListener('click', fn)
  </script>
</body>

</html>
The difference between mouse over events

Using mouseover will have a bubbling effect. When the mouse moves to a child element, the mouseout event will be triggered, and then the mouseover event will be triggered when the child element bubbles up.
However, there is no bubbling effect when using mouseenter, and the mouseleave event will not be triggered when the mouse enters the child element. The mouseleave event will be triggered only when the mouse completely leaves the parent element.
<!DOCTYPE html>
<html lang="en">
<head>
<meta charset="UTF-8">
<meta http-equiv="X-UA-Compatible" content="IE=edge">
<meta name="viewport" content="width=device-width, initial-scale=1.0">
<title>Document</title>
<style>
.dad {
width: 400px;
height: 400px;
background-color: pink;
}
.baby {
width: 200px;
height: 200px;
background-color: purple;
}
</style>
</head>
<body>
<div class="dad">
<div class="baby"></div>
</div>
<script>
const dad = document.querySelector('.dad')
const baby = document.querySelector('.baby')
dad.addEventListener('mouseenter', function () {
console.log('鼠标经过')
})
dad.addEventListener('mouseleave', function () {
console.log('鼠标离开')
})
</script>
</body>
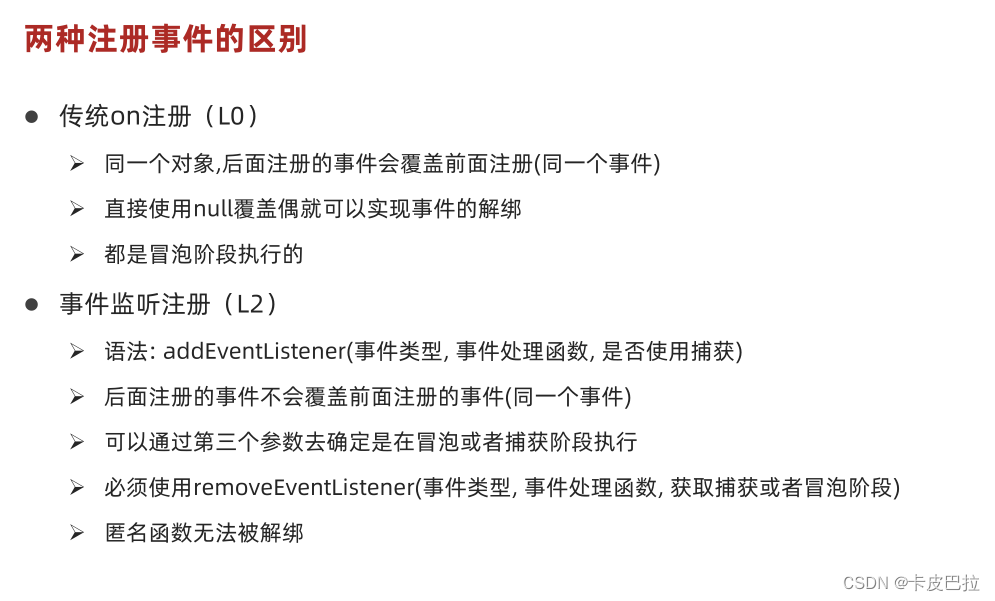
</html>The difference between two registration events
2. Event delegation

<!DOCTYPE html>
<html lang="en">

<head>
  <meta charset="UTF-8">
  <meta http-equiv="X-UA-Compatible" content="IE=edge">
  <meta name="viewport" content="width=device-width, initial-scale=1.0">
  <title>Document</title>
</head>

<body>
  <ul>
    <li>第1个孩子</li>
    <li>第2个孩子</li>
    <li>第3个孩子</li>
    <li>第4个孩子</li>
    <li>第5个孩子</li>
    <p>我不需要变色</p>
  </ul>
  <script>
    // 点击每个小li 当前li 文字变为红色
    // 按照事件委托的方式  委托给父级,事件写到父级身上
    // 1. 获得父元素
    const ul = document.querySelector('ul')
    ul.addEventListener('click', function (e) {
      // alert(11)
      // this.style.color = 'red'
      // console.dir(e.target) // 就是我们点击的那个对象
      // e.target.style.color = 'red'
      // 我的需求,我们只要点击li才会有效果
      if (e.target.tagName === 'LI') {
        e.target.style.color = 'red'
      }
    })
  </script>
</body>

</html>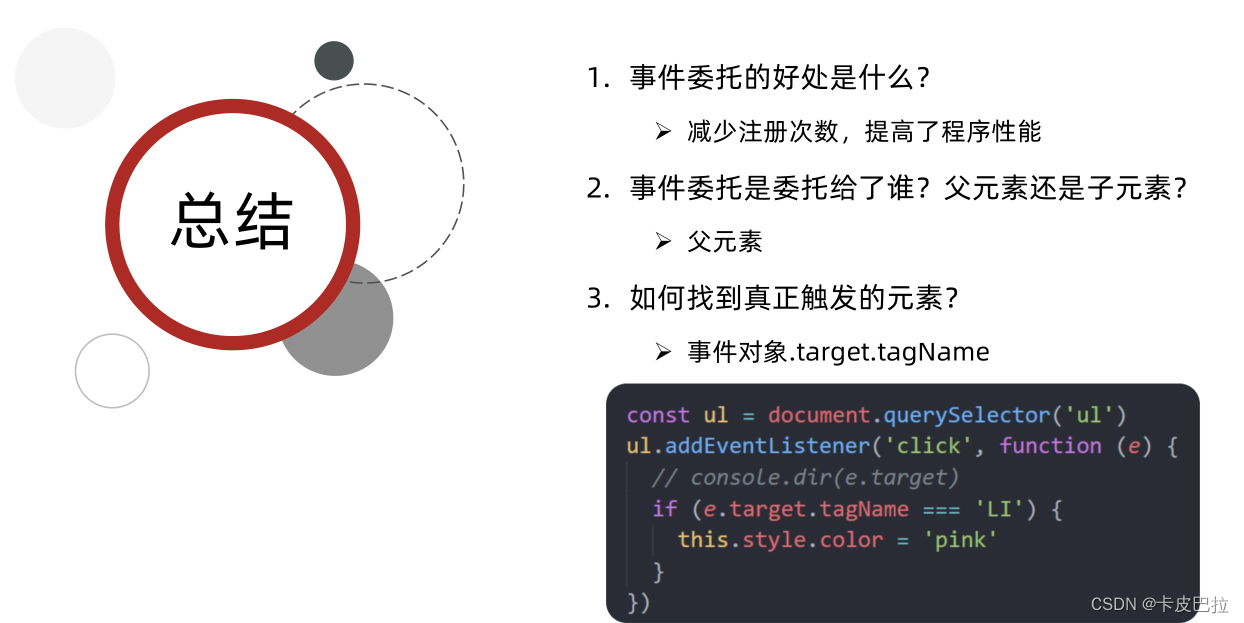

In the above case, we no longer traverse and cannot obtain the serial number i.
Use custom attributes
<!DOCTYPE html>
<html lang="en">

<head>
  <meta charset="UTF-8">
  <meta http-equiv="X-UA-Compatible" content="IE=edge">
  <meta name="viewport" content="width=device-width, initial-scale=1.0">
  <title>Document</title>
</head>

<body>
  <div data-id="0"></div>
  <script>
    const div = document.querySelector('div')
    console.log(div.dataset.id) // 0
  </script>
</body>

</html>
<!DOCTYPE html>
<html lang="en">

<head>
  <meta charset="UTF-8" />
  <meta http-equiv="X-UA-Compatible" content="IE=edge" />
  <meta name="viewport" content="width=device-width, initial-scale=1.0" />
  <title>tab栏切换</title>
  <style>
    * {
      margin: 0;
      padding: 0;
    }

    .tab {
      width: 590px;
      height: 340px;
      margin: 20px;
      border: 1px solid #e4e4e4;
    }

    .tab-nav {
      width: 100%;
      height: 60px;
      line-height: 60px;
      display: flex;
      justify-content: space-between;
    }

    .tab-nav h3 {
      font-size: 24px;
      font-weight: normal;
      margin-left: 20px;
    }

    .tab-nav ul {
      list-style: none;
      display: flex;
      justify-content: flex-end;
    }

    .tab-nav ul li {
      margin: 0 20px;
      font-size: 14px;
    }

    .tab-nav ul li a {
      text-decoration: none;
      border-bottom: 2px solid transparent;
      color: #333;
    }

    .tab-nav ul li a.active {
      border-color: #e1251b;
      color: #e1251b;
    }

    .tab-content {
      padding: 0 16px;
    }

    .tab-content .item {
      display: none;
    }

    .tab-content .item.active {
      display: block;
    }
  </style>
</head>

<body>
  <div class="tab">
    <div class="tab-nav">
      <h3>每日特价</h3>
      <ul>
        <li><a class="active" href="javascript:;" data-id="0">精选</a></li>
        <li><a href="javascript:;" data-id="1">美食</a></li>
        <li><a href="javascript:;" data-id="2">百货</a></li>
        <li><a href="javascript:;" data-id="3">个护</a></li>
        <li><a href="javascript:;" data-id="4">预告</a></li>
      </ul>
    </div>
    <div class="tab-content">
      <div class="item active"><img src="./images/tab00.png" alt="" /></div>
      <div class="item"><img src="./images/tab01.png" alt="" /></div>
      <div class="item"><img src="./images/tab02.png" alt="" /></div>
      <div class="item"><img src="./images/tab03.png" alt="" /></div>
      <div class="item"><img src="./images/tab04.png" alt="" /></div>
    </div>
  </div>
  <script>
    // 采取事件委托的形式 tab栏切换
    // 1. 获取 ul 父元素 因为 ul只有一个
    const ul = document.querySelector('.tab-nav ul')
    // 获取 5个 item
    const items = document.querySelectorAll('.tab-content .item')
    // 2. 添加事件
    ul.addEventListener('click', function (e) {
      // console.log(e.target)  // e.target是我们点击的对象
      // 我们只有点击了 a 才会 进行 添加类和删除类操作
      // console.log(e.target.tagName)  // e.target.tagName 点击那个对象的 标签名
      if (e.target.tagName === 'A') {
        // console.log('我选的是a')
        // 排他思想 ,先移除原来的active
        document.querySelector('.tab-nav .active').classList.remove('active')
        //当前元素添加 active  是 e.target
        // this 指向ul 不能用this
        e.target.classList.add('active')

        // 下面大盒子模块
        // console.log(e.target.dataset.id)
        const i = +e.target.dataset.id
        // 排他思想 ,先移除原来的active
        document.querySelector('.tab-content .active').classList.remove('active')
        // 对应的大盒子 添加 active
        // document.querySelector(`.tab-content .item:nth-child(${i + 1})`).classList.add('active')
        items[i].classList.add('active')
      }
    })
  </script>
</body>

</html>
3. Other events
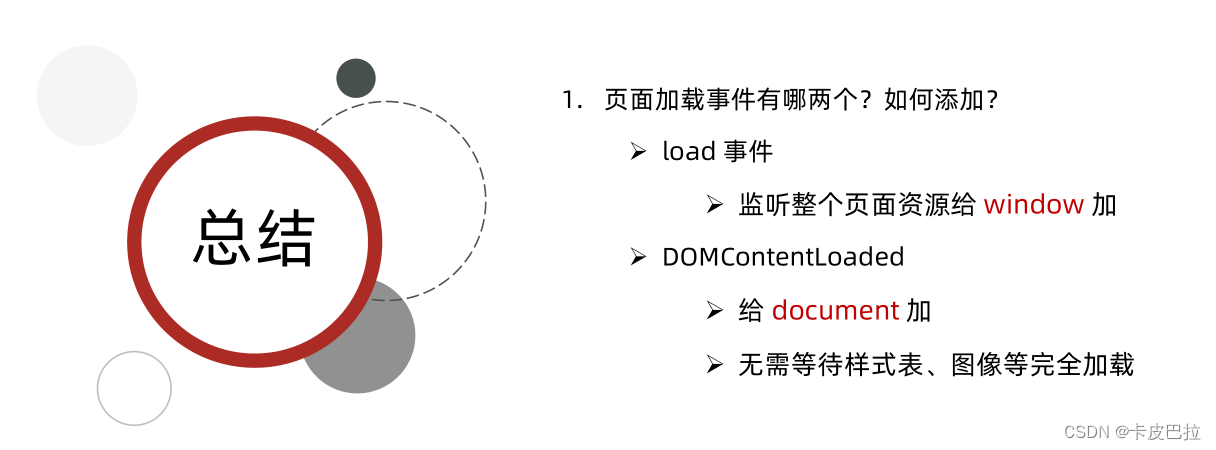
3.1 Page load event
Note who the loading event listener is added to


<!DOCTYPE html>
<html lang="en">

<head>
  <meta charset="UTF-8">
  <meta http-equiv="X-UA-Compatible" content="IE=edge">
  <meta name="viewport" content="width=device-width, initial-scale=1.0">
  <title>Document</title>
  <script>
    // 等待页面所有资源加载完毕,就回去执行回调函数
    // window.addEventListener('load', function () {
    //   const btn = document.querySelector('button')
    //   btn.addEventListener('click', function () {
    //     alert(11)
    //   })
    // })

    // img.addEventListener('load', function () {
    //   // 等待图片加载完毕,再去执行里面的代码
    // })

    document.addEventListener('DOMContentLoaded', function () {
      const btn = document.querySelector('button')
      btn.addEventListener('click', function () {
        alert(11)
      })
    })
  </script>
</head>

<body>
  <button>点击</button>

</body>

</html>
3.2 Page scroll event
In whose range is scrolling (whose scroll bar is scrolling), the scrolling event is added to him
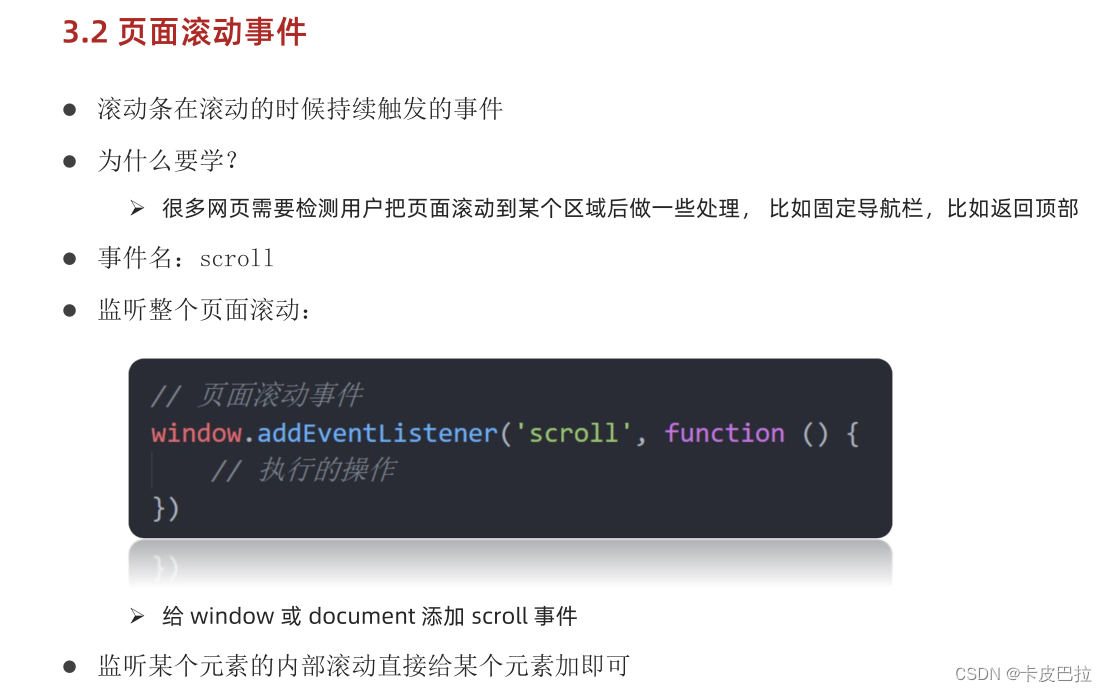
scroll event, triggered once scrolling

3.2 Page scroll event-get position

Get the body element, document.body
Get the html element, document.documentElement


<!DOCTYPE html>
<html lang="en">

<head>
  <meta charset="UTF-8">
  <meta http-equiv="X-UA-Compatible" content="IE=edge">
  <meta name="viewport" content="width=device-width, initial-scale=1.0">
  <title>Document</title>
  <style>
    body {
      padding-top: 100px;
      height: 3000px;
    }

    div {
      display: none;
      margin: 100px;
      overflow: scroll;
      width: 200px;
      height: 200px;
      border: 1px solid #000;
    }
  </style>
</head>

<body>
  <div>
    我里面有很多很多的文字
    我里面有很多很多的文字
    我里面有很多很多的文字
    我里面有很多很多的文字
    我里面有很多很多的文字
    我里面有很多很多的文字
    我里面有很多很多的文字
    我里面有很多很多的文字
    我里面有很多很多的文字
    我里面有很多很多的文字
    我里面有很多很多的文字
    我里面有很多很多的文字
    我里面有很多很多的文字
    我里面有很多很多的文字

  </div>
  <script>
    const div = document.querySelector('div')
    // 页面滚动事件
    window.addEventListener('scroll', function () {
      // console.log('我滚了')
      // 我想知道页面到底滚动了多少像素, 被卷去了多少  scrollTop
      // 获取html元素写法
      // document.documentElement
      // console.log(document.documentElement.scrollTop)
      const n = document.documentElement.scrollTop
      if (n >= 100) {
        div.style.display = 'block'
      } else {
        div.style.display = 'none'
      }
    })
    // const div = document.querySelector('div')
    // div.addEventListener('scroll', function () {
    //   // console.log(111)
    //   // scrollTop 被卷去的头部
    //   console.log(div.scrollTop)
    // })
  </script>
</body>

</html>
The document.documentElement.scrollTop result is a numeric type without a unit , and scrollTop can be read and written (do not bring a unit when writing)
<!DOCTYPE html>
<html lang="en">

<head>
  <meta charset="UTF-8">
  <meta http-equiv="X-UA-Compatible" content="IE=edge">
  <meta name="viewport" content="width=device-width, initial-scale=1.0">
  <title>Document</title>
  <style>
    body {
      height: 3000px;
    }
  </style>
</head>

<body>
  <script>
    document.documentElement.scrollTop = 800
    window.addEventListener('scroll', function () {
      // 必须写到里面
      const n = document.documentElement.scrollTop
      // 得到是什么数据   数字型 不带单位
      // console.log(n)
    })
  </script>
</body>

</html>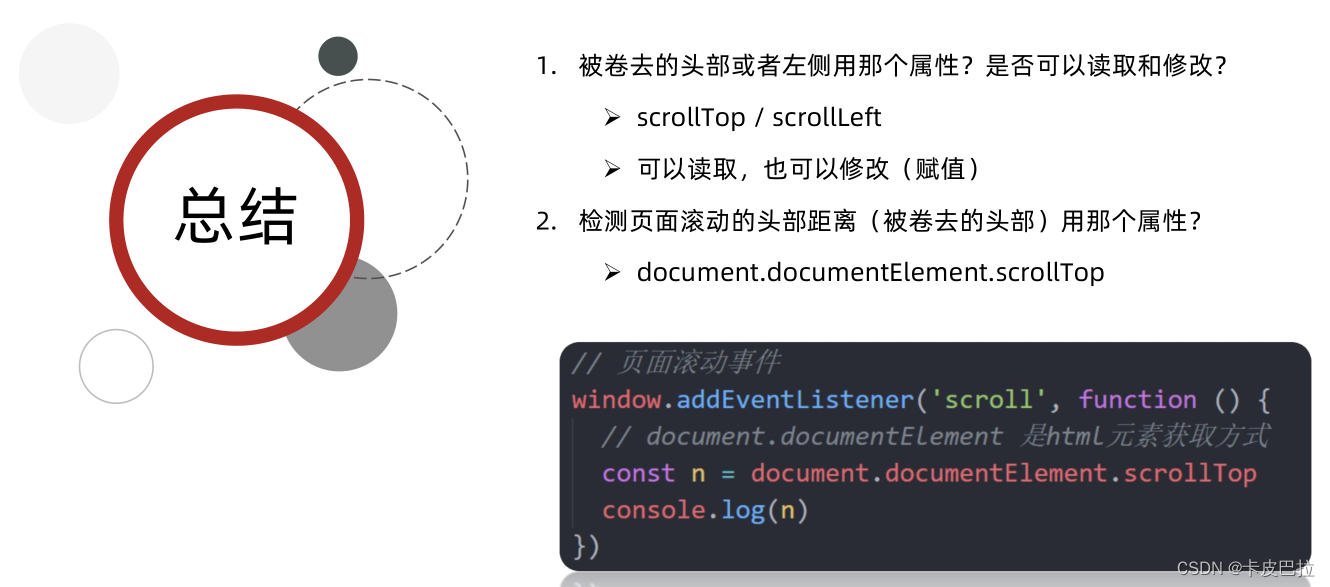
You can also use the scrollTo method, but scrollTop is readable and writable
3.3 Page size event
I used to use it for responsiveness, but now I don’t use it anymore.

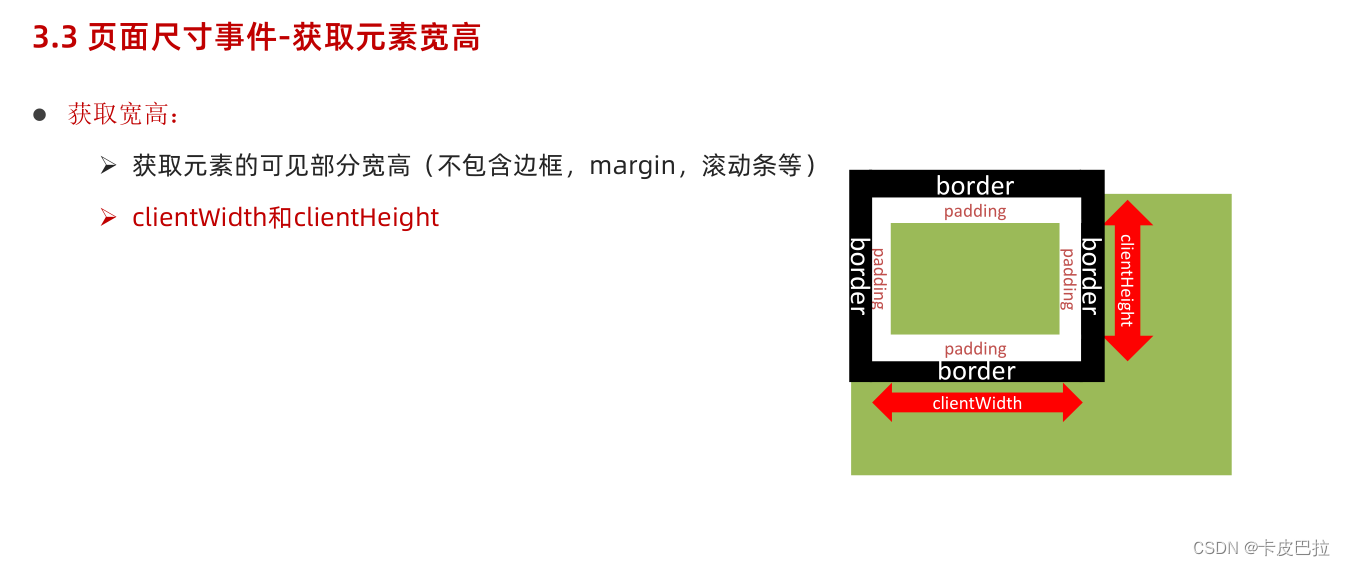
3.3 Page size event-get element width and height

Contains padding (padding supports the big box)
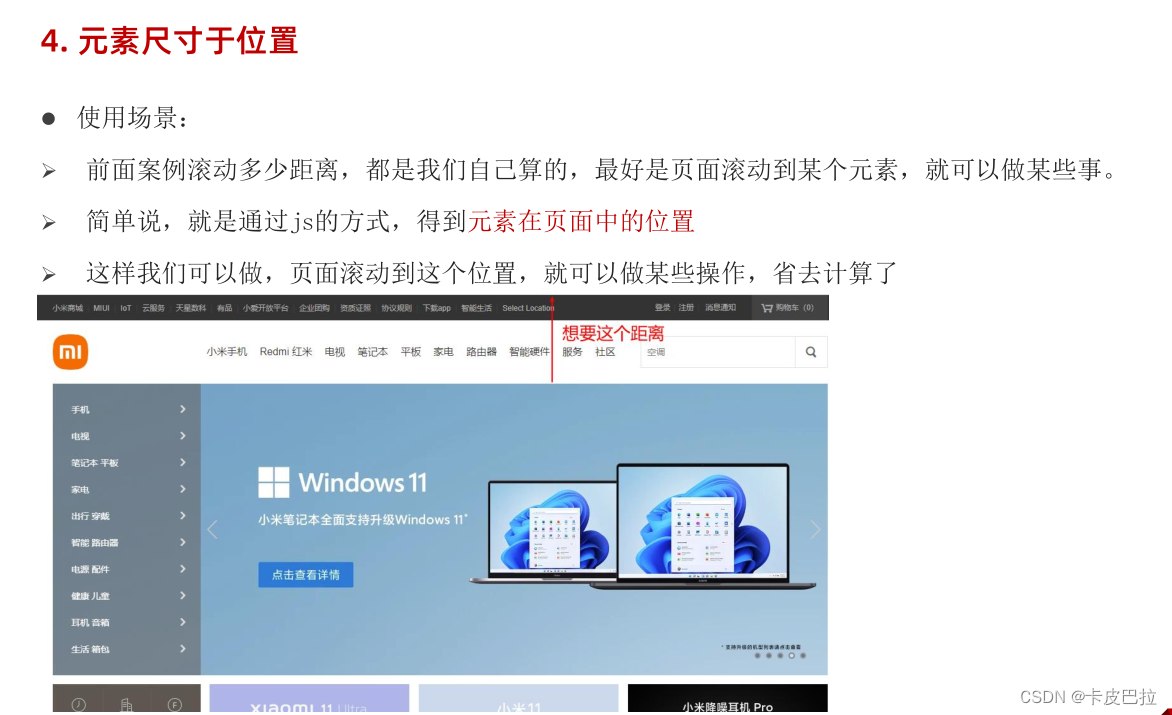
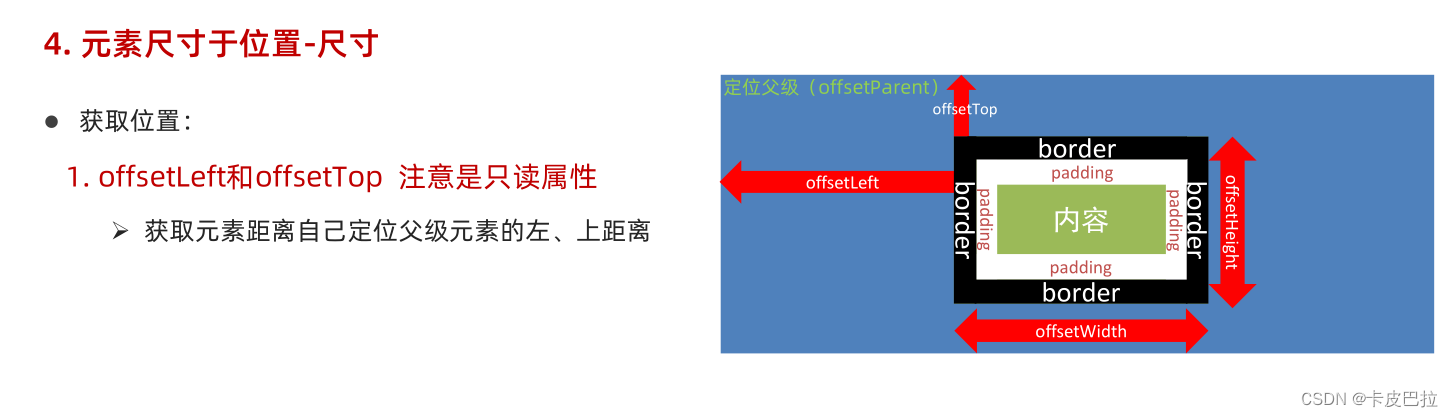
4. Element size and position
offsetWidth和offsetHeight
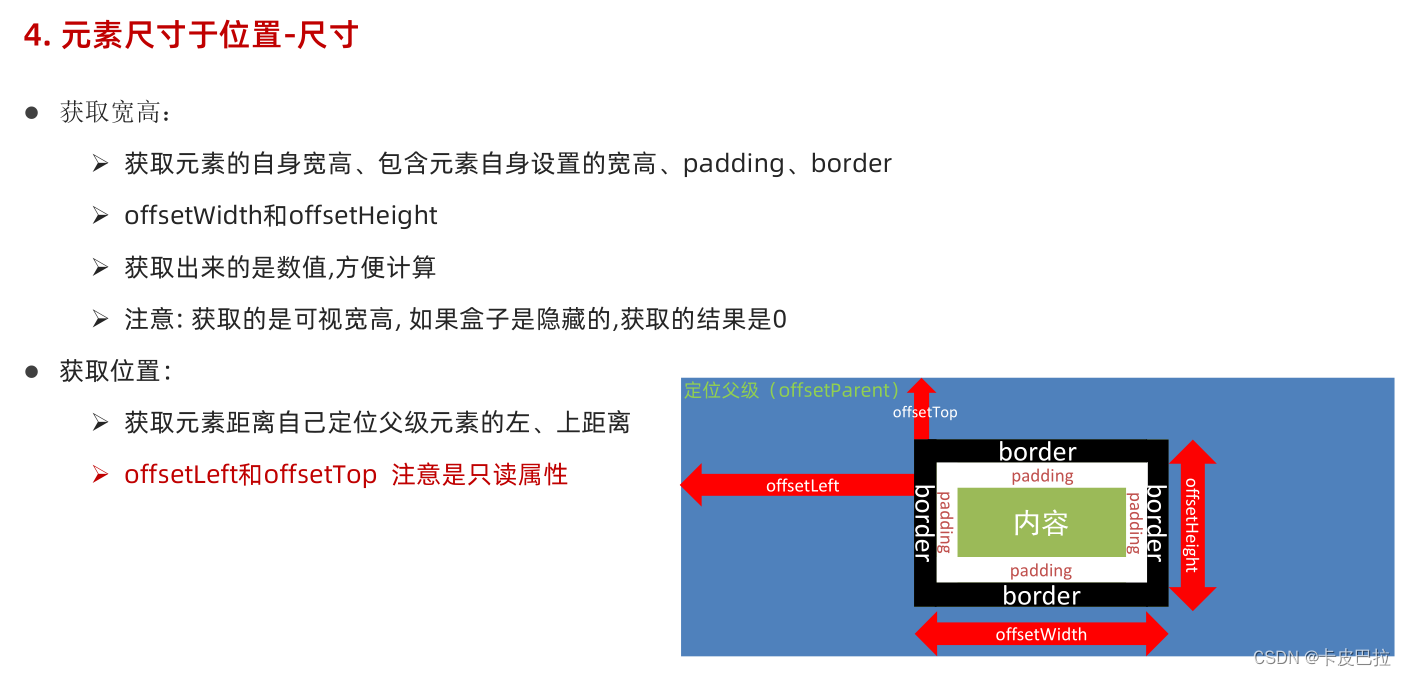
offsetLeft和offsetTop
Note: What is obtained is the left and top distance of the element from the parent element where it is positioned.
(But generally large boxes that need to be positioned have no parent elements and are standard flows)

<!DOCTYPE html>
<html lang="en">

<head>
  <meta charset="UTF-8">
  <meta http-equiv="X-UA-Compatible" content="IE=edge">
  <meta name="viewport" content="width=device-width, initial-scale=1.0">
  <title>Document</title>
  <style>
    div {
      position: relative;
      width: 200px;
      height: 200px;
      background-color: pink;
      margin: 100px;
    }

    p {
      width: 100px;
      height: 100px;
      background-color: purple;
      margin: 50px;
    }
  </style>
</head>

<body>
  <div>
    <p></p>
  </div>
  <script>
    const div = document.querySelector('div')
    const p = document.querySelector('p')
    // console.log(div.offsetLeft)
    // 检测盒子的位置  最近一级带有定位的祖先元素
    console.log(p.offsetLeft)
  </script>
</body>

</html>
getBoundClientRect targets the viewport. For example, after scrolling, the relative viewport position will change.


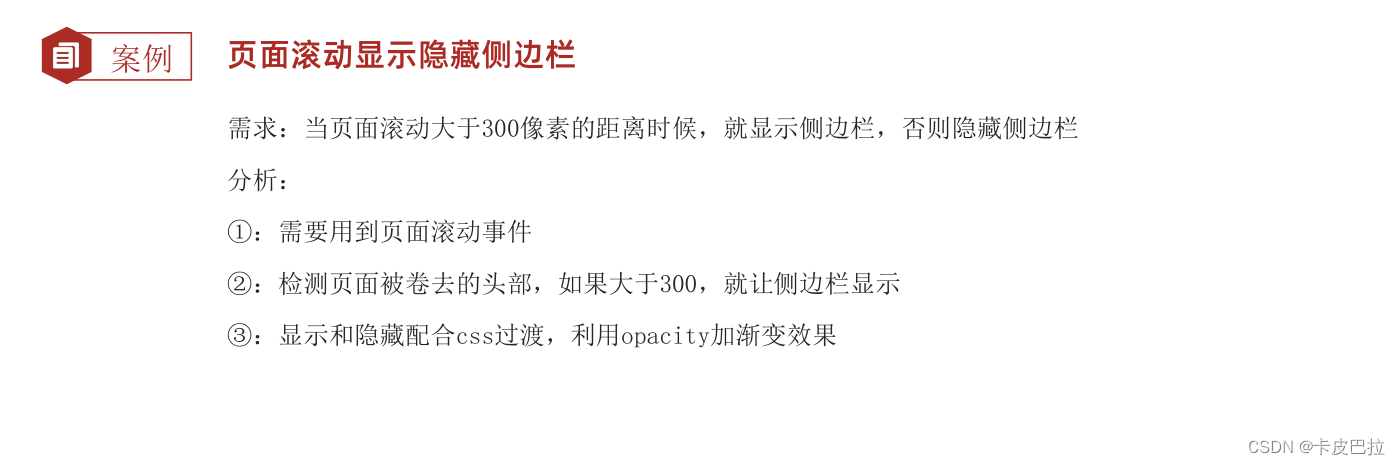
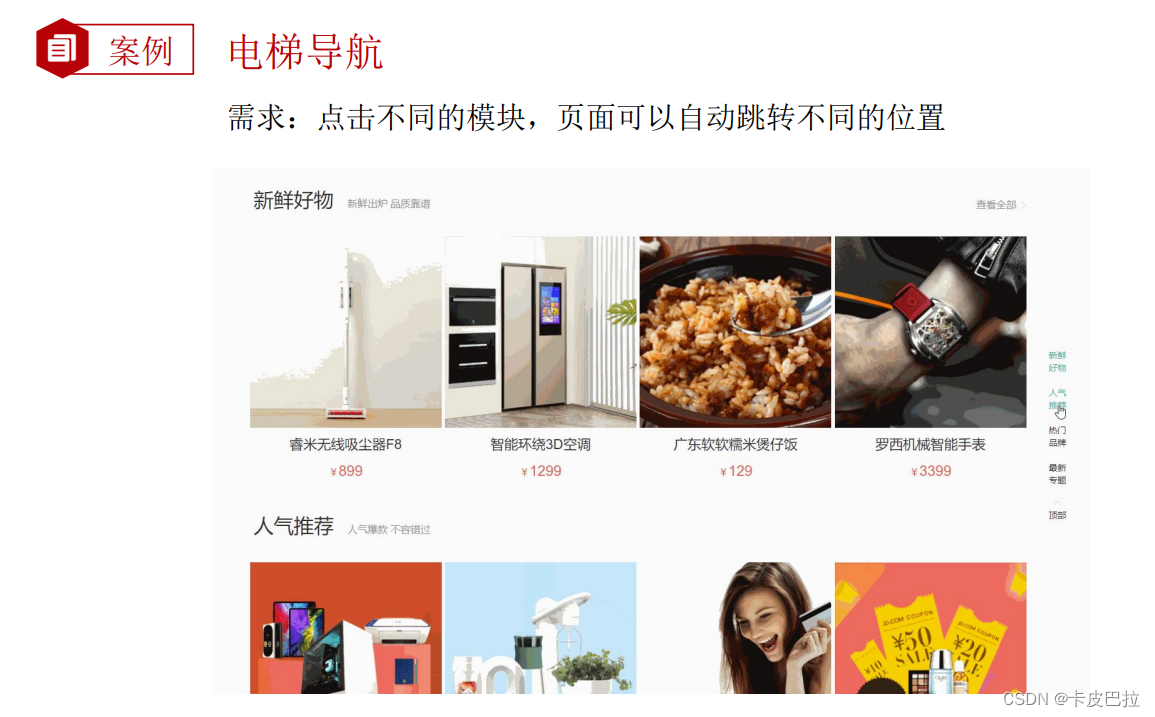
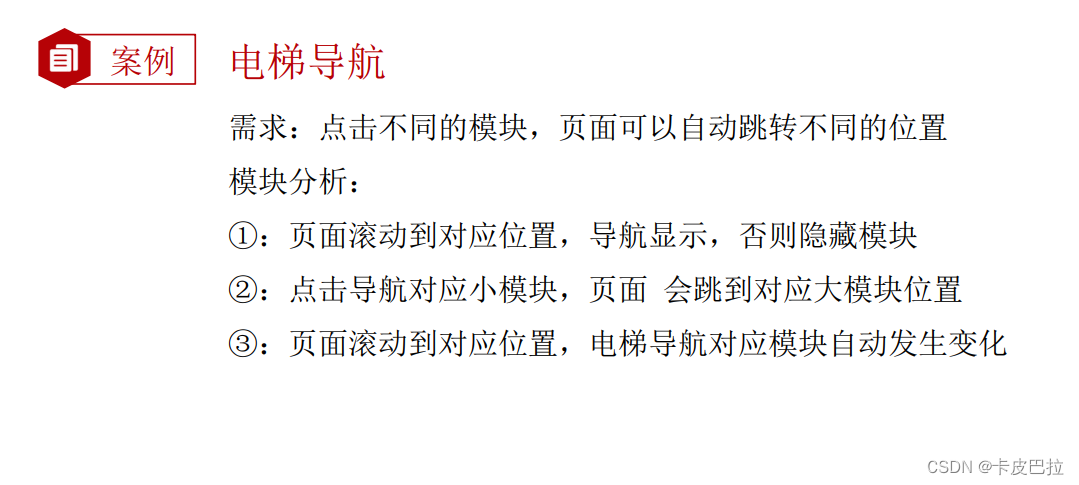
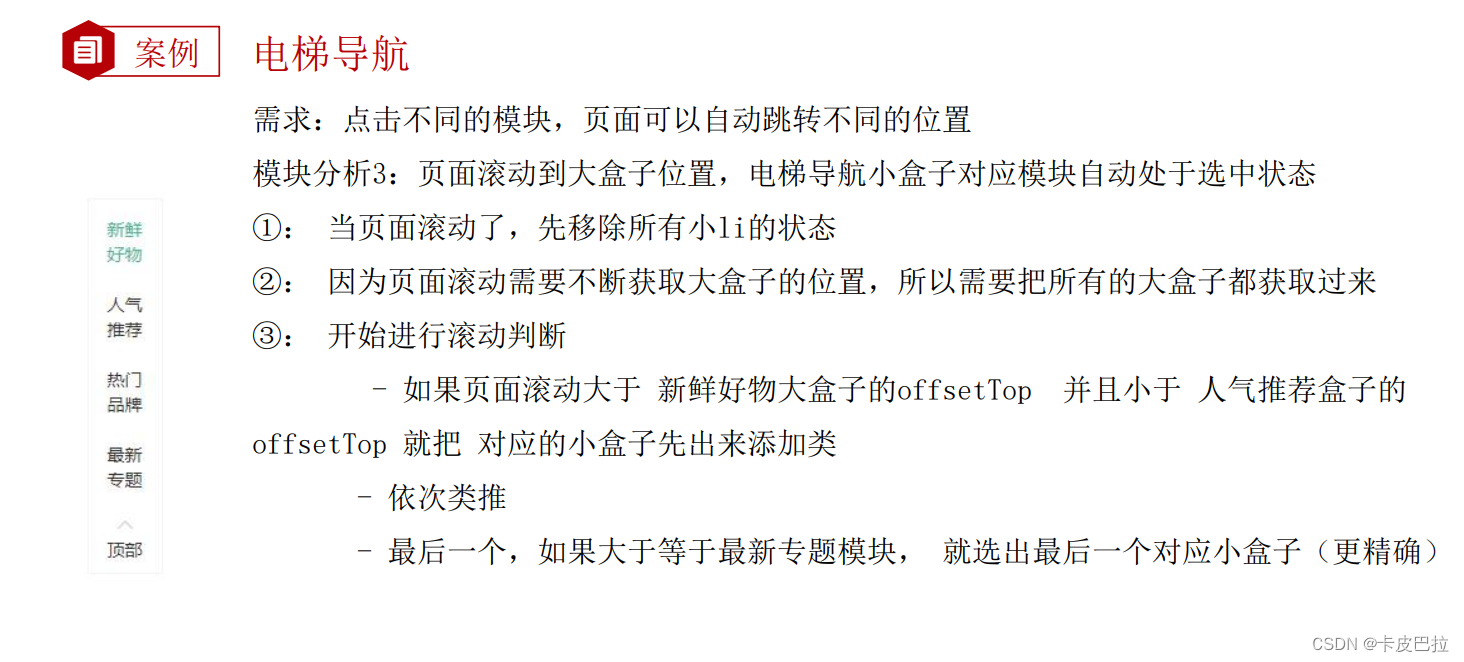
5. Comprehensive cases
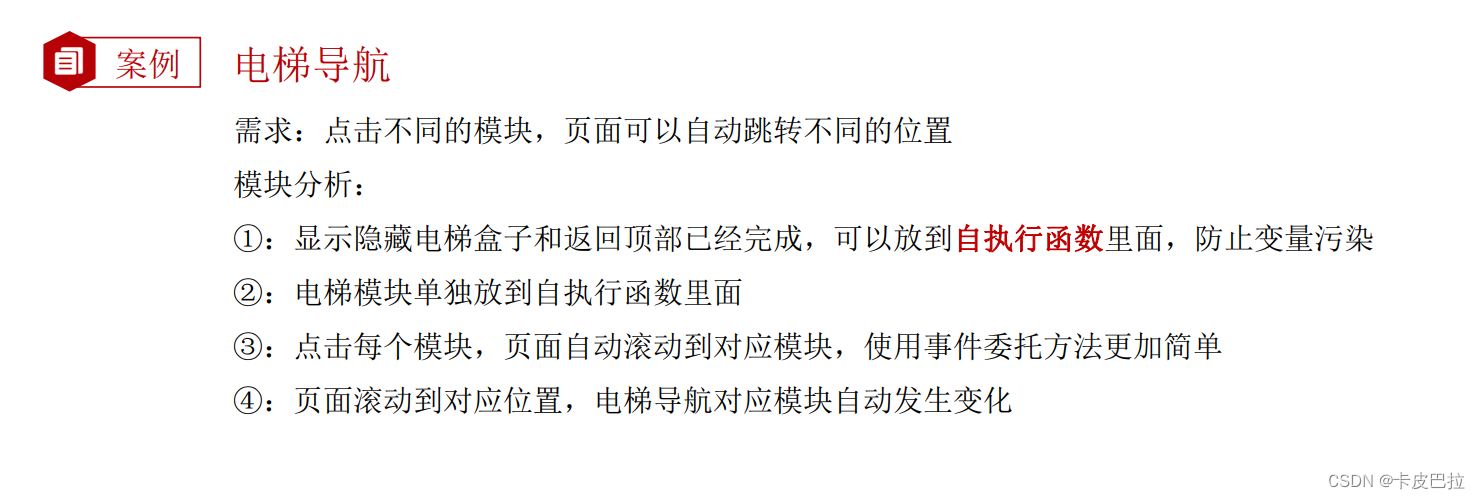
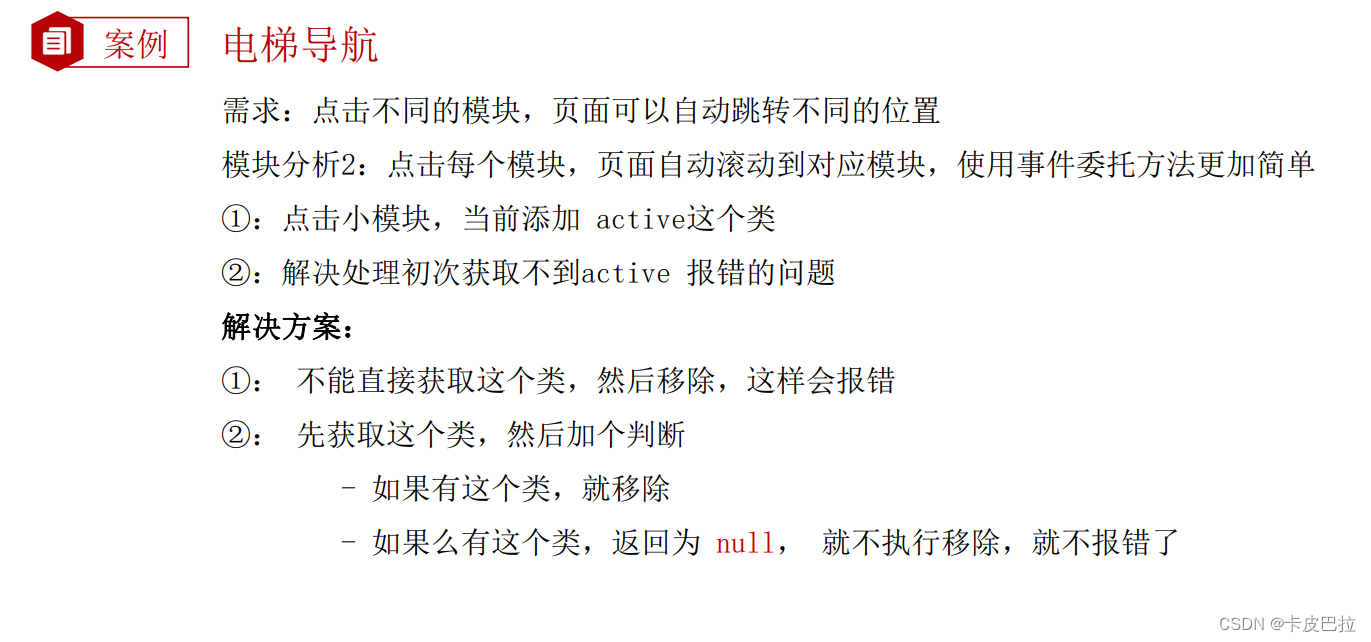


Key code:
① Use custom attributes + attribute selectors to select large box elements
②Judgment before adding active
<script>
// 第一大模块,页面滑动可以显示和隐藏
(function () {
// 获取元素
const entry = document.querySelector('.xtx_entry')
const elevator = document.querySelector('.xtx-elevator')
// 1. 当页面滚动大于 300像素,就显示 电梯导航
// 2. 给页面添加滚动事件
window.addEventListener('scroll', function () {
// 被卷去的头部大于 300
const n = document.documentElement.scrollTop
// if (n >= 300) {
// elevator.style.opacity = 1
// } else {
// elevator.style.opacity = 0
// }
// 简写
elevator.style.opacity = n >= entry.offsetTop ? 1 : 0
})
// 点击返回页面顶部
const backTop = document.querySelector('#backTop')
backTop.addEventListener('click', function () {
// 可读写
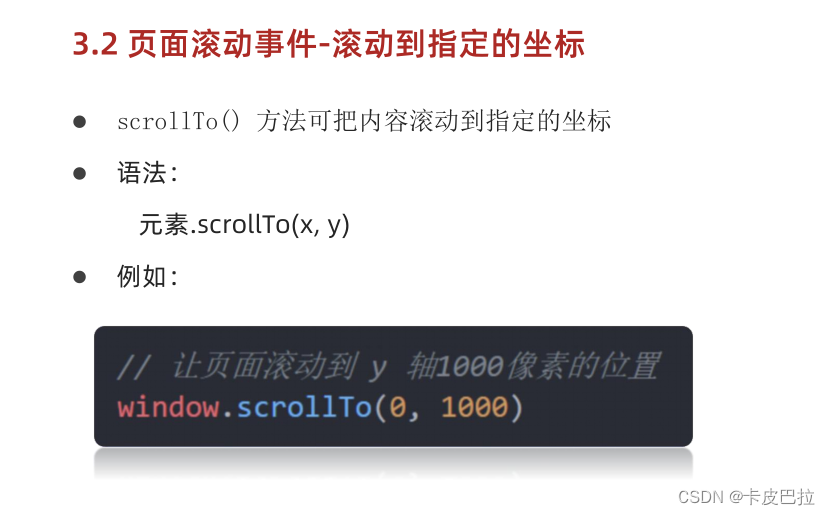
// document.documentElement.scrollTop = 0
// window.scrollTo(x, y)
window.scrollTo(0, 0)
})
})();
// 第二第三都放到另外一个执行函数里面
(function () {
// 2. 点击页面可以滑动
const list = document.querySelector('.xtx-elevator-list')
list.addEventListener('click', function (e) {
// console.log(11)
if (e.target.tagName === 'A' && e.target.dataset.name) {
// 排他思想
// 先移除原来的类active
// 先获取这个active的对象
const old = document.querySelector('.xtx-elevator-list .active')
// console.log(old)
// 判断 如果原来有active类的对象,就移除类,如果开始就没有对象,就不删除,所以不报错
if (old) old.classList.remove('active')
// 当前元素添加 active
e.target.classList.add('active')
// 获得自定义属性 new topic
// console.log(e.target.dataset.name)
// 根据小盒子的自定义属性值 去选择 对应的大盒子
// console.log(document.querySelector(`.xtx_goods_${e.target.dataset.name}`).offsetTop)
// 获得对应大盒子的 offsetTop
const top = document.querySelector(`.xtx_goods_${e.target.dataset.name}`).offsetTop
// 让页面滚动到对应的位置
document.documentElement.scrollTop = top
}
})
// 3. 页面滚动,可以根据大盒子选 小盒子 添加 active 类
window.addEventListener('scroll', function () {
// 3.1 先移除类
// 先获取这个active的对象
const old = document.querySelector('.xtx-elevator-list .active')
// console.log(old)
// 判断 如果原来有active类的对象,就移除类,如果开始就没有对象,就不删除,所以不报错
if (old) old.classList.remove('active')
// 3.2 判断页面当前滑动的位置,选择小盒子
// 获取4个大盒子
const news = document.querySelector('.xtx_goods_new')
const popular = document.querySelector('.xtx_goods_popular')
const brand = document.querySelector('.xtx_goods_brand')
const topic = document.querySelector('.xtx_goods_topic')
const n = document.documentElement.scrollTop
if (n >= news.offsetTop && n < popular.offsetTop) {
// 选择第一个小盒子
document.querySelector('[data-name=new]').classList.add('active')
} else if (n >= popular.offsetTop && n < brand.offsetTop) {
document.querySelector('[data-name=popular]').classList.add('active')
} else if (n >= brand.offsetTop && n < topic.offsetTop) {
document.querySelector('[data-name=brand]').classList.add('active')
} else if (n >= topic.offsetTop) {
document.querySelector('[data-name=topic]').classList.add('active')
}
})
})();
// let n = 10
// n = 20
</script>