Table of contents
4. Intranet penetration to achieve remote access
4.3 Fixed public network address
Preface
Today we learn something interesting, which is intranet penetration. Before this, I have some articles about html, CSS and JavaScript to teach you how to make a simple web page. Now that you have a web page, how do you publish these web pages for others to visit? Today we will implement this function through intranet penetration, let’s see below.
1.Node.js download
Node.js is an open source and cross-platform JavaScript runtime environment . It's a popular tool for almost any type of project! Node.js runs the V8 JavaScript engine (the core of Google Chrome) outside of the browser. This makes Node.js very efficient. Node.js applications run in a single process, eliminating the need to create a new thread for each request.
Download address: Download | Node.js (nodejs.org)
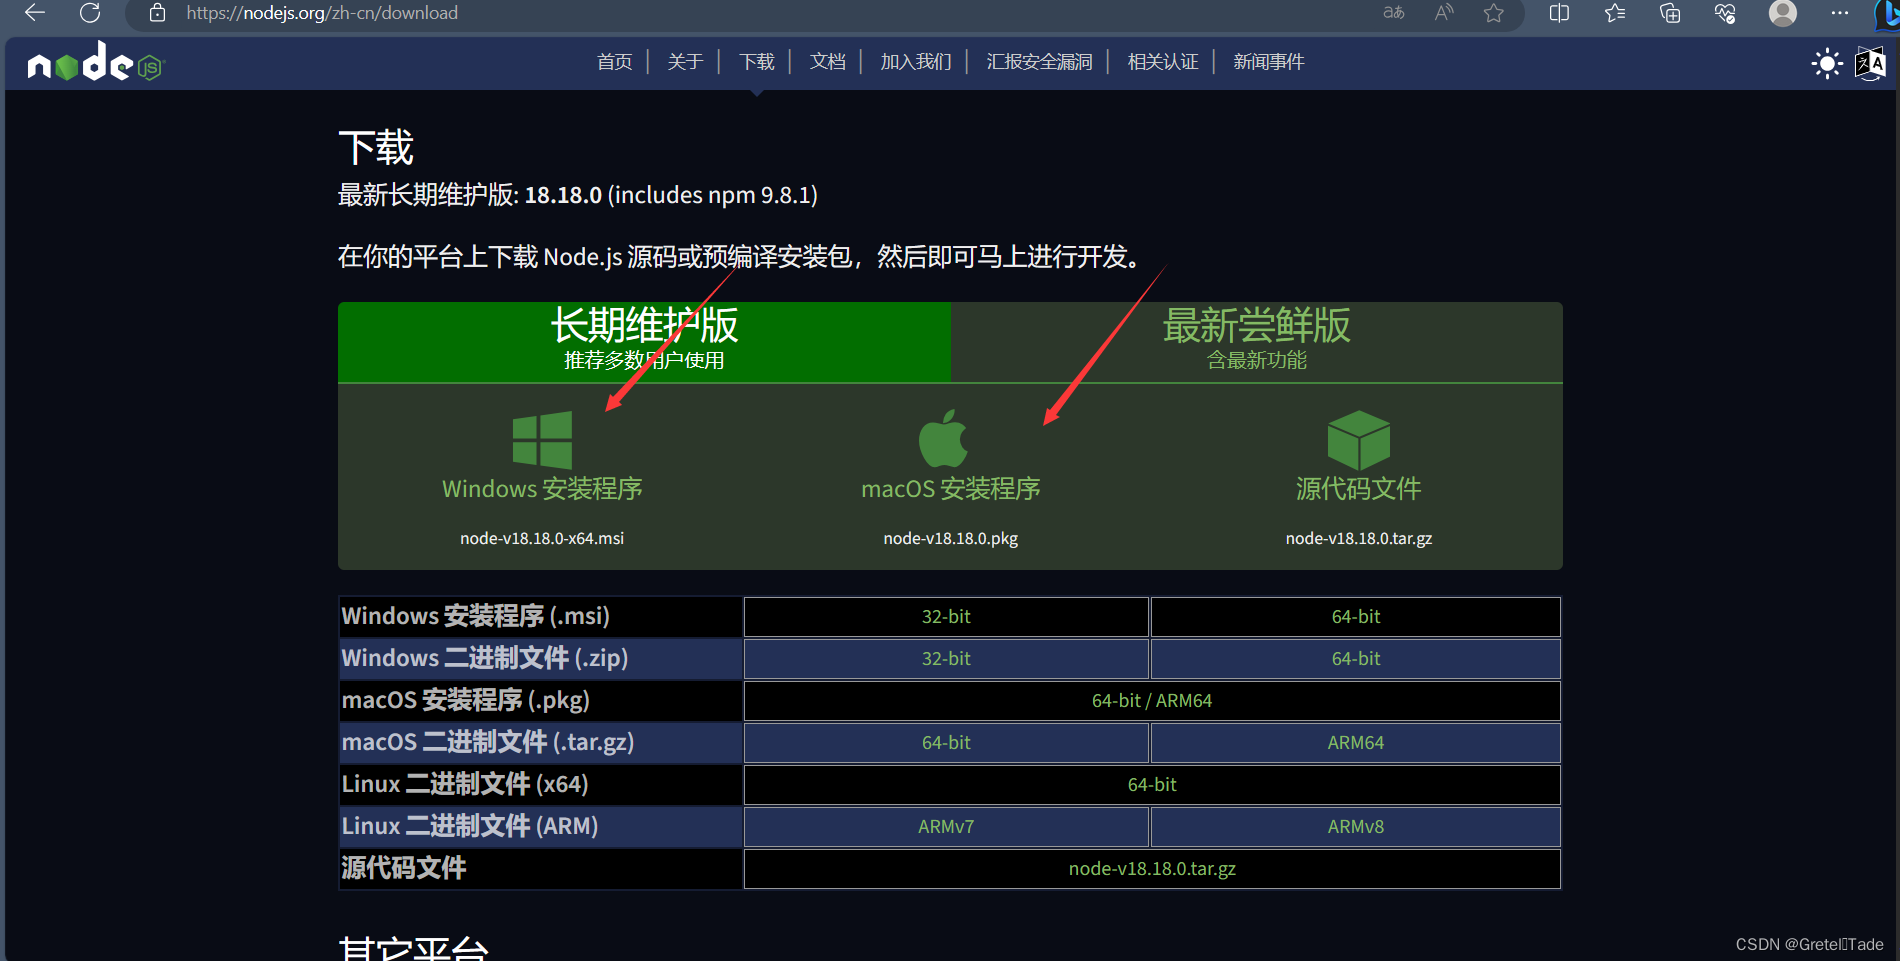 Just download and install it directly according to your computer operating system.
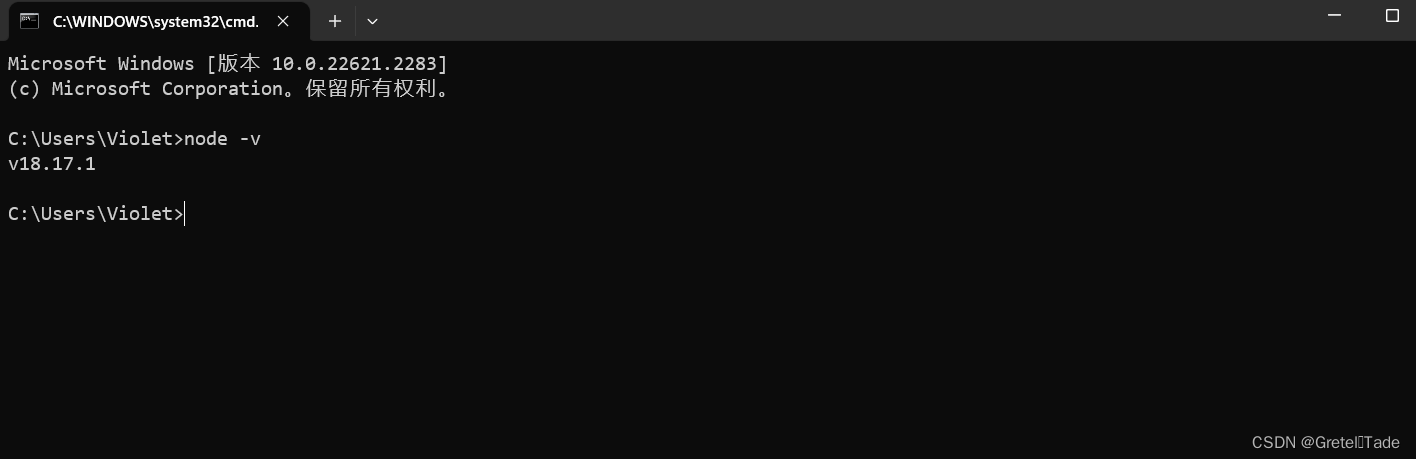
After the installation is complete, enter the command prompt with cmd and enter the following commands.
node -v
If the following situation is displayed, the installation is successful.
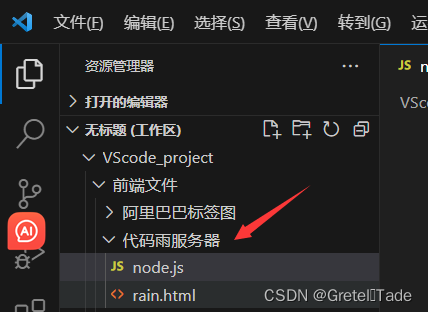
2. Create node server
To create a node server, you need to use the existing web page html code and JavaScript to implement it. First create a folder as a directory in VScode, and then place the html and JavaScript code files respectively, as shown in the following figure:
html code:
<!DOCTYPE html>
<html lang="en">
<head>
    <meta charset="UTF-8">
    <title>Code</title>
    <style>
        body{
            margin: 0;
            overflow: hidden;
        }
    </style>
</head>

<body>
<canvas id="myCanvas"></canvas>
<script>
    const width = document.getElementById("myCanvas").width = screen.availWidth;
    const height = document.getElementById("myCanvas").height = screen.availHeight;
    const ctx = document.getElementById("myCanvas").getContext("2d");
    const arr = Array(Math.ceil(width / 10)).fill(0);
    const str = "ABCDEFGHIJKLMNOPQRSTUVWXYZ0123456789".split("");

function rain() {
    ctx.fillStyle = "rgba(0,0,0,0.05)";
    ctx.fillRect(0, 0, width, height);
    ctx.fillStyle = "#0f0";
    arr.forEach(function (value, index) {
        ctx.fillText(str[Math.floor(Math.random() * str.length)], index * 10, value + 10);
        arr[index] = value >= height || value > 8888 * Math.random() ? 0 : value + 10;
    });
}

setInterval(rain, 30);
</script>
</body>
</html>
The display effect is as follows:
1696150004782
JavaScript server code
const http = require('http');

//加载文件模块
const fs = require("fs");

const hostname = '127.0.0.1';
//端口
const port = 3630;


const server = http.createServer((req, res) => {
  res.statusCode = 200;
  res.setHeader('Content-Type', 'text/html');

  fs.readFile('./rain.html', (err, data) => {
    if (err) throw err;
    console.log(data.toString);
    res.end(data);
  });

});

server.listen(port, hostname, () => {
  console.log(`Server running at http://${hostname}:${port}/`);
});
The JavaScript code starts the server listening on port number 3630.
3. Open the node server
In this directory file, open the terminal, as shown below:
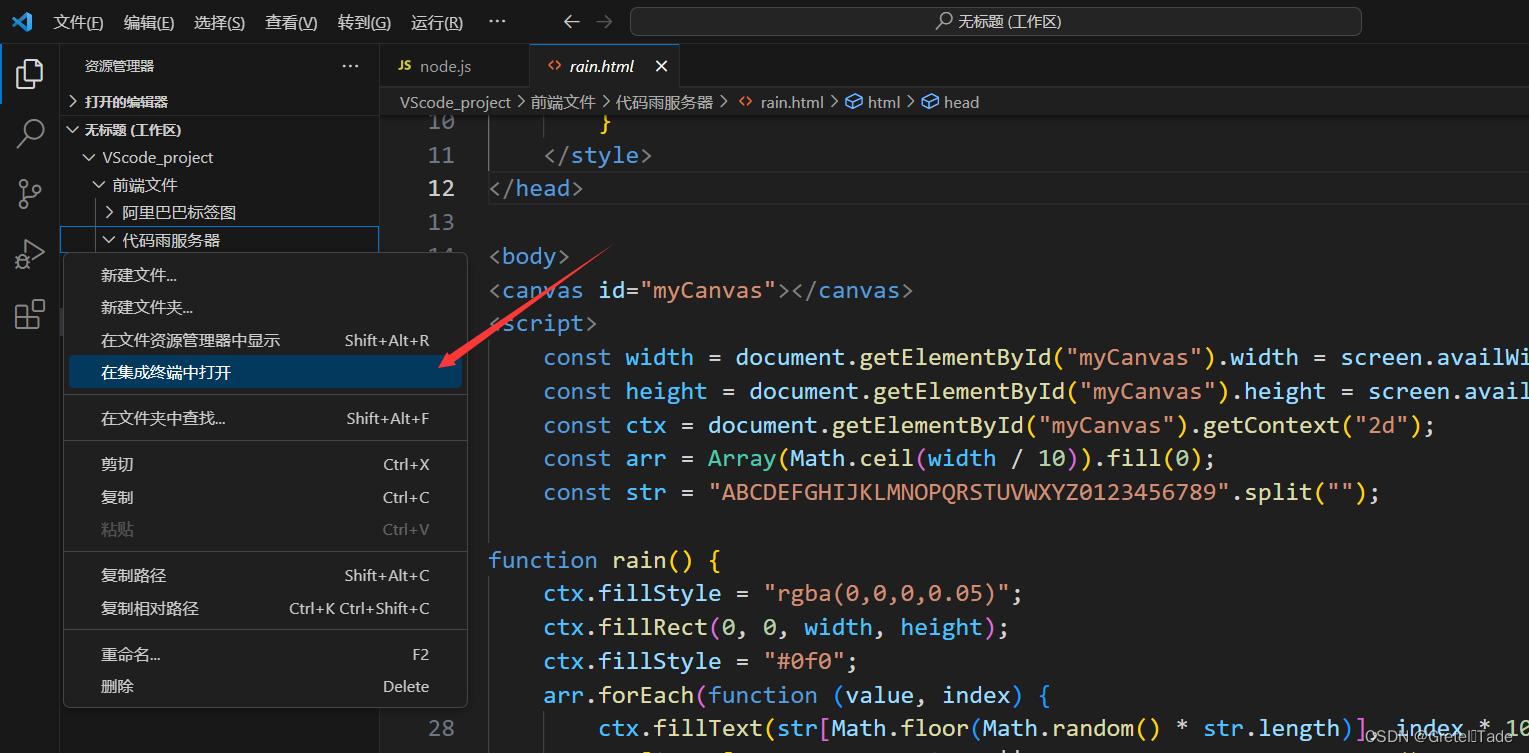
After opening the terminal, enter the command node ./node.js and press Enter. A link address of the server will be returned. Copy this address and open it in the browser. Results as shown below:


4. Intranet penetration to achieve remote access
4.1 Install cpolar
cpolar official website: cpolar - secure intranet penetration tool
Click in, download and install coplar, then just take it off the shelf and install it to the default path.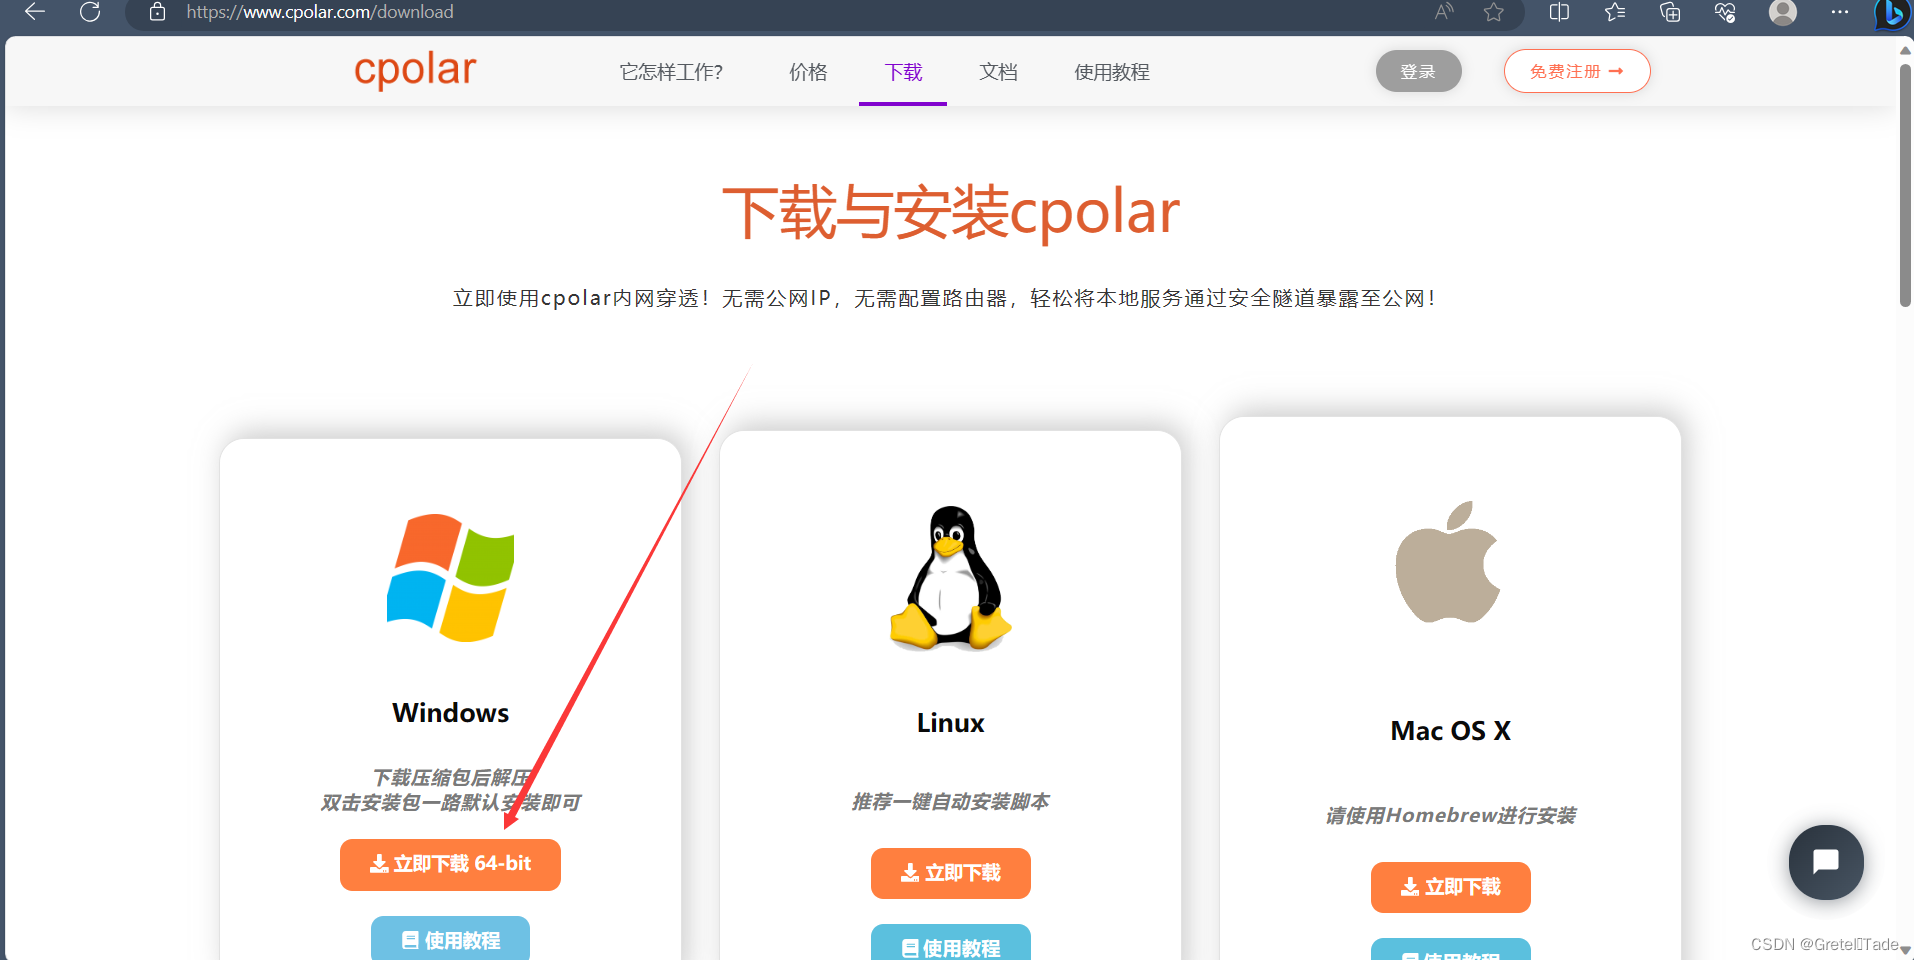
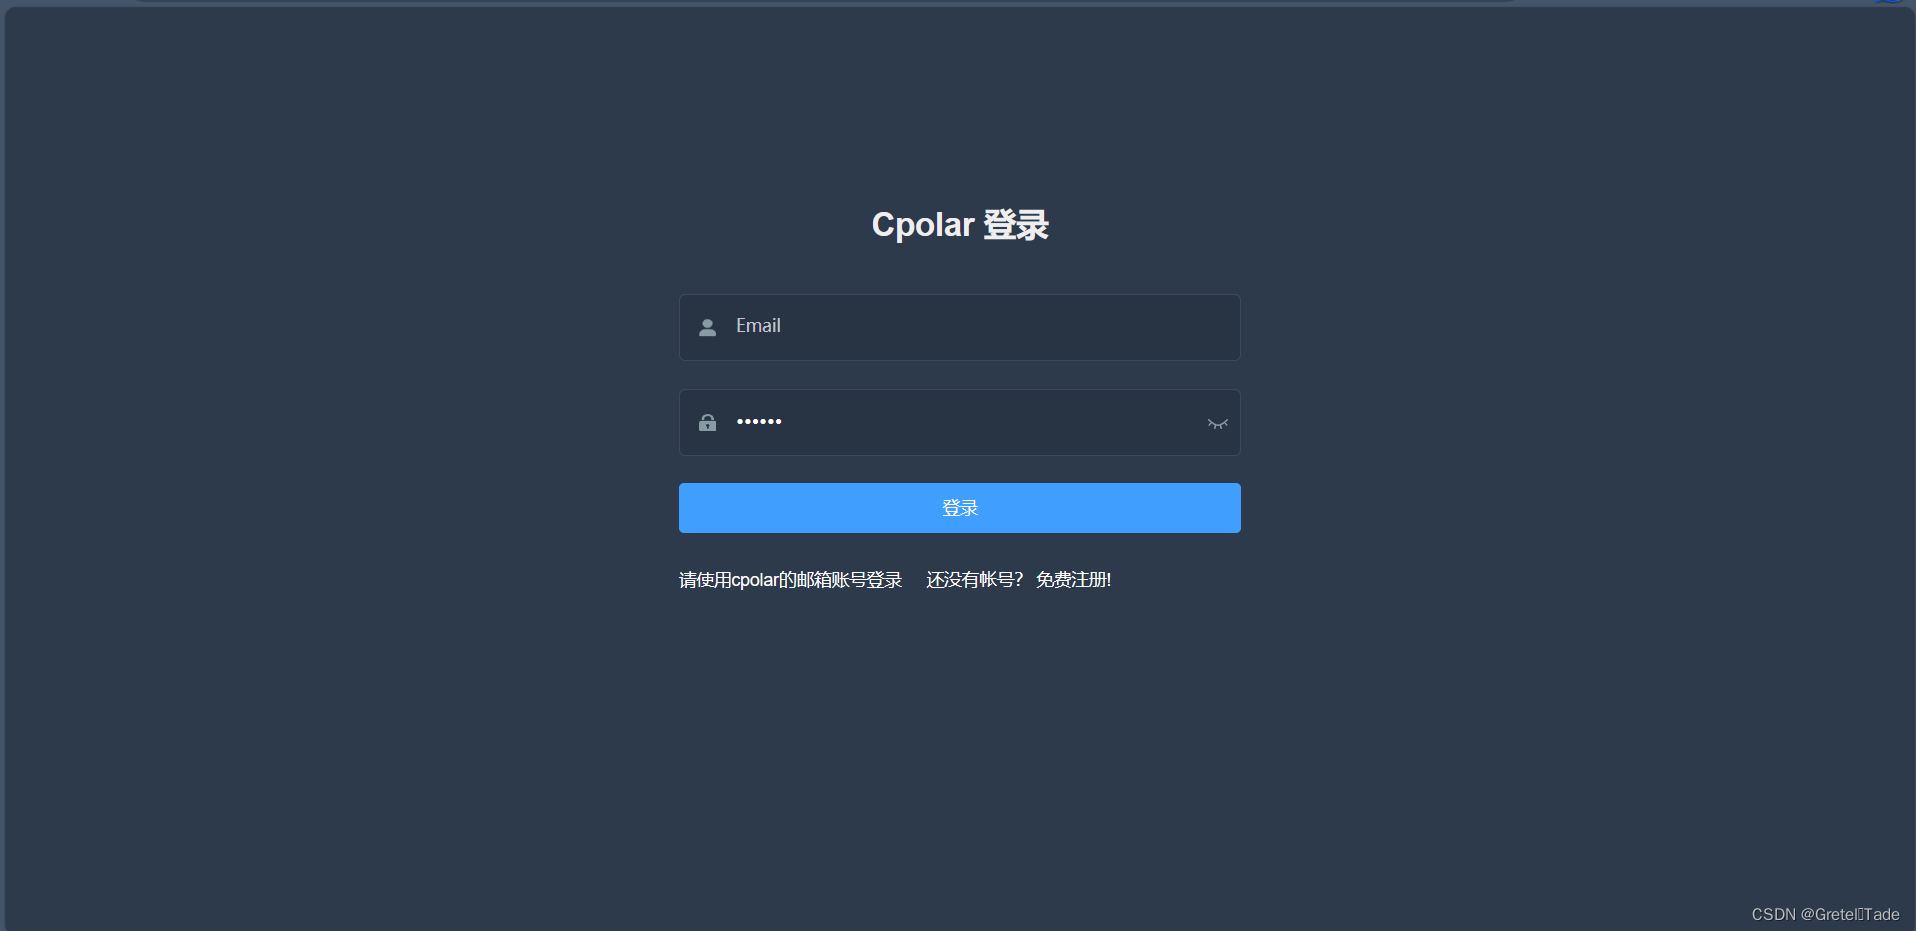
After the installation is complete, register an account with your own email address.
4.2 Create tunnel (website)
This is what it looks like after entering, and then click Create Tunnel.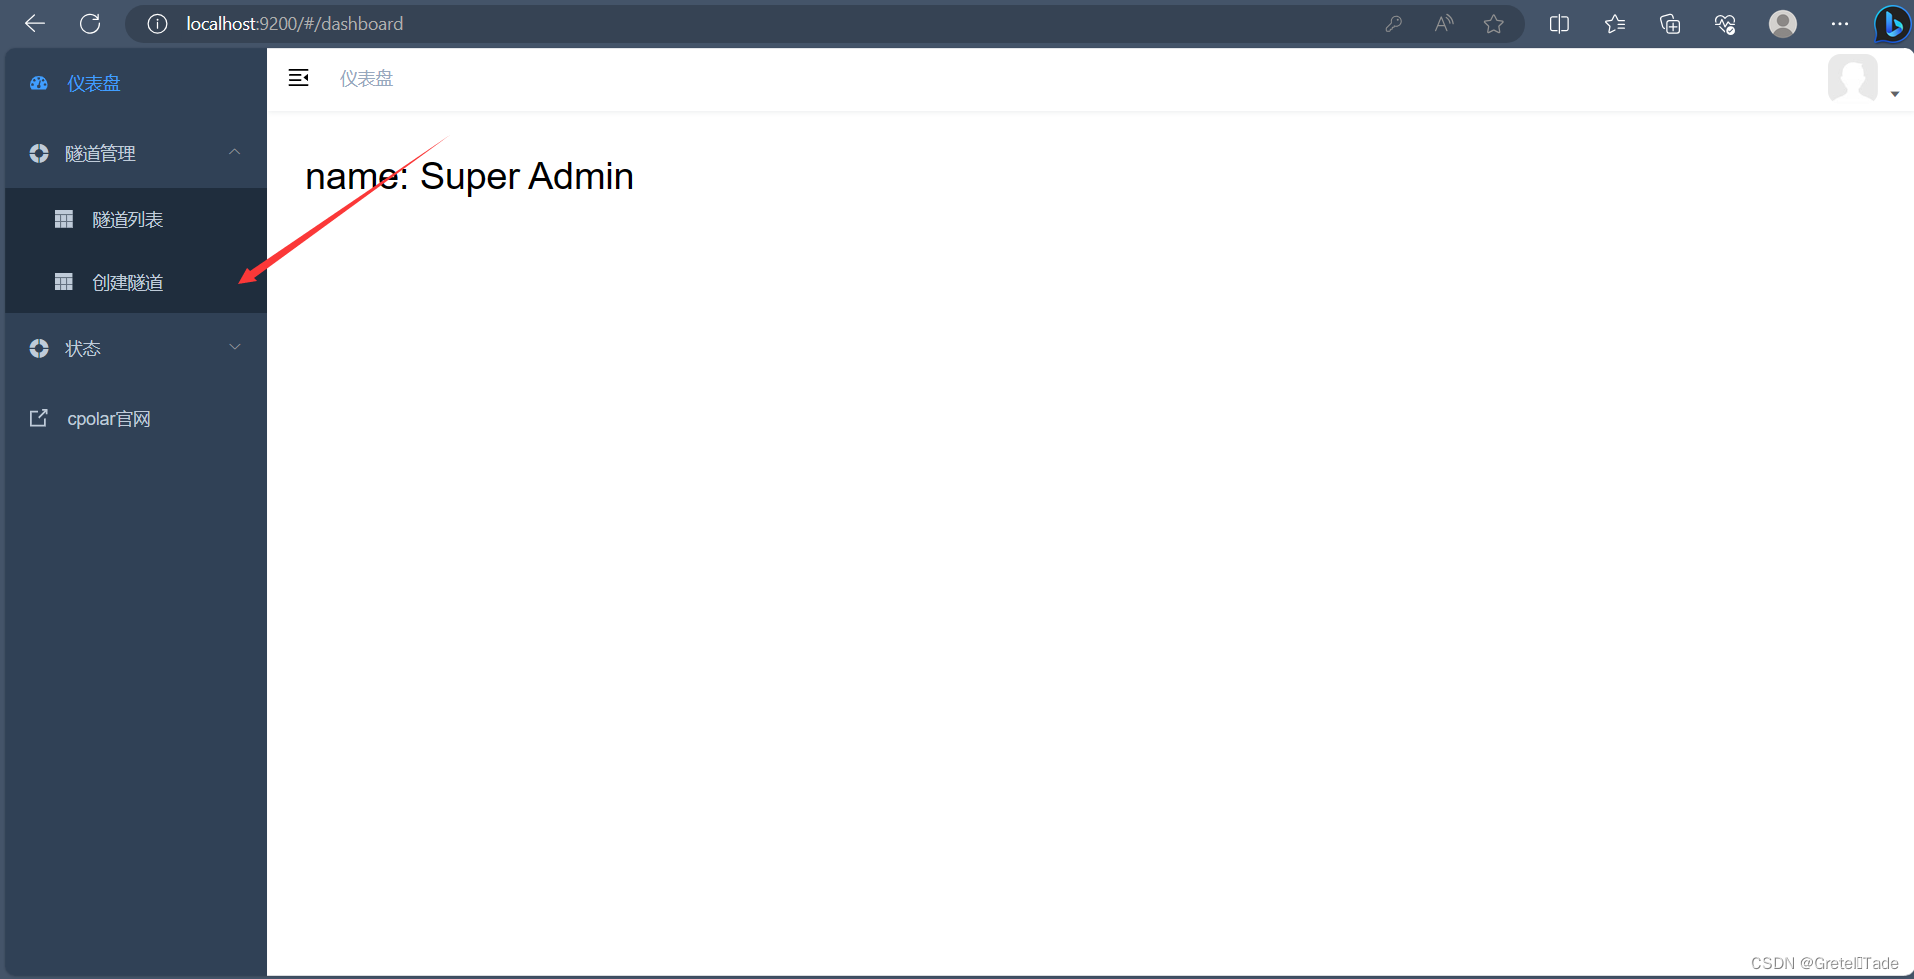
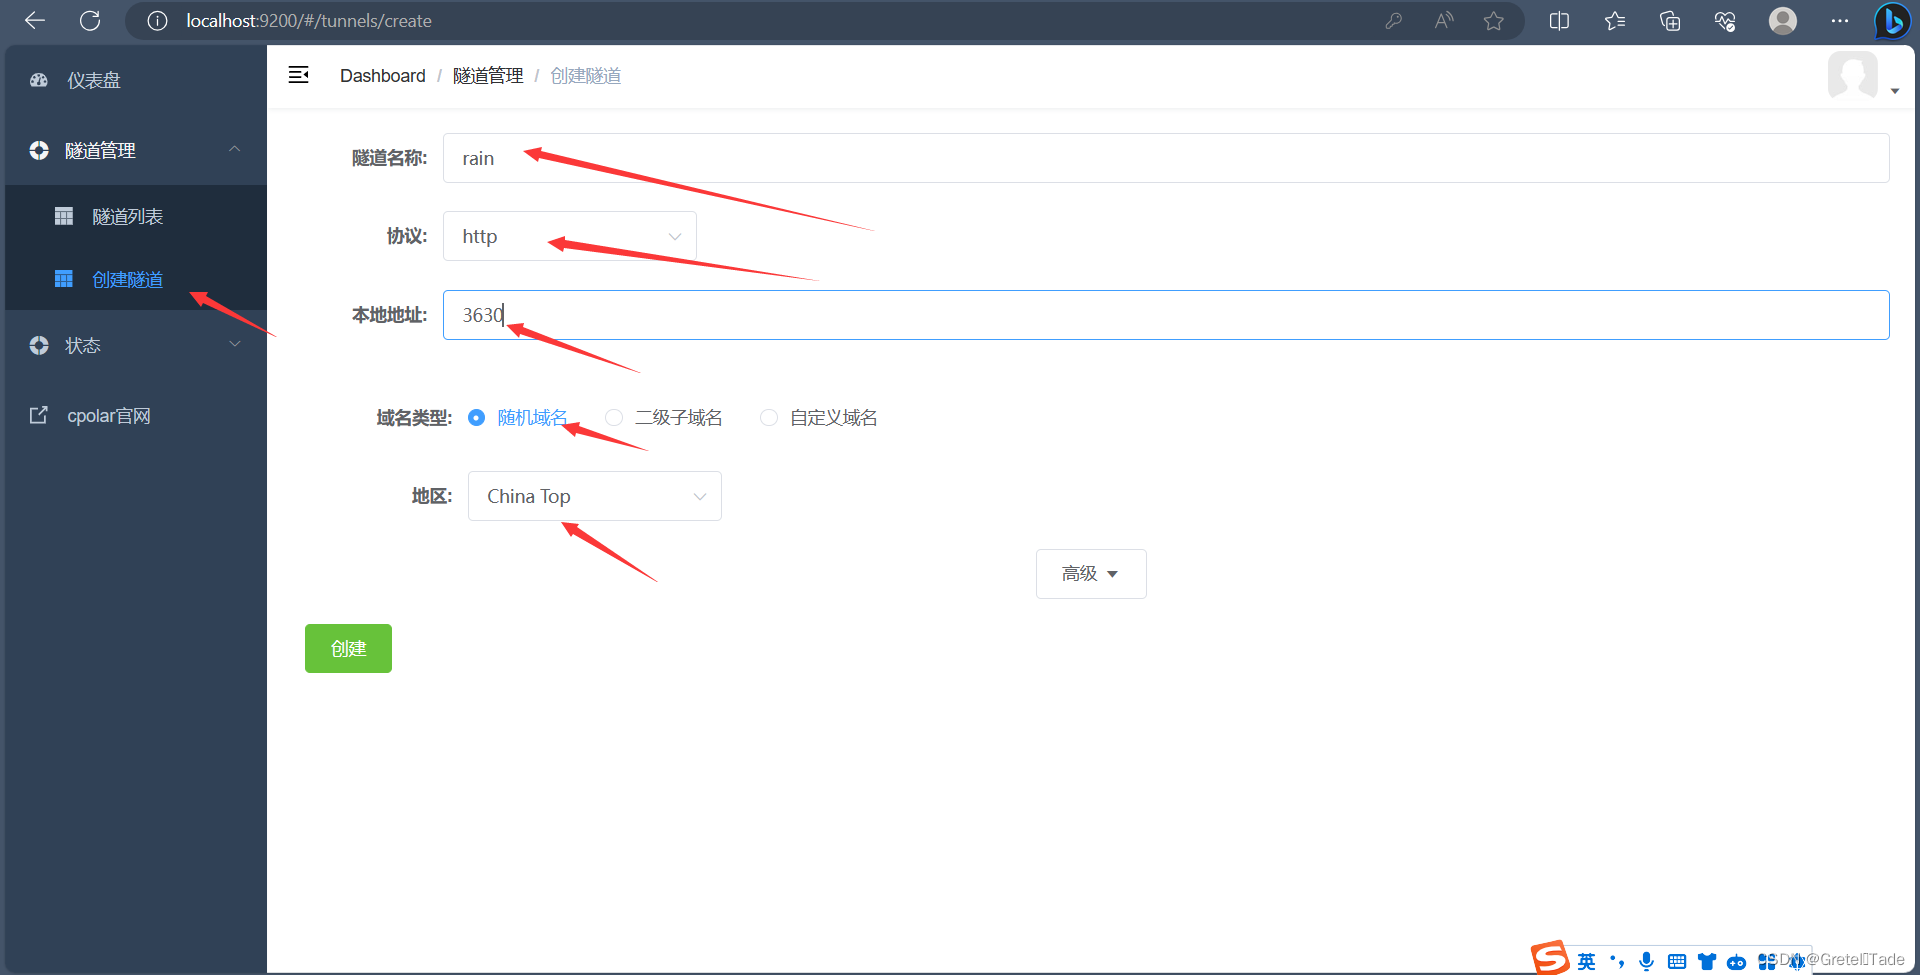
After entering, create a tunnel pointing to the local 3630 port number.
Tunnel name: (can be customized)
Protocol: http
Local address: 3630
Domain name type: Random domain name (free domain name, randomly assigned)
Region: Select China Top
 After clicking Create, open the online tunnel list, and we can see that the server has taken effect and has two public network addresses, as shown in the figure below
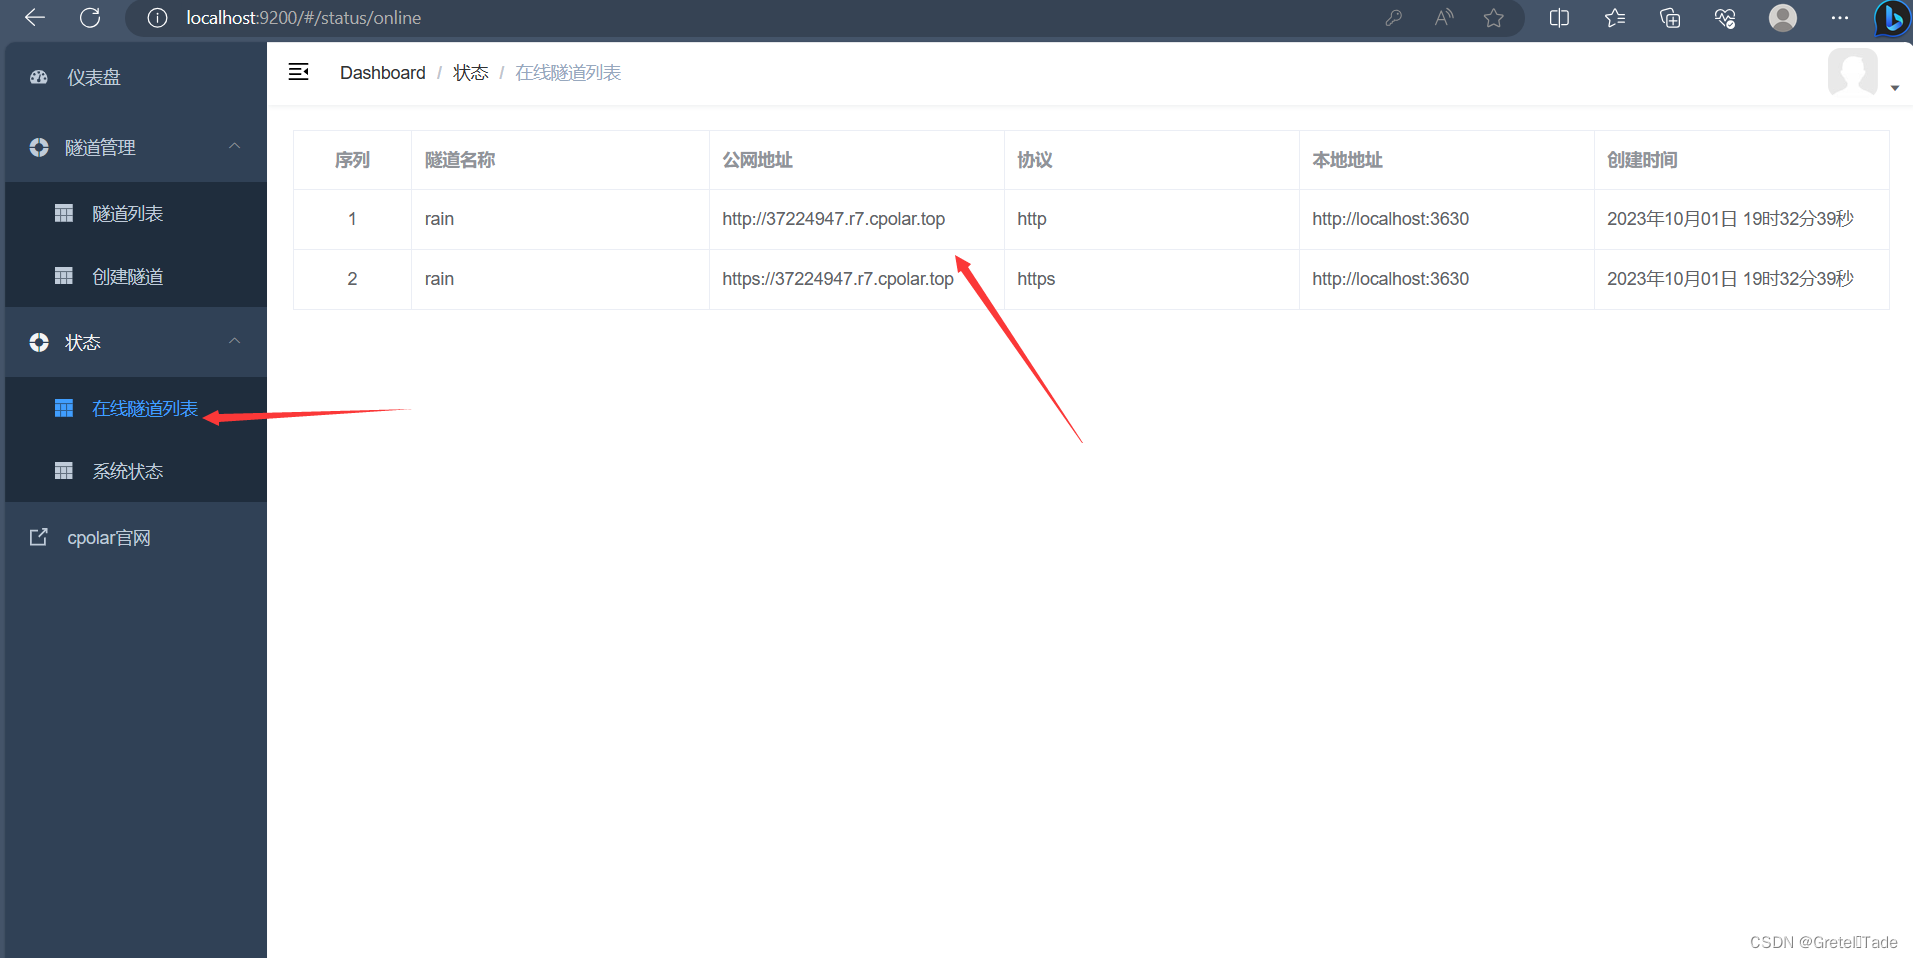
Copy the URL and open it in the browser. The effect is as shown in the picture below. This means that we have created it successfully! Now you can discover your website address to your friends, so that they can all see your web page!
4.3 Fixed public network address
Before that, I need to explain that the currently created website has a lifespan of only 24 hours, which means that your website will be invalid after 24 hours. After all, we use a free one (randomly assigned URL). If you still want to To enable your webpage to be published, you can only recreate the tunnel. If you want your website to be preserved, you have to pay some money to reserve your domain name.
Go to the coplar official website, click Reserve, then reserve the second-level subdomain here, and purchase a package.
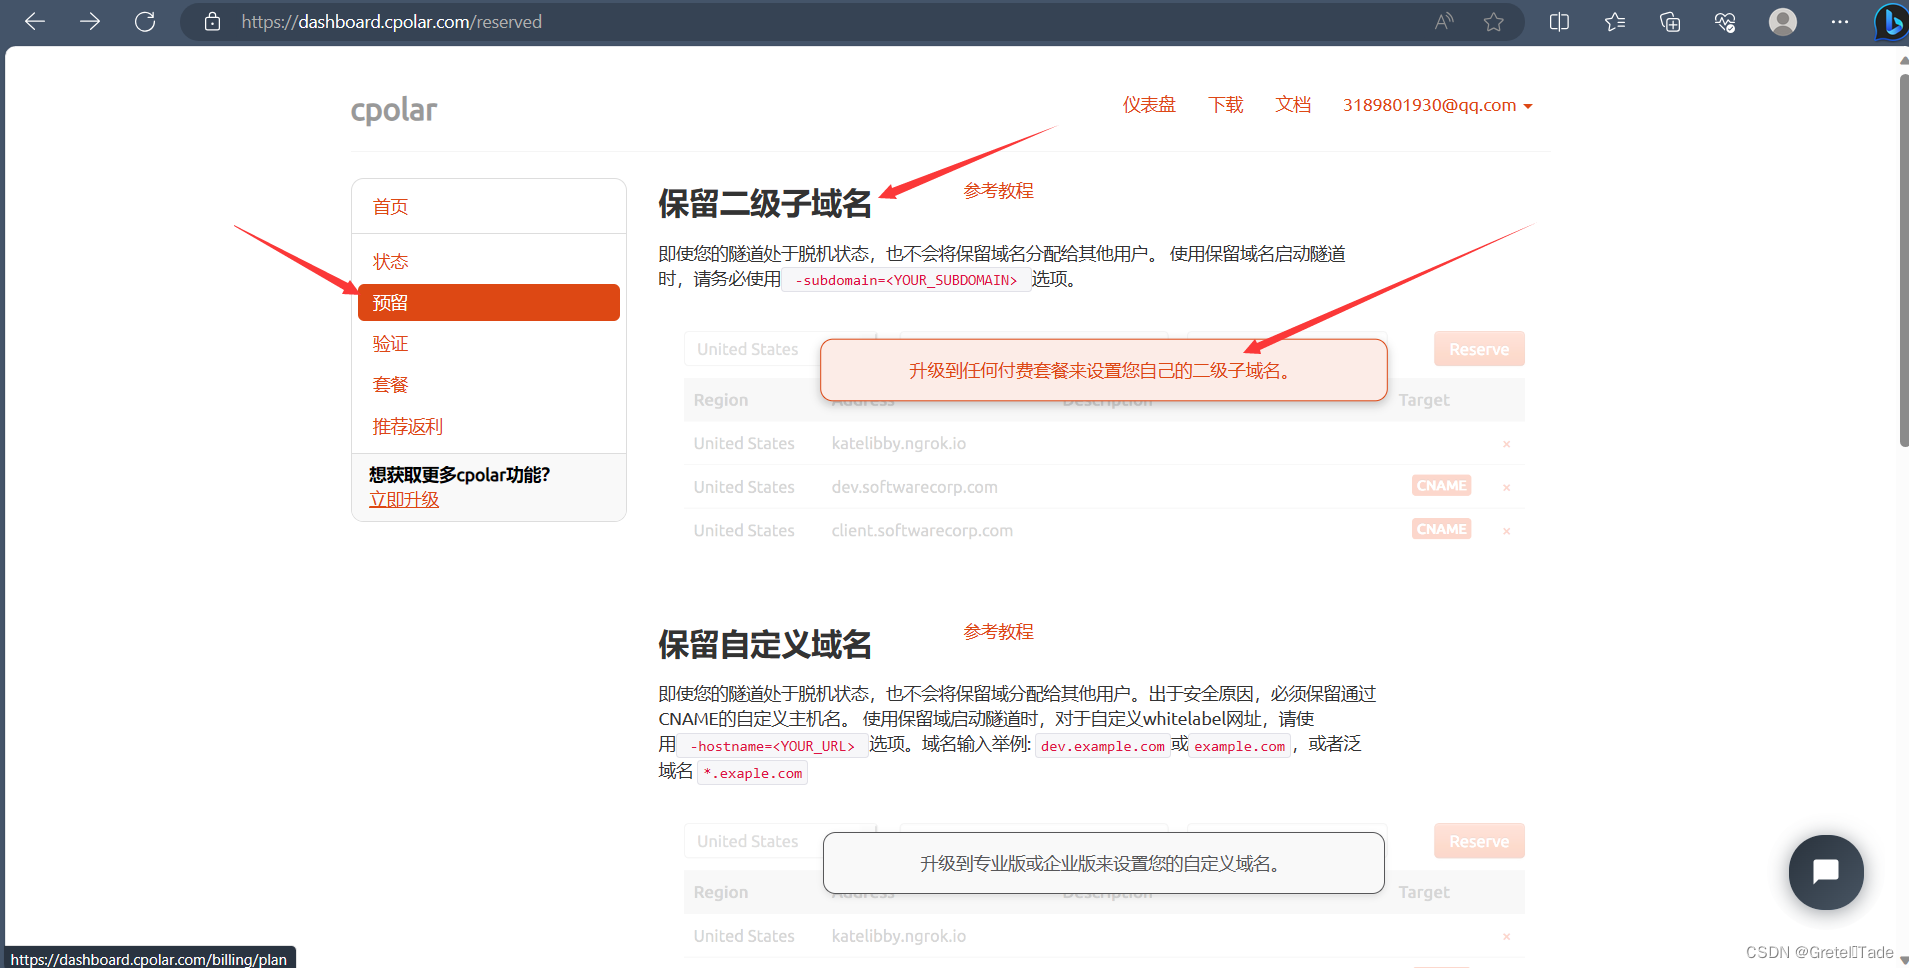
After purchasing the package, just click on the second-level subdomain name for the domain name type on the tunnel creation side. Then your website is fixed.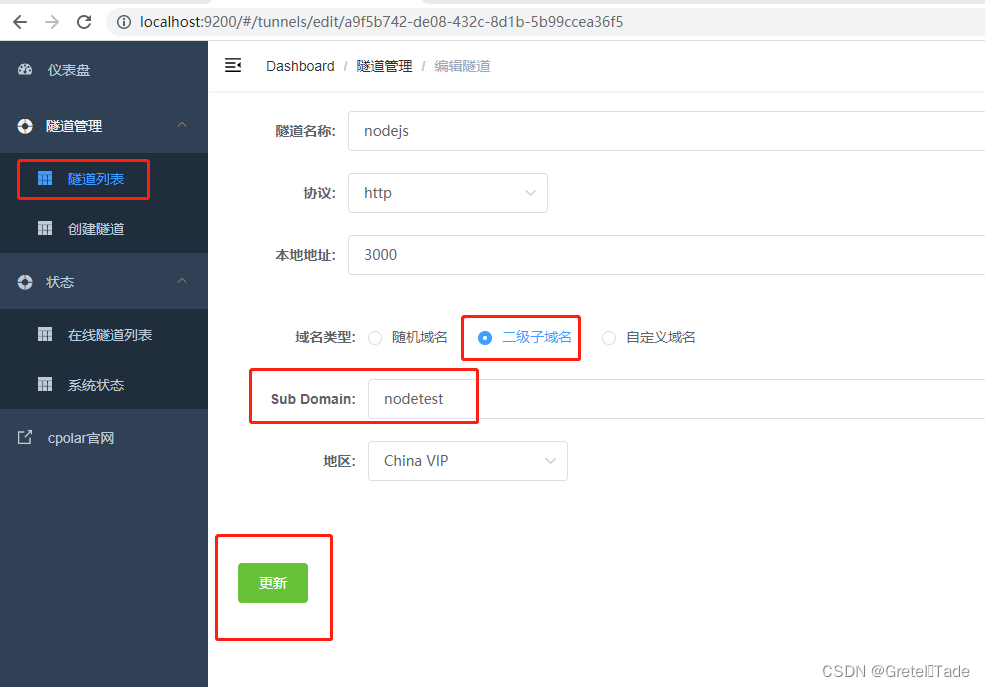
That’s it for this issue. Isn’t it interesting? You can also try writing a small website!
Share a wallpaper: