Summarize and organize some technical points developed by Qualcomm Camera HAL3.
Make a record for easy reference later.
1. Directory, so, configuration file
productName is the project name
- out Target路径:\out\target\product\productName\
- chi-cdk:\vendor\qcom\proprietary\chi-cdk\
- ldc node:\vendor\qcom\proprietary\chi-cdk\oem\qcom\node\ldc\
- So compiled by node:\vendor\lib64\camera\components\
- usecase compiled so: \vendor\lib64\com.qti.chiusecaseselector.so (you need to compile usecase so after modifying the pipeline's xml)
- so compiled by chi-cdk: \vendor\lib64\hw\com.qti.chi.override.so
- usecase xml文件:chi-cdk\oem\qcom\topology\titan\fillmore\fillmore_usecase.xml
- pipelines xml文件:chi-cdk\oem\qcom\topology\titan\usecase-components\usecases\UsecaseZSL\pipelines\
- vendortag file: chi-cdk\oem\qcom\vendortag\chivendortagoemdefines.h
- RealTimeFeature.xml:chi-cdk\oem\qcom\topology\titan\usecase-components\segments\fillmore\RealTimeFeature.xml
- camxoverridesettings.txt: A temporary debugging method provided by Qualcomm to developers to control log printing, data dump, etc. Under vendor/etc/camera/ in the device directory, the directories camera and camxoverridesettings.txt need to be created manually by yourself.
2. Driver related paths:
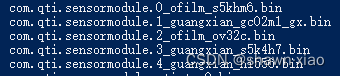
bin file: /vendor/lib64/camera (if you delete the bin file until there is only one left, then only one will be installed when the driver is powered on, and only this camera will be opened when the camera is turned on)
Configuration file:
- \vendor\qcom\proprietary\chi-cdk\oem\qcom\buildbins\build\android\binary_taro
- /vendor/qcom/proprietary/chi-cdk/oem/qcom/module
Driver file:
- \vendor\qcom\proprietary\chi-cdk\oem\qcom\sensor\s5khm6
3.camxsettings.xml
Search camxsettings.xml under /vendor/qcom/proprietary. After finding it, change the value of the variable defined in camxsettings.xml by modifying camxoverridesettings.txt.
- /vendor/etc/camera # echo enableDSM=FALSE >> camxoverridesettings.txt
- /vendor/etc/camera # cat camxoverridesettings.txt
4.camxoverridesettings.txt log settings:
chi log: For example: CHX_LOG_ERROR(fmt, args);
adb shell "echo overrideLogLevels=0x1f >> /vendor/etc/camera/camxoverridesettings.txt"
Or: adb shell setprop vendor.debug.camera.overrideLogLevels 0x1F (defined in camxsettings.xml, different codes may be different)
Normally opened logs (open as needed, all logs will be lost and performance will be affected):
hal/core/chi
- adb shell "echo logInfoMask=0x50080 >> /vendor/etc/camera/camxoverridesettings.txt"
- adb shell setprop persist.vendor.camera.logVerboseMask 0xFFFFFFFF
- adb shell setprop persist.vendor.camera.logEntryExitMask 0xFFFFFFFF
- adb shell setprop persist.vendor.camera.logInfoMask 0xFFFFFFFF
- adb shell setprop persist.vendor.camera.logWarningMask 0xFFFFFFFF
- adb shell setprop persist.vendor.camera.logConfigMask 0xFFFFFFFF
- adb shell setprop persist.vendor.camera.systemLogEnable TRUE
- adb shell setprop persist.vendor.camera.logLogDRQMask 0xFFFFFFFF
camx log:
- adb shell "echo overrideLogLevels=0xF >> /vendor/etc/camera/camxoverridesettings.txt"
- adb shell "echo logVerboseMask=0x1000 >> /vendor/etc/camera/camxoverridesettings.txt"
- adb shell "echo logInfoMask=0xFFFFFFFF >> /vendor/etc/camera/camxoverridesettings.txt"
5. Select the featuregraph log:
Chifeature2graphselector.cpp:1549 SelectFeatureGraphforRequestFromTable()
Tag:"Selected feature graph for request:"
Usually you need to execute the following command first to print out the Log:
- adb shell echo "overrideLogLevels=0x9" >>/vendor/etc/camera/camxoverridesettings.txt
- adb shell echo overrideLogLevels=8 >>echo/vendor/etc/camera/camxoverridesettings.txt
Different platforms have different details:
8350:
- static const UINT32 CHX LOG CONFIG MASK =4:
- adb shell echo overrideLogLevels=4 >>/vendor/etc/camera/camxoverridesettings.txt
8450:
- adb shell overrideLogLevels=8 >>"echo/vendor/etc/camera/camxoverridesettings.txt
- CHX LOG INFO("Selected feature graph for request %u : %spFeature2RequestObject->GetAppFrameNumber (),requestGraph. pGraphDesc->pFeatureGraphName);
sm4350:
- adb shell "echo overrideLogLevels=4>>/vendor/etc/camera/camxoverridesettings.txt
- CHX LOG CONFIG(Feature2Mapping: Selected feature graph : %s"pChiFeature2GraphDesc->pFeatureGraphName);
6.How to find pipeline
Code lookup:
Find chifeature2rawhdrdescriptor.cpp
Find ChiFeature2PipelineDescriptor

Log search:
Tag: "StreamingOn"
7.CreatePipelines()
AdvancedCameraUsecase, UsecaseMultiCamera and other usecases will call CreatePipelines() to create pipelines
chifeature2 will also call CreatePipelines() to create a pipeline
for example:
In SAT mode, the preview mode is non-feature2, and the photo mode is feature2:
//Three pipelines created: SATOfflinePreview; RealtimePreviewSATO; Merge3YuvCustomTolYuv


8. How to find the pipeline node configuration file:
1. Log TAG: "StreamingOn for pipeline" Check the current pipeline
2. Find the pipeline's xml in the \vendor\qcom\proprietary\chi-cdk\oem\qcom\topology\titan directory
3. Look in the pipeline xml <CamxInclude segment=" xxxxxxxxxx"/>
4. Find the xml of CamxInclude
5. Add node
9. Add stack printing:
Add stack printing in \camx\src\core\hal\camxhal3stream.cpp
camx/src/lib/build/android/Android.mk 里添加 LOCAL_SHARED_LIBRARIES += libutilscallstack
In the code where you want to print the stack, add: android::CallStack stackprintf("xxxxxx");
10. Add a VendorTag to control Feature:
For details, see "Add a VendorTag"
Qualcomm Camera HAL3: Add a VendorTag_shawn·xiao's blog-CSDN blog
11.Camera Id configuration file
chi-cdk\oem\qcom\multicamera\chimcxcameraconfig\configs\fillmore\fillmore_legacymc.xml
12. Check the impact of algorithms in node
You can just use memcopy Node to exclude:

13. Add debug system properties to the bottom layer:
Header file: #include <cutils/properties.h>
Add under \chi-cdk\oem\qcom\node\awrawhdr\build\android\Android.mk:
LOCAL_SHARED_LIBRARIES :=
libcutils \
代码:if(property_get_int32("debug.vendor.camera.dumpawraw",0))
13. View AEC logs:
Mainly look at the second one
(1).05-14 06:40:13.737 7710 7779 V CamX : [ VERB][STATS_AEC] caecxcontrol.h:586: PrintFrameControl CID 1 role 0 fID 227 mode PerFrame skipped:0 flash off lux 276.5 ISO 640 (short safe long) G 13.319 13.319 13.319 ET 60000000 60000000 60000000 SI 799110720 799110720 799110720 settled 1 brightness settled 1 FL 219.9 snapshot normal LED1 0 LED2 0 LEDAF 0 LEDFD 0 predictive 1.0 flashduration 0 compenDB 1.000 compenADRC 1.000 shortBlend 1.000000 FinalFlickerMode 1
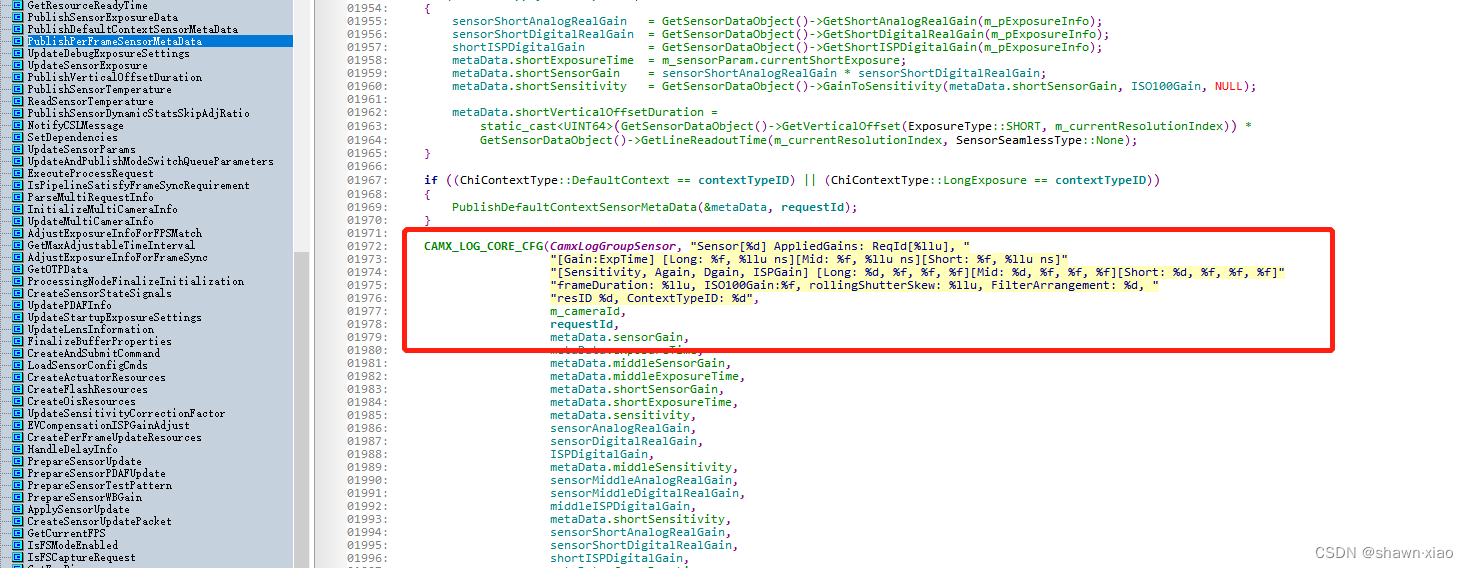
(2) Gain:ExpTime
14. Remove QCFA Size from driver configuration
Find the noted driver settings file
qssi12_7450/vendor/qcom/proprietary/chi-cdk/oem/qcom/sensor/s5khm6/s5khm6_sensor.xml
Find the Qcfa definition and remove them all
15. Find the maximum, middle and minimum exposure values
\chi-cdk\core\chiframework\chimcxdevicecaps.cpp
Fill exposure value function: FillExposureTime()
\camx\src\core\camximagesensordata.cpp
Get the configuration from the sensor xml and calculate the assigned minimum, middle and maximum exposure values: GetSensorStaticCapability()
/chi-cdk/oem/qcom/sensor/s5khm6/s5khm6_sensor.xml
Configured in the driver configuration file:
<exposureControllnfo>
<verticalOffset>10<verticalOffset>
<maxLineCount>65525<maxLineCount>
16. Common usecases and pipelines
I’ve listed it in previous blog posts, so I’ll list it again.
Different models have different product performance and positioning. Even if the baseline is the same, the use case, etc. may be different.
Qualcomm's approach gives mobile phone manufacturers a lot of room for customization. For example, for a certain model, UseCase can be reused in scenarios, and the corresponding pipeline can also be used or reused.

17. Modify file permissions
The calibration results are written into the patch of calib_result, but the file 777 permissions are not set successfully, resulting in the generated calib_result file not having third-party readable permissions.
It can be viewed through adb shell ls -laZ calib_result as -rwx------
Modify the patch as follows. After debugging, the third party can read calib_result, and the permission becomes -rwxrwxrwx:
{

        mode_t pCurMask = umask(0);

        ......

        umask(pCurMask);

}
18. Implement dump yuv and raw by configuring camxoverridesettings.txt
dump raw:
autoImageDumpMask=1
offlineImageDumpOnly=FALSE
reprocessDump=TRUE
autoImageDump=TRUE
autoInputImageDumpMask=0x1
autoImageDumpIFEoutputportMask=0xFB8
dump yuv:
autoImageDumpMask=1
offlineImageDumpOnly=FALSE
reprocessDump=TRUE
autoImageDump=TRUE
autoImageDumpIPEoutputportMask=0x700